

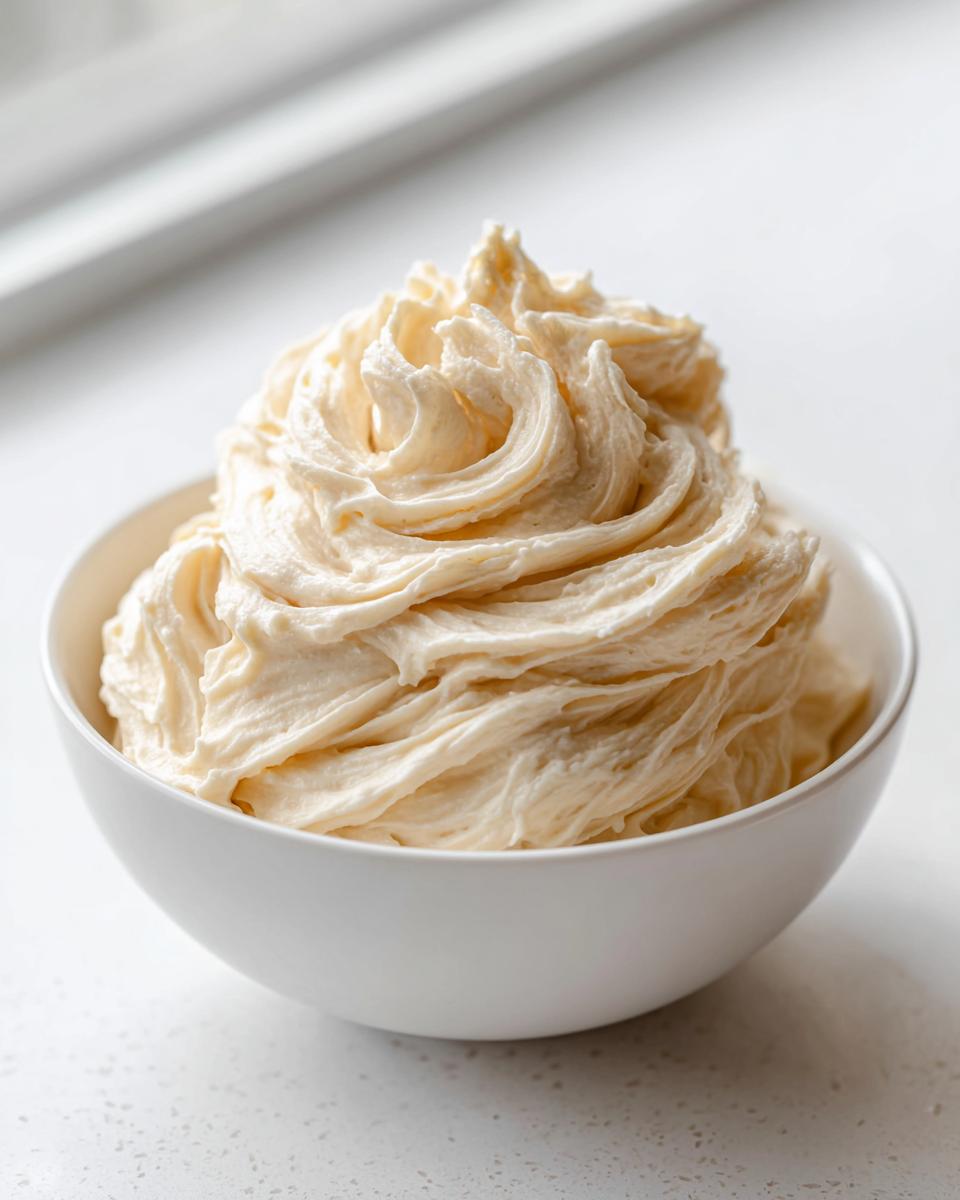
Are you tired of frosting that tastes like sugary grit or melts if you look at it funny? Trust me, I’ve been there! Making that dreamy, perfectly smooth topping for your cakes and cupcakes used to feel like rocket science, but I promise you, it doesn’t have to be. Here at Kings Cook, my whole mission is to give you recipes that just *work* every single time, no stress required. That’s why I’m sharing my absolute favorite, foolproof **vanilla buttercream** recipe. We’re talking smooth, creamy, and perfectly light—and we’re getting it done in under 15 minutes!
- Why This Is the Best Vanilla Buttercream Recipe for Home Bakers
- Ingredients for Your Creamy Buttercream Recipe
- How to Make Perfect Vanilla Buttercream in 10 Minutes
- Tips for Piping Buttercream Consistency
- Troubleshooting Common Vanilla Buttercream Issues
- Serving Suggestions: What to Pair with Your Vanilla Buttercream
- Storage and Reheating Instructions for Homemade Frosting
- Frequently Asked Questions About Classic Vanilla Frosting
- Estimated Nutritional Data for This Vanilla Buttercream
Why This Is the Best Vanilla Buttercream Recipe for Home Bakers
When I developed this recipe, I was so frustrated by finicky frostings! You probably see all sorts of complicated Swiss and Italian versions online, but honestly, for home bakers who need a reliable dessert topping fast, nothing beats this classic American **buttercream**. It’s my go-to **No-Fail Buttercream** because it’s quick—seriously, we’re talking about a **Quick Buttercream** here—and it delivers that rich, familiar decadence we all crave. I tested this dozens of times to make sure it whips up into the dreamiest **Smooth Vanilla Frosting** possible without getting grainy or weird. If you use good butter, this will be your forever recipe!
It’s fabulous over everything, especially my famous vanilla cupcakes or even just on simple sugar cookies. I even looked up how others handle this frosting technique, like the folks over at Hertaste, because I want you to have the absolute best results, even when aiming for speed.
Achieving a Fluffy Buttercream Texture
The secret to transforming this simple mix into that gorgeous, light topping isn’t complex; it’s just about technique. You have to spend enough time beating that butter *before* you even think about adding sugar. That initial creaming creates the foundational tiny air pockets.
Once the sugar is in, crank up that mixer! The high-speed whipping is crucial for incorporating air, which is what transforms it into that wonderfully **Fluffy Buttercream**. Don’t rush it—give it those full 3 to 5 minutes of whipping time. That’s how you avoid a dense, heavy topping!
Ingredients for Your Creamy Buttercream Recipe
Alright, let’s look at what you need for this **Creamy Buttercream Recipe**. The beautiful thing about this **Homemade Frosting** is that it uses ingredients you probably have right now! The only things I insist on are that your butter must be softened completely—we mean room temperature, soft enough to easily press a divot into—and you absolutely must sift that powdered sugar. Seriously, skipping the sifting is the main way frosting ends up grainy. Don’t cheat this step!
Here is the lineup for about three cups of topping:
- 1 cup (226g) unsalted butter, softened beautifully to room temperature
- 3 1/2 to 4 cups (420g to 480g) powdered sugar, SIFTED!
- 1 teaspoon pure vanilla extract (go for pure, not imitation!)
- 2 to 4 tablespoons heavy cream or milk
- A small, crucial pinch of salt
Ingredient Notes and Substitutions
The vanilla flavor is super important here since it’s the star! Make sure you grab the good stuff—pure vanilla extract. Imitation just doesn’t do it justice for this classic **Vanilla Frosting for Cakes**.
Now, for the liquid (cream or milk): this is where you control the texture. We start with just 2 tablespoons. If you want a super stiff **Piping Buttercream Consistency** for borders, you might stick with that. But if you want it for spreading or a lighter, more whipped consistency, that extra tablespoon or two of cream is what makes it perfect. It’s all about adjustment!
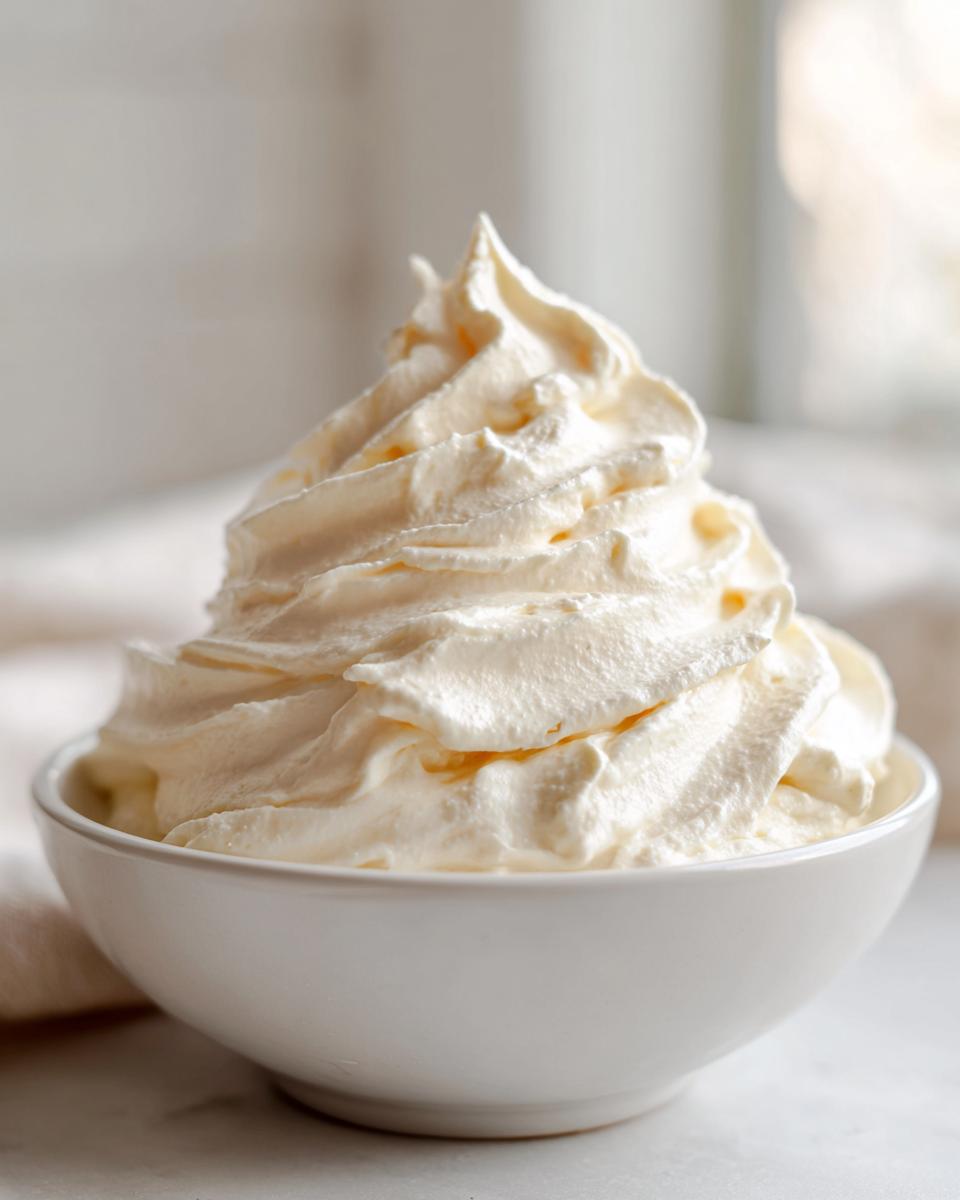
How to Make Perfect Vanilla Buttercream in 10 Minutes
I know, I know, promising perfect **vanilla buttercream** in 10 minutes sounds too good to be true, but that’s the beauty of this American frosting! This is purely a mixing job, so once your ingredients are prepped—butter soft, sugar sifted—we are ready to go. Put on a good song and let your mixer do the work. We’re talking about getting that ultimate **Homemade Frosting** texture that tastes just like the classic bakery stuff, only better because you made it fresh!
If you’re whipping this up for a batch of my famous chocolate cake tonight, you’ll have time to grab your spatula before the cake is even cool! For reliable results that people rave about, like the incredible tasting frosting I saw others making, just follow these steps closely.
Step 1: Creaming the Butter for Smooth Vanilla Frosting
This is non-negotiable! Softened butter goes straight into the mixer bowl with your paddle attachment. You need to beat this on medium speed until it looks completely uniform and creamy—no lumps, no streaks, just smooth goodness, probably for about three full minutes. Then, scrape down those sides. We want that base layer perfect before we bring in the sugar to avoid any graininess later on. This foundation directly leads to that **Smooth Vanilla Frosting** look we are chasing.
Step 2: Incorporating Sugar and Liquid for Easy Buttercream Icing
Right, now for the potentially messy part, so keep the mixer on *low* speed here. You have to add that beautiful sifted powdered sugar one cup at a time. If you dump it all in, you’ll just end up decorating your kitchen ceiling! Once the sugar is incorporated, toss in your vanilla and salt. Finally, add 2 tablespoons of heavy cream or milk. Now, turn the speed up to medium-high and just let it whip! Beat it hard for 3 to 5 minutes until it gets light and fluffy. If it looks too stiff to spread, slowly add that remaining cream, just a teaspoon at a time, until it’s perfect for your needs.
Tips for Piping Buttercream Consistency
This is where folks sometimes get worried if they’re planning serious decorating. Is this **Vanilla Buttercream Frosting** going to hold its pretty shape on top of my cupcakes, or is it going to melt into a puddle? Because we stuck strictly to the lower end of the liquid measurement (2 tablespoons of cream), this frosting is generally quite stable for piping right out of the mixer. It’s what I recommend for any intricate piping work on holiday cookies, like the ones I use for my sugar cookie recipes.
But baking is never exact, right? You need the flexibility to adjust! I always keep some extra powdered sugar and extra cream/milk on standby when I’m frosting a big layer cake.
Here’s my go-to advice for dialing in that perfect **Piping Buttercream Consistency**:
- If the Frosting is Too Soft: This usually happens if your room temperature butter was a little too soft to start with, or maybe you added too much liquid accidentally. The fix is easy! Just turn the mixer back on low and start adding more sifted powdered sugar, just one tablespoon at a time. Beat well after each addition until it stiffens up enough to hold a peak when you lift the beater.
- If You Need to Soften It Up: Maybe you followed the instructions perfectly, but you want a frosting that just slathers beautifully onto a layer cake without tearing the crumbs? If it’s too stiff, add a teaspoon of heavy cream at a time. I mean it—just one teaspoon! Mix it thoroughly before adding the next until you hit that perfect spreading texture.
- The Emergency Chill: If you’ve over-whipped or added too much liquid and it seems soupy, don’t panic! Pop the whole bowl (or the frosting into a separate container) into the fridge for about 10 minutes. Then, take it out and give it a quick re-whip on medium speed. That chilling period allows the fat molecules to firm up just enough, and reintroducing air brings back the fluff!
Remember what those bakers say—it’s all about patience during these final adjustments. You want it just right so your decorations look sharp, just like the clean results others have shared when they follow guidance like in this great tutorial about getting the consistency right. You’ve got this!
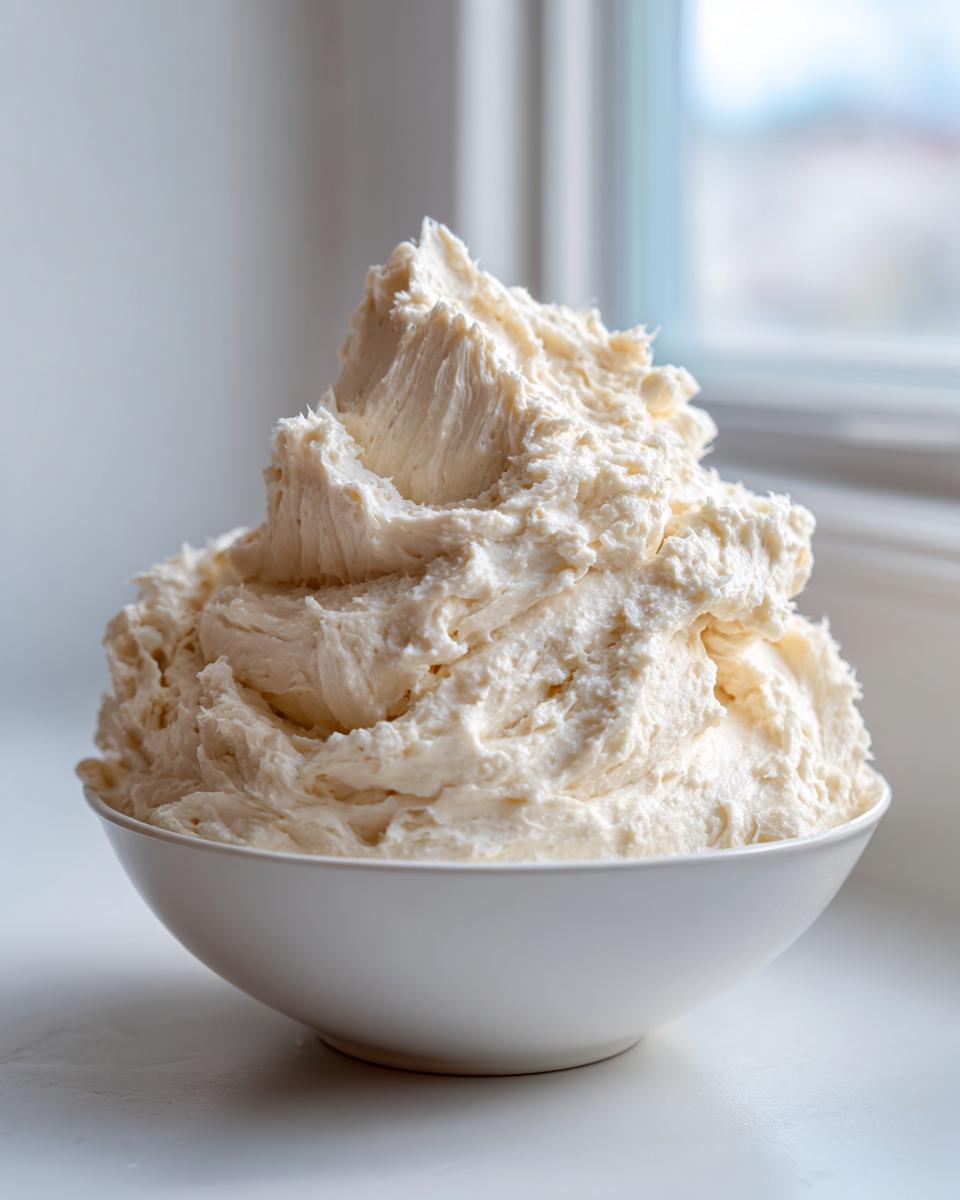
Troubleshooting Common Vanilla Buttercream Issues
Even with a foolproof recipe, sometimes things can still go a little wonky when you’re whipping up your **vanilla buttercream**. Don’t stress or toss that bowl out! Almost every issue has a super easy fix that brings it right back to that smooth, bakery-quality texture we want. My goal is to help you build confidence, and that means knowing how to rescue a batch when things aren’t looking perfect.
After baking hundreds of batches, I’ve learned the telltale signs of trouble:
Grainy or Gritty Frosting
Oh, that sandy sugar texture—it ruins everything! If you take a taste and it feels like you’re eating sand instead of **Homemade Frosting**, the problem is usually one of two things. First, your powdered sugar wasn’t sifted properly, and a lump hardened up in the mix. Second, and this is common, your butter was too warm when you started. If the butter is melted or greasy, it can’t properly suspend the sugar crystals, and they just stay crunchy.
The fix for graininess is patience, actually! If the butter was too warm, try chilling the bowl in the fridge for about 10 minutes, then bring it back out and re-whip it slowly, adding just a tiny splash of cold cream. If you suspect a lump, stop the mixer, scrape the sides really well, and give it a brief pulse to break up those dry spots. Sometimes, a little extra beating time once the liquid is added can incorporate those stubborn sugar bits.
Weeping or Separated Buttercream
If your **Creamy Buttercream Recipe** starts looking oily or watery, like the fat and sugar are trying to break up and run away from each other—that’s what I call ‘weeping’ or separating. This usually happens right after you add too much liquid (the heavy cream or milk) too fast, or if the ambient temperature in your kitchen is just too hot!
If it splits, stop adding liquid immediately! You want to bring the mixer speed back down to low. Try mixing in just one tablespoon of *extra* sifted powdered sugar. This gives the liquid something else to absorb and helps bind the mixture back together. If it still looks sad, chill the whole bowl for 15 minutes right above freezing, then place it back on the mixer and beat it on medium speed until it comes back together into a cohesive, **Fluffy Buttercream**. It needs that time to firm up again once it gets cold!
Serving Suggestions: What to Pair with Your Vanilla Buttercream
Honestly, you could just eat this rich, **Creamy Buttercream Recipe** with a spoon (don’t tell anyone I said that!), but it truly shines when paired with a great cake or cupcake. Since you asked for the best, you already know this frosting sings on my classic red velvet cake. The slight tang of the cocoa pairs perfectly with this sweet topping!
It’s also fantastic on drier or spiced cakes. If you’ve tried my recipe for moist carrot cake, you know it needs a rich topping, and this **Vanilla Buttercream Frosting** is the ideal match! It’s sturdy enough for a thick layer and complements all those warm spices beautifully.
And if you need something simple? This is the perfect **Simple Dessert Topping** for sugar cookies or even plain brownies. Head over and see how others are using their amazing frosting, like the gorgeous work showcased on Mix Mirth. It’s so versatile!

Storage and Reheating Instructions for Homemade Frosting
So, you made a huge batch of this amazing **vanilla buttercream** because, let’s be honest, you know you’ll eat the leftovers with a spoon later. Don’t worry about finding room for it! Storing this **Homemade Frosting** is wonderfully easy, but you have to remember that since this is an American Buttercream (no weird cooking involved), it relies on butter, which means temperature matters a lot!
You have two options for keeping that fluffy texture intact:
Storing at Room Temperature
If you plan on using the rest of the frosting within about two days, you are safe to keep it right on the counter. Just make sure it’s covered tightly—a piece of plastic wrap pressed right down onto the surface of the frosting is the best way to stop it from forming that crusty top layer. Keep it somewhere cool, away from the sunny window or the warm oven. Room temperature storage keeps it ready to spread immediately since the room temperature makes it soft, which is great for spreading onto a cake!
Storing in the Refrigerator
If you made a giant batch or you won’t use it for a week or more, you absolutely must put it in the fridge. Store it in an airtight container. It’ll firm up rock solid, so it’s not usable straight from the cold! Don’t try to spread it when it’s cold—you’ll tear your cake to shreds.
When you want to use your chilled **Creamy Buttercream Recipe**, take it out about an hour before you need it. Once it’s softened a little, it *must* go back into the mixer. This is the most important reheating step! Beat it hard again on medium-high speed for at least two minutes. That beat incorporates the air back in, transforming that stiff block back into that light, **Whipped Vanilla Frosting** texture you worked so hard to achieve the first time around. Trust me, re-whipping is the secret to using up leftovers!
Frequently Asked Questions About Classic Vanilla Frosting
I get so many questions about this **Vanilla Buttercream Frosting** because everyone wants that perfect finish! It’s a staple, so I want to make sure you feel totally confident using it on your cakes, cookies, or even my simple pound cake. Here are the common things I hear, so you don’t have to guess!
Is this American Buttercream or Swiss Meringue?
This is absolutely the classic **American Buttercream**! That’s part of why it’s so wonderful and why I can call it a **Quick Buttercream** recipe. It’s just butter, sugar, vanilla, and a touch of liquid. There’s no egg white cooking or tempering involved, which means it comes together incredibly fast—usually in 10 minutes flat. Swiss meringue is lovely, but honestly, sometimes you just need frosting without all the extra fuss!
Can I use salted butter in this Vanilla Buttercream?
I strongly suggest using unsalted butter, and here’s why: the salt content in salted butter is *never* consistent. One brand might have a lot of salt, and another might have barely any. Since we only add a tiny, crucial pinch of salt to this recipe to balance the sweetness, using salted butter throws off that balance entirely. If you absolutely must use salted butter because it’s all you have, then skip adding *any* extra salt to the mix, and maybe even taste the butter first! But for real, unsalted butter is the way to ensure that beautiful, classic **Vanilla Frosting** flavor shines through.
How much frosting does this recipe actually make?
This recipe is designed to yield about 3 cups, which sounds like a lot, but buttercream disappears fast! That’s usually enough to generously frost a standard two-layer 8-inch round cake, or it will top about 18 to 24 medium cupcakes, depending on how tall you like your swirls. If you’re working on a huge sheet cake or trying to make thick borders, you might want to double the recipe right from the start so you aren’t scrambling halfway through!
Estimated Nutritional Data for This Vanilla Buttercream
I promised you that this **vanilla buttercream** is made with simple, standard ingredients, but because nothing is perfectly standardized in home baking—depending on the brand of butter you use or how much sugar you add—these numbers are just an estimate. I always try to give these figures so you have a general idea of what’s in the final product, especially when it comes to fat and sugar content in a rich **Homemade Frosting** like this one!
This data is based on a serving size of 1/4 cup, yielding about 12 servings total from the batch, which is a fairly generous scoop for topping a cupcake or a slice of cake.
Here is the snapshot of what you can generally expect from this **Creamy Buttercream Recipe**:
- Calories: Around 320 per serving. Yep, frosting is a treat, and we embrace it!
- Fat: Approximately 16g. Remember, we used real butter here, which gives it that incredible texture!
- Sugar: This clocks in high, around 45g. That’s the powdered sugar content, but paired with the fat, it tastes so balanced.
- Carbohydrates: About 46g in total. There’s hardly any protein or fiber here, which is normal for pure frosting.
Take these figures with a grain of sugar—literally! They are just a guide line. If you use less sugar or swap out dairy, the final count will shift, of course. But the amazing flavor and **Fluffy Buttercream** texture you get in just 10 minutes is worth every bit of it, no matter the exact decimal point!
PrintThe Best Foolproof Vanilla Buttercream Frosting: Achieve Smooth, Creamy Perfection
Make classic American vanilla buttercream frosting that is smooth, creamy, and stable for piping. This no-fail recipe uses simple ingredients and whips up quickly for cakes and cupcakes.
- Prep Time: 10 min
- Cook Time: 0 min
- Total Time: 10 min
- Yield: About 3 cups 1x
- Category: Dessert Topping
- Method: Mixing
- Cuisine: American
- Diet: Vegetarian
Ingredients
- 1 cup (226g) unsalted butter, softened to room temperature
- 3 1/2 to 4 cups (420g to 480g) powdered sugar, sifted
- 1 teaspoon pure vanilla extract
- 2 to 4 tablespoons heavy cream or milk
- Pinch of salt
Instructions
- Place the softened butter in the bowl of a stand mixer fitted with the paddle attachment. Beat the butter on medium speed until it is completely smooth and creamy, about 3 minutes. Scrape down the sides of the bowl.
- Reduce the mixer speed to low. Gradually add the sifted powdered sugar, one cup at a time, mixing until just combined after each addition.
- Add the vanilla extract and a pinch of salt. Mix on low speed until incorporated.
- Add 2 tablespoons of heavy cream or milk. Increase the mixer speed to medium-high and beat for 3 to 5 minutes until the frosting is light and fluffy.
- If the frosting seems too stiff, add the remaining cream or milk, one teaspoon at a time, until you reach your desired consistency for spreading or piping.
- If the frosting is too soft, add a little more sifted powdered sugar, one tablespoon at a time. Beat again until smooth.
Notes
- For the smoothest texture, make sure your butter is truly softened, not melted.
- Sifting the powdered sugar prevents lumps and graininess in the final product.
- If you are piping decorations, use the lower amount of liquid (2 tablespoons) for a stiffer consistency.
- If the frosting seems too soft after mixing, chill it for 10 minutes before using.
Nutrition
- Serving Size: 1/4 cup
- Calories: 320
- Sugar: 45g
- Sodium: 45mg
- Fat: 16g
- Saturated Fat: 10g
- Unsaturated Fat: 6g
- Trans Fat: 0.5g
- Carbohydrates: 46g
- Fiber: 0g
- Protein: 0g
- Cholesterol: 50mg