
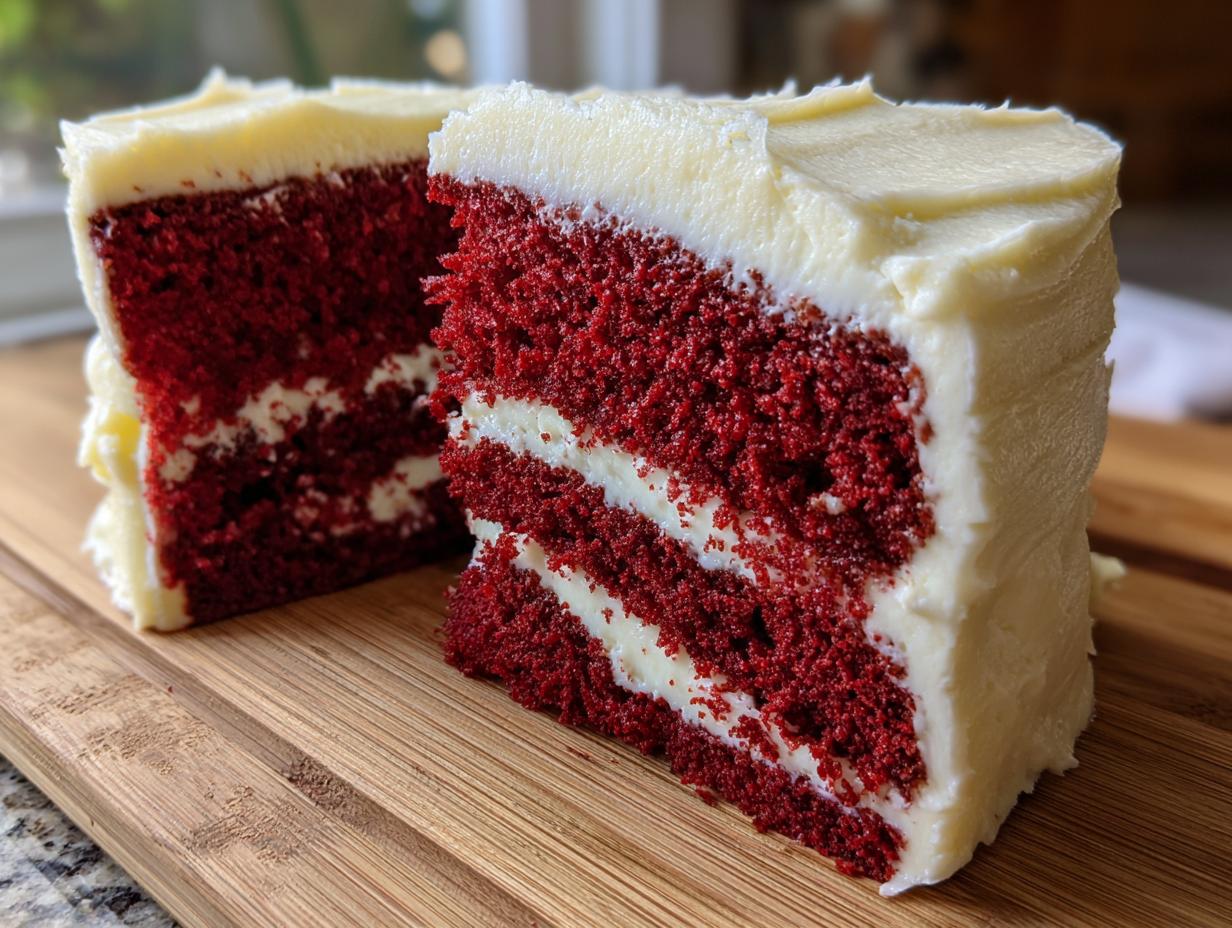
Oh, hello there! If you’re anything like me, the thought of a perfect red velvet cake just screams “special occasion” or maybe even just “a really, really good Tuesday.” There’s something magical about that tender, almost impossibly moist crumb, with just a whisper of cocoa and that stunning, iconic red color. And let’s not even start on the cool, tangy cream cheese frosting that just ties it all together. It’s a Southern classic for a reason, you know? For so long, I thought getting that bakery-quality texture and those perfect layers was some kind of secret art, but trust me, it’s totally achievable right in your own kitchen. I learned so much from my Grandma Kate, who always said baking was just love you could eat. This recipe is my way of sharing that a little bit of that kitchen joy and confidence, just like I love doing over on my About page. Get ready to impress yourself (and everyone lucky enough to get a slice!).
- Why You'll Love This Red Velvet Cake Recipe
- Ingredients for Your Perfect Red Velvet Cake
- How to Make a Bakery-Style Red Velvet Cake at Home
- Tips for the Best Southern Red Velvet Cake Recipe
- Frequently Asked Questions about Red Velvet Cake
- Nutritional Information for Red Velvet Cake
- Share Your Red Velvet Cake Creations!
Why You’ll Love This Red Velvet Cake Recipe
Seriously, y’all, there are so many reasons to fall head over heels for this red velvet cake recipe. It’s one of those showstoppers that makes everyone think you spent hours slaving away, but it’s actually super doable. Here’s why it’s become a go-to in my kitchen:
- Effortlessly Impressive: It looks *so* fancy with that vibrant red and creamy white frosting, but the steps are totally manageable for home bakers.
- Taste of Pure Bliss: That delicate balance of mild cocoa, subtle sweetness, and the tangy cream cheese frosting is just heaven. It’s not overly sweet, just perfectly rich.
- Perfect Texture, Every Time: We’ve nailed the moist, tender crumb. No dry, crumbly messes here – just pure velvet-y goodness!
- Celebration Ready: Birthdays, holidays, potlucks, or just because – this festive cake is always a winner and a guaranteed crowd-pleaser for any special occasion.
Ingredients for Your Perfect Red Velvet Cake
Okay, let’s talk ingredients! This is where the magic really starts for our gorgeous red velvet cake. I’ve listed out everything you’ll need, broken down nice and neat so you can just grab your apron and get going. Make sure you have good quality ingredients here, they truly make a difference! If you’re looking for a super vibrant color, sometimes a gel food coloring works wonders, but regular liquid works too. And for that signature tang, real buttermilk is the way to go! If you need a quick substitute for buttermilk, just stir a tablespoon of lemon juice or white vinegar into a cup of regular milk and let it sit for a few minutes – easy peasy! It’s a baking trick I picked up years ago, similar to how I approach recipes like my apple coffee cake – simple swaps can make all the difference.
For the Moist Red Velvet Cake Layers
Here’s what goes into those beautiful, moist layers. We’re talking about the basics that build that classic flavor and texture:
- 2 1/2 cups all-purpose flour
- 1 1/2 cups granulated sugar
- 1 teaspoon baking soda
- 1 teaspoon unsweetened cocoa powder (just a hint!)
- 1/2 teaspoon salt
- 1 cup buttermilk
- 1/2 cup vegetable oil
- 2 large eggs
- 2 tablespoons red food coloring
- 1 teaspoon white vinegar
- 1 teaspoon vanilla extract
For the Cream Cheese Frosted Cake
And for that dreamy, decadent frosting that’s just perfection on top of the red velvet goodness:
- 8 ounces cream cheese, softened (super important for smooth frosting!)
- 1/2 cup unsalted butter, softened (another key for creaminess)
- 4 cups powdered sugar
- 1 teaspoon vanilla extract
- 2 tablespoons milk or heavy cream (just enough to get it going!)
How to Make a Bakery-Style Red Velvet Cake at Home
Alright, let’s get down to business and make this incredible red velvet cake! Trust me, following these steps is like a cheat sheet to baking perfection. It’s all about a few key techniques that make a huge difference in how your cake turns out. No complicated stuff, just good old-fashioned baking wisdom that makes it achievable for anyone. We’ll go from simple ingredients to a show-stopping dessert that’ll have everyone asking for the recipe. It’s really no harder than whipping up a batch of my easy apple crisp, just with a little more flair!
Preparing the Cake Pans and Oven
First things first, let’s get your oven nice and toasty. It needs to be preheated to 350°F (175°C). While that’s heating up, grab your two 9-inch round cake pans. You want to grease them really well – I like to use a little butter or baking spray. Then, dust them lightly with flour, tapping out any extra. This makes sure your beautiful cake layers won’t stick!
Mixing the Dry Ingredients
In a big mixing bowl, grab a whisk and get ready to combine all our dry goodies. We’ve got the all-purpose flour, granulated sugar, baking soda, that tiny bit of unsweetened cocoa powder (it’s just for a hint of flavor, not to make it brown!), and the salt. Whisking these all together really makes sure everything is evenly distributed, so you don’t get pockets of baking soda or salt in your cake. Just a good, thorough whisk until it all looks like one happy blend.
Combining the Wet Ingredients
Now, grab another bowl, maybe a medium-sized one this time. In here, we’ll whisk up the buttermilk, that lovely vegetable oil, your two large eggs, the vibrant red food coloring (this is where the magic happens!), the white vinegar, and that lovely splash of vanilla extract. Whisk this all together until it’s nice and smooth. See that beautiful crimson color? It’s starting to look like a proper red velvet cake already!
Bringing the Red Velvet Cake Batter Together
Here’s a super important step for that tender crumb: pour the wet ingredients into the bowl with your dry ingredients. Now, mix them *just* until everything is combined. Seriously, don’t go crazy with the mixer! Overmixing is the enemy of a tender cake; it can make it tough. You want to see just a few little streaks of flour still hanging around before you stop. We’ll get those incorporated gently in the next step.
Baking Your Festive Layer Cake
Divide your batter evenly between those prepared pans. You can eyeball it or use a kitchen scale for perfect balance. Pop them into your preheated oven. They’ll need to bake for about 30-35 minutes. How do you know they’re done? The easiest way is to insert a wooden skewer or a toothpick right into the center of the cake. If it comes out clean, with no wet batter clinging to it, your festive layer cake is ready to rock and roll!
Cooling the Cake Layers
Once they’re out of the oven, let those beautiful cakes hang out in their pans for about 10 minutes. This little rest helps them firm up a bit. Then, carefully flip them out onto a wire cooling rack. Make sure they cool *completely* before you even think about frosting them. I know it’s tempting, but frosting a warm cake is a melty disaster waiting to happen!
Crafting the Cream Cheese Frosting
While the cakes are doing their cool-down thing, let’s whip up that irresistible cream cheese frosting. In a large bowl, beat your softened cream cheese and softened butter together until they’re super smooth and creamy. No lumps allowed! Slowly start adding in the powdered sugar, beating after each addition until it’s all incorporated. Then, stir in the vanilla extract. For that perfect, spreadable consistency, add the milk or cream, just a tablespoon at a time, until it’s just right for spreading. This is key for that gorgeous cream cheese frosted cake finish!
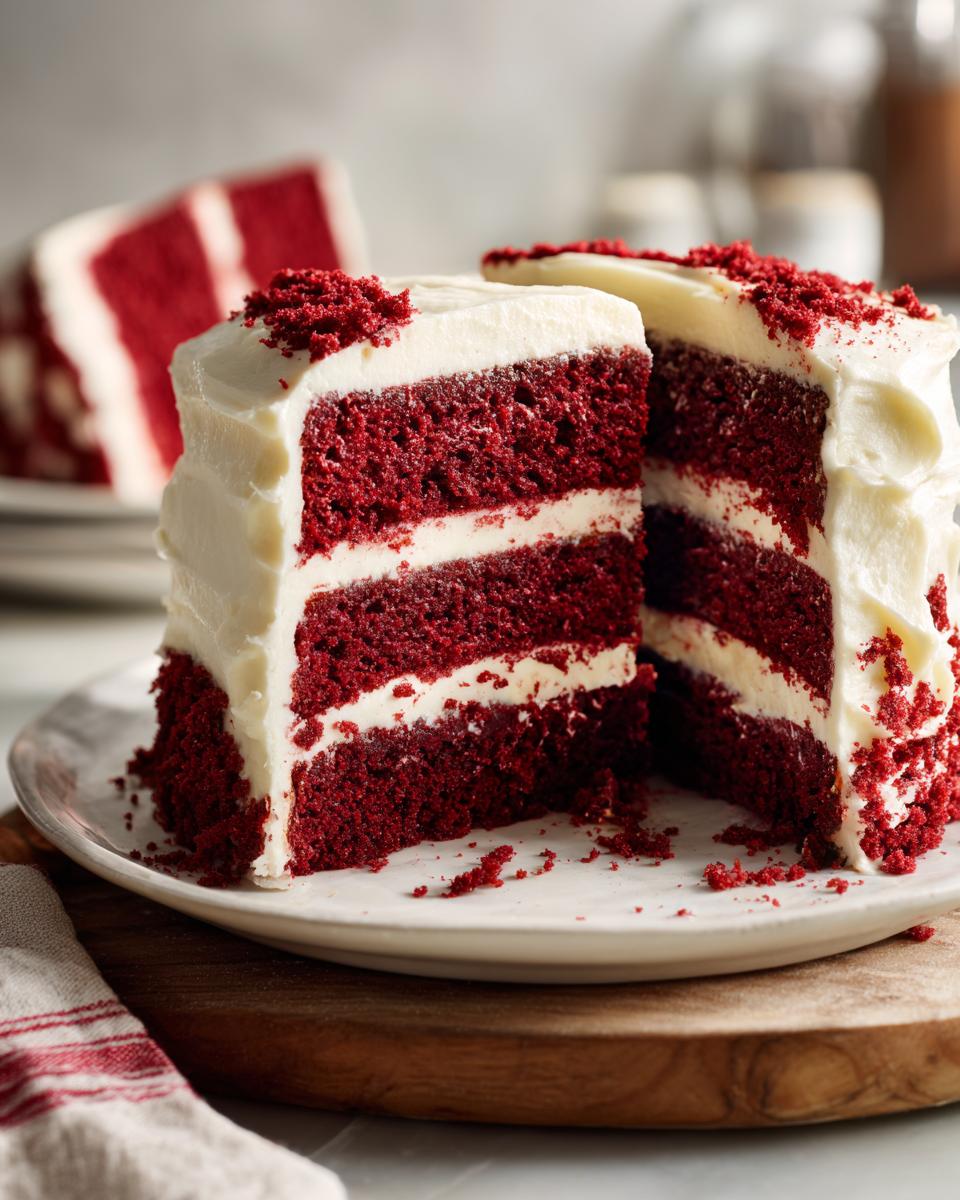
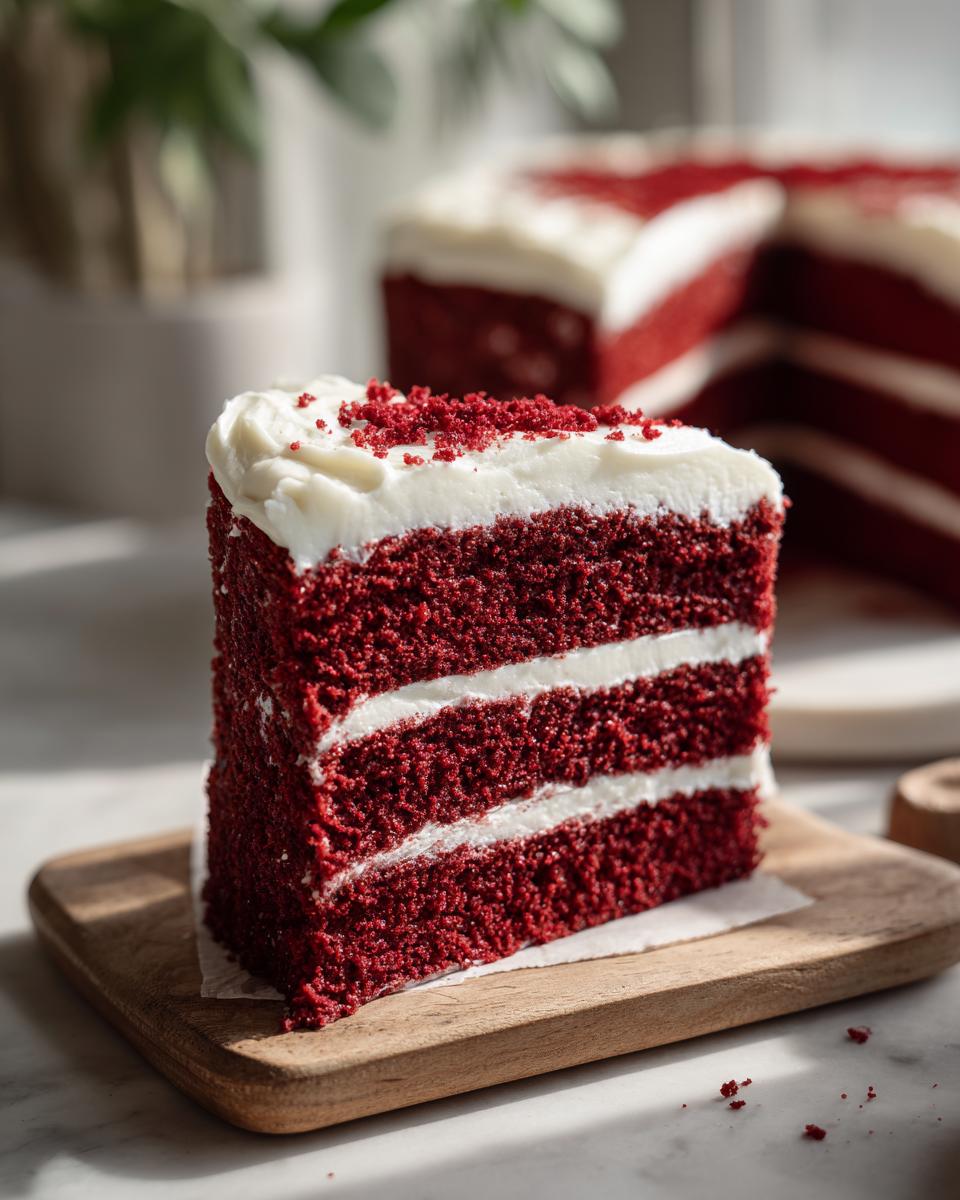
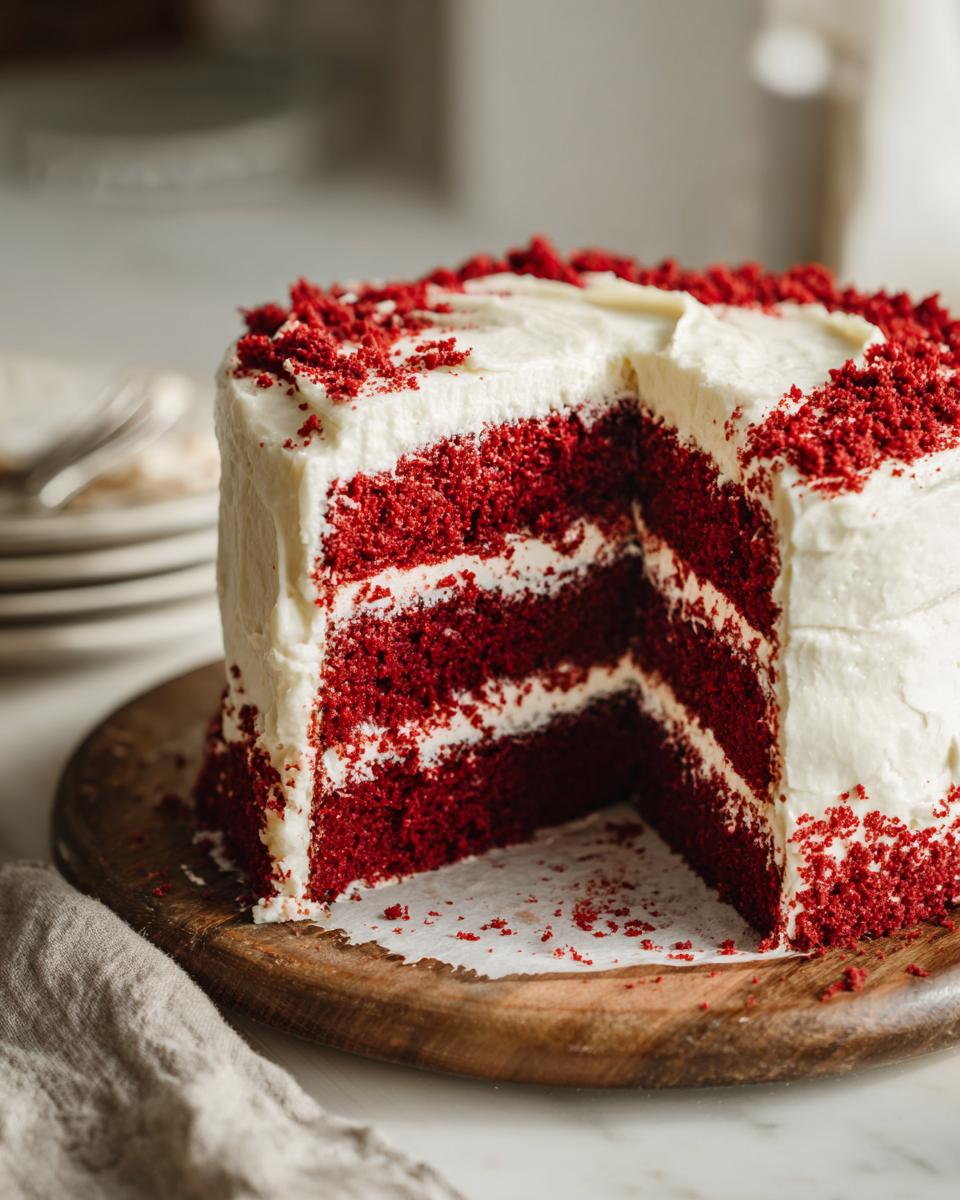
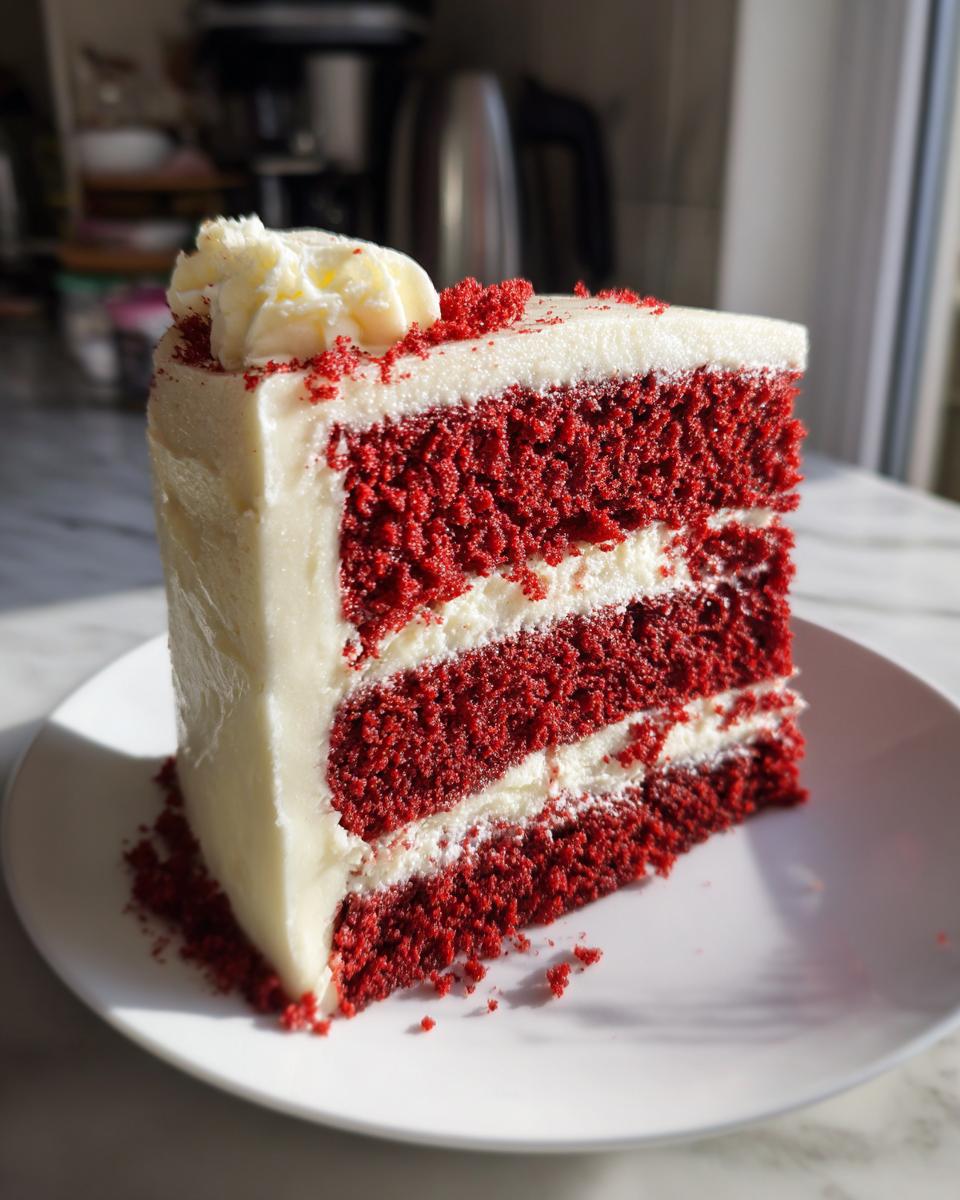
Assembling and Frosting Your Red Velvet Cake
Once your cakes are totally cool, you’re ready for the grand finale! Place one cake layer on your serving plate. Generously spread a layer of that yummy cream cheese frosting on top. Then, carefully place the second cake layer on top of that. Now, frost the entire outside of the cake – the top and the sides. You can make it super smooth with an offset spatula, or go for a more rustic look. Either way, it’s going to be amazing. Your stunning red velvet cake is ready to go!
Tips for the Best Southern Red Velvet Cake Recipe
Okay, so you’ve got the recipe, and you’re ready to bake up a storm! To make sure your southern red velvet cake recipe is absolutely perfect, I’ve gathered a few of my favorite tried-and-true tips. These are the little things that make a big difference, turning a good cake into a *spectacular* cake. Think of them as my kitchen secrets, passed down from my Grandma Kate herself! They’re kind of like the little tricks I use when I’m making my jalapeño cheddar cornbread to get that extra punch of flavor and perfect texture.
Achieving the Perfect Red Hue
That gorgeous, vibrant red color is the hallmark of a great red velvet cake! For the deepest, most intense red, I highly recommend using a gel food coloring. A little goes a long way, and it gives you that stunning hue without adding extra liquid to your batter. If you’re using liquid food coloring, you might need a bit more, so start with the amount in the recipe and add more if you want that wow factor.
Ensuring a Moist Cake Texture
The key to that melt-in-your-mouth, moist red velvet cake is all in the details. Make sure your buttermilk and eggs are at room temperature! This helps them emulsify better with the other ingredients, leading to a smoother batter and a more tender cake. Also, remember my warning about not overmixing? That’s crucial! Mix just until combined, and you’ll be rewarded with a wonderfully moist crumb that’s just perfect.
Frosting Like a Pro
For that beautiful cream cheese frosted cake finish, the frosting needs to be just right. Make sure your cream cheese and butter are truly softened – not melted! This makes them easy to beat into a smooth, lump-free base. If your frosting seems a little too thick, add your milk or cream a tiny bit at a time until it’s perfectly spreadable. If it’s too thin, just add a little more powdered sugar. A chilled cake also makes frosting so much easier; it won’t get smushed!
Frequently Asked Questions about Red Velvet Cake
Got questions about making the perfect red velvet cake? You’re not alone! It’s a classic for a reason, and sometimes a few little quirks pop up. I’ve pulled together some of the most common things people ask, so you can bake with total confidence. Think of this as your quick-guide to red velvet success, just like you’d find hints for my easy butter chicken. Let’s dive in!
What makes red velvet cake unique?
The real magic of a red velvet cake is its unique trifecta: that stunning, vibrant red color (from the cocoa and food coloring), a subtle, almost mysterious rich chocolate-vanilla flavor, and that incredibly soft, tender, velvety texture. It’s not quite chocolate, not quite vanilla, but something deliciously in between, especially when topped with that tangy cream cheese frosting!
Can I make red velvet cake without buttermilk?
Absolutely! If you don’t have buttermilk on hand, no worries at all. Just grab some regular milk and add about a tablespoon of white vinegar or lemon juice to it. Give it a little stir and let it sit for 5-10 minutes. It’ll curdle slightly, and voilà – you’ve got a great homemade buttermilk substitute that works perfectly for your southern red velvet cake recipe!
How do I store red velvet cake?
To keep your beautiful red velvet cake (especially that dreamy cream cheese frosted cake) fresh, it’s best to store it in an airtight container in the refrigerator. Because of the cream cheese frosting, it needs to stay cool. It will keep deliciously for about 3-4 days. When you’re ready to serve, just let it sit at room temperature for about 20-30 minutes to take the chill off!
Why is my red velvet cake not red enough?
This is a common one! Often, the red color can look a bit muted if you’re not using enough food coloring, or if you’re using a liquid type that gets diluted. For the most vibrant, show-stopping shade in your festive layer cake, try using a gel food coloring. They’re super concentrated and give you that intense red without adding too much extra liquid to your batter. Don’t be afraid to add a little more if you want that super dramatic look!
Nutritional Information for Red Velvet Cake
Now, let’s talk about the delicious details! When you’re whipping up this amazing Red Velvet Cake, it’s always good to have an idea of what’s in each slice. Keep in mind these are just estimates, you know? Serving sizes can vary, and the exact brands you use can change things up a tiny bit. But this will give you a pretty good ballpark for sharing this gorgeous festive layer cake.
Per Serving (approx. 1 slice):
- Calories: Around 450
- Fat: About 25g (with ~15g being saturated fat, thanks to that yummy butter and cream cheese!)
- Carbohydrates: Roughly 60g
- Sugar: Around 55g
- Protein: About 4g
- Cholesterol: Around 70mg
It’s a treat, for sure, so enjoy every bite!
Share Your Red Velvet Cake Creations!
Making this red velvet cake has been such a joy, and honestly, the best part for me is seeing what amazing things YOU create! If you whip up this recipe, please, please snap a picture and share it with me. I’d love to hear all about your experience in the comments below – did it turn out just like you hoped? Did you add any fun twists? You can also reach out through my contact page. Happy baking!
PrintClassic Red Velvet Cake with Cream Cheese Frosting
Bake a show-stopping red velvet cake with a tender, moist crumb and rich cream cheese frosting. This recipe delivers a bakery-style cake at home, perfect for celebrations.
- Prep Time: 25 min
- Cook Time: 35 min
- Total Time: 60 min
- Yield: 12 servings 1x
- Category: Dessert
- Method: Baking
- Cuisine: American
- Diet: Vegetarian
Ingredients
- 2 1/2 cups all-purpose flour
- 1 1/2 cups granulated sugar
- 1 teaspoon baking soda
- 1 teaspoon unsweetened cocoa powder
- 1/2 teaspoon salt
- 1 cup buttermilk
- 1/2 cup vegetable oil
- 2 large eggs
- 2 tablespoons red food coloring
- 1 teaspoon white vinegar
- 1 teaspoon vanilla extract
- For the Cream Cheese Frosting:
- 8 ounces cream cheese, softened
- 1/2 cup unsalted butter, softened
- 4 cups powdered sugar
- 1 teaspoon vanilla extract
- 2 tablespoons milk or heavy cream
Instructions
- Preheat your oven to 350°F (175°C). Grease and flour two 9-inch round cake pans.
- In a large bowl, whisk together the flour, sugar, baking soda, cocoa powder, and salt.
- In a separate medium bowl, whisk together the buttermilk, vegetable oil, eggs, red food coloring, white vinegar, and vanilla extract until well combined.
- Pour the wet ingredients into the dry ingredients and mix until just combined. Do not overmix.
- Divide the batter evenly between the prepared cake pans.
- Bake for 30-35 minutes, or until a wooden skewer inserted into the center comes out clean.
- Let the cakes cool in the pans for 10 minutes before inverting them onto a wire rack to cool completely.
- While the cakes cool, prepare the frosting. In a large bowl, beat the softened cream cheese and butter until smooth and creamy.
- Gradually add the powdered sugar, beating until well combined. Stir in the vanilla extract.
- Add the milk or cream, one tablespoon at a time, until the frosting reaches your desired consistency.
- Once the cakes are completely cool, frost the top of one layer, then carefully place the second layer on top. Frost the top and sides of the entire cake.
Notes
- For a deeper red color, you can use gel food coloring.
- Ensure your buttermilk is at room temperature for best results.
- Chill the cake for about 30 minutes before frosting for easier handling.
Nutrition
- Serving Size: 1 slice
- Calories: 450
- Sugar: 55g
- Sodium: 300mg
- Fat: 25g
- Saturated Fat: 15g
- Unsaturated Fat: 10g
- Trans Fat: 0g
- Carbohydrates: 60g
- Fiber: 2g
- Protein: 4g
- Cholesterol: 70mg