
Have you ever walked into one of those charming Italian pastry shops and stared longingly at those perfectly shaped, delicate cookies? I know I have! For years, I thought achieving that level of buttery perfection at home was impossible, reserved only for seasoned bakers. Well, I’m Kate Connolly, and I’m here to tell you that you absolutely can bring that bakery magic to your own kitchen. Seriously, after rigorously testing batch after batch, I nailed this recipe for authentic, melt-in-your-mouth italian butter cookies. They are tender, rich, and absolutely guaranteed to become your new favorite cookie. You can see more inspiration on perfect holiday treats over at Italian Butter Cookies, but trust me, ours are built on the same standard of quality! Next time you’re looking for something beautiful to decorate, check out my guide for sugar cookies for decorating, but for now, let’s focus on these buttery beauties.
- Why These are the Best Bakery Style Cookies You Will Make
- Gathering Ingredients for Perfect Italian Butter Cookies
- Step-by-Step Instructions for Homemade Butter Cookies
- Tips for Perfect Italian Butter Cookies Every Time
- Variations: Chocolate Dipped Cookies and Jam Filled Italian Cookies
- Serving Suggestions for These Buttery Dessert Treats
- Storage and Make-Ahead Tips for Your Italian Butter Cookies
- Frequently Asked Questions About Italian Butter Cookies
- Estimated Nutritional Data for These Italian Butter Cookies
Why These are the Best Bakery Style Cookies You Will Make
What sets these italian butter cookies apart from every other shortbread or butter cookie recipe? It’s all about that glorious texture. These aren’t the snappy, hard cookies you sometimes find; these are true Melt In Your Mouth Cookies. I remember my Grandma Kate making a version of these for Christmas every year, and the recipe I finally settled on after testing gives you that exact, airy, delicate crumb. They feel so luxurious and are deeply satisfying as a Rich Butter Cookie. I promise, once you make this batch, you won’t need another recipe. If you want another simple, buttery option, check out my guide to easy melt in mouth cookies, but stay here for the Italian magic! For more incredible melt-away goodness, take a peek at this great resource: Melt In Your Mouth Easy Italian Butter Cookie Recipe.
Achieving Authentic Italian Butter Cookies Texture
The secret to that pillow-soft texture that dissolves on your tongue really comes down to two things. First, we skip granulated sugar in favor of powdered sugar in the main dough. That fine powder incorporates air beautifully when creamed with the butter, creating a smoother base that bakes up incredibly tender. Second, we don’t overmix once the flour goes in! We want minimal gluten development, which keeps these Authentic Italian Cookies from ever getting tough. They should feel tender yet substantial enough for dipping, often called Spritz Cookies Recipe variations.
Gathering Ingredients for Perfect Italian Butter Cookies
Okay, the magic of any great Italian Butter Cookie Recipe happens right here with the quality and preparation of your ingredients. Don’t try to sneak in substitutions here—the richness comes directly from what we use! I’ve listed everything you need below. Remember, proper prep makes all the difference when you are aiming for a true Buttery Dessert that holds its shape but still melts away in your mouth.
Essential Components for Rich Butter Cookies
These are the basics for the dough itself. Make sure your butter is truly softened—not melted! It helps everything mix together properly, which is key for these types of Homemade Butter Cookies.
- 1 cup unsalted butter, softened
- 1 cup powdered sugar
- 1 large egg yolk
- 1 teaspoon vanilla extract
- 1/4 teaspoon almond extract
- 2 cups all-purpose flour
- 1/4 teaspoon salt
Optional Decorations for Your Italian Butter Cookies
I love how versatile this base dough is! You can keep it simple, or you can dress them up right before serving. Since these are fantastic for Holiday Baking, having dipping options ready is smart planning.
- For dipping/decorating (optional): 4 ounces semi-sweet chocolate, melted, or raspberry jam
If you’re looking for simple flavor additions for other bakes, my Vanilla Cupcakes Recipe uses similar high-quality extracts!
Step-by-Step Instructions for Homemade Butter Cookies
Alright, let’s get down to business! Making these italian butter cookies is just like any good pastry—it requires a little patience in the beginning, but the payoff is huge. Since these rely so much on texture, make sure your butter is at perfect room temperature before you even touch the mixer. Trust me, room temperature fat is the foundation of all great, tender cookies. If you happen to finish these early, you can compare dipping techniques with my fudge brownies recipe!
Mixing the Dough: Creaming and Combining
This is where we build that air pocket structure that makes these cookies so delicate. Start by creaming the softened butter and powdered sugar together until they are truly light and fluffy—you want volume here, not just mixed! Next, gently beat in your egg yolk and both vanilla and almond extracts. You’re aiming for a cohesive, smooth mixture. Then, we tackle the dry stuff. Whisk your flour and salt separately, and then, this is important, you add the dry ingredients to the wet slowly. Mix on low speed until *just* combined. As soon as you see the last streaks of flour disappear, stop the mixer! Overmixing at this stage develops the gluten and ruins that wonderful, tender texture we’re striving for in these Homemade Butter Cookies.
Shaping and Chilling Your Italian Butter Cookies
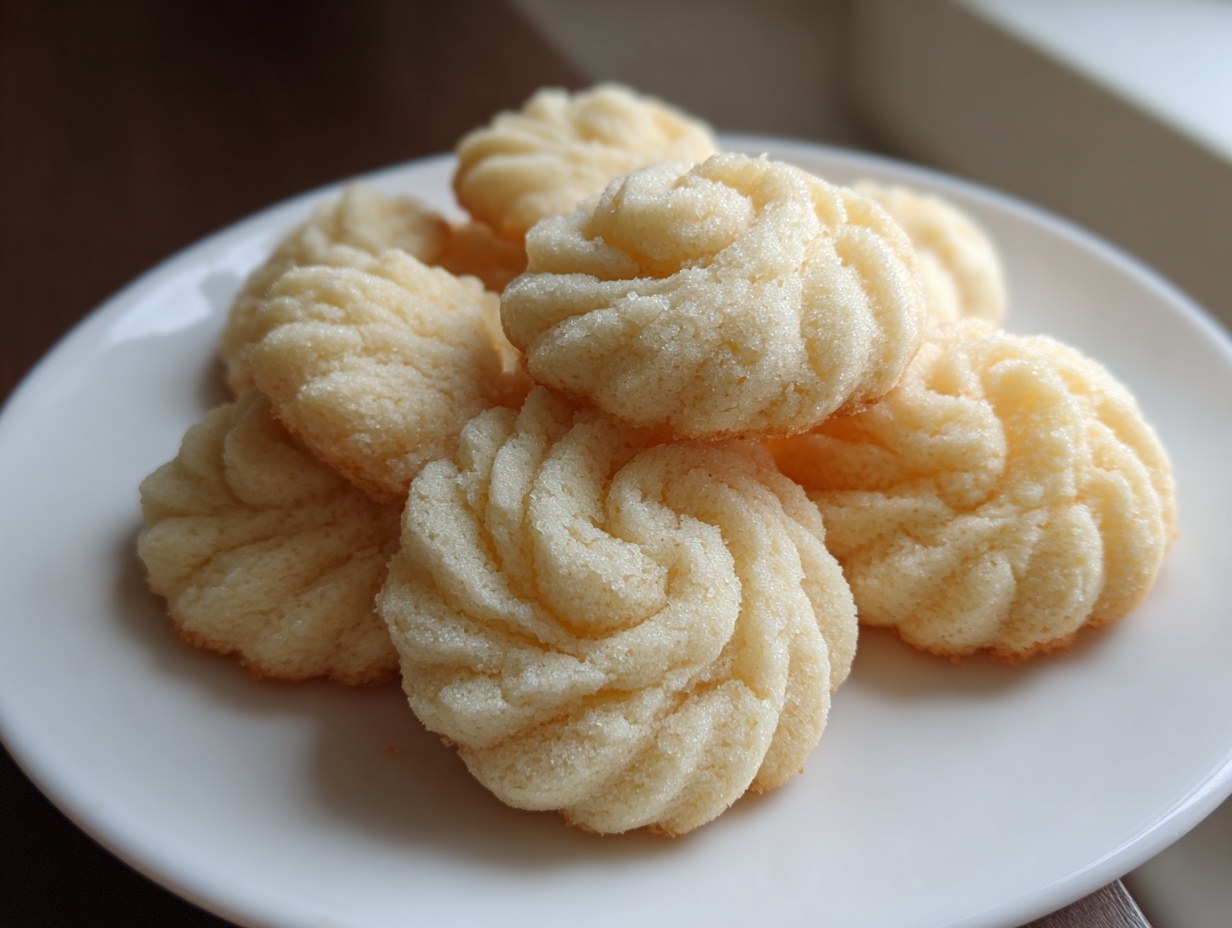
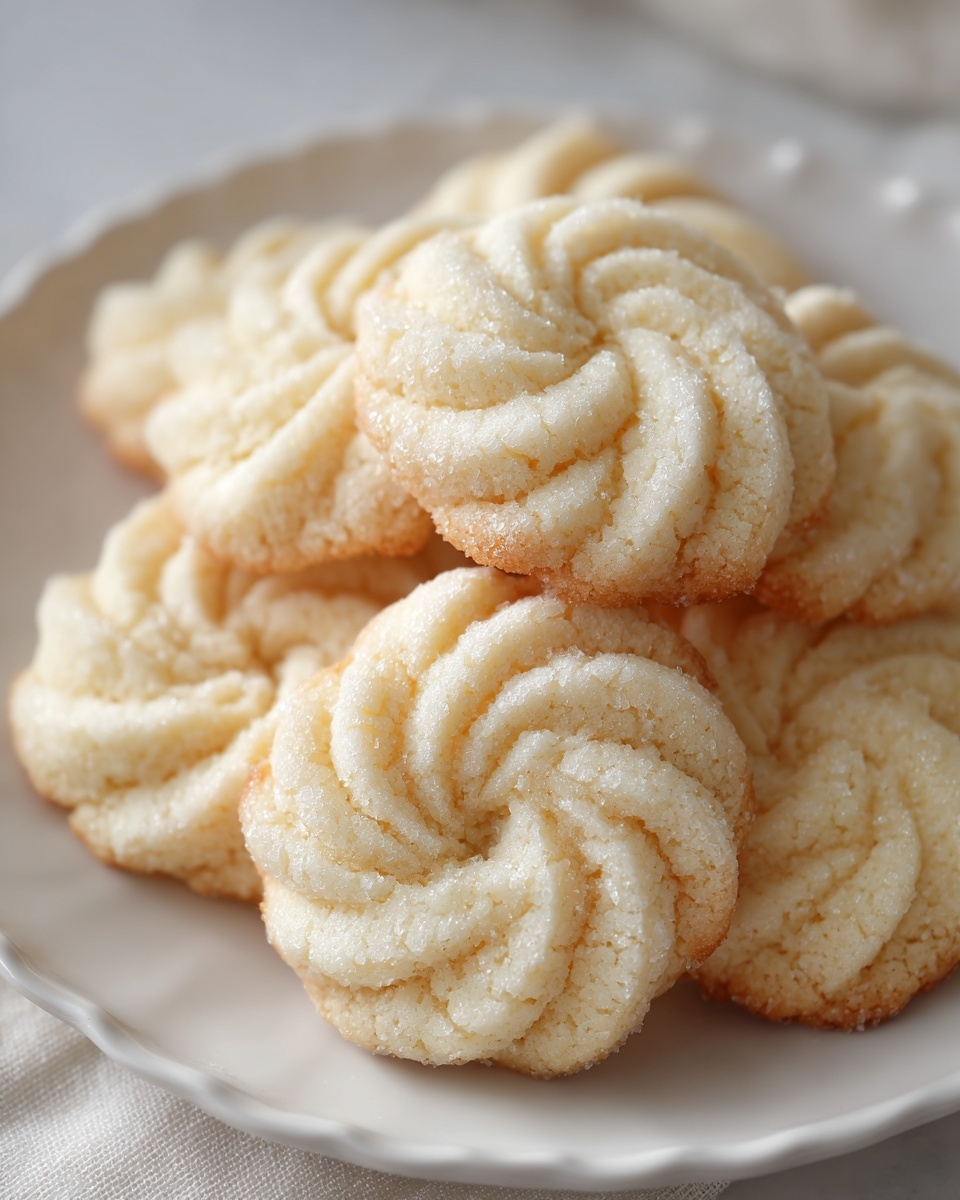
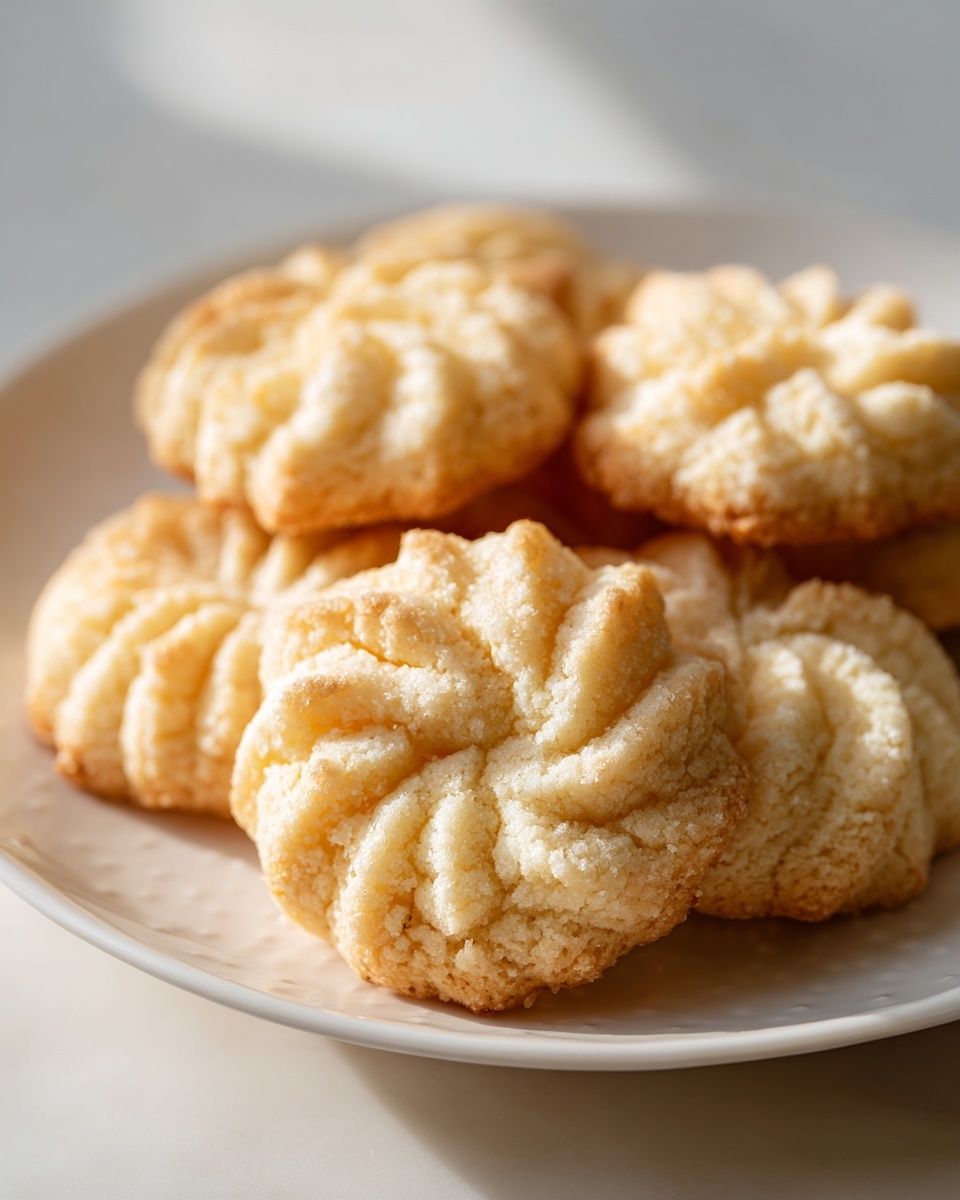
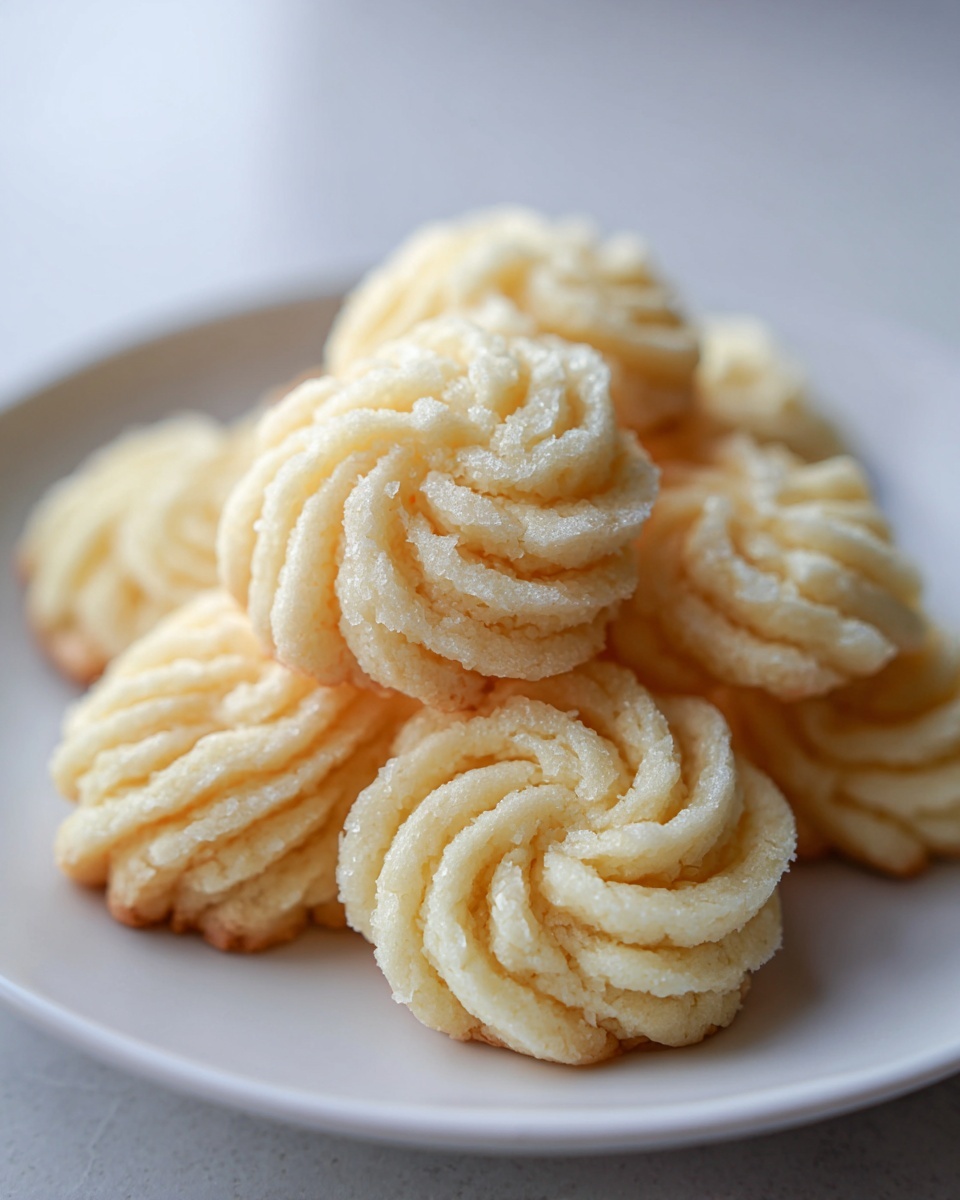
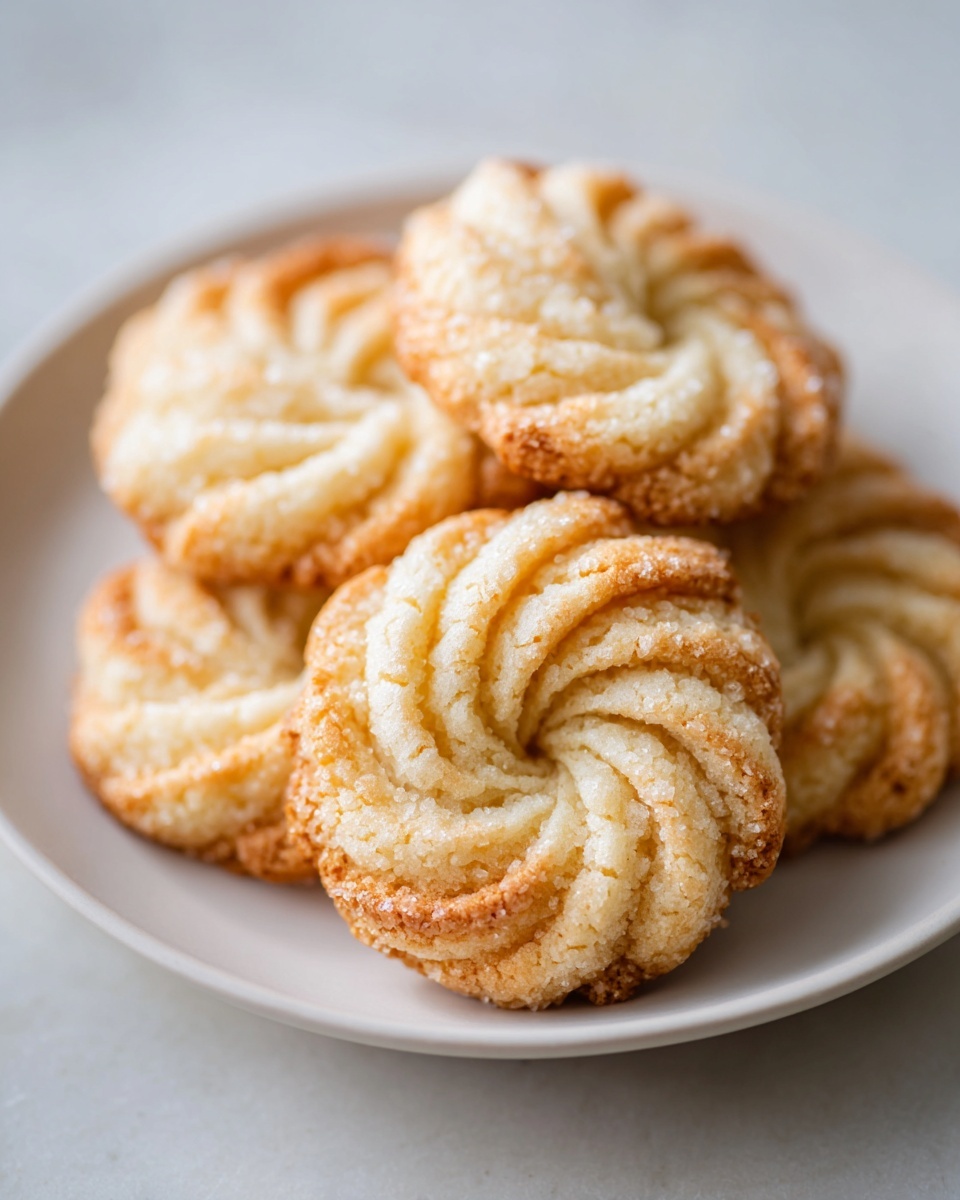
Now for my favorite part—shaping! We need to get these ready for the oven, but we have to chill them first so they don’t melt into puddles. Transfer your soft dough—and yes, it will be soft!—into a pastry bag fitted with a large star tip, like that handy Wilton 1M tip. Pipe little swirls or rosettes directly onto your parchment-lined baking sheets. If you don’t have a cookie press or pastry bag, don’t panic! You can always roll the dough into small logs and slice them into rounds before chilling. No specialized equipment necessary to make Authentic Italian Cookies!
The chilling step is non-negotiable, friends. Pop those shaped cookies into the refrigerator for at least 30 minutes. This firming process is what locks in those beautiful shapes while they bake.
Baking and Finishing the Cookies
Once they’re nice and chilly, preheat your oven to 350°F (175°C). Bake those beauties for 10 to 12 minutes. How do you know they are done? You’re looking for a visual cue: the edges should just start to turn lightly golden. The centers should look pale—they don’t brown much, which keeps them soft! Let them cool right on the baking sheet for about five minutes before carefully moving them to a wire rack to cool completely. Then, if you’re feeling fancy, this is when you dip half of each cookie into melted semi-sweet chocolate or spoon a touch of raspberry jam into the center of sandwich pairs.
Tips for Perfect Italian Butter Cookies Every Time
You made them! But wait, I’ve got a few final pearls of wisdom from my kitchen tests to ensure these italian butter cookies are absolutely flawless every single time you bake them. Remember how I stressed room temperature butter earlier? That’s crucial! Cold butter won’t cream properly, and melted butter leads to flat, greasy cookies. For the absolute best texture when we talk about Rich Butter Cookies, take the time to soften it correctly—soft enough to leave an imprint easily, but not soft *enough* to look oily.
Also, don’t be afraid to mix up the flavors! While my recipe calls for vanilla and almond, I actually love using almond extract with a tiny bit of fresh lemon zest. The lemon really brightens up the richness of the butter, making them feel lighter for an afternoon treat. If you’re making a huge batch for Holiday Baking, you can check out my super reliable recipe for chocolate chip cookies recipe later to add variety to your tray!
Ingredient Notes and Substitutions for Italian Butter Cookies
The almond extract in this recipe is what gives it that classic, slightly nostalgic Italian kick, but if anyone in your family doesn’t care for it, you can swap that out! I usually replace the almond extract with fresh lemon zest—maybe the zest from half a lemon. It keeps the cookie bright and zesty, which is lovely alongside a cup of tea. This change doesn’t affect the cookie’s structure at all. For more baking creativity, look at these gorgeous cookies over at Italian Butter Cookies. Just remember, always use unsalted butter so you can control the salt level yourself!
Variations: Chocolate Dipped Cookies and Jam Filled Italian Cookies
One reason I love this base dough for our italian butter cookies so much is how beautifully it holds up to decoration! You can make a huge batch of the plain dough and then divide it up for half a dozen different types of Christmas Cookies. It’s the perfect canvas for dipping or filling, giving you lots of options for your Cookie Tray Favorites.
When I make these for the holidays, I always dedicate at least one sheet pan to becoming Chocolate Dipped Cookies. Once the cookies are completely cool—and I mean totally cool, or the chocolate will seize up on you!—melt down your semi-sweet chocolate carefully. I prefer just dipping half of the cookie, making sure the pretty star shape is still clearly visible. Set them on parchment paper while the chocolate sets. If you’re using a double boiler for melting, be super careful not to get any water in the chocolate, or it will turn grainy.
For the sandwich cookies, we turn them into lovely Jam Filled Italian Cookies. You just need to find two cookies that match up nicely in size. Take your favorite raspberry jam—or apricot if you’re feeling bright—and gently spread a small amount onto the flat side of one cookie. Then, place the second cookie on top and gently press just until the jam peeks out slightly around the edges. These look wonderfully traditional and make for such a delightful presentation on any serving platter. For a different kind of treat that still involves a rich base, you should definitely check out my recipe for peanut butter cookies recipe for a great contrast!
If you want even more inspiration on dips and fillings for these Authentic Italian Cookies, take a look at what other folks are doing over at Italian Butter Cookies (Filled with Jam + Chocolate Dipped). Having a few different decorated options on hand makes these humble Homemade Butter Cookies feel like a truly grand spread!
Serving Suggestions for These Buttery Dessert Treats
These perfect little italian butter cookies aren’t just delicious straight out of the cooling rack. They really shine when they are served alongside a hot beverage. Think about the soft, buttery texture dissolving perfectly against something warm and slightly bitter—it’s just heavenly! Whether you’re planning for a big family gathering during Holiday Baking or just needing an elegant little afternoon snack, pairing is key. These truly elevate just a casual moment into something special, feeling just as appropriate as my apple cinnamon muffins recipe on a Sunday morning.
Pairing Italian Butter Cookies with Coffee or Tea
If you ask me, these are the ultimate Tea Time Cookies. The richness of the butter cuts beautifully through the tannins in black tea, making every sip feel more intentional. But, if you’re like me and crave that intense flavor contrast, they are phenomenal alongside coffee. These cookies fit perfectly into that category of Coffee Pairing Desserts. They are delicate enough that they don’t overpower the coffee, but substantial enough that they hold up to a quick dip without crumbling apart instantly. For a gorgeous cookie paired with a nice brew, check out how others are enjoying these treats at Italian Spritz Cookies—they look great for a coffee break!
Storage and Make-Ahead Tips for Your Italian Butter Cookies
One of the best things about making these italian butter cookies? They travel so well and they are absolutely perfect for making ahead! Since we are talking about a high-fat, low-moisture cookie, they actually hold up beautifully, which is fantastic news when you are prepping for big events or managing that crazy Holiday Baking schedule.
When they are completely cooled—and I mean stone cold, especially if you dipped them in chocolate—store them in an airtight container. You can layer them between sheets of wax paper in a cookie tin, and they will stay just as tender and buttery for at least a week on your counter. I usually don’t even bother with the fridge unless my kitchen is extra humid!
But here is my real secret weapon for getting a head start: freezing the dough! You don’t have to bake these immediately after chilling. If you find a spare moment a week before you need them, just place the shaped cookies on a baking sheet and pop the whole thing into the freezer until the they are solid pucks. Then, transfer those frozen shapes into a sealed freezer bag. When it’s time to bake, you don’t even need to thaw them!
Just pull out as many as you need, place them directly onto a parchment-lined sheet, and add about three or four extra minutes to the bake time listed in the recipe. They bake up perfectly! It’s such a lifesaver when you need a fresh batch of Homemade Butter Cookies at the last minute without spending hours piping. While you’re thinking about make-ahead, you should absolutely look at my recipe for cinnamon rolls recipe—gooey breakfast buns, which also freezes like a dream!
Frequently Asked Questions About Italian Butter Cookies
It happens every time I bake something I love—you finish, and suddenly you realize you forgot to ask the *really* important questions! Don’t worry, I gathered some of the most common things people ask me about making these italian butter cookies so you don’t have to track me down later. We want these to be great Easy Italian Cookies, and knowing these little tricks helps immensely!
Can I make these Italian Butter Cookies without a cookie press?
Oh, absolutely you can! While the cookie press or the pastry bag with a star tip gives you those gorgeous, classic shapes that make them look like they came right from the display case, they are not mandatory for deliciousness. If you don’t have specialized equipment, just treat the dough like a simple shortbread. Roll the entire ball of dough into small logs—maybe half an inch thick—and chill them thoroughly. Once firm, slice those logs into little rounds, probably about a quarter-inch thick. They are still going to be incredible Vanilla Butter Cookies, they just won’t be perfect swirls. Easy peasy!
How do I keep my Italian Butter Cookies from spreading?
This is the question I get asked most often, especially around the holidays when the kitchen is warm! If you want those crisp edges and that signature shape reminiscent of Spritz Cookies Recipe, chilling is your absolute best friend. I can’t stress this enough: that minimum 30-minute chill time in the refrigerator is non-negotiable. It firms up the butter within the dough so rigidly that when it hits the heat of the oven, the butter melts slowly instead of immediately releasing and causing the cookie to relax and spread flat. If your kitchen is naturally warm, you might even chill the piped/pressed cookies for 45 minutes instead of 30!
If you want to try out another simple bake for your next batch, check out my recipe for easy pumpkin bread recipe—it’s straightforward and always a crowd-pleaser!
Estimated Nutritional Data for These Italian Butter Cookies
I always try to be as transparent as possible about what goes into the food we eat here at Kings Cook. As you know, I came from a nutrition science background, and understanding what we’re putting into our bodies is important, even when we’re enjoying delicious treats!
I’ve put together the estimated nutritional data below for these fantastic italian butter cookies based on the standard recipe ingredients. Remember, these are just guidelines, my friends! If you use salted butter instead of unsalted, or if you decide to use extra thick layers of jam, those numbers will shift a bit. These estimates are based on one cookie serving.
If you’re looking for more rich, buttery bases, you might want to bookmark my pound cake recipe for later. But for now, here is the breakdown for these delightful Homemade Butter Cookies.
- Serving Size: 1 cookie
- Calories: 110
- Fat: 7g
- Carbohydrates: 11g
- Sugar: 8g
- Protein: 1g
See? Not bad at all, especially for such a rich and satisfying Buttery Dessert! Knowing this little bit of data helps me feel more confident serving these up to my family, especially during long sessions of Holiday Baking. Enjoy every single bite!
PrintBakery-Style Italian Butter Cookies: Rich, Melt-In-Your-Mouth Recipe

Follow this simple recipe to make authentic Italian Butter Cookies at home. These rich, buttery cookies have a tender texture that melts in your mouth, making them perfect for holiday baking or serving with coffee.
- Prep Time: 25 min
- Cook Time: 12 min
- Total Time: 67 min
- Yield: 3 dozen 1x
- Category: Dessert
- Method: Baking
- Cuisine: Italian
- Diet: Vegetarian
Ingredients
- 1 cup unsalted butter, softened
- 1 cup powdered sugar
- 1 large egg yolk
- 1 teaspoon vanilla extract
- 1/4 teaspoon almond extract
- 2 cups all-purpose flour
- 1/4 teaspoon salt
- For dipping/decorating (optional): 4 ounces semi-sweet chocolate, melted, or raspberry jam
Instructions
- In a large bowl, cream together the softened butter and powdered sugar until the mixture is light and fluffy.
- Beat in the egg yolk, vanilla extract, and almond extract until fully combined.
- In a separate bowl, whisk together the all-purpose flour and salt.
- Gradually add the dry ingredients to the wet ingredients, mixing on low speed until just combined into a soft dough. Do not overmix.
- Transfer the dough to a pastry bag fitted with a large star tip (like a Wilton 1M) for classic swirls, or use a cookie press for other shapes.
- Pipe small swirls or desired shapes onto baking sheets lined with parchment paper.
- Chill the shaped cookies in the refrigerator for at least 30 minutes. This helps them hold their shape during baking.
- Preheat your oven to 350 degrees Fahrenheit (175 degrees Celsius).
- Bake the chilled cookies for 10 to 12 minutes, or until the edges are lightly golden. They should remain pale in the center.
- Let the cookies cool on the baking sheet for 5 minutes before carefully transferring them to a wire rack to cool completely.
- If desired, dip half of each cooled cookie into melted semi-sweet chocolate or fill the center of sandwich cookies with raspberry jam. Let any chocolate set before serving.
Notes
- For the best melt-in-your-mouth texture, use room temperature butter.
- You can substitute some of the vanilla extract with lemon zest for a brighter flavor.
- These cookies freeze well before baking; place frozen shapes directly onto a lined baking sheet and add a few extra minutes to the bake time.
- If you do not have a pastry bag, you can roll the dough into small logs and slice them into rounds before chilling.
Nutrition
- Serving Size: 1 cookie
- Calories: 110
- Sugar: 8
- Sodium: 35
- Fat: 7
- Saturated Fat: 4
- Unsaturated Fat: 3
- Trans Fat: 0
- Carbohydrates: 11
- Fiber: 0
- Protein: 1
- Cholesterol: 25