
If you’re anything like me, you search for a dessert that feels like a warm hug. Maybe you need something comforting for a chilly evening or perhaps a traditional treat for a celebration. Well, stop scrolling right now because I’ve perfected what I consider the ultimate Filipino Cassava Cake. This isn’t some fussy, complicated bake, folks! I spent weeks testing this specific *cassava cake* recipe—trying different amounts of coconut milk and fiddling with the bake times—to guarantee reliability.
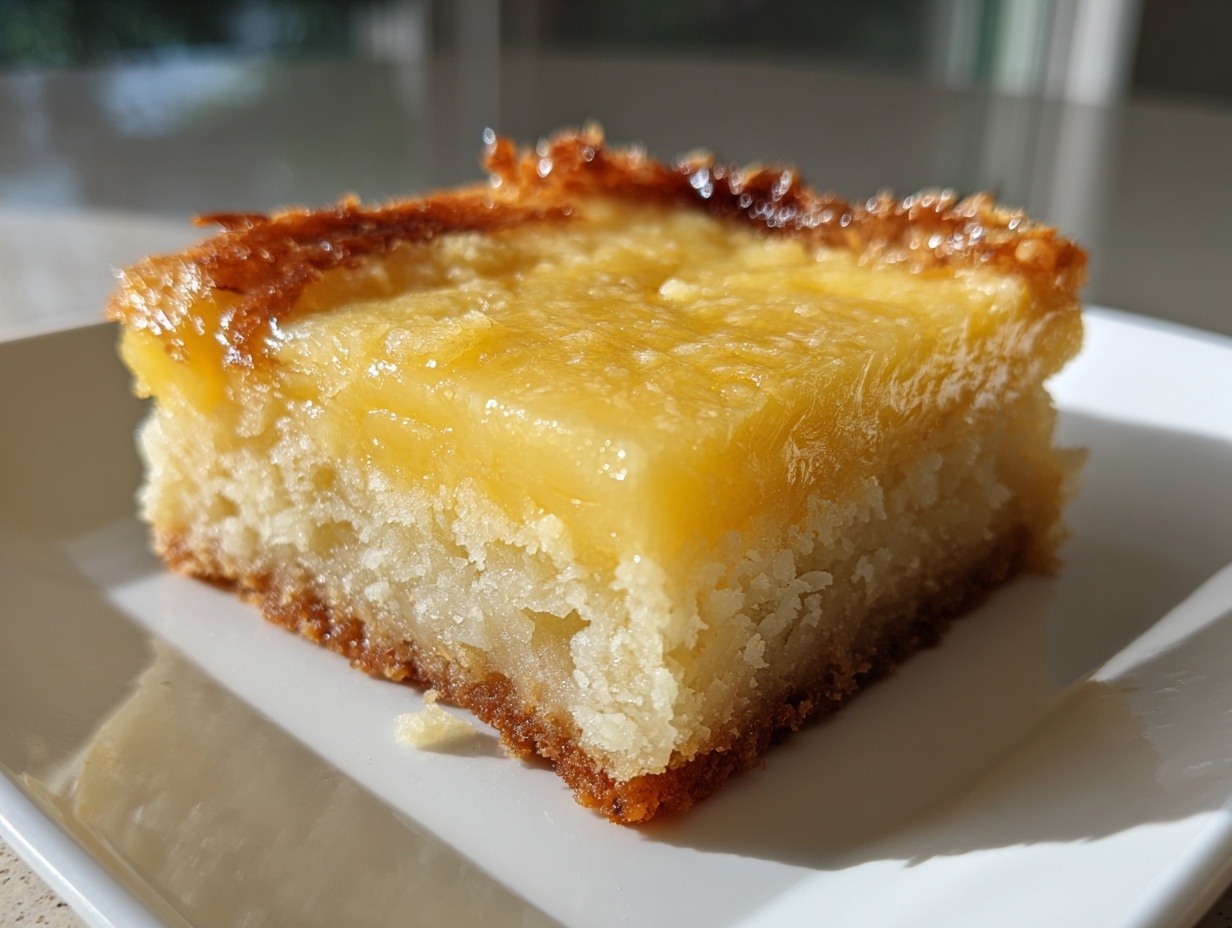
What you get here is an easy tutorial that yields a dessert that is unbelievably creamy in the middle and wonderfully chewy around the edges. It’s topped with that luscious, golden custard layer everyone dreams about. Trust me, even if you’ve never touched a grater before, this recipe will make you feel like royalty!
- Why This Easy Cassava Cake Tutorial Delivers Comfort Food Perfection
- Gathering Ingredients for Your Creamy Cassava Cake with Custard
- How to Make Cassava Cake: Step-by-Step Baking Guide
- Expert Tips for the Best Baked Cassava Cake Texture
- Delicious Cassava Cake Variations: Macapuno and Cheese Topping
- Storing and Reheating Your Moist Cassava Cake
- Frequently Asked Questions About This Filipino Cassava Cake Recipe
- Serving Suggestions for Your Tropical Cassava Dessert
- Share Your Experience Making This Cassava Cake
Why This Easy Cassava Cake Tutorial Delivers Comfort Food Perfection
I know you’re busy, so I designed this *cassava cake* recipe to fit right into your life. When I was testing this—sometimes with fresh cassava, sometimes frozen—my goal was speed without sacrificing that incredible, authentic flavor. This method proves you don’t need hours slaving away to achieve Filipino comfort food perfection.
Here is why I’m so confident this recipe will become your new favorite:
- It’s Speedy: We are talking about being ready to serve in under 90 minutes total. That’s amazing for a layered dessert!
- Texture is Guaranteed: Forget dry or crumbly. This version consistently hits that sweet spot: wonderfully moist, satisfyingly chewy, and that creamy custard topping seals the deal.
- Beginner Approved: Every step is broken down simply. If you can grate cassava and whisk a sauce, you can master this *Easy Cassava Cake Tutorial*. It truly works every time.
If you need more sweet ideas for after dinner, check out my collection of best dessert recipes—but honestly, start here!
Gathering Ingredients for Your Creamy Cassava Cake with Custard
Okay, ingredient prep is where the magic—and the trust—begins! I laid this out really clearly in the recipe because getting the measurements right is key, especially with *cassava cake*. We aren’t trying to wrestle with runny batter here. We want that perfect density that leads to that satisfying chewiness.
You’ll notice the recipe splits into two groups: the main cake body and the gorgeous custard blanket that goes on top. Read everything through before you start grating, okay? That’s my number one rule for confidence in the kitchen!
For the Cassava Cake Base
This is the heart of our *Moist Cassava Cake Baking Guide*. Seriously, don’t skimp on the coconut milk here; we need that full-fat richness to make sure this *Filipino Cassava Cake Recipe* turns out truly decadent.
- 4 cups grated cassava (make sure this is fresh, or if you’re using frozen, please thaw it completely first!)
- 1 (13.5 oz) can full-fat coconut milk – the rich one, trust me!
- 1 (14 oz) can sweetened condensed milk
- 1/2 cup granulated sugar
- 1/4 cup melted unsalted butter
- 2 large eggs
- 1 teaspoon vanilla extract
- 1/2 cup shredded young coconut (*macapuno*), this part is optional but highly recommended for that authentic texture!
For the Rich Custard Topping
This topping is what takes us from a great simple dessert to a showstopper. Note that we are using the egg yolks here separately to get that incredibly smooth, rich custard texture. We want it thick enough to coat a spoon beautifully.
- 1 (13.5 oz) can full-fat coconut milk (yes, you need it for the topping too!)
- 1 (14 oz) can sweetened condensed milk
- 2 large egg yolks (save those whites for another project!)
- 1/4 cup all-purpose flour or cornstarch (use whichever you have on hand—I often use cornstarch for a slightly cleaner set)
- 1/4 cup granulated sugar
- Pinch of salt (never skip the salt, it balances the sweetness!)
- 1/4 cup shredded cheddar cheese, for topping (optional, but SO good for that sweet and savory hit!)
How to Make Cassava Cake: Step-by-Step Baking Guide
Alright, deep breath! This is the fun part. Making *cassava cake* is mostly prep work, and the actual assembly is surprisingly fast—seriously, we’ll be done baking in about an hour total. The key here is respecting the two separate cooking stages: setting the dense base, and then gently nurturing that custard top until it’s perfect. I’ve tested this flow so many times that it’s fool-proof now!
Do you want to see how fast we can get this amazing *Filipino Cassava Cake Recipe* ready? If you want a deep-dive into the technique itself, I wrote a whole post on how to make cassava cake that covers every little detail, but here are the core steps for our creamy version.
Preparing the Base and Initial Bake
First things first: get that oven preheated! We need it hot and ready at 350°F (175°C). Grab your 8×8 inch baking pan—I always grease mine well and then cut a piece of parchment paper to fit the bottom. That parchment is your insurance policy against sticking, trust me on this!
- In your biggest mixing bowl, combine the 4 cups of grated cassava.
- Pour in that first can of coconut milk, the condensed milk, 1/2 cup sugar, melted butter, 2 eggs, and vanilla. Give it a gentle stir until everything is just combined together. Don’t overmix this base layer! If you’re using the macapuno, fold it in now.
- Scrape that thick batter into your prepared pan and spread it out nice and even.
- Bake this base layer for a solid 40 minutes. You want the edges to look set before we even think about the topping.
Cooking the Creamy Cassava Cake Topping
While that base is baking away, we tackle the star of the show: the custard!
- Grab a medium saucepan. Whisk together the *second* can of coconut milk, the *second* can of condensed milk, those two egg yolks, flour (or cornstarch—whatever you chose!), the last 1/4 cup of sugar, and that tiny pinch of salt.
- Set this over medium-low heat. Here’s my expert tip: you must whisk constantly! We are looking for this mixture to thicken just enough that it coats the back of a wooden spoon. If you see big, aggressive bubbles popping, you’re too hot—pull it off the heat immediately and whisk like crazy until it calms down. This should take about 5 to 8 minutes.

If you want more ideas on amazing Filipino recipes, Nora has a great classic take on this over at her site!
Final Bake and Setting the Cassava Cake
Now we bring it all together. Carefully pull that cake base out of the oven after 40 minutes. It won’t be fully cooked, but it needs to be firm enough to hold the custard.
- Gently, and I mean gently, pour that thickened custard topping evenly over the still-hot cassava base. Try not to disturb the bottom layer too much!
- If you decided to go for that sweet and savory combination, now is the time to sprinkle that shredded cheddar cheese right over the custard.
- Pop it back into the oven for another 15 to 20 minutes. We are just looking for that topping to be fully set and maybe just starting to get those pretty light brown spots.
- The absolute final and most important step? Let the *Creamy Cassava Cake with Custard* cool COMPLETELY on a wire rack before you slice it. If you jump the gun, it will be too soft and fall apart! This cooling time is what locks in that lovely chewy texture we worked so hard for.
Expert Tips for the Best Baked Cassava Cake Texture
I’ve made this baked *cassava cake* recipe so many times that I’ve learned all the little secrets to handling the ingredients, especially when dealing with cassava, which can sometimes be moody! Getting that perfect chewiness isn’t luck; it’s technique. You want a dessert so moist and rich that people ask when you made it!
Ingredient Notes and Substitutions for Cassava Cake
When we talk texture in a *Moist Cassava Cake Baking Guide*, we are talking about managing moisture. The cassava itself is the main variable here. If you are using pre-grated cassava—which is totally fine if you’re short on time—you must drain it after thawing.
- Squeezing the Cassava: If you’re using frozen or fresh cassava, wrap it snugly in a clean kitchen towel or cheesecloth and squeeze out as much liquid as you possibly can. Excess water will lead to a gummy, under-baked bottom layer, and we absolutely don’t want that.
- Choosing Your Thickener: I listed both flour and cornstarch for the custard. Cornstarch tends to create a slightly smoother, more gelatinous set, which is nice, but all-purpose flour gives it a richer, slightly firmer mouthfeel. Test both and see which one you prefer next time!
- Flavor Boost: While this recipe is classic as written, sometimes I like adding a tiny bit of lime zest (maybe half a teaspoon) into the base mixture. It cuts through the richness of the coconut milk beautifully.
Remember, the secret to a great *Chewy Cassava Cake Dessert* lies in the ingredients you choose, but also in the ones you actively remove, like excess water! To see a few other tips on keeping baked goods moist, check out my guide for the moist banana bread recipe—the principles of not overmixing are the same!
And for another great run-through of the technique, Rebecca over at Recipe Ni Juan has fantastic visuals that can help if you get stuck on the stovetop custard!
Delicious Cassava Cake Variations: Macapuno and Cheese Topping
One of the things I love most about Filipino desserts is how customizable they are. This base is fantastic on its own, but adding just one extra element can take it to a whole new level. We need to talk about the popular additions that elevate this *Authentic Filipino Dessert*.
If you’ve seen a picture of a truly next-level *cassava cake*, it usually has one of these two optional goodies layered in or on top.
Incorporating Macapuno
If you managed to find young coconut strings, or *macapuno*, you absolutely must use them in the base mixture. They blend right into the batter before the first bake.
Why do they matter? They melt just slightly, leaving behind these tender, slightly chewy ribbons of coconut that are totally different from regular shredded coconut. It just adds another layer of tropical texture that makes people rave about your baking. I found that using half a cup gives you a lovely surprise in about every third bite. You can find pointers on using them over at Dishes Tasty.
Layering on the Cheese Topping
This is my favorite variation, and I know it sounds odd to Americans sometimes—cheese on a sweet cake? But trust me, the salty sharp profile of cheddar is the perfect foil for the sweet coconut and condensed milk. This is the signature move in many modern *Cassava Cake with Cheese Topping* recipes.
The trick is *when* you add it. If you put the shredded cheese on before the final 15-minute bake, it melts beautifully into the custard, becoming slightly gooey under a nice golden crust. Just make sure you grate your cheese thinly so it melts evenly, rather than browning too fast!
Storing and Reheating Your Moist Cassava Cake
The best part about this *cassava cake* is that it actually tastes even better the next day! I call it the flavor marriage—everything settles down, and it gets that signature dense, chewy texture everyone loves.
Since this dessert relies so much on moisture from the coconut milk, proper storage is key to keeping it fresh. If you plan to serve it within the same day, leaving it covered at cool room temperature is fine for several hours, especially if you have that rich custard top. But for longer storage, the fridge is where it needs to be.
- Refrigeration: Wrap the cooled cake tightly in plastic wrap, or better yet, in an airtight container. It stays great for up to four days.
- Serving Cold vs. Room Temp: Honestly, I prefer it slightly chilled, but if you want that soft, melt-in-your-mouth texture back, let it sit on the counter for about 30 minutes before slicing.
- Warming It Up: If you want it warm, use your microwave sparingly! I zap individual squares for about 10 to 15 seconds. To keep it from getting rubbery—which happens when you overheat it—cover the piece with a damp paper towel while microwaving. That steam keeps the moisture locked in!
Frequently Asked Questions About This Filipino Cassava Cake Recipe
I get a ton of questions about making sure this tropical favorite turns out perfectly. People often wonder about timing and texture because cassava can behave differently than wheat flour!
Can I make this Chewy Cassava Cake Dessert ahead of time?
Oh, absolutely you can! In fact, I highly recommend it! This *Chewy Cassava Cake Dessert* firms up beautifully overnight in the fridge. The custard sets completely, and all those coconut flavors marry up nicely. You can easily make this a day ahead for parties, which frees you up for other cooking!
Is this the Authentic Filipino Dessert version?
Yes, I feel very confident calling this an *Authentic Filipino Dessert*. The combination of cassava, condensed milk, and that pure, dedicated coconut milk custard topping is exactly what you’d find in the Philippines. If you add the macapuno, you’re checking off all the traditional boxes! It’s a cornerstone of Filipino comfort food.
Can I skip the oven and steam this Cassava Cake?
You certainly could steam it—that’s common for some regional variations, sometimes called *Cassava Bibingka Recipe* styles. However, this specific recipe, especially with the two-layer structure and the baked custard topping, is optimized for the oven. The baking process gives you that desirable chewy bottom layer and the golden, slightly browned custard top. If you steam it, the custard will stay softer and won’t brown.
If you want to see another great recipe idea, I’ve got highlights of my best dessert recipes collection linked right here!
Serving Suggestions for Your Tropical Cassava Dessert
Once your *cassava cake* has cooled and firmed up perfectly, it’s time to admire your work! This *Tropical Cassava Dessert* is incredibly satisfying all by itself, thanks to all that coconut and condensed milk. It really doesn’t need much else, but I always like to have a simple counterpoint to balance the richness.
Since this cake is so dense and sweet, I find that pairing it with something light or slightly bitter works best. A strong, hot cup of black coffee—maybe some Filipino Barako coffee if you have it—is fantastic. Alternatively, a cup of lightly sweetened black tea cuts through the richness perfectly as well. If you are serving this after a big meal, skip the heavy desserts and just serve a small cube of this cake alongside some fresh, sliced mangoes. It’s perfection!
If you’re looking for some beverage ideas to go with your rich dessert, take a peek at my favorite drink and cocktail recipes for pairing inspiration!
Share Your Experience Making This Cassava Cake
I truly, truly hope you loved making this recipe as much as I loved testing it for you. When you bake something traditional like this *Filipino Cassava Cake Recipe*, you become part of the tradition, and I love being part of your kitchen story.
Once you give this a try, please come back and leave me a star rating right below the recipe card! Let me know what you thought—was the custard firm enough? Did you add the cheese? Your feedback helps new bakers feel confident trying this recipe next. And honestly, seeing photos of your finished cakes makes my whole week!
Thank you again for joining me here at Kings Cook. I can’t wait to see what you create next!
Happy Cooking,
Kate Connolly
Expert Tips for the Best Baked Cassava Cake Texture
I’ve made this baked cassava cake recipe so many times that I’ve learned all the little secrets to handling the ingredients, especially when dealing with cassava, which can sometimes be moody! Getting that perfect chewiness isn’t luck; it’s technique. You want a dessert so moist and rich that people ask when you made it!
Ingredient Notes and Substitutions for Cassava Cake
When we talk texture in a *Moist Cassava Cake Baking Guide*, we are talking about managing moisture. The cassava itself is the main variable here. If you are using pre-grated cassava—which is totally fine if you’re short on time—you must drain it after thawing.
- Squeezing the Cassava: If you’re using frozen or fresh cassava, wrap it snugly in a clean kitchen towel or cheesecloth and squeeze out as much liquid as you possibly can. Excess water will lead to a gummy, under-baked bottom layer, and we absolutely don’t want that.
- Choosing Your Thickener: I listed both flour and cornstarch for the custard. Cornstarch tends to create a slightly smoother, more gelatinous set, which is nice, but all-purpose flour gives it a richer, slightly firmer mouthfeel. Test both and see which one you prefer next time!
- Flavor Boost: While this recipe is classic as written, sometimes I like adding a tiny bit of lime zest (maybe half a teaspoon) into the base mixture. It cuts through the richness of the coconut milk beautifully.
Remember, the secret to a great *Chewy Cassava Cake Dessert* lies in the ingredients you choose, but also in the ones you actively remove, like excess water! To see a few other tips on keeping baked goods moist, check out my guide for the moist banana bread recipe—the principles of not overmixing are the same!
And for another great run-through of the technique, Rebecca over at Recipe Ni Juan has fantastic visuals that can help if you get stuck on the stovetop custard!
Delicious Cassava Cake Variations: Macapuno and Cheese Topping
I’ve found that even with a perfect base recipe, adding in a little something extra turns this *cassava cake* from reliable to unforgettable. One of the things I love most about Filipino desserts is how customizable they are. This base is fantastic on its own, but adding just one extra element can take it to a whole new level. We need to talk about the popular additions that elevate this *Authentic Filipino Dessert*.
If you’ve seen a picture of a truly next-level *cassava cake*, it usually has one of these two optional goodies layered in or on top. Don’t worry if you can’t find these ingredients; the cake is still amazing solo, but they really shine!
Incorporating Macapuno
If you managed to find young coconut strings, or *macapuno*, you absolutely must use them in the base mixture. They blend right into the batter before the first bake. I usually add them right in with the wet and dry ingredients for the base layer.
Why do they matter? They melt just slightly during the bake, leaving behind these tender, slightly chewy ribbons of coconut that are totally different from regular shredded coconut. It just adds another layer of tropical texture that makes people rave about your baking. I found that using half a cup gives you a lovely surprise in about every third bite. You can find pointers on how to source and use them over at Dishes Tasty if you need visuals!
Layering on the Cheese Topping
This is my favorite variation, and I know it sounds odd to some folks—cheese on a sweet cake? But trust me, the salty, sharp profile of cheddar is the perfect foil for the sweet coconut and condensed milk. This is the signature move that many people look for when searching for *Cassava Cake with Cheese Topping* recipes.
The trick is *when* you add it. Since we are baking the cake in two stages, you only want the cheese sprinkled on top of the custard layer *after* the base has set. If you put the shredded cheese on before the final 15-minute bake, it melts beautifully into the custard, often becoming slightly gooey underneath a nice golden crust. Just make sure you grate your cheese thinly so it melts evenly, rather than browning too fast! You can find my full thoughts on making the best sweet and savory treats when I talk about my best dessert recipes collection!
Storing and Reheating Your Moist Cassava Cake
The best part about this *cassava cake* is that it actually tastes even better the next day! I call it the flavor marriage—everything settles down, and it gets that signature dense, chewy texture everyone loves. It truly holds up wonderfully, which is why it’s such a great make-ahead dessert.
Since this dessert relies so much on moisture from the coconut milk, proper storage is key to keeping it fresh. You need to handle it gently, especially with that creamy custard topping intact.
Here’s my breakdown on keeping your *Moist Cassava Cake Baking Guide* creation perfect until you are ready for seconds:
- Refrigeration is Your Friend: If you plan on keeping this longer than a few hours, pop it in the fridge. Wrap the cooled cake tightly in plastic wrap, or better yet, place it in an airtight container. It stays great for up to four days. The texture will firm up significantly when cold, which I personally love for a cleaner slice!
- Serving Cold vs. Room Temp: Honestly, I prefer it slightly chilled right out of the fridge for that firm, chewy bite. However, if you want that soft, melt-in-your-mouth texture back, just set those squares out on the counter for about 30 minutes before you plan to eat them.
- Warming It Up Gently: If you absolutely must have it warm, you need to use your microwave sparingly! I zap individual squares for just 10 to 15 seconds. To keep it from getting rubbery—which happens when you overheat baked goods packed with starch like this—cover the piece with a damp paper towel while microwaving. That burst of steam keeps the moisture locked right where it belongs!
Frequently Asked Questions About This Filipino Cassava Cake Recipe
I get a ton of questions about making sure this tropical favorite turns out perfectly. People often wonder about timing and texture because cassava can behave differently than wheat flour! Don’t worry, I’ve got answers for you, drawing from all my testing sessions.
Can I make this Chewy Cassava Cake Dessert ahead of time?
Oh, absolutely you can! In fact, I highly recommend it! This *Chewy Cassava Cake Dessert* firms up beautifully overnight in the fridge. The custard sets completely, and all those coconut flavors marry up nicely. You can easily make this a day ahead for parties, which frees you up for other cooking! Just remember to let it warm up slightly on the counter for about 30 minutes before slicing for the best texture.
Is this the Authentic Filipino Dessert version?
Yes, I feel very confident calling this an *Authentic Filipino Dessert*. The combination of cassava, condensed milk, and that pure, dedicated coconut milk custard topping is exactly what you’d find in the Philippines. It hits all those key notes we look for—creamy, rich, and slightly sweet but balanced. If you add the macapuno, you’re checking off all the traditional boxes!
Can I skip the oven and steam this Cassava Cake?
You certainly could steam it—that’s common for some regional variations, sometimes called *Cassava Bibingka Recipe* styles. However, this specific recipe, especially with the two-layer structure and the baked custard topping, is optimized for the oven. The baking process gives you that desirable chewy bottom layer and the golden, slightly browned custard top. If you steam it, the custard will stay softer and won’t brown, which changes the experience! For this recipe, stick to the oven for that beautiful bake.
If you want to see another great recipe idea, I’ve got highlights of my best dessert recipes collection linked right here!
Serving Suggestions for Your Tropical Cassava Dessert
Once your *cassava cake* has cooled and firmed up perfectly, it’s time to admire your work! This *Tropical Cassava Dessert* is incredibly satisfying all by itself, thanks to all that coconut and condensed milk. It really doesn’t need much else, but I always like to have a simple counterpoint to balance the richness.
Since this cake is so dense and sweet, I find that pairing it with something light or slightly bitter works best. A strong, hot cup of black coffee—maybe some Filipino Barako coffee if you have it—is fantastic. Alternatively, a cup of lightly sweetened black tea cuts through the richness perfectly as well. If you are serving this after a big meal, skip the heavy desserts and just serve a small cube of this cake alongside some fresh, sliced mangoes. It’s perfection!
If you’re looking for some beverage ideas to go with your rich dessert, take a peek at my favorite drink and cocktail recipes for pairing inspiration!
Share Your Experience Making This Cassava Cake
I truly, truly hope you loved making this recipe as much as I loved testing it for you. When you bake something traditional like this *Filipino Cassava Cake Recipe*, you become part of the tradition, and I love being part of your kitchen story. It really means the world to me when I see folks succeeding in their kitchens!
Once you give this a try, please come back! I need to know how it went. Don’t hide your success in the kitchen—leave me a star rating right below the recipe card. Let me know what you thought! Was the custard firm enough? Did you decide to go for the cheese topping, or did you stick strictly to the classic look? Your feedback helps new bakers feel confident trying this delicate dessert next.
If you snap any photos of your finished *Creamy Cassava Cake with Custard*, please tag me! I live for seeing the results. You can learn more about my philosophy for helping home cooks right here on my About Page.
Thank you again for baking with me today. I can’t wait to see what delicious creation you share next!
Happy Cooking,
Kate Connolly
PrintThe Easiest Creamy Filipino Cassava Cake with Custard Topping

Learn how to make this authentic Filipino Cassava Cake. It is moist, chewy, and topped with a rich, creamy custard layer. This recipe is simple enough for beginners and delivers classic comfort food flavor.
- Prep Time: 20 min
- Cook Time: 60 min
- Total Time: 80 min
- Yield: 9 servings 1x
- Category: Dessert
- Method: Baking
- Cuisine: Filipino
- Diet: Vegetarian
Ingredients
- 4 cups grated cassava (fresh or frozen, thawed)
- 1 (13.5 oz) can full-fat coconut milk
- 1 (14 oz) can sweetened condensed milk
- 1/2 cup granulated sugar
- 1/4 cup melted unsalted butter
- 2 large eggs
- 1 teaspoon vanilla extract
- 1/2 cup shredded young coconut (macapuno), optional
- For the Custard Topping:
- 1 (13.5 oz) can full-fat coconut milk
- 1 (14 oz) can sweetened condensed milk
- 2 large egg yolks
- 1/4 cup all-purpose flour or cornstarch
- 1/4 cup granulated sugar
- Pinch of salt
- 1/4 cup shredded cheddar cheese, for topping (optional)
Instructions
- Preheat your oven to 350°F (175°C). Grease and line an 8×8 inch baking pan with parchment paper.
- In a large bowl, combine the grated cassava, 1 can of coconut milk, 1 can of condensed milk, 1/2 cup sugar, melted butter, 2 eggs, and vanilla extract. Mix until just combined. If using, stir in the macapuno.
- Pour the cassava mixture into the prepared baking pan and spread evenly.
- Bake the base layer for 40 minutes, or until the edges are set.
- While the base bakes, prepare the custard topping. In a medium saucepan, whisk together the second can of coconut milk, the second can of condensed milk, 2 egg yolks, flour (or cornstarch), 1/4 cup sugar, and salt.
- Cook the custard mixture over medium-low heat, whisking constantly, until it thickens enough to coat the back of a spoon, about 5 to 8 minutes. Do not let it boil rapidly.
- Remove the partially baked cassava cake from the oven. Carefully pour the thickened custard evenly over the top of the cake base.
- If using cheese, sprinkle the shredded cheddar cheese over the custard layer.
- Return the cake to the oven and bake for another 15 to 20 minutes, or until the custard topping is set and lightly golden brown.
- Let the cassava cake cool completely in the pan on a wire rack before slicing. Cooling allows the cake to firm up for a chewy texture.
Notes
- For a richer flavor, substitute evaporated milk for some of the coconut milk in the base mixture.
- You can use frozen grated cassava; thaw it completely and squeeze out any excess liquid before mixing.
- If you prefer a smoother custard, strain the mixture before pouring it over the base.
Nutrition
- Serving Size: 1 square
- Calories: 350
- Sugar: 35
- Sodium: 150
- Fat: 18
- Saturated Fat: 15
- Unsaturated Fat: 3
- Trans Fat: 0
- Carbohydrates: 45
- Fiber: 3
- Protein: 5
- Cholesterol: 55