
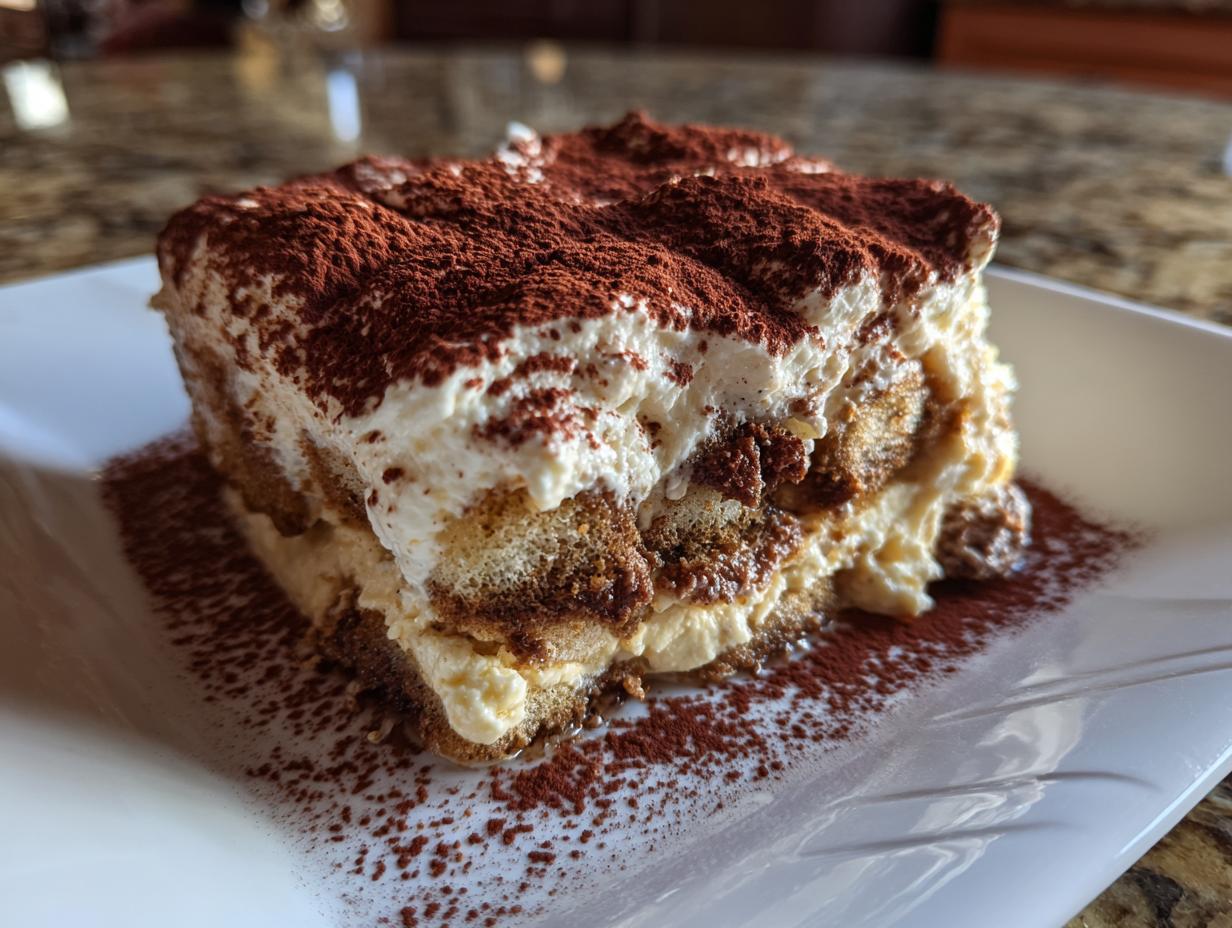
Oh, Italian desserts! Just the thought of them makes me want to grab my apron and whip up something magical. And when it comes to that perfect blend of decadent and surprisingly simple, Tiramisu is always the star. It’s that incredible, no-bake layered dream that honestly feels like a luxury dessert but is totally doable right in your own kitchen. I remember the first time I made this for a dinner party – my friends were absolutely speechless! That feeling of taking a classic, beloved dessert and making it shine for the people you love is exactly why I started Kings Cook. It’s all about making those special moments accessible, and this Tiramisu recipe is proof that you don’t need to be a pastry chef to create something truly spectacular.
- Why You'll Love This Classic Tiramisu Recipe
- Gather Your Ingredients for Authentic Tiramisu
- Essential Equipment for Making Tiramisu
- Step-by-Step Guide to Your Perfect Tiramisu
- Tips for the Best Tiramisu
- Ingredient Notes and Substitutions for Tiramisu
- Make-Ahead and Storage for Your Tiramisu
- Frequently Asked Questions About Tiramisu
- Estimated Nutritional Information for Tiramisu
- Share Your Tiramisu Creations!
Why You’ll Love This Classic Tiramisu Recipe
You’re going to adore this Tiramisu recipe! Here’s why:
- Effortlessly No-Bake: Seriously, no oven needed! It’s perfect for when you want a showstopper dessert without the baking stress.
- Impressive Results: It looks and tastes like a fancy restaurant dessert, but you made it! Those layers are *chef’s kiss*.
- Rich, Delicious Flavor: The coffee, the creamy mascarpone, that hint of liqueur—it all comes together for pure bliss in every bite.
- Perfect for Any Occasion: Whether it’s a holiday, a birthday, or just a Tuesday you want to make special, this dessert always hits the spot.
Gather Your Ingredients for Authentic Tiramisu
Alright, let’s get together everything you need to make this truly authentic Tiramisu! It’s all about using good ingredients here. You’ll want:
- 6 large egg yolks (make sure they’re fresh!)
- 3/4 cup granulated sugar
- 16 ounces mascarpone cheese, brought to room temperature so it’s nice and soft
- 1 1/2 cups strong brewed espresso or coffee, totally cooled down
- 1/4 cup coffee liqueur or dark rum (this is optional, but trust me, it adds a wonderful depth of flavor!)
- About 24 to 30 ladyfingers – the crisp kind are best for soaking
- Unsweetened cocoa powder, for that classic dusty finish on top
- And if you’re feeling fancy, 1 cup of heavy cream, whipped, for a little garnish when serving.
Essential Equipment for Making Tiramisu
Before we dive in, let’s make sure you have the right tools ready to go. For this simple yet delicious Tiramisu, you’ll want a 9×13 inch baking dish for those beautiful layers. You’ll also need a heatproof bowl for making that luscious custard base, some measuring cups and spoons, and a whisk for all that important mixing. Oh, and a shallow dish for dipping those ladyfingers is a must!
Step-by-Step Guide to Your Perfect Tiramisu
Alright, get ready to put it all together! Making this Tiramisu is like assembling a beautiful puzzle, and each step is pretty straightforward. Don’t worry; I’ll walk you through it all to make sure it turns out absolutely perfect. It’s not complicated, I promise! Thinking about this process always makes me excited, kind of like when I’m getting ready to make those easy apple fritters or even my hearty pumpkin turkey chili – it’s all about bringing deliciousness to life.
Preparing the Mascarpone Cream for Tiramisu
First things first, let’s make that heavenly mascarpone cream. You’ll need a heatproof bowl set over a pot of gently simmering water – think of it as a double boiler! Whisk your egg yolks and sugar together in that bowl. Keep whisking constantly; this little bit of heat helps cook the yolks safely and makes the mixture wonderfully thick and pale yellow. This usually takes about 5 to 7 minutes. Once it looks like luscious custard, take it off the heat to cool a bit. While that’s cooling, grab your softened mascarpone cheese and give it a gentle whisk until it’s smooth and creamy. Then, slowly and lovingly fold that cooled egg yolk mixture into the mascarpone until everything is just combined. Be gentle here; we want it light and airy!
Soaking and Layering Ladyfingers for Tiramisu
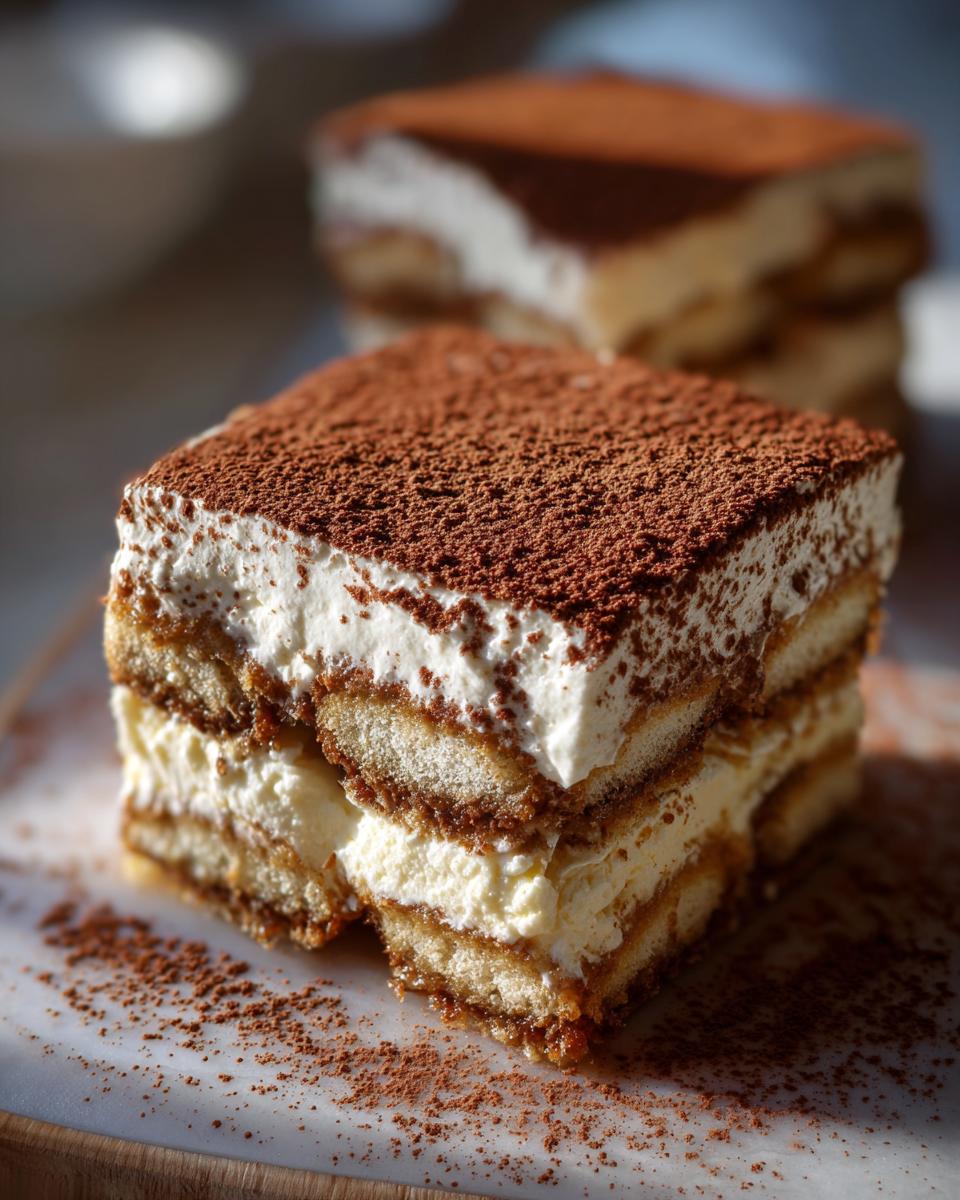
Now for the fun part! Grab a shallow dish and pour in your cooled espresso and the coffee liqueur or rum, if you’re using it. This is where the magic really starts. Take your ladyfingers one by one and give them a quick dip into this coffee mixture. Quick is the keyword here – you want them moist, but not soggy and falling apart! Arrange a single layer of these soaked beauties right in the bottom of your 9×13 inch baking dish.
Once that first layer is down, spread about half of your glorious mascarpone cream mixture right over the top. Don’t be shy; get it all in there! Then, repeat: another layer of dipped ladyfingers followed by the rest of that dreamy mascarpone cream.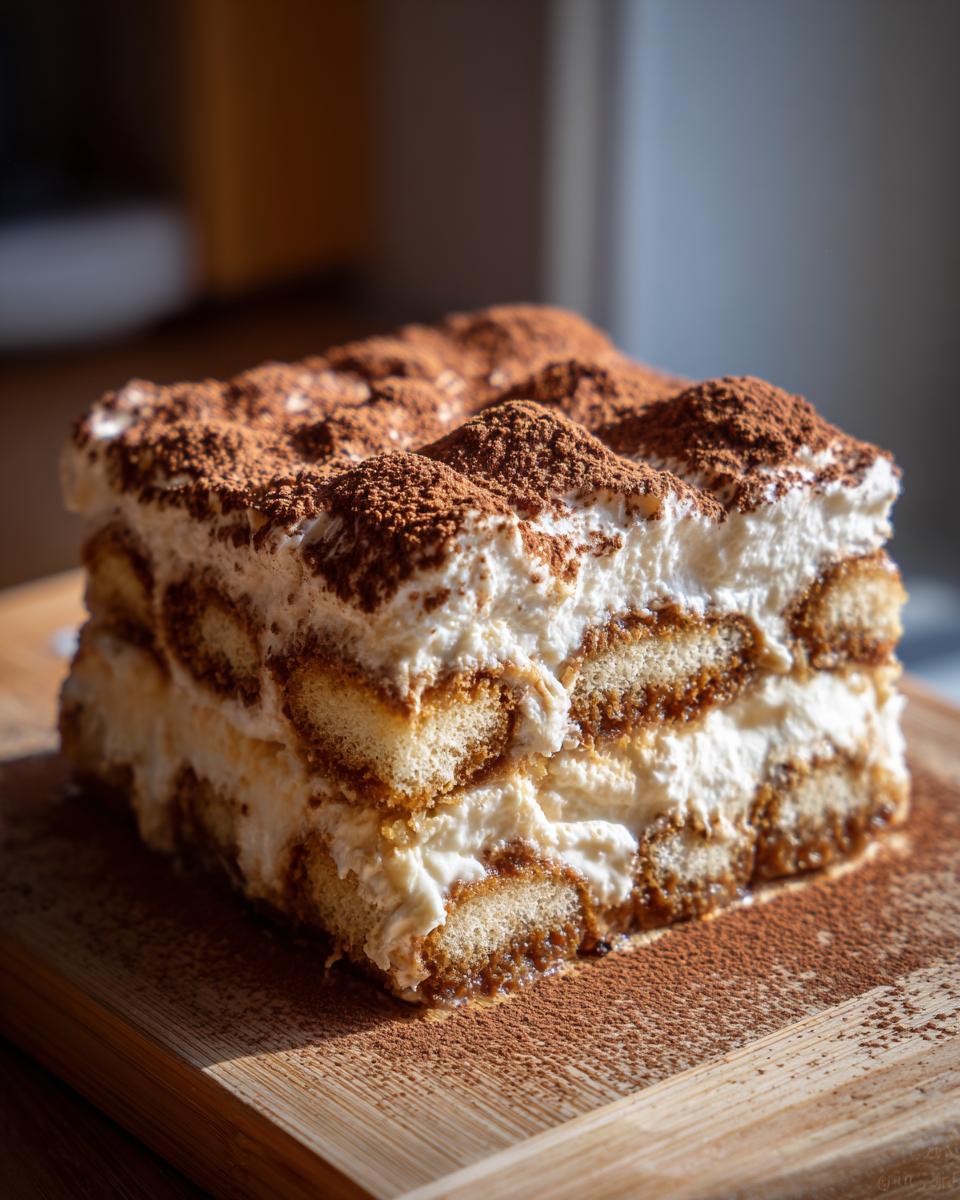
Chilling and Finishing Your Tiramisu
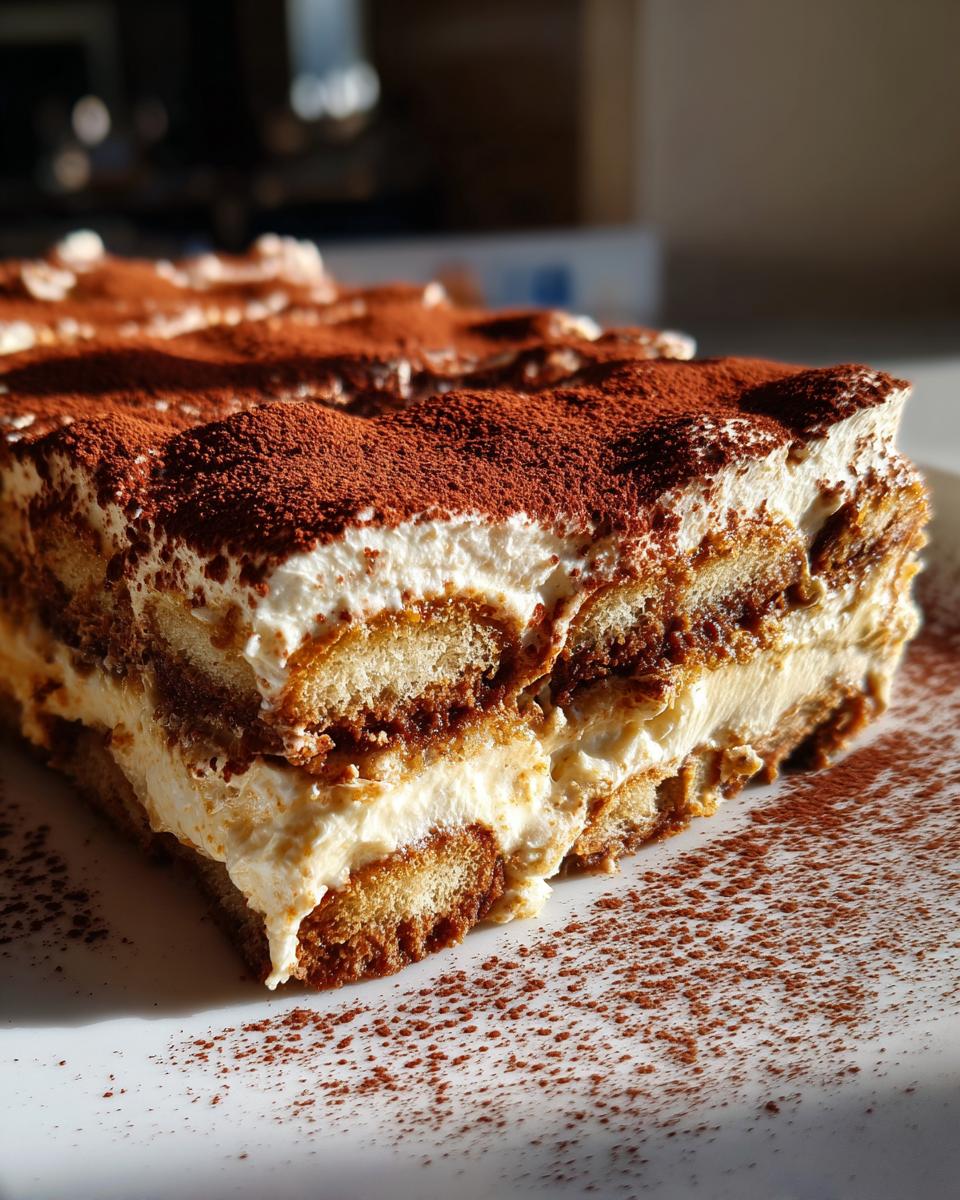
This is the hardest part: waiting! Cover your beautiful Tiramisu creation tightly with plastic wrap. Now, it needs to chill in the refrigerator for at least 4 hours, but honestly, overnight is even better. This chilling time is super important; it lets all those amazing flavors meld together and gives the Tiramisu that perfect, firm texture. Right before you serve, give the top a generous dusting of unsweetened cocoa powder.
It looks so elegant and adds that perfect little bitter contrast. If you like, you can also add a dollop of freshly whipped cream on top for an extra touch of luxury. Then, slice it up and get ready for applause!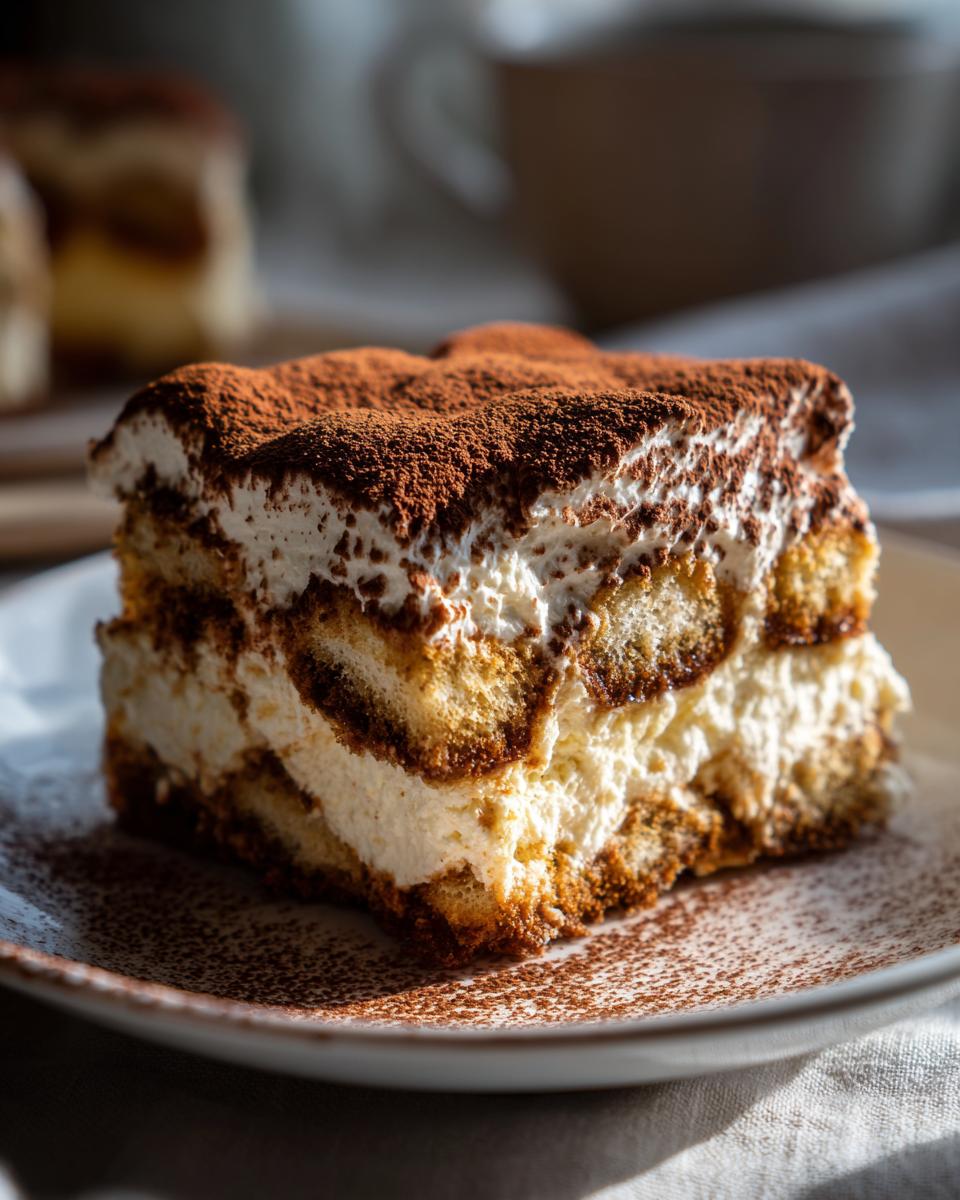
Tips for the Best Tiramisu
Okay, let’s chat about how to make sure your Tiramisu is absolutely, perfectly divine every single time. It’s all about a few little secrets and avoiding some common oopsies!
First off, use the good stuff when you can. Freshly brewed espresso makes a world of difference, and real mascarpone cheese is key – don’t skimp on it! When you’re dipping those ladyfingers, be lightning-fast. Seriously, just a quick dunk on each side. If they soak too long, you’ll end up with a mushy mess instead of lovely layers. Trust me on this one; I’ve been there!
Also, and this is super important for the perfect Tiramisu texture, give it plenty of chill time. Rushing this step is like trying to run a marathon without training – it just won’t end well. That chilling period is what lets everything meld together beautifully, creating that signature creamy, custardy consistency. You’ll thank yourself later, I promise! It reminds me a bit of letting my apple coffee cake cool properly before slicing so all those lovely flavors can really sink in.
Ingredient Notes and Substitutions for Tiramisu
Let’s chat about a few key players in this Tiramisu recipe and what to do if you can’t find them or want to tweak things up a bit. First, mascarpone cheese is definitely the star here. It’s this super rich, creamy Italian cheese that gives our Tiramisu its signature luxurious texture. If you absolutely can’t find mascarpone, you *could* try a mix of full-fat cream cheese and heavy cream, but it won’t be quite the same – mascarpone is really worth seeking out!
For the ladyfingers, make sure you’re grabbing the crisp, Italian-style ones, not the soft, cakey ones. They need to hold up to that coffee soak! And the coffee liqueur? Marsala wine or a good dark rum works beautifully if you don’t have coffee liqueur on hand, or you can simply skip it if you prefer an alcohol-free Tiramisu. Using really strong, cooled coffee or espresso is key for that authentic Italian coffee dessert flavor!
Make-Ahead and Storage for Your Tiramisu
One of the best things about this no-bake layered dessert is that it’s actually *better* when you make it ahead of time! You can totally assemble the whole Tiramisu the day before you plan to serve it. Just cover it tightly with plastic wrap and pop it back in the fridge. This gives all those yummy flavors time to really get to know each other. As for leftovers? Keep any extra Tiramisu covered in the refrigerator for up to 2-3 days. It freezes okay, but the texture might change a bit when it thaws, so chilling is usually my go-to!
Frequently Asked Questions About Tiramisu
Got questions about making the perfect Tiramisu? I’ve got answers! It’s one of my favorite Italian coffee desserts, and I get asked about it a lot.
Can I make Tiramisu without raw eggs?
You sure can! If you’re worried about using raw eggs, you can make a cooked zabaglione-style custard like we did in the main recipe, which cooks the yolks safely. Or, some folks use a simple whipped cream and mascarpone mixture instead of the egg yolks, though it will change the texture a little.
What are the best ladyfingers for Tiramisu?
For the best no-bake layered dessert, you want to use crisp, dry ladyfingers, sometimes called savoiardi. They soak up the espresso mixture beautifully without falling apart. Avoid the soft, cake-like ones; they’ll just turn to mush!
How long does Tiramisu last in the fridge?
This classic tiramisu recipe is fantastic for making ahead, and it will keep well covered in the refrigerator for about 2 to 3 days. Honestly, the flavor often gets even better on the second day!
Estimated Nutritional Information for Tiramisu
Just a heads-up, the nutritional info for this amazing Tiramisu is an estimate, of course! It can change depending on the exact ingredients and brands you use. This is roughly per serving (about 1/10th of the whole dessert): a delightful 350 calories, around 25g of sugar, 22g of fat (with about 13g saturated), and maybe 7g of protein. It’s definitely a treat, but oh-so-worth-it!
Share Your Tiramisu Creations!
Have you made this Tiramisu? I would absolutely LOVE to hear all about it! Please share your experience in the comments below. Did you rate it? Do you have a favorite tip? Or maybe you even snapped a photo you’d love to share on social media? Tag me so I can see your beautiful Tiramisu creations! It’s so much fun to see what you all make in your kitchens!
PrintClassic Tiramisu Recipe

A no-bake Italian coffee dessert featuring espresso-soaked ladyfingers and a creamy mascarpone filling, dusted with cocoa.
- Prep Time: 25 min
- Cook Time: 10 min
- Total Time: 4 hr 35 min
- Yield: 8-10 servings 1x
- Category: Dessert
- Method: No-Bake
- Cuisine: Italian
- Diet: Vegetarian
Ingredients
- 6 large egg yolks
- 3/4 cup granulated sugar
- 16 ounces mascarpone cheese, softened
- 1 1/2 cups strong brewed espresso or coffee, cooled
- 1/4 cup coffee liqueur or dark rum (optional)
- 24–30 ladyfingers
- Unsweetened cocoa powder, for dusting
- 1 cup heavy cream, whipped (for garnish, optional)
Instructions
- In a heatproof bowl set over a saucepan of simmering water, whisk together the egg yolks and granulated sugar. Cook, whisking constantly, until the mixture is pale yellow and thickened, about 5-7 minutes. Remove from heat and let cool slightly.
- In a separate bowl, gently whisk the softened mascarpone cheese until smooth. Gradually fold the cooled egg yolk mixture into the mascarpone until well combined.
- In a shallow dish, combine the cooled espresso and coffee liqueur or rum, if using.
- Quickly dip each ladyfinger into the espresso mixture, ensuring they are moistened but not soggy. Arrange a single layer of soaked ladyfingers in the bottom of a 9×13 inch baking dish.
- Spread half of the mascarpone mixture evenly over the ladyfingers.
- Repeat with another layer of soaked ladyfingers and the remaining mascarpone mixture.
- Cover the dish with plastic wrap and refrigerate for at least 4 hours, or preferably overnight, to allow the flavors to meld and the dessert to set.
- Before serving, dust the top generously with unsweetened cocoa powder. Garnish with whipped cream if desired.
Notes
- For a richer flavor, use freshly brewed espresso.
- Ensure your mascarpone is at room temperature for easier mixing.
- Do not oversoak the ladyfingers, as they can become too mushy.
- Chilling time is crucial for the best texture and flavor.
Nutrition
- Serving Size: 1/10th of dessert
- Calories: 350
- Sugar: 25g
- Sodium: 50mg
- Fat: 22g
- Saturated Fat: 13g
- Unsaturated Fat: 9g
- Trans Fat: 0g
- Carbohydrates: 30g
- Fiber: 1g
- Protein: 7g
- Cholesterol: 150mg