
Okay, you know how sometimes you just need a dessert that’s ridiculously easy but tastes like you spent hours on it? That’s exactly why I adore this no bake banana pudding. Seriously, it’s a lifesaver for potlucks, backyard BBQs, or just when you want something sweet without turning on the oven. It’s one of those crowd-pleasers that just makes everyone happy, and the fact that you can whip it up ahead of time means less stress for you! It reminds me a bit of why I started Kings Cook: bringing simple, joyful, and totally reliable recipes into your kitchen, just like the ones my grandma used to make.
- Why You'll Love This No Bake Banana Pudding
- Ingredients for Your Perfect No Bake Banana Pudding
- Crafting Your No Bake Banana Pudding: Step-by-Step
- Trifle Bowl vs. 9x13 Banana Pudding: Presentation Matters
- Tips for Success with Your Layered Pudding Dessert
- Make-Ahead Crowd Pleaser: Planning Your Banana Pudding
- Understanding Banana Pudding Calories Per Cup
- Frequently Asked Questions About No Bake Banana Pudding
- Serving Suggestions for Your Southern Dessert Classic
- Storage and Reheating Instructions
- Share Your No Bake Banana Pudding Creations!
Why You’ll Love This No Bake Banana Pudding
This no bake banana pudding is a total game-changer for a few reasons:
- Seriously Simple to Make: You won’t spend hours in the kitchen. It’s all about mixing and layering, making it super accessible.
- Make-Ahead Superstar: Need something for a potluck or gathering? This layered pudding dessert is your best friend because you can prep it practically a day in advance.
- Crowd-Pleasing Flavors: That perfect combo of creamy vanilla pudding, sweet condensed milk, soft wafers, and fresh bananas? It’s a classic for a reason and always a hit.
- Perfect for Any Occasion: Whether it’s a summer BBQ or a casual get-together, this dessert just fits, bringing those delightful Southern dessert classic vibes.
Ingredients for Your Perfect No Bake Banana Pudding
Alright, let’s talk ingredients! Getting these right is key to that dreamy no-bake banana pudding. You really don’t need much, which is part of why I love it so much. Here’s what you’ll need to gather:
- 1 (3.4 ounce) package instant vanilla pudding mix (trust me, instant is the way to go here!)
- 2 cups milk (whole milk gives the creamiest result, but any kind works!)
- 1 (14 ounce) can sweetened condensed milk (this is where that rich, velvety texture comes from!)
- 1 (8 ounce) container whipped topping, thawed (like Cool Whip – make sure it’s not still freezer-hard when you’re ready to mix!)
- 1 (11 ounce) package vanilla wafers (the classic Nilla Wafers are perfect for those soft, cake-like layers)
- 3 ripe bananas, sliced (the riper, the sweeter and more flavorful they are!)
Crafting Your No Bake Banana Pudding: Step-by-Step
Now for the fun part – putting it all together! This is where the magic happens and you see your delicious no-bake banana pudding come to life. It’s really quite simple, just a matter of layering, so don’t stress at all. Just follow along with me!
Preparing the Pudding Mixture for Your Banana Pudding Layers
First things first, we need to get that glorious pudding base ready. Grab a big bowl, dump in your instant vanilla pudding mix, milk, and that sweet, sweet condensed milk. Give it a really good whisking – you want it to get nice and thick, kind of like melted ice cream. Then, super gently, fold in that thawed whipped topping until it’s all smooth and creamy, with no white streaks. It should look like the most luscious cloud you’ve ever seen.
Assembling the Layers for Your Potluck Banana Pudding
Okay, time to build this beauty! Whether you’re using a classic 9×13 inch dish or a pretty trifle bowl (which I love for showing off those layers!), start with a solid base of vanilla wafers. Seriously, just cover the bottom. Then, arrange your sliced bananas right on top of those wafers. Spoon about half of your creamy pudding mixture over everything. Now repeat! Another layer of wafers, then bananas, and finish it off with the rest of that amazing pudding. It’s like building dessert architecture, and it looks so pretty!
Chilling Your No Bake Banana Pudding with Condensed Milk
This is the hardest part, but you *have* to be patient! Cover your dish or bowl tightly with plastic wrap. We need to pop this into the fridge for at least 4 hours, but honestly, overnight is even better. This chilling time is crucial; it lets all those yummy flavors get to know each other and allows the pudding to really set up perfectly.
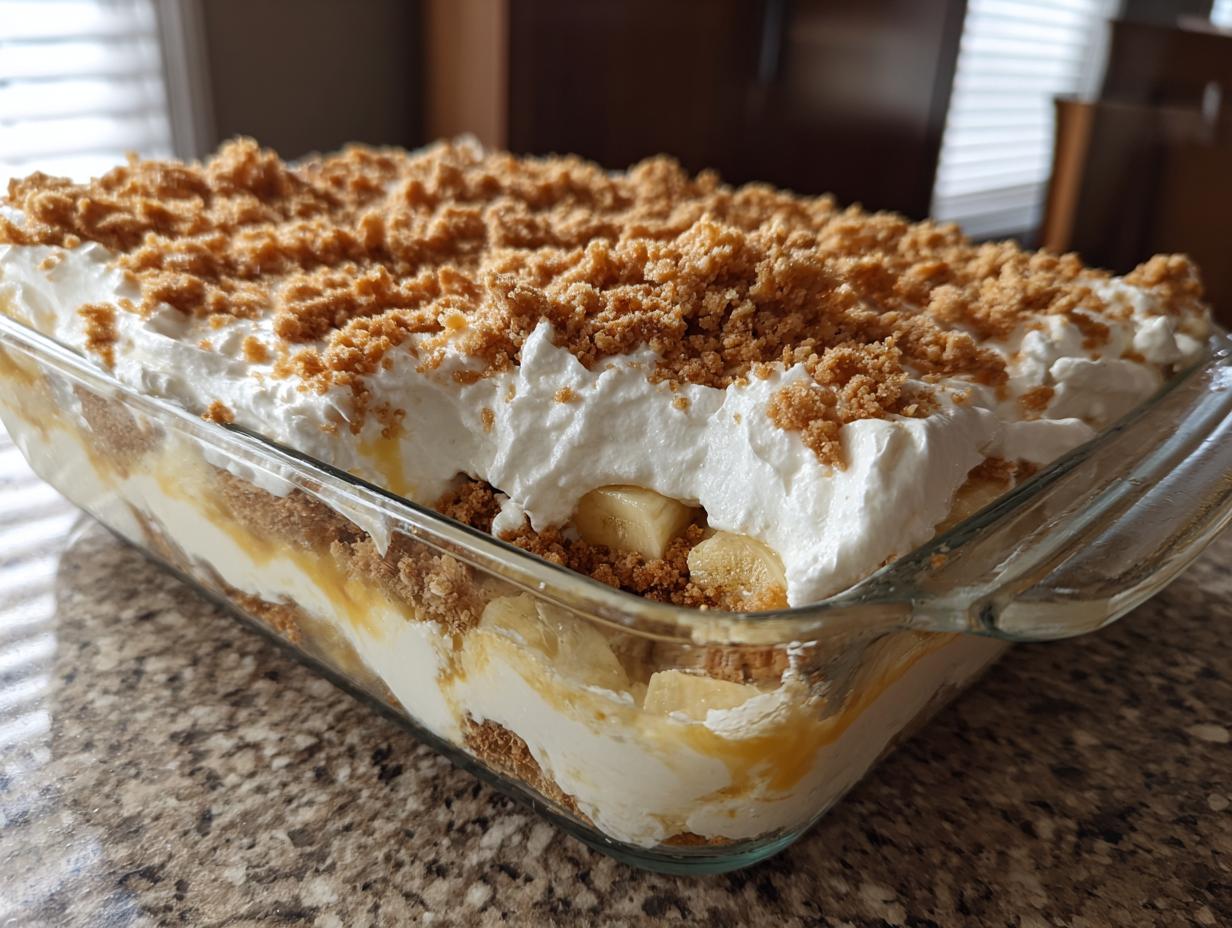
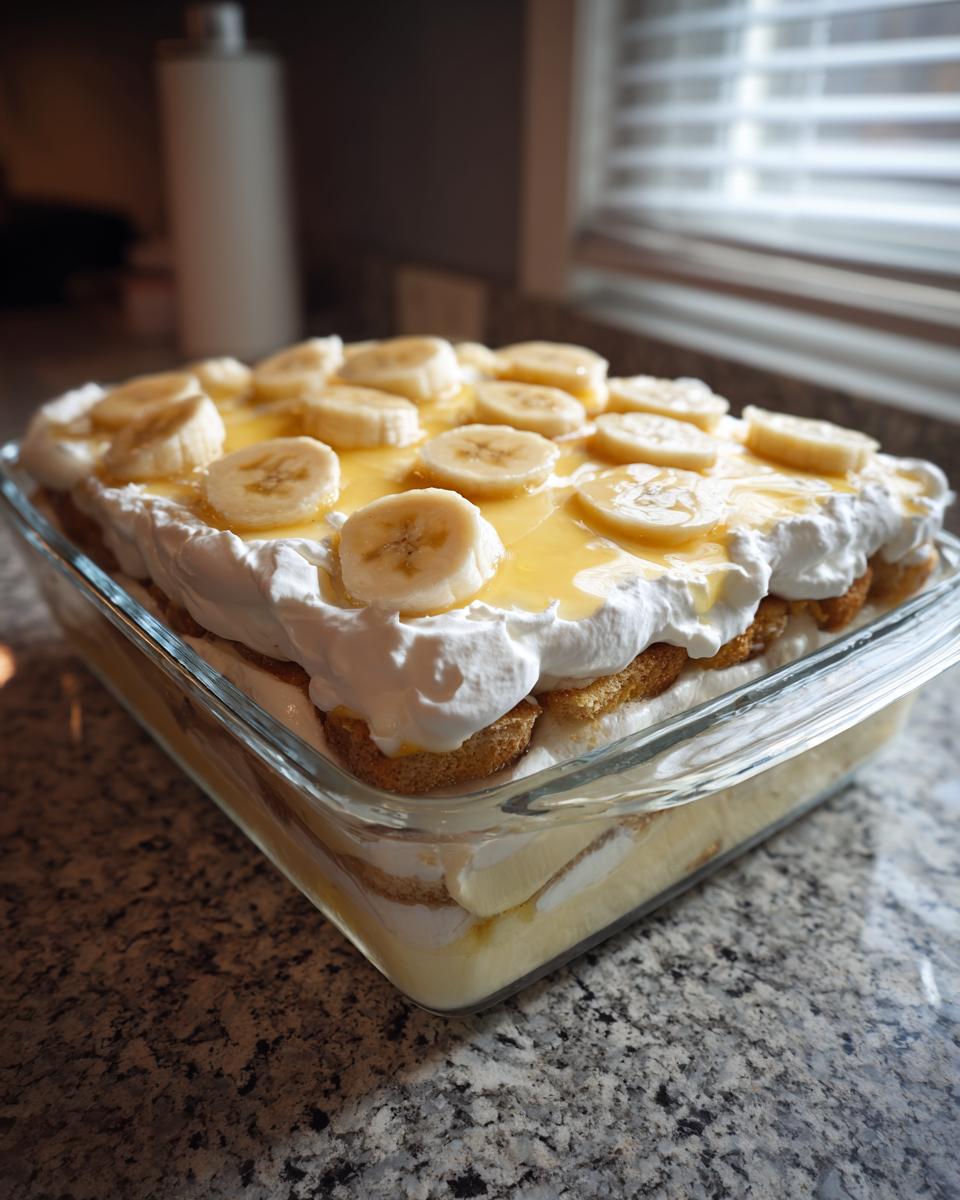
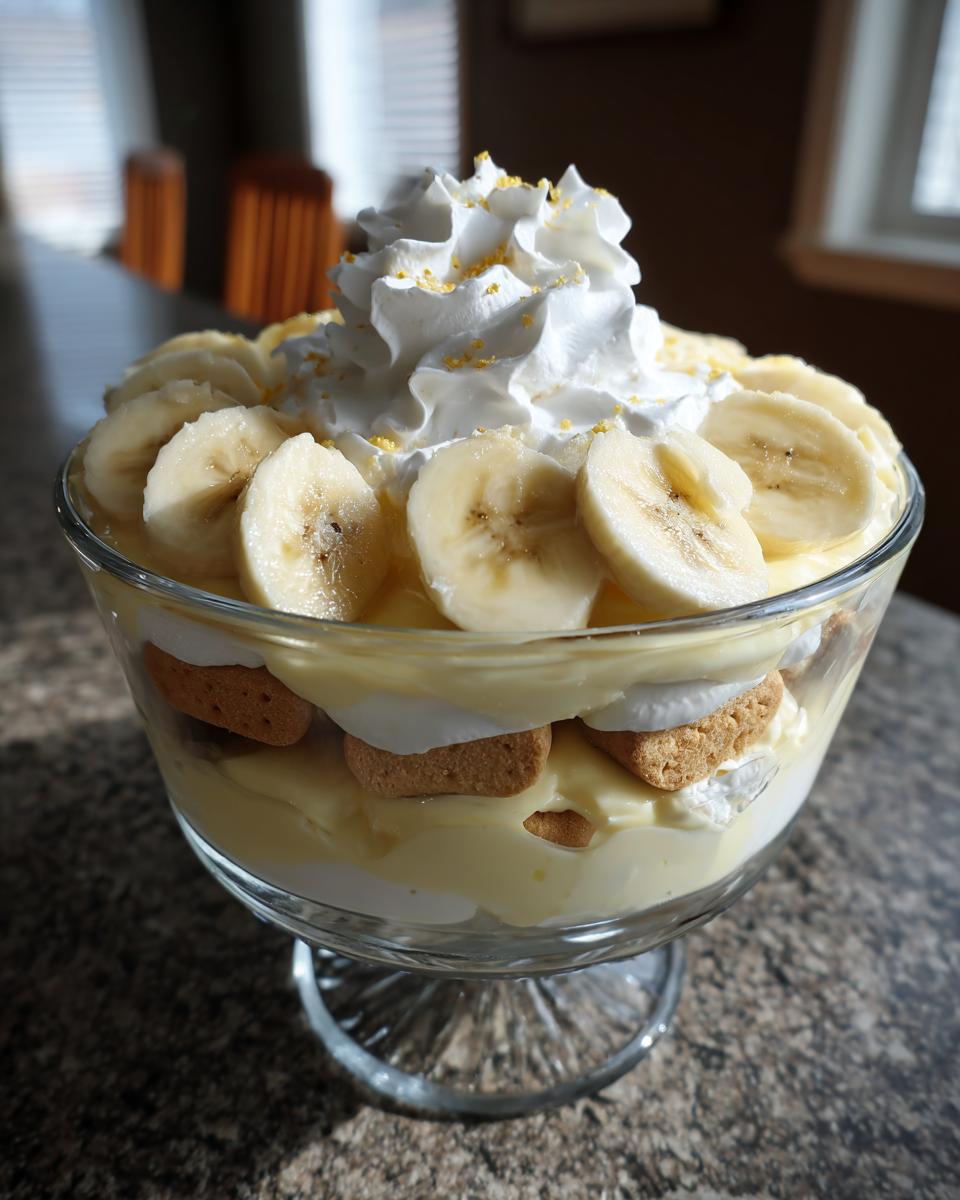
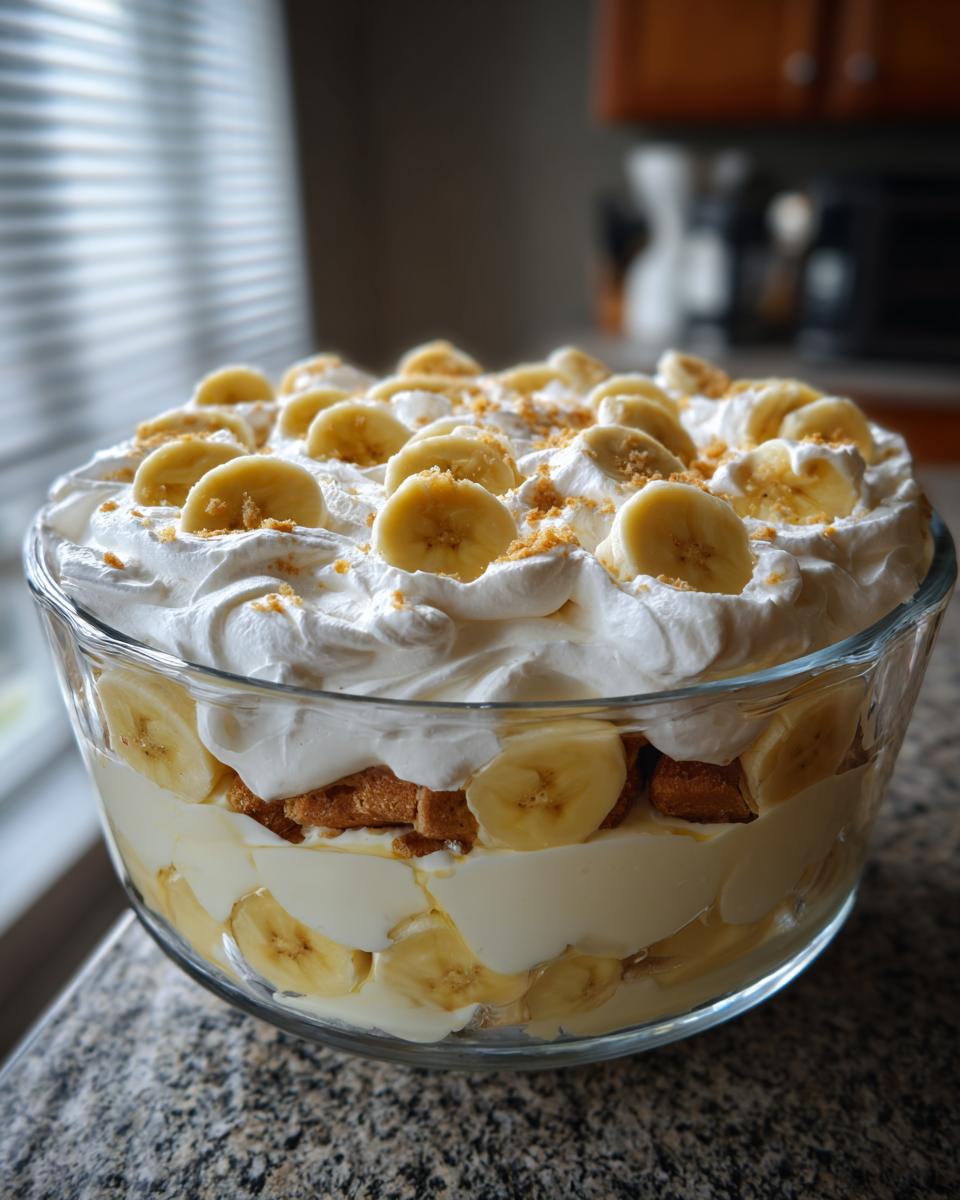
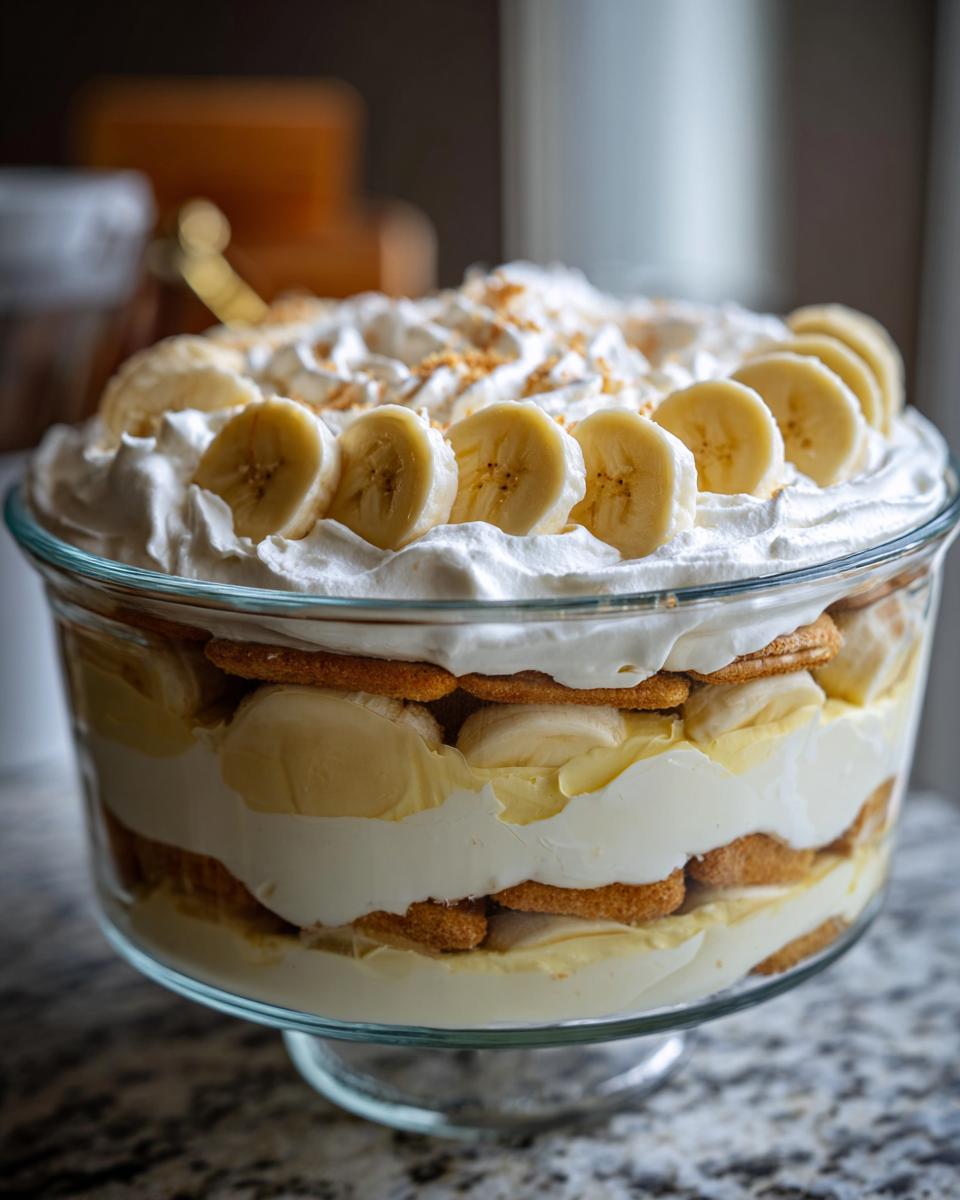
Trifle Bowl vs. 9×13 Banana Pudding: Presentation Matters
So, you’ve got your ingredients ready, and now you’re probably wondering if it matters *where* you assemble this yummy no-bake banana pudding. The answer is… a little bit! Both a classic 9×13 inch dish and a gorgeous trifle bowl work like a charm, but they give you a totally different vibe.
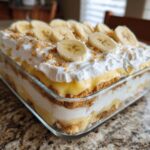
If you use a 9×13 pan, it’s super easy to serve, and you get those lovely soft, cake-like layers from the wafers soaking up all that creamy pudding. It’s more about that comforting, grab-a-spoon-and-dig-in kind of feel. For distinct layers, just be sure to spread each component evenly. Don’t worry too much about perfection; the taste is what really counts!
Now, if you have a trifle bowl – oh my gosh, pull it out! It’s the showstopper. Because it’s clear glass, you can see every single beautiful layer of wafers, bananas, and that luscious pudding. The trick here is to really take your time building each layer, making sure they’re visible as you go up. It turns your simple dessert into a stunning centerpiece for any potluck or gathering.
Tips for Success with Your Layered Pudding Dessert
You know, even with a recipe this easy, a few little tricks can make your no-bake banana pudding absolutely spectacular. It’s all about those small details that elevate a good dessert to a *great* one. Trust me on this!
First off, those bananas? Make sure they’re ripe, but not *too* ripe. You want them sweet and creamy, but if they’re got those mushy brown spots, your pudding might get a little… well, mushy too. Aim for that perfect yellow with just a few tiny brown freckles. And slice them evenly – it just looks nicer when you dig in!
Now, about those vanilla wafers: This is a delicate balance. You want them to soften into that delicious cake-like layer, but not turn into total mush before you even serve it. The key is chilling time! Don’t skimp on it. Also, try to layer them in a single, even layer as much as possible. Some folks even put a thin layer of pudding *down first* to act as a bit of a barrier for the bottom wafer layer, which can be a neat trick if you’re worried about sogginess.
And for that pudding consistency? Make sure you let it sit for those few minutes after mixing before you fold in the whipped topping. That way, it has a chance to thicken up properly, giving you that luscious, creamy texture without needing any weird thickeners. It just comes together beautifully if you give it a second!
Make-Ahead Crowd Pleaser: Planning Your Banana Pudding
You know, the best part about this no bake banana pudding is how incredibly well it holds up when you make it ahead of time. If you’re hosting a party or heading to a potluck, you can totally get this dessert ready the day before! Just assemble it completely, cover it tightly with plastic wrap, and pop it in the fridge. It actually gets even better if it has a bit more time for those flavors to really meld together. Store it in the refrigerator, and it’s perfect for up to 24 hours. That way, when it’s serving time, you can just pull it out and relax – no last-minute dessert stress for you!
Understanding Banana Pudding Calories Per Cup
Curious about the numbers? This no bake banana pudding is a treat that’s pretty reasonable when portioned out. We estimate that one serving, which is about a cup, comes in at roughly 350 calories. Of course, this is just an estimate, and the exact amount can vary a teeny bit depending on the specific brands you use for your instant pudding, whipped topping, and even how ripe your bananas are!
Frequently Asked Questions About No Bake Banana Pudding
Got questions about this delightful no-bake banana pudding? I’ve got answers! It’s always good to think through how things work or if you can tweak them a bit. Here are some common things people ask:
How Long to Chill Banana Pudding for Best Results?
Okay, so this is important! You *really* want to chill your banana pudding for at least 4 hours. Honestly, if you can let it go overnight, that’s even better. This time lets everything get super creamy and the flavors really hug each other. Plus, it makes sure the pudding is nice and set so it’s not runny when you serve it. Patience pays off, I promise!
Can This No Bake Banana Pudding Be Made Gluten-Free?
Oh, absolutely! If you need to make this a gluten-free dessert, you’ve got options. The easiest swap is to use gluten-free vanilla wafers – they’re pretty easy to find these days! Just layer them in like you would the regular ones. It won’t change the texture much, and you still get that lovely soft layer. It’s a great way to make sure everyone can enjoy this classic treat, almost like how some folks look for gluten-free meal delivery options to keep their diets on track, you can just swap out a few ingredients here!
Serving Suggestions for Your Southern Dessert Classic
This creamy, dreamy no-bake banana pudding is just begging to be the star of the show, but it also plays nicely with others! Think of it after a big, homestyle meal. It’s perfect following some BBQ chicken or perhaps some fried catfish. For summer get-togethers, it’s a fantastic lighter option after grilled burgers or corn on the cob. You could even serve it alongside a fresh fruit salad or a simple green salad to balance out the sweetness. Honestly, it’s so versatile, it just makes any meal feel a little more special and comforting!
Storage and Reheating Instructions
So, you’ve got leftovers of this amazing no-bake banana pudding? Lucky you! Storing it is super simple. Just cover whatever’s left tightly with plastic wrap, making sure it’s sealed up well to keep out air. You can pop it back in the fridge, and it’ll stay delicious for about 2-3 days. It’s really best served cold, so no need to worry about reheating! Just grab a spoon and dig in when that craving hits.
Share Your No Bake Banana Pudding Creations!
Hey everyone, I’d absolutely LOVE to hear how your no-bake banana pudding turned out! Did you take it to a potluck? Did the kids gobble it up? Please, please spill the beans in the comments below. If you made any fun tweaks or have tips to share, I’m all ears! You can also tag me on social media if you share photos – I just adore seeing all your delicious creations. And if you enjoyed this recipe, a quick rating really helps a lot! Feel free to reach out through my contact page if you have any questions!
PrintNo-Bake Banana Pudding
A simple, layered no-bake banana pudding featuring instant vanilla pudding, sweetened condensed milk, whipped topping, vanilla wafers, and fresh bananas. This dessert is perfect for make-ahead gatherings and potlucks.
- Prep Time: 20 min
- Cook Time: 0 min
- Total Time: 4 hr 20 min
- Yield: 8 servings 1x
- Category: Dessert
- Method: No-Bake
- Cuisine: American
- Diet: Vegetarian
Ingredients
- 1 (3.4 ounce) package instant vanilla pudding mix
- 2 cups milk
- 1 (14 ounce) can sweetened condensed milk
- 1 (8 ounce) container whipped topping, thawed
- 1 (11 ounce) package vanilla wafers
- 3 ripe bananas, sliced
Instructions
- In a large bowl, whisk together the instant vanilla pudding mix, milk, and sweetened condensed milk until well combined and slightly thickened.
- Gently fold in the thawed whipped topping until no streaks remain.
- Arrange a layer of vanilla wafers in the bottom of a 9×13 inch baking dish or a trifle bowl.
- Top the wafers with a layer of sliced bananas.
- Spoon about half of the pudding mixture over the bananas.
- Repeat the layers: vanilla wafers, bananas, and the remaining pudding mixture.
- Cover the dish or bowl with plastic wrap.
- Chill in the refrigerator for at least 4 hours, or preferably overnight, to allow the flavors to meld and the pudding to set.
- Before serving, you can add a final layer of whipped topping and a few extra vanilla wafers or banana slices for garnish.
Notes
- For a trifle bowl, layer ingredients in the same order, creating distinct visual layers.
- Ensure bananas are fresh and ripe for the best flavor.
- This dessert can be made up to 24 hours in advance.
- The pudding will soften the vanilla wafers, creating a cake-like texture.
Nutrition
- Serving Size: 1 cup
- Calories: 350
- Sugar: 45g
- Sodium: 250mg
- Fat: 15g
- Saturated Fat: 8g
- Unsaturated Fat: 7g
- Trans Fat: 0g
- Carbohydrates: 50g
- Fiber: 2g
- Protein: 5g
- Cholesterol: 20mg