

Have you ever stared longingly at a slice of perfectly open, tangy sourdough bread and thought, “That magic comes from a jar of bubbly goo that I could never create?” Well, I’m here to tell you that you absolutely can! When I first started trying to create my own sourdough starter, I thought the process was ridiculously complicated, ending up with everything from smelly sludge to nothing at all. But trust me, it’s totally doable. This journey is all about harnessing something ancient—wild yeast! We’re going to ditch the complex science here and focus on a super reliable, step-by-step guide designed just for beginners. By the end of this week, you’ll have the foundation for wonderful artisan bread right on your counter.
- The Foundation: What is a Sourdough Starter and Why Make Your Own?
- Gathering Supplies for Your New Sourdough Starter Recipe
- Day-by-Day Guide: How to Make Sourdough Starter
- Tips for Success When Creating Your Sourdough Starter From Scratch
- Troubleshooting Common Issues with Your New Sourdough Starter
- Sourdough Starter Maintenance: Storage and Reviving
- Signs Your Sourdough Starter is Healthy and Ready to Bake
- Frequently Asked Questions About Your Sourdough Starter for Beginners
- Next Steps in Your Artisan Bread Starter Guide Journey
The Foundation: What is a Sourdough Starter and Why Make Your Own?
People get scared of the word ‘starter,’ but honestly, it’s just flour and water hanging out together, waiting for local, friendly bacteria to move in! That’s right—this isn’t about buying commercial yeast; this is about capturing the natural, wild yeast bread starter that lives all around us. It’s the original way people made bread, giving it that incredible tangy depth you just can’t get from a packet. I realize it seems intimidating, but creating your own **sourdough bread foundation** is easier than you think. Once you have this culture going, you hold the keys to incredible, naturally leavened loaves! When you’re ready to bake, check out my go-to sourdough bread recipe.
Why This Flour and Water Starter Works Best for Beginners
We are keeping this super straightforward because I don’t want you to quit before day three! We only use flour and water to create this culture. I strongly suggest starting with whole wheat or rye flour for the first couple of feedings. Those grains have extra bits on them that the yeast and bacteria love—think of it like giving our tiny new friends a five-star welcoming dinner. This simple start is the key to an easy homemade sourdough starter that thrives.
Gathering Supplies for Your New Sourdough Starter Recipe
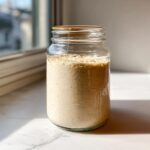
Before we start mixing, we need a little setup. Don’t overthink this part! You don’t need fancy, specialized gear to begin your **sourdough starter recipe**, but having the right basics makes life so much easier. First up: a clean jar. I prefer a straight-sided glass jar—a quart size is perfect—because I need to see what’s happening inside to be sure it’s rising and falling correctly. You’ll also need a small kitchen scale. Seriously, toss out the measuring cups for this part! Weight (grams) is crucial for consistency when dealing with wild yeast cultures. A silicone spatula helps tremendously for stirring and scraping down the sides.
Now, let’s talk water! This is where so many beginners trip up without even realizing it. You absolutely must use *unchlorinated* water. Chlorine, which is added to most municipal tap water, is designed to kill microbes—and that’s exactly what we are trying to grow! If you can’t get spring water, just leave your tap water sitting out on the counter overnight; the chlorine will evaporate. This small step makes a huge difference in nurturing a strong, healthy **sourdough starter**.
Ingredients for Creating Sourdough Starter From Scratch
When we finally get to the mixing, you’ll see how minimal this whole process is. It’s just flour and water, but the quality matters, especially in these early days. For the initial mix, I need you to grab these things:
- 100g Whole Grain Flour (Rye or Whole Wheat recommended for initial mix)
- 100g Unbleached All-Purpose Flour
- 100g Unchlorinated Water (room temperature)
That’s it! We stick to these simple things to get our culture going strong before we move on to the fun part: feeding and watching it grow!
Day-by-Day Guide: How to Make Sourdough Starter
This is where the magic starts! Honestly, the easiest way to learn how to make sourdough starter is by following a routine. Think of these first seven days as building a relationship with your new culture. You’ll be discarding some and feeding the remainder daily. Don’t panic when you see little or no action early on—that’s totally normal! We are just getting the wild elements happy enough to start bubbling around.
For the full, detailed steps, you can always refer to the official instructions shared with the recipe, but here’s my personal rundown of what to watch for! If you’re learning the ropes of rustic baking, remember how essential this first step is before you try my focaccia bread recipe.
Days 1 through 4: Initial Activation of Your Sourdough Starter
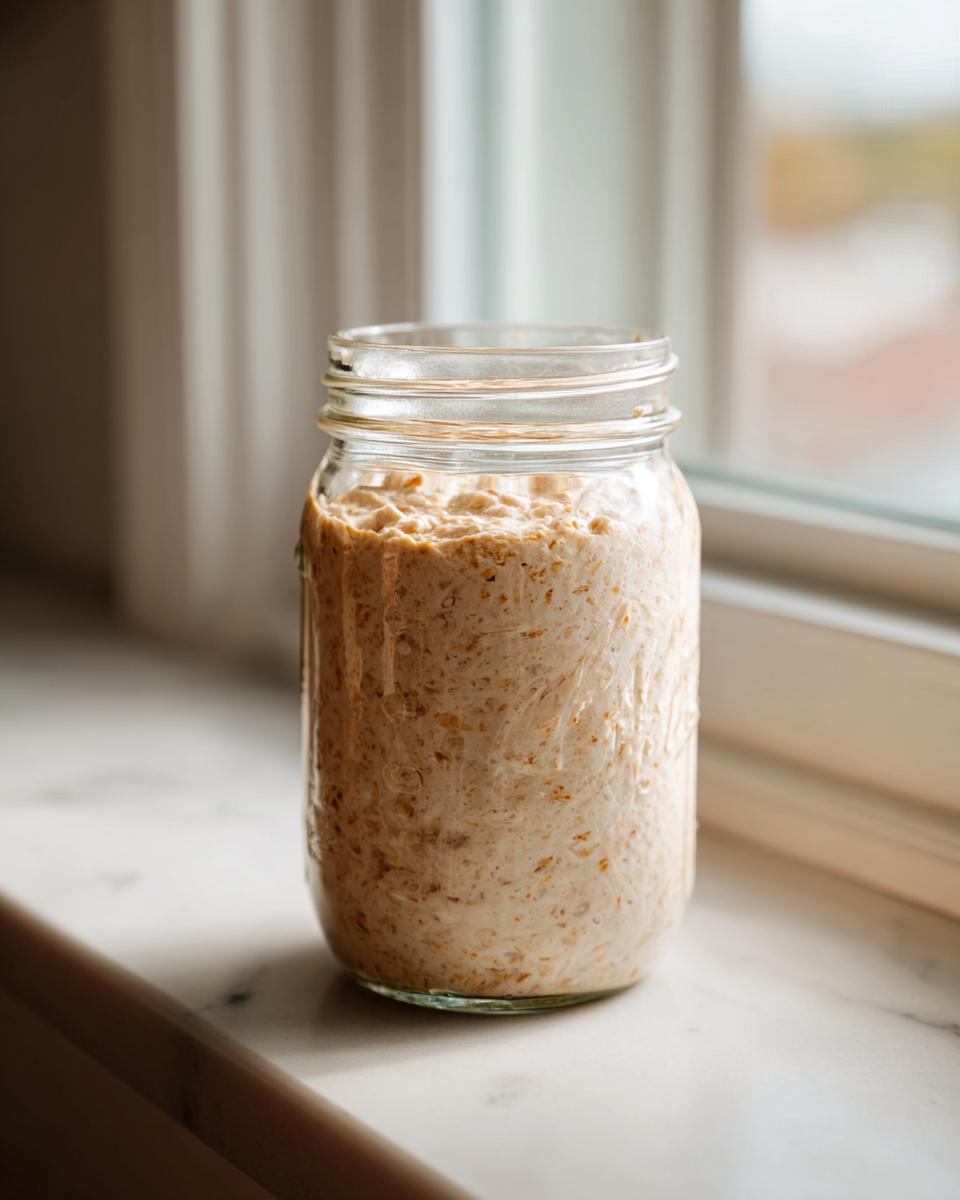
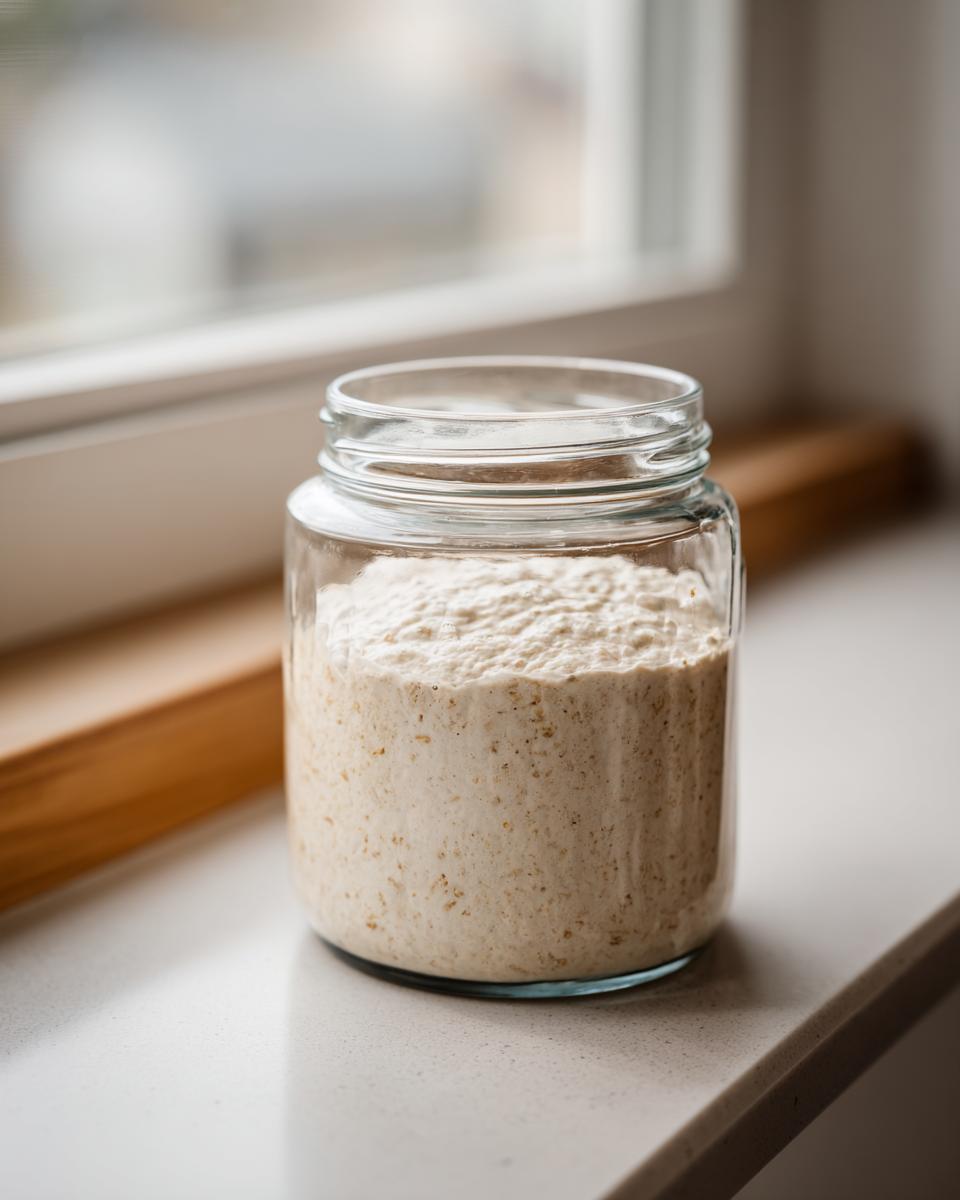
Day 1 is mixing your initial whole grain flour and water. It will look like thick paste. Cover it loosely—a piece of cheesecloth or a coffee filter held on with a rubber band works great—and leave it somewhere reliably room temperature, around 70°F. By Day 2 and 3, you might see a few tiny specks of activity, maybe a single bubble or two. Some folks even see a burst of activity on Day 3, only for it to disappear completely on Day 4. If that happens, don’t worry! Keep discarding half and feeding it the same amount of unbleached flour and water. We are just looking for consistency, which takes time to develop that beautiful, bubbly sourdough starter we are aiming for.
Days 5 through 7: Establishing the Daily Sourdough Feeding Schedule
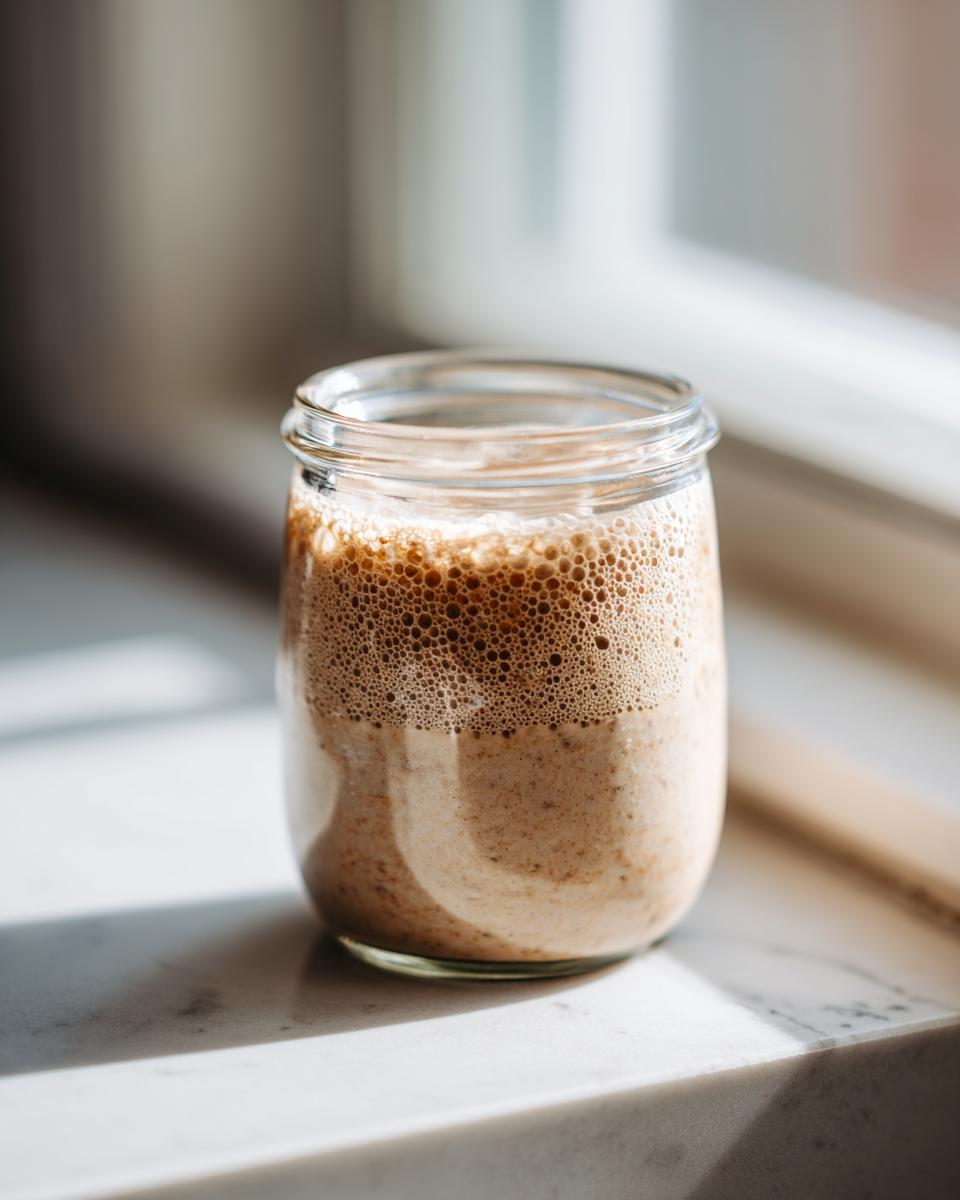
Around Day 5, if you see your starter consistently rising significantly (like, doubling in size!) within maybe 12 hours of feeding, it’s time to step up your commitment. That means we switch to that daily sourdough feeding schedule of twice a day, every 12 hours. When you feed it in the morning and in the evening, you are giving those yeasties plenty of food to gain strength. By Day 7, you should see it doubling reliably in a 4 to 8-hour window. If it smells pleasantly sour, like yogurt or maybe slightly like vinegar, congratulations! You’ve got a strong, active culture ready to go. If you want more insight on managing your process, this guide is also super helpful for understanding the wild elements involved.
Tips for Success When Creating Your Sourdough Starter From Scratch
We’ve all been there, staring at the jar thinking, “Is this supposed to look like that?” Growing this culture takes a little patience, and honestly, a bit of intuition. My best piece of advice when collecting **sourdough starter tips and tricks** is to watch for temperature! If your kitchen is sitting below 68°F, the wild yeast works super slowly, which can feel like you’re waiting forever. Try keeping your jar near the pilot light on your stove or on top of the fridge where it’s a little warmer.
Now, let’s talk about that funky dark liquid you might see on top—it’s called hooch! Don’t freak out! Hooch means your **sourdough starter** is hungry. You can either stir it right back in for extra tang or just pour it off before feeding. Either way, it’s a sign to feed it right away. Consistency is key in these first seven days, so stick to that feeding routine, and you’ll be rewarded. If you want some solid backup reading, you can peek at this easy homemade guide I often recommend.
Troubleshooting Common Issues with Your New Sourdough Starter
Okay, let’s be real for a second. Not every day is a celebration when you are cultivating a **sourdough starter**. Sometimes you look in the jar and think, “Oops, I think I messed this up.” I want you to take a deep breath! Remember, you are capturing wild organisms here, and they don’t always follow our clean, neat schedules. The biggest beginner fear I hear is, “Why isn’t it bubbly by Day 4?” That is super common! If you are seeing very little activity, your kitchen is probably just a bit too cool for optimal yeast growth. Try moving the jar to a slightly warmer spot, like on top of the microwave or near the oven while it’s preheating. A little warmth goes a long way!
Another issue that really sends people looking for a complete **sourdough starter** reset is a smell that turns intensely chemical, usually smelling sharp, like strong nail polish remover or rubbing alcohol. That strong acetone smell means your starter has eaten all its food and is super hungry—it’s producing acid as a byproduct. It’s not dead, I promise! When this happens, don’t wait for the next scheduled feeding. Immediately discard most of it, give it a good, hearty feeding of fresh flour and water, and see if that smell mellows out over the next 24 hours. If you’re still struggling with slow action after a few days, I always encourage people to go back and check out this guide on how to make a sourdough starter from scratch, just to ensure those initial steps were perfect.
If you see mold—that pink, orange, or fuzzy green stuff—that’s a different story. That means contamination, and you have to toss the whole batch and start over, making sure everything that touches the culture is totally clean next time. But 99% of the time, it’s just a hungry or slow starter, and you need consistency!
Sourdough Starter Maintenance: Storage and Reviving
Congratulations! You have a thriving, active culture, but now what? You don’t have to bake sourdough bread every single day, thank goodness. You have two main choices for **sourdough starter maintenance**: keeping it active on the counter or keeping it dormant in the fridge.
If you plan to bake frequently—say, several times a week—keeping it on the counter is easiest. You just need to follow a **daily sourdough feeding schedule**, usually feeding it once every 12 or 24 hours (discard half, then feed). But if you’re like me and only bake on weekends, the refrigerator is your best friend. When you put your **sourdough starter** in the fridge, slow down the feeding to once a week. This keeps the yeast sleepy but alive.
When it’s time to bake after a nice long nap in the cold, you need to wake it up! This is the process of **activating sourdough starter**. Pull it out and give it at least two or three good feedings on the counter (with 12 hours between each feeding) until it starts reliably doubling again within 4 to 6 hours. Don’t try to bake with it right after it comes out of the fridge—it needs a couple of good meals first! For all the details on how to manage and keep your culture happy long-term, check out this great resource on caring for your starter culture. Once it’s ready, you’ll be glad you kept it alive!
Remember, caring for your starter is the true heart of this process. If you need a refresher on getting started before you bake, go back and review my beginner bread baking guide.
Signs Your Sourdough Starter is Healthy and Ready to Bake
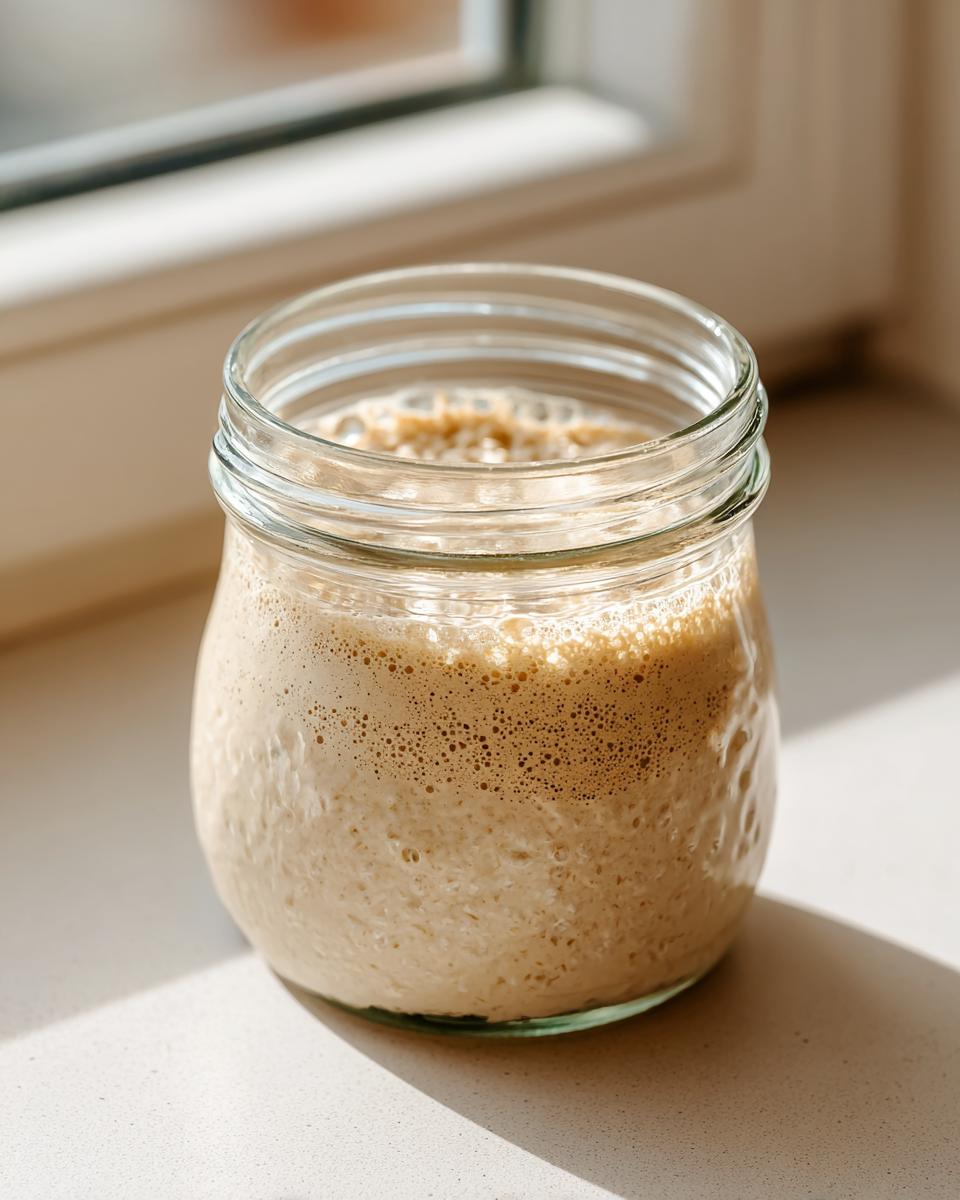
This is the moment of truth, isn’t it? That wonderful, suspenseful feeling when you wonder if this bubbling culture means you’re ready for your first real sourdough loaf, or if you need one more feeding. How can you be absolutely sure you have a **healthy sourdough starter**? Easy! It comes down to three things: timing, smell, and the float test.
First, watch the rise and fall. A starter that is ready to bake will predictably double, or even triple, in volume within 4 to 8 hours after a normal feeding. You need to see that maximum height, and then, crucially, watch it start to recede a little before you stir it down. If it’s consistently doing that, it’s happy and fed!
Second is the smell. When it’s perfectly fed and right at its peak, your **sourdough starter** should smell pleasantly sour—think mild yogurt or perhaps sweet and yeasty. It should never smell overwhelmingly like acetone or dirty gym socks. That pleasant tang is the flavor we want in our bread, not harsh acidity.
Finally, for those of you who like a clear physical test, there’s the float test! Gently drop a small spoonful of starter (at its peak rise) into a cup of room-temperature water. If it floats, it means it has built up enough trapped gas to be lighter than water, and yes, you are ready to go! If it sinks, just give it one more feeding on the counter, wait until it peaks again, and then test it. When it passes these checks, you know you are set up for success in your baking—maybe even try putting that culture to work in these naan bread recipes while you wait for your first loaf!
Frequently Asked Questions About Your Sourdough Starter for Beginners
It’s so smart of you to check here before you panic! Having a **sourdough starter for beginners** means you’re going to have questions that the seasoned bakers sometimes forget to answer. Don’t worry one bit if these seem basic; learning the culture is a process, and I’ve gathered some of the most common things I hear while people are getting their **sourdough starter** bubbling away.
Can I use regular tap water for my flour and water starter?
This is the big one! You usually *can* use tap water, but only if you make sure it’s unchlorinated. Remember how I mentioned that chlorine is designed to kill microbes? Well, those are the exact living organisms we are trying to invite into your jar! If you use chlorinated water, you might be feeding your flour, but you are stressing out your yeast before they even get settled. The safest bet is to use filtered or bottled water, or, like I said before, just leave your tap water sitting on the counter overnight to let the chlorine gas off before you mix it in with your flour.
What is the difference between a starter and a levain?
This is a slightly more advanced concept, but something good to know about your **sourdough starter**! Think of your established culture—the one living in that jar that you feed every day or week—as your ‘Mother Starter.’ It’s the foundation, the source you keep going forever. A *levain* (sometimes called a ‘chef’ or ‘off-shoot’) is simply a portion of that mother starter that you intentionally feed just before you go to mix your main bread dough! You feed it, let it get super active, and then quickly use it up in the loaf recipe before putting the main culture back in the fridge. It’s essentially feeding the mother specifically for one baking mission. It ties right into learning the full sourdough levain guide.
We’ve covered the start, the feeding, and now you know how to keep it happy! When you have extra starter that you aren’t using right away, don’t throw it out! I always turn mine into something delicious, like these sourdough discard pizza crusts.
Next Steps in Your Artisan Bread Starter Guide Journey
So, you’ve nurtured this lively culture for a week or so, you’ve watched it reliably peak and fall, and you’ve passed the float test with flying colors! That’s incredible work, and you should be really proud of yourself. You’ve successfully learned the fundamentals of managing your **artisan bread starter guide**! But what do you do now that this bubbly companion is ready for action? The only logical next step is to bake something! The temptation to jump straight into a giant, complicated boule might be there, but I always recommend starting with something slightly easier to get the feel for how your starter behaves in the dough.
I think the best way to celebrate your new **sourdough starter** is by making a simple, soft loaf. It won’t challenge you with shaping or the super long proofs of a traditional country loaf, but it will let you use your active starter to get that amazing flavor we worked so hard for. You can see exactly how I handle that in my sourdough sandwich bread recipe. It’s soft, great for toast, and a wonderful confidence booster!
Just remember everything we talked about—temperature, consistency, and patience. Those little pieces of advice are what turn a good starter into a great one that lasts for years. Now go on, feed that culture up one last time, and let’s see what delicious things we can bake together! If you want to see another fantastic beginner take on the whole process, this resource is also quite thorough: Easy Fluffy Sourdough Starter Guide for Beginners!
PrintThe Ultimate No-Fail Guide: How to Make and Maintain an Active Sourdough Starter from Scratch
Welcome! This guide shows you how to create a healthy, active sourdough starter using only flour and water. We break down the day-by-day process so you can begin your artisan bread baking journey with confidence.
- Prep Time: 5 min daily
- Cook Time: 0 min
- Total Time: 7 days active creation
- Yield: About 100g active starter 1x
- Category: Baking Foundation
- Method: Wild Fermentation
- Cuisine: American
- Diet: Vegetarian
Ingredients
- 100g Whole Grain Flour (Rye or Whole Wheat recommended for initial mix)
- 100g Unbleached All-Purpose Flour
- 100g Unchlorinated Water (room temperature)
Instructions
- Day 1: Mix 50g of whole grain flour and 50g of water in a clean glass jar. Stir until fully combined. Cover loosely and let it sit at room temperature (68-75°F) for 24 hours.
- Day 2: Discard half of the mixture. Add 50g of all-purpose flour and 50g of water to the remaining starter. Mix well, cover loosely, and wait 24 hours.
- Day 3: You may see some small bubbles. Discard half. Feed with 50g all-purpose flour and 50g water. Wait 24 hours.
- Day 4: You should see more activity. Discard half. Feed with 50g all-purpose flour and 50g water. Wait 24 hours.
- Day 5: If the starter is doubling in size within 12 hours, switch to a twice-daily feeding schedule (every 12 hours). Discard half, then feed with 50g all-purpose flour and 50g water.
- Day 6 & 7: Continue twice-daily feedings. The starter is ready when it consistently doubles in size 4-8 hours after feeding and smells pleasantly sour. This is your healthy sourdough starter, ready for baking.
Notes
- Use a clear jar so you can watch the rise and fall of your starter.
- If your kitchen is cool, fermentation will slow down. Keep the jar in a warmer spot, like near a pilot light or on top of the refrigerator.
- Once active, you can switch to a maintenance feeding schedule of once every 7 days if storing it in the refrigerator. Feed it the day before you plan to bake.
- If you see dark liquid (hooch) on top, stir it in or pour it off, then feed the starter immediately.
Nutrition
- Serving Size: N/A (Culture)
- Calories: 10
- Sugar: 0g
- Sodium: 1mg
- Fat: 0g
- Saturated Fat: 0g
- Unsaturated Fat: 0g
- Trans Fat: 0g
- Carbohydrates: 2g
- Fiber: 0g
- Protein: 0g
- Cholesterol: 0mg