
Okay, seriously, how many times have you pulled a sourdough loaf out of the oven expecting that amazing artisan crackle, only to realize it’s too dense or too chewy for a peanut butter and jelly? I know I’ve been there! We love the gut-healthy benefits of naturally leavened bread, but sometimes you just need that classic, fluffy texture for a real sandwich. Well, stop searching! This recipe for sourdough sandwich bread is the game-changer you’ve been waiting for. It’s soft, it’s perfectly sliceable, and I promise you, it’s designed to make you feel successful right from your very first attempt. If you’re nervous about sourdough, stick with me; we’re going to master this together and give you the best homemade sandwich bread you’ve ever tasted. For more on my mission to boost kitchen confidence, check out my About page!
- Why This is the Best Soft Sourdough Sandwich Bread for Beginners
- Gathering Ingredients for Your Sourdough Sandwich Bread Recipe
- Step-by-Step Instructions for Your Easy Sourdough Sandwich
- Tips for Success When Baking Sourdough for Beginners
- Make Ahead & Storage for Your Overnight Sourdough Recipe
- Variations for Your Sourdough Sandwich Bread
- Frequently Asked Questions About Sourdough Sandwich Bread
- Nutritional Estimates for This Gut Healthy Bread Recipe
- Share Your Soft Sourdough Loaf Creations
Why This is the Best Soft Sourdough Sandwich Bread for Beginners
I get it—most sourdough recipes feel like they require two years of apprenticeship before you can even touch the flour. Not this one! This recipe focuses entirely on getting you a wonderful, soft sourdough loaf that actually behaves itself in a loaf pan. You deserve a dependable beginner sourdough bread recipe that doesn’t throw you curveballs.
Here’s why this method works wonders for sandwiches:
- It’s incredibly forgiving, even when your starter is just warming up.
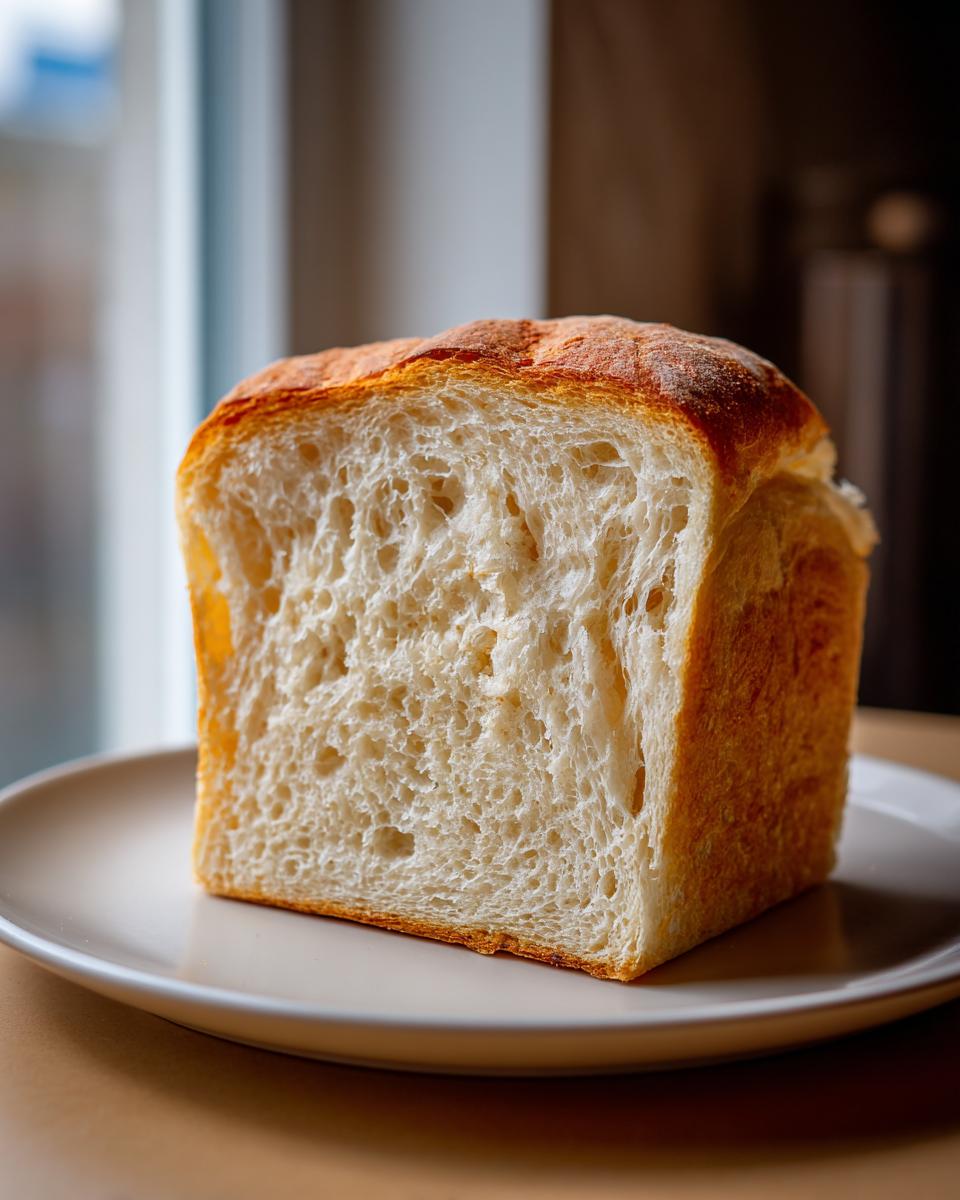
- The final texture is tender and truly sliceable sourdough loaf material—no more struggling to cut thick, dense slices!
- We use simple steps like stretch and folds which are easy to see and feel.
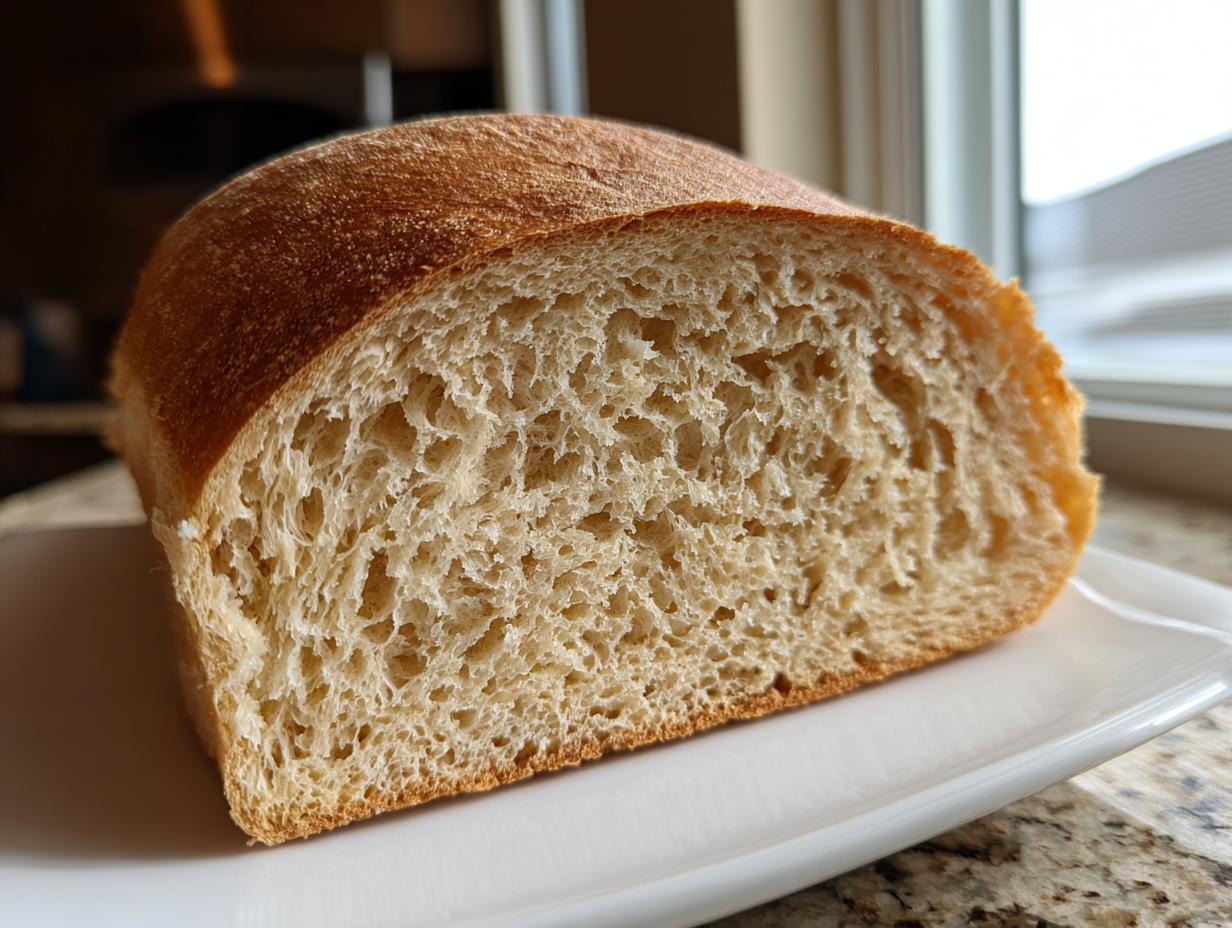
Achieving That Fluffy Sourdough Bread Texture
The secret to ditching that gummy, rustic crumb is twofold. First, we add a little bit of fat—avocado oil, in this case—which coats the starch and keeps everything wonderfully tender. Second, we aren’t aiming for a massive 100% rise during bulk fermentation; we only need about 30-50% volume increase. This shorter window keeps the crumb tighter, making it the perfect fluffy sourdough bread for toast or lunchboxes. Trust me, that right amount of honey helps, too!
If you are looking for more essential sourdough knowledge, check out my main Sourdough Bread Guide!
Gathering Ingredients for Your Sourdough Sandwich Bread Recipe
You won’t need a huge shopping list for this recipe, which is a huge win when you’re trying to make baking sourdough for beginners less intimidating. We are keeping things wholesome, simple, and accessible so you feel great about what you’re mixing up. Remember, this is a naturally leavened sandwich bread, so the quality of your starter matters most!
Here is exactly what you need to gather:
- 150g active sourdough starter (it needs to be bubbly!)
- 325g warm filtered water (don’t use ice cold water, please!)
- 20g avocado oil (or another neutral oil)
- 25g honey (this adds sweetness and softness)
- 500g unbleached bread flour
- 10g salt
Ingredient Notes and Swaps for Soft Sourdough Loaf
Let’s talk details, because these really impact the final texture of your Soft Sourdough Loaf. Your sourdough starter absolutely has to be active. I mean, triple in size and passing the float test active. If it’s sluggish, your bread won’t rise properly, leading to that dense texture we are trying to avoid!
Why avocado oil? It stays liquid at cooler temperatures, helping keep the crumb soft even when the bread cools down. Butter works, but it can sometimes firm up too much. And don’t skip the honey! It’s essential here, acting as a gentle sugar that aids browning and keeps the crumb incredibly moist. We are making a proper, flavorful, Gut Healthy Bread Recipe, but with a soft edge!
Step-by-Step Instructions for Your Easy Sourdough Sandwich
Now for the fun part! Just follow these steps closely, and I guarantee you’ll end up with the best sourdough sandwich bread you’ve ever made. This whole process is designed to be very manageable, even if you’re juggling kids or work during the initial mixing stages. Remember, the goal here is an easy-to-handle dough that results in a beautiful, soft loaf.
Mixing and Autolyse for the Best Homemade Sandwich Bread
First things first, get your active starter, warm water, oil, and honey into a big bowl. Mix that up gently until it looks nice and combined—it’ll look kind of milky, which is exactly what we want. Now, dump in your flour and salt. Mix it all by hand just until you don’t see any dry pockets of flour left. It will look totally shaggy and messy for a minute, and that’s okay! That’s why we cover it up and let it rest for one full hour right then. This rest period is something called autolyse, and it lets the flour soak up all that liquid, which kickstarts gluten development. This is the secret sauce for a truly sliceable sourdough loaf!
Managing Bulk Fermentation and Shaping the Simple Sourdough Loaf
Once the rest is up, it’s time for our folds. We need four sets of stretch and folds, done every 30 minutes. When you stretch, be gentle! Just pull one edge up and fold it over the middle. Rotate the bowl and do it three more times. After that fourth fold, let the dough chill out and bulk ferment for 4 to 8 hours, or watch it carefully until it puffs up around 30% to 50%. If you want to make this an overnight sourdough recipe, you can actually pop it in the fridge after that very first set of folds!
When it’s ready, turn that dough out onto a lightly floured surface. You need to coax it into a tight log or rectangle that fits snugly into your greased loaf pan. Think about wrapping a tight present—you want surface tension! Then, place it seam-side down in the pan. Cover it loosely and let it proof for 1 to 3 hours. It’s done when it’s risen about an inch over the pan edge. For more simple baking adventures, check out my Dinner Rolls Recipe!

Baking the Sourdough Sandwich Bread for a Soft Crust Sourdough
About half an hour before you expect your dough to be proofed, crank that oven up to 375°F (190°C). We want it hot! Bake the loaf for about 35 to 45 minutes. You’re looking for a nice golden brown color, and ideally, the internal temperature should hit 200–210°F if you have a probe thermometer. This guarantees it’s baked all the way through without getting dry.
Here’s a major tip for that soft crust sourdough: the second it comes out of the oven, take it IMMEDIATELY out of the hot pan and set it on a wire rack. If you leave it in the hot metal pan, condensation builds up underneath, and you get that dreaded gummy bottom. Let it cool completely—I know, it’s the hardest part—before you slice into your amazing bread!
Tips for Success When Baking Sourdough for Beginners
Even though this is a wonderfully reliable sourdough sandwich bread recipe, a few small snags can trip up folks new to the process. Don’t worry, I hit these same walls when I was first learning! Getting these few key areas right is what separates a good loaf from a truly fantastic, soft one. Paying attention to these details is your fast-track guide to mastering baking sourdough for beginners.
Here are my absolute must-know tips for a perfect bake every single time:
- Watch the Dough, Not the Clock: Bulk fermentation (the main rise) is the trickiest part. Forget the 4-8 hour window sometimes—it depends entirely on your kitchen temperature! Look for the dough to increase volume by that 30-50% mark and look puffy, jiggly, and airy. If your kitchen is cool, it might take 10 hours. That’s fine!
- Don’t Skimp on the Oil in the Pan: Since this recipe aims for a soft loaf, it can be stickier than rustic, crusty sourdough. When you grease your loaf pan, be generous with the avocado oil or use that homemade cake goop I sometimes use for sticky things. You don’t want to wrestle your beautiful, soft loaf out of the pan!
- Work That Starter: If your starter isn’t bubbly and active, your bread will be flat. Test it before you start! Mix a spoonful of starter in a glass of water. If it floats, you are good to go! If it sinks, feed it again and wait a few hours until it passes the float test. A happy starter is the key to this simple sourdough loaf working its magic.
If you want to practice your shaping skills on something a little flatter before tackling the pan loaf, my Focaccia Bread Recipe is fantastic practice!
Make Ahead & Storage for Your Overnight Sourdough Recipe
I know life gets busy, and waiting around for dough can be impossible on a weekday morning! That’s why this sourdough sandwich bread recipe is fantastic—it totally works on an overnight sourdough recipe schedule. The great thing about this dough is that it handles a cold rest really well without getting too sour or too dense. You have two excellent options for making this bread fit your schedule.
Option one is chilling during bulk fermentation. After you do that very first set of stretch and folds (after the initial one-hour rest), cover the dough tightly and put it right into the fridge. It can hang out there for up to 18 hours! Then, when you take it out in the morning, let it warm up for about an hour before doing your remaining three folds. This is usually easier if you want to keep your day flexible. For more make-ahead baking ideas, check out my reliable Moist Zucchini Bread Recipe.
Option two is what I’ve started doing lately: a cold proof after shaping. Once you’ve done all your folds and the dough has risen nicely—say, about 50% volume increase—shape it super tight for your loaf pan. Place it in the greased pan, cover it well, and pop it straight into the fridge overnight. This slows everything down. In the morning, let it sit on the counter for an hour or two to ‘wake up’ before baking it straight from the cold. This method gives you that perfect sliceable texture right when you need it for lunch!
Now, for storage so you keep that soft crust: once the loaf is completely cool—and I mean totally cool, no temptation allowed—wrap it tightly in plastic wrap or place it in an airtight bag. This traps moisture and keeps that soft, fluffy quality intact for days! Don’t store it in the fridge unless you plan to keep it for over a week, because chilling can dry out bread faster. Honestly, though, this loaf is so good, I doubt it lasts that long!
Variations for Your Sourdough Sandwich Bread
When you’ve mastered the basic soft loaf, the next exciting step is figuring out What to Bake with Sourdough Starter besides plain white bread! The basic formula here is so flexible. Since we already have honey in the base recipe, we can customize the flavor profile easily without messing up that perfect soft crumb we worked so hard to achieve. You should absolutely play around with additions during the final shaping stage.
Here are a couple of my favorite, simple twists:
- Honey Wheat Sensation: If you want a slightly heartier flavor, swap out 100g of the bread flour for 100g of whole wheat flour when mixing the dry ingredients. Don’t use more than that unless you increase the water slightly, or you risk a denser loaf. This variation maintains that great texture while deepening the flavor profile beautifully.
- Herby Goodness: For something savory that’s amazing toasted, gently fold in about 2 tablespoons of dried herbs, like rosemary, thyme, or Italian seasoning, right before the final shaping step. Add about 2 ounces of finely shredded sharp cheddar cheese in there too! Make sure your cheese and herbs are incorporated quickly so you don’t deflate the dough; this is your last chance to handle it gently.
These simple additions take your basic sourdough sandwich bread and elevate it for dinner parties or just a really fancy lunch. Don’t forget to check out my Moist Banana Bread Recipe for another fantastic way to use up that active starter when you’re ready for a sweet break!
Frequently Asked Questions About Sourdough Sandwich Bread
I know when you’re trying a new technique, especially with sourdough, questions pop up fast. That’s totally normal! I’ve compiled the ones I get asked the most, especially from folks new to making this sourdough sandwich bread. Getting these little details right is what guarantees you a great crumb!
Can I make this sourdough sandwich bread without a loaf pan?
Yes, you absolutely can, but it changes the outcome a bit, so you need to know what you’re trading! If you bake this dough free-form on a baking stone or sheet, it will spread out more because we’re using a softer dough formula designed to conform to a pan. You will end up with a flatter loaf, more like a round boule, and you’ll definitely get a thicker, crunchier crust all around instead of that lovely soft crust we aim for here. If you are going free-form, you must perform tighter shaping to build good surface tension so it doesn’t just flatten into a pancake! For the best sliceable sourdough loaf, I really do recommend the pan, though.
How do I know if my starter is active enough for this recipe?
This is the most important question for any beginner sourdough bread baker! If your starter isn’t strong, this soft sourdough loaf won’t get the lift it needs during that short bulk fermentation. The best check is the float test. Take a tiny spoonful of your actively fed and bubbly starter—it should have doubled or tripled in size in the last 4-6 hours—and gently drop it into a glass of room-temperature water. If that starter floats right on the surface, it’s light and full of gas, meaning it’s ready to rock! If it sinks straight to the bottom, give it another feeding and wait a few more hours until it passes the float test. A happy starter is the secret weapon for a successful loaf!
If you want more tips on managing your starter and getting the best results, take a peek at my guide for Easy Pumpkin Bread Recipe—sometimes starter tips cross over!
Nutritional Estimates for This Gut Healthy Bread Recipe
We all love that this sourdough sandwich bread is great for your gut, but I know some of you are tracking macros too! Keep in mind these numbers are just estimates based on the ingredients listed. Your local flour brand or how much honey you sneak in—oops!—can change things slightly. Here is a basic breakdown per slice, just so you know what you’re working with for this wonderful, gut healthy bread recipe.
- Serving Size: 1 slice
- Calories: 250
- Fat: 3g
- Carbohydrates: 50g
- Protein: 8g
For more great balanced meal ideas, you should absolutely check out my Quinoa Salad Recipe!
Share Your Soft Sourdough Loaf Creations
Okay, now that you’ve baked the fluffiest, softest sourdough sandwich bread known to humankind, I absolutely need to hear about it! Seriously, seeing your beautiful loaves hanging out of the pan is the best part of my whole day. Don’t keep that success a secret!
Please, please, please leave a rating and a comment right below this section. Tell me how it went for you as a beginner. Did you manage that tight shape? How was the texture for your sandwiches? Knowing these things helps me keep writing the best, most reliable recipes for all of us home cooks.
If you snapped a picture while you were making your soft sourdough loaf—maybe showing off that perfect rise or the tight crumb structure—I’d love to see it on social media! Tag me so I can swoon over your work. If you need to reach out with a specific question that the FAQ didn’t cover, my contact page is always open. Happy baking, and thank you for trusting this recipe!
PrintThe Best Soft Sourdough Sandwich Bread for Beginners

Bake a soft, fluffy, and sliceable sourdough loaf perfect for everyday sandwiches. This recipe uses simple steps designed for beginner sourdough bakers.
- Prep Time: 30 min
- Cook Time: 45 min
- Total Time: 7 hours 15 min
- Yield: 1 loaf 1x
- Category: Baking
- Method: Baking
- Cuisine: American
- Diet: Vegetarian
Ingredients
- 150g active sourdough starter
- 325g warm filtered water
- 20g avocado oil
- 25g honey
- 500g unbleached bread flour
- 10g salt
Instructions
- Combine Starter Mix: In a large bowl, mix the active sourdough starter, warm filtered water, avocado oil, and honey until the mixture looks milky.
- Add Dry Ingredients: Add the bread flour and salt to the wet mixture. Mix by hand until a shaggy dough forms and no dry flour remains. Cover the bowl.
- Rest: Let the dough rest for 1 hour. This is the initial autolyse period.
- Stretch and Fold: Perform four sets of stretch and folds, spaced 30 minutes apart. To do this, gently stretch one side of the dough up and fold it over the center. Rotate the bowl and repeat three more times.
- Bulk Fermentation: After the final set of folds, cover the dough and let it bulk ferment for 4 to 8 hours at room temperature, or until it has increased in volume by about 30-50% and shows signs of life. For an overnight rise, place it in the refrigerator after the first set of folds.
- Shape: Gently turn the dough out onto a lightly floured surface. Shape the dough into a tight log or rectangle suitable for a standard loaf pan (approximately 9×5 inches).
- Pan Proofing: Place the shaped dough seam-side down into a greased loaf pan. Cover the pan loosely with plastic wrap or a damp towel. Let it proof at room temperature for 1 to 3 hours, or until the dough has risen about 1 inch above the rim of the pan.
- Preheat Oven: About 30 minutes before baking, preheat your oven to 375 degrees Fahrenheit (190 degrees Celsius).
- Bake: Bake the loaf for 35 to 45 minutes, or until the crust is golden brown and the internal temperature reaches 200-210 degrees Fahrenheit.
- Cool: Remove the bread from the pan immediately after baking and let it cool completely on a wire rack before slicing. This prevents a gummy texture.
Notes
- For a softer crust, you can lightly brush the top of the loaf with melted butter immediately after removing it from the oven.
- If you prefer a slightly sweeter loaf, increase the honey to 30g.
- This recipe works well with an overnight, cold proof in the refrigerator after shaping for a more developed flavor.
Nutrition
- Serving Size: 1 slice
- Calories: 250
- Sugar: 2
- Sodium: 250
- Fat: 3
- Saturated Fat: 0.5
- Unsaturated Fat: 2.5
- Trans Fat: 0
- Carbohydrates: 50
- Fiber: 2
- Protein: 8
- Cholesterol: 0