
Oh, I just adore comfort desserts, don’t you? There’s something about something creamy, sweet, and totally classic that just soothes the soul. If you’ve ever been scared off by recipes because you thought you’d end up with grainy, cracked **egg custard**, please stop worrying right now! I’ve spent ages in my kitchen testing and tweaking, and I finally have it: a truly fail-proof recipe that guarantees a silky smooth dessert every single time. This isn’t just any recipe; it’s a tested secret for homemade custard perfection.
- Why This is the Best Fail Proof Homemade Custard Recipe
- Ingredients for Your Old Fashioned Baked Egg Custard
- Mastering the Water Bath Custard Technique for Silky Egg Custard
- Step-by-Step Instructions for the Classic Egg Custard Recipe
- Tips for Success When Making Your Creamy Egg Dessert
- Serving and Storing Your Perfect Egg Custard
- Frequently Asked Questions About Making Egg Custard
- Estimated Nutrition for This Simple Ingredient Custard
- Share Your Silky Smooth Egg Custard Results
Why This is the Best Fail Proof Homemade Custard Recipe
I hear you! The difference between a dreamy, **silky smooth custard dessert** and a sad, rubbery mess feels like a giant leap sometimes. This recipe isn’t tricky; it actually forces you to use the right techniques so you get that perfect, creamy consistency you’re craving.
Here’s why you can trust this **fail proof homemade custard** recipe to always deliver:
- No Cracks Allowed: We use the gentle water bath method, which is my non-negotiable tip for keeping the top smooth and pristine.
- Velvet Texture Guaranteed: Between gentle whisking and that crucial straining step, graininess just doesn’t stand a chance.
- Beginner Friendly Custard: Seriously, if you can heat milk and whisk gently, you can master this. I’ve simplified every step so beginners feel totally confident.
- Classic Comfort Flavors: It uses simple, traditional pantry staples for that nostalgic taste we all love.
If you are looking for more guaranteed success stories, check out Jade’s amazing tips on achieving that perfect texture too. This guide really dives deep into the fail-proof magic!
Ingredients for Your Old Fashioned Baked Egg Custard
One of the best things about this **old fashioned baked custard** is how humble the ingredient list is. You don’t need to run to five specialty stores! These are basic, wholesome components that come together beautifully. Trust me, simplicity is key when you’re aiming for that perfect **creamy egg dessert**.
To make this amazing **egg custard**, gather these few things:
- 3 large eggs
- 1/2 cup granulated sugar
- 2 2/3 cups whole milk (make sure it’s whole milk for the best richness!)
- 1 teaspoon pure vanilla extract
- 1/4 teaspoon ground nutmeg (this is just for dusting the very top before serving)
That’s it! Simple, classic, and ready for us to turn into a **silky smooth custard dessert**.
Mastering the Water Bath Custard Technique for Silky Egg Custard
Okay, listen up, this is where we separate a good **egg custard** from a truly dreamy one. If you want that beautiful, non-cracked top and the creamiest consistency imaginable, you absolutely must use the **water bath custard technique**. I know, I know, putting a pan inside another pan sounds fussy, but promise me you’ll try it just once! This crucial step surrounds your custard dishes with insulating hot water while they bake, meaning the heat is gentle and distributed evenly.
What does that mean for you? No scorching, no dry edges, and definitely no cracked surfaces that look like the desert! You simply place your filled pie plate or ramekins into a larger baking pan, and then carefully pour hot water—I mean properly hot water—into the larger pan until it comes about halfway up the sides of your custard dishes. It’s the secret to maintaining moisture and getting that unbelievably **silky smooth custard dessert** feel. For more insight on perfecting pie fillings, check out these classic pie tips over here!
Gentle Mixing and Tempering Secrets for Perfect Egg Custard
Our goal here is smooth, not fluffy! When you whisk the eggs and sugar, just combine them until the sugar dissolves—I mean *gently*. If you start whipping it up like you’re making meringue, you’re just encouraging air bubbles, and those bubbles cause cracking later on. Remember, we’re making a **creamy egg dessert**, not a sponge cake!
Next, when you add the milk, pour it in slowly while whisking very softly. This gentle incorporation mimics tempering and ensures the eggs don’t shock or curdle. If you see foam forming on the top after you mix everything together, you’ve whisked too hard, friend! A little patience in this egg custard stage saves you big time later.
Step-by-Step Instructions for the Classic Egg Custard Recipe
Ready to put it all together? Following these steps correctly is how we turn simple things into our amazing **Classic Egg Custard Recipe**! It moves fast once you get organized. Remember, every step is designed to help you achieve that perfect, non-curdled finish, so follow along carefully.
- First things first: Get your oven ready! Preheat it to 325 degrees Fahrenheit. While it warms up, set your 9-inch pie plate (or those cute individual ramekins) right inside a larger baking pan. This pan is for your water bath later.
- In a medium bowl, gently whisk your eggs and sugar. I stress *gently*—we are just combining them until the sugar starts to disappear. Don’t introduce unnecessary air if you can help it!
- Now, carefully whisk in the whole milk and the pure vanilla extract until everything looks uniform.
- This next step is key for that beautiful, **creamy egg dessert** mouthfeel: strain the entire mixture through a fine-mesh sieve into a clean bowl or a big measuring cup. This catches anything that didn’t blend perfectly. If you want more tips on gentle cooking, I talk about handling eggs softly in my article on making tender omelettes!
- Slowly pour that lovely, strained custard mixture into the pie plate or ramekins that are already sitting snug inside the large baking pan.
- Get some very hot water ready. Very carefully pour the hot water into the outer baking pan until it comes about halfway up the sides of your custard dishes. See? Easy water bath setup! For another recipe that uses milk simply, check out my French toast guide later.
- Bake for about 40 to 50 minutes. You’ll know it’s nearly done when the edges look set, but if you nudge the pan, the very center still has a little wiggle—that’s the ‘slight jiggle’ doneness test working its magic! For more guaranteed smooth results, check out this great resource here.
- Use tongs to carefully lift the custard dishes out of the hot water bath and let them cool down thoroughly on a wire rack before you chill them completely.
Tips for Success When Making Your Creamy Egg Dessert
I truly want you to have the best experience making this **creamy egg dessert**. If you follow my little tricks, you’ll never look back! Remember the one step I always harp on about? Straining! Even if you think your mix looks perfectly blended, take the extra minute to push it through that fine-mesh sieve. It is the fastest way to guarantee a beautiful, **silky smooth egg custard**.
Also, patience during cooling is vital. Don’t try to rush the chill! The custard needs several hours—at least four—to fully firm up. If you slice into it too early, it will definitely collapse. If you’re using this mixture as an **easy custard pie filling**, the cooling time allows it to set up firm enough to slice beautifully without running everywhere. For more inspiration on foolproof desserts, I love checking out Carla’s great tips right here!
Serving and Storing Your Perfect Egg Custard
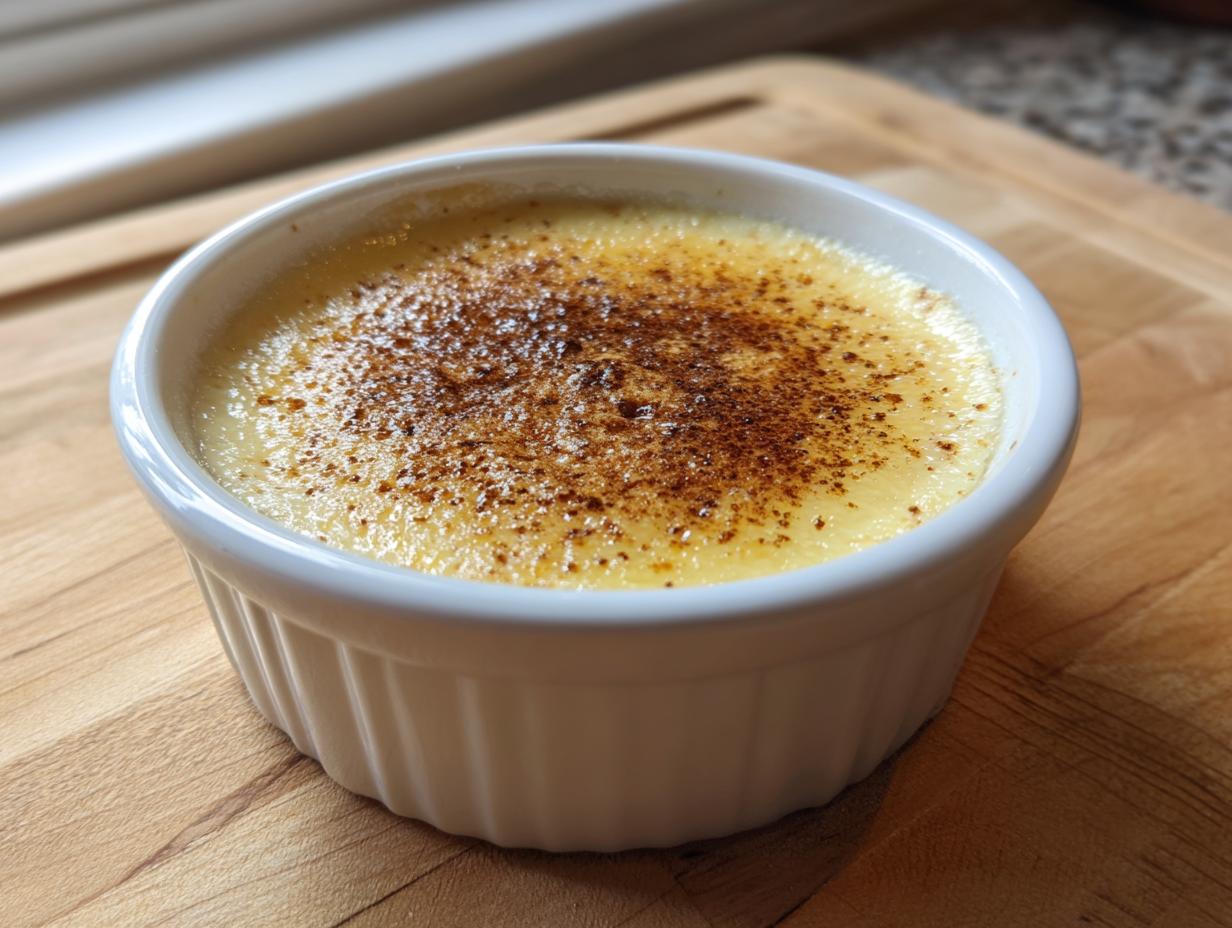
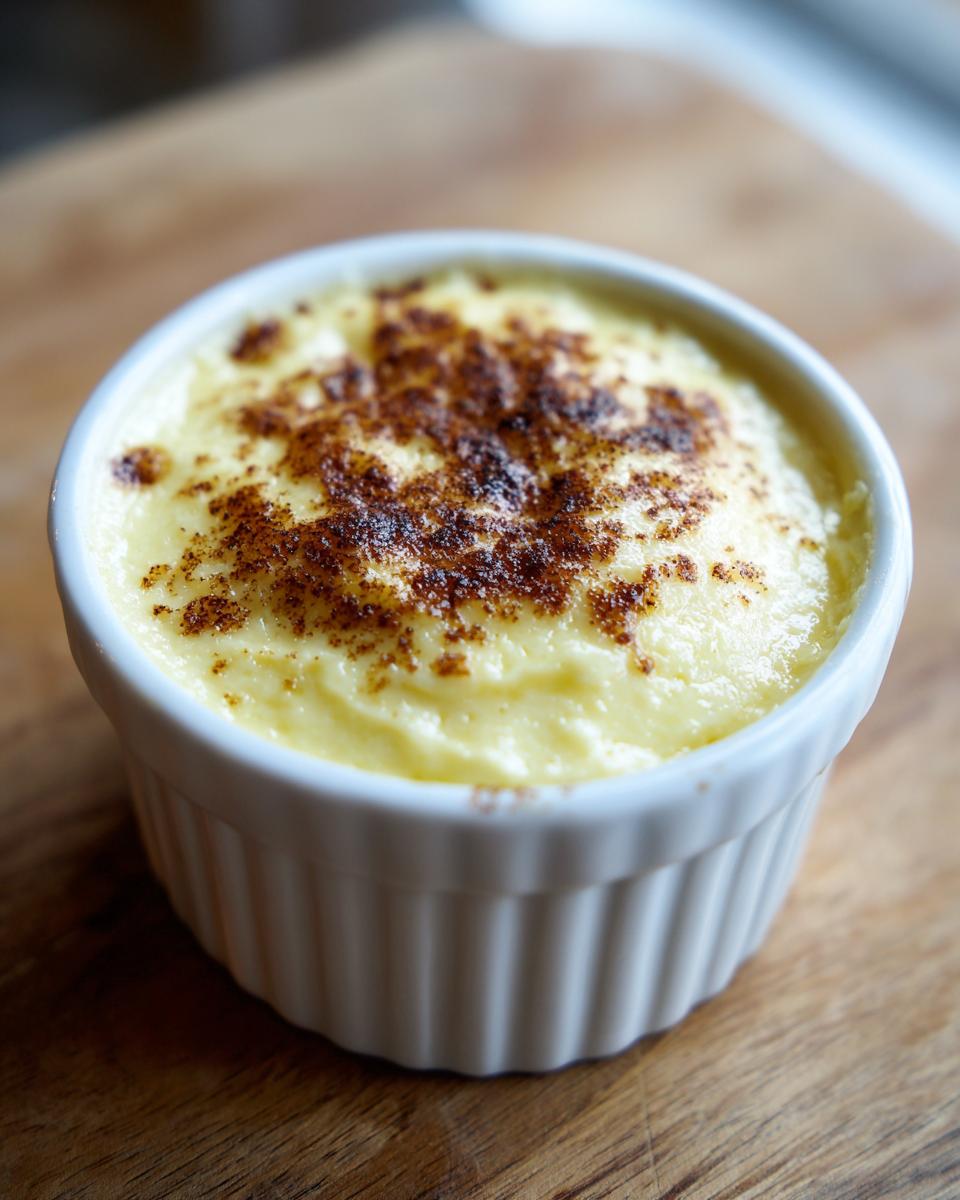
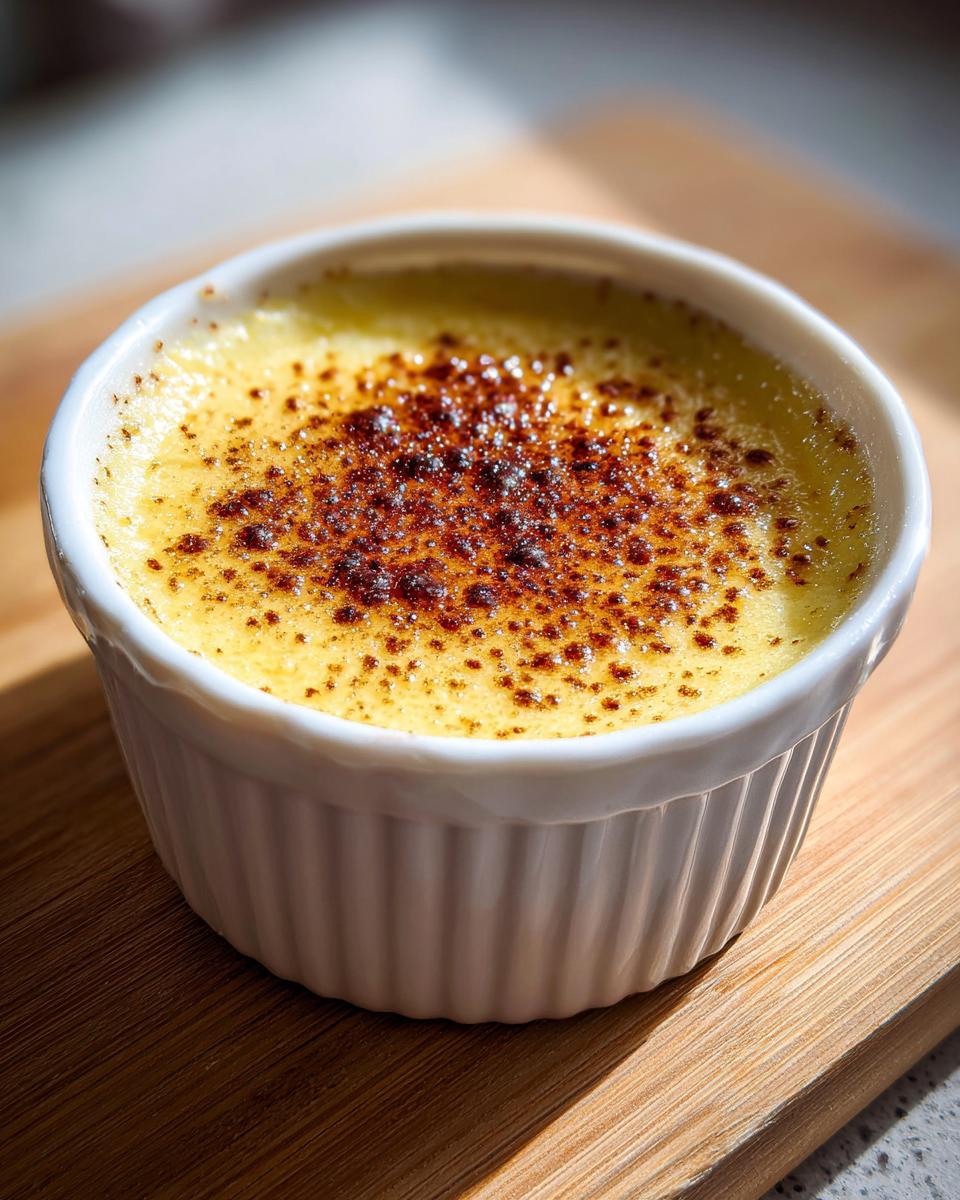
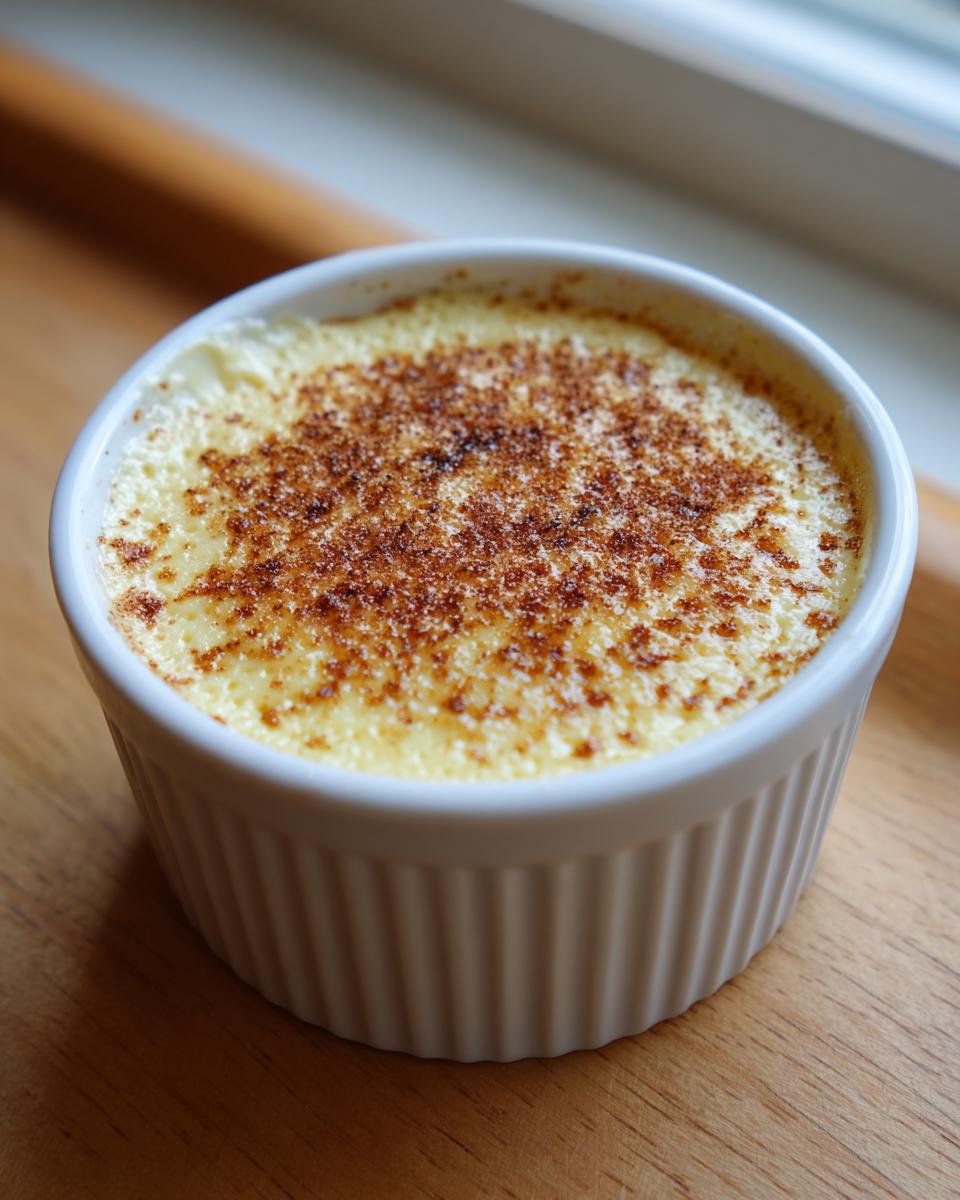
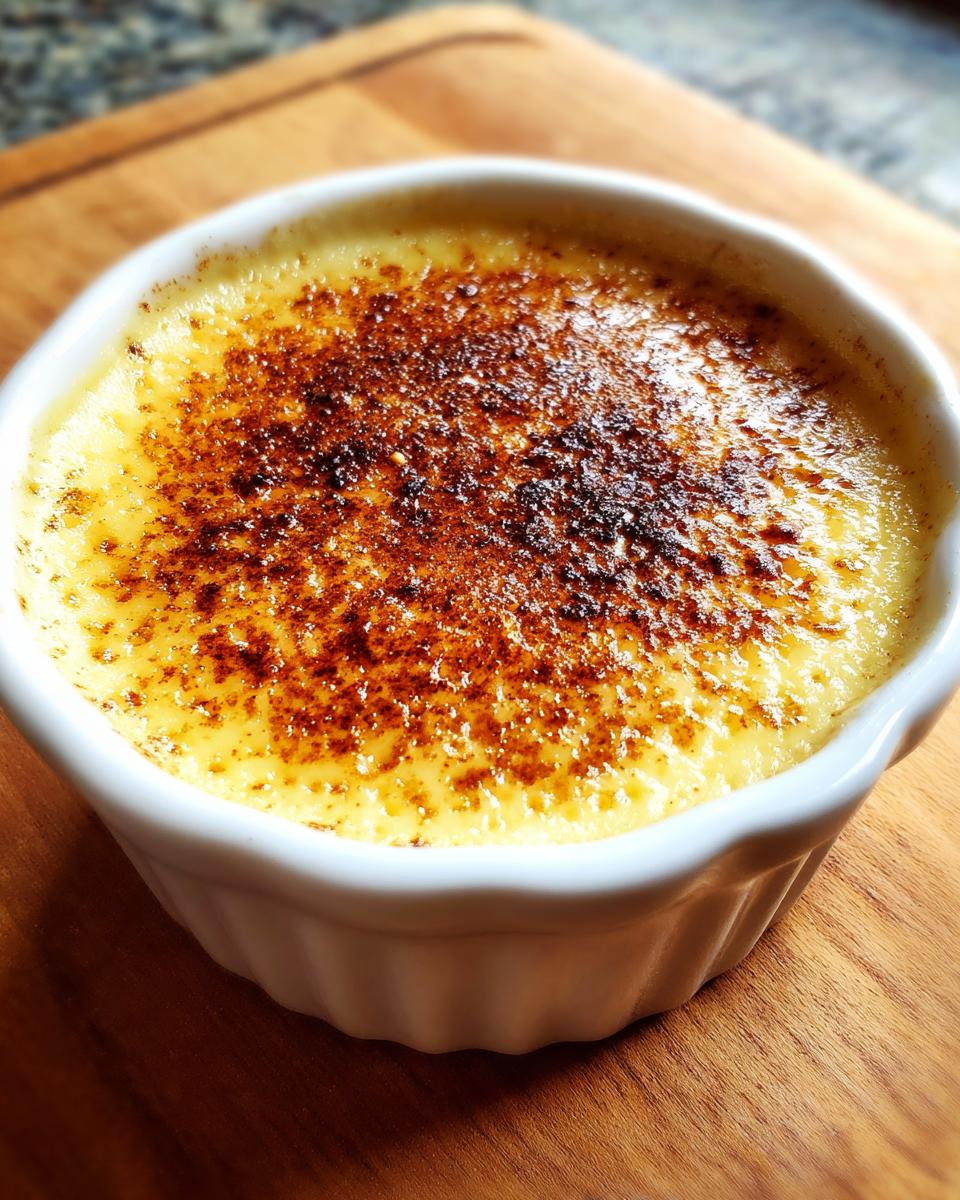
This **egg custard** truly shines when served completely chilled. Once cooled on the counter, pop those dishes into the refrigerator and let them rest for a minimum of four hours. That chilling time is non-negotiable for setting that perfect, sliceable texture!
Just before you serve it—whether it’s straight from a petite ramekin or as a slice of **easy custard pie filling**—give the top a light dusting of that beautiful ground nutmeg. Store any leftovers tightly covered in the fridge. Speaking of pies, if you ever need a fall dessert idea, my apple pie recipe is divine next to a cold slice of this custard! Save that recipe for later!
Frequently Asked Questions About Making Egg Custard
I know you might still have a few lingering worries, especially if this is your first time attempting any **traditional vanilla custard**. Don’t fret! We’ve all been there. Here are the most common questions I get about ensuring this remains a **fail proof homemade custard** experience.
Why did my egg custard crack on top?
This is the number one worry for people making any **creamy egg dessert**! Usually, cracking happens for two reasons: either the oven temperature was too high, or you didn’t use the water bath. The high heat causes the edges to set too fast while the center is still expanding, leading to tension and those awful cracks. Also, if you whipped too much air in during mixing, those air pockets expand and pop on the surface. We fixed both issues by using the water bath technique and whisking gently!
Can I substitute whole milk with low-fat milk for this custard?
You absolutely *can*, but I strongly advise sticking to whole milk for the first time you try this **classic egg custard recipe**. The fat in the whole milk is crucial for achieving that deep richness and the velvety, **silky smooth custard** texture we are aiming for. Lower fat milk tends to result in a thinner, sometimes slightly more prone-to-weeping custard.
How do I know when the egg custard is truly done baking through?
This is tricky! You want it set but not stiff. When you gently nudge the pan (carefully, it’s hot!), the edges should look firm, but the very center—maybe a quarter size—should still have a tiny, delicate jiggle. This is the sweet spot! If it’s completely still, it’s overdone. If it sloshes, it needs more time. This check guarantees moist results.
Can I make this custard dessert ahead of time for a party?
Yes, and it’s actually better if you do! This **old fashioned baked custard** needs at least four hours to fully chill and set up in the refrigerator. I often make mine a day ahead. It’s so wonderful to pull out a **nostalgic comfort dessert** that is already perfectly chilled and ready to go!
If you need a great reminder on how easy it is to handle ingredients like eggs in other ways, you should bookmark my recipe for classic deviled eggs!
Estimated Nutrition for This Simple Ingredient Custard
Now, while my focus is always on flavor and that perfect, creamy result when making this **simple ingredient custard**, I know some of you like to keep track of the numbers! Remember, these are just estimates based on the initial recipe breakdown, so they might vary slightly based on exactly what brand of milk you grab.
For one serving of this **old fashioned baked custard**, here’s the general breakdown:
- Calories: 210
- Fat: 7g
- Carbohydrates: 23g
- Sugar: 22g
- Protein: 12g
It’s a lovely, comforting dessert that keeps the ingredients straightforward while delivering maximum old-fashioned flavor!
Share Your Silky Smooth Egg Custard Results
I am so thrilled for you! You just mastered a truly **fail-proof homemade custard**, and that feeling of accomplishment is the best dessert of all. Seriously, seeing that perfectly **silky smooth egg custard** come out of the oven makes all the gentle mixing worth it!
I hope you try it soon. When you do, please come back! I’d be so grateful if you’d leave a rating down below (five stars if you loved it!) and let me know in the comments how yours turned out. Did you use ramekins or a pie plate? I always love hearing about your success in the kitchen! Feel free to learn more about my journey right here.
PrintFail-Proof Silky Old Fashioned Baked Egg Custard
Learn how to make a truly silky smooth, creamy egg custard using simple ingredients. This old fashioned baked custard recipe uses a water bath technique to guarantee a perfect, non-cracked dessert every time. It works great served alone or as a pie filling.
- Prep Time: 10 min
- Cook Time: 50 min
- Total Time: 60 min
- Yield: 4 servings 1x
- Category: Dessert
- Method: Baking
- Cuisine: American
- Diet: Vegetarian
Ingredients
- 3 large eggs
- 1/2 cup granulated sugar
- 2 2/3 cups whole milk
- 1 teaspoon pure vanilla extract
- 1/4 teaspoon ground nutmeg (for topping)
Instructions
- Preheat your oven to 325 degrees Fahrenheit. Place a 9-inch pie plate or four 6-ounce ramekins into a large baking pan.
- In a medium bowl, gently whisk the eggs and sugar together until just combined. Do not over-whisk; you want to avoid incorporating too much air, which causes cracks.
- Slowly whisk in the milk and vanilla extract until fully mixed.
- Strain the custard mixture through a fine-mesh sieve into a separate bowl or large measuring cup. This step removes any unmixed egg bits and helps create a silky smooth texture.
- Carefully pour the strained custard mixture into the pie plate or ramekins set inside the baking pan.
- Pour hot water into the large baking pan until the water reaches halfway up the sides of the custard dishes. This water bath technique insulates the custard and prevents cracking.
- Bake for 40 to 50 minutes for a pie dish, or 35 to 40 minutes for ramekins. The custard is done when the edges are set but the center still jiggles slightly when gently nudged.
- Carefully remove the custard dishes from the water bath using tongs. Let them cool on a wire rack for one hour.
- Dust the top lightly with ground nutmeg. Chill the egg custard in the refrigerator for at least 4 hours, or until completely firm, before serving.
Notes
- To achieve a truly fail-proof, silky smooth custard, never skip straining the mixture.
- If you are using this as an egg custard pie filling, bake until the center has a slight wobble. It will set fully as it cools.
- For a beginner friendly approach, use ramekins instead of a full pie dish, as they cook more evenly.
Nutrition
- Serving Size: 1 serving
- Calories: 210
- Sugar: 22
- Sodium: 85
- Fat: 7
- Saturated Fat: 4
- Unsaturated Fat: 3
- Trans Fat: 0
- Carbohydrates: 23
- Fiber: 0
- Protein: 12
- Cholesterol: 140