
Oh, fall baking! It’s my absolute favorite time of year, and nothing says cozy quite like the smell of pumpkin and warm spices filling the kitchen. Forget complicated desserts; I’ve got something that’s going to make you feel like a baking superstar even if you’re just starting out. We’re talking about the most divine pumpkin cheesecake bars! They’ve got that perfect crumbly gingersnap crust, a dreamy, creamy cheesecake filling, and just the right amount of pumpkin spice goodness. I just know you’re going to love how easy these are to whip up, and they’re always a huge hit at any get-together. My whole goal here at Kings Cook is to help you create those joyful kitchen moments, and believe me, these bars are pure joy!
- Why You'll Love These Pumpkin Cheesecake Bars
- Effortless Pumpkin Cheesecake Bars with Gingersnap Crust
- Step-by-Step Guide to Perfect Pumpkin Cheesecake Bars
- Tips for Success with Pumpkin Cheesecake Bars
- Ingredient Notes and Substitutions for Pumpkin Cheesecake Bars
- Make-Ahead and Freezing Instructions for Pumpkin Cheesecake Bars
- Frequently Asked Questions About Pumpkin Cheesecake Bars
- Estimated Nutritional Information
- Share Your Pumpkin Cheesecake Bar Creations!
Why You’ll Love These Pumpkin Cheesecake Bars
Seriously, what’s not to adore about these bars? They are:
- Super Easy! Just a few simple steps and you’re on your way.
- Absolutely Delicious: That gingersnap crust with creamy pumpkin cheesecake? Pure magic.
- Perfectly Festive: They’re the taste of fall and the holidays in every bite.
- Dreamy Texture: That smooth, swirled cheesecake with a tender crust is just divine.
Effortless Pumpkin Cheesecake Bars with Gingersnap Crust
Alright, let’s get down to the good stuff – what you need to make these incredible pumpkin cheesecake bars happen! My philosophy is always to use ingredients you can actually find at your local grocery store, because baking should be joyful, not a scavenger hunt. And trust me, using good quality ingredients here really makes a difference. You’ll see that mentioned in a lot of my recipes, like when I talk about my pumpkin spice coffee cake – it’s all about those little details that add up!
For the Gingersnap Crust
This crust is just so perfect with the pumpkin and cheesecake. You really want to use actual gingersnap cookies for that distinctive spicy flavor. Just grab about 35 cookies, crush them up nice and fine (a food processor is your best friend here!), and mix them with some sugar and melted butter. It’s so simple, but wow, does it set the stage beautifully!
For the Pumpkin Cheesecake Filling
Now for the star of the show! Make sure your 16 ounces of cream cheese are nice and soft – this is key for a smooth, lump-free filling. You’ll also need about ¾ cup of sugar, two large eggs (room temp is best!), a splash of vanilla extract for that classic flavor, a good teaspoon of pumpkin pie spice to really warm things up, and of course, a cup of pure pumpkin puree. Remember, you want the puree, not the pumpkin pie filling – they’re totally different things!
Step-by-Step Guide to Perfect Pumpkin Cheesecake Bars
Alright, my friends, let’s get these amazing pumpkin cheesecake bars into the oven! It’s really not too tricky, and I promise, the results are SO worth it. Think of me right there in the kitchen with you, guiding you through each step. It’s kind of like how I break down my easy apple crisp recipe – super straightforward, and every step makes sense.
Preparing the Gingersnap Crust
First things first, let’s get that crust ready! Go ahead and preheat your oven to 350°F (that’s 175°C). Grab your 8×8 inch pan and line it with parchment paper, leaving some extra hanging over the sides. This is your secret weapon for lifting them out later – no stuck bars here! Now, mix up those gingersnap crumbs with the ¼ cup of sugar and that melted butter until it all looks like wet sand. Press it down nice and firm into the bottom of your pan. Pop it in the oven for about 8 to 10 minutes, just until it’s fragrant. Let it cool while we whip up the filling.
Making the Cream Cheese and Pumpkin Mixtures
Okay, onto the star! In a nice big bowl, beat your softened cream cheese with the ¾ cup sugar until it’s super smooth and creamy. Seriously, no lumps allowed! Then, beat in those eggs one at a time, really mixing well after each one. Stir in your vanilla and that lovely pumpkin pie spice. Now, here’s the fun part: divide this glorious mixture right down the middle into two separate bowls. Stir the pumpkin puree into one of the bowls until it’s all beautifully combined into a dreamy orange mixture.
Creating the Perfect Cream Cheese Swirl
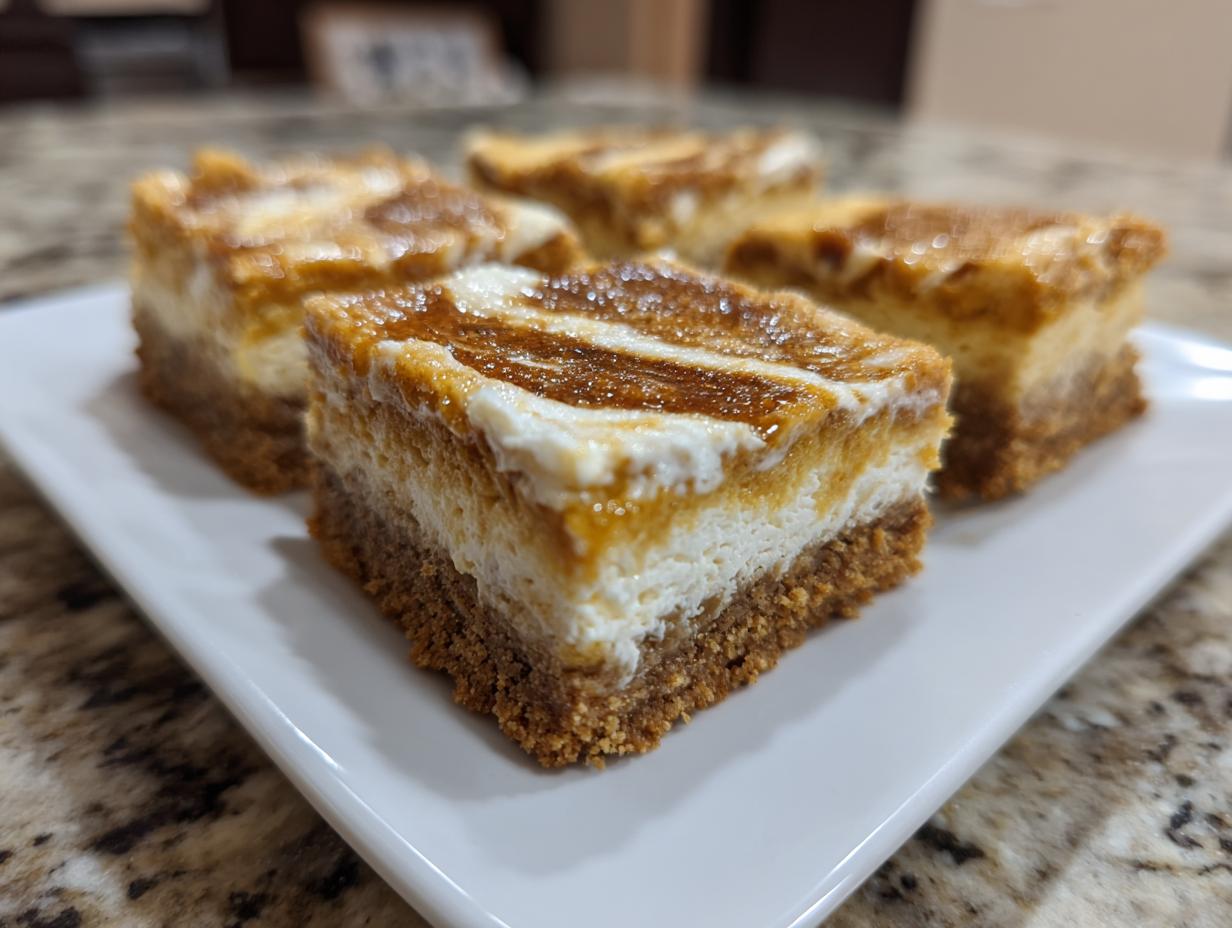
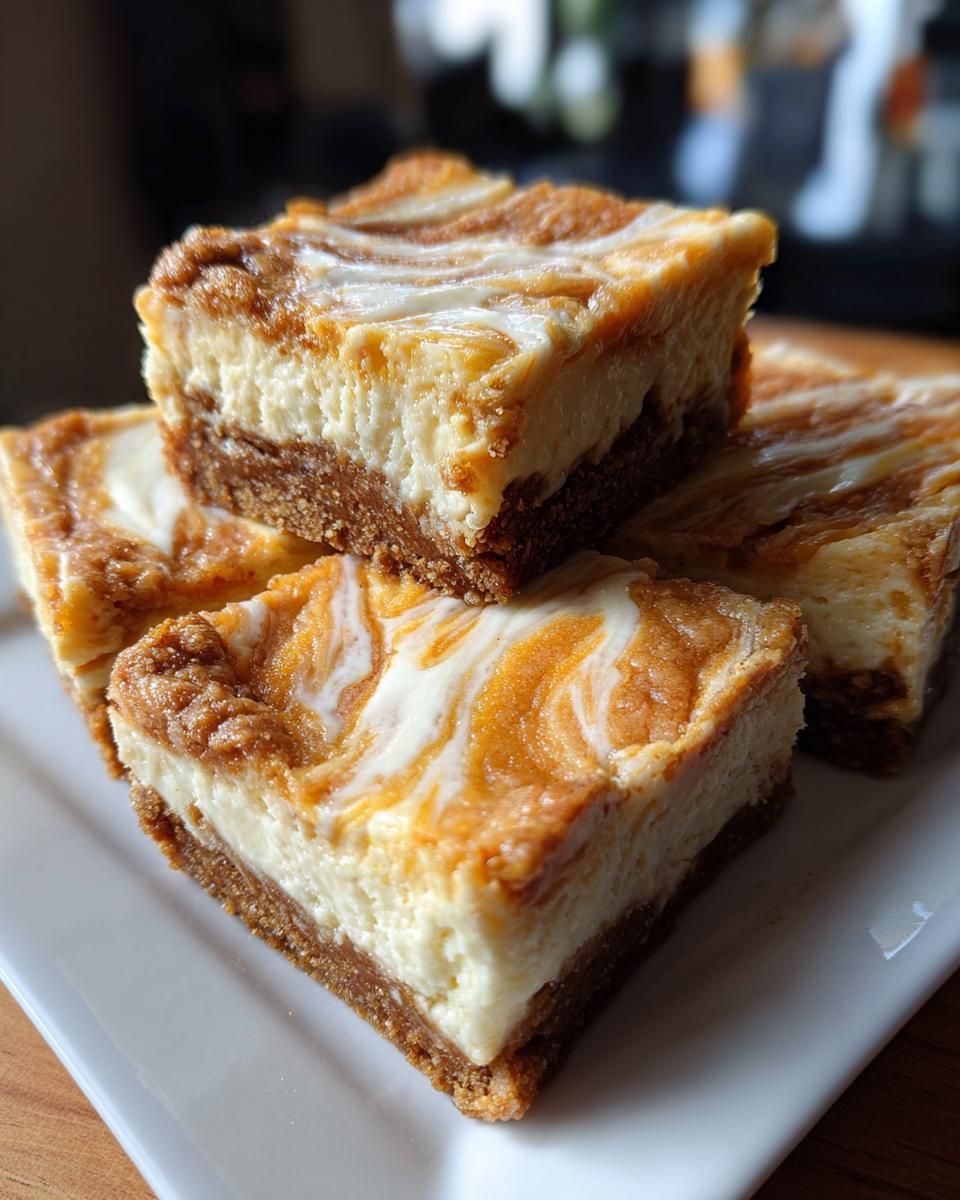
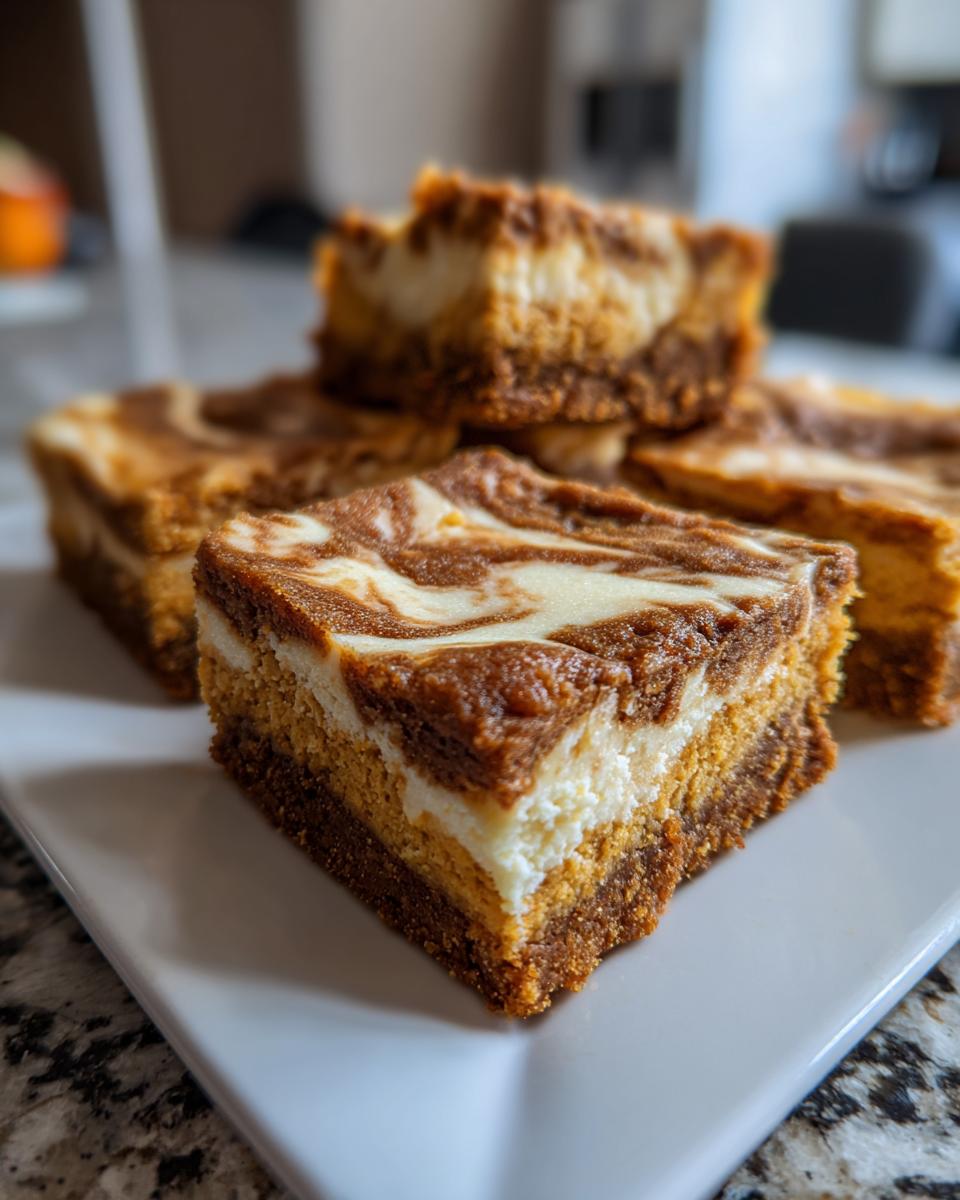
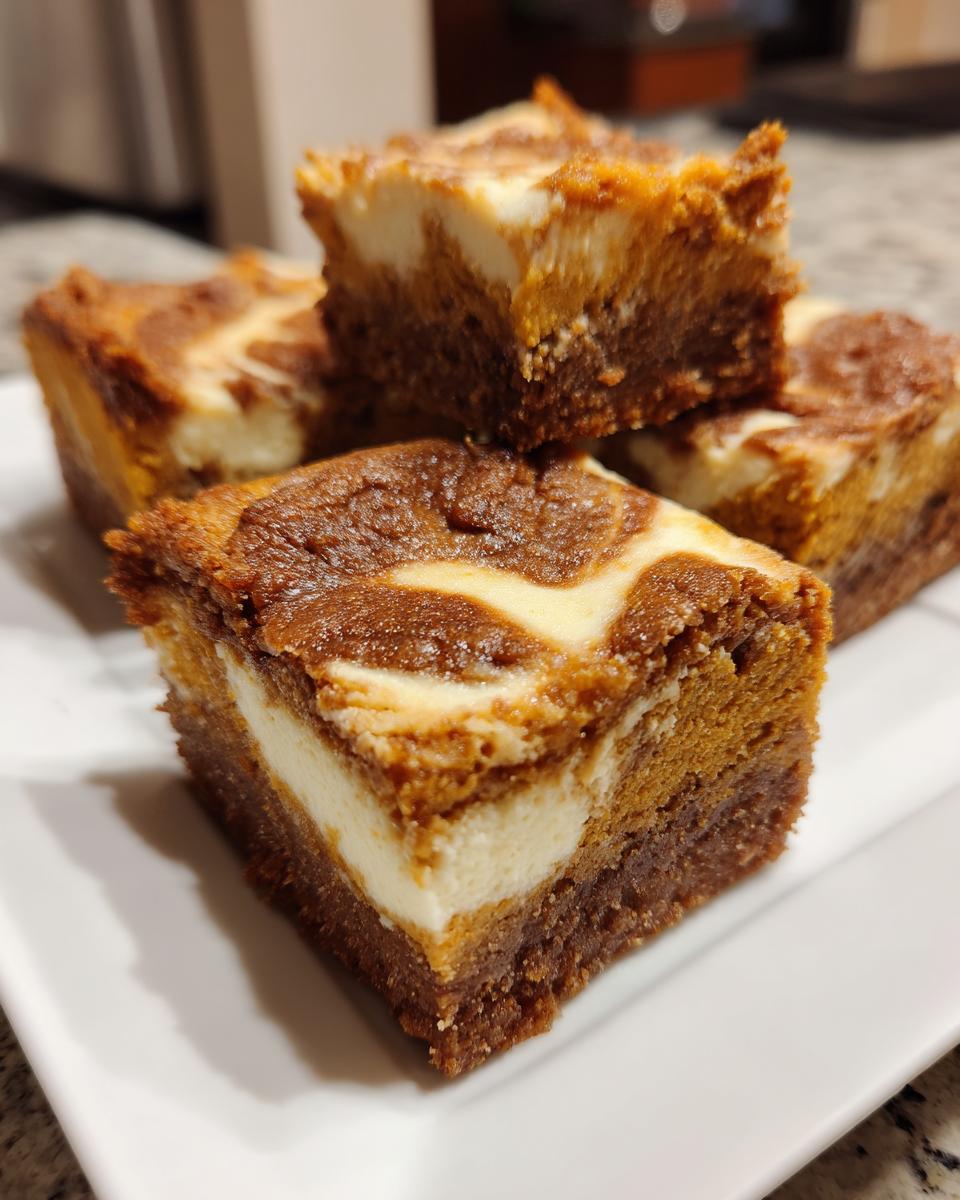
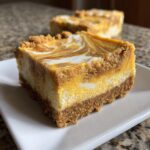
This is where the magic happens! We want a gorgeous marble effect. Take spoonfuls of the plain cream cheese mixture and dollop them all over that cooled crust. Then, do the same with the pumpkin cream cheese mixture, alternating spoonfuls. Now, grab a knife or a skewer and gently swirl the two together. The secret to how to swirl cheesecake bars without cracks is to be gentle! Don’t go crazy mixing it; just a few gentle passes will give you that beautiful marbled look. Over-swirling can sometimes cause the cheesecake to crack later, and we don’t want that!
Baking and Cooling Your Pumpkin Cheesecake Bars
Time to bake! Pop your creation back into the oven for about 30 to 35 minutes. You’re looking for the edges to lookset, but the very center should still be just a tiny bit wobbly – like it’s almost set. Once they’re out, let them cool completely right there in the pan on a wire rack. Patience is key here! After they’re totally cooled, cover the pan and pop them in the fridge for at least 4 hours, but honestly, overnight is even better. This chilling time is crucial for them to set up perfectly so they slice beautifully. This step really makes all the difference for that clean slice you want for parties!
Tips for Success with Pumpkin Cheesecake Bars
Okay, let’s talk about making these easy pumpkin cheesecake bars absolutely perfect for you. The biggest thing I’ve learned over the years? Room temperature ingredients are your best friend for a super smooth cheesecake filling! Make sure that cream cheese and those eggs aren’t straight from the fridge. It really makes all the difference in getting that silky texture, just like when I make my creamy mac and cheese – smooth is the goal! Also, remember that gentle swirl we talked about? That’s key to avoiding cracks. If you’re a bit nervous, you can even pop the pumpkin mixture in the fridge for about 15 minutes before you start dolloping, which helps it hold its shape a little better. And for those super clean slices, chilling them fully is non-negotiable. It’s like the final polish on these little beauties!
Ingredient Notes and Substitutions for Pumpkin Cheesecake Bars
Let’s chat about the ingredients for these pumpkin cheesecake bars for a sec. First off, the crust – the recipe calls for gingersnaps, and trust me, they give it this amazing warm spice. But if you can’t find them, or just prefer a different flavor, you can totally swap them out for graham cracker crumbs! Just use the same amount. The biggest thing I can tell you is to make sure your cream cheese is SOFTENED. Seriously, leave it out on the counter for a good hour or so. It makes all the difference in getting a super smooth, creamy filling without any lumps – no one wants a lumpy cheesecake! Also, double-check you’re grabbing pure pumpkin puree, not the canned pumpkin pie filling, or your spice balance will be all off. It’s a little detail, much like when I prepped my easy apple pie – little things make a big difference!
Make-Ahead and Freezing Instructions for Pumpkin Cheesecake Bars
Okay, so one of my favorite things about these pumpkin cheesecake bars is that you can totally make them ahead of time! They actually taste even better after chilling overnight. Just bake them, let them cool completely, then cover the pan and pop them in the fridge. They’ll keep nicely for about 3-4 days, which means you can prep them before guests arrive and not stress on the day of. And if you’re wondering, yes, you absolutely can freeze pumpkin cheesecake bars! Once they’re cut into squares, wrap each one individually in plastic wrap, then pop them into a freezer-safe container or bag. They should be good for up to 3 months. Just thaw them in the refrigerator overnight before you want to enjoy them. So convenient, just like my no-bake banana pudding!

Frequently Asked Questions About Pumpkin Cheesecake Bars
Got questions about whipping up these festive pumpkin cheesecake bars? I’ve got you covered! These little squares are perfect for any fall get-together, especially for Thanksgiving desserts. People often ask me about making them, so let’s dive in! You know, it reminds me a bit of how everyone loves my cheesy garlic breadsticks – simple, crowd-pleasing, and always a hit!
What size pan is best for pumpkin cheesecake bars?
For these bars, an 8×8 inch baking pan is just perfect. It gives you lovely, thick bars that slice up beautifully and make for a great presentation, especially if you’re going for that perfect cream cheese swirl aesthetic.
How do I get a clean swirl in my cheesecake bars?
The trick to a gorgeous swirl is gentle hands! When you’re dolloping your fillings, try not to over-mix them together; just a few passes with a knife or skewer is all you need. For an even cleaner look, chilling the pumpkin mixture slightly before you dollop it can really help.
Can I make these pumpkin cheesecake bars ahead of time?
Absolutely! These bars are fantastic for making ahead. In fact, they really benefit from chilling overnight to let all those flavors meld and for the cheesecake to fully set, making them ideal for busy holiday weekends. You can store them covered in the fridge for a few days.
How long do pumpkin cheesecake bars need to chill?
You’ll want to give them at least 4 hours in the refrigerator to chill and set properly. But, if you can wait, chilling them overnight is even better! It ensures they’re firm enough to slice cleanly and have the best texture.
Estimated Nutritional Information
Now, let’s talk numbers! While we’re all about deliciousness here, it’s helpful to get an idea of what’s in these tasty treats. This information is just an estimate per bar, and of course, it can change a little depending on the exact ingredients you use and how thick you slice them! Think of it as a ballpark figure while you’re enjoying these amazing pumpkin cheesecake bars. It’s a bit like when I share carb counts for my keto chicken casserole; it gives you a helpful guide!
Per serving (1 bar, estimates):
- Calories: around 250
- Fat: roughly 15g
- Protein: about 3g
- Carbohydrates: approximately 25g
- Sugar: around 20g
Share Your Pumpkin Cheesecake Bar Creations!
Have you made these delightful pumpkin cheesecake bars? I’d absolutely love to hear about your experience! Drop a comment below and let me know how they turned out, or even better, share a picture of your beautiful creation. You can also reach out through my contact page – I’m always excited to see what you’re baking!
PrintPumpkin Cheesecake Bars with Gingersnap Crust
Easy pumpkin cheesecake bars with a gingersnap crust and a creamy cheesecake swirl. These bars are perfect for fall gatherings and slice cleanly.
- Prep Time: 25 min
- Cook Time: 35 min
- Total Time: 4 hours 55 min
- Yield: 16 bars 1x
- Category: Dessert
- Method: Baking
- Cuisine: American
- Diet: Vegetarian
Ingredients
- 1 ½ cups gingersnap cookie crumbs (about 35 cookies)
- ¼ cup granulated sugar
- 6 tablespoons unsalted butter, melted
- 16 ounces cream cheese, softened
- ¾ cup granulated sugar
- 2 large eggs
- 1 teaspoon vanilla extract
- 1 teaspoon pumpkin pie spice
- 1 cup pumpkin puree
Instructions
- Preheat your oven to 350°F (175°C). Line an 8×8 inch baking pan with parchment paper, leaving an overhang on the sides.
- In a medium bowl, combine the gingersnap crumbs, ¼ cup sugar, and melted butter. Press the mixture evenly into the bottom of the prepared pan to form the crust.
- Bake the crust for 8-10 minutes, then remove from the oven and let it cool slightly.
- In a large bowl, beat the softened cream cheese and ¾ cup sugar with an electric mixer until smooth and creamy.
- Beat in the eggs one at a time, mixing well after each addition. Stir in the vanilla extract and pumpkin pie spice.
- Divide the cream cheese mixture in half. Stir the pumpkin puree into one half of the mixture until well combined.
- Dollop spoonfuls of both the plain cream cheese mixture and the pumpkin cream cheese mixture over the cooled crust.
- Use a knife or a skewer to gently swirl the two mixtures together, creating a marbled effect. Be careful not to over-swirl, which can cause cracks.
- Bake for 30-35 minutes, or until the edges are set and the center is almost set.
- Let the bars cool completely in the pan on a wire rack.
- Once cooled, cover the pan and refrigerate for at least 4 hours, or preferably overnight, to allow the cheesecake to set fully.
- Use the parchment paper overhang to lift the bars out of the pan. Cut into squares for serving.
Notes
- For a cleaner swirl, chill the pumpkin mixture slightly before dolloping.
- These bars can be frozen for up to 3 months. Thaw in the refrigerator before serving.
- For a graham cracker crust, substitute 1 ½ cups graham cracker crumbs.
Nutrition
- Serving Size: 1 bar
- Calories: 250
- Sugar: 20g
- Sodium: 100mg
- Fat: 15g
- Saturated Fat: 9g
- Unsaturated Fat: 6g
- Trans Fat: 0g
- Carbohydrates: 25g
- Fiber: 1g
- Protein: 3g
- Cholesterol: 50mg