
Oh my gosh, if there is one thing that instantly cures a long day, it’s the smell of warm, garlicky butter melting into cheese. Seriously, it’s the simplest kind of magic. Forget those fancy, complicated recipes you see on TV; I’m here to hand you the key to the ultimate comfort food bread—our Easy Cheesy Garlic Pull-Apart Bread. This recipe is the lifeline for busy weeknights when you need something impressive on the table fast. I’ve tested this exact method dozens of times, tweaking the garlic levels until it hits that perfect savory spot, so trust me when I say this wonderfully reliable recipe just *works*. You are minutes away from having the best homemade **cheese bread** you’ve ever tasted!
- Why This Easy Cheese Bread Recipe Is Your New Go-To Comfort Food Bread
- Ingredients for the Best Cheese Bread
- How to Make Cheesy Garlic Bread: Step-by-Step Instructions
- Baking the Perfect Warm Cheesy Loaf
- Variations on This Savory Bread Recipe
- Serving Suggestions for Your Cheesy Appetizer Bread
- Storage and Reheating Instructions for Leftover Cheese Bread
- Frequently Asked Questions About Making Cheese Bread
- Share Your Homemade Cheese Bread Creations
Why This Easy Cheese Bread Recipe Is Your New Go-To Comfort Food Bread
I know you’re busy, so I designed this **cheese bread** to be the absolute definition of effortless deliciousness. It’s not just good; it’s reliable. If you’re hunting for an amazing **cheesy appetizer bread** that doesn’t require any kneading or long proofing times, you’ve found the winner here. This **Savory Bread Recipe** is the secret weapon for last-minute guests or when movie night just demands something warm and cheesy.
Quick Prep for Melty Cheese Bread Recipe
Honestly, the prep barely takes 10 minutes. Ten minutes! That’s less time than it takes to find those misplaced oven mitts. This is truly a fantastic **Quick Cheese Bread** option, which means you can focus on enjoying the company instead of stressing over the oven. It’s perfect for when you need a satisfying side dish bread recipe *now*.
Achieving Gooey Cheese Bread Perfection
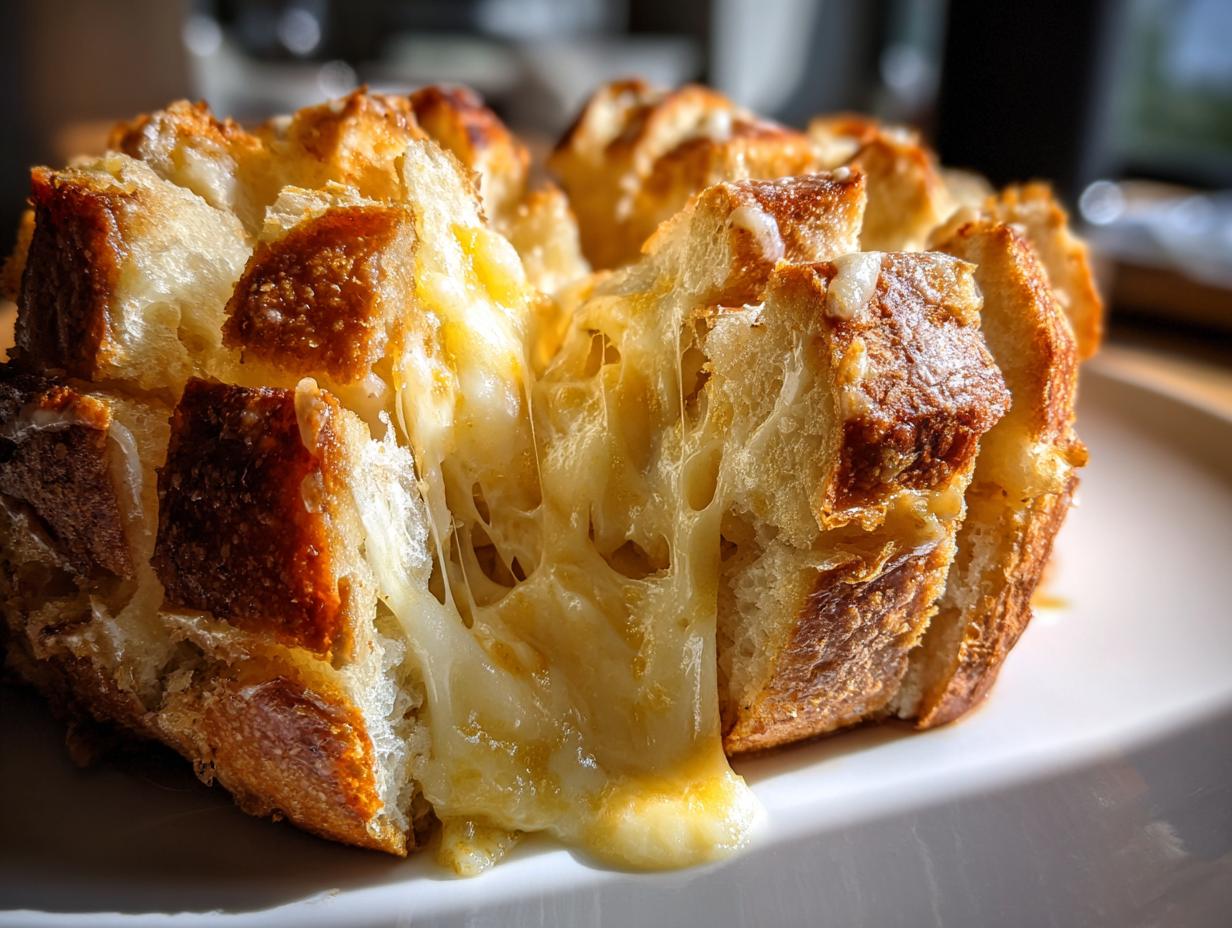
The texture is everything, right? We aren’t going for dry or hard here; we’re aiming straight for **Gooey Cheese Bread** status. By using a blend of mozzarella and cheddar, we get that incredible stretch and flavor combo you crave. The trick to the melt is wrapping it tightly in foil for the first bake. That forces all that butter and cheese steam to soak deep into the loaf before we expose it for that final golden finish.
Ingredients for the Best Cheese Bread
Okay, let’s talk about what you need to gather. This **Homemade Cheese Bread** recipe uses super accessible elements, but the quality matters! You’ll need one standard loaf of French or Italian bread, about half a cup of unsalted butter that’s been softened—and I mean *softened*, not melted. We’re also using four cloves of fresh garlic, minced scary-fine, plus our Italian herbs, salt, and pepper. And of course, the star of the show: cheese! Grab about 1 1/2 cups total of good melting cheese.
Ingredient Notes and Substitution Tips for Your Cheese Bread
Listen, if you want to take this over the top and make it truly spectacular, follow my lead and toss in about a quarter cup of grated Parmesan cheese along with your mozzarella and cheddar. Parmesan just adds that salty depth that screams quality! While I used Italian herbs, feel free to swap in dried dill or even a little smoked paprika if you’re feeling adventurous, though this recipe shines as a classic **Cheddar Cheese Bread**. If you don’t have a French loaf, any sturdy crusty loaf will work well, but make sure the bread is fresh enough to handle the gooey insides!
How to Make Cheesy Garlic Bread: Step-by-Step Instructions
Alright, let’s get this party started! I’m going to walk you through assembling this **cheese bread** so that every single bite is buttery, garlicky, and stuffed with melted goodness. We start by preheating that oven to 350 degrees Fahrenheit and getting a baking sheet ready with some parchment paper—that’s just good sense so cleanup is a breeze. Now, let’s mix up the flavor magic! Speaking of amazing appetizers, if you ever make my fresh tomato bruschetta, you’ll see how simple it is to build big flavor, just like we are doing here with this tomato basil appetizer.
Preparing the Garlic Butter Spread for Your Cheese Bread
In a small bowl, you’re going to combine that softened butter—remember, soft, not oily!—with your minced garlic, the Italian herbs, salt, and pepper. You want to mix this really well until everything is totally uniform. This mixture is what permeates the entire loaf with that amazing aroma. Get it smooth! It needs to be creamy so it slides easily into every crevice of the bread.
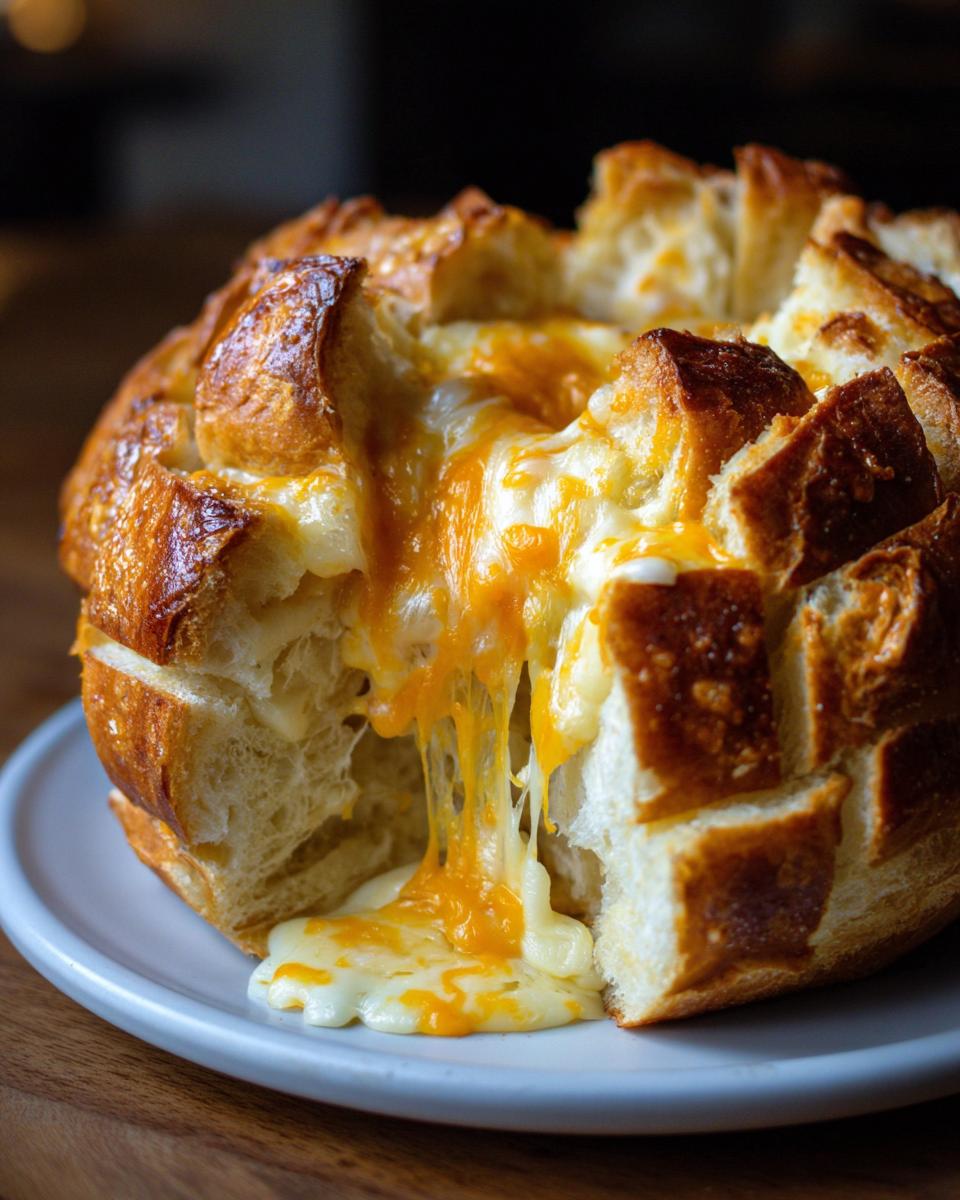
Assembling the Pull Apart Cheese Bread Loaf
This step is where the fun begins! Take your loaf and use a sharp knife to cut deep, crisscross slices across the top. I mean *deep* slices, cutting almost all the way through to the bottom, but be careful not to slice the bottom apart—we need that base to hold everything in! Next, you gently open those cuts and start slathering that glorious garlic butter deep inside. Then, take your shredded cheese and stuff it generously into every single gap. You want cheese hiding everywhere! This technique is what gives you that wonderful **Pull Apart Cheese Bread** experience when it comes out of the oven. If you want to see another incredible take on this style, you should check out the amazing Cheese and Garlic Crack Bread—it uses a similar concept!

Baking the Perfect Warm Cheesy Loaf
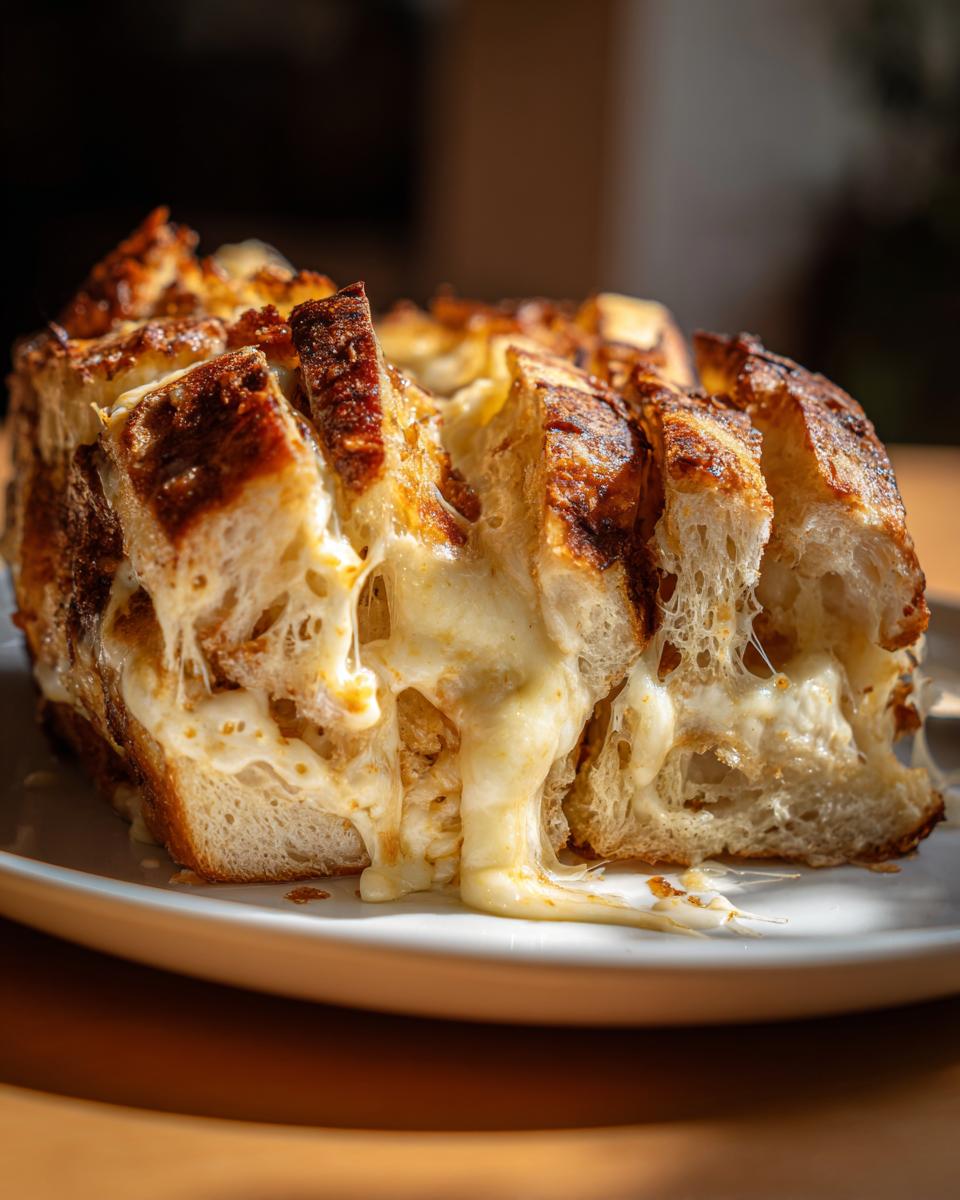
This is it—the moment of truth! We are turning this assembled loaf of potential into golden, bubbling **Warm Cheesy Loaf** perfection. The baking process here involves two crucial stages; don’t skip either one, or you won’t get that beautiful, infused flavor we’re aiming for. First up, we need to trap all that garlic butter goodness inside!
Preheat your oven to 350 degrees Fahrenheit. Once you’ve wrapped your loaf tightly in aluminum foil—like a little cheesy present—place it on your prepared baking sheet. Pop it in for 15 minutes. This wrapped time is essential because it steams the bread slightly, making sure that garlic butter soaks right down to the bottom layer and the cheese starts melting evenly from the inside out. It’s foolproof heat distribution, honestly!
After those initial 15 minutes, you carefully take off the foil. You want the top exposed now so it can brown up nicely. Slide it back into the oven for just another 5 to 7 minutes. Keep an eye on it; this second stage is fast! We want the cheese completely melted, bubbly, and just starting to turn golden brown on the peaks of the bread slices.
Pro Tips for Crispy Crust on Your Cheese Bread
If you truly want that bakery-style crust that cracks just right when you pull a piece off, I have a little secret weapon from my own kitchen experiments. Once the cheese is fully melted and looking gorgeous (around that 5-7 minute mark), you can switch your oven setting to broil! Yes, broil! BUT you have to stand right there and watch it like a hawk. I mean it—one minute is usually plenty, maybe even 45 seconds, to get those high spots extra brown and crispy without incinerating your incredible **cheese bread**.
If you leave it alone for even a second when the broiler is on, you risk turning that perfect golden brown crust into a smoky disaster. This is where that baker’s intuition comes in handy! If you prefer to play it safe, just stick to the 350°F bake time only. Either way, don’t forget to let it rest for two minutes after taking it out!
Variations on This Savory Bread Recipe
Sometimes, you just want to tweak things a bit, right? While this basic garlic and Italian herb combination is my absolute favorite for a classic **cheese bread**, I totally get the desire to personalize it for whatever you’re serving for dinner or just what you have hanging out in the fridge. The beauty of this recipe is that it’s so simple that it begs you to play around with the fillings. You can think of it as a truly versatile **Comfort Food Bread** base.
If you’re feeling fancy, swap out that cheddar for something with a bit more bite, like Gruyère, or maybe even a sharp white cheddar—that melts beautifully, by the way! A little smoked paprika tossed into the butter mixture gives you a completely different, warmer vibe, turning it into a smoky snack bread that’s fantastic for game day. Since we are already using cheese, a sprinkle of bacon bits when you add the cheese is a no-brainer addition for meat lovers!
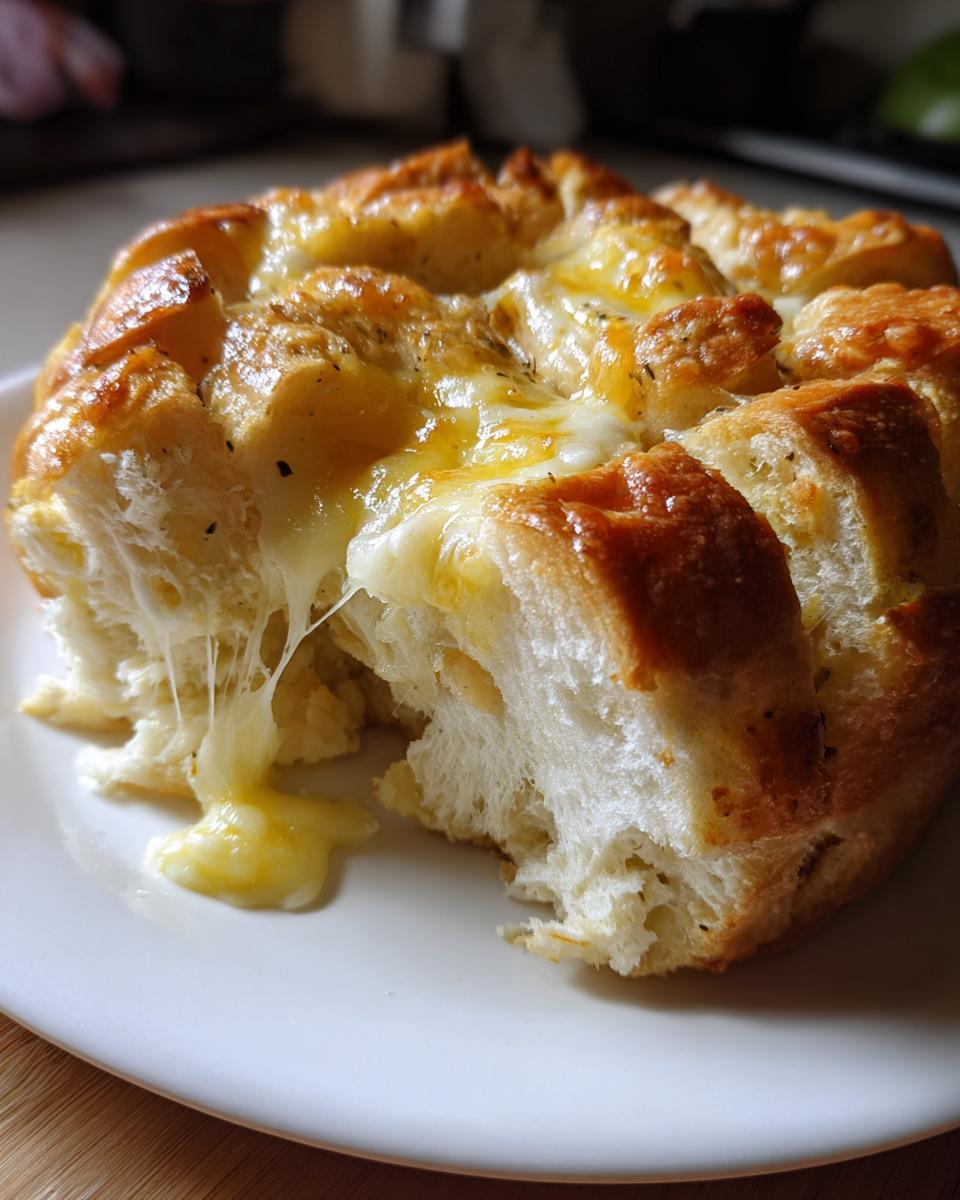
Making Italian Herb Cheese Bread
If you’re looking for that bright, quintessential Italian flavor that makes you think of lasagna night, lean heavily into the herbs! In the version I shared above, I used a standard Italian blend, but here’s where you crank it up. Add an extra half teaspoon of dried oregano and a tiny pinch of dried basil to your butter mix. If you want to see how herbs truly elevate a simple bread, you might enjoy my dedicated Italian Herb Cheese Bread recipe profile for inspiration on ratios!
Another great trick is adding a teaspoon of garlic powder alongside the fresh garlic. The fresh stuff gives you that initial sharp punch, but the powder sticks around a bit longer through the baking process, ensuring the crust sings with flavor. If you’re fascinated by recipes centered entirely around herbs, you should absolutely peek at how my friends handle their Italian Herbs and Cheese Bread—it’s a lovely variation!
Serving Suggestions for Your Cheesy Appetizer Bread
Okay, so you’ve pulled this glorious, shimmering loaf of **cheese bread** out of the oven, and the cheesy aroma is doing happy little dances around your kitchen. Now what? Well, this **Cheesy appetizer bread** is fantastic all by itself, honestly, but serving it up with the right companion takes it from “great snack” to “effortlessly impressive party spread.” You want something to dip into those buttery, garlicky crevices, right?
First, if you’re serving this as a main appetizer before dinner, you absolutely need a dip. Marinara sauce is a classic for a reason, especially since we already have those Italian herbs singing in the butter. But try swapping that out for a sharp, cool ranch dressing for a completely different flavor dynamic—the cool creaminess cuts right through the richness of the cheese.
This **cheese bread** also doubles perfectly as a spectacular **Side dish bread recipe**. It pairs unbelievably well with hearty, creamy soups. Think about how amazing this would be next to a big bowl of soup on a chilly evening. I personally love making a big batch of my creamy Broccoli Cheddar Soup when I make this loaf; the textures just complement each other perfectly. Don’t you dare try serving dry bread with soup when you could have this!
If you’re having people over for a football game or a casual get-together, skip the plain breadsticks and serve this instead! Everyone gravitates toward the pull-apart format. It’s interactive, it’s delicious, and because it comes together so fast, you’ll look like a culinary genius without even trying too hard. Happy pairing!
Storage and Reheating Instructions for Leftover Cheese Bread
Okay, let’s be real for a second. The way this **cheese bread** tastes fresh out of the oven—buttery, hot, with that dreamy stretchy cheese—is unmatched. It’s designed to be devoured immediately! However, sometimes life happens, and you end up with a cheesy hunk or two left over. Don’t panic and definitely don’t throw it away!
You can store leftovers at room temperature in an airtight container, but honestly, that gooey texture starts to fade pretty quickly. If you plan on saving it for more than a day, wrap the leftover loaf tightly in plastic wrap first, and then slip it into a zip-top bag or an airtight container to keep as much moisture in as possible before chilling it in the fridge. It will keep decently for about three days this way.
The Best Way to Reheat Your Cheese Bread for Gooey Results
Reheating is absolutely crucial if you want to bring that fresh-from-the-oven experience back. Microwaving it? Don’t do it! You’ll end up with rubbery bread. We need gentle, enveloping heat to wake up that cheese and soften the butter again. This method brings back the magic!
First, if your bread is a little dry, give it a small spray of water or melted butter where the cheese is visible, just to help introduce some steam. Then, wrap the entire loaf tightly—and I mean *tightly*—in aluminum foil. You want to seal in every bit of moisture.
Bake that foil-wrapped bread at 350 degrees Fahrenheit for about 10 to 12 minutes. Once it feels warm all the way through, unwrap the top foil layer, just like we did in the original bake. Pop it back in the oven for another 3 to 5 minutes until the cheese is perfectly bubbly and gooey again. It might take a minute longer than the first bake, but this two-step process replicates that original delicious texture perfectly!
Frequently Asked Questions About Making Cheese Bread
I know sometimes after reading a recipe, you still have a few burning questions, especially when you’re ready to jump into the kitchen! Don’t worry, that’s completely normal. I’ve gathered up the most common things folks ask me about this **Easy Cheese Bread Recipe** and answered them right here so you can bake with total confidence.
Can I use pre-sliced bread to make this cheese bread?
That’s a great question when you’re pressing for time! While I generally recommend using a whole, fresh loaf because a fresh loaf handles the stuffing and baking process better, you *can* use high-quality, thickly sliced bread if you must. If you use pre-sliced, just make sure you are cutting extra deep slices between the existing ones—don’t just rely on the factory slices! This helps the butter and cheese penetrate the whole thing better. It won’t quite be the same as the authentic **Homemade Cheese Bread** loaf, but it’ll still be delicious!
What if I don’t have Italian herbs on hand?
Oh, I’ve definitely been there! If you don’t have a pre-mixed Italian herb blend, don’t run to the store. You can easily make your own blend right now with things you probably already have. Just mix a little dried oregano, a pinch of dried basil, some dried thyme, and maybe a tiny bit of dried rosemary. That combination works perfectly for this **Cheesy Garlic Bread**. If you keep forgetting to buy herbs, you can skip them entirely and just rely on the fresh garlic, salt, and pepper, but the herbs really do add that extra savory lift.
Is this recipe considered a no-knead cheese bread?
Yes, absolutely! Since we are using store-bought bread as our base, there is zero kneading required, which is why this is such a fantastic solution for a quick appetizer. It’s what makes this recipe one of my favorite super-fast **Comfort Food Bread** options. If you are looking for more bread recipes that skip the kneading process entirely, I have a lovely easy pumpkin bread recipe that follows a similar ‘mix-and-bake’ philosophy.
Can this cheese bread be made ahead of time?
You can certainly assemble this ahead of time, which is a lifesaver for parties! Mix your garlic butter and stuff the bread with the cheese. Wrap the whole thing tightly in foil and keep it refrigerated for up to 24 hours. When you’re ready to bake, just add about 5 extra minutes to the initial wrapped baking time because the loaf will be cold when it hits the oven. For more great make-ahead ideas, you can see some awesome serving inspiration from this Cheddar Cheese Quick Bread guide!
What is the best type of cheese for the melty result?
While the recipe calls for a mix of mozzarella and cheddar, I always point people toward low-moisture mozzarella. Fresh mozzarella is lovely, but it holds too much water, which can make your loaf a little soggy instead of gooey. Lower moisture cheese melts beautifully and stretches nicely without weeping everywhere. The cheddar gives you that sharp flavor kick, and the mozzarella provides the classic elastic stretch for that perfect **Melty Cheese Bread Recipe** experience!
Share Your Homemade Cheese Bread Creations
Now that your kitchen smells like the coziest place on earth and you’ve successfully devoured this fantastic **cheese bread**, I absolutely need to hear about it! Seriously, my goal for Kings Cook is to build a community right here where we can cheer each other on in the kitchen, so I want to know how your **Garlic Cheese Bread** turned out.
Did you manage to get that crispy crust we talked about using the broiler? Or did you try sneaking in some Parmesan cheese like I suggested? Please leave a brief comment below letting me know your rating out of five stars. Seeing your successes—especially when you tackle a new savory recipe—is honestly the best part of my job!
And if you snapped a picture of your gooey, golden loaf waiting to be pulled apart (and who wouldn’t?), tag me on social media! I love reposting your kitchen wins. You can find me on all the platforms, just look up Kate Connolly or Kings Cook. I always check those tags for amazing food inspiration. For those of you curious about me or want to see more of my philosophy on making home cooking accessible, you can always read a bit more on my About Page.
Thank you so much for baking with me today. Enjoy every single cheesy, buttery pull!
PrintEasy Cheesy Garlic Pull-Apart Bread
This recipe shows you how to make warm, buttery pull-apart bread stuffed with melted cheese and garlic flavor. It is a quick appetizer perfect for parties or cozy nights.
- Prep Time: 10 min
- Cook Time: 22 min
- Total Time: 32 min
- Yield: 6 servings 1x
- Category: Appetizer
- Method: Baking
- Cuisine: American
- Diet: Vegetarian
Ingredients
- 1 loaf (about 1 pound) French or Italian bread
- 1/2 cup (1 stick) unsalted butter, softened
- 4 cloves garlic, minced
- 1 teaspoon dried Italian herbs
- 1/4 teaspoon salt
- 1/4 teaspoon black pepper
- 1 1/2 cups shredded cheese (a mix of mozzarella and cheddar works well)
Instructions
- Preheat your oven to 350 degrees Fahrenheit. Prepare a baking sheet by lining it with parchment paper.
- In a small bowl, combine the softened butter, minced garlic, Italian herbs, salt, and pepper. Mix until the butter is evenly flavored.
- Take the loaf of bread and cut deep, crisscross slices across the top, cutting almost all the way through to the bottom, but do not cut the loaf completely in half.
- Carefully spread the garlic butter mixture into the cuts you made in the bread, ensuring the butter reaches the bottom of the slices.
- Generously stuff the shredded cheese down into the cuts between the bread slices. Press the cheese down gently so it settles into the loaf.
- Wrap the entire loaf tightly in aluminum foil.
- Bake for 15 minutes while wrapped.
- Carefully unwrap the foil, leaving the top exposed. Return the bread to the oven and bake for another 5 to 7 minutes, or until the cheese is fully melted and bubbly.
- Let the bread cool for 2 minutes before serving warm. You can pull the pieces apart easily.
Notes
- For extra flavor, you can add 1/4 cup of grated Parmesan cheese along with the shredded cheese.
- If you want a crispier crust, place the unwrapped bread under the broiler for 1 minute at the end, watching closely to prevent burning.
- This bread is best served immediately while the cheese is gooey.
Nutrition
- Serving Size: 1 slice
- Calories: 280
- Sugar: 1
- Sodium: 450
- Fat: 18
- Saturated Fat: 10
- Unsaturated Fat: 8
- Trans Fat: 0
- Carbohydrates: 20
- Fiber: 1
- Protein: 10
- Cholesterol: 45