
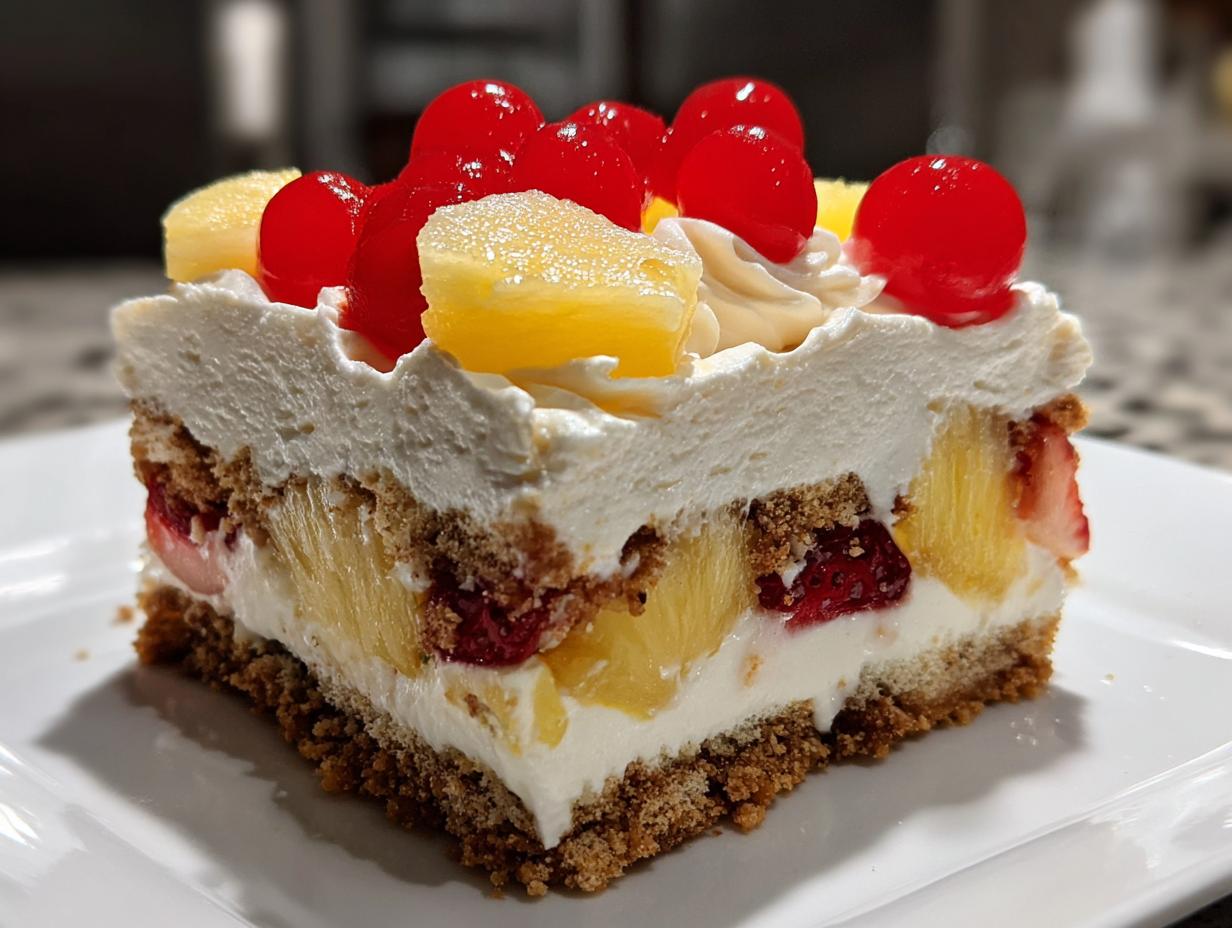
When the heat of summer hits, the last thing I want to do is turn on my oven. Seriously, who wants to bake when you could be relaxing outside? That’s why I’m always hunting for dazzling desserts that deliver maximum flavor with next to zero effort. Enter my absolute favorite discovery: the banana split cake. This isn’t just any dessert; we’re talking about capturing all those nostalgic, perfect ice cream parlor moments—the creamy filling, the sweet fruit, the crunchy base—all tucked into one gorgeous, chilled pan.
Here at Kings Cook, my promise is always recipes that actually work, every single time. You don’t need complicated techniques or weird ingredients here! This incredible no-bake treat proves you can pull off something spectacular for your next gathering. Trust me when I say, this creamy, layered beauty is about to become your go-to summer solution. Let’s get this assembled!
- Why This No Bake Banana Split Cake is Your New Favorite Summer Party Cake
- Gathering Ingredients for Your Banana Split Cake
- Step-by-Step Instructions for the Easy Layered Dessert
- Tips for Success Making the Perfect Banana Split Cake
- Make Ahead Dessert Recipe: Storing Your Banana Split Cake
- Serving Suggestions for This Crowd Pleasing Layered Cake
- Frequently Asked Questions About Your Banana Split Cake
- Nutritional Estimates for This Easy Summer Dessert
- Share Your No Bake Banana Split Cake Creations
Why This No Bake Banana Split Cake is Your New Favorite Summer Party Cake
If you ask me what screams “easy entertaining,” it’s this No Bake Banana Split Cake. The best part? We don’t even have to turn on the oven! When the thermometer jumps, I look for guaranteed wins, and this recipe is just that. It’s the ultimate Easy Layered Dessert because the assembly is quick—maybe 25 minutes max—and then it just chills itself to perfection in the fridge.
I remember making this for the Fourth of July two summers ago; everything was running late, and I almost served packaged cookies. Oops! But then I remembered this setup in the fridge. It pulled out looking absolutely stunning! It’s definitely my current go-to Potluck Perfect Dessert because everyone gravitates toward those familiar, fruity, retro dessert flavors. It looks way fancier than the effort it actually requires, which is really the goal, isn’t it?
Gathering Ingredients for Your Banana Split Cake
Okay, let’s talk what you need to grab from the store. Since this is a no-bake concept, the quality of your components really shines through, so don’t skimp! We mostly rely on that crisp graham cracker crust, the smooth, creamy filling, and a bounty of colorful fruit. Check your pantry first; sometimes you already have every single thing needed for this Crowd Pleasing Layered Cake.
Here is what you need for this fantastic assembly:
- 1 1/2 cups graham cracker crumbs
- 1/2 cup unsalted butter, melted
- 8 ounces cream cheese, softened
- 1 cup powdered sugar
- 1 teaspoon vanilla extract
- 1 large tub (12 ounces) frozen whipped topping, thawed, divided
- 3 ripe bananas, sliced
- 1 cup crushed pineapple, well drained
- 1 cup fresh strawberries, sliced
- 1/2 cup maraschino cherries, drained and halved
- Optional: 1/4 cup chopped nuts or chocolate syrup for topping
Ingredient Notes and Substitutions for Your Creamy Fruit Dessert
Listen, the success of this Creamy Fruit Dessert relies on a couple of little secrets. First and maybe most importantly: you absolutely MUST drain that crushed pineapple. I mean, really wring it out! If it’s wet, your layers will slide right off each other. I usually press mine between a few heavy layers of paper towels. Also, use bananas that are ripe—yellow with maybe a few freckles—but not brown mushy ones, or they’ll break down too fast.
If, for some wild reason, you don’t have graham cracker crumbs, you can totally use Nilla Wafers or even shortbread cookies for the base of this No Bake Banana Split Cake. Just crush them up fine like you would the crackers! It gives a nice buttery flavor to your crust.
Step-by-Step Instructions for the Easy Layered Dessert
This is where the magic happens, and honestly, it’s so straightforward! Since this is a no bake banana split cake, every visual appeal comes from the layering, so take your time and enjoy the process. We are building this beautiful tower of flavor right in the 9×13 pan, meaning zero extra things to wash later—always a win in my book! Remember, the secret to any good layered dessert is patience between steps, especially when it comes to chilling stuff down.
We move fast in the beginning, but we save the longest wait for the end. If you’re short on time, check out my easy lunch ideas while waiting for this to set up!
Preparing the Graham Cracker Crust Desserts Base
First thing’s first: let’s get that foundational crunch done. Mix up your graham cracker crumbs and melted butter right in the dish you plan to serve from—really! Then, use the bottom of a measuring cup to press that mixture down firmly and evenly across the base. Make sure there are no weak spots! Pop that dish into the freezer while you whip up the next layer. That quick chill helps lock the butter in so the crust doesn’t end up soggy later on.
Building the Cream Cheese and Whipped Cream Layer Cake
Next up is the creamy heart of the cake! Beat that softened cream cheese until it’s completely lump-free. Slowly beat in your powdered sugar and vanilla. Now, here’s a critical step for your Whipped Cream Layer Cake: take half of your thawed whipped topping and gently *fold* it in. Don’t use the electric mixer here! Folding keeps the air in, so you get light clouds instead of heavy paste. Spread this mixture carefully over your chilled crust.
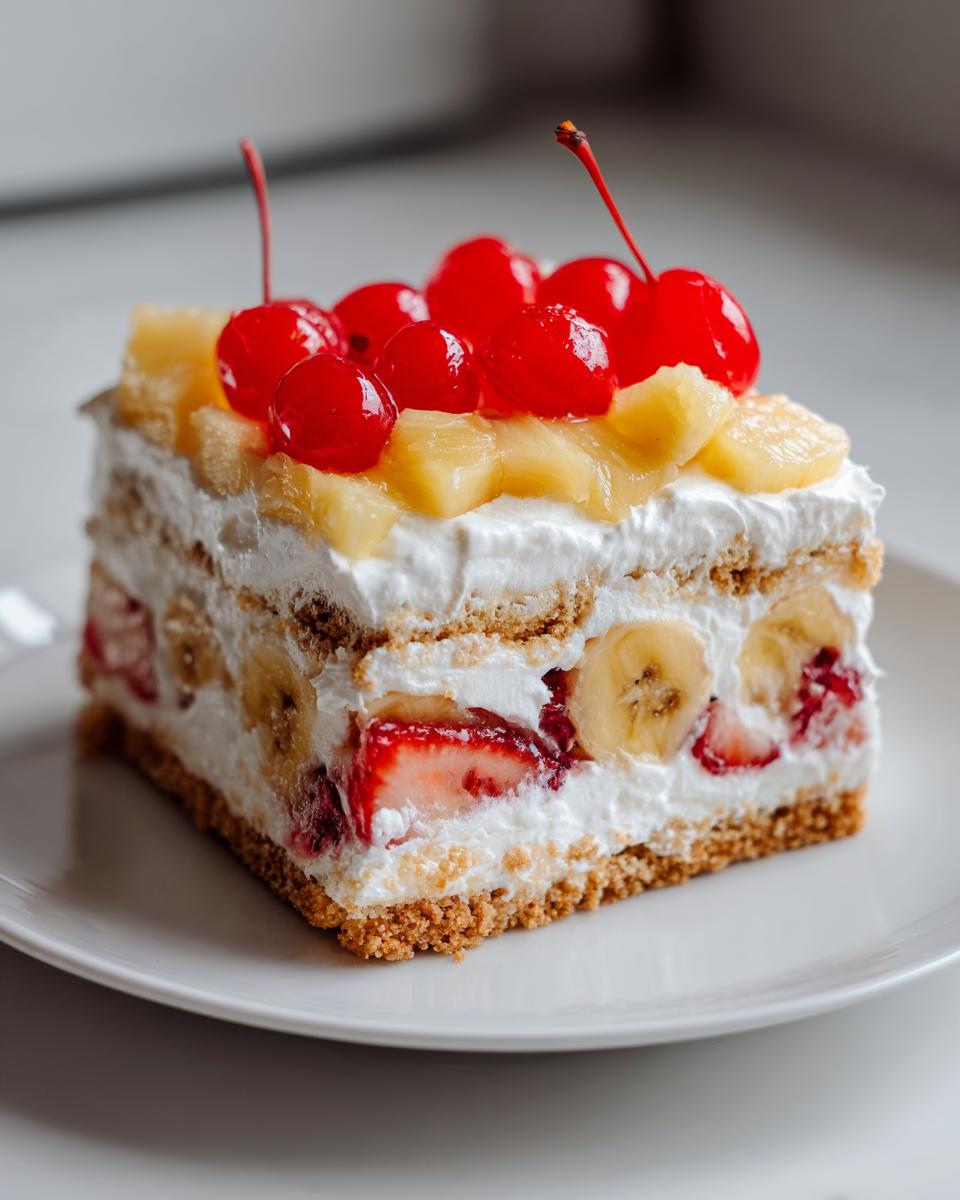
Layering Fruit for the Pineapple Strawberry Banana Dessert
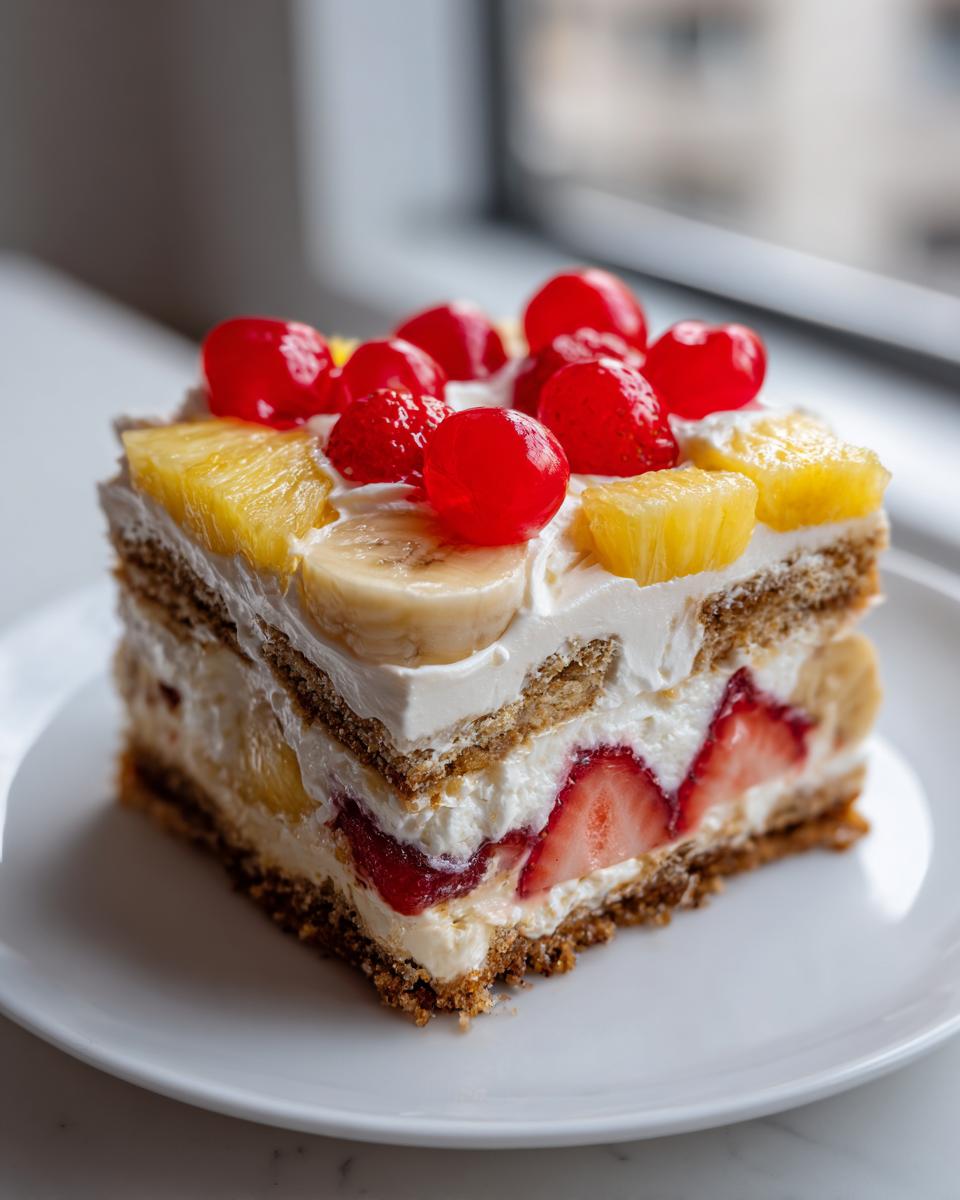
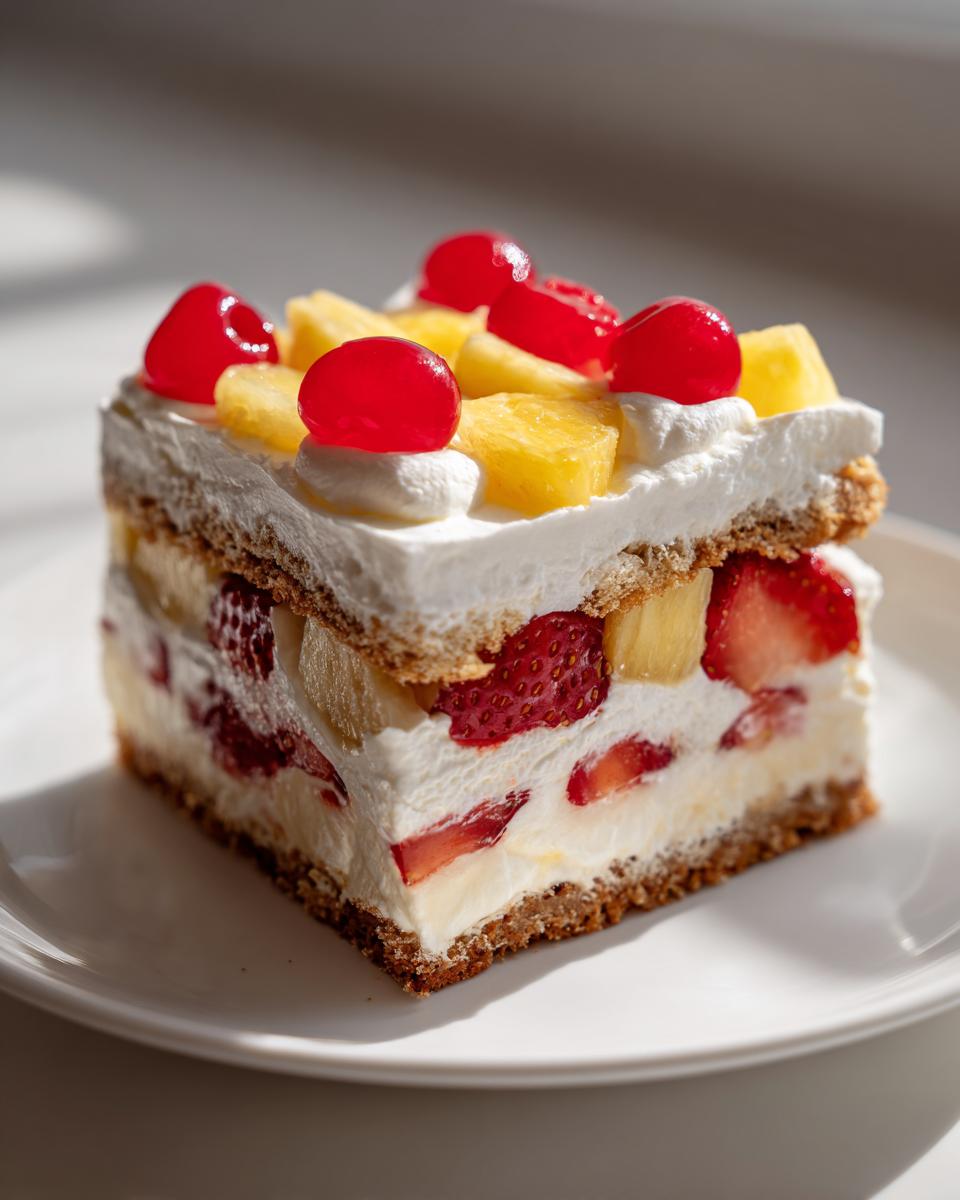
This is the fun, colorful part! Arrange your fresh banana slices neatly on top of the cream cheese base. Then, sprinkle that super-drained crushed pineapple evenly across the bananas. Follow that up gently with your sliced strawberries. Remember what I said earlier? If you didn’t drain that pineapple well, this is where you’ll see trouble! Even fruit distribution means everyone gets a bite of that perfect Pineapple Strawberry Banana Dessert mixture.
Tips for Success Making the Perfect Banana Split Cake
Achieving that perfect, firm set in your Chilled Banana Dessert takes just a couple of extra considerations. My biggest piece of advice for keeping this a truly refreshing, non-sloppy mess is that chilling time I mentioned earlier. Don’t cheat it! Giving it four hours minimum will let the cream cheese layer firm up around the fruit beautifully.
When it comes to presentation, save that remaining half of the whipped topping until the very last minute before you put the cherries on. If you put the topping on too early, or if it starts getting warm before going into the fridge, it can deflate. Arrange the cherry halves cut-side down for a cleaner, more retro look if you want to really impress people at your gathering!
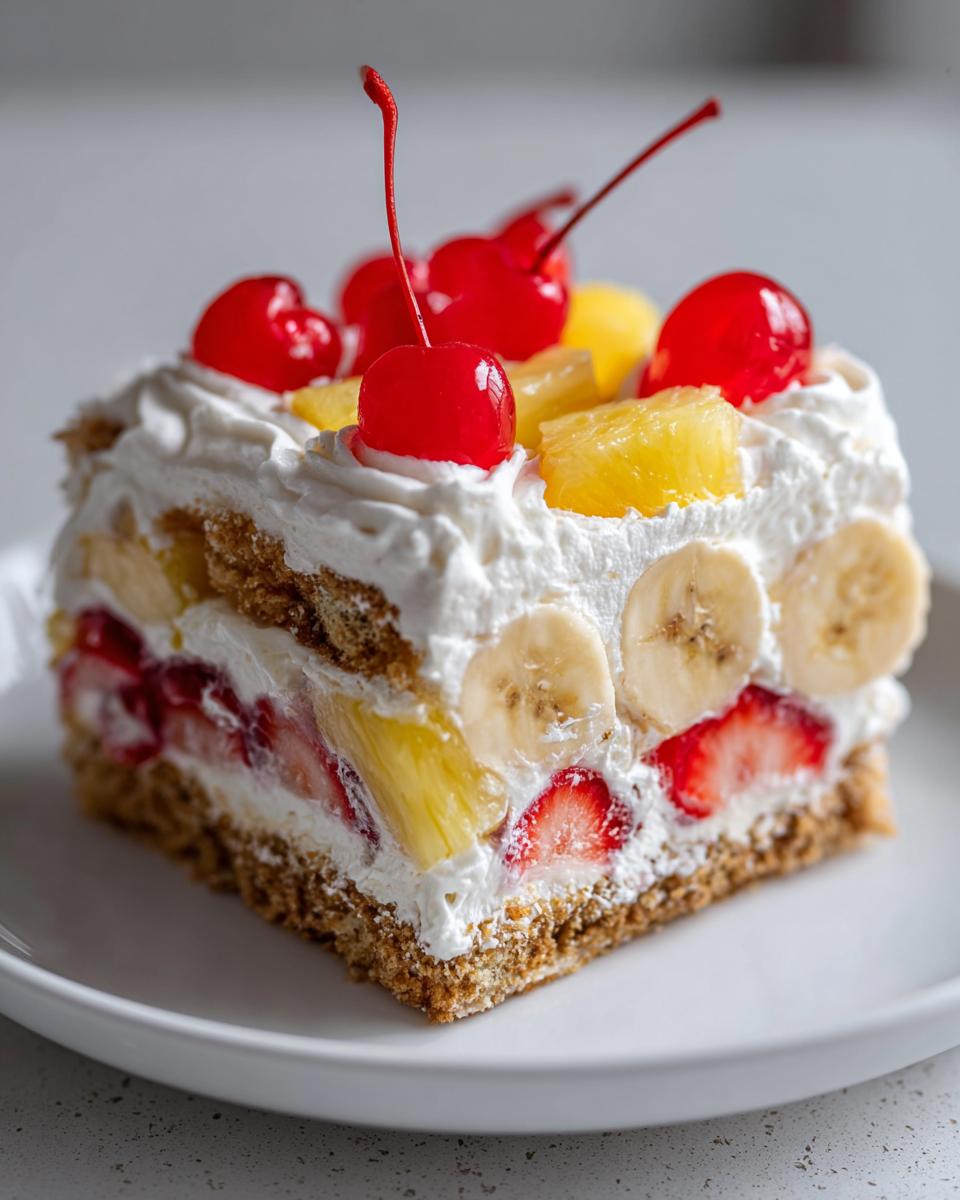
Also, when slicing your banana split cake, use a very sharp knife dipped in hot water and wiped clean between each cut. That trick keeps the creamy layers looking sharp and gorgeous, not dragged and messy. You want those layers looking distinct!
Make Ahead Dessert Recipe: Storing Your Banana Split Cake
This is exactly why this dessert rocks for planners like me! Since this is a Make Ahead Dessert Recipe, you can totally take the stress out of party day. I often assemble the whole thing the day before a big barbecue or potluck. That long chill time isn’t just helping it set; it’s actually making the flavors deepen and marry together beautifully. It’s one of those rare recipes where the second day tastes even better than the first!
You need to keep it covered tightly in plastic wrap, either directly against the topping or tented slightly so the plastic doesn’t mess up your pretty cherry arrangement. I find that keeping it in the 9×13 dish it was made in is best for stability. It stays perfect in the refrigerator for up to three days. If you are making it for a weeknight dinner surprise, know that day one is the best for the crust texture, but day two is amazing for flavor fusion.
Now, should you freeze this? Here’s where I have to draw the line. Because we are using fresh bananas, cream cheese, and whipped topping, freezing this isn’t my recommendation. The cream cheese layer can get a little grainy when thawed, and the whipped topping just doesn’t handle the freeze-thaw cycle well. It tends to weep a lot. So, for the best result, stick to the fridge! If you have leftovers after a couple of days, eat them quickly!
Serving Suggestions for This Crowd Pleasing Layered Cake
Even though this dessert is a complete showstopper on its own, I always like to offer a little something extra on the side for my guests! Because the cake is so rich and creamy, you don’t want anything too heavy. A side of toasted, chopped pecans or walnuts is divine for adding that last pop of crunch right before serving.
If you are serving this at a backyard gathering, pairing it with something simple and refreshing contrasts nicely. I love setting out small glasses of sparkling water with a mint sprig, or maybe even a very light, chilled lemonade. It keeps the focus right where it belongs: on the cold, sweet layers of your amazing banana split cake!
Frequently Asked Questions About Your Banana Split Cake
It seems like whenever I share a picture of this dessert, folks have a ton of smart questions, which I love! You want to make sure your Retro Dessert Ideas turn out absolutely perfect, right? I’ve gathered up the most common things I get asked about this amazing No Oven Needed Sweets recipe.
Can I substitute the whipped topping in this banana split cake?
That’s a great question about managing the volume! The frozen whipped topping is fantastic because it’s so stable and fluffy, which is what gives us that airy feel in the middle. If you can’t find it, you want to replicate that lightness. You can definitely make your own stabilized whipped cream by whipping heavy cream with a bit of powdered sugar and a teaspoon of clear vanilla extract until stiff peaks form. Be careful when folding that into the cream cheese mixture—fold it gently so you don’t deflate all the lovely air you just whipped into it!
Using a standard cream cheese frosting instead won’t give you the same light texture; it will make the filling much denser, almost like a cheesecake, which changes the whole vibe of this Easy Layered Dessert.
Is this banana split cake recipe better than a dump cake variation?
That’s like asking me to choose a favorite child! Dump cakes are fantastic for pure ease—you literally dump ingredients and bake. However, for this specific experience, I absolutely prefer the layered, no-bake approach for the banana split cake. Why? Because the texture!
The dump cake gives you a cakey, sometimes slightly gooey bottom layer once baked, and it’s warm. This recipe delivers a cold, supremely creamy, defined structure. When you slice into this Simple Summer Sweets beauty, you get clean layers of graham crust, smooth cream cheese filling, and distinct fruit slices. A dump cake mixes things up too much for me when I want that classic banana split feel!
We want those crisp layers, and only the chilling process can truly lock those in perfectly.
Can I use pre-sliced frozen bananas?
Oh gosh, please don’t use frozen bananas here unless you’re planning on defrosting them completely, and even then, I wouldn’t recommend it. Frozen bananas tend to get super watery and mushy once they thaw, turning your beautiful layers into soup. Stick to fresh, ripe bananas and slice them right before you layer them onto that cream cheese base. That freshness is key to a great Chilled Banana Dessert!
How long will this banana split cake last in the fridge?
Because this dessert relies heavily on fresh fruit—especially the bananas—I honestly think it’s at its absolute peak within the first 24 hours. It can safely hang out in the fridge for up to three days, covered tightly. After day two, the bananas might start looking a bit sad and brown, even sitting under the whipped topping. If you notice the bananas browning, just scoop that topping off the top and replace it with a fresh layer before serving day three!
Nutritional Estimates for This Easy Summer Dessert
Now, I’m Kate, and while I preach comfort food and joy over everything, I also studied nutrition, so I know you’re curious! Since this is a rich, creamy, layered piece of heaven, it does have some substance. Keep in mind that these numbers are just estimates based on the standard measurements in the recipe—your exact brand of whipped topping or butter will change things slightly, of course. But it gives you a great ballpark idea for your Easy Summer Dessert!
For one generous serving slice of this wonderful No Bake Banana Split Cake, here’s what the numbers generally look like:
- Serving Size: 1 slice
- Calories: 350
- Fat: 18g
- Saturated Fat: 10g
- Carbohydrates: 45g
- Sugar: 30g (Yes, a bit high, it’s cake!)
- Protein: 4g
This is definitely an indulgence, but remember that it’s chilled, not baked, and it’s packed with fresh fruit, so we can feel good about that! You’re getting a lot of flavor for those 350 calories, and honestly, when you bring this gorgeous creation to a party, nobody is counting!
Share Your No Bake Banana Split Cake Creations
Alright, my friend, that’s it! You have officially created one of the best, easiest, show-stopping desserts for summer. Now that you’ve pulled that glorious, chilled masterpiece out of the fridge, I desperately want to see it!
When you serve up this Easy Layered Dessert at your next gathering, please snap a picture! Tag me on social media—I want to see those vibrant cherry tops and beautifully defined layers. Hearing from you all is seriously the best part of running Kings Cook. If you loved this recipe, drop a quick star rating right below—it helps other home cooks like us find reliable recipes!
If you want to see more incredible, low-effort, high-reward recipes, feel free to browse my contact page here, or maybe check out what others have been cooking up, like this delicious take on the no-bake banana split cake recipe I mentioned earlier!
Thank you so much for cooking with me today. I hope this banana split cake brings smiles to your table. Happy cooking, everyone!
PrintNo-Bake Banana Split Layered Dessert Cake

You can create this creamy, chilled No-Bake Banana Split Cake that captures all the classic ice cream parlor flavors. This easy layered dessert is perfect for summer parties or potlucks and requires no oven time.
- Prep Time: 25 min
- Cook Time: 0 min
- Total Time: 4 hr 25 min
- Yield: 12 servings 1x
- Category: Dessert
- Method: No Bake
- Cuisine: American
- Diet: Vegetarian
Ingredients
- 1 1/2 cups graham cracker crumbs
- 1/2 cup unsalted butter, melted
- 8 ounces cream cheese, softened
- 1 cup powdered sugar
- 1 teaspoon vanilla extract
- 1 large tub (12 ounces) frozen whipped topping, thawed, divided
- 3 ripe bananas, sliced
- 1 cup crushed pineapple, well drained
- 1 cup fresh strawberries, sliced
- 1/2 cup maraschino cherries, drained and halved
- Optional: 1/4 cup chopped nuts or chocolate syrup for topping
Instructions
- Prepare the crust: Mix the graham cracker crumbs and melted butter in a medium bowl until the crumbs are evenly moistened. Press this mixture firmly into the bottom of a 9×13 inch baking dish. Place the crust in the freezer while you prepare the filling.
- Make the cream cheese layer: In a large bowl, beat the softened cream cheese until smooth. Gradually beat in the powdered sugar until fully combined. Mix in the vanilla extract. Gently fold in half of the thawed whipped topping until just combined.
- Assemble the first layer: Spread the cream cheese mixture evenly over the chilled graham cracker crust.
- Layer the fruit: Arrange the sliced bananas over the cream cheese layer. Sprinkle the well-drained crushed pineapple evenly over the bananas. Arrange the sliced strawberries over the pineapple layer.
- Add the topping: Gently spread the remaining half of the whipped topping over the fruit layers.
- Garnish: Decorate the top with the halved maraschino cherries. If you wish, drizzle with chocolate syrup or sprinkle with chopped nuts for extra flavor.
- Chill: Cover the dish loosely with plastic wrap and refrigerate for at least 4 hours, or preferably overnight, to allow the layers to set completely. This chilling time is essential for the best texture.
- Serve: Cut into squares and serve this easy summer dessert cold.
Notes
- Make sure the crushed pineapple is very well drained; excess liquid will make the cake watery. Press the pineapple between paper towels to remove as much moisture as possible.
- For the best results, use a 9×13 inch dish for even layering. If you use a smaller dish, you may need to increase the ingredient quantities.
- This make ahead dessert recipe tastes best when chilled for a full 8 hours or overnight.
Nutrition
- Serving Size: 1 slice
- Calories: 350
- Sugar: 30
- Sodium: 210
- Fat: 18
- Saturated Fat: 10
- Unsaturated Fat: 8
- Trans Fat: 0
- Carbohydrates: 45
- Fiber: 2
- Protein: 4
- Cholesterol: 45