
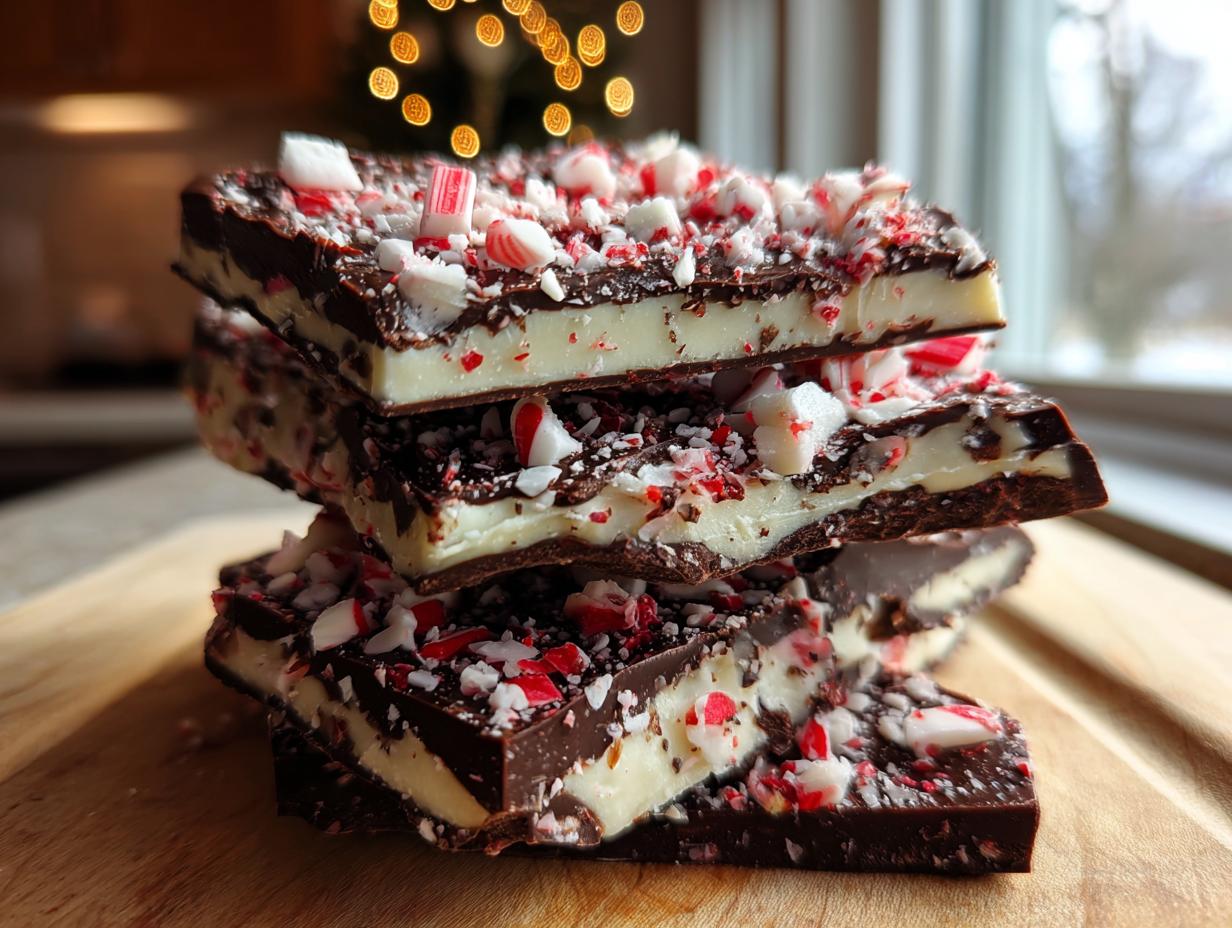
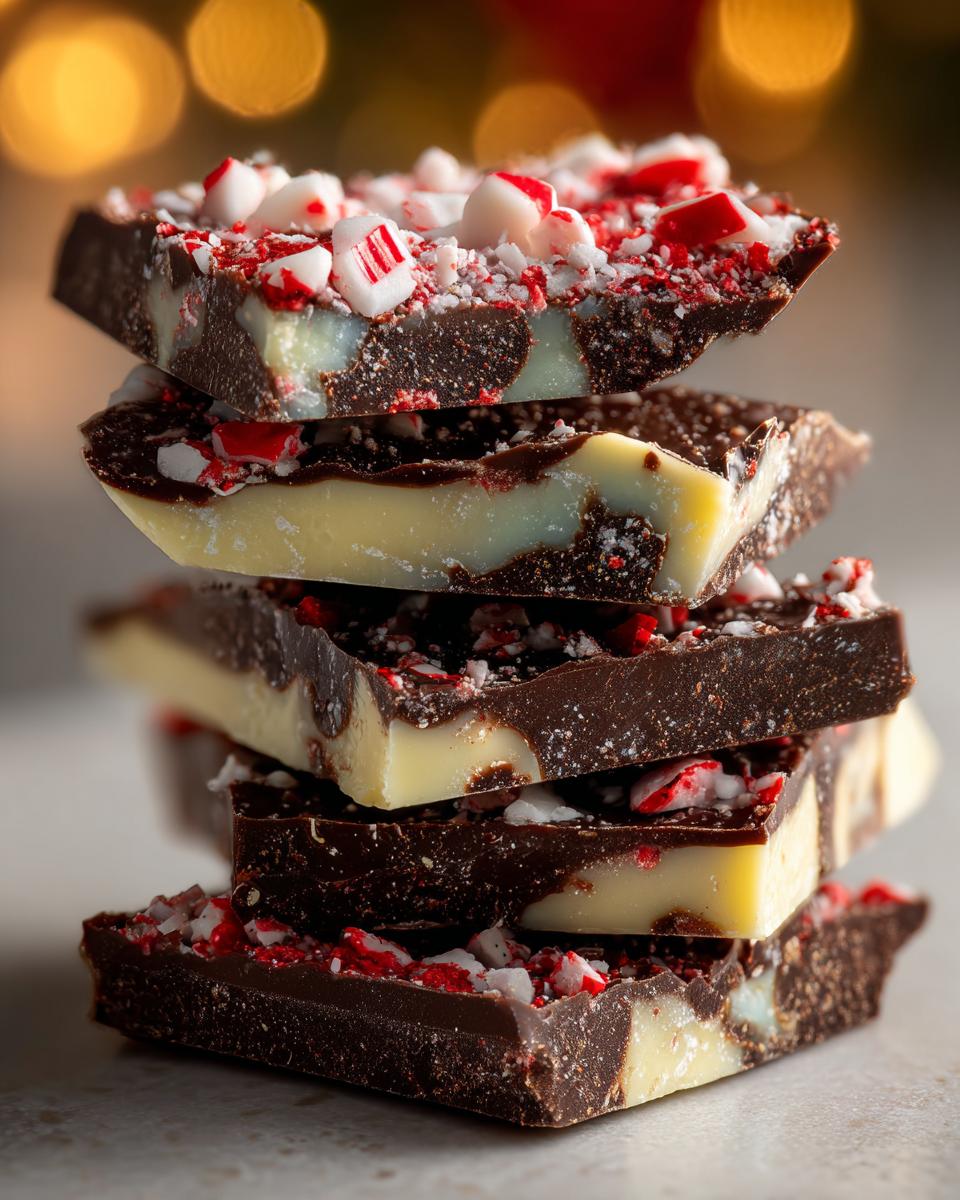
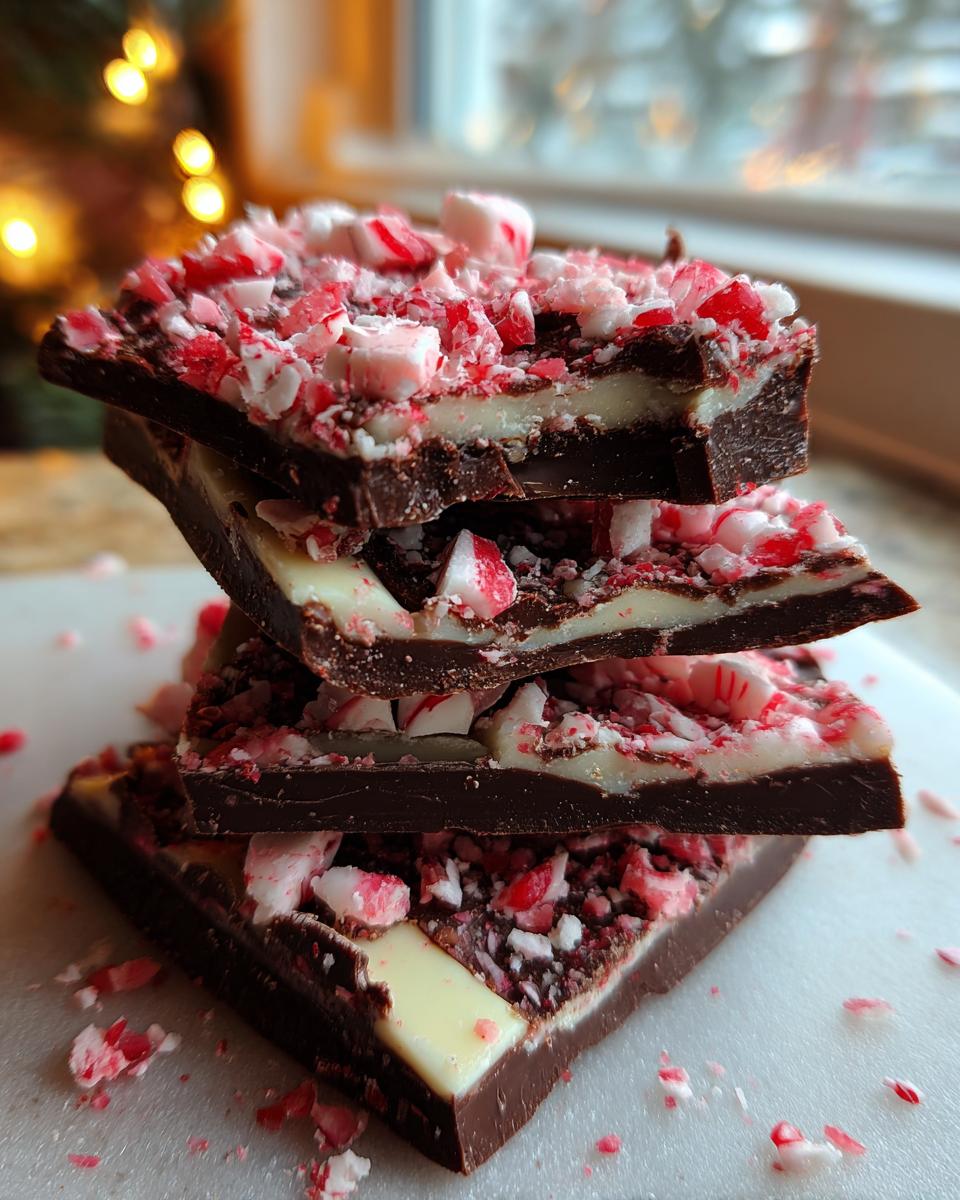
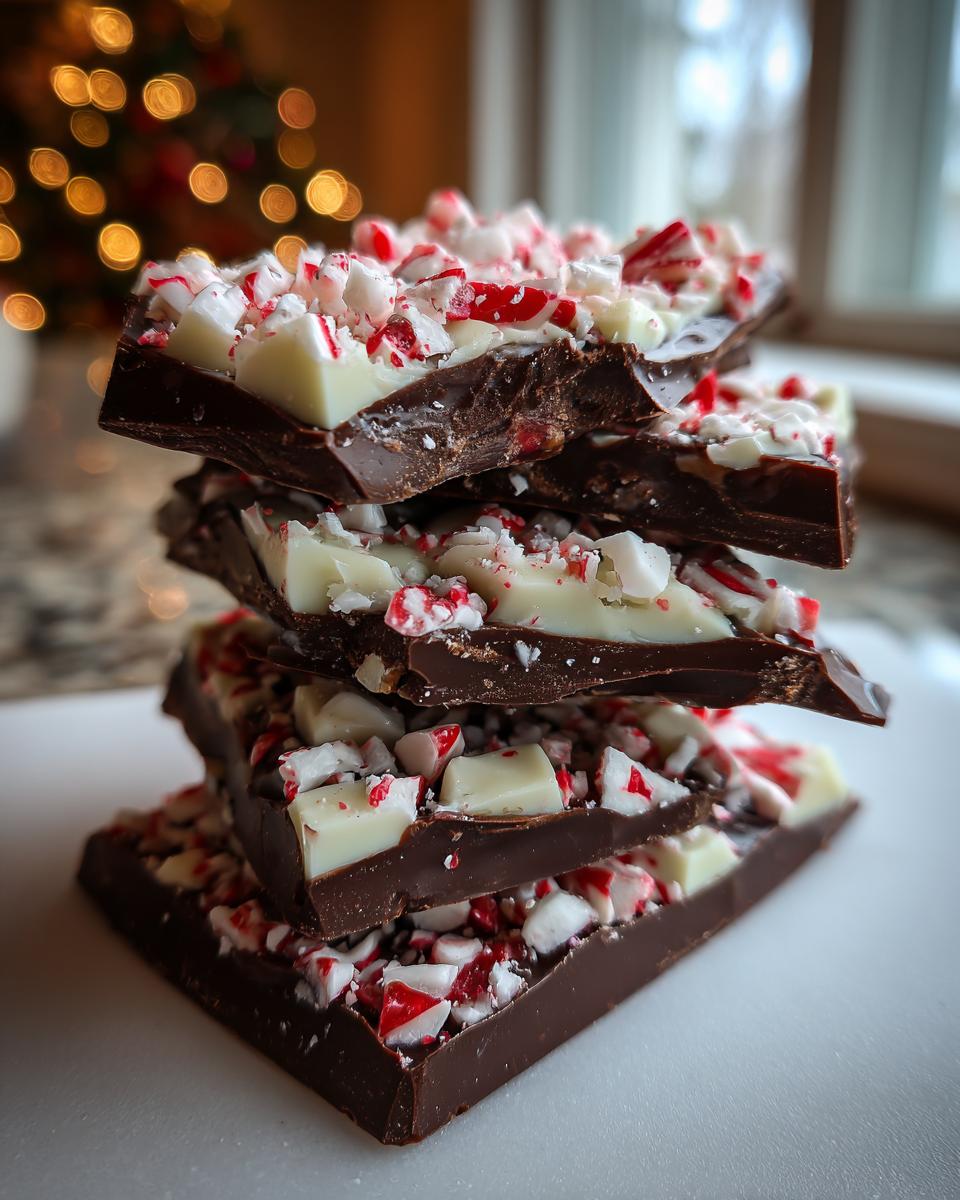
Oh my goodness, are you feeling that holiday crunch yet? Between finding the perfect gifts and planning all those big meals, sometimes the thought of baking feels like just another stressful chore. But hold on! I promise you don’t need hours in the kitchen to make something absolutely festive and delicious. That’s why I’m spilling the secret on the ultimate stress-buster: my **peppermint bark**. It’s ridiculously easy—only three ingredients and absolutely no oven time required! Just like everything else here at Kings Cook, I tested this recipe until it was foolproof. This batch of **peppermint bark** is guaranteed to give you that perfect, confident holiday win every single time, just right for every American home cook.
- Why This Easy Peppermint Bark Recipe Works for the Holidays
- Gathering Ingredients for Your Peppermint Bark
- Step-by-Step Instructions for Easy Peppermint Bark
- Tips for Perfect Homemade Holiday Candy
- Variations on Classic Peppermint Bark
- Serving Suggestions for Your Winter Chocolate Bark
- Frequently Asked Questions About Peppermint Bark
- Estimated Nutritional Data for Peppermint Bark
- Share Your Simple Christmas Sweets Creations
Why This Easy Peppermint Bark Recipe Works for the Holidays
When the holidays roll around, we’re all juggling so much, right? That’s why this **peppermint bark** is my number one go-to. It delivers that huge “Wow!” factor without any of the actual stress. Even if you’re deep into finding those best dessert recipes for your parties, this one saves the day because it’s a genuine, fast, **Quick Holiday Dessert**. You can pull this together while the oven is busy with something else entirely!
The Magic of 3-Ingredient Peppermint Bark
Seriously, three things! Dark chocolate, white chocolate, and those glorious candy canes. That’s it. You don’t need butter, cream, or complicated tempering techniques. This simple structure means minimal measuring and cleanup. It’s the perfect solution when you need a homemade treat fast.
Perfect for Gifting: Festive Chocolate Layers
If you’re looking for fantastic **DIY Edible Gifts**, stop looking! The visual pop of the dark base, the creamy white layer, and the bright red specks makes this look so professional. It’s stunning on a platter as an **Entertaining Holiday Dessert** item too. People always ask me how long it took, and I just smile!
Gathering Ingredients for Your Peppermint Bark
Okay, keeping this recipe simple doesn’t mean skimping on quality! Since there are so few components here, making sure you grab good ingredients really pays off. Remember, I tested these formulas rigorously so you get the best result possible on your first try. Here is what you need for our classic layers.
- 8 ounces dark chocolate, chopped
- 8 ounces white chocolate, chopped
- 1 cup crushed peppermint candies or candy canes
Ingredient Notes and Simple Substitutions
I know you guys have different needs in your pantries, so let’s talk substitutions quickly. This is where we make sure this recipe works for *you*. Since this uses naturally chocolate, it is already a wonderful option for anyone looking for **Gluten Free Peppermint Bark**, so yay for no worries there!
Now, if you need to make **Dairy Free Holiday Treats**, this is super easy to adjust. Just swap out the dark and white chocolate blocks for high-quality dairy-free baking chips. I really recommend checking the labels, though, because cheaper chips sometimes have weird additions that don’t melt as smoothly. For the best texture, look for chips that list cocoa butter high up on the ingredient list.
A quick note on the candy canes: you can use those classic ones or even those hard peppermint sticks. Just make sure they are fresh and won’t taste stale when you crush them up!
Step-by-Step Instructions for Easy Peppermint Bark
Alright, this is where the magic happens! Since this is a **no bake chocolate treat**, our active cooking time is minimal—it’s all about gentle melting and quick setting. I promise, if you follow these few steps, you’ll have the best **peppermint bark** ever. We are going to build those beautiful, thick, festive chocolate layers. If you’re looking for great ideas on where to serve this, check out some of my favorite appetizers and snacks later!
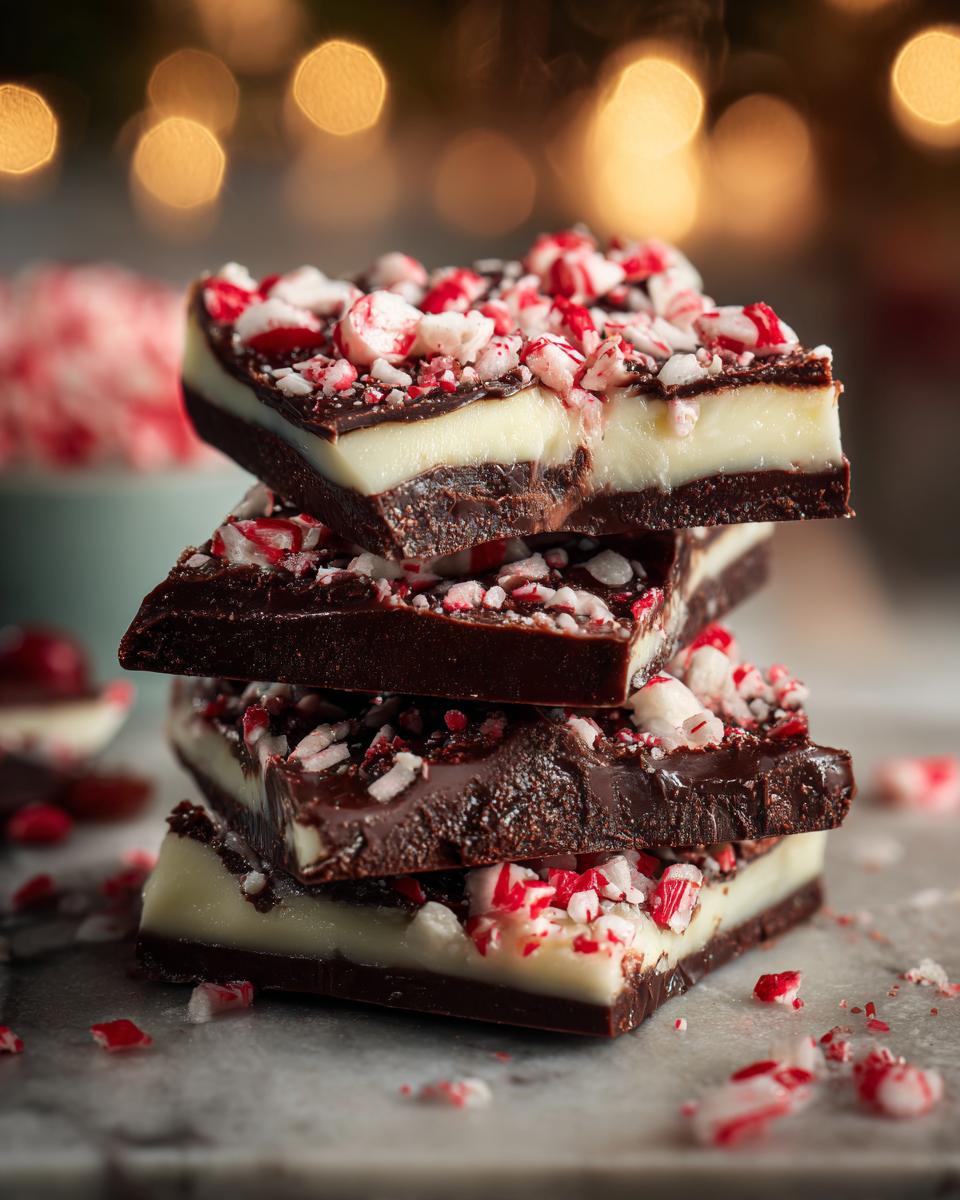
Preparing the Base Layer of Dark Chocolate Candy
First things first, grab that 8×8 inch pan and line it completely with parchment paper. Make sure you leave the paper draped over the sides—trust me, that overhang is your handle for getting the finished bark out later. Don’t skip that part! Now, take your chopped dark chocolate and place it in a microwave-safe bowl. Microwave it in short bursts—30 seconds at a time—stirring really well between each blast. This is crucial! If you overheat chocolate, it stops being smooth and starts getting chunky. We want velvety smooth!
Once it’s completely melted and glossy, pour that rich dark layer right into your prepared pan. Use a spatula to push it out gently into an even coating. Pop this pan into the fridge for about ten minutes. It needs to set up enough so that when the white chocolate goes on, they don’t just blend into one muddy layer.
Creating the White Chocolate Peppermint Topping
When the dark chocolate is just set (it should feel firm to the touch but maybe still cool), it’s time for the white chocolate. Melt your white chopped chocolate the exact same way—short intervals in the microwave, stirring constantly. Pour this beautiful, creamy layer right over the set dark base and smooth it out quickly. You have to work fast now!
Immediately, while the white chocolate is still wet, grab your crushed peppermint candies and sprinkle them evenly across the top. Don’t just dump them; try for a nice distribution. Then, gently press them down just a tiny bit so they stick securely. If you haven’t crushed your canes yet, now is the time: toss them in a heavy bag and use a rolling pin. That’s the easiest way to get that lovely crunch for your **candy cane bark**!
Setting, Breaking, and Storing Your Peppermint Bark
Now comes the hardest part: waiting! Put the whole pan back into the refrigerator for at least 30 minutes until that entire block is rock solid. Once it’s firm, use those trusty parchment overhangs to lift the whole thing out of the pan in one sheet. You want irregular pieces, not perfect squares. Just place the whole slab on a cutting board and break it apart forcefully with your hands. Those jagged edges honestly look the best! Store your finished **peppermint bark** in an airtight container right on the counter, or keep it chilled if your kitchen runs warm.
Tips for Perfect Homemade Holiday Candy
Even though this **peppermint bark** is super easy, I want you to achieve that gourmet, *I can’t believe you made this* look! Since you’re using high-quality chocolate, a few extra little tricks will make this store-bought quality. If you follow my basic steps, you’ll have the **Best Peppermint Bark** around, but these tips are how you jump from ‘good’ to ‘amazing’.
My absolute number one tip for preventing those streaky chocolate layers—where the dark bleeds into the white—is temperature control. Make sure that first dark chocolate layer is truly firm before you pour on the white. If it’s just slightly soft, the heat from the second layer will make them mix. Seriously, give it that full ten minutes in the fridge. It’s worth the short wait!
The Key to No Streaks: Gentle Melting
When you’re microwaving the chocolate, remember that white chocolate is far more sensitive than dark chocolate. If you burn white chocolate, it turns grainy and horrible, and you can’t save it! Keep your **white chocolate peppermint** melting sessions very short—only 15 or 20 seconds at a time once it starts looking soft. Stir every single time, even if you think it doesn’t need it yet. I learned this the hard way back in college; trust me on the heat control here!
Achieving That Gourmet Texture
If you’re aiming for that **Copycat Peppermint Bark** feel, look for chocolate that has a higher cocoa butter content. It cools down smoother and has a better “snap” when you break it. Also, don’t crush your peppermint into dust! I like a mix of textures. Make sure you have some medium chunks—about pea-sized—and some finer bits so you get that satisfying crunch in every single bite. A little unevenness looks much more rustic and homemade.
Don’t Forget the Final Polish
Once you break the bark, you’ll notice the edges can look a little rough. For true party-ready appeal, take a small, sharp knife and very lightly shave a few pieces of the bark along the edges to create some delicate, thin curls of chocolate. It gives the platter a gorgeous finish. People always think I spent hours fussing over the details!
Variations on Classic Peppermint Bark
Now, while I absolutely adore this classic three-ingredient recipe, sometimes you want to jazz things up for the holidays! It’s so simple to make a few tweaks and suddenly you have a whole new **Christmas confectionery** to share. Don’t be afraid to experiment a little once you nail the basic technique; that’s what cooking is all about, right?
If you’re making your **peppermint bark** for grown-up gatherings, you have to try adding flaky sea salt! I love sprinkling a pinch right on top of the white chocolate layer—it transforms into an amazing **Salted Chocolate Bark Recipe**. That salty bite cuts through the sweet chocolate perfectly. Seriously, it’s my favorite way to elevate this **simple Christmas sweet**!
You can also play with your chocolate base. Instead of all dark chocolate for the bottom, try semi-sweet! Or, if you want a super decadent look, try using half milk chocolate and half dark chocolate for the base layer to create a richer color contrast. For those needing alternatives, don’t forget you can explore options like dairy free holiday treats just by switching out your regular chips for verified dairy-free versions. See? It works for everyone!
Serving Suggestions for Your Winter Chocolate Bark
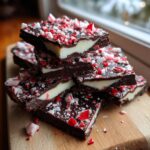
Once you’ve got that beautiful, snappy **peppermint bark** broken into rustic pieces, the next fun part is figuring out how to show it off! This treat shines brightest when it’s part of your holiday spread. Because honestly, who doesn’t love something wonderfully festive sitting out on the counter?
For a holiday party, don’t just pile it onto a plain plate. I always arrange my pieces on a simple slate board or even a holiday-themed platter to emphasize those gorgeous **festive chocolate layers**. If you have a mix of sizes, it looks much more artisanal and less like a store-bought slab. You can even tuck small sprigs of fresh rosemary around the edges of the platter for a little bit of green contrast—it smells amazing, too!
Now, let’s talk about pairing this **winter chocolate bark** with drinks. My favorite thing in the whole world is setting up a hot cocoa bar where people can serve themselves. You can place the bark pieces right next to the mugs! The peppermint flavor melts just slightly into the hot chocolate, making it extra special. If you’re hosting an adult gathering, this bark is a fabulous little snack alongside a warm coffee drink or even something spirited. If you’re looking for some great recipes to serve alongside your candy, you absolutely must check out my ideas over on my drink and cocktail recipes page!
It’s also wonderful tucked into little cellophane bags tied with a red ribbon. They make perfect neighbor gifts or teacher thank-yous. It’s such a simple item, but packaging it nicely really elevates this **easy peppermint bark recipe** into something truly thoughtful. Honestly, watching people snap off a piece and immediately close their eyes in delight is the best part of making **homemade holiday candy**!
Frequently Asked Questions About Peppermint Bark
I know you’re going to love making this **peppermint bark**! But sometimes, when you’re trying out something new—even something this simple—you have a few little questions pop up. That’s totally normal! I’ve gathered the ones I get asked most often about this recipe to hopefully clear everything up so you can get right to the dipping and sprinkling.
Can I use chocolate chips instead of chopped chocolate in this peppermint bark?
Yes, you absolutely can! So many people keep chocolate chips on hand, especially for **no bake chocolate treats**, and it works just fine here. Chopped bars sometimes melt a hair smoother, but chips are perfectly acceptable for this recipe. The key thing is not to overheat them; they can seize up faster than chopped chocolate when they start melting. Just use those short microwave bursts and stir often. It still gives you that great layering effect we need for this **easy peppermint bark recipe**.
How long can I store homemade peppermint bark?
This is great news for batch bakers: homemade **candy cane bark** lasts for ages, mostly because of the high sugar content making it stable. I typically keep mine stored in a good, airtight container right on the counter at cool room temperature. If your house is warm, the fridge is better! Stored properly, it stays fantastic for at least two to three weeks. The texture stays crisp, and the flavor stays bright. You can even make it well ahead of time for your Christmas gifts!
Is this recipe truly ‘No Bake Chocolate Treats’?
One hundred percent true! That’s such a huge selling point for me during the busy holidays. There is zero oven time involved. We are only using the microwave to gently melt the chocolate layers. Everything else is spreading, sprinkling, and chilling to set. It’s the definition of a **quick holiday dessert** that lets you focus on more complicated cooking projects if you have them! You are going to have so much fun making this.
If you need some ideas for dinner that takes way more time than this candy, why not hop over and browse my weeknight dinner recipes? You deserve a break after all that chocolate making!
Estimated Nutritional Data for Peppermint Bark
Now, I know you aren’t making this **peppermint bark** for health food reasons, but keeping track of what we eat is important, even during the holidays! Because this recipe is so simple, the nutrition is mostly straightforward—it’s chocolate and candy, after all! It’s a guaranteed hit for your next party!
Here are the estimated numbers based on serving one piece (about 1/16th of the whole batch). Please remember that these are estimates, though. If you use super high-quality, heavy dark chocolate or switch out the white chocolate for a dairy substitute, the numbers will shift a little bit. But this gives you a great starting point for your **homemade holiday candy**!
- Serving Size: 1 piece (approx 1/16th of recipe)
- Calories: 180
- Sugar: 18g
- Sodium: 15mg
- Fat: 12g
- Saturated Fat: 7g
- Unsaturated Fat: 5g
- Trans Fat: 0g
- Carbohydrates: 19g
- Fiber: 1g
- Protein: 2g
- Cholesterol: 5mg
See? Nothing too scary! It’s really not much worse than a small serving of chocolate chips! Enjoy that beautiful finish to your **Christmas confectionery**!
Share Your Simple Christmas Sweets Creations
I truly hope making this **peppermint bark** makes your holiday prep just a little bit easier and a whole lot sweeter! I bake things not just to eat them, but because sharing them is the whole point. Once you’ve got your pieces snapped and ready to go, I absolutely love hearing from you! Did you try adding the sea salt? Did your candy canes crush up perfectly?
Please drop a comment down below! Let me know how this easy recipe stacked up for you, and tell me what you thought of the texture. And if you took a beautiful picture of your finished **homemade holiday candy**—maybe sitting next to a cup of hot cocoa—I would be thrilled if you tagged me! Sharing your successes is what Kings Cook is all about. Knowing I helped you feel that sense of accomplishment makes my whole day.
If you’re new around here and loved how simple this candy was, why don’t you take a sneak peek over on my About Page? I share a little more about how I developed this whole site to help you feel like royalty in your own kitchen. Happy baking, and please enjoy every crackly, minty bite!
PrintUltimate Easy 3-Ingredient Peppermint Bark
Make this classic holiday confection with simple layers of dark chocolate, white chocolate, and crushed candy canes. This no-bake recipe is quick to prepare and perfect for gifting.
- Prep Time: 15 min
- Cook Time: 5 min
- Total Time: 20 min
- Yield: About 24 servings 1x
- Category: Dessert
- Method: No Bake
- Cuisine: American
- Diet: Vegetarian
Ingredients
- 8 ounces dark chocolate, chopped
- 8 ounces white chocolate, chopped
- 1 cup crushed peppermint candies or candy canes
Instructions
- Line an 8×8 inch baking pan with parchment paper, letting the paper hang over the sides for easy removal later.
- Melt the dark chocolate in a microwave-safe bowl in 30-second intervals, stirring well after each interval until smooth. Do not overheat.
- Pour the melted dark chocolate into the prepared pan. Spread it into an even layer using an offset spatula.
- Place the pan in the refrigerator for 10 minutes, or until the dark chocolate is set but not completely hard.
- Melt the white chocolate using the same method as the dark chocolate until smooth.
- Pour the melted white chocolate over the set dark chocolate layer. Spread evenly.
- Immediately sprinkle the crushed peppermint candies evenly over the white chocolate layer. Gently press the candies into the chocolate with your hands or the back of a spoon.
- Return the pan to the refrigerator and chill for at least 30 minutes, or until the bark is completely firm.
- Lift the bark out of the pan using the parchment paper overhang. Break the bark into irregular pieces.
- Store the peppermint bark in an airtight container at room temperature or in the refrigerator.
Notes
- For a saltier flavor, sprinkle 1 teaspoon of flaky sea salt over the white chocolate layer before the peppermint candies.
- If you prefer a copycat version similar to gourmet brands, use high-quality chocolate for the best texture and taste.
- To crush candy canes easily, place them in a sturdy zip-top bag and crush them with a rolling pin or the bottom of a heavy pan.
- This recipe is naturally gluten free. For a dairy free option, substitute the chocolate with dairy free chips.
Nutrition
- Serving Size: 1 piece (approx 1/16th of recipe)
- Calories: 180
- Sugar: 18g
- Sodium: 15mg
- Fat: 12g
- Saturated Fat: 7g
- Unsaturated Fat: 5g
- Trans Fat: 0g
- Carbohydrates: 19g
- Fiber: 1g
- Protein: 2g
- Cholesterol: 5mg