
Okay, serious talk time! If you’ve ever tried baking 100% whole wheat bread, you know the fear: the dense brick. It happens to the best of us. But I’m Kate Connolly from Kings Cook, and I promise you this recipe is different. We aren’t messing around with any white flour shortcuts here; this is a truly **whole wheat bread** that actually comes out soft and fluffy. If you’ve felt intimidated by yeast or all-wheat baking before, trust me—this easy homemade whole wheat bread recipe is my secret weapon for beginners. Every measurement has been checked and re-checked to make sure you get that perfect rise every time!
- Why This Is the Best Soft Whole Wheat Bread Recipe for Beginners
- Ingredients for Your 100 Percent Whole Wheat Loaf
- Step-by-Step Instructions for Homemade Whole Wheat Bread Recipe
- Tips for Success When Baking Whole Wheat Bread
- Variations on the Honey Whole Wheat Bread Recipe
- Storage and Reheating Instructions for Whole Wheat Bread
- Serving Suggestions for Hearty Whole Wheat Baking
- Frequently Asked Questions About Whole Wheat Bread
- Share Your Whole Wheat Bread Creation
Why This Is the Best Soft Whole Wheat Bread Recipe for Beginners
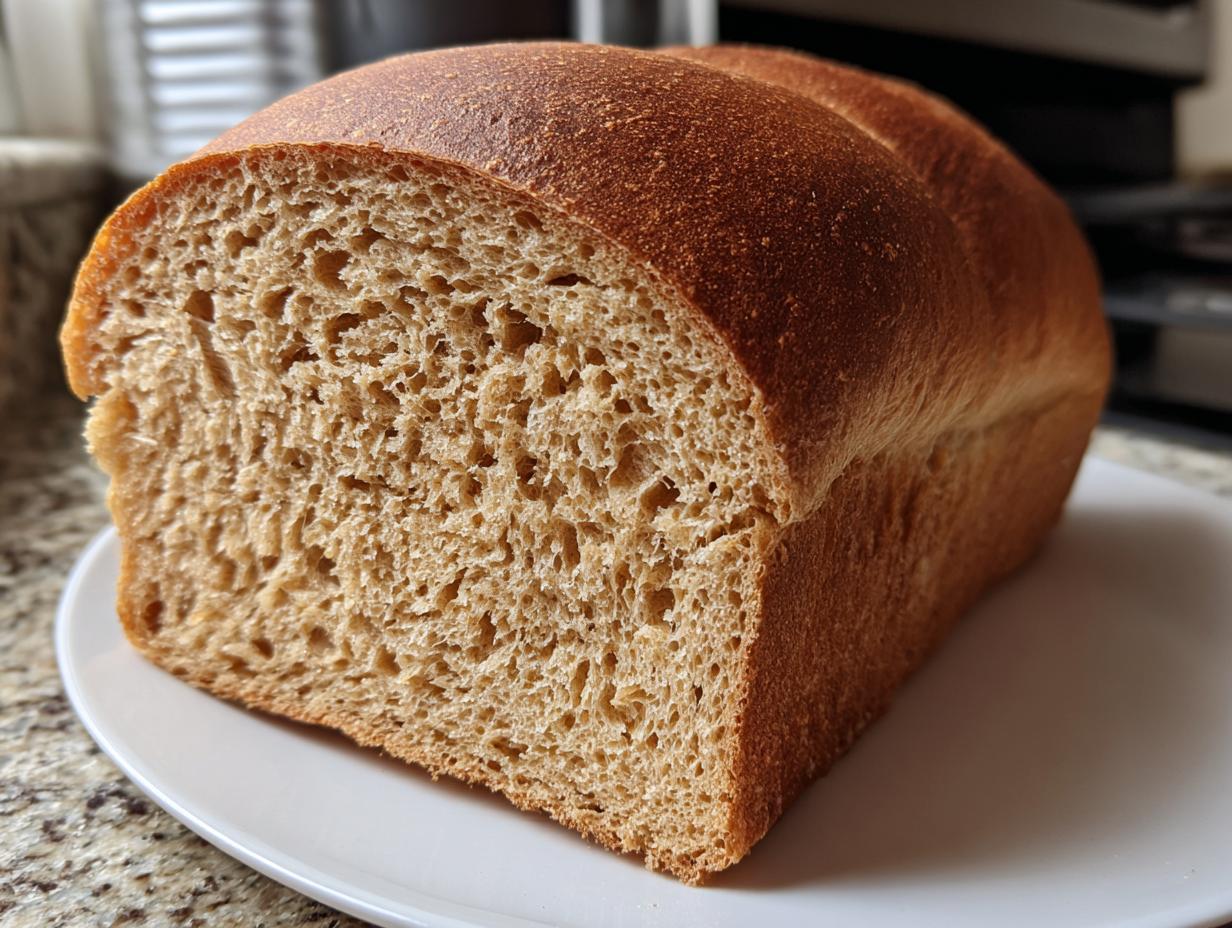
I know what you’re thinking: 100% whole wheat always equals a brick! But hand to heaven, I have tested this formula until I nearly ran out of flour. That’s why I feel so good about sharing it; this is my no-fail method for achieving **soft whole wheat bread**. I wanted to create something truly **easy whole wheat baking for beginners** could tackle without fear. We focus on hydration and gentle handling to stop that dreaded density before it even starts. You get the hearty nutrition you want without sacrificing that squishy texture needed for a great sandwich!
I even linked a great article for further comparison, because seeing how others tackle whole wheat bread can be helpful too. Check out this resource if you want to compare notes on structure!
Achieving the Perfect Fluffy Whole Wheat Sandwich Bread Texture
The secret to that fantastic **fluffy whole wheat sandwich bread** vibe actually lies in two simple additions: the honey and the kneading time. The honey keeps the crumb super tender—it adds moisture without making the dough wet. Then, we knead just long enough—5 to 7 minutes is the sweet spot. This builds just enough gluten structure to trap our yeast bubbles, giving you that wonderful, tall rise instead of a flat top. It’s all about balance, honey!
Ingredients for Your 100 Percent Whole Wheat Loaf
When we talk about flavor and fiber, we only use the best base for this **100 percent whole wheat loaf**. You need 4 cups of 100% whole wheat flour, so make sure you grab that bag without any refined white flour mixed in! The water needs to be warm, about 105°F to 115°F—too hot and you kill your yeast friends, too cold and they sleep in! I also pop in 1/3 cup of honey; that natural sweetness is just non-negotiable here. Oh, and if you want an extra push on that rise, toss in 2 tablespoons of vital wheat gluten—it’s optional, but I highly recommend it for beginners to ensure that perfect lift!
I actually found a great guide on ingredient choices over at Sally’s site that you might want to bookmark when you have a second. See what she recommends too!
Ingredient Notes and Substitutions for Whole Wheat Bread
For the flour, I’m serious about 100% whole wheat. Anything less means you lose out on that deep, nutty flavor that makes this bread so wholesome! If you can’t find vital wheat gluten, go ahead and skip it. The bread will still be delicious, though it might be just a smidge shorter. You can slightly increase one of the rising times if you omit it. Also, maple syrup works beautifully if you’re out of honey, but honey just seems to bring out that extra caramel note, don’t you think?
Step-by-Step Instructions for Homemade Whole Wheat Bread Recipe
Now that we have our amazing ingredients ready for this **homemade whole wheat bread recipe**, let’s get that dough going! Don’t worry about complicated steps; we’re keeping this super straightforward. First, you need to wake up the yeast. Take your warm water—remember, not too hot!—and sprinkle the yeast on top. Let it sit for about five minutes until it gets foamy. That’s how you know it’s ready to work its magic! After that, we mix in the honey, melted butter, and salt.
Then it’s time for the flour. Slowly add the 3 cups of whole wheat flour first, along with that optional vital wheat gluten if you’re using it. Once it starts looking shaggy, gradually add the last cup until a dough just starts to form. If you want to see a great guide on how the wet and dry ingredients cooperate, this site has excellent visual breakdowns.
Before we knead, take a peek at our dinner rolls recipe for general yeast-handling tips, you can see it here!
Mixing and Kneading the Whole Wheat Bread Dough
Time to get your hands dirty! Turn that shaggy mass out onto a lightly floured counter and get to kneading for about 5 to 7 minutes. This is where we build strength in the dough. Here is your biggest tip: it’s going to feel slightly sticky; avoid adding too much extra flour! That stickiness is what keeps the final loaf soft. If you add too much flour during kneading, you end up right back at that dense loaf you were trying to avoid. Stop kneading when the dough is smooth and elastic—it should spring back slowly if you poke it.
First and Second Rise for Your Whole Wheat Bread
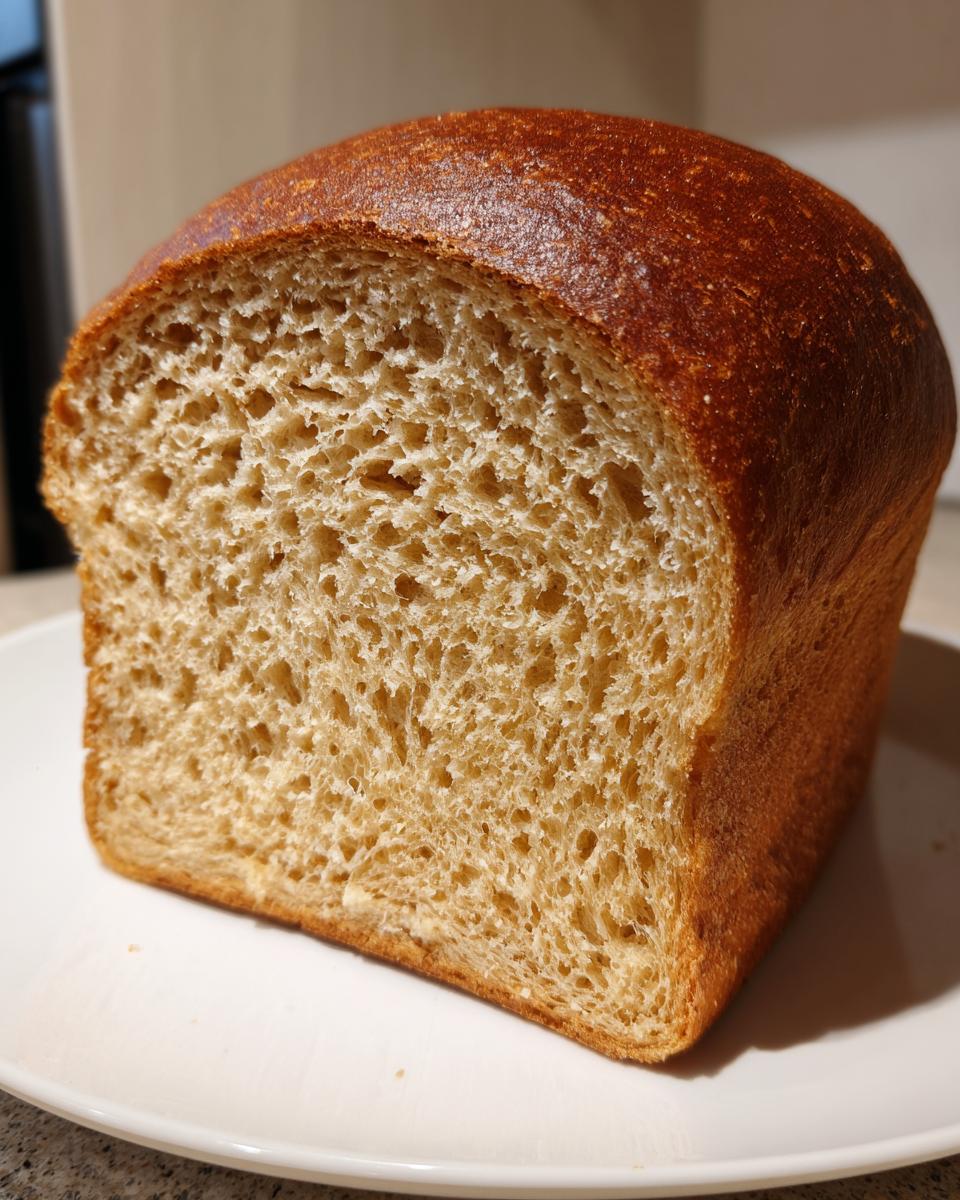
Once your dough is kneaded, pop it into a greased bowl, cover it up, and let it rest somewhere warm. We need it to double in size, which usually takes about 1 to 1.5 hours. Keep an eye on it rather than the clock! After you gently punch it down, shape it into your 9×5 loaf pan. The second rise is shorter, about 30 to 45 minutes. You’ll know the second rise is done when the dough crests about 1 inch above the rim of the pan. It should look proud before it goes into the hot oven!
Tips for Success When Baking Whole Wheat Bread
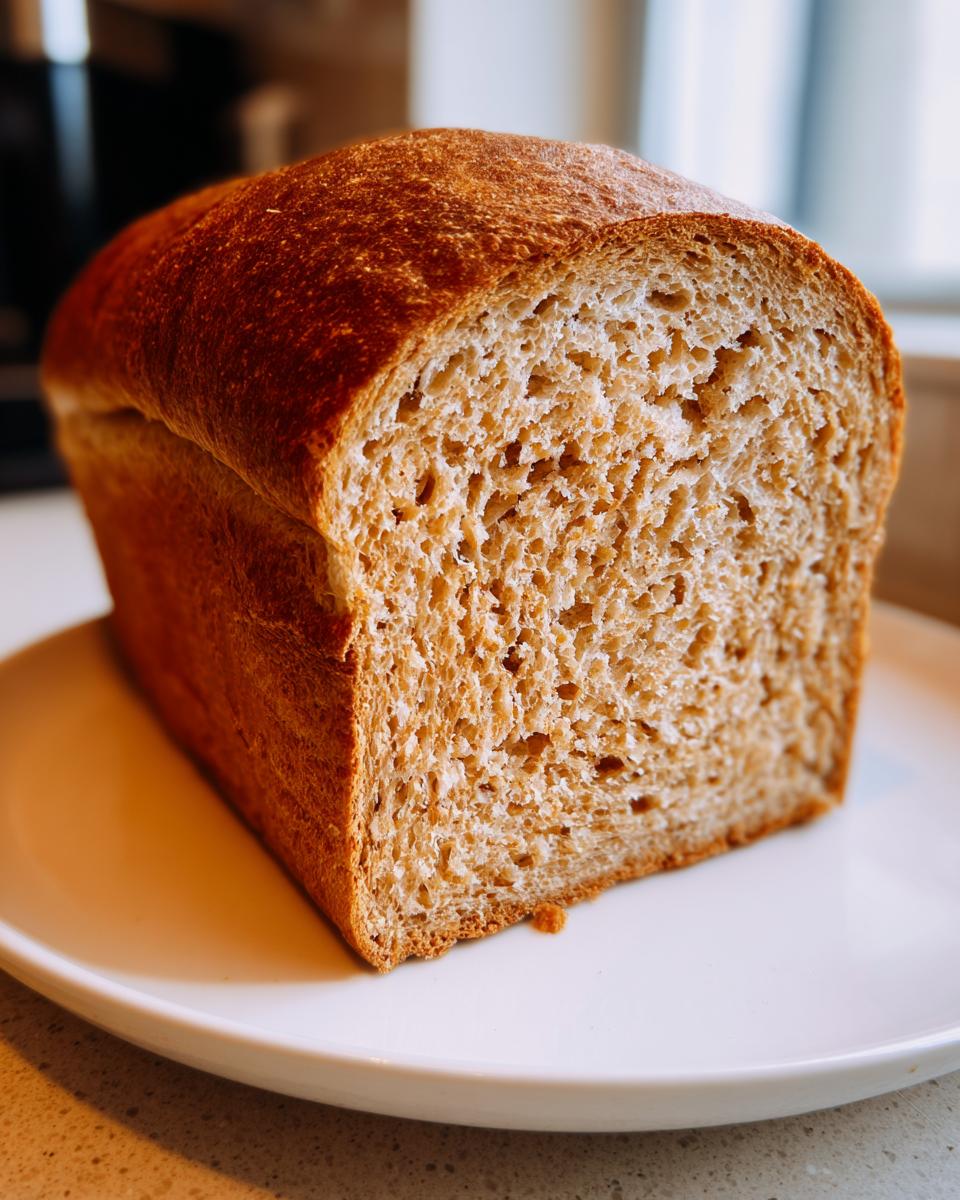
Baking a **no-fail whole wheat bread** really boils down to listening to your dough and respecting temperature. My number one pro tip concerns the oven, not the mixing bowl! You need that internal temperature to hit 190°F (88°C). If you rely only on the color, you might pull it out too soon, leading to a gummy center. I always keep an instant-read thermometer handy—it’s a game-changer!
Also, remember that kneading technique we talked about? Don’t be tempted to substitute it with excessive flour if the dough feels sticky. That slight tackiness is your friend for softness! If you’re ever nervous about a batch, check out this easy guide from Eleanor’s site; she walks through what to do when you think your dough won’t cooperate. See her tips here.
Just like with my focaccia, proper resting and temperature control make all the difference. If your kitchen is cold, find a spot—like inside a slightly warmed (but turned off!) oven—to encourage those yeast friends to have a happy, productive rise time. You can see my cold-weather baking trick in my focaccia post!
Variations on the Honey Whole Wheat Bread Recipe
This **honey whole wheat bread recipe** is a fantastic starting point, but I love a good customization! Once you’ve mastered the basic fluffy loaf, you can really start playing around. For extra crunch and nuttiness, try folding in about 1/2 cup of sunflower seeds or rolled oats right before the final shaping. Remember to mix them in gently so you don’t deflate all that hard work you did during the rise!

If you want something cozy, sprinkle in 1 teaspoon of ground cinnamon along with the dry ingredients. That warm spice pairs perfectly with the honey! We love adding cinnamon to our apple cinnamon muffins too, so you know it’s a winner flavor profile for sweet breads! Check out that muffin recipe if you’re in a spice mood!
For a serious boost of texture, you can also mix in flaxseed meal during the mixing stage. It keeps things wholesome and boosts the fiber content even higher. Isn’t it fun to make something healthy taste this good?
Storage and Reheating Instructions for Whole Wheat Bread
The hardest part about this **wholesome homemade bread** is trying not to eat the entire loaf the day you bake it! But since this recipe is so moist, it keeps really well if you store it properly. As soon as the bread is completely cool—and I mean totally cool, don’t cheat and slice it warm or you’ll smash the crumb—wrap it tightly. I prefer using beeswax wraps or just a really good zip-top bag to keep the air out. That keeps it soft for about three to four days on the counter.
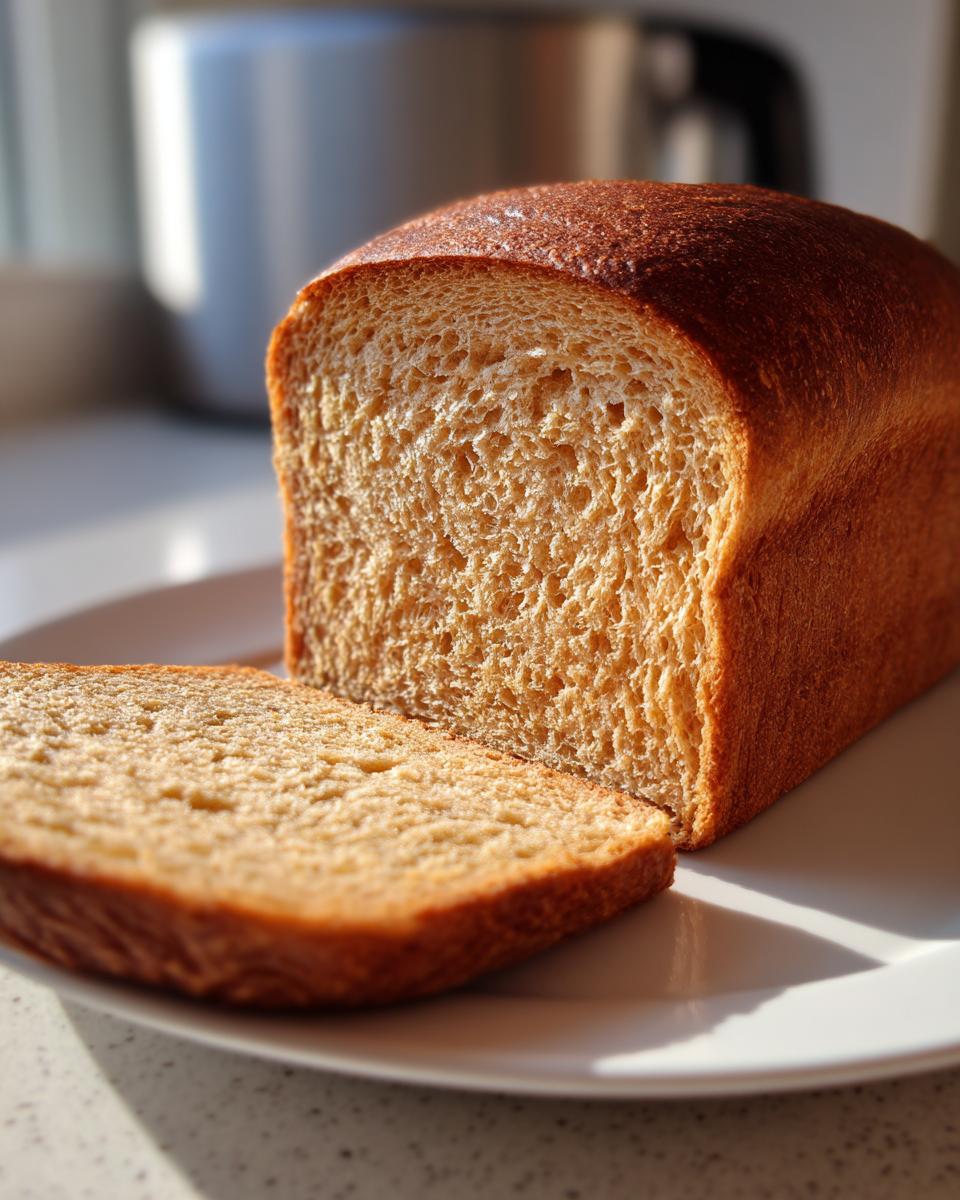
If you know you won’t finish it quite that fast, definitely slice the extra halves and freeze them right away! Freezing is a lifesaver for homemade bread. When you’re ready for a slice, don’t bother thawing it out on the counter; just toss the frozen slice straight into the toaster or under the broiler. You get that perfect, slightly crispy exterior and a warm middle—it’s honestly the **best whole wheat bread for toast** that way!
If you baked a rustic loaf and want that slight crust back, you can briefly warm the whole loaf sitting directly on the oven rack at about 300°F for about 10 minutes. It brings back that freshly baked taste just beautifully. If you want some inspiration on rustic loaves, I saw this great recipe on Cook Breeze that might give you ideas for non-sandwich shapes! Take a peek here!
Serving Suggestions for Hearty Whole Wheat Baking
Honestly, this **hearty whole wheat baking** masterpiece works for nearly everything! Since we worked so hard to get that soft texture, it truly shines as the foundation for the absolute yummiest, thick-cut sandwiches. Forget flimsy white bread; this holds up beautifully to tomatoes, lettuce, and thick layers of turkey. It’s definitely the **best whole wheat bread for toast** in the morning, too. My dad used to insist we use slices from this loaf specifically for French toast on Saturday mornings—it crisps up perfectly without drying out. You can see my favorite French toast recipe here!
Frequently Asked Questions About Whole Wheat Bread
So many questions come up when folks bake with 100% whole wheat, and that’s perfectly normal! I get asked about density and flour purity all the time. I tried to cover everything in the main post, but here are the big ones about why your loaf might not puff up exactly like the picture. If you want to learn more about my commitment to reliable recipes, you can read my full story here!
Can I make this whole wheat bread recipe without kneading?
Well, you *can* skip it, but I wouldn’t recommend it for achieving that soft texture we’re after! This recipe is easy because the kneading time is short—just 5 to 7 minutes. If you skip kneading entirely, you won’t develop enough gluten to hold onto the gas from the yeast. That means you’ll absolutely end up with a denser result. The minimal kneading is what makes this recipe a winner for beginners who still want a proper rise!
Why is my 100% whole wheat loaf dense?
This is the big one. When customers write to me frustrated about density, it almost always comes down to two main culprits in an all-wheat bake. First, they might have added too much flour during kneading—remember, that dough should feel slightly sticky! Second, and this happens a lot, they didn’t let the dough rise long enough. That first rise needs to double in size, and the second rise needs to crest the pan. If you rush the rise, you don’t develop the airy structure you need in a **whole wheat bread without white flour**.
If you were aiming for a super rustic, crusty loaf, maybe you want an **artisan whole wheat loaf** which handles density differently, but for this soft sandwich bread, those two steps are where you can troubleshoot your texture issues!
Share Your Whole Wheat Bread Creation
Now that you’ve got a beautiful, soft, and wholesome loaf sitting on your counter, I have one last request for you! Seriously, seeing your results warms my heart more than anything. Did this turn out soft and fluffy just like mine? I really want to know if this recipe finally conquered the dense bread monster for you!
Please, take a moment—once you’ve sliced into that perfect **whole wheat bread**—to leave a rating right below this post. Even just a three-star or five-star mark helps other bakers know this recipe is reliable.
And if you snapped a picture of your beautiful slice ready for a hearty sandwich or that perfect piece of toast, tag me on social media! Show off that gorgeous homemade crumb. Knowing I helped you master **easy whole wheat baking for beginners** is why I do this! Happy baking, friends!
PrintEasy 100% Whole Wheat Sandwich Bread (Soft and Fluffy)
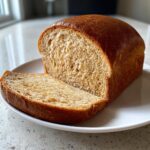
Bake a soft, fluffy loaf of 100% whole wheat bread at home. This recipe uses simple steps and honey for natural sweetness, making it perfect for beginners and daily sandwiches.
- Prep Time: 20 min
- Cook Time: 35 min
- Total Time: 2 hours 5 minutes
- Yield: 1 loaf (about 12 slices) 1x
- Category: Baking
- Method: Yeast Baking
- Cuisine: American
- Diet: Vegetarian
Ingredients
- 1 1/2 cups warm water (105°F to 115°F)
- 2 1/4 teaspoons active dry yeast
- 1/3 cup honey
- 1/4 cup unsalted butter, melted
- 1 1/2 teaspoons salt
- 4 cups 100% whole wheat flour, plus more for dusting
- 2 tablespoons vital wheat gluten (optional, for extra rise)
Instructions
- Combine the warm water and yeast in a large bowl. Let it sit for 5 minutes until foamy.
- Stir the honey, melted butter, and salt into the yeast mixture.
- Add 3 cups of the whole wheat flour and the vital wheat gluten (if using) to the wet ingredients. Mix until just combined.
- Gradually add the remaining 1 cup of flour until a soft dough forms.
- Turn the dough out onto a lightly floured surface. Knead for 5 to 7 minutes until the dough is smooth and elastic. It will feel slightly sticky; avoid adding too much extra flour.
- Lightly grease a large bowl. Place the dough in the bowl, turning to coat. Cover the bowl with plastic wrap or a clean towel.
- Let the dough rise in a warm place for 1 to 1.5 hours, or until it has doubled in size. This addresses the perfect rise pain point.
- Gently punch down the risen dough. Shape it into a loaf and place it into a greased 9×5 inch loaf pan.
- Cover the pan loosely and let the dough rise again in a warm spot for 30 to 45 minutes, or until the dough crests about 1 inch above the rim of the pan.
- Preheat your oven to 375°F (190°C).
- Bake for 30 to 35 minutes, or until the top is golden brown and the internal temperature reaches 190°F (88°C).
- Remove the bread from the pan immediately and let it cool completely on a wire rack before slicing. Cooling prevents a dense texture.
Notes
- For a slightly rustic crust, brush the top of the loaf with a little water just before baking.
- If your dough feels too dense after the first rise, add 1 tablespoon of warm water and knead briefly to incorporate moisture.
- This bread is excellent toasted or used for hearty sandwiches.
Nutrition
- Serving Size: 1 slice
- Calories: 140
- Sugar: 5
- Sodium: 150
- Fat: 3
- Saturated Fat: 1.5
- Unsaturated Fat: 1.5
- Trans Fat: 0
- Carbohydrates: 26
- Fiber: 4
- Protein: 6
- Cholesterol: 5