
Are you tired of your hearty chili or creamy clam chowder sinking right through the bottom of a flimsy serving vessel? Oh, I totally get it. When I first started Kings Cook, I wanted to tackle those showstopper comforting meals, and that meant having the perfect foundation. Many folks think making bakery-style bread bowls at home is impossible—all that kneading and waiting—but trust me, it’s one of the most rewarding things you can bake! My journey to culinary confidence started just like yours, and that’s why I share everything over on the About Me page.
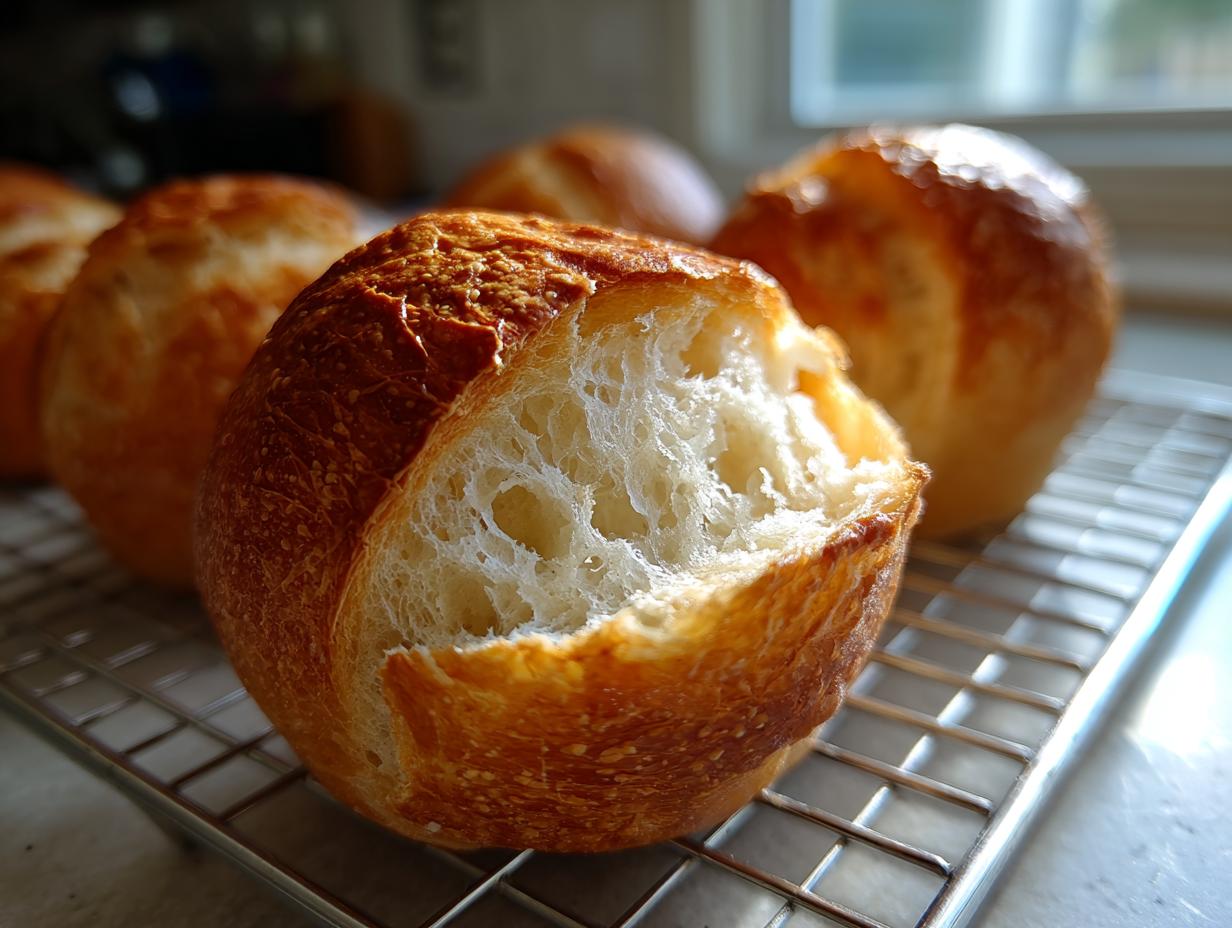
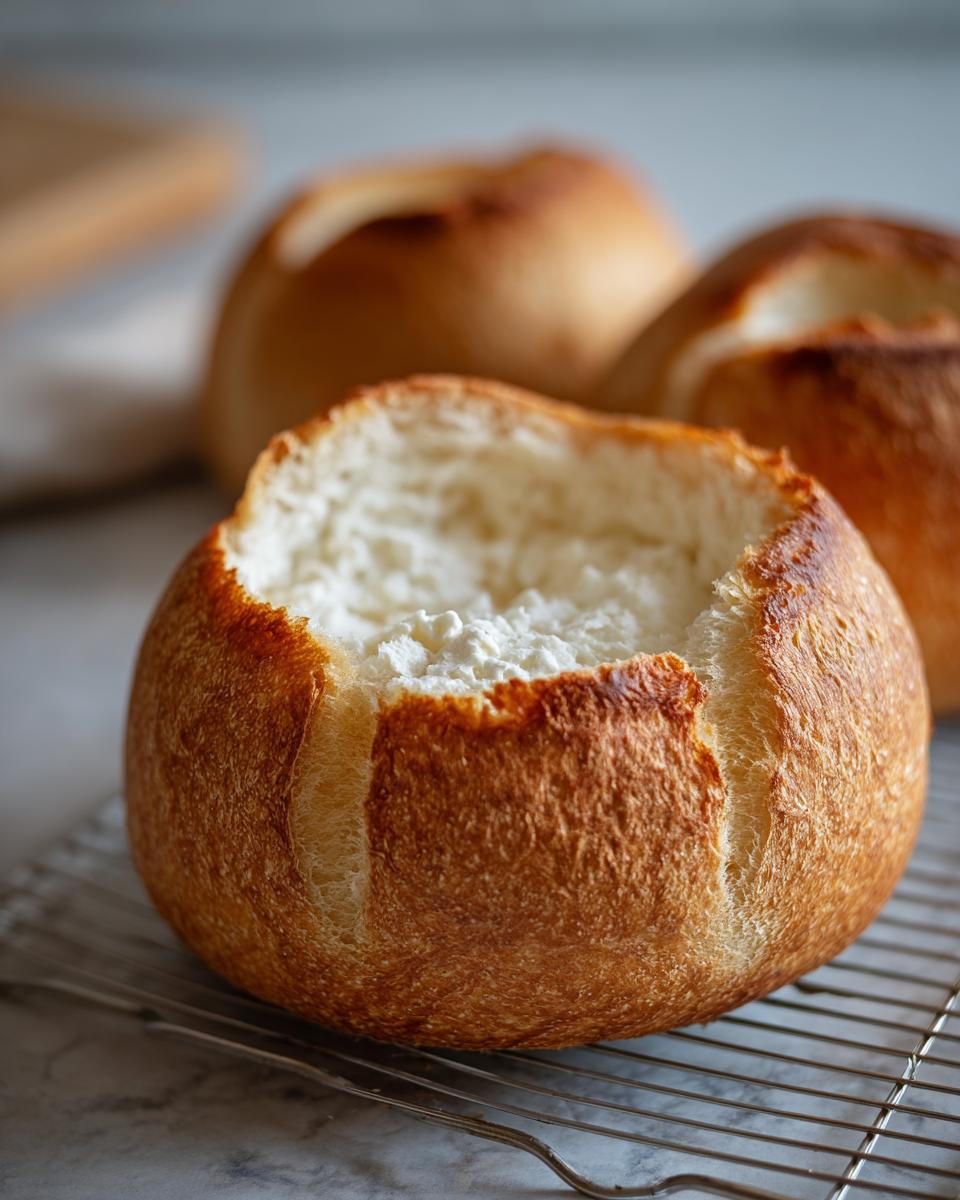
My goal here is to make you feel completely confident tackling this bread from scratch. We are chasing that perfect texture: a deep, golden, crackly crust on the outside that gives way to a wonderfully soft, sturdy interior ready to soak up every drop of goodness. Follow these simple steps, and you’ll be serving restaurant quality bread bowls faster than you think!
- Why You Will Master This Homemade bread bowls recipe
- Essential Ingredients for Perfect bread bowls
- How to Bake bread bowls: A Step-by-Step Crusty bread bowls tutorial
- Tips for Success: Achieving Perfect bread bowls consistency
- Serving Suggestions: What to Fill Your Sturdy bread bowls for stew
- Variations: From Sourdough bread bowl recipe to Garlic bread bowls recipe
- Storage and Reheating: Keeping Your bread bowls Fresh
- Estimated Nutritional Information for bread bowls
- Your Kitchen Questions Answered About bread bowls
- Share Your Bakery-Style bread bowls Creations
Why You Will Master This Homemade bread bowls recipe
When you use this method, you unlock the secrets to truly fantastic bread. You won’t just make a bread container; you’ll make a delicious component of the meal itself! Trust me, the satisfaction of pulling these beauties out of the oven is unmatched.
- You get that incredible crusty bread bowls tutorial finish thanks to steam—a trick used in real bakeries!
- The dough is forgiving, making this the perfect Homemade bread bowls recipe even if you’re new to yeast.
- We prioritize structure, so these bowls hold up against even the thickest chili or stew. Say goodbye to sogginess!
- You’ll consistently achieve Restaurant quality bread bowls at home that taste ten times better than anything you could buy pre-made.
Essential Ingredients for Perfect bread bowls
The magic of these sturdy beauties comes down to simple, high-quality components. I’m listing everything out here, but I want to talk about that first step: the water and the honey for your yeast. This is where we build flavor and success!
For the water, you absolutely must hit that temperature range of 105°F to 115°F. If it’s too cold, your yeast just naps. If it’s too hot—say, boiling hot—you’ve killed your yeast before it even wakes up! A quick thermometer check really helps build confidence in your first rise. Also, using bread flour instead of regular all-purpose flour is key here; it has a higher protein content, which develops the gluten you need for that fantastic, chewy, sturdy wall for your soup.
- 2 1/4 cups warm water (about 105-115°F)
- 1 tablespoon honey
- 3 teaspoons active dry yeast
- 1 tablespoon olive oil
- 2 teaspoons salt
- 4 1/2 cups bread flour, plus more for dusting
- 1 large egg, beaten (for egg wash)
- Water (for steam pan)
How to Bake bread bowls: A Step-by-Step Crusty bread bowls tutorial
Alright, bread novices, take a deep breath! Learning how to bake bread bowls seems intimidating, but I promise, once you see that yeast foam up, you’ll feel like a professional. This is truly the definitive crusty bread bowls tutorial you need. There was one time I rushed the kneading process, focusing more on getting dinner on the table than on the dough—bad idea! The resulting loaves were tasty, sure, but they collapsed immediately when dipped into my favorite soup. Now, I never skip this crucial structuring time because it guarantees that soft interior bread bowls structure we are aiming for.
Activating the Yeast and Mixing the Dough
Let’s start with the lifeblood of our bread: the yeast. Pour your warm water—remember, just warm, not hot!—and stir in the honey. Sprinkle that yeast over the top and just wait patiently. You’re looking for visual confirmation, that fuzzy, foamy layer on top that tells you, “Yep, this is good to go!” Once you see that foam, stir in your olive oil and salt before gradually adding the bread flour. Stop when you have a messy, shaggy ball; we aren’t aiming for smooth yet!
Kneading and First Rise for Soft interior bread bowls
Now for the workout! Turn that shaggy mess out onto your counter and start kneading. You need 8 to 10 solid minutes of working that dough until it completely transforms. We knead because this develops the gluten structure, which is what gives you those strong walls needed for our soft interior bread bowls—it traps those gases so the bread puffs up tall instead of spreading flat. Once that dough is smooth and elastic, pop it into an oiled bowl, turn it to coat, and let it rise in a warm place for 1 to 1.5 hours, or until doubled in size. If you love working dough, my focaccia recipe is another great place to practice those kneading skills!
Shaping and Second Proofing
When the dough is huge, gently punch out that air—it feels amazing, by the way! Divide the whole thing into four equal pieces. Here’s a crucial shaping trick: pull the edges of each piece underneath itself repeatedly until you create a really tight, smooth little ball on top. This tension is what helps them spring up beautifully in the oven. Place these four beauties on your lined baking sheet and cover them loosely for a final 30-minute rest. While they rest, make sure to get a shallow metal pan on the bottom rack of your oven so it heats up along with everything else.
Achieving the Golden Crust on Your bread bowls
This last part is what makes them look like they came straight from a high-end bakery! Lightly brush the tops of your rested dough balls with that beaten egg wash. This gives us that incredible golden color we want. Then, working quickly, slide the baking sheet into the oven. Immediately pour about a cup of hot water into that preheated bottom pan. That immediate burst of steam is the absolute secret to a thin, crispy crust! Bake for 20 to 25 minutes until they are deep brown. Seriously, go check out this great tip on making the perfect bread bowl, and then let yours start cooling immediately on a wire rack!
Tips for Success: Achieving Perfect bread bowls consistency
Even with the best recipe, pulling off that perfect bread bowl consistency requires just a few little insider tricks. Remember, these aren’t just lovely rolls; they have a job to do! They need to hold soup without becoming a soggy mess an hour later. These baking tips for bread bowls are what separate a standard loaf from a true soup vessel.
First, that steam bath during baking is non-negotiable if you want a truly crispy exterior. It delays the crust setting, allowing the bread to expand fully before hardening up. Second, when you hollow them out later, leave a good, thick wall—I aim for at least one full inch all around. That sturdy frame is everything!
And finally, don’t skip cooling these completely on a wire rack before you even *think* about slicing them open. Trapped steam equals a gummy texture, and we absolutely don’t want that. If you ever want an even deeper dive into shaping, my sourdough guide has some great tips on building structure!
Serving Suggestions: What to Fill Your Sturdy bread bowls for stew
Okay, you’ve successfully baked the most gorgeous, crusty bread bowls, and now comes the best part: deciding what glorious thing to put inside! Because we worked so hard on developing that strong structure, these loaves are ready for the heaviest, heartiest stuff you can find. You want fillings that really test their mettle!
Forget flimsy broth; these babies were made specifically for sturdy bread bowls for stew. Seriously, picture this: a slow-cooked, rich beef stew loaded with root vegetables. The bread soaks up all those savory juices without giving up the ghost. They are absolutely heavenly filled with thick, creamy goodness. If you’re craving classic comfort, you cannot beat filling these with my famous Broccoli Cheddar Soup—it melts perfectly into that soft interior.
And, of course, we have to talk about the standard-bearer: chowder! These are the perfect size for generous scoops of clam chowder. The crust holds up, and the interior becomes a textural masterpiece by the time you finish eating. Honestly, even thick baked dips or cheeseburger soup are amazing in these!
Variations: From Sourdough bread bowl recipe to Garlic bread bowls recipe
Now that you’ve mastered the basic texture, you might be thinking, “Kate, what else can I do with this structure?” That’s the spirit! While this particular recipe uses commercial yeast for speed and reliability, if you’re already a starter enthusiast, you can definitely pivot this into a Sourdough bread bowl recipe. Keep in mind that sourdough will require a much longer, slower fermentation, usually overnight, but the tangy flavor pairs unbelievably well with savory fillings like French onion soup.
But let’s talk about using the beautiful baked loaves you already made. Why stop at soup when you have this incredible crusty shell? You can easily turn these into a garlicky, cheesy treat! For a quick Garlic bread bowls recipe, wait until the bread has cooled completely, then take a sharp knife and carefully hollow out the center, just like you would for soup.
Next, you’ll want to grab some good quality butter, mince up a ton of fresh garlic, and mix in some dried herbs like oregano and parsley. Slather that mixture generously across the inside of the bowl and on top of the cut-out lid. I usually sprinkle the inside with some shredded mozzarella and Parmesan—don’t be shy with the cheese!
Pop those open bowls back into a 375°F oven for about 8 to 10 minutes until the cheese is bubbly. You can explore more ways to use that garlic butter over on my easy garlic bread tutorial, but trust me, serving this cheesy garlic bowl stuffed with spaghetti or just alongside a big salad is a game-changer. It shows people you really thought about the presentation!
For those interested in the long route, exploring a true sourdough bread bowl recipe is a beautiful project for a slow weekend, even if this quick yeast version is my default for weeknight soup.
Storage and Reheating: Keeping Your bread bowls Fresh
You’ve done the hard work, and these beauties are too good to eat all in one sitting, right? Well, maybe! But if you do have leftovers, we need to talk about preservation. These aren’t like standard sandwich bread; they need a little special attention so we keep that wonderful crust intact.
How long do they last? Stored properly, they are great for about two days at room temperature. You must let them cool completely before doing anything else, though—this is critical for that crisp exterior. Once cool, wrap them individually in plastic wrap, and then pop them into a large zip-top bag or an airtight container. Keep them out on the counter. Don’t put them in the fridge! The fridge is the enemy of crusty bread; it makes everything chewy and stale much faster.
Now, for reheating, you need to revive that crust. If you’re just reheating the whole bowl before filling it, don’t use a microwave! That will turn it instantly soft. Instead, wrap the entire bread bowl loosely in aluminum foil. Pop that foil-wrapped beauty into a 350°F oven for about 10 minutes. This warms it all the way through gently without steaming the crust.
If you pulled the top off and you have leftover bread chunks inside? Save those! We never waste good bread around here. Those soft centers are perfect for making quick croutons. Just cube them up, toss them with a little olive oil and salt, and bake them at 350°F until they are nicely browned and crunchy. Those are going straight into your next batch of soup!
Estimated Nutritional Information for bread bowls
I always say that when you bake from scratch, you’re in control of what goes into your food, which is a huge win! However, because this is a recipe made using basic components—flour, water, yeast—and we aren’t using commercial additives, the exact numbers can shift slightly based on the brand of bread flour or the size of the egg you use. So, please treat this information just as that: a guide.
This breakdown is calculated based on the recipe yielding 4 large bread bowls, dividing the total nutritional content equally among those four large servings. Remember, this is before you add any chowder or chili, which will obviously change the final count!
- Serving Size: 1 bread bowl
- Calories: 350
- Sugar: 3g
- Sodium: 350mg
- Fat: 4g
- Saturated Fat: 1g
- Unsaturated Fat: 3g
- Trans Fat: 0g
- Carbohydrates: 70g
- Fiber: 3g
- Protein: 12g
- Cholesterol: 5mg
This is a solid foundation for a cozy dinner! Because we skipped excessive sugar and fat in the dough itself, we keep the base loaf nice and clean, leaving room to load up on the creamy, decadent fillings that really make soup night special. Knowing your baseline nutrition is part of the joy of home cooking!
Your Kitchen Questions Answered About bread bowls
I know when you tackle a totally new recipe, your brain starts whirring with ‘what ifs.’ That’s perfectly normal! I’ve gathered a few of the questions I get asked most often about these rustic beauties. We want zero guesswork when it comes to getting that perfect bake and shape. If you ever have a question I didn’t cover, please feel free to reach out through the contact page!
Can I make these bread bowls without bread flour?
That’s a great question about substitutions! Ideally, you absolutely want to stick with bread flour for this recipe. Bread flour has a higher protein content, remember? That protein is what allows the gluten network to stretch and strengthen, giving you those robust walls that can stand up to the thickest stew. If you are totally out and have to use regular all-purpose flour, it will still work, but you have to be prepared that the texture won’t be quite as chewy or strong. You might need to knead it for a couple of extra minutes to develop what gluten you can, and you definitely need to be cautious when hollowing them out.
How thick should the walls be when hollowing out the bread bowls?
This is critical for our perfect bread bowl consistency! We aren’t just making little hollow shells; we need structural integrity! When you cut the ‘lid’ off—which, by the way, makes the best dipping tool ever—don’t try to scoop everything out. I strongly recommend leaving at least a solid one-inch wall of bread all the way around, especially at the bottom. If you go much thinner than that, especially if you plan on keeping a very hot chowder inside for a while, you risk having it degrade too fast. That one-inch buffer ensures you have a strong, sturdy base!
Can I use the removed bread interior for anything?
Are you kidding me? Never throw that soft, sweet bread interior away! It’s delicious! The absolute best thing you can do with the removed centers is turn them into amazing additions for another meal. As soon as they cool, cube them up or tear them into rough pieces. Toss them with a drizzle of olive oil and some salt, and bake them on a sheet until they are golden brown. These make the best croutons you will ever eat—they are so much softer on the inside than store-bought ones. They are also fantastic to use as the base for bread pudding later in the week!
Share Your Bakery-Style bread bowls Creations
You know, seeing your creations is genuinely the best part of running Kings Cook. Baking bread is such a personal, tactile experience, and I love seeing how these turn out on your tables!
Once you’ve pulled those beautiful, golden bread bowls out of the oven, I really hope you take a moment to admire the crust! I want to know how they held up to your favorite creamy filling, whether it was chili, soup, or maybe even a dip.
If you loved this recipe and found that it helped you conquer your intimidation around yeast baking, please leave a rating right down below. Your feedback is what helps me keep creating reliable recipes, and I promise to read every single comment. If you feel like sharing a snap of your incredible dinner presentation—maybe with soup brimming over the edge—tag me on social media! It makes my week to see the confidence you build!
Happy cooking, and thank you again for trusting me with your oven time. If you want to read up on how we handle information shared on the site, you can always check the Terms of Use.
PrintThe Ultimate Bakery-Style Homemade Bread Bowls for Soup
Learn how to bake bakery-style bread bowls with a crusty exterior and a soft, sturdy interior perfect for holding your favorite soups, stews, or dips.
- Prep Time: 30 min
- Cook Time: 25 min
- Total Time: 2 hours 25 min
- Yield: 4 servings 1x
- Category: Dinner
- Method: Baking
- Cuisine: American
- Diet: Vegetarian
Ingredients
- 2 1/4 cups warm water (about 105-115°F)
- 1 tablespoon honey
- 3 teaspoons active dry yeast
- 1 tablespoon olive oil
- 2 teaspoons salt
- 4 1/2 cups bread flour, plus more for dusting
- 1 large egg, beaten (for egg wash)
- Water (for steam pan)
Instructions
- Combine the warm water and honey in a large bowl. Sprinkle the yeast over the top and let it sit for 5 to 10 minutes until foamy. This confirms your yeast is active.
- Stir the olive oil and salt into the yeast mixture.
- Gradually add the bread flour, mixing until a shaggy dough forms. If the dough is too sticky, add the extra tablespoon of flour one at a time.
- Turn the dough out onto a lightly floured surface. Knead for 8 to 10 minutes until the dough is smooth and elastic.
- Place the dough in a lightly oiled bowl, turning to coat. Cover the bowl with plastic wrap or a clean kitchen towel and let it rise in a warm place for 1 to 1.5 hours, or until doubled in size.
- Preheat your oven to 425°F (220°C). Place a shallow pan on the bottom rack of the oven; you will add water to this later to create steam for a crispier crust.
- Gently punch down the risen dough. Divide it into 4 equal pieces. Shape each piece into a tight, round ball.
- Place the dough balls on a baking sheet lined with parchment paper, leaving space between them. Cover them loosely and let them rest for a second proof for 30 minutes.
- Brush the tops of the dough balls with the beaten egg wash.
- Carefully pour about 1 cup of hot water into the shallow pan on the bottom rack to create steam. Immediately place the baking sheet with the dough into the oven.
- Bake for 20 to 25 minutes, or until the bread bowls are deep golden brown and sound hollow when tapped.
- Remove the bread bowls from the oven and transfer them to a wire rack to cool completely before hollowing them out for serving.
Notes
- For a crispier crust, place a metal pan on the bottom rack while the oven preheats and add hot water to it just before putting the bread in.
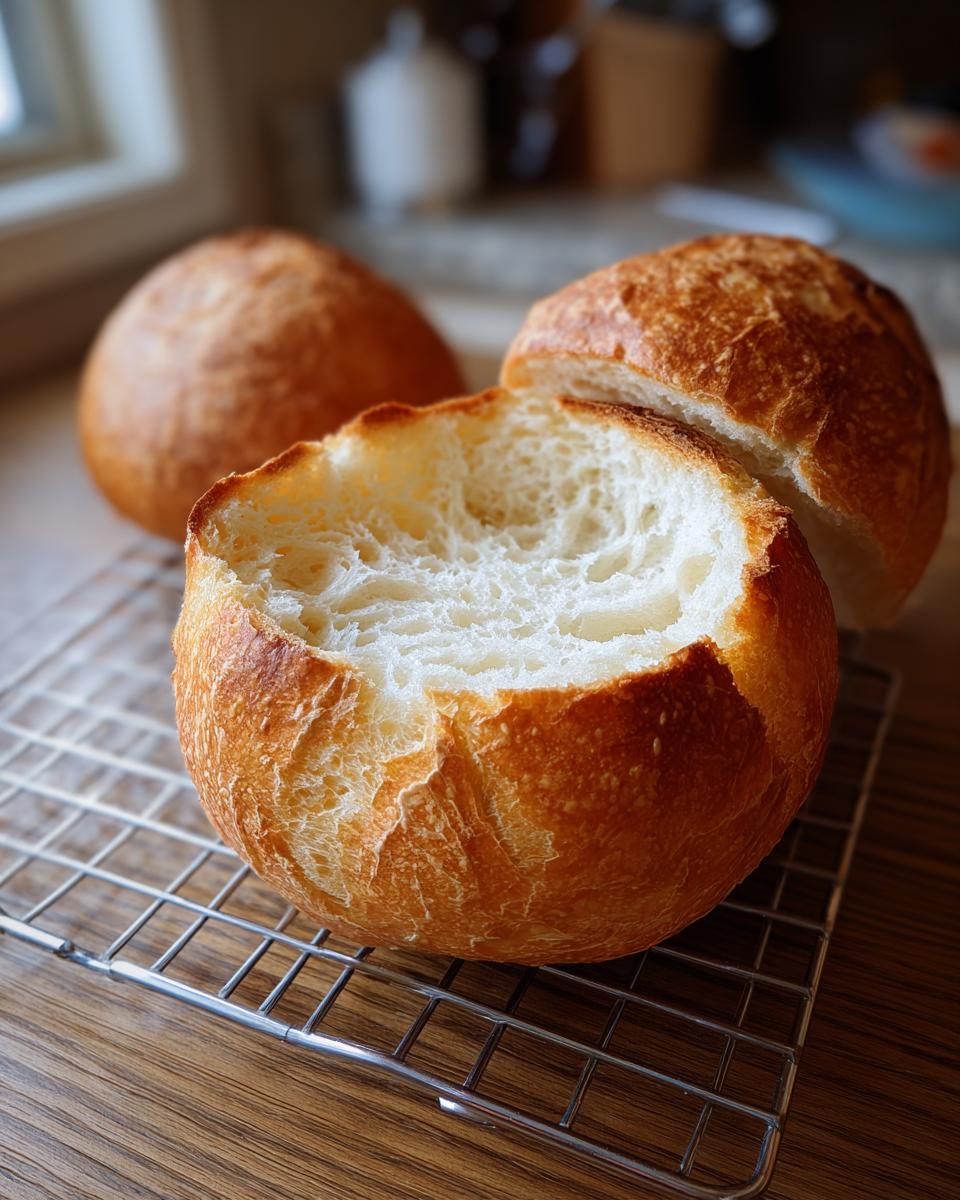
- When hollowing out the bread, cut a circle in the top and gently pull out the soft interior, leaving a thick wall (about 1 inch) to hold liquids like clam chowder or stew.
- The removed bread interior is perfect for dipping or making croutons.
Nutrition
- Serving Size: 1 bread bowl
- Calories: 350
- Sugar: 3
- Sodium: 350
- Fat: 4
- Saturated Fat: 1
- Unsaturated Fat: 3
- Trans Fat: 0
- Carbohydrates: 70
- Fiber: 3
- Protein: 12
- Cholesterol: 5