
I know the feeling—you want stunning bakery-quality bread on your table, without spending half your Saturday wrestling with dough. Most recipes promise easy, but deliver sticky frustration! Well, get ready to toss out that kneading pillow because I have cracked the code. This No Knead Dutch Oven Bread is what dreams are made of: crackly crust, pillowy center, incredible flavor. As Kate Connolly, I promise you that I tested this recipe until it was utterly foolproof. If you can mix a few things in a bowl, you can achieve this gorgeous, rustic loaf. Trust me, this simple approach changes everything you thought you knew about making fresh bread at home!
- Why This No Knead Dutch Oven Bread Recipe is Your New Favorite Homemade Bread Recipes
- Gathering Ingredients for Garlic Herb Bread
- Step-by-Step No Knead Bread Tutorial
- Flavor Infusion: Creating the Best Garlic Herb Bread
- Tips for Success in Beginner Bread Baking
- Serving Suggestions for Your Rustic French Bread
- Storage and Reheating Instructions for Homemade Bread Recipes
- Frequently Asked Questions About No Knead Bread
- Share Your Homemade Bread Creations
Why This No Knead Dutch Oven Bread Recipe is Your New Favorite Homemade Bread Recipes
If the thought of making homemade bread sounds exhausting, I get it! But this loaf is different. We cut out the ten minutes of aggressive kneading and substitute it with time—passive time, which is the best kind. This specific method gives you the texture you normally only get from hours of traditional work. It’s easily the best crusty bread I have ever made at home. Ready to see why this recipe is a big staple here at Kings Cook? It’s amazing served alongside soup!
- Incredibly Crusty Exterior: That beautiful, shatteringly crisp crust you crave? We get it here.
- Soft, Fluffy Interior: The inside stays tender and perfect for dunking, unlike other quick recipes.
- Minimal Effort: Seriously, the dough does all the heavy lifting while it rests on your counter.
It’s the perfect foundation for any savory topping you want to try on your next batch of homemade bread.
Achieving Artisan Bread From Scratch Texture Without Kneading
The secret to that amazing artisan texture isn’t muscle; it’s patience! We rely on a really long, slow fermentation—that 12 to 18-hour rest—to develop the gluten structure naturally. This long rest time is what breaks down starches just right, giving you that open crumb structure you expect when you splurge on an artisan bread from scratch. You mix it once, and that’s it. Easy, right?
The Magic of Dutch Oven Bread Baking
Next up is the star tool: the Dutch oven! People always ask me why they need one for this recipe, and here’s the deal: the Dutch oven acts like a mini steam oven right in your baking vessel. When you put the lid on, it traps all the moisture evaporating from the dough, creating the perfect steamy environment. That steam keeps the crust soft just long enough for the loaf to fully expand, then you take the lid off so it can turn deep gold and crispy. It’s the ultimate trick for great Dutch oven bread!
Gathering Ingredients for Garlic Herb Bread
Okay, you’ve committed to the 18-hour rest, so now for the fun part: we are flavoring this absolutely incredible loaf! One of my favorite things about this easy bread baking method is that the flavor infusion is done right at the end, so nothing gets burnt. The ingredients are super straightforward—nothing fancy you have to hunt for at a specialty store. We are using standard flour, salt, and instant yeast, which is critical for this recipe to work its magic overnight. Then, we have our flavor bombs ready for brushing right before baking!
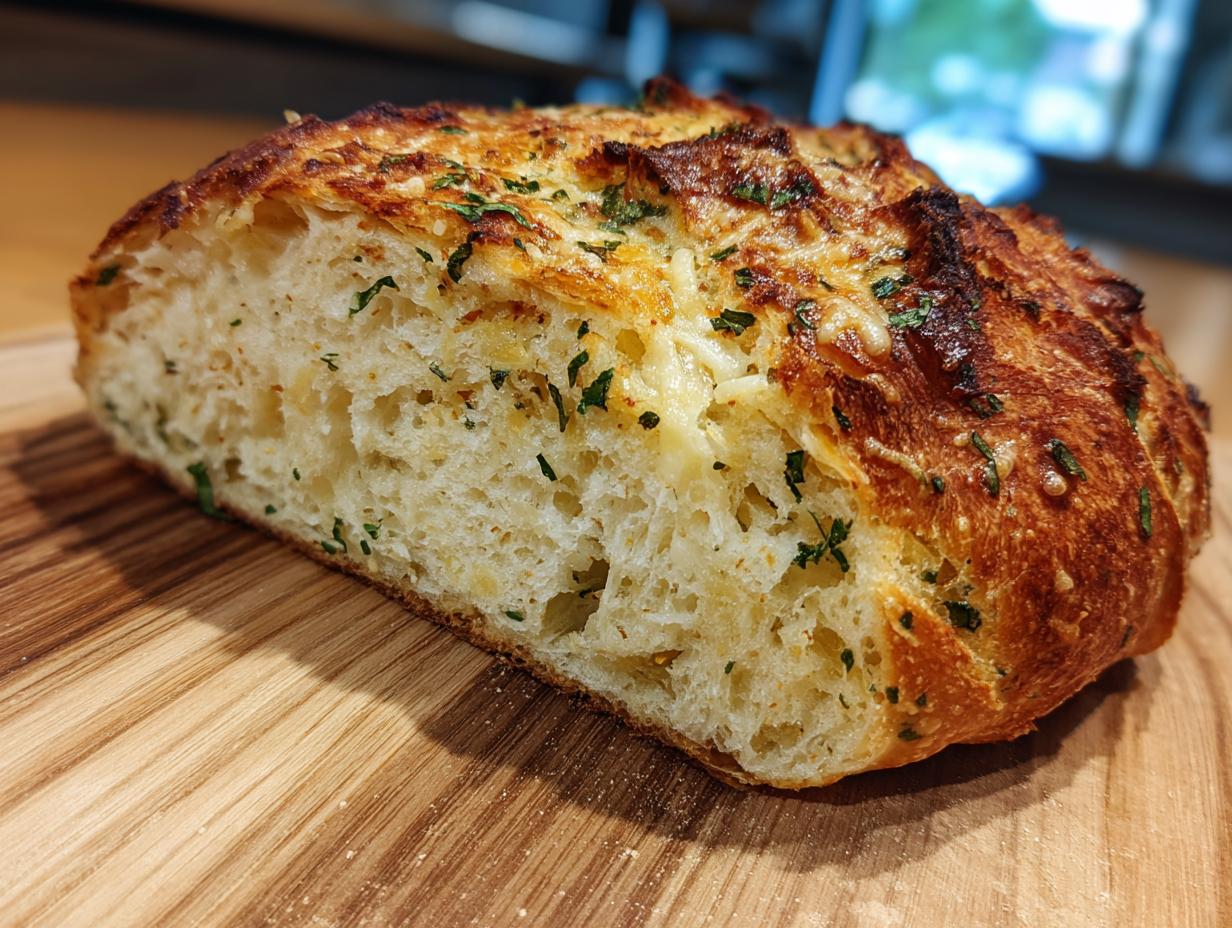
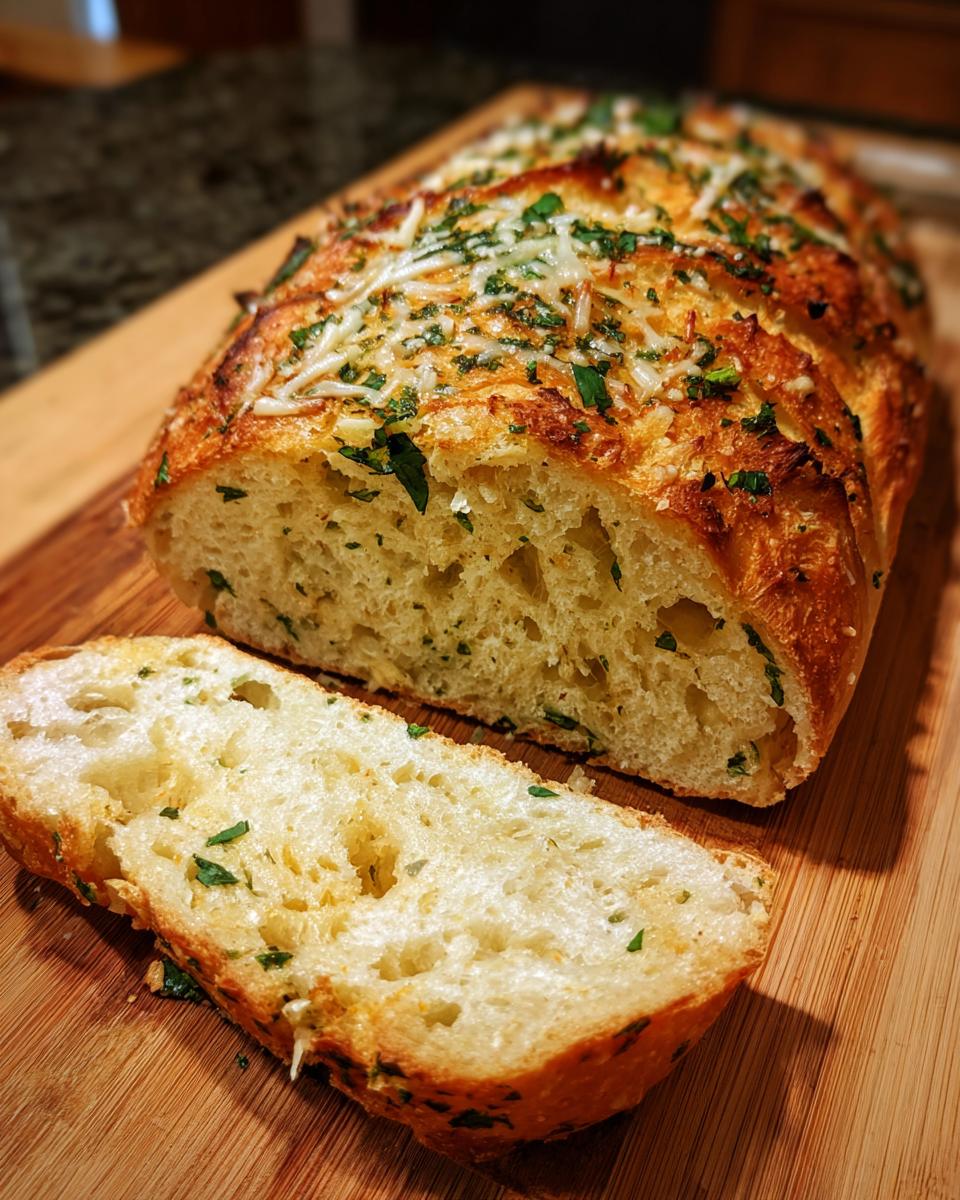
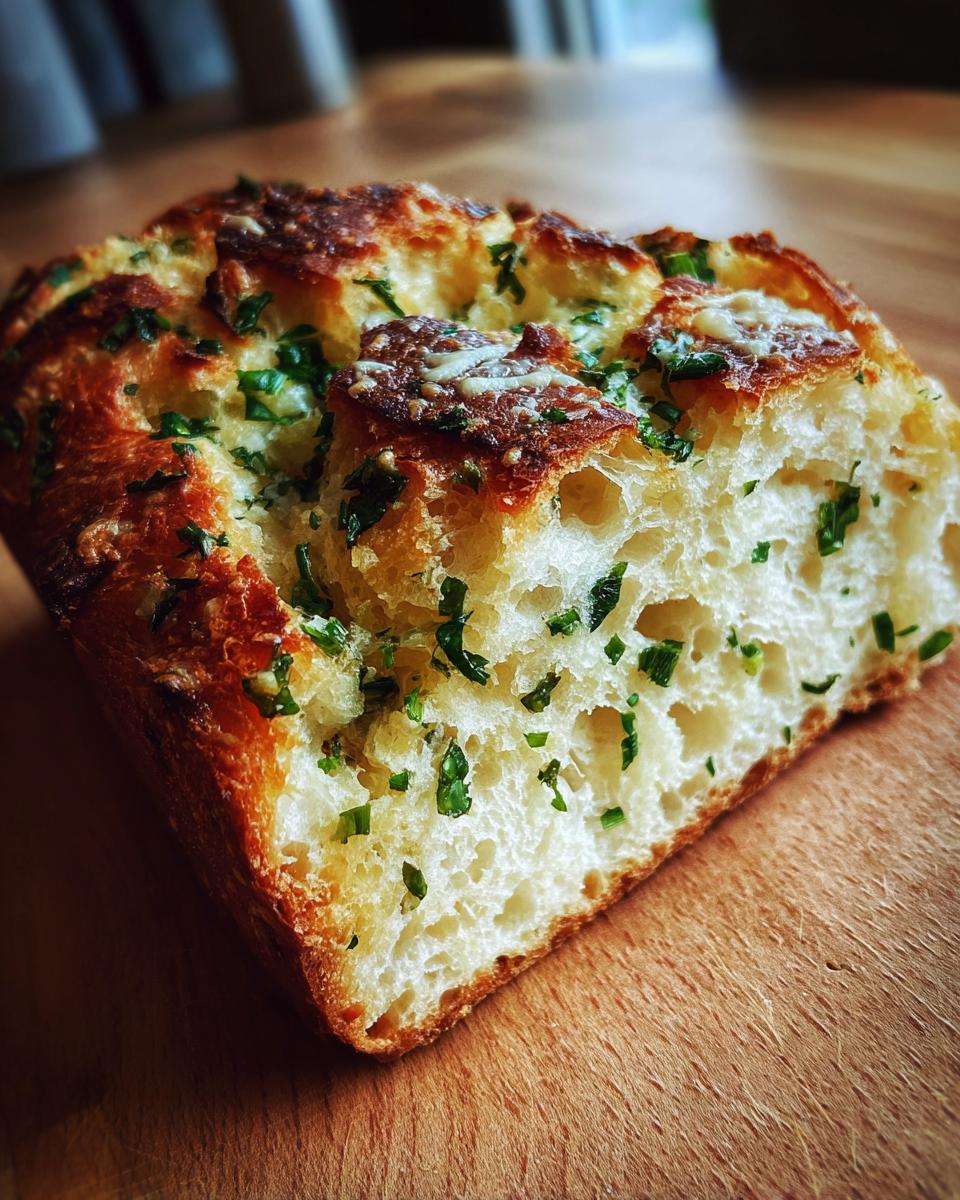
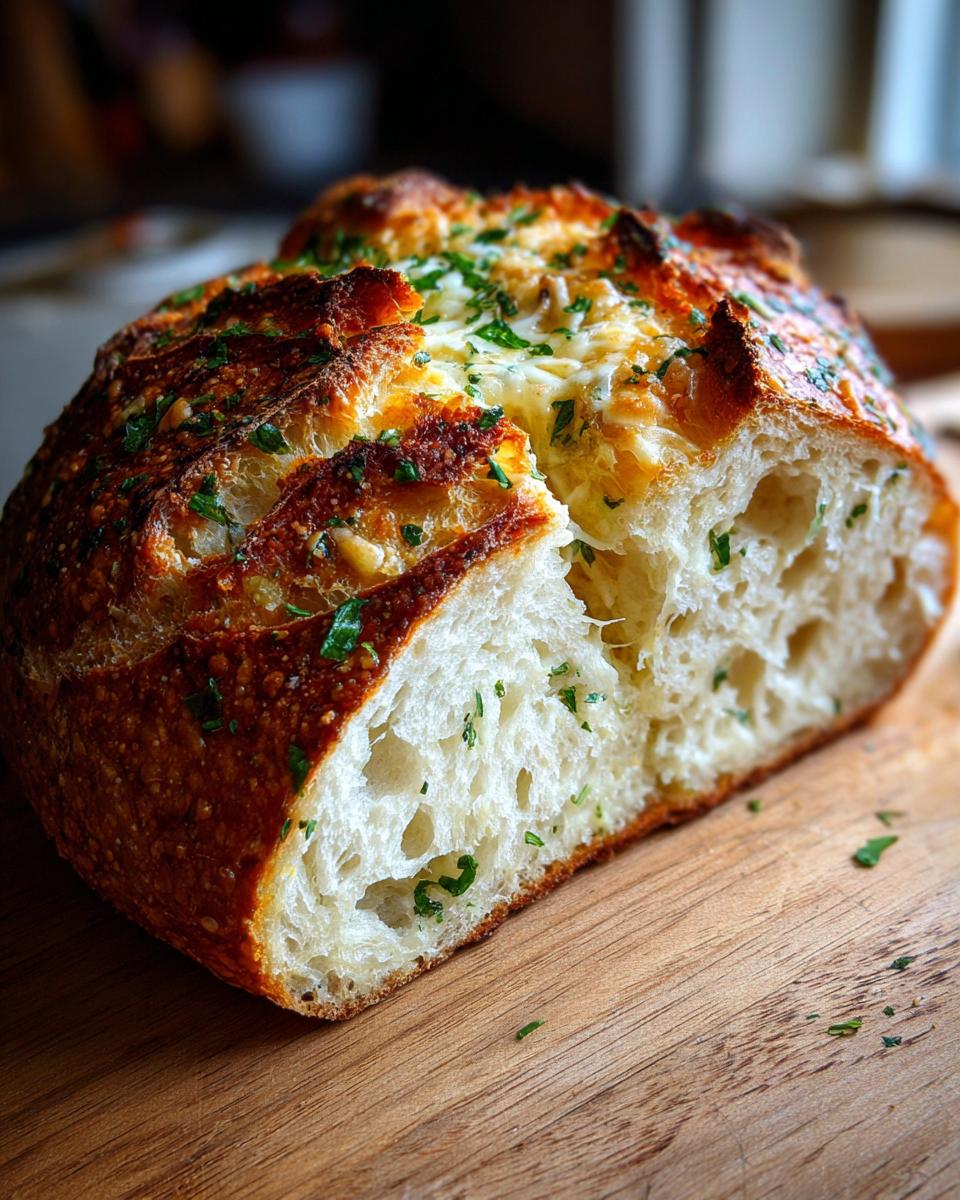
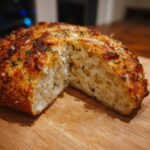
Don’t forget to pull out the butter, garlic, and herbs—these give our yeast bread its signature savory kick. I love seeing that beautiful Parmesan cheese waiting to add that final salty crust to the top of our finished bread.
Ingredient Notes and Substitutions for Your Garlic Parmesan Bread
When it comes to flour, I kept this recipe using all-purpose flour because I want maximum accessibility for beginners. But, if you want to lean into that chewier texture, go ahead and swap the AP for bread flour—it just has more protein, which helps develop that chew. Also, make sure you are grabbing instant yeast! Active dry yeast requires activation in water first, and for this overnight rest, instant is what the recipe calls for. The Parmesan cheese in this Garlic Parmesan Bread doesn’t just taste good; it browns up nicely and adds great salty pockets!
Step-by-Step No Knead Bread Tutorial
Are you ready to see the magic happen? This No Knead Bread Tutorial is the easiest part of the whole process because you basically just stand back and let nature do the work. Remember, the success of this crusty loaf hinges on this slow process. We are going to get the ingredients married together, and then we let the yeast convert those starches into flavor and structure. Before you know it, you will have a beautiful, rustic bread ready for the oven. This is truly the best way to get homemade bread with minimal hands-on time!
The Long Fermentation: Making the Dough for Your Crusty Bread Recipe
Listen closely to this step, because skipping it is how you end up disappointed. After you mix the flour, salt, yeast, and water into that shaggy mess, you absolutely must cover the bowl tightly. I use plastic wrap, making sure air can’t sneak in and dry out the top. Now, walk away! You need 12 to 18 hours at room temperature. Don’t open it, don’t poke it, and for goodness sake, do not knead it. This long, undisturbed rest is developing the gluten network that gives you that fantastic, irregular hole structure in your crusty bread recipe.
Preheating and Loading the Dutch Oven Bread
This is the only part that requires a little bit of focused attention, but it’s worth it for the bake! About 20 minutes before that long rest is up, you need to put your empty Dutch oven right into the cold oven and crank the heat up to 450°F. Yes, the pot gets screaming hot, and that’s exactly what we want. When the dough has rested, gently scrape it onto parchment paper, and try folding it over itself just a few times. Okay, now cover it loosely with a towel and let it rest for 30 minutes while the pot finishes heating. Then, using the parchment paper like a sling—be incredibly careful here—you gently lower your dough ball into that sizzling hot Dutch oven bread vessel. That intense heat hits the dough immediately. For more recipes perfect for a busy evening, check out my weeknight dinner ideas!
Flavor Infusion: Creating the Best Garlic Herb Bread
We’ve let the dough work its long, mysterious magic. Now it’s time for the party! While the Dutch oven is preheated and the dough is taking its short 30-minute rest, we mix up our herb topping. This is where our simple yeast bread transforms into an unforgettable Garlic Parmesan Bread. In a tiny bowl, mix that melted butter, minced fresh garlic, and those dried Italian herbs. The reason we wait until the very last moment, just before it hits the hot pot, is the garlic—fresh garlic burns easily at high temperatures. It’s perfect for dipping into something rich, like maybe even my favorite crab cakes!
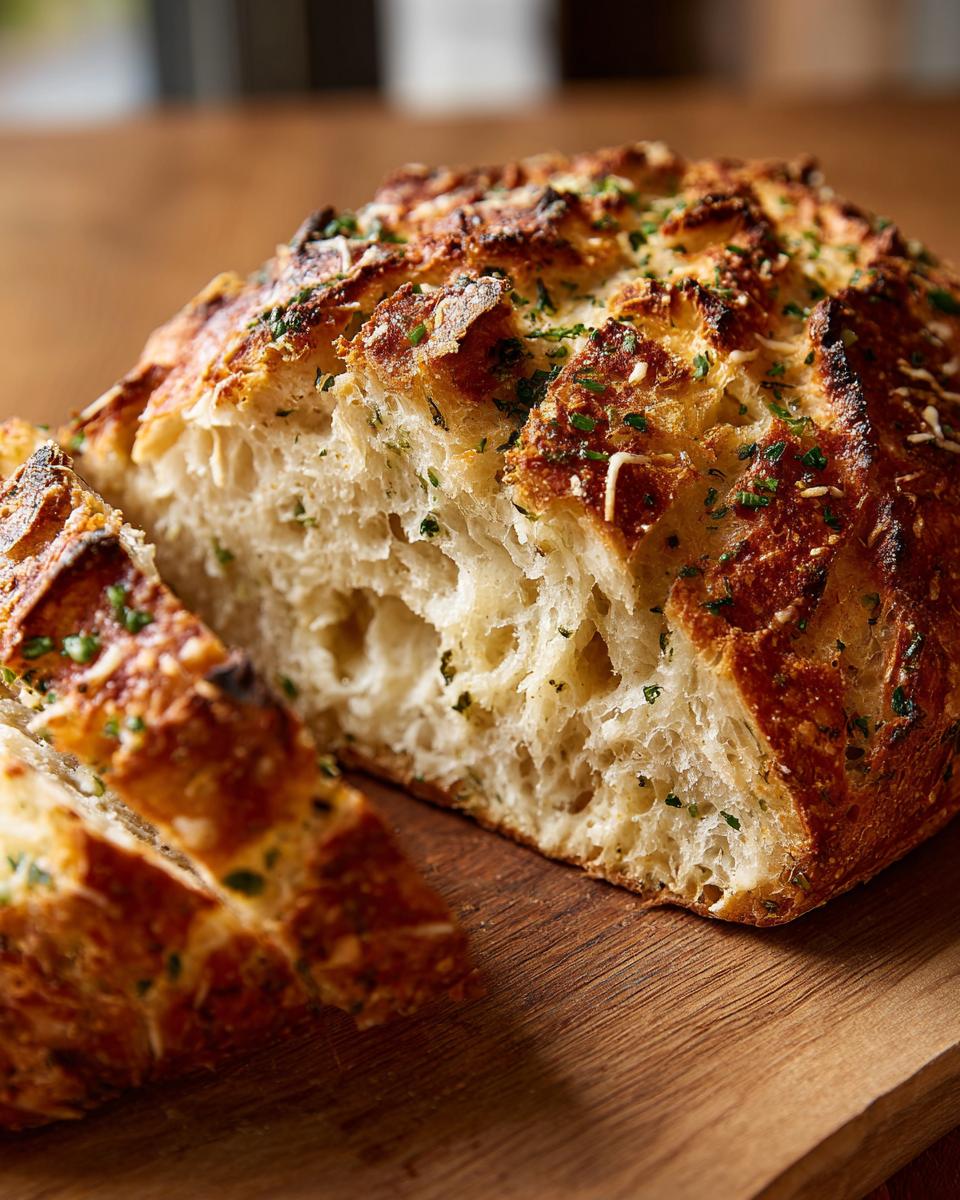
Once the loaf is carefully placed in the hot Dutch oven, take your herbal butter mixture and gently brush it all over the top surface of the dough. Don’t be shy! Then, sprinkle that gorgeous Parmesan cheese right on top. This topping protects the dough as it first steams, and when we remove the lid halfway through, that topping toasts up into the perfect savory crust for your amazing homemade bread.
Tips for Success in Beginner Bread Baking
When you’re tackling your first artisan-style loaf, having a few insider tips makes all the difference. This No Knead bread might look simple, but watching out for a couple of pitfalls guarantees that perfect result. Don’t panic if the dough looks ridiculously sticky after you first mix the water in—that’s totally normal! Remember, we aren’t kneading it to develop structure; the long rest does that heavy lifting for us. For real beginners, I always suggest using a kitchen scale if you have one, just to make sure your flour measurement is spot-on.
If your crust isn’t getting as dark or crunchy as you’d like, check your oven temperature, but also consider that little note about removing the lid for those last 15 minutes. That exposure to direct heat helps it brown up beautifully. If you’re curious about how flawless results are achieved, take a peek at why others love this technique right here, and don’t forget to check out my full philosophy on reliable recipes.
Achieving a Fluffy Bread Loaf Interior
The number one mistake I see people make after baking a beautiful crusty loaf is slicing into it too soon! I know the smell is intoxicating, but if you cut into that hot bread, all the internal steam rushes out, and you end up with a dense, gummy layer right in the middle. We want that wonderful fluffy bread loaf texture, right? That means you absolutely must let it cool completely—and I mean *completely*—on a wire rack before you even think about slicing. Patience during cooling guarantees the interior structure sets perfectly!
Serving Suggestions for Your Rustic French Bread
Now that you have this incredible, crusty loaf, the real fun begins! This Garlic Herb bread is fantastic all on its own, torn apart piece by piece. Because of that wonderful herbed butter we brushed on top, it’s the perfect companion for anything soupy. Seriously, try dunking it into a bowl of rich French Onion Soup—you won’t regret it. It also makes a phenomenal holiday bread side dish; ditch the boring rolls and impress everyone with this rustic, savory flavor. It’s meant to be enjoyed warmly, maybe with just a little extra butter spread on the slices!
Storage and Reheating Instructions for Homemade Bread Recipes
This loaf is absolutely best enjoyed the day you pull it from that hot Dutch oven, but let’s be real, sometimes we have leftovers! For your homemade bread recipes, fight the urge to refrigerate it—that cold air kills crusts. Keep the remainder on the counter, covered loosely under a clean towel so the outside air can still hit it a little. If you want to bring that amazing crunch back? You just need a quick trip back to the heat. Wrap the slices loosely in foil and heat them in a 350°F oven for just about 8 minutes. That little refresh brings that crusty texture right back to life on your delicious bread.
Frequently Asked Questions About No Knead Bread
Baking is always an adventure, and sometimes you run into little snags, especially when you’re trying a new technique like this incredible No Knead bread! I’ve gathered the questions I get most often from readers curious about the process or looking to tweak the recipe. Don’t worry if you don’t have a Dutch oven; we have workarounds! I want you to feel totally confident diving into your first batch of homemade bread. If you have another question, don’t hesitate to reach out via my contact page!
Can I use this recipe for a standard loaf pan instead of a Dutch Oven Bread?
You absolutely can, though the texture will be slightly different! Because a standard loaf pan doesn’t trap steam as effectively as a Dutch oven, you probably won’t get that super aggressive, shatteringly crisp crust. To help it out, you can place a small, oven-safe pan on the bottom rack underneath your loaf pan filled with hot water when you preheat the oven. This creates at least some steam! Just remember to bake it for longer, maybe 45 to 55 minutes at 400°F, until it sounds hollow when you tap the side. You’ll get a lovely, softer loaf, which is great if you prefer something closer to a classic white bread texture!
What if my dough didn’t rise much during the 18 hours?
This is usually related to something simple in the basic environment. Since this recipe relies on very little yeast for a slow rise, temperature is everything. If your kitchen was chilly—say, below 68°F—the yeast was taking a vacation. Yeast likes warmth! Also, make sure you used instant yeast, not active dry, unless you proofed it first. If the dough looks exactly like it did when you mixed it after 18 hours, your yeast might have been old, meaning it wasn’t viable. Next time, double-check your yeast package date, or test it in warm water first. That’s a key part of understanding yeast bread basics!
How do I make this recipe into a soft dinner rolls recipe?
Oh, I love this idea! Turning this into soft dinner rolls means we need to change the shaping and drastically reduce the resting/baking time. Skip the 18-hour rest entirely—that long fermentation is for the big, airy artisan structure. Instead, mix your dough gently, cover, and let it rest for just 1.5 hours until it has visibly puffed up a bit. Then, divide the dough into equal portions, shape them quickly into little balls, and set them into a greased 9×13 pan, leaving some space between them. Let them proof for another 45 minutes, then bake them at 375°F until golden brown (about 20 minutes max). You’ll get wonderfully soft dinner rolls instead of one giant loaf!
Share Your Homemade Bread Creations
Well, we finally did it! We took minimal effort and turned it into this jaw-dropping loaf of Garlic Herb bread. I truly hope using this No Knead Dutch Oven method has inspired you to bake more often. Baking is always better when we talk about it, so please don’t be shy!
If you made this recipe, I would be so grateful if you could come back here and drop a rating below. Did you stick to the herbs I suggested, or did you try adding dried rosemary or maybe some smoked paprika? I love hearing about your unique twists! These variations are what make cooking with a community so much fun. Feel free to leave comments detailing your process, especially if you tried this for the first time. I’ve learned so much from readers like you over the years, and I always love seeing pictures of your beautiful bakes! You can read more about my own baking journey on my About page.
Thank you again for joining me in the kitchen today. Happy baking, and I can’t wait to see what delicious things you create next!
PrintNo Knead Dutch Oven Garlic Herb Bread
Make this incredibly easy, crusty No Knead Dutch Oven Bread flavored with garlic and herbs. It bakes up with a perfect crust and a soft, fluffy interior, requiring almost no effort from you.
- Prep Time: 10 min
- Cook Time: 50 min
- Total Time: 13 hours 0 min
- Yield: 1 loaf 1x
- Category: Side Dish
- Method: Baking
- Cuisine: American
- Diet: Vegetarian
Ingredients
- 3 cups all-purpose flour
- 1 1/2 teaspoons salt
- 1/4 teaspoon instant yeast
- 1 1/2 cups cool water
- 2 tablespoons unsalted butter, melted
- 2 cloves garlic, minced
- 1 teaspoon dried Italian herbs
- 1/4 cup grated Parmesan cheese
Instructions
- In a large bowl, whisk together the flour, salt, and yeast.
- Pour in the cool water and mix with a wooden spoon until just combined. The dough will be shaggy and sticky.
- Cover the bowl tightly with plastic wrap and let the dough rest at room temperature for 12 to 18 hours. Do not knead the dough.
- After the long rise, gently scrape the dough out onto a lightly floured surface. Fold the dough over itself a few times to form a rough ball.
- Place the dough ball on a piece of parchment paper, cover loosely with a clean kitchen towel, and let it rest for 30 minutes.
- About 20 minutes before baking, place a 5- to 6-quart Dutch oven, with the lid on, into your oven. Preheat the oven to 450°F (232°C).
- Carefully remove the hot Dutch oven from the oven. Lift the dough using the parchment paper and gently place it inside the hot pot.
- In a small bowl, mix the melted butter, minced garlic, and dried Italian herbs. Brush this mixture over the top of the dough. Sprinkle with Parmesan cheese.
- Cover the Dutch oven with its lid and place it back into the oven. Bake for 30 minutes.
- Remove the lid and continue baking for another 15 to 20 minutes, or until the crust is deep golden brown.
- Carefully remove the bread from the Dutch oven and let it cool completely on a wire rack before slicing.
Notes
- For a chewier artisan bread texture, use bread flour instead of all-purpose flour.
- If you want a softer crust, remove the bread from the Dutch oven for the last 10 minutes of baking and place it directly on the oven rack.
- This bread is excellent served warm with soup or as a side dish for pasta meals.
Nutrition
- Serving Size: 1 slice
- Calories: 245
- Sugar: 1
- Sodium: 350
- Fat: 5
- Saturated Fat: 3
- Unsaturated Fat: 2
- Trans Fat: 0
- Carbohydrates: 45
- Fiber: 2
- Protein: 8
- Cholesterol: 10