
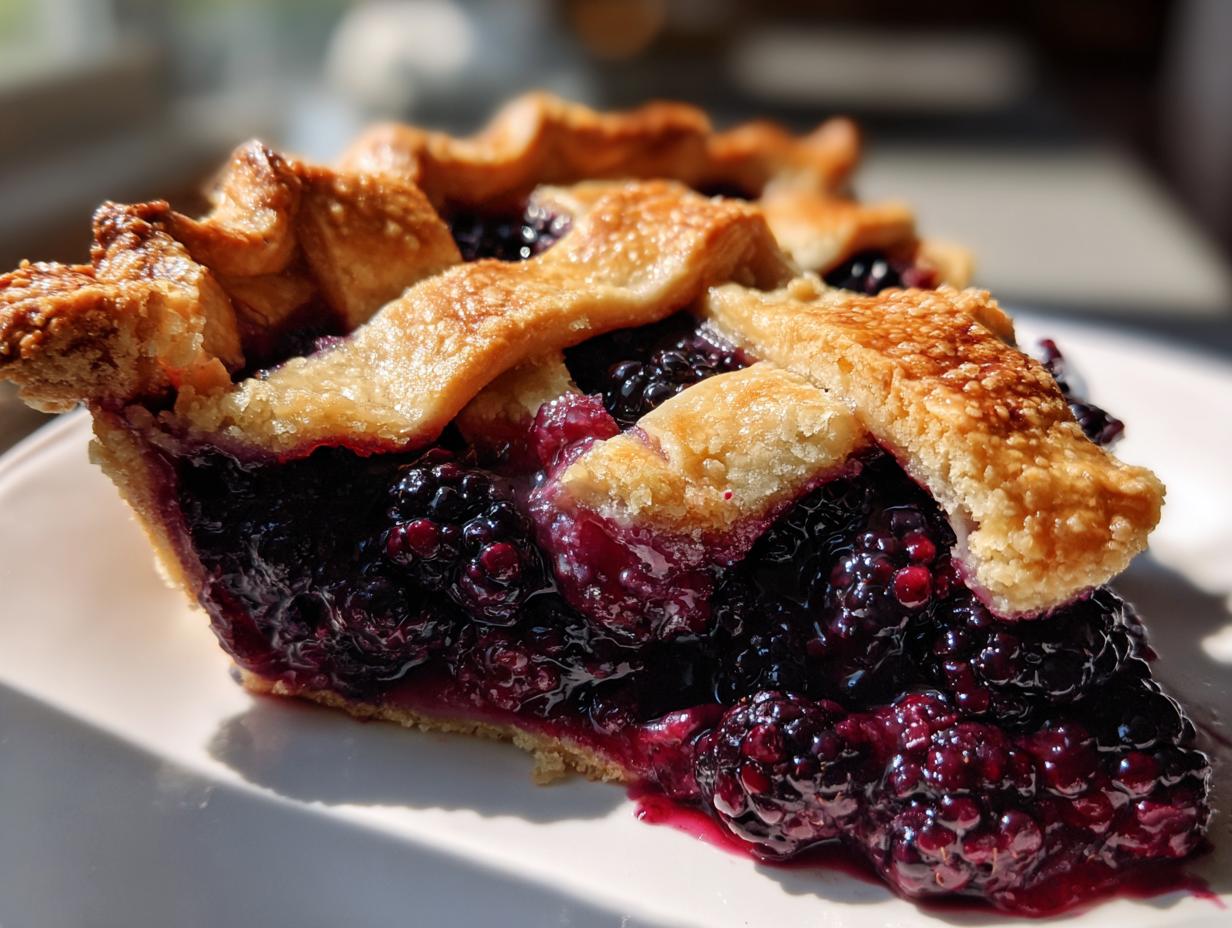
There is nothing quite as comforting as slicing into a truly classic, homemade dessert, and for me, that means a perfect blackberry pie. I know that making a pie from scratch can feel intimidating—especially when you’re worried about that dreaded soggy bottom or runny filling.
But trust me, after years of testing and tasting in my own kitchen, I’ve nailed down the system for you. This is the foolproof guide to achieving that impossibly flaky, all-butter crust and a juicy, sweet-tart filling that sets up beautifully every single time. Mastering these foundational American classic dessert recipes, like this one, is how you build confidence in the kitchen, and I want you to feel that pride!
We’re going the old-fashioned route here, focusing on technique. Once you master this, you’ll see why pies are the ultimate baking achievement. Before we dive in, if you love mastering the classics, you should check out my guide on making the perfect apple pie next!
- Why This Classic Blackberry Pie Recipe Works Every Time
- Ingredients for Your Homemade Blackberry Pie
- Flaky Pie Crust Secrets: How to Make Blackberry Pie Dough
- Preparing the Juicy Blackberry Filling for Your Blackberry Pie
- Step-by-Step Assembly of Your Lattice Top Blackberry Pie
- Baking Instructions for the Ultimate Blackberry Pie
- The Most Important Step: Cooling Your Blackberry Pie
- Serving Suggestions for This Old Fashioned Blackberry Dessert
- Frequently Asked Questions About Blackberry Pie
Why This Classic Blackberry Pie Recipe Works Every Time
I truly believe this isn’t just another pretty picture; it’s the best berry pie recipe because it’s built on real baking foundations. I’ve gone over every millimeter of this recipe to make sure you get reliable results, even if you’ve never made a pie before. It’s about removing the guesswork!
- Flaky Crust Guarantee: We use the very specific cold butter technique. This means fewer lamination failures and a crust that shatters perfectly, not crumbles sadly.
- Perfect Filling Consistency: My approach to thickening ensures you get a slice that holds its shape. No more pool of sweet purple juice on your plate, I promise!
- Accessible Ingredients: Everything here is what you’d find in a standard pantry—no strange thickeners or imported flavorings required. This is honest, good baking.
Ingredients for Your Homemade Blackberry Pie
Okay, let’s get down to business! The magic of a great blackberry pie starts right here with the right components. Seriously, don’t even think about using room-temperature butter here—that’s the biggest mistake anyone makes when going for that super flaky pie crust secrets!
For the crust, remember: everything needs to be cold. I mean *ice* cold! We’re using two sticks of unsalted butter, cut into those perfect little half-inch cubes. Keep that bowl ready in the freezer while you measure everything else out. Here’s what you’ll need:
- 2 1/2 cups all-purpose flour
- 1 teaspoon salt
- 1 cup (2 sticks) unsalted butter, very cold and cut into 1/2-inch cubes
- 1/2 cup ice water, plus more if needed
- 6 cups fresh or frozen blackberries (do not thaw if frozen)
- 1 1/2 cups granulated sugar (adjust based on berry sweetness)
- 1/4 cup cornstarch (for thickening)
- 1 tablespoon fresh lemon juice
- 1/2 teaspoon ground cinnamon
- 1/2 teaspoon ground nutmeg
- 1 large egg, beaten with 1 tablespoon milk (for egg wash)
- 1 tablespoon coarse sugar (for sprinkling)
Flaky Pie Crust Secrets: How to Make Blackberry Pie Dough
This is where we earn our stripes! If you want an Old Fashioned Blackberry Pie that melts in your mouth, you need to listen closely to these flaky pie crust secrets. The whole process relies on keeping everything super cold and handling that dough like it’s made of spun glass. Seriously, the less you touch it, the better your final result will be.
We are making a classic all-butter crust here. That means rich flavor and unbelievable texture. A lot of folks try quick fixes, but the real magic in this buttery pie crust tutorial is in the chilling! After we mix the dough, we wrap those two disks tightly and make them chill out in the fridge for at least an hour. This lets the gluten relax, which stops the dough from shrinking in the oven. And that chilling is your first defense against that dreaded no soggy bottom pie! If you want to dive deeper into just the crust, I’ve got a whole tutorial on making the perfect butter pie crust.
Achieving the Perfect Texture: Butter and Water Ratio
When you’re cutting in that icy cold butter, don’t blend it completely smooth. You absolutely need some pieces about the size of small peas. When those pea-sized chunks hit the hot oven air, they create steam pockets. Those pockets are what separate the dough layers—that’s where your flakiness comes from! Add the ice water slowly, just until the dough *barely* holds together. Remember, we are not kneading bread here; we want layers, not toughness!
Preparing the Juicy Blackberry Filling for Your Blackberry Pie
Now that our crust is chilling out, we can focus on the star of the show: that vibrant, sweet-tart blackberry filling. The goal here is twofold: maximum berry flavor and zero sogginess underneath! Getting the filling consistency right is something I’ve spent a lot of time perfecting, so listen up, this is key to a beautiful slice.
We need the berries to release their juice, but we need that juice to thicken up nicely. That’s why cornstarch is our superhero here! We toss the 6 cups of blackberries—whether they are fresh from the market or straight from the freezer—with your sugar, lemon juice for brightness, cinnamon, and nutmeg. The cornstarch loves to hang out with that sugar, and when it hits the heat, bam, it creates that perfect gel.
A quick note on frozen berries from my other recipes: use them straight from the freezer! If you thaw them first, you’ll end up with way too much liquid, and that equals a runny mess. A gentle toss is all you need here; we don’t want to mash our beautiful fruit before it even gets into the dough!
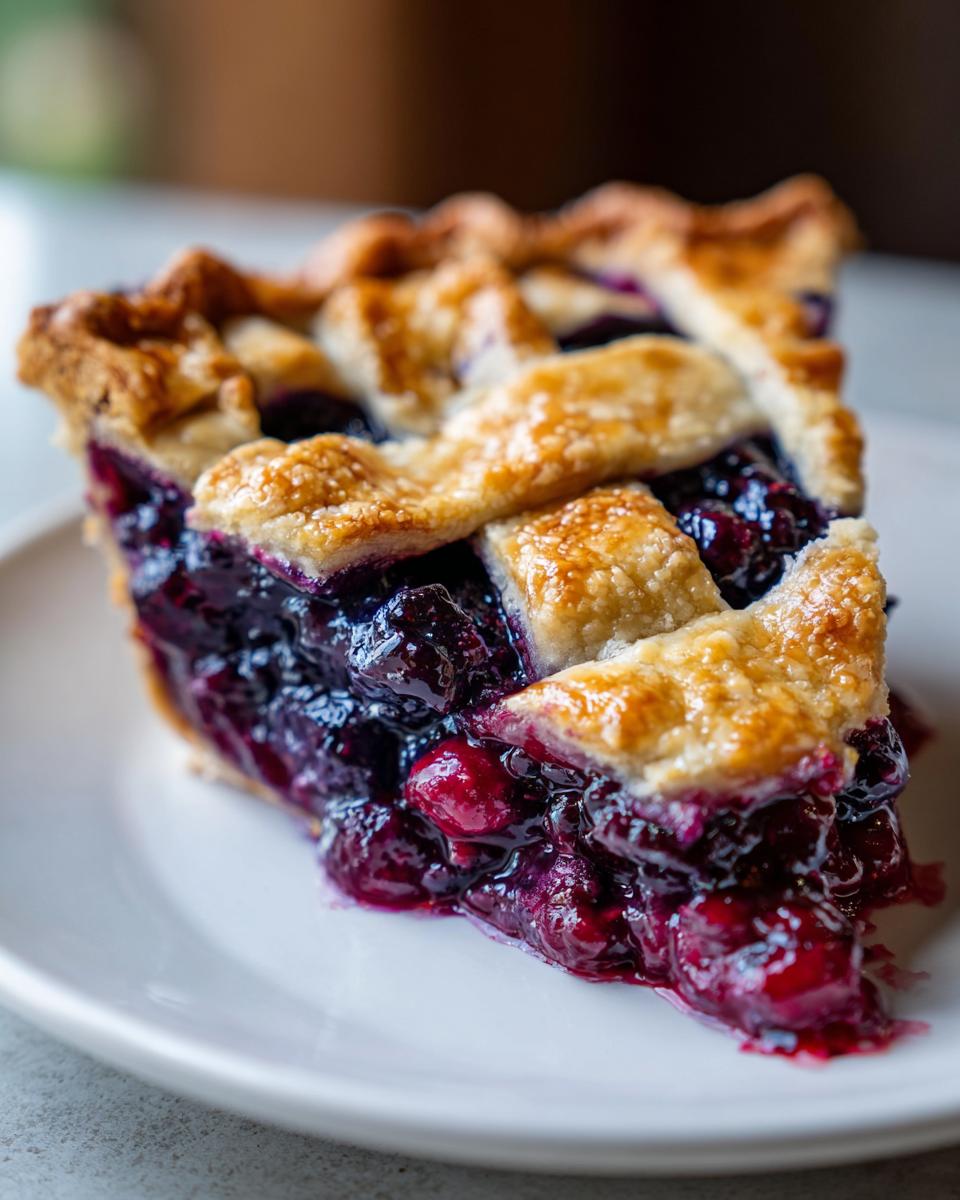
Step-by-Step Assembly of Your Lattice Top Blackberry Pie
Okay, deep breath! We’ve got our dough chilled and our filling waiting patiently. This next part—the assembly—is where the visual magic happens in this step by step pie making guide. First, grab that bottom crust from the fridge. On a lightly floured surface, take one disk and roll it out into about a 12-inch circle. Don’t panic if it’s a little uneven; that just adds to the charm of a fantastic homemade blackberry pie!
Gently drape that circle over your 9-inch pie plate. Once it’s settled in, trim the edges so you have about an inch of overhang. Back into the fridge it goes! While that firms up, roll out your top crust. If you are going for the classic look, cut that into strips for your lattice top pie. Before you fill it, make sure that bottom crust is nice and cold; it’s another layer of protection against a no soggy bottom pie! If you need some inspiration on how a gorgeous lattice looks, check out this great inspiration from Ayla’s kitchen: Paula Deen’s Blackberry Pie Recipe.
Pour all those gorgeous berries into the chilled bottom shell. Now, if you want an extra rich touch, I always tuck a couple of tiny knobs of cold butter right on top of the filling. Then, it’s time to weave! Once your lattice is done and sealed beautifully to the bottom crust, give the whole thing a brush with egg wash and a sprinkle of coarse sugar. Here’s the secret weapon: pop the whole assembled pie into the freezer for 15 minutes right before it goes into the hot oven. Cold crust bakes up flaky beautifully!
Tips for a Showstopping Lattice Top Pie
When you’re weaving those strips, try to keep them relatively uniform. When you finish weaving, make sure you really press (crimp!) the top strips firmly against the bottom edge to seal them tight. If you opt for a solid top, you absolutely must cut vents—at least five slits—for the steam to escape. No vents means a crust that blows out instead of baking beautifully!
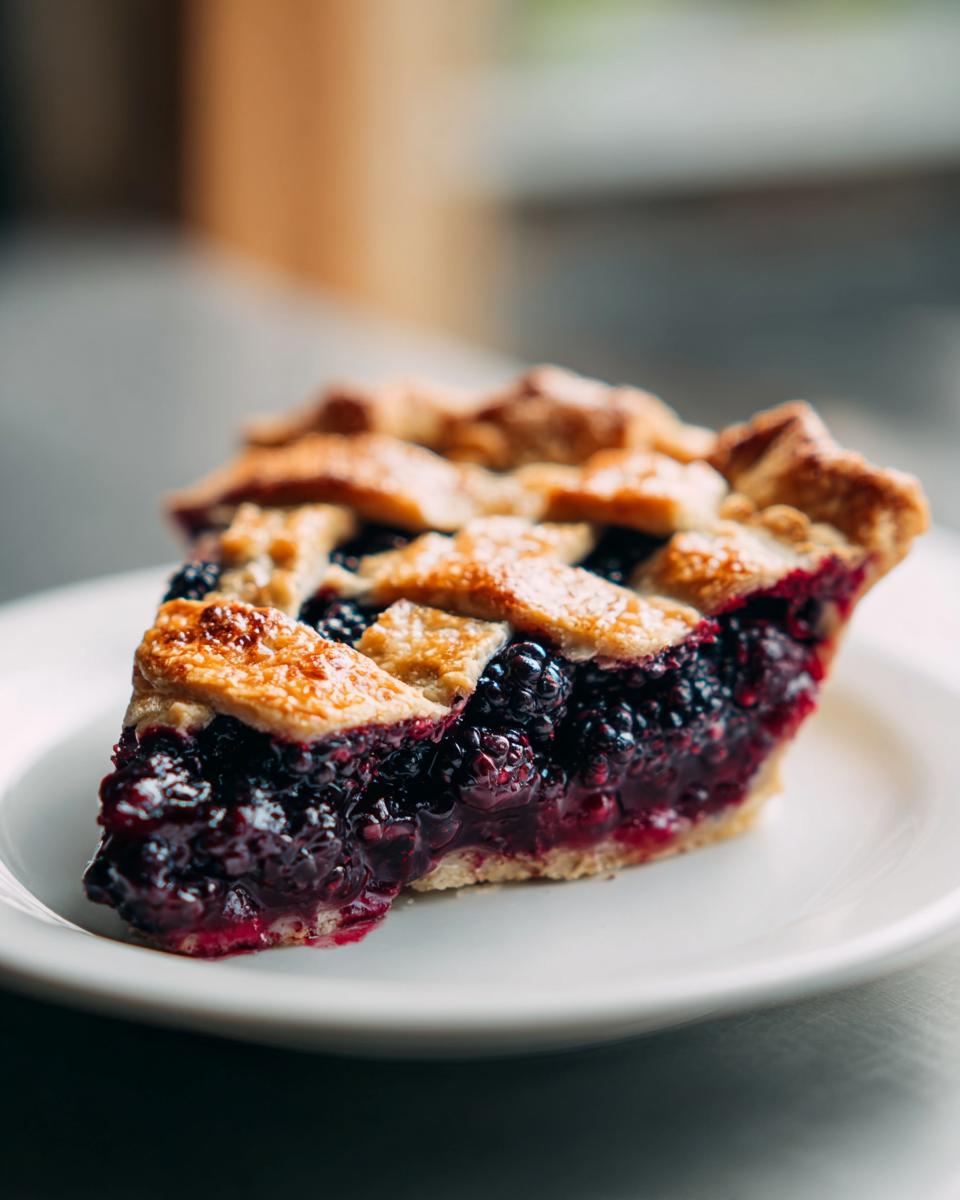
Baking Instructions for the Ultimate Blackberry Pie
Alright, the pie is assembled, chilled, and ready for its moment of truth! Getting the baking temperature exactly right is the final checkpoint to ensure you get that golden crust without burning the edges before the center cooks. We start hot, then bring the heat down.
Preheat your oven to a fairly hot 400°F (200°C). Always put your pie on a sturdy baking sheet—this is non-negotiable because those berry juices *will* bubble up, and you don’t want a sticky, smoky mess on the bottom of your oven. Bake it at 400°F for the first 20 minutes. This initial blast of heat helps set the crust structure fast, which is another step toward beating that soggy bottom!
After 20 minutes, immediately reduce that temperature down to 375°F (190°C). Let it bake for another 35 to 45 minutes. You’ll know it’s ready when you can clearly see the filling bubbling thickly right through the lattice gaps. If the edges start looking too dark before the filling is set—which happens sometimes with my older oven—just snip a few strips of aluminum foil and drape them loosely over the crimped crust edge. Don’t cover it completely, just protect those tender parts!
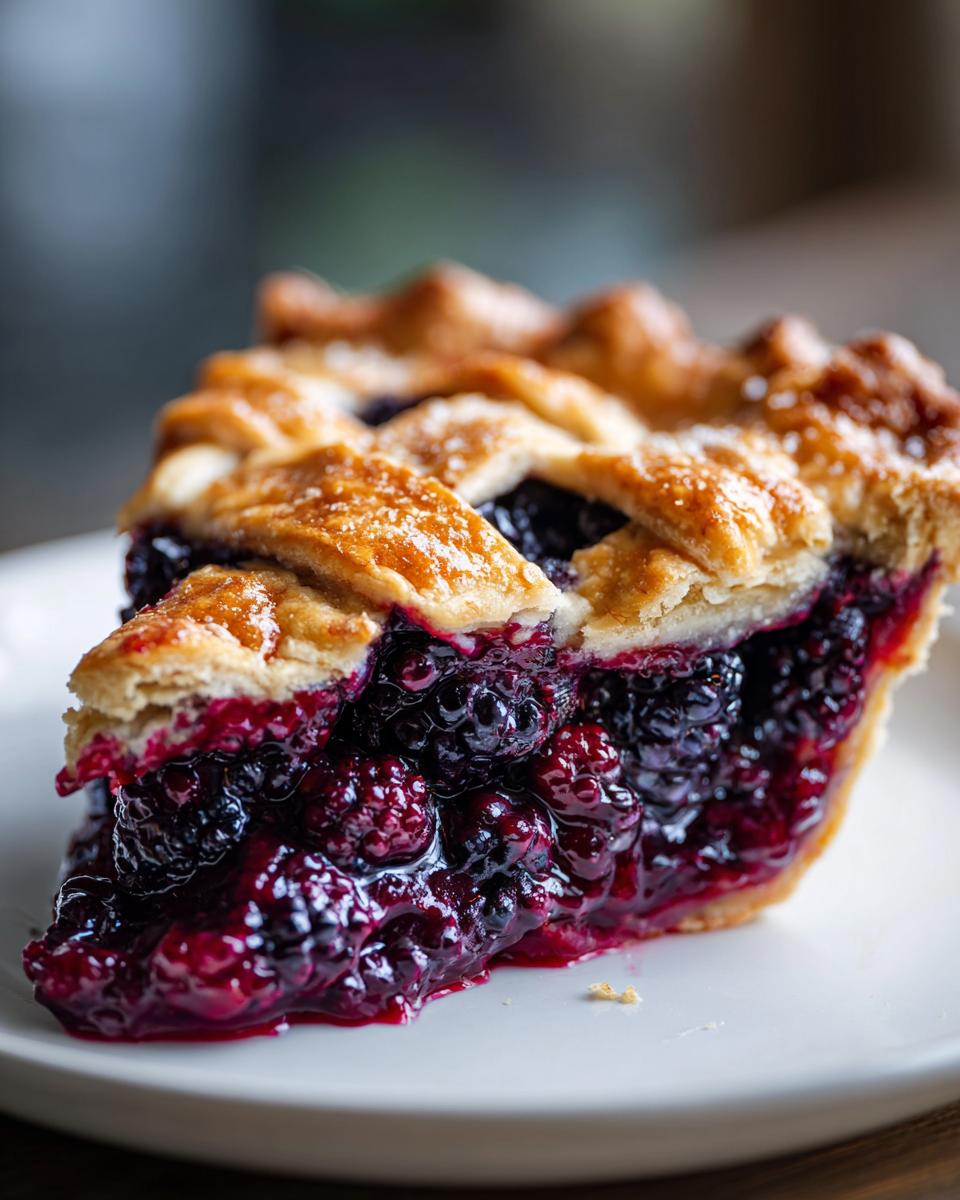
The Most Important Step: Cooling Your Blackberry Pie
You’ve done the hard work! The crust is golden, the berries are bubbly, and the house smells like heaven. But stop right there! I need you to hear me on this one: you absolutely cannot slice this pie yet. I know, the temptation is real, but that slice is going to be a puddle if you rush this final step, even if you’ve mastered all the best dessert recipes!
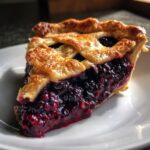
This is the true final secret to guaranteeing a gorgeous, perfect slice of your homemade blackberry pie. You must let your pie cool completely on a wire rack, which means a solid four hours—seriously. That cooling window is when the cornstarch you added does its real work, locking all that beautiful juice into a firm gel. If you cut it hot, it runs. Patience here means you get that perfect, clean slice showcasing your beautiful work every time!
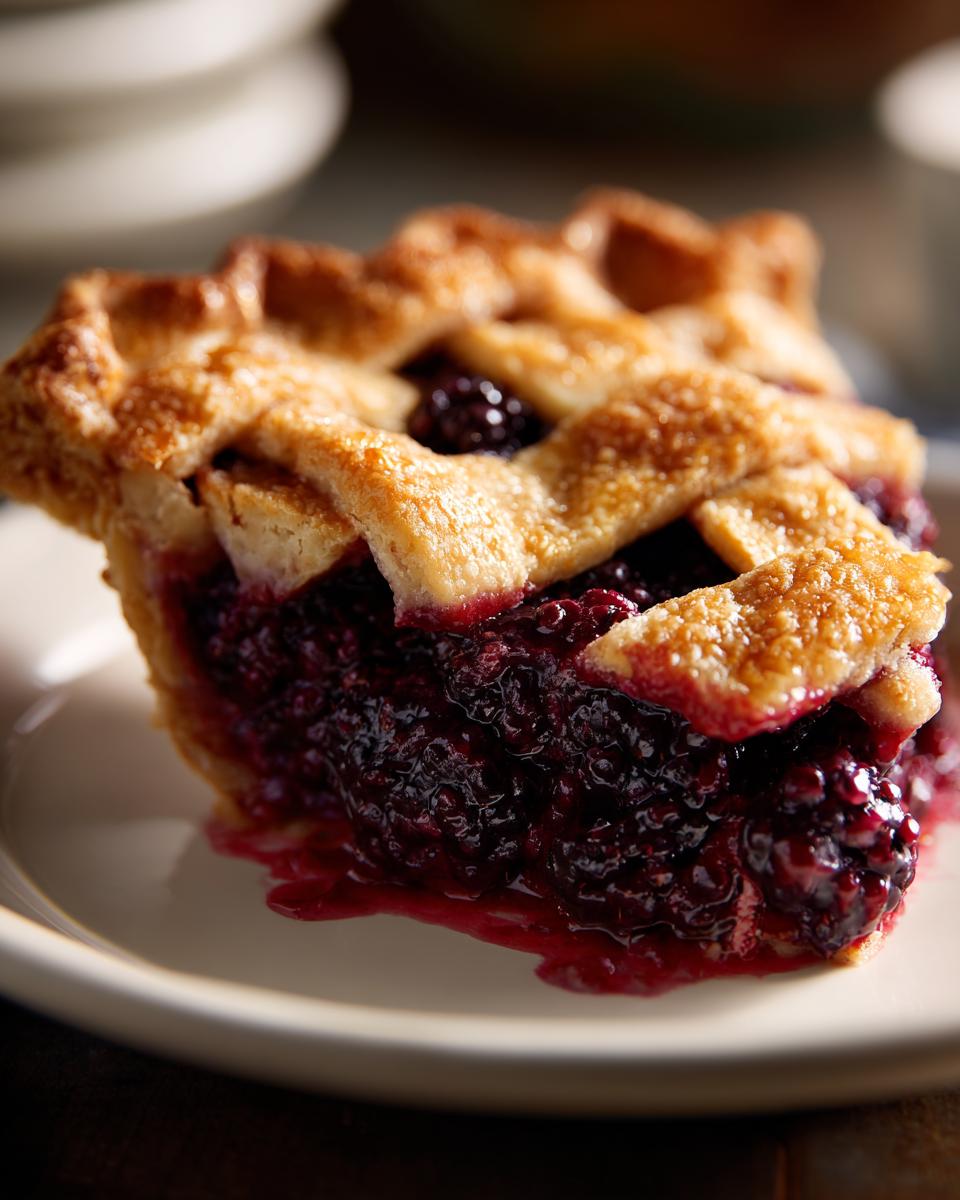
Serving Suggestions for This Old Fashioned Blackberry Dessert
Patience pays off, and now it’s time for the enjoyment! This Old Fashioned Blackberry Dessert is truly spectacular all on its own, but let’s face it, a classic always tastes better with a friend. When I finish baking one of these beauties, I always make sure I have a carton of high-quality vanilla ice cream ready to go.
The contrast between the warm, spiced, slightly tart pie and the cold, rich cream is pure magic. If ice cream isn’t your thing, a dollop of freshly whipped, unsweetened cream is divine; it cuts through the sweetness perfectly. Serving this piece of Americana is always a showstopper, truly an American classic dessert!
If you’re looking for more ways to celebrate seasonal fruit desserts, I have tons of ideas over on my best dessert recipes page. And if you want to see one of the best rustic presentations out there, take a peek at this gorgeous pie featured on Savor the Best: Old Fashioned Blackberry Pie!
Frequently Asked Questions About Blackberry Pie
I know you might have a few lingering thoughts after tackling something as magnificent as a classic blackberry pie recipe! Baking is all about knowing how to troubleshoot, so let’s clear up any last-minute worries you might have before you pull that golden beauty out of the oven. Don’t forget, if you want to try a slightly different take on fruit pies, I have a great easy fruit pie recipe guide too!
Can I substitute frozen blackberries in this blackberry pie recipe?
Yes, you absolutely can! This recipe is fantastic because it works with whatever berries you have access to. Just remember my big golden rule from the filling section: DO NOT thaw frozen blackberries first! If you thaw them, they release all their liquid prematurely, and you’ll end up with soup instead of a thick filling. Keep them rock solid when you mix them with the cornstarch and sugar, and they’ll cook down perfectly in the oven.
How do I prevent the berry juices from leaking out?
Leaking is usually caused by one of three things, and we’ve covered the fixes in the main steps! First, make sure you used enough cornstarch—that’s the primary thickener. Second, check your bottom seal. When you crimp the top and bottom crusts together, press hard with your fingers or a fork to seal those edges completely. Any opening lets steam escape too fast, which can push juice out. Lastly, that quick 15-minute freeze right before baking helps harden the bottom crust barrier, which is a major player in preventing leaks!
What is the best way to store leftover homemade blackberry pie?
Because this homemade blackberry pie filling is so jammy now (thanks to that cooling time!), it keeps really well. Do not put it in the fridge for just one night; the crust will get soft and sad! You can leave it covered loosely at cool room temperature for up to 24 hours. After that, or if your kitchen is super warm, cover it tightly with foil and pop it in the fridge for up to four days. When you want a slice, I recommend taking it out about an hour before serving to let the crust warm up a tiny bit, or you can gently reheat slices in a low oven.
PrintClassic Homemade Blackberry Pie with Foolproof Flaky Lattice Crust
Master the art of the perfect homemade blackberry pie. This recipe delivers a juicy, sweet-tart filling and an all-butter, flaky double crust that guarantees no soggy bottom. This is your new favorite Old Fashioned Blackberry Dessert.
- Prep Time: 45 min
- Cook Time: 65 min
- Total Time: 110 min
- Yield: 8 servings 1x
- Category: Dessert
- Method: Baking
- Cuisine: American
- Diet: Vegetarian
Ingredients
- 2 1/2 cups all-purpose flour
- 1 teaspoon salt
- 1 cup (2 sticks) unsalted butter, very cold and cut into 1/2-inch cubes
- 1/2 cup ice water, plus more if needed
- 6 cups fresh or frozen blackberries (do not thaw if frozen)
- 1 1/2 cups granulated sugar (adjust based on berry sweetness)
- 1/4 cup cornstarch (for thickening)
- 1 tablespoon fresh lemon juice
- 1/2 teaspoon ground cinnamon
- 1/4 teaspoon ground nutmeg
- 1 large egg, beaten with 1 tablespoon milk (for egg wash)
- 1 tablespoon coarse sugar (for sprinkling)
Instructions
- Prepare the Pie Dough: In a large bowl, whisk together the flour and salt. Cut in the cold butter using a pastry blender or your fingers until the mixture resembles coarse crumbs with some pea-sized pieces of butter remaining.
- Gradually add the ice water, one tablespoon at a time, mixing gently with a fork until the dough just comes together. Do not overmix. Divide the dough in half, flatten each half into a disk, wrap in plastic, and chill for at least 1 hour.
- Prepare the Filling: In a separate bowl, gently combine the blackberries, granulated sugar, cornstarch, lemon juice, cinnamon, and nutmeg. Toss lightly until the berries are evenly coated. Set aside while you roll out the bottom crust.
- Assemble the Bottom Crust: On a lightly floured surface, roll out one disk of dough into a 12-inch circle. Carefully transfer the dough to a 9-inch pie plate. Trim the edges, leaving a 1-inch overhang. Place the pie plate in the refrigerator.
- Roll the Top Crust: Roll out the second disk of dough. Cut into strips for a lattice top or leave whole for a solid top. If making a lattice, cut strips about 3/4-inch wide. Chill the strips or top crust while you fill the pie.
- Fill the Pie: Pour the blackberry filling into the chilled bottom crust. Dot the top of the filling with a few small pieces of leftover cold butter, if desired, for extra richness.
- Create the Lattice Top: Weave the dough strips over the filling to create a lattice pattern, or place the solid top crust over the filling. Trim the edges of the top crust and crimp the top and bottom crusts together to seal. Cut several slits in a solid top crust for steam to escape.
- Chill and Bake: Brush the top crust or lattice with the egg wash mixture and sprinkle evenly with coarse sugar. Place the pie in the freezer for 15 minutes before baking to help prevent a soggy bottom. Preheat your oven to 400°F (200°C).
- Bake the Pie: Place the pie on a baking sheet (to catch drips). Bake at 400°F (200°C) for 20 minutes. Reduce the oven temperature to 375°F (190°C) and continue baking for another 35 to 45 minutes, or until the crust is golden brown and the filling is bubbling thickly. If the edges brown too quickly, cover them loosely with foil strips.
- Cool Completely: Remove the pie from the oven and place it on a wire rack. You must let this American classic dessert cool for at least 4 hours, or until the filling is completely set, before slicing. This step is key for a non-runny slice.
Notes
- For the flakiest crust, keep all your dough ingredients, especially the butter, very cold. Handle the dough as little as possible.
- If using frozen blackberries, do not thaw them first; use them directly in the recipe to prevent excess liquid release.
- To prevent a soggy bottom, bake the pie on the lowest rack of your oven for the first 20 minutes, or place a preheated pizza stone underneath the pie plate.
- Serve this Old Fashioned Blackberry Pie warm with a scoop of high-quality vanilla ice cream or fresh whipped cream.
Nutrition
- Serving Size: 1 slice
- Calories: 450
- Sugar: 35g
- Sodium: 210mg
- Fat: 25g
- Saturated Fat: 15g
- Unsaturated Fat: 10g
- Trans Fat: 0g
- Carbohydrates: 58g
- Fiber: 4g
- Protein: 5g
- Cholesterol: 60mg