
Let’s be honest, that thin, pale excuse for a crust you buy in the freezer aisle just doesn’t cut it, especially when the holidays roll around! If you’ve been chasing that perfect shatteringly crisp yet tender edge, I can tell you right now, the answer is butter, and lots of it. Welcome to Kings Cook! I’m Kate, and growing up in the Midwest, my grandma taught me everything—starting with her legendary apple pie. That’s why I promise you, this **butter pie crust** recipe is the one you need. It’s foolproof, giving you those gorgeous, rich, flaky layers every single time. Stop guessing; let’s make a crust that truly tastes like home.
- Why This is the **Best Butter Pie Crust** You Will Ever Make
- Ingredients for Your Foolproof **Butter Pie Crust**
- Step-by-Step Instructions for Making the **Butter Pie Crust**
- Tips for Achieving a **Buttery Pie Foundation** That Bakes Perfectly
- Using Your **Butter Pie Crust** for Sweet and Savory Pies
- Storage and Make-Ahead Tips for **Homemade Pie Dough for Beginners**
- Frequently Asked Questions About Making a **Butter Pie Crust**
- Estimated Nutritional Data for This **Butter Pie Crust**
- Share Your **Best Buttery Pastry** Creations
Why This is the **Best Butter Pie Crust** You Will Ever Make
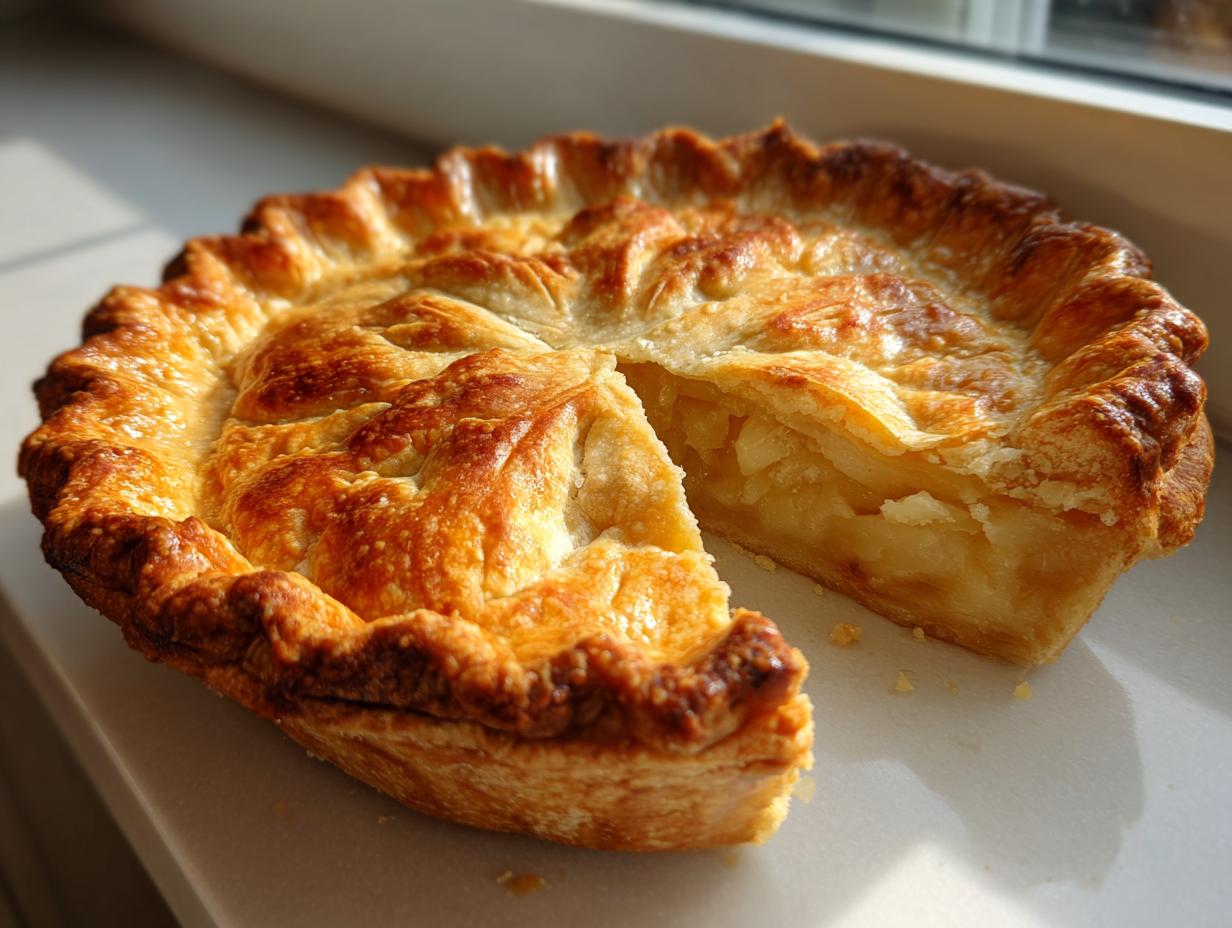
If you’re tired of crusts that taste vaguely waxy or just don’t have that rich flavor we all crave, then you’ve found your recipe. This is hands-down the **Best Homemade Pie Crust** because we skip the shortening completely! That deep, unmistakable aroma comes straight from using 100% excellent quality butter. I tested this formula endlessly, especially before Thanksgiving dinners, to make sure I could serve something truly reliable. Need proof that all-butter works? Check out how others are achieving amazing results here!
When you use real butter, you get tenderness and flavor that substitutes just can’t touch. This recipe ensures you get that signature shatter. Trust me, once you use this **No Shortening Pie Crust**, you won’t look back. I guarantee it works!
The Secret to a Super Flaky **Butter Pie Crust**
The absolute, non-negotiable rule here is COLD. I mean brutally cold. Your butter needs to be straight from the freezer, and your water must have ice cubes floating in it. Why? Because when those super-chilled chunks of butter hit the hot oven, they create pockets of steam. This steam pushes the layers of dough apart, and voilà—that’s what gives you those beautiful, flaky layers you see in bakery windows. If the butter melts before it hits the oven, you just end up with a slightly tough pastry, not a flaky dream!
Ingredients for Your Foolproof **Butter Pie Crust**
Okay, I love how minimal this recipe is. Seriously, if you are looking for an **Easy Butter Pastry** that feels fancy but comes together lightning-fast, this is it. We only need four core components, plus the magic ingredient: ice water! I’ve laid out exactly what you need below. Remember, the quality of your butter really shines through here, so use the good stuff. This simple list is the foundation for the **Four Ingredient Pie Crust** you’ve always dreamed of.
- 2 1/2 cups all-purpose flour
- 1 teaspoon salt
- 1 tablespoon granulated sugar
- 1 cup (2 sticks) unsalted butter, very cold and cut into 1/2-inch cubes
- 6 to 8 tablespoons ice water
Ingredient Substitutions for Your **Easy Butter Pastry**
Now, substitutions are where beginners often run into trouble, but I have a few tricks! If you only have salted butter on hand, no sweat. Just cut the added salt in the dry mix down to about 1/2 teaspoon instead. For an advanced trick that seriously boosts the tenderness and minimizes gluten development—which means less chance of tough dough—try replacing 2 tablespoons of the ice water with ice-cold vodka. The alcohol evaporates faster than water, leaving behind a super tender texture. You won’t taste it, I promise!
Step-by-Step Instructions for Making the **Butter Pie Crust**
Alright, let’s get our hands dirty! This is where the magic happens, and honestly, technique matters more than anything here. We need to treat this dough gently, otherwise, bye-bye flakiness! Once you see those butter chunks incorporated just right, you’ll finally get why everyone raves about this **butter pie crust**. I remember the first few times I tried this, I used my food processor, and it ended up with a sad, tough disc. It wasn’t until I started cutting the butter in by hand, focusing on those chunky bits, that I finally mastered that perfect, flaky texture! You can get some awesome serving ideas for this style of crust over here.
First things first, whisk your flour, salt, and sugar together really well. You want that dry mix uniform before adding the cold stuff. Next, toss in those very cold butter cubes. Now, grab a pastry blender—or just use your cold fingertips if you’re quick! You need to cut that butter in until the mixture looks like coarse crumbs, but here’s the key: make sure you still see some pieces that are about the size of a small pea. Those visible chunks are your structure, so don’t blend them away!
Now for the water. Sprinkle 6 tablespoons of that ice water over the crumbs, and use a fork to just barely start bringing it together. You’re not kneading! Stop as soon as the dough looks shaggy and holds together when you squeeze a handful. If it’s still way too dusty, add that last tablespoon or two of water. Turn that pile out onto your clean surface and gently press it into one solid mass. Divide that dough right in half, flatten each piece into a disk, wrap them super tight, and get them into the fridge. You must, must chill them for at least two hours before rolling.
Mixing and Chilling the **Flaky Pie Dough**
The mixing process needs to be fast and deliberate. We want to minimize the friction heating up that butter, so work quickly when you’re cutting it in and mixing in the water using a fork. If you feel the dough getting warm or sticky at any point, wrap it up and let it chill for 15 minutes—seriously, don’t skip this rest! That long, mandatory chill time is what sets the gluten and keeps your final pastry wonderfully **Tender Pie Crust** instead of tough or elastic.
Rolling Out Your Perfect **Butter Pie Crust**
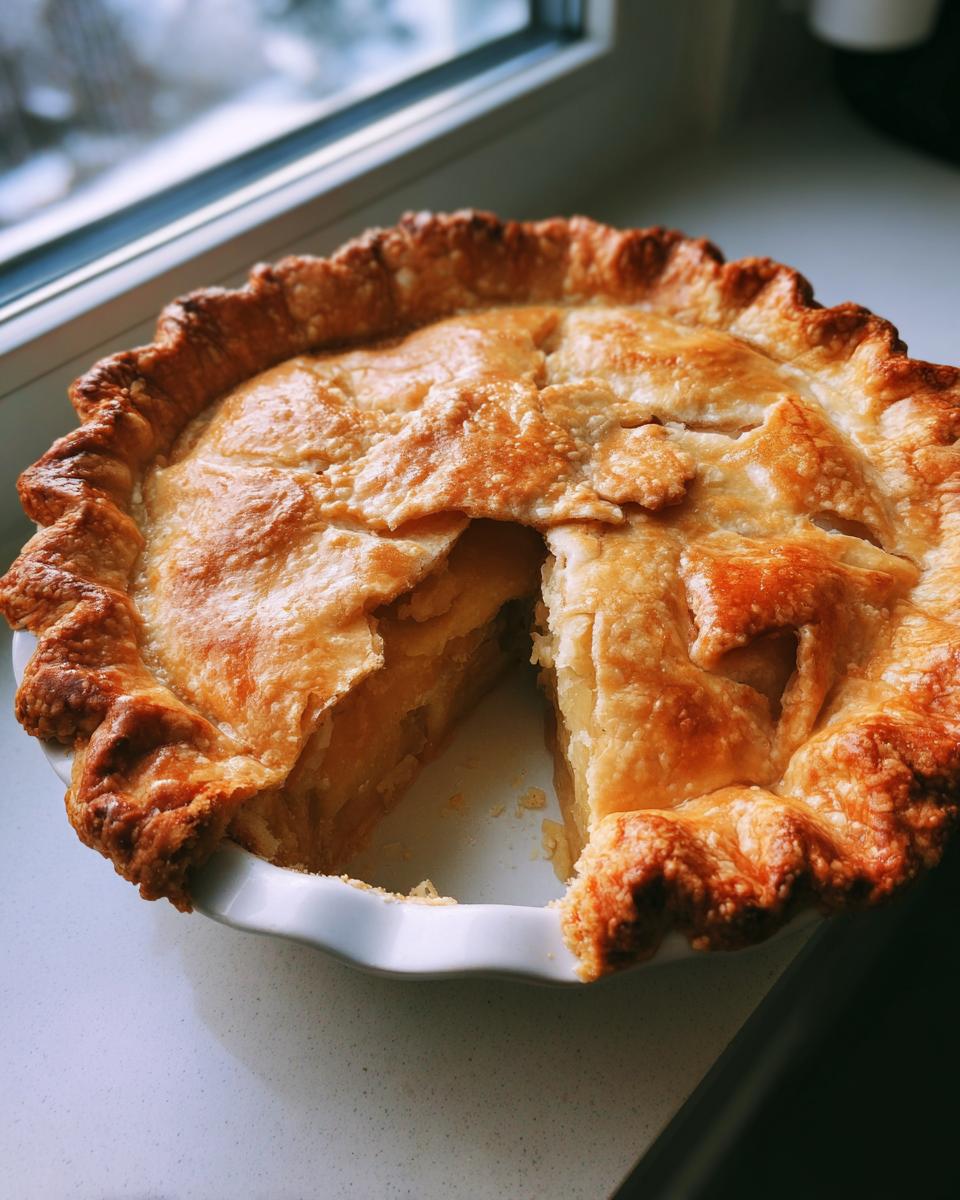
Once rested, let the disk sit out for about five minutes before you start on it, or it will fight you! Lightly flour your surface, and roll that disk out to about a 12-inch circle. We want it bigger than the plate so we have room to maneuver! Be gentle when lifting it into the pie dish; if it tears (especially if you’re making a **Double Crust Pie Recipe**), don’t panic! Just patch it with a bit of scrap dough. Trim and crimp those edges beautifully. This foundation works for everything; you can get great tips on using this dough here for inspiration.
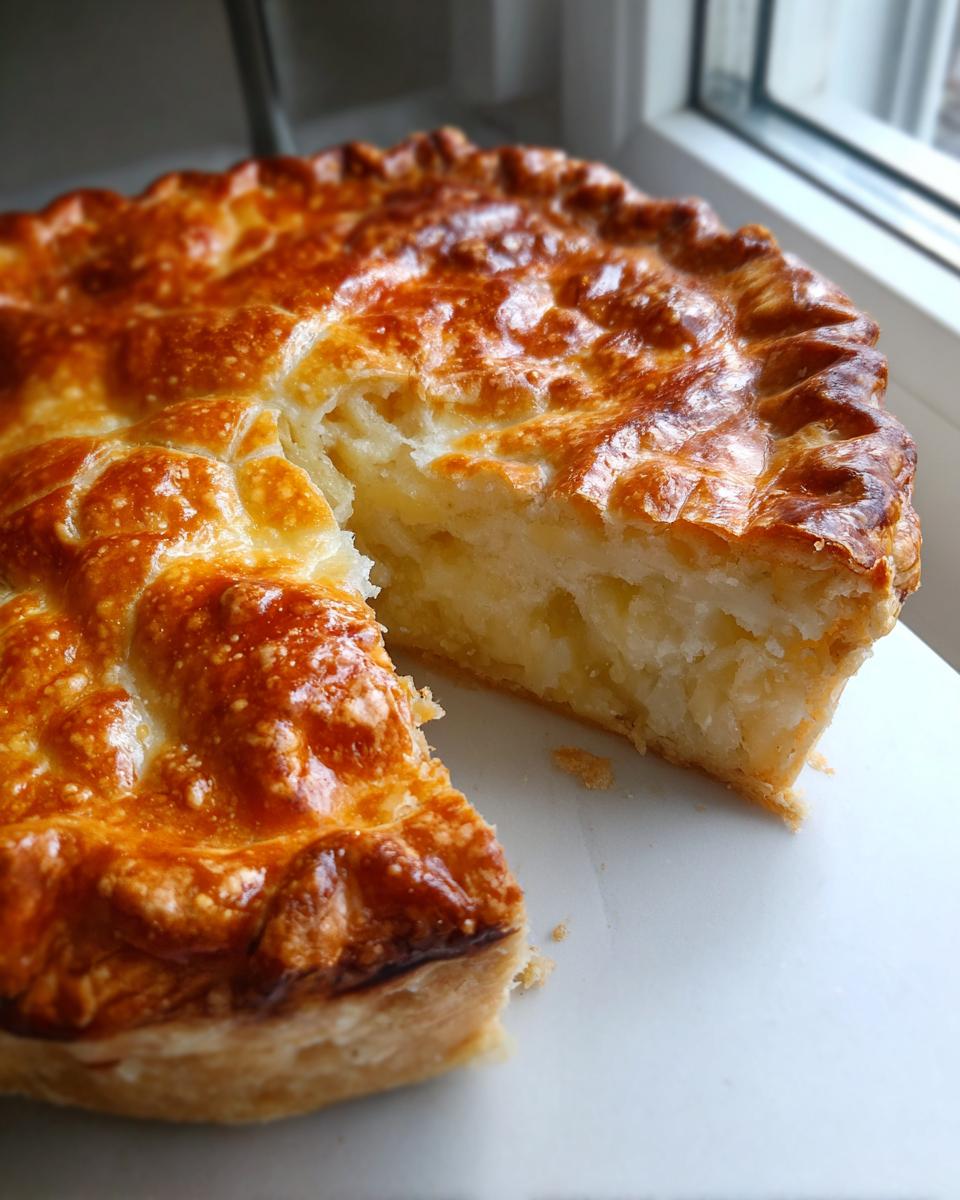
Tips for Achieving a **Buttery Pie Foundation** That Bakes Perfectly
We’ve got the dough mixed, now let’s make sure that **Buttery Pie Foundation** bakes up exactly as we planned—light, crisp, and with that beautiful, even color. Achieving a perfect **Golden Brown Pie Shell** takes just a couple of extra checks before it heads into the oven. I want you to feel totally confident serving this up during your next big meal. I’ve learned a few things the hard way that I’m happy to pass along so you don’t have to, like ensuring you let the dough rest during rolling.
Troubleshooting Your **Butter Pie Crust**
Don’t panic if things get tricky! If your dough starts tearing apart when you try to lift it into the pan, it means it’s too cold and stiff. Take the whole thing, plastic wrap and all, let it sit on the counter for just five minutes. Don’t force it! Conversely, if your finished pie shell shrinks down the sides of the pan while it bakes, it’s because you overworked the dough, developing too much gluten. The chilling stage isn’t optional in this recipe; it’s what keeps that gluten relaxed!
Another thing people ask me about is crimping. If you want those beautiful edges, make sure the dough is still relatively cool when you shape them. If you’re doing a blind bake, use pie weights or dried beans and line the crust with parchment paper first. This prevents bubbles and keeps everything flat. For a truly golden result, sometimes I brush the edges with an egg wash, which you can look into great tips about here before baking!
Using Your **Butter Pie Crust** for Sweet and Savory Pies
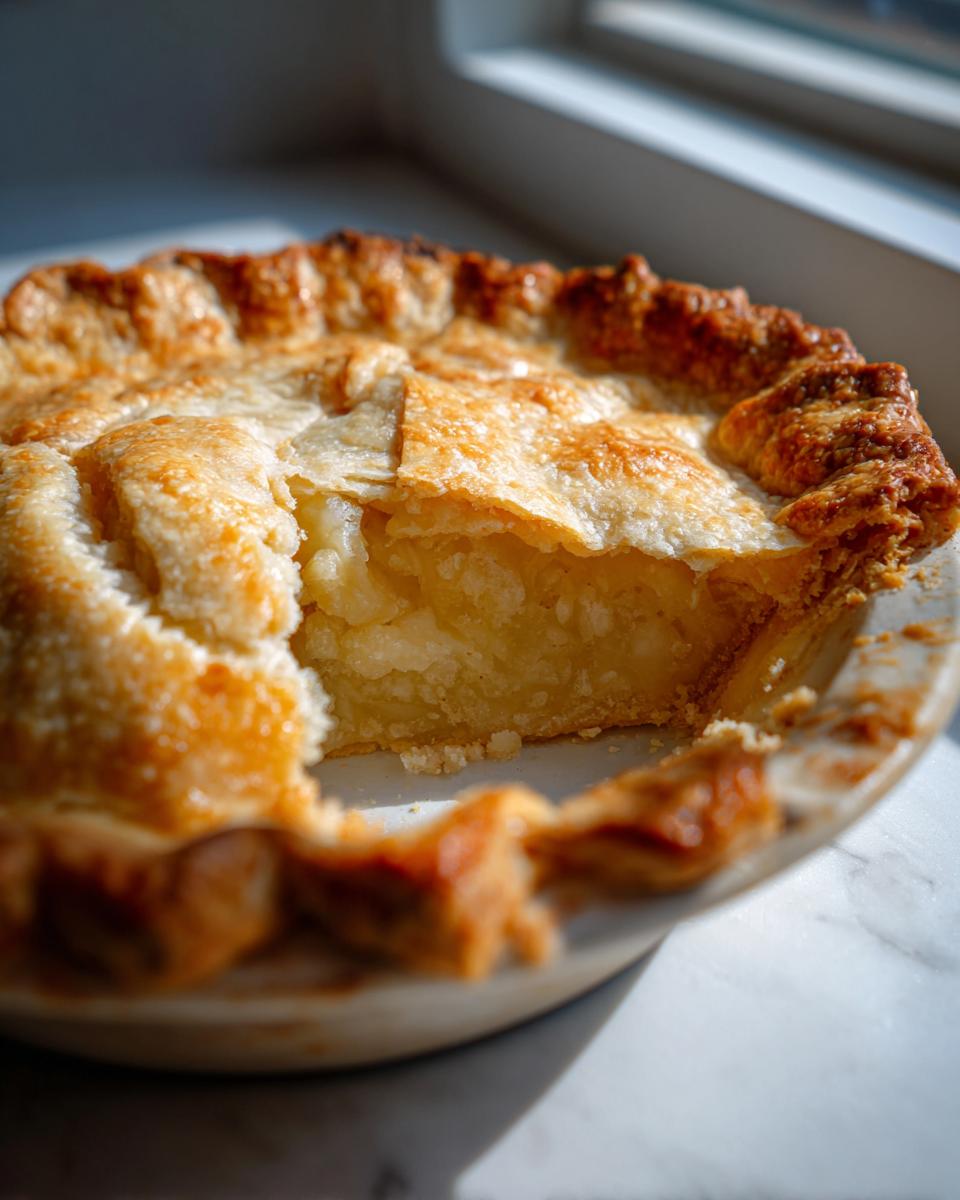
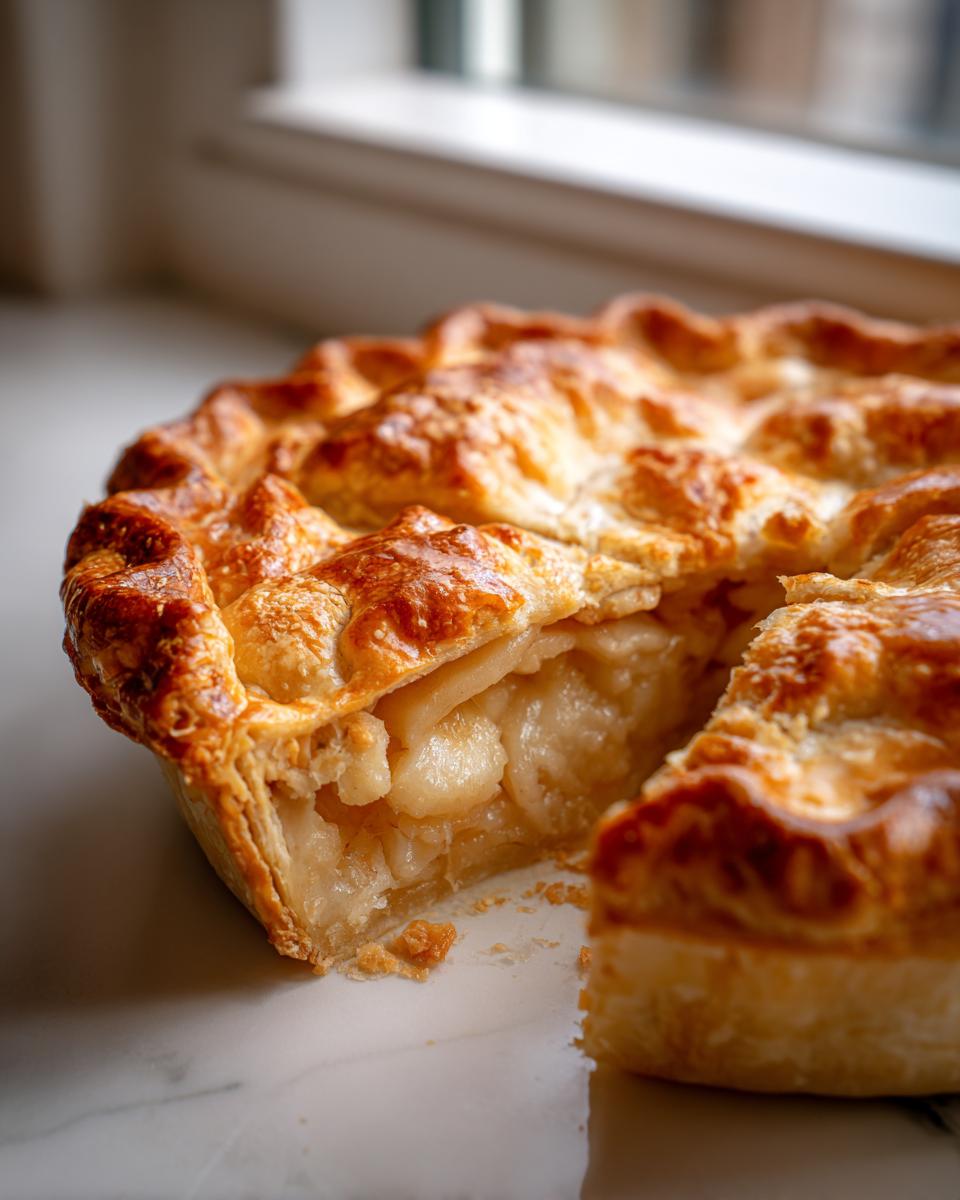
The real beauty of this **butter pie crust** is how unbelievably versatile it is. I didn’t just develop this for pumpkin pie! This recipe creates the ultimate **Sweet and Savory Pie Crust**. Seriously, you can fill half of it with spiced apples and the other half with a deeply savory quiche filling, and both will be fantastic. That rich butter flavor compliments everything beautifully.
If you are using a filling that doesn’t bake for very long—like something custardy or perhaps a cream pie that you chill—you absolutely must blind bake the shell first. I usually poke the base all over with a fork, line it with parchment paper, and fill it with pie weights or even dried beans. Bake it until it’s just barely starting to brown around the edges, then remove the weights and bake it for a few more minutes until it’s set. This little pre-bake guarantees you won’t get a soggy bottom, which is just the worst when you’ve worked this hard!
For a classic double-crust fruit pie, though, you just assemble it raw and bake it right away. For great ideas on making a seasonal favorite using this base, check out my go-to apple pie recipe here!
Storage and Make-Ahead Tips for **Homemade Pie Dough for Beginners**
Baking shouldn’t stress you out, especially when you’re gearing up for a big holiday meal! The wonderful thing about this **butter pie crust** is that it is fantastic for making ahead. My promise to deliver reliable results absolutely includes making sure you can prepare this dough in advance. This means less frantic rolling and cutting when everyone is waiting on you!
You can keep the wrapped disks in the refrigerator for up to two days. If you need it longer, right into the freezer they go! They freeze beautifully for about three months. When it’s time to use one, just pull it out and let it thaw overnight in the fridge. You can learn more about prepping ahead for pies here. A little advanced planning makes the day so much easier!
Frequently Asked Questions About Making a **Butter Pie Crust**
I get so many messages about this recipe, which just tells me how confusing pastry can feel for people! I love helping clear up those last few panics before you pop your pie in the oven. Here are the questions I hear most often about nailing that **butter pie crust**!
Why is my butter pie crust tough instead of flaky?
Oops, that usually means one of two things happened: You either overworked the dough when mixing, or the butter wasn’t cold enough and melted into the flour when you rubbed it in. Toughness comes from developing too much gluten, and warm butter lets that gluten get too strong! If you’re struggling, try this advanced tip: Next time, aim for truly massive chunks of butter, and remember that chilling is your best friend for ensuring a **Tender Pie Crust**.
Can I really use only four ingredients for this pastry?
Yes, you absolutely can! We list five main items—flour, salt, sugar, butter, and water—but functionally, salt and sugar are flavor enhancers, not structural ingredients. So, this is essentially a **Four Ingredient Pie Crust** base! It’s proof that simple ingredients, used correctly, make the best things. You can find some great guidance on keeping the ingredient list simple here.
Do I have to use ice water, or can regular cold water work?
Please, please stick to ice water! I know it seems fussy, but this recipe is built on keeping the fat solid. If your water is just ‘cold’ from the tap, it usually warms up the flour mixture too much before it even gets to the fridge. If your water has ice crystals in it, it keeps everything just cold enough to ensure you get the flakiest outcome possible for your **Homemade Pie Dough for Beginners**.
Can I roll this dough out the next day?
That’s perfectly fine! The dough will actually be *better* after an overnight chill. Giving the gluten a really long rest allows the dough to relax, which means less shrinkage when you bake it. Just pull it out of the fridge about 10 to 15 minutes before you plan to roll it for your **Double Crust Pie Recipe**. Happy baking!
Estimated Nutritional Data for This **Butter Pie Crust**
Now, I know some of you are tracking everything, and others just want assurance that a homemade **butter pie crust** isn’t going to totally derail your day. I’ve done my best to pull together the numbers based on the ingredients listed here. Remember, this is just an estimate because your flour, the exact brand of butter, and how much trimming you do can really change things! These numbers reflect a serving size of 1/8th of the total crust. Think of this as fuel for making the most incredible pie imaginable!
- Serving Size: 1/8 of crust (This is generous!)
- Calories: Roughly 280 per slice
- Total Fat: About 19 grams—that’s where the flavor payoff is!
- Saturated Fat: Around 12 grams
- Carbohydrates: 24 grams
- Protein: 4 grams
- Sugar: Super low at only 0.5 grams
Since this is purely pastry dough without filling, the numbers are quite concentrated in the fat area, which is exactly what we want for maximum texture. If you use this for a double crust pie, remember to divide those numbers by the number of slices you cut your finished pie into, obviously! Trust me, the payoff in texture and taste for this **Best Homemade Pie Crust** is worth every single gram.
Share Your **Best Buttery Pastry** Creations
Whew! We made it through! You’ve successfully conquered the most important part of any amazing pie—the base. Now that you have this incredibly **Best Buttery Pastry** recipe under your belt, the sweet victory is yours!
I truly hope this recipe helps you kick back the stress and just enjoy the process of making something wonderful from scratch. If you’re feeling proud of that perfectly golden, flaky edge, tell me about it! Please leave a rating below and drop a comment. I want to hear exactly what you filled your crust with—was it a deep-dish apple disaster, or did you master that perfect savory quiche?
Your success is why I put all this work into testing and re-testing these recipes. Seeing your photos and reading about how you felt confident tackling pie dough for the first time? That’s the best part of running Kings Cook! Remember, being in the kitchen should feel joyful, not like a chore. Head over to my About Page to see more of my philosophy on building kitchen confidence.
Don’t be shy—let’s build this community of happy, confident bakers together!
PrintFoolproof Flaky All Butter Pie Crust Recipe

Make this simple butter pie crust for tender, flaky layers that stay crisp. This recipe uses only four ingredients and provides reliable results for any sweet or savory pie.
- Prep Time: 25 min
- Cook Time: 0 min (baking time depends on pie filling)
- Total Time: 2 hours 25 min
- Yield: One double crust
- Category: Baking
- Method: Pastry Making
- Cuisine: American
- Diet: Vegetarian
Ingredients
- 2 1/2 cups all-purpose flour
- 1 teaspoon salt
- 1 tablespoon granulated sugar
- 1 cup (2 sticks) unsalted butter, very cold and cut into 1/2-inch cubes
- 6 to 8 tablespoons ice water
Instructions
- Combine the flour, salt, and sugar in a large bowl. Whisk to mix the dry ingredients.
- Add the cold butter cubes to the flour mixture. Use a pastry blender or your fingertips to cut the butter into the flour until the mixture resembles coarse crumbs with some pea-sized pieces of butter remaining. This step is key for flakiness.
- Sprinkle 6 tablespoons of ice water over the mixture. Use a fork to gently mix until the dough just starts to come together. If the dough is too dry, add the remaining water one tablespoon at a time. Do not overmix.
- Turn the shaggy dough out onto a clean surface. Gently press the dough together to form a cohesive mass. Divide the dough in half and shape each half into a flat disk.
- Wrap each disk tightly in plastic wrap. Chill the dough in the refrigerator for at least 2 hours, or up to 2 days.
- When ready to use, let the chilled dough sit at room temperature for 5 to 10 minutes to soften slightly.
- On a lightly floured surface, roll out one disk into a 12-inch circle. Carefully transfer the dough to your pie plate. Trim and crimp the edges as desired.
- If making a double crust, repeat the rolling process for the top crust. Place the filling inside and cover with the top crust, cutting vents for steam release.
- Bake according to your specific pie recipe instructions.
Notes
- Keep your butter and water as cold as possible throughout the mixing process. Cold fat creates steam pockets, which result in flaky layers.
- If the dough gets warm while rolling, place it back in the refrigerator for 15 minutes before continuing.
- This recipe makes enough dough for one double-crust 9-inch pie or two single-crust shells.
Nutrition
- Serving Size: 1/8 of crust
- Calories: 280
- Sugar: 0.5
- Sodium: 180
- Fat: 19
- Saturated Fat: 12
- Unsaturated Fat: 7
- Trans Fat: 0.5
- Carbohydrates: 24
- Fiber: 1
- Protein: 4
- Cholesterol: 50