

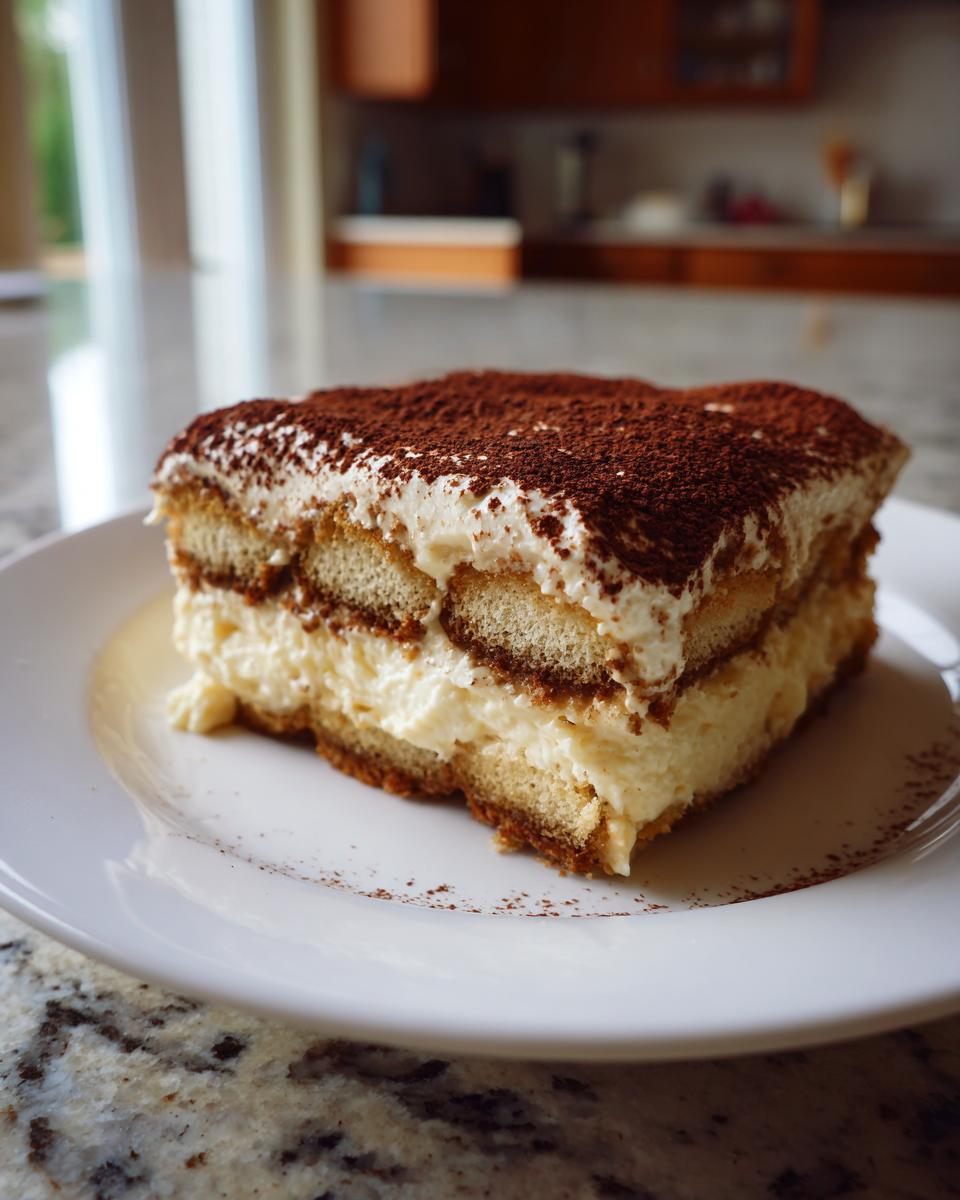
I know what you’re thinking: Tiramisu looks elegant, complicated, and maybe a little intimidating, right? Well, I’m here to tell you that you can completely forget those worries! Welcome to the world of the easy tiramisu recipe, where we achieve that authentic, show-stopping Italian look without ever turning on the oven. My goal here at Kings Cook is to simplify the impressive, and this decadent, creamy mascarpone dessert proves it. We are skipping the worry about raw eggs entirely because this is a totally no-bake version. Trust me, this simple layering technique yields an elegant chilled dessert that will make you feel like royalty!
- Why This Easy Tiramisu Recipe is Your New Go-To
- Gathering Ingredients for Your Classic Italian Dessert
- Simple Tiramisu Instructions: Mastering the Layers
- Assembly and Chilling for the Perfect Make Ahead Dessert
- Tips for Success with Your Easy Tiramisu Recipe
- Storage and Reheating Instructions for This Decadent Coffee Dessert
- Serving Suggestions for This Impressive Dessert for Guests
- Frequently Asked Questions About This Tiramisu Recipe
- Estimated Nutritional Data for This Tiramisu Recipe
Why This Easy Tiramisu Recipe is Your New Go-To
Honestly, this isn’t just another dessert; this is my secret weapon for easy entertaining! When you need an impressive dessert for guests, this one always wins. It delivers that classic Italian flavor profile without any fuss. Check out why this version is going straight into your favorites rotation:
- It’s genuinely quick to assemble—think under 30 minutes of active work.
- It yields the most unbelievably creamy mascarpone dessert you’ve ever tasted.
- It’s totally party perfect dessert because it has to be made ahead of time!
It’s the best choice when you want elegance tomorrow with minimal effort today. You can find more of my favorite quick show-stoppers in my Best Dessert Recipes collection!
No Oven Required: The Ultimate No Bake Tiramisu
This is the thing I love most! Who needs to turn on the oven when it’s already 90 degrees outside during summer entertaining season? We skip the baking time completely. This no bake tiramisu lets you focus all your energy on getting those beautiful, clean layers just right. It’s instant gratification because the hard work—the chilling—is hands-off!
Safety First: A No Raw Egg Tiramisu Recipe Approach
I never mess around when it comes to food safety, especially with something creamy and served chilled. That’s why this specific tiramisu recipe uses pasteurized egg yolks. That simple step means you get the traditional richness and body from the custard base without any of that nervous worry. It’s the best way to guarantee an authentic taste that everyone can enjoy securely!
Gathering Ingredients for Your Classic Italian Dessert
Okay, let’s talk about what you need for this amazing dessert. Even though this is an easy tiramisu recipe, the quality of your few ingredients makes a huge difference in creating that authentic tiramisu experience. You’ll need strong, brewed espresso—and trust me, please use the best espresso you can find! If it’s weak, your whole dessert will taste watery. We absolutely must start with those 8 ounces of softened mascarpone cheese and those pasteurized egg yolks, right away!
If you happen to be planning a party, be sure to check out my guide to Italian appetizers to round out the menu!
Ingredient Notes and Substitutions for This Tiramisu Recipe
The structure of this dish relies on two key components you shouldn’t swap lightly. First, Savoiardi biscuits. These are the classic ladyfingers, and they are designed to absorb liquid perfectly without turning into mush, unlike standard sponge cake. They give us that necessary structure.
Second, for the soaking liquid, if you choose to skip the optional coffee liqueur (like Kahlúa or Marsala), don’t just use plain coffee! To build depth back in, add about 1 teaspoon of almond extract to your cooled espresso soak. It mimics that complex, slightly sweet alcohol flavor beautifully.
Simple Tiramisu Instructions: Mastering the Layers
Now we get to the fun part—putting this beautiful dessert together! Since we want an elegant chilled dessert, timing the dipping of those biscuits is everything. You’ll mix your coffee soak first and get all your cream components ready to go. You just need about 25 minutes of active assembly time, and then—poof—it goes into the fridge to work its magic. For those of you rushing after work, this fits perfectly into a busy schedule, maybe right after you wrap up those easy lunch ideas planning!
Creating the Creamy Mascarpone Dessert Filling
First things first: whisk those pasteurized yolks and sugar until they are pale and thick. Don’t rush this; that’s where a lot of the body comes from! Then, blend in the softened mascarpone and vanilla until it’s smooth as silk. The absolute most important part here is folding in the stiffly whipped heavy cream. I mean *gently* fold. Think like you’re tucking the cream into bed. Overmixing will deflate all the air we just worked so hard to create, and we want that fluffy texture, not liquid soup!
The Coffee Soaked Ladyfingers Technique for This Tiramisu Recipe
This is where most people go wrong with a tiramisu recipe. When dipping the Savoiardi biscuits, you have to be lightning fast. Seriously, dip them one by one, just a quick dunk on each side into that espresso mixture, and pull them right out. They soak up liquid like crazy! If you let them sit, your final tiramisu will have a soupy bottom layer instead of those lovely, distinct layers. Quick dip, quick place. That’s the rule!
Assembly and Chilling for the Perfect Make Ahead Dessert
Since this is a showstopper, the assembly needs to look clean, but don’t stress—it’s just layering! You’ll take your dish (I prefer an 8×8 square for nice clean slices, but any dish works) and start with that first layer of coffee-soaked ladyfingers we talked about. Remember: quick dip only! Brush them close together to cover the bottom.
Next, grab half of that glorious, lightened-up mascarpone cream—the stuff you folded so delicately—and spread it evenly over the biscuits. We want good coverage here. Then, dip and place your second layer of those espresso-soaked Savoiardi biscuits right on top of that first layer of cream. Finally, spread the very last of the cream mixture over the top. Smooth it out nicely; this top layer is what you’ll see when you dust the cocoa later!
Here is the hardest part: leaving it alone! This is truly a make ahead dessert, and it needs time to set up. You absolutely must refrigerate this tiramisu recipe for a minimum of six hours, but honestly, overnight is where the real magic happens. Chilling isn’t just for flavor melding; it actually firms up the cream structure so when you cut it, you get those beautiful, clean, distinct layers. If you try to cut it early, it just turns into a delicious mess. I learned that the hard way trying to sneak a tiny piece the same night I made it! Plan ahead, wrap it tightly, and save yourself the temptation until tomorrow. Speaking of planning, make sure you have your weeknight dinner recipes sorted so you have zero stress leading up to dessert time!
Tips for Success with Your Easy Tiramisu Recipe
Even though this is one of the quickest, most simple layering technique dessert recipes out there, a couple of little tricks will take it from great to absolutely unforgettable. You deserve a win every time you bake, or in this case, *assemble*!
First, the coffee soak again—I can’t stress this enough! If you’re worried about the biscuits dissolving later, try chilling your espresso/liqueur mixture for about 30 minutes *before* you start dipping. Cold liquids absorb just slightly slower than room temperature ones, giving you a tiny bit more margin for error on that super quick dip.
Second, make sure your mascarpone isn’t straight out of the fridge. If it is rock hard, it will fight with the sugar/yolk mixture and you’ll end up with lumps in your filling, which ruins that lovely smooth experience. Eight ounces usually needs about 30 minutes on the counter to soften up just right.
Remember my story about under-chilling? Last year when I was rushing to get ready for a party, I only chilled my Tiramisu for about four hours. It looked lovely, but the minute I cut into it, the whole edge just sort of slumped. It tasted fine, of course—it was still Tiramisu—but it didn’t have that elegant, perfect structure we want. From now on, I always plan to make it the day before. It saves stress, and the deep, rich coffee flavor that develops overnight is simply incomparable when serving up this impressive dessert for guests. It really lets the whole Italian classic shine!
Oh, and one last quick one before we move on—don’t forget the dusting of cocoa powder. Do this right before serving! If you dust it too early, the moisture from the cream will soak it up, and it turns into a dark, slightly wet patch instead of that soft, velvety, traditional top layer. Enjoy these little secrets; they are perfect to have in your back pocket when you’re putting together appetizers and snacks for a big gathering!
Storage and Reheating Instructions for This Decadent Coffee Dessert
Since this amazing tiramisu recipe is truly a chilled beauty, storage is simple, but timing that cocoa dusting is key! The great thing about this make ahead dessert is that it actually tastes better the longer it sits in the fridge. I always aim for that overnight chill, but if you need to serve it sooner, make sure you give it at least six hours. This time lets those coffee soaked ladyfingers absorb just enough moisture to become perfectly tender without dissolving the structure of the cream.
When storing it, you need to keep that beautiful creamy top layer safe from any rogue smells in the fridge. Always cover your dish tightly with plastic wrap. Don’t press the wrap directly onto the surface, though! If you do, the condensation can make the mascarpone wet. Just tent the plastic loosely over the top so there is a little air gap between the wrap and the surface of the cream.
You can safely keep this decadent coffee dessert in the refrigerator for up to three, maybe four days. Past that, the texture of the ladyfingers might start to degrade a tiny bit, even though the flavor will still be fantastic! And just to be perfectly clear—you absolutely cannot reheat this! It’s a chilled preparation, and warming it up would turn that beautiful creamy mascarpone dessert into a very sweet, messy puddle. No reheating required. Just cover it, chill it, and you’re good to go!
Serving Suggestions for This Impressive Dessert for Guests
So, you’ve made it through the chilling process! Congrats! Now for the grand finale—how do we present this Italian favorite dessert so it really wows everyone? While a thick dusting of cocoa powder is the classic way, we don’t have to stop there, right? We want this to look as good as it tastes!
If you’re feeling extra fancy before you slice into this easy tiramisu recipe, try adding some visual texture on top of that cocoa dusting. A few curls of dark chocolate shavings look incredibly professional. If you have time, grating a tiny bit of orange or lemon zest over the top can sometimes bring out a lovely bright note that cuts through the richness of the mascarpone. Or, if you prefer something warmer, a light dusting of cinnamon mixed in with the cocoa powder gives it a cozy, slightly unique spin.
When it comes to pairing—since this is such a rich decadent coffee dessert—always think about what you’ll serve alongside it. A small cup of strong, piping hot espresso is the perfect pairing; you get that intense coffee flavor hitting your palate right before the sweet, cool cream melts in your mouth. Alternatively, if you’re serving this after a large meal or as part of a late-night gathering, a small glass of a strong digestif works wonders. Think of a little sip of aged grappa or maybe even a quality glass of Irish cream liqueur. If you’re looking for ideas for setting up a full spread, take a peek at my favorite cocktail and drink recipes to complement your desserts!
This tiramisu recipe is designed to be the star, but a small, thoughtful presentation makes serving it such a joy!
Frequently Asked Questions About This Tiramisu Recipe
I always get so many questions when people first try making a classic, no-bake dessert like this. It’s smart to ask! Having all your bases covered before you start assembling is the key to getting that perfect, creamy result every time. Here are some things I hear most often about conquering this tiramisu recipe.
Can I make this easy tiramisu recipe using store-bought whipped topping instead of heavy cream?
Oh, honey, please don’t! I know it seems like a shortcut for an easy tiramisu recipe, but you really want to avoid it here. Store-bought whipped topping just doesn’t have the structure or the clean, neutral flavor of real heavy whipping cream. That cream melts into the mascarpone and sugar beautifully, giving you that silky, light texture we are aiming for in this creamy mascarpone dessert. Using alternative toppings usually results in something that feels greasy or overly sweet, and it definitely compromises that authentic Italian dessert experience. Stick to the heavy cream, I promise it’s worth the extra step!
What is the best way to achieve that authentic tiramisu flavor?
For me, achieving that authentic tiramisu taste comes down to two non-negotiables. First: Espresso. You need strong, dark, high-quality espresso. If it tastes watery when it’s hot, it will taste even sadder when it’s cold in the dessert! Don’t use regular drip coffee unless it’s heavily concentrated. Second: Quality Mascarpone. This cheese is the backbone of your entire dessert. If you can find a reputable brand, go for it. High-fat, high-quality mascarpone melts into the egg mixture perfectly, giving you that subtle tang unique to a true Italian classic.
And since we are talking about making things ahead for guests, remember that this make ahead dessert tastes exponentially better after that full overnight chill! That’s when the flavors truly marry up.
Estimated Nutritional Data for This Tiramisu Recipe
Now, I always like to include a little note about the numbers, just so we know what we are enjoying! Remember, since this is a wonderful make ahead dessert, the nutrition is spread across eight generous servings. What you see here is just an estimate, of course. If you use more rum or a lot more chocolate shavings on top, those numbers are going to budge a bit!
But generally, for one slice of this truly decadent coffee dessert, here’s the breakdown:
- Serving Size: 1 slice
- Calories: 380
- Sugar: 25g
- Fat: 25g
- Saturated Fat: 15g
- Carbohydrates: 30g
- Protein: 7g
See? It’s decadent, but manageable! This is why it makes such an excellent choice when you’re looking for an impressive dessert for guests that you can truly savor. Just remember, this information doesn’t account for any extra dusting of cocoa or chocolate you pile on at the end—and trust me, I usually pile it on!
PrintEasy No-Bake Classic Tiramisu Recipe: Authentic Italian Style

Welcome! Let’s Master Your Kitchen, Together. You can make this impressive, creamy mascarpone dessert without turning on your oven. This easy tiramisu recipe uses simple steps to create the authentic Italian favorite, perfect for any gathering.
- Prep Time: 25 min
- Cook Time: 0 min
- Total Time: 6 hours 25 min
- Yield: 8 servings 1x
- Category: Dessert
- Method: No-Bake/Chilling
- Cuisine: Italian
- Diet: Vegetarian
Ingredients
- 1 ½ cups strong brewed espresso or coffee, cooled
- ¼ cup coffee liqueur or dark rum (optional)
- 2 large egg yolks (pasteurized for safety)
- ½ cup granulated sugar
- 8 ounces mascarpone cheese, softened
- 1 teaspoon vanilla extract
- 1 ½ cups heavy whipping cream
- 1 package (7 ounces) ladyfingers (Savoiardi biscuits)
- Unsweetened cocoa powder, for dusting
Instructions
- Prepare the coffee soak: In a shallow dish, combine the cooled espresso and coffee liqueur or rum, if using. Set aside.
- Make the cream base: In a medium bowl, whisk the pasteurized egg yolks and granulated sugar together until the mixture is pale yellow and thick. This step helps ensure safety.
- Beat in the mascarpone cheese and vanilla extract until the mixture is smooth.
- In a separate, clean bowl, whip the heavy whipping cream until stiff peaks form.
- Gently fold the whipped cream into the mascarpone mixture in two additions until just combined. Do not overmix.
- Assemble the tiramisu: Quickly dip each ladyfinger into the coffee mixture, ensuring it is coated but not soggy.
- Arrange a single layer of dipped ladyfingers in the bottom of an 8×8 inch baking dish or similar serving dish.
- Spread half of the mascarpone cream mixture evenly over the layer of ladyfingers.
- Create a second layer by dipping and arranging the remaining ladyfingers over the cream.
- Top with the remaining mascarpone cream mixture, spreading it smoothly across the top.
- Cover the dish tightly with plastic wrap and chill in the refrigerator for at least 6 hours, or preferably overnight, to allow the flavors to meld and the dessert to set.
- Before serving this decadent coffee dessert, dust the top generously with unsweetened cocoa powder. Slice and serve your party perfect dessert.
Notes
- For a truly authentic Italian dessert experience, use high-quality espresso.
- If you skip the optional liqueur, add 1 teaspoon of almond extract to the coffee soak for depth of flavor.
- Chilling overnight results in the best texture for this make ahead dessert.
Nutrition
- Serving Size: 1 slice
- Calories: 380
- Sugar: 25g
- Sodium: 85mg
- Fat: 25g
- Saturated Fat: 15g
- Unsaturated Fat: 10g
- Trans Fat: 0.5g
- Carbohydrates: 30g
- Fiber: 1g
- Protein: 7g
- Cholesterol: 120mg