
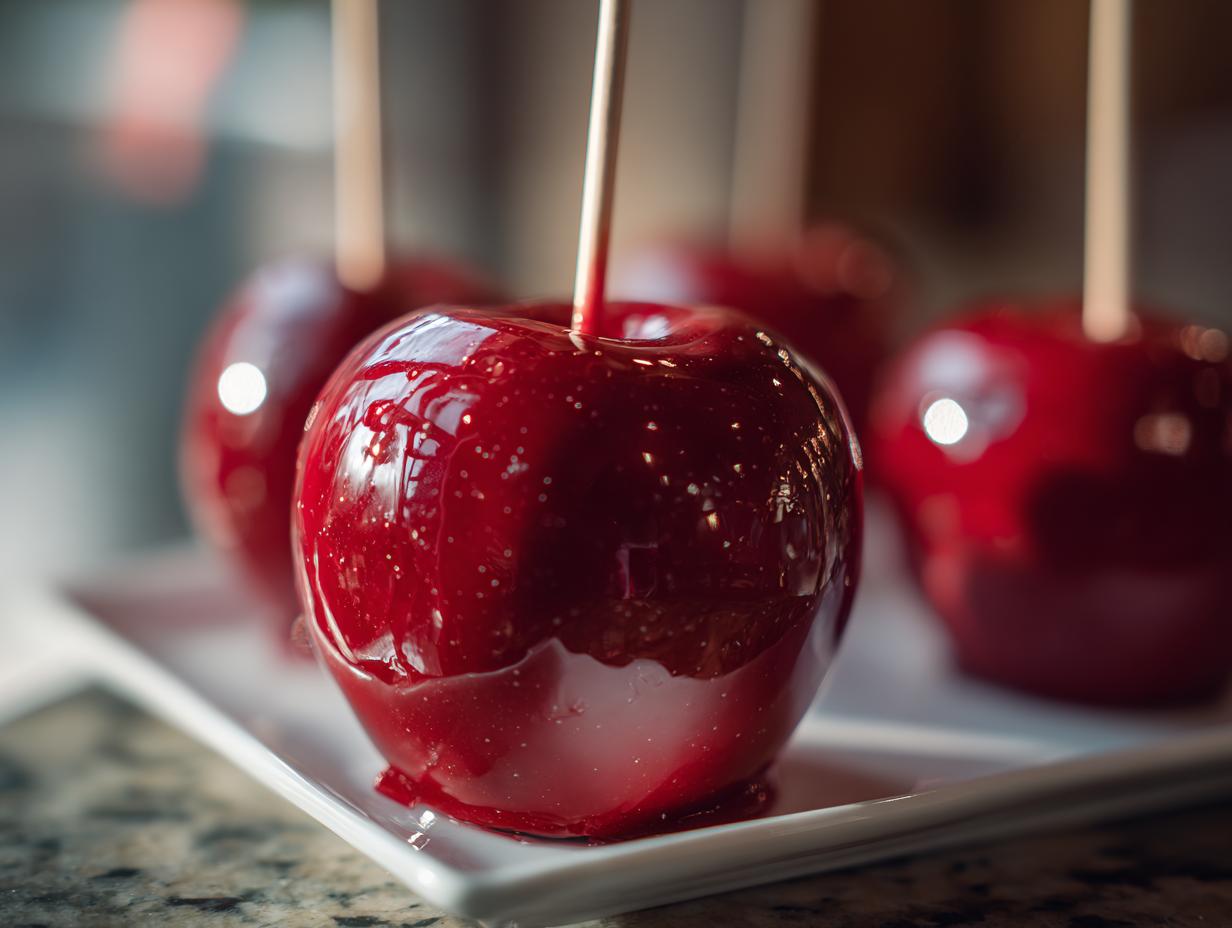
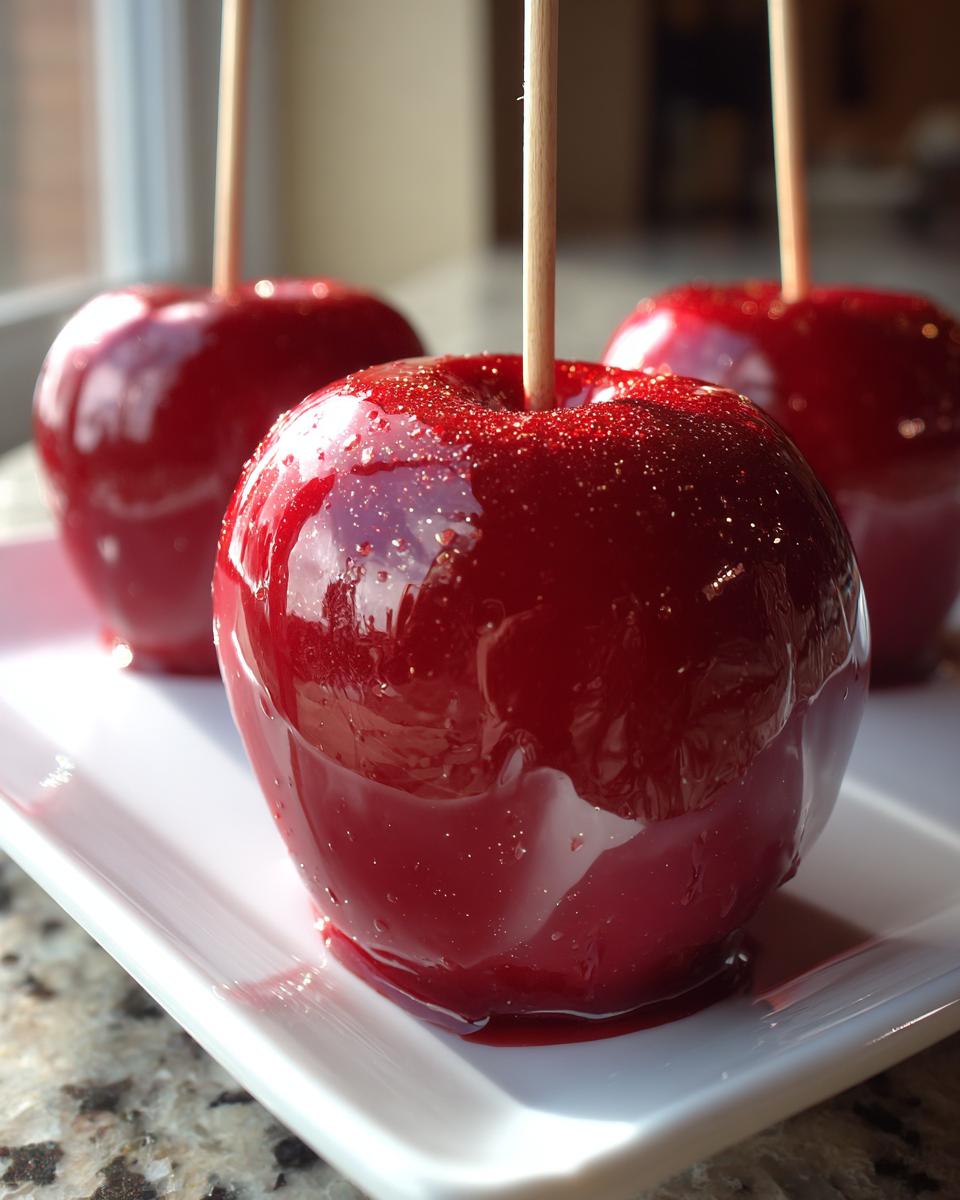
There is nothing quite like that satisfying *crack* of biting into a perfectly made candy apple! They scream fall festivals, Halloween nights, and sheer nostalgic fun. I know so many people skip making homemade candy apples because they’re scared of sticky sugar messes or getting that frustrating, cloudy, cracked shell. Well, guess what? Me too, the first few times! But after years of testing and tweaking every measurement for my family’s gatherings, I finally nailed it. This recipe is my foolproof guide to achieving that professional, glossy, vibrant red coating that never cracks. Trust me, once you see how easy this technique is, you’ll be making these crispy treats all year long!
- Why This is the Best Easy Candy Apple Recipe for Beginners
- Essential Ingredients for Classic Red Candy Apples
- How to Make Candy Apples: Step-by-Step Instructions
- Troubleshooting Common Candy Apples Mistakes
- Tips for Making Gourmet Candy Apples Variations
- Serving and Storing Your Homemade Candy Apples
- Frequently Asked Questions About Candy Apples
- Enjoying These Nostalgic Fall Dessert Recipes
- Share Your Perfect Candy Apples Creations
Why This is the Best Easy Candy Apple Recipe for Beginners
I totally get it—candy making seems like something only expert bakers attempt. For years, I avoided anything that required a candy thermometer! I thought I’d end up with a big, melted sugar puddle on my stove. But this easy candy apple recipe changed everything because it’s built for reliability. We focus on the simple steps that guarantee success, especially when it comes to getting those beautiful crack free candy apples right out of the pot.
Honestly, the first batch I made looked like something a toddler dipped in glue. It was cloudy, sticky, and absolutely refused to come off the apple! Since then, I learned that the secret isn’t complicated chemistry; it’s sticking to the temperatures I provide. Once you hit that mark, you’ll have a professional shine that looks like you bought them from a fairground stand. Check out my cousin’s amazing apple pie recipe if you want another easy fall favorite, but for these apples, keep reading!
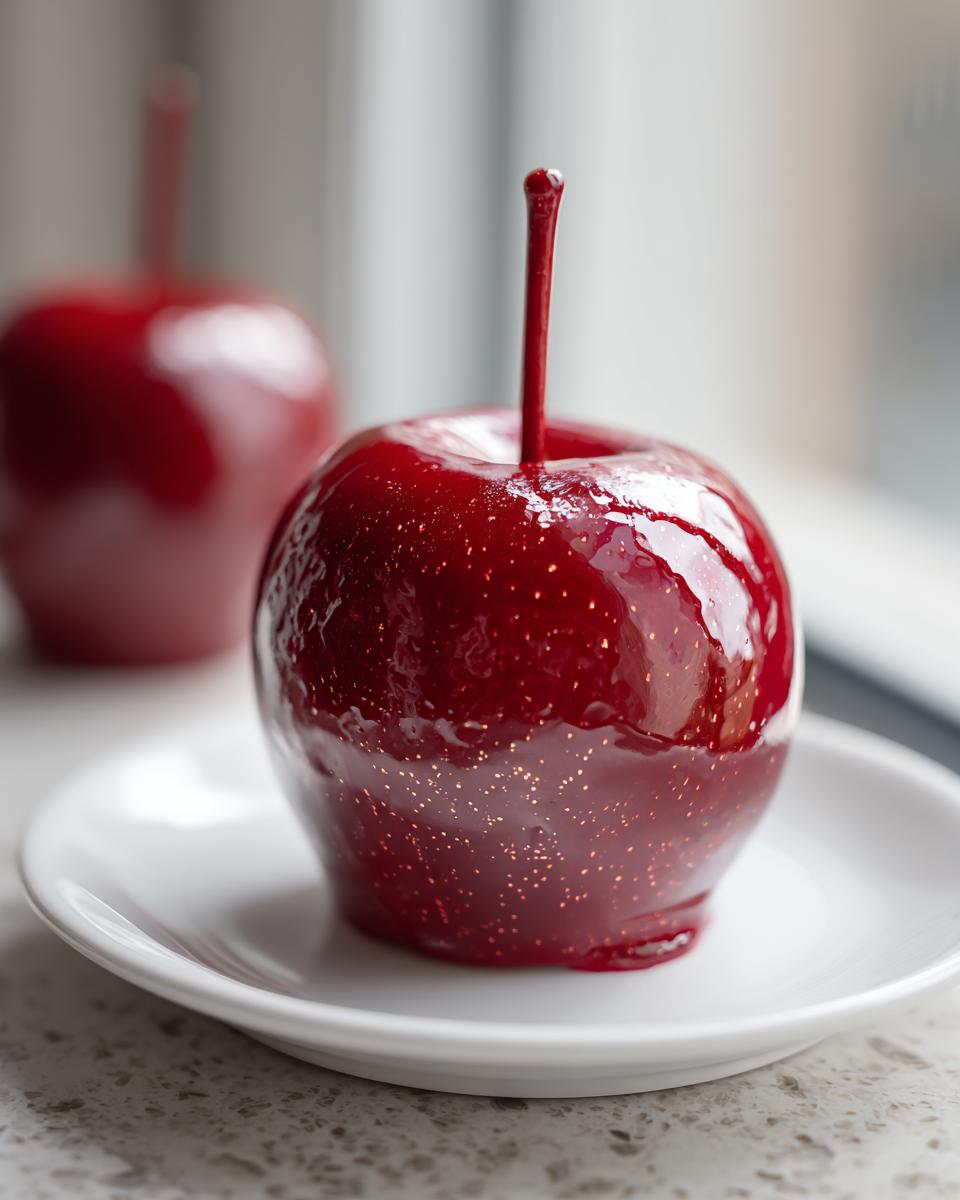
Achieving the Perfect Shiny Candy Apple Coating
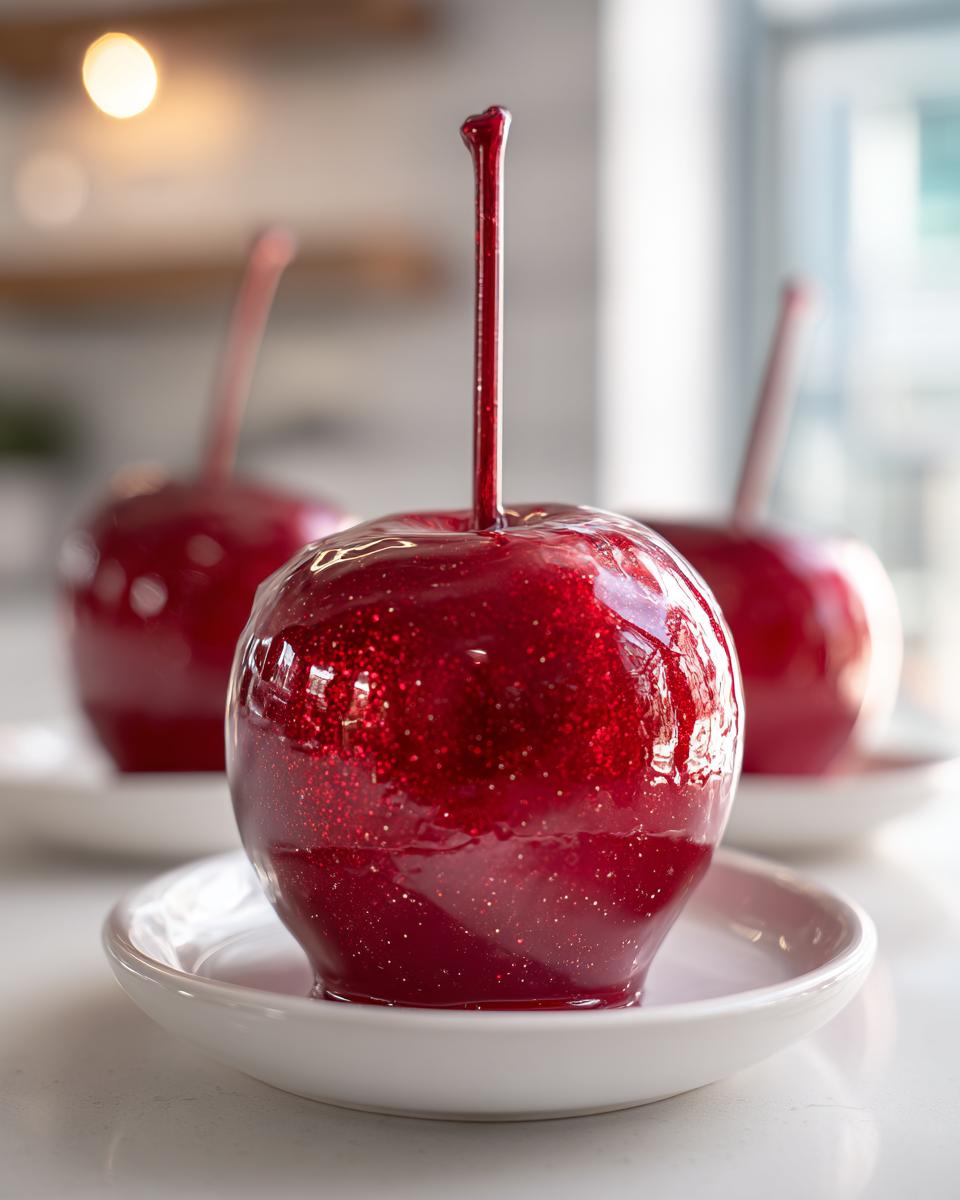
That incredible gloss comes down to one thing: the temperature. We are aiming for the “Hard Crack Stage,” which is exactly 300 degrees Fahrenheit (149°C). If you pull it off the heat too soon, it’s soft and gooey—which is fine for caramel, but not what we want here! If you go way over, it burns.
The combination of sugar and corn syrup is specially proportioned here to ensure that when it hits 300°F, you get a flawless, glassy, shiny candy apple coating. When you tilt the pan later, you should see the mixture flowing like thick, bright lava. That’s the look you want for that satisfying, crisp snap!
Essential Ingredients for Classic Red Candy Apples
Okay, let’s talk supplies! Getting the right things ready before you even turn the stove on is half the battle won. When you’re dealing with sugar this hot, you don’t want to be scrambling for the food coloring while your syrup is cooling down. I keep everything measured out in little bowls near the stove so I can move fast once we hit that magic temperature.
This recipe uses just a handful of basic items, but using quality versions makes a huge difference in the final look and taste of your classic red candy apples.
- 6 medium crisp apples (Granny Smith or Fuji are my go-tos!)
- 6 sturdy wooden sticks or lollipop sticks
- 2 cups granulated sugar
- 1 cup light corn syrup (don’t skip this, seriously!)
- 3/4 cup water
- 1 teaspoon red food coloring (use the gel kind if you can—it’s super concentrated!)
- 1/2 teaspoon cinnamon or vanilla extract (this is optional, but it smells amazing)
Ingredient Notes and Apple Selection
You need apples that can stand up to that hot candy shell! I stick with Granny Smith apples almost every time. Why? Because that tart, sharp flavor cuts right through the intense sweetness of the coating. It’s the perfect balance, just like when you have salty popcorn with your movie. If you use a very soft, sweet apple, the whole thing can taste too much like sugar.
Now, about that corn syrup. This stuff is your best friend when making hard candy! It’s super important because it stops the sugar from seizing up and turning grainy or crystallizing. That’s what causes those rough patches or those dreaded crack free candy apples you might have had trouble with before. The corn syrup keeps the sugar molecules smooth and flowing, giving you that perfect, glossy shell every single time. It’s a non-negotiable ingredient for this hard-shell treat!
How to Make Candy Apples: Step-by-Step Instructions
Ready to dive in? Learning how to make candy apples is seriously rewarding, and these instructions are designed to feel like I’m standing right next to you in the kitchen, coaching you through it. We’re going to move quickly once we get the syrup cooking, so make sure everything is ready to go before you start mixing the sugar!
First up, let’s deal with the apples. We want that beautiful, hard, crispy candy coating to stick like glue, not slide right off! If the apple skins are too smooth or waxy, the candy shell just won’t grab onto them properly. We tackle this in two quick movements. After you wash them, you’re going to gently dip each apple into a pot of simmering water for just five seconds—no more! This sounds scary, but it just micro-etches the surface so the candy has something to hold onto.
Prepping Apples for Maximum Coating Adhesion
That quick dip in the water is the secret handshake for sticking! Immediately after you take them out of the hot water, you have to dry them completely. I mean bone dry—use a clean paper towel and pat them until you think they are totally dry, and then pat them one more time. Any little speck of moisture will cause the hot candy to steam and bubble when you dip, which leads to pitting in your final shell. Once they are dry, push those lollipop sticks right into the center while you prepare your syrup station. I always line my baking sheet with parchment paper and give it a tiny spray of cooking oil—just in case! You can find lots more great tips on recipes like these over at Tastey Stew when you’re done here.
Cooking the Candy Syrup to Hard Crack
Now, the serious part: the sugar syrup. Grab your heavy-bottomed pot; we want even heat distribution always. Combine the sugar, corn syrup, and water. You can stir it gently at first just to make sure the sugar is fully wet, but I stress this: stop stirring the second it starts to boil! If you keep stirring once it’s boiling, you risk shaking sugar crystals back into the liquid, which makes the entire batch go cloudy and crystallize later. Yuck! Stick your candy thermometer right in there, making sure it’s suspended in the syrup and not touching the bottom of the pan.
You need patience here. Let it boil away until that thermometer screams 300°F. This is your target—the hard crack stage. This takes around 15 to 20 minutes, so use this time to get your red food coloring and any extracts ready right next to the stove. When you hit 300°F, quickly take the pot off the heat. Wait about half a minute for those giant bubbles to die down, then stir in your color quickly. Keep a metal spoon nearby, because if you see any little bubbles forming on top as you dip, just use that spoon to skim them right off the surface before you dunk your next apple. Don’t forget to check out my favorite apple crisp recipe for a different kind of warm apple dessert!
Once you’ve dipped, if the syrup in the pan gets too stiff to move around, just put it back on the lowest heat setting for just 30 seconds to loosen it up again. It’s all about staying close and working fast!
Troubleshooting Common Candy Apples Mistakes
Don’t panic if things look a little wonky! Candy making has a learning curve, but since we are focusing on building that beautiful shell, we can fix most errors right on the stovetop. My goal is for you to have shiny, crack free candy apples, not a sticky mess, so here are the things that used to drive me nuts when I first started.
If you follow the temperature rule (300°F!), you’ll avoid most issues. But here’s the cheat sheet for when things go sideways:
- The coating is dull or cloudy, not shiny: This usually means you stirred the sugar *after* it came to a boil, which introduced crystals. You can try to save it by adding a teaspoon of water and very gently reheating it until it clears up again, but honestly, if it’s too cloudy, it’s often better to just scrap that batch and start fresh. We want that ultra-glossy look!
- The candy shell has small bubbles: This is super common, especially if your apples weren’t perfectly dry after the boiling pre-dip. As soon as you take the pot off the heat before dipping, gently skim the surface with a thin metal spoon. Scoop up just the tiny bubbles resting on the top layer. This ensures you get a smooth, uniform, shiny candy apple coating.
- The coating is too stiff in the pan while I’m dipping: This happens as the sugar cools down between apples! It’s totally fine. Just move your saucepan back onto the burner over the *lowest* possible heat setting for just a moment—maybe 10 or 15 seconds. You just want it liquid enough to coat easily again, not boiling hot.
- The coating won’t stick to the apple: Did you skip the quick 5-second dip in boiling water? If you’re certain you dried them really well, that quick boil etched the surface just enough for the candy to adhere. If it’s still sliding off, make sure the apples you’re using aren’t room temperature; slightly cool apples work best!
Tips for Making Gourmet Candy Apples Variations
Once you’ve mastered that perfect hard shell using the classic red food coloring, the real fun begins! Making your own candy apples means you can turn them into the star of any party theme. Don’t feel like you have to stick to just red, either! This base recipe is so sturdy that it holds all sorts of fun additions really well. Think about wrapping them in cellophane and tying them with checkered ribbon for a picnic vibe.
For a total showstopper, especially if you’re decorating for Halloween or a themed birthday, you can easily swap out that red dye for any gel color you want. Blues, purples, even making them black for a “poison apple” effect! If you want something really over the top, check out these amazing glow-in-the-dark Jolly Rancher apples for inspiration—though that’s a different process entirely, it shows you how creative you can get!
Flavoring and Coloring Your Candy Apples Tutorial
When we made the classic batch, I used vanilla or cinnamon extract, but seriously, play around! A drop of cherry extract turns the whole coating into a perfect cherry flavor, and almond extract gives it that nostalgic, almost marzipan-like taste that is just terrific. This is your chance to do a full colored candy apples tutorial for your own family!
And toppings, oh my goodness. Right after you dip the apple and lift it out, while the coating is still tacky, you can roll it or sprinkle it with things. Crushed peanuts are classic, but I love using clear sprinkles for extra sparkle. If you are looking for something less rigid than candy, you might want to check out my caramel apples recipe instead, though nothing beats that hard crash of a true candy shell!
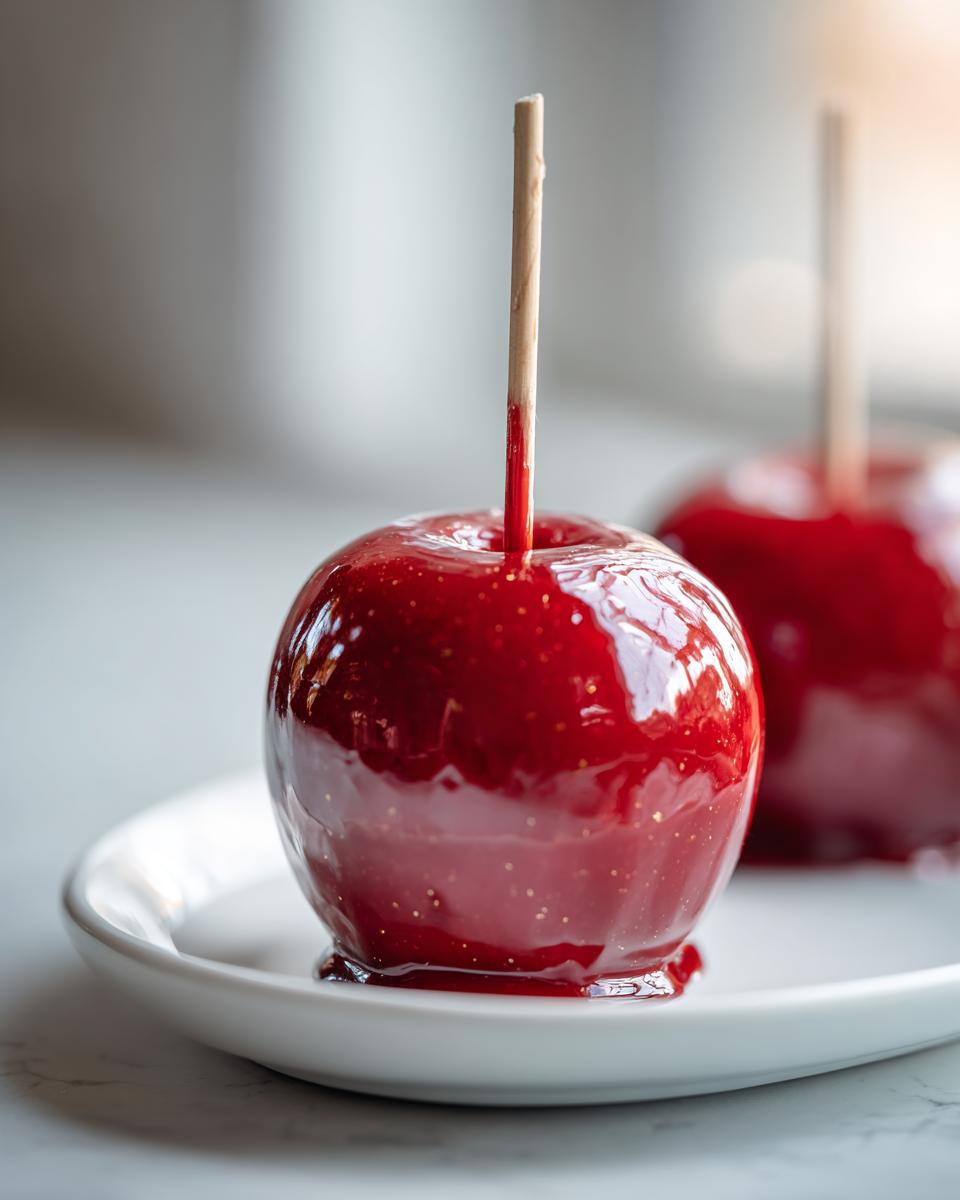
Serving and Storing Your Homemade Candy Apples
Alright, you’ve got these gorgeous, shiny, perfect apples! Now, the big question: when do we eat them, and how do we keep them looking perfect until then? My biggest piece of advice for any hard candy, including these candy apples, is that they truly are best enjoyed the same day you make them. That crispy shell achieves its peak texture right after it has fully cooled down.
Candy loves humidity, and it loves to sweat! If you try to store these in the fridge, I can almost guarantee you’ll come back to a sticky, weeping mess because the moisture in the air condenses right onto that hard sugar shell. So, rule number one: keep them out of the refrigerator entirely!
To store them overnight, you need a cool, dry spot. I usually just set them upright on their sticks on a sheet of parchment paper, away from any heat sources like the oven or sunny windows. If you’re making a huge batch for a party the next day, try sealing them tightly in an airtight container, but place a small disc of paper towel in the bottom to absorb any stray moisture that tries to collect. Just know that they might lose a tiny bit of that incredible, fresh-from-the-pot crunch.
If you’re looking for other fantastic sweets to round out your dessert spread, make sure you take a peek at my master list of best dessert recipes. But honestly, nothing beats the excitement of these glossy, crunchy apples!
Frequently Asked Questions About Candy Apples
Whenever I share these recipes, I get so many questions about the finer details—especially when people compare them to other beloved apple treats! Making perfect candy apples requires remembering just a few key things, and usually, once those are settled, the confusion clears right up. Here are the things I get asked most often about this recipe.
Caramel Apple vs Candy Apple: What is the Difference?
This is probably the question I hear the most! They both use apples on a stick, but they are totally different experiences. Caramel apples use a cooked mixture of butter, cream, and sugar that results in a soft, chewy coating—think rich, sweet, and yielding when you bite it. Our recipe, the one for classic red candy apples, uses a higher temperature (that hard crack stage!) and relies on corn syrup and water to create a pure sugar shell.
The result? A hard, thin, glossy, and *crisp* shell that shatters when you bite it. If you find yourself thinking, “I prefer soft candy,” then you should definitely check out my recipe for homemade caramel apples instead! But if you want that loud *CRACK*, stick with this guide.
Can I make these ahead of time for party candy apples?
For the absolute best texture, no, you shouldn’t make them too far ahead of time. Remember how I mentioned humidity is the enemy? The hard shell is designed to keep moisture *out*, but if the air has any humidity, the sugar will start drawing that moisture in, making the candy dull and sticky over time. For party candy apples to look their very best, I suggest making them the day of the party or, at the absolute latest, the night before. If you must make them a day ahead, seal them in an airtight container in a cool, dry spot—cool meaning room temperature, not the fridge!
If you want lots of creative ideas for dressing up your apples, even for next year’s big bash, this guide on caramel and candied apple toppings has some truly fun suggestions for sprinkles and drizzles.
Enjoying These Nostalgic Fall Dessert Recipes
Honestly, making candy apples always feels like tapping into childhood all over again, doesn’t it? That vibrant red color just brings back all the memories of crisp autumn nights and fun at the local fair. These aren’t just a sweet snack; they are pure nostalgia wrapped around a crisp apple!
If you’re planning a fall dessert table or a big Halloween bash, these apples are the centerpiece. They look dramatic sitting on a platter, and everyone loves grabbing one. They are the perfect addition to any spread of true fall dessert recipes. They give you that sweet, crunchy element alongside things like pumpkin pie or warmer baked goods.
If you’re looking for other cozy, seasonal things to bake up this time of year, you absolutely have to try my easy pumpkin bread recipe. That recipe also uses warm spices and gives you that amazing deep fall aroma that fills the whole house. Between the apple bread and these shiny red apples, your kitchen is going to smell like the best time of year!
Share Your Perfect Candy Apples Creations
Now that you’ve got the technique for that perfect, glossy shell down, I just can’t wait to see what you’ve made! Seriously, I get such a thrill watching you all conquer candy making. Don’t keep that shiny success to yourself—share the joy!
Did you stick with the classic red, or did you venture out into vibrant blues or pinks? Tell me everything!
I really want to hear your experience! Drop a comment down below and let me know how your first batch of hard-shell apples turned out. Did you find that boiling water trick made all the difference for adhesion? Has your family already asked for a second batch? Rate this recipe for me so other cooks know they can trust it!
If you posted a picture of your stunning, crack-free creations on social media, please tag me! I love saving photos in my inspiration folder. You can find me over on my About page where I share all my handles. Seeing your gorgeous, shiny apples makes all my testing worthwhile. Happy dipping, everyone!
PrintClassic Shiny Red Candy Apples: Foolproof Recipe for a Crack-Free Coating
Make perfect, glossy red candy apples with this easy recipe. You will achieve a crisp, crack-free coating every time by following these straightforward steps for preparation and cooking.
- Prep Time: 15 min
- Cook Time: 20 min
- Total Time: 35 min
- Yield: 6 servings 1x
- Category: Dessert
- Method: Stovetop Cooking
- Cuisine: American
- Diet: Vegetarian
Ingredients
- 6 medium crisp apples (like Granny Smith or Fuji)
- 6 wooden sticks or lollipop sticks
- 2 cups granulated sugar
- 1 cup light corn syrup
- 3/4 cup water
- 1 teaspoon red food coloring (gel coloring works best for vibrant color)
- 1/2 teaspoon cinnamon extract or vanilla extract (optional, for flavor)
Instructions
- Prepare the apples: Wash the apples thoroughly. Remove the small stem. To help the candy coating stick, dip each apple briefly in boiling water for 5 seconds, then immediately dry them completely with a paper towel. Insert the wooden sticks firmly into the apple core.
- Prepare your station: Line a baking sheet with parchment paper or a silicone mat and lightly grease it with cooking spray. Set this near your stove.
- Make the candy syrup: In a medium, heavy-bottomed saucepan, combine the sugar, corn syrup, and water. Stir gently over medium heat until the sugar dissolves completely. Stop stirring once it boils.
- Cook the syrup: Insert a candy thermometer into the side of the pan, making sure it does not touch the bottom. Boil the mixture without stirring until it reaches 300 degrees Fahrenheit (149 degrees Celsius), which is the hard crack stage. This usually takes 15 to 20 minutes.
- Add color and flavor: Carefully remove the saucepan from the heat. Wait about 30 seconds for the bubbling to subside slightly. Stir in the red food coloring and the extract, if using. Work quickly.
- Dip the apples: Tilt the saucepan slightly. Hold an apple by the stick and dip it into the hot candy mixture, rotating it to coat evenly. Lift the apple out and let excess candy drip off back into the pan.
- Cool and set: Immediately place the coated apple onto the prepared baking sheet. If the candy hardens too much in the pan, gently reheat the mixture briefly over low heat.
- Let the candy apples cool completely at room temperature until the shell is hard and shiny before serving.
Notes
- For the best adhesion, ensure your apples are completely dry and slightly cool before dipping.
- If you see small bubbles forming in your coating, you can carefully skim them off the top of the syrup with a metal spoon before dipping.
- To achieve a vibrant color, use gel food coloring instead of liquid drops.
- If the coating becomes too thick while dipping, reheat it gently over low heat until it flows smoothly again.
Nutrition
- Serving Size: 1 apple
- Calories: 350
- Sugar: 85g
- Sodium: 1mg
- Fat: 0g
- Saturated Fat: 0g
- Unsaturated Fat: 0g
- Trans Fat: 0g
- Carbohydrates: 90g
- Fiber: 1g
- Protein: 0g
- Cholesterol: 0mg