
Do you ever have that powerful craving for a rich, creamy tiramisu, but you immediately think about the heavy mascarpone and the weekend cooking time required? I totally get it! Back when I was studying nutrition, I loved classic desserts, but I needed ways to make those amazing flavors fit into my busy schedule. That’s why I absolutely had to crack the code on a healthy, simple version—and folks, I nailed it. Say hello to my ultimate tiramisu chia pudding! This no-bake wonder layers all the coffee-soaked goodness you adore into a creamy pudding base. It’s the perfect make-ahead breakfast or a guilt-free layered dessert that tastes incredibly indulgent, but it’s surprisingly good for you. Let’s make classic flavors accessible for everyone!
- Why This tiramisu chia pudding is Your New Favorite Healthy Tiramisu Recipe
- Gathering Ingredients for Your tiramisu chia pudding
- Step-by-Step Instructions for Perfect tiramisu chia pudding
- Tips for Making the Best tiramisu chia pudding
- Ingredient Notes and Substitutions for tiramisu chia pudding
- Storage and Make Ahead Breakfast Ideas for tiramisu chia pudding
- Variations on the Classic tiramisu chia pudding
- Frequently Asked Questions About tiramisu chia pudding
- Nutritional Snapshot of This Guilt Free Dessert
- Share Your Healthy Layered Dessert Creations
Why This tiramisu chia pudding is Your New Favorite Healthy Tiramisu Recipe
When I create a recipe, I want it to replace those heavier, traditional ones in your rotation, not just sit there as a novelty. This tiramisu chia pudding is designed for real life. You get all that intense coffee warmth and cocoa dustiness without any fuss, which is why I rely on it so much!
- This is truly your go-to Healthy Tiramisu Recipe because it uses wholesome ingredients you already have on hand.
- It’s completely customizable, making it a fantastic Make Ahead Breakfast Ideas staple that keeps you full.
- And the best part? It feels decadent, yet it’s a total Guilt Free Dessert!
The Perfect No Bake Coffee Dessert Experience
Forget turning on the oven or dealing with raw eggs. That’s the beauty of the chia seed method! You simply mix, chill, and layer. Because we steep the chia seeds directly in strong coffee overnight, you get the absolute deepest flavor payoff. This is the ultimate No Bake Coffee Dessert when you need a hit of energy and elegance without the effort.
Gathering Ingredients for Your tiramisu chia pudding
Before we get to the magic of the overnight soak, we need to gather our simple supplies. Honestly, this recipe is fantastic because it relies on pantry staples. However, I want to stress one thing: the coffee needs to be STRONG. Seriously, the flavor of your coffee dictates the flavor of your final dessert, so don’t skimp here!
Base Pudding Components
These are the core ingredients that turn into that creamy, luscious pudding base:
- 1/4 cup chia seeds
- 1 cup unsweetened almond milk (If you are making a Vegan Tiramisu Alternative, stick with almond, soy, or oat milk—whatever makes you happiest!)
- 1/4 cup strong brewed coffee, completely cooled
- 1/2 teaspoon vanilla extract
- Pinch of salt
Tiramisu Flavor Layers and Toppings
This is where we bring in the signature Tiramisu taste. Remember, we are using a small amount of the coffee again later to mimic that crucial soaking step:
- 1 tablespoon maple syrup (If you’re aiming for a Keto Tiramisu Chia version, you’ll swap this for your favorite granulated keto sweetener, trust me!)
- For Topping: 1 tablespoon unsweetened cocoa powder
- For Topping: 1 tablespoon strong brewed coffee, completely cooled
Step-by-Step Instructions for Perfect tiramisu chia pudding
Okay, Kate’s rule number one for chia pudding: always defeat the clumps! Chia seeds are great, but if you just toss them into liquid, they decide to form one giant sticky mass at the bottom of your jar. We’re making this tiramisu chia pudding beautiful and smooth, not a blob of sweet gel! Since this is a no-bake recipe, timing is really about how much patience you have—but trust me, the overnight rest is worth it.
Mixing the Overnight Chia Pudding Base
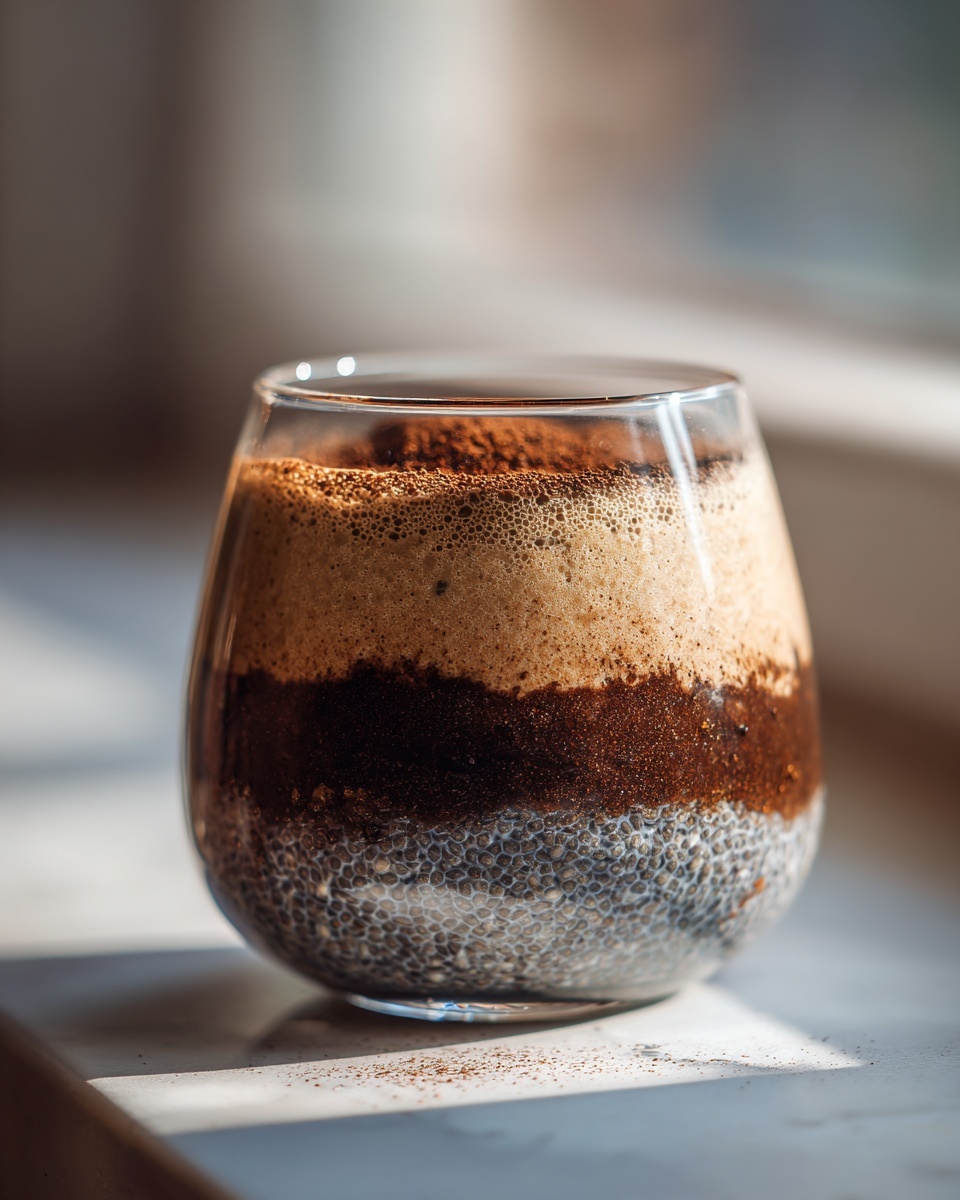
First things first, grab a jar or a container—I prefer clear jars so I can see that beautiful layering later on! Add in your chia seeds, almond milk, the 1/4 cup of cooled coffee, maple syrup, vanilla, and salt. Now, here’s my royal tip: stir it like you mean it for a full minute! Don’t just give it a quick swirl. You need to keep it moving constantly so every seed gets coated. If you skip this vigorous initial stir, you’ll end up with a disappointing pudding brick. Once it looks smooth, cover it up and pop it into the fridge for a minimum of four hours, but honestly, aim for overnight soaking.
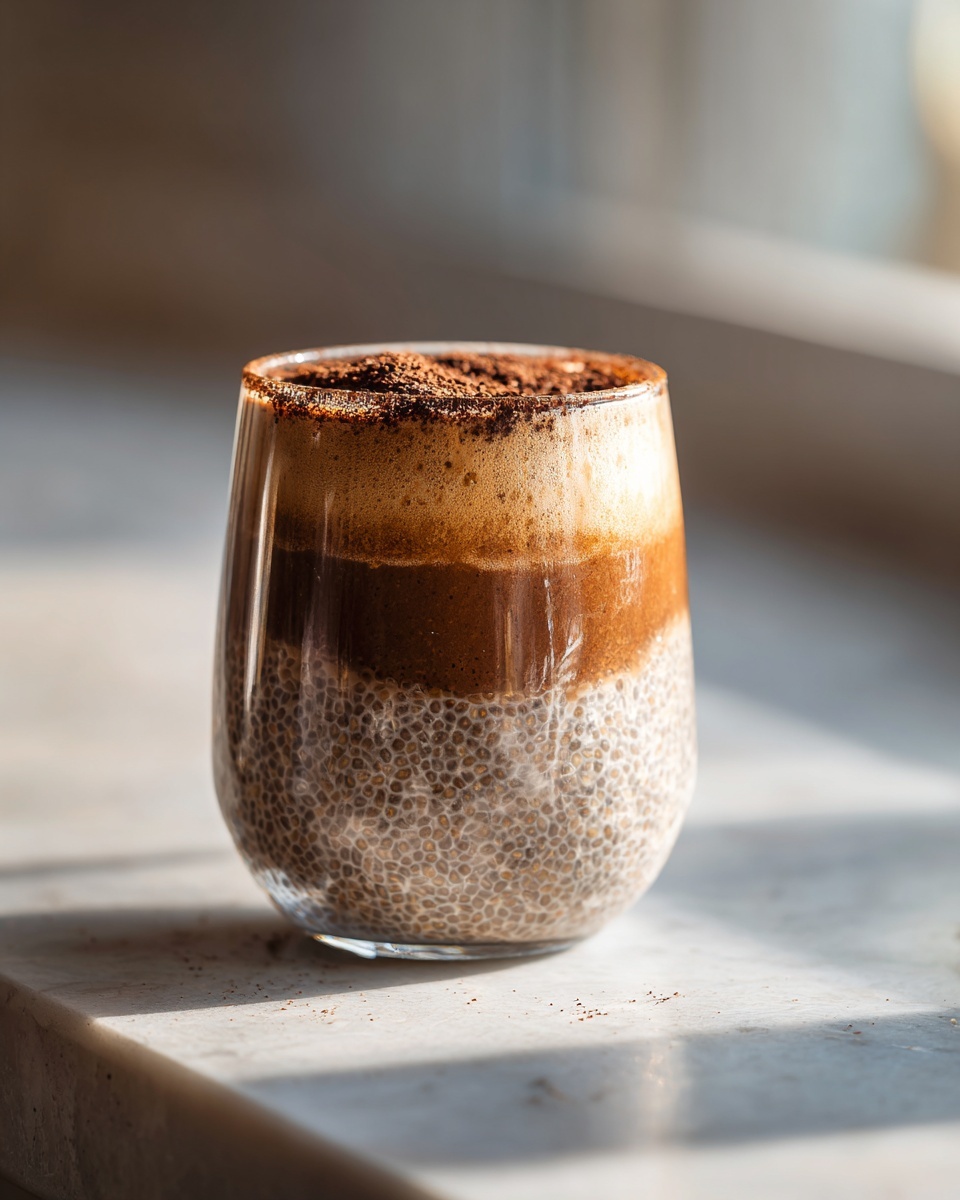
Assembling Your Healthy Layered Dessert
Once your base is thick—it should feel firm like a soft custard—it’s assembly time! This is where we turn pudding into a showstopper, like one of my favorite Easy Dessert Parfaits. First, mix that remaining tablespoon of coffee with a tiny bit of sweetener if you want it punchier, and create your cocoa paste by whisking the cocoa powder with just a teaspoon of water or milk until it’s completely smooth.
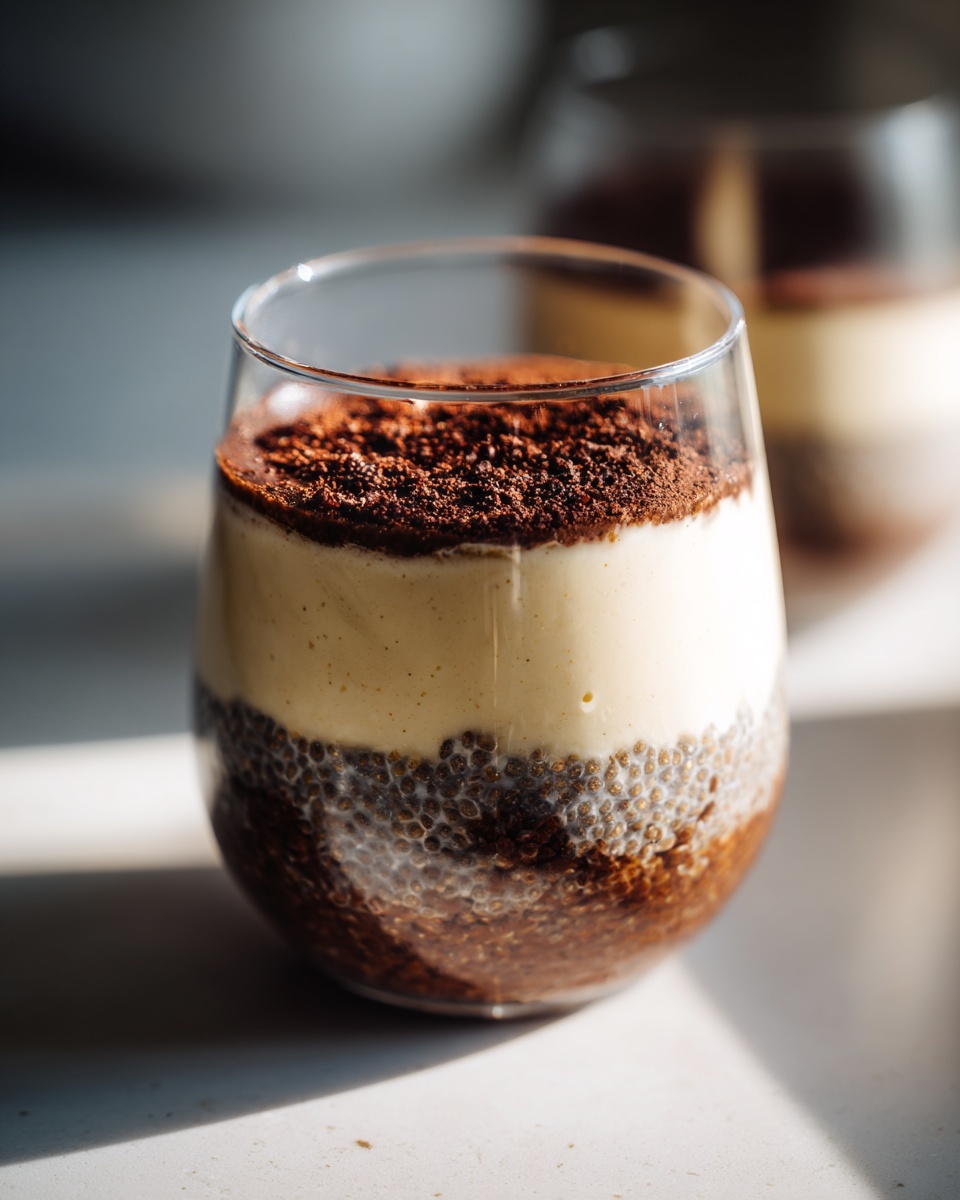
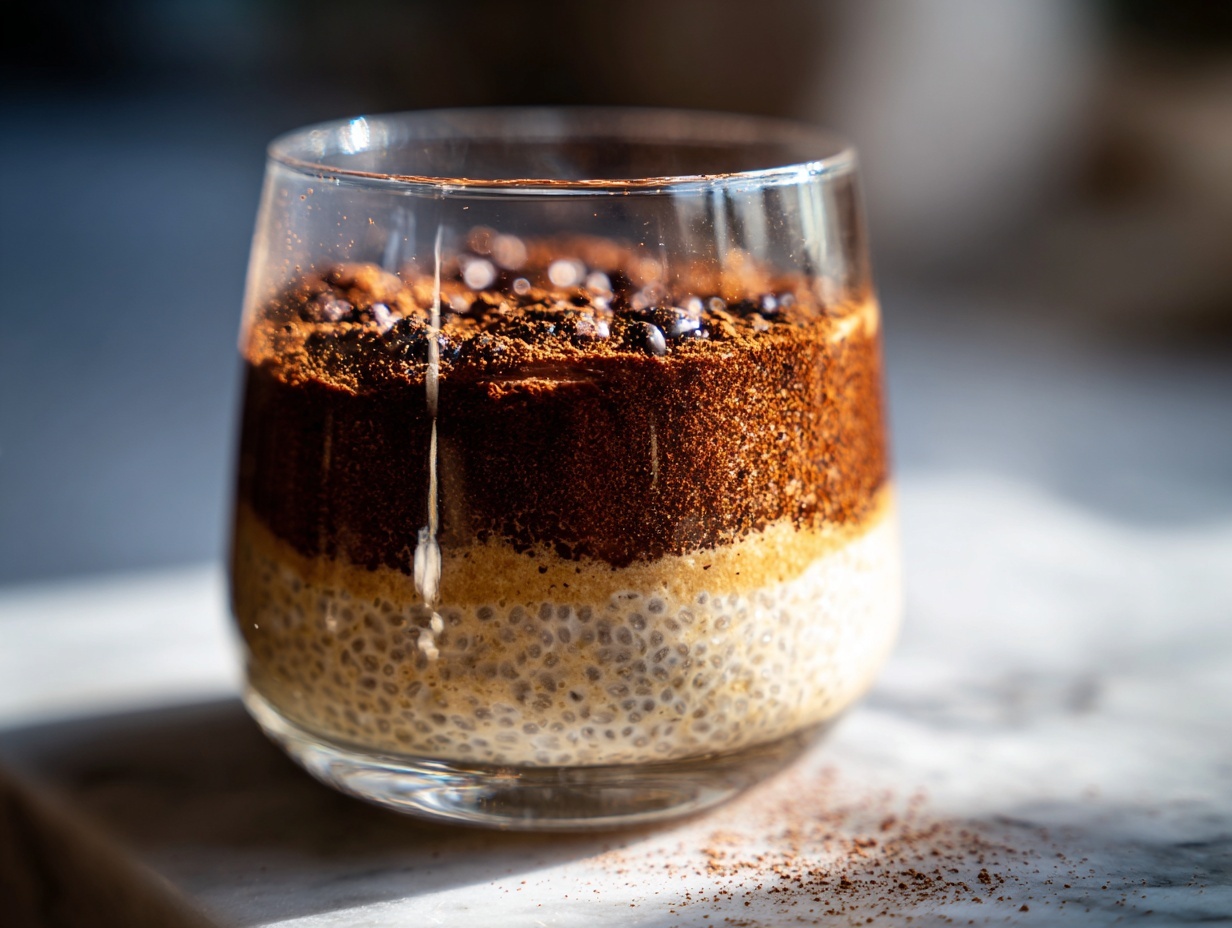
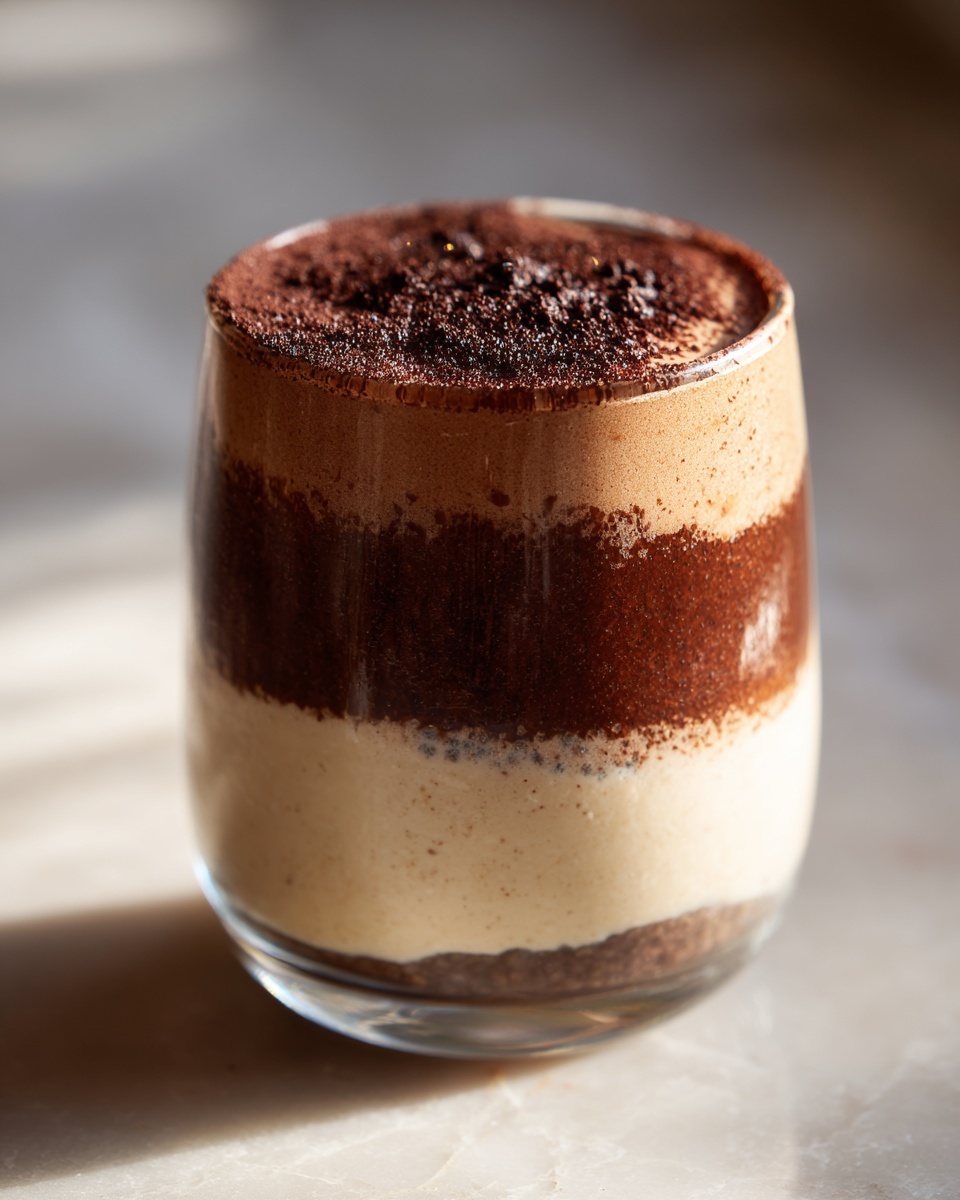
To build the flavor layers, start by spooning half of your thick chia pudding into your serving glass. Drizzle half of that coffee soak right over that first layer. Then, gently spread half of your rich cocoa paste on top. Now, repeat the process: pudding, coffee soak, and finish it all with the last of that gorgeous cocoa dusting. You made a stunning Healthy Layered Dessert, and you didn’t even turn on the stove!
Tips for Making the Best tiramisu chia pudding
You know I test my recipes over and over again to make sure they are foolproof, and that means having backup plans for common issues! While this tiramisu chia pudding is naturally straightforward, tweaking the coffee and texture can take it from good to truly regal. I want every single bite to transport you straight to an Italian café, even if you’re eating this at your desk for breakfast!
Achieving the Ideal Coffee Flavored Pudding Texture
If coffee flavor is your main goal—and for Tiramisu, it absolutely should be—then swap out the regular brewed coffee for espresso in the pudding base. Using just a touch of strong espresso concentrate mixed with water to hit that 1/4 cup measurement makes this an incredible Espresso Chia Pudding. The flavor is punchier and deeper, which really helps it cut through the sweetness.
Now, let’s talk about texture the morning after. Sometimes, depending on the humidity or even the brand of chia seed you use, your pudding might set up slightly firmer than you prefer the next day. Don’t panic! If you find your Coffee Flavored Pudding is too thick for your liking, just stir in an extra splash—maybe a tablespoon or two—of your almond milk. Stir it until it loosens up just a bit. It will immediately become creamier, and nobody will ever know you adjusted it!
Ingredient Notes and Substitutions for tiramisu chia pudding
When I set out to make this recipe accessible, I knew we had to account for different dietary needs. The beauty of this tiramisu chia pudding is that the base ingredients are inherently flexible. Chia seeds are the powerhouse here; they absorb liquid and turn gummy, but in a good way, creating that essential density without relying on eggs or heavy cream. Almond milk works wonderfully because it’s generally neutral in flavor, which allows the coffee and cocoa to truly shine through. If you’re modifying for a specific diet, you can easily tweak the sweetener.
Making This a Dairy Free Tiramisu
Good news! This recipe is inherently suitable for those avoiding dairy, making it a perfect Dairy Free Tiramisu option right out of the gate. Just be sure to stick with non-dairy milk options like almond, oat, or cashew milk. They blend so smoothly into the coffee mixture and don’t interfere with the final texture. For anyone looking for a specific Vegan Tiramisu Alternative, rest assured, as long as you skip any egg or dairy toppings, this layered dessert is fully plant-based and delicious!
Storage and Make Ahead Breakfast Ideas for tiramisu chia pudding
This is truly where the tiramisu chia pudding shines brightly for busy people like us! If you are trying to sneak in some healthy fuel before work or you just need a grab-and-go dessert, making this ahead of time is essential. I always prepare mine on Sunday evening. That way, I have a fantastic, ready-to-eat breakfast waiting for me, or a simple, amazing treat after dinner without having to lift another finger.
The best way to store this is in individual serving jars—the ones with tight-fitting lids are ideal for keeping that moisture locked in. This keeps you from having breakfast chaos in the morning! You can absolutely prepare the entire layered system—pudding, coffee soak, and cocoa dust—all at once and store it sealed in the fridge.
Because of the coffee and the natural preservatives in the chia and cocoa powder, this pudding keeps really well. I’ve kept mine for up to three full days, and the flavor is still vibrant and the texture is fantastic. If you notice the cocoa dust sinking in a bit after the second day, just sprinkle a tiny fresh dust on top before serving for that perfect look! It’s such a relief knowing that your Make Ahead Breakfast Ideas are handled for the next few mornings.
Variations on the Classic tiramisu chia pudding
While I want you to experience this tiramisu chia pudding as close to its perfect, simple form as possible, I know you might be looking to customize it for your routine. That’s the joy of cooking at home, right? We take the best parts of a classic and tweak them slightly so they fit perfectly into *your* life. Don’t forget, if you love boosting your intake, you might want to check out my recipe for those easy protein balls too!
The basic coffee and cocoa structure is so forgiving, which is why it’s so easy to adapt. You don’t need to hunt down fancy specialty items; we’re keeping it achievable here at Kings Cook.
Here are a couple of easy twists I’ve tested that turned out wonderfully:
- Turning it into a High Protein Chia Pudding: If you’re using this as a post-workout fuel or need something extra hearty for breakfast, adding protein is simple. Once the pudding has set overnight, take out about half a cup of the mixture and blend it vigorously with one scoop of vanilla or unflavored protein powder and a splash more milk. Mix this thick protein blend back into the rest of the pudding. It will thicken it up even more, but keeps you full for hours!
- Vanilla vs. Almond Extract: If you happen to be out of vanilla extract, you can substitute it with almond extract, but tread lightly—it’s potent! Just use 1/4 teaspoon instead of 1/2. Almond pairs surprisingly well with the deep coffee flavor!
- A Touch of Spice: This is definitely not traditional, but it’s fun! A tiny pinch of ground cardamom mixed into the pudding base before chilling adds an unexpected warmth that complements the espresso notes beautifully. It’s a subtle nod to Middle Eastern flavors that makes your Coffee Flavored Pudding feel much fancier.
See? Simple shifts that make this versatile tiramisu chia pudding recipe your very own!
Frequently Asked Questions About tiramisu chia pudding
I always love hearing what questions pop up after you start making a new favorite recipe! When you’re adapting classics into something healthier, like our tiramisu chia pudding, you need clear answers so you can bake (or in this case, chill!) with confidence. Don’t worry if you’re new to chia puddings; I’ve broken down the most common concerns here to ensure your dessert turns out perfectly every time.
Is this tiramisu chia pudding recipe gluten-free?
Yes, absolutely! This recipe is fantastic for anyone managing gluten sensitivities. Since we rely on chia seeds as the base instead of traditional ladyfingers or flour, this is naturally a fantastic Gluten Free Dessert option. As long as you ensure your cocoa powder and any alternative milks you use are certified gluten-free (which most pure brands are), you are good to go!). It’s one less thing to stress about when you’re making a quick, healthy treat!
Can I make this keto-friendly?
That’s a great question, especially since we used maple syrup as the natural sweetener in the main recipe. You can definitely adjust this to be a Keto Tiramisu Chia version! The swap is quite straightforward: simply replace the tablespoon of maple syrup in the base with your preferred granulated keto sweetener, like erythritol or monk fruit blend. When you test the sweetness, start with a bit less than you think you need, as keto sweeteners can sometimes be extra potent. It still retains that lush texture, making it a wonderfully low-carb Guilt Free Dessert!
What about a cocoa dusting replacement? For the topping, you can whisk your cocoa powder with a tiny bit of almond milk and a pinch of powdered keto sweetener to create a frosting-like layer instead of just plain cocoa powder.
How long do I need to soak the chia seeds?
The absolute minimum time for the seeds to plump up and create that pudding texture is about four hours, provided your fridge isn’t too cold. However, and this is my honest advice from years of meal prepping: overnight is always better for a true Overnight Chia Pudding. When you let it sit overnight, the flavors really have time to meld, the coffee fully permeates the seeds, and the texture sets up perfectly stable. You want it thick enough that a spoon stands up, but not hard!
Nutritional Snapshot of This Guilt Free Dessert
When we talk about making a tiramisu chia pudding that fits into a healthy lifestyle, I know the next question is always about the numbers. I’ve broken down the estimated nutrition for a single serving below based on the recipe ingredients I provided. Remember, this is an estimate! If you swap out almond milk for something higher in fat like full-fat coconut milk, or use a different sweetener, those numbers will shift slightly. But generally, this is a fantastic way to satisfy your sweet tooth without the guilt!
It’s amazing how much fiber and protein we sneak in here thanks to those tiny but mighty chia seeds. This truly is a power-packed Guilt Free Dessert!
- Serving Size: 1 serving
- Calories: Around 250
- Protein: About 9g (Great for a breakfast boost!)
- Total Fat: Around 12g (Mostly healthy unsaturated fats!)
- Total Carbohydrates: About 30g
- Fiber: A whopping 15g (That’s more than half your daily recommendation!)
- Sugar: Roughly 8g (Mostly natural sugars from the maple syrup, easily adjustable!)
Don’t forget, these figures are just a guide. I always encourage you to track what works best for your personal goals. But honestly, getting that intense coffee and cocoa flavor for only about 250 calories? That’s a culinary win in my book!
Share Your Healthy Layered Dessert Creations
Now that you have whipped up batches of this delicious tiramisu chia pudding, I truly want to see what you’ve created! Getting joyful feedback from readers like you is honestly the best part of running Kings Cook. Whether you served it in a fancy wine glass or just in a trusty mason jar (which always looks great for a Healthy Layered Dessert, by the way!), snapping a quick picture and tagging me on social media makes my day.
If this recipe helped you finally conquer that Tiramisu craving in a way that felt easy and guilt-free, please consider leaving a rating right here on the page. Five stars means the world to me and helps other home cooks who are stuck in a dinner rut find recipes that actually work! It validates all the testing I do in my kitchen.
Did you find that using espresso made a huge difference? Did you try a different non-dairy milk that you loved? Seriously, I want to hear all the details! Drop a comment below and tell me how easy you found the overnight process and what you loved most about this tiramisu chia pudding. Let’s keep building that confidence in the kitchen together!
PrintTiramisu Chia Pudding: Healthy Overnight Coffee Dessert
Make this easy, no-bake Tiramisu Chia Pudding for a guilt-free breakfast or layered dessert. It captures the classic coffee and cocoa flavors in a healthy, make-ahead format.
- Prep Time: 5 min
- Cook Time: 0 min
- Total Time: 4 hr 5 min
- Yield: 1 serving 1x
- Category: Breakfast
- Method: No Bake
- Cuisine: American
- Diet: Vegan
Ingredients
- 1/4 cup chia seeds
- 1 cup unsweetened almond milk (or dairy-free milk for Vegan Tiramisu Alternative)
- 1/4 cup strong brewed coffee, cooled
- 1 tablespoon maple syrup (or sweetener of choice for Keto Tiramisu Chia)
- 1/2 teaspoon vanilla extract
- Pinch of salt
- For Topping: 1 tablespoon unsweetened cocoa powder
- For Topping: 1 tablespoon strong brewed coffee, cooled
Instructions
- In a jar or container, combine the chia seeds, almond milk, 1/4 cup cooled coffee, maple syrup, vanilla extract, and salt.
- Stir the mixture well for about one minute to prevent the chia seeds from clumping at the bottom.
- Cover the container and place it in the refrigerator to soak for at least 4 hours, or preferably overnight, until the mixture thickens into a pudding consistency. This creates your Overnight Chia Pudding base.
- When ready to serve, prepare the coffee soak: Mix the remaining 1 tablespoon of cooled coffee with 1 teaspoon of maple syrup if desired.
- In a small bowl, whisk the cocoa powder with 1 teaspoon of water or milk until a smooth paste forms.
- To assemble your Healthy Layered Dessert, spoon half of the chia pudding into a serving glass.
- Drizzle half of the coffee soak over the pudding layer.
- Top with half of the cocoa mixture, spreading it gently.
- Repeat the layers: remaining chia pudding, remaining coffee soak, and remaining cocoa mixture.
- Serve immediately as an Easy Dessert Parfait or chill for up to 2 more days.
Notes
- For a richer coffee flavor, use espresso instead of brewed coffee.
- If the pudding is too thick the next morning, stir in a splash more milk until you reach your preferred texture.
- This recipe is naturally Gluten Free Dessert and Dairy Free Tiramisu friendly.
Nutrition
- Serving Size: 1 serving
- Calories: 250
- Sugar: 8
- Sodium: 150
- Fat: 12
- Saturated Fat: 1
- Unsaturated Fat: 11
- Trans Fat: 0
- Carbohydrates: 30
- Fiber: 15
- Protein: 9
- Cholesterol: 0