
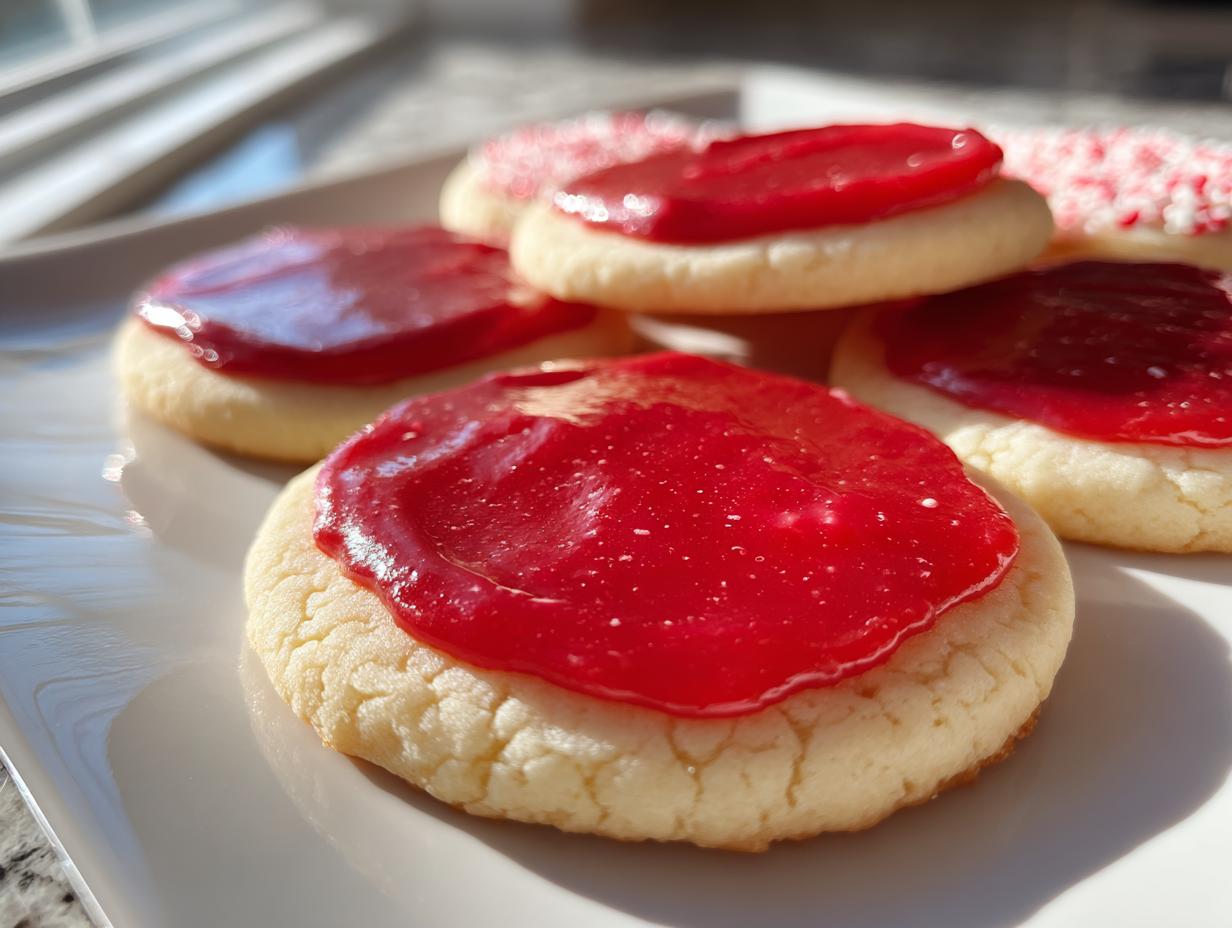
Are you tired of spending hours decorating beautiful cut-out cookies only to watch your stunning designs smudge the second you stack them in a tin? Trust me, I’ve been there! That’s why I’m so excited to share this incredible sugar cookie icing recipe with you. This glaze sets up like a dream—it dries hard, gives you that gorgeous, professional gloss, and it’s surprisingly easy to make. I’ve used this reliable Royal Icing Alternative for every holiday ever since I first mastered the flooding consistency. It truly transforms cookies meant for gifting!
- Why This Is the Best sugar cookie icing recipe for Cut-Out Cookies
- Essential Ingredients for a Smooth cookie icing tutorial
- How to Make This Easy decorating icing for sugar cookies
- Mastering Icing Consistency: Cookie decorating consistency guide
- Application Techniques for a Bakery style cookie icing
- Tips for Success with your sugar cookie icing recipe
- Storage & Reheating Instructions for Leftover sugar cookie icing recipe
- Frequently Asked Questions About This sugar cookie icing recipe
- Estimated Nutritional Data for This sugar cookie icing recipe
Why This Is the Best sugar cookie icing recipe for Cut-Out Cookies
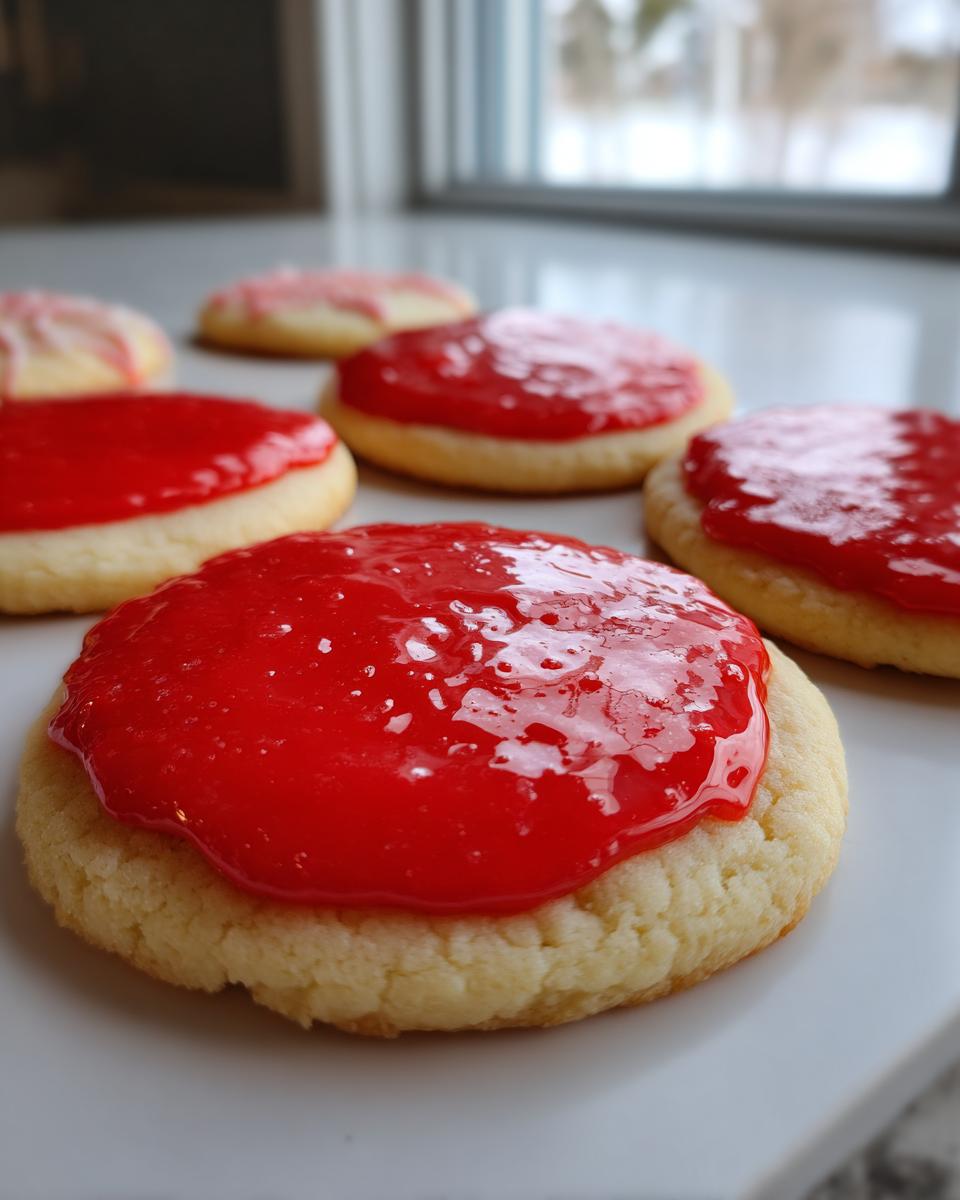
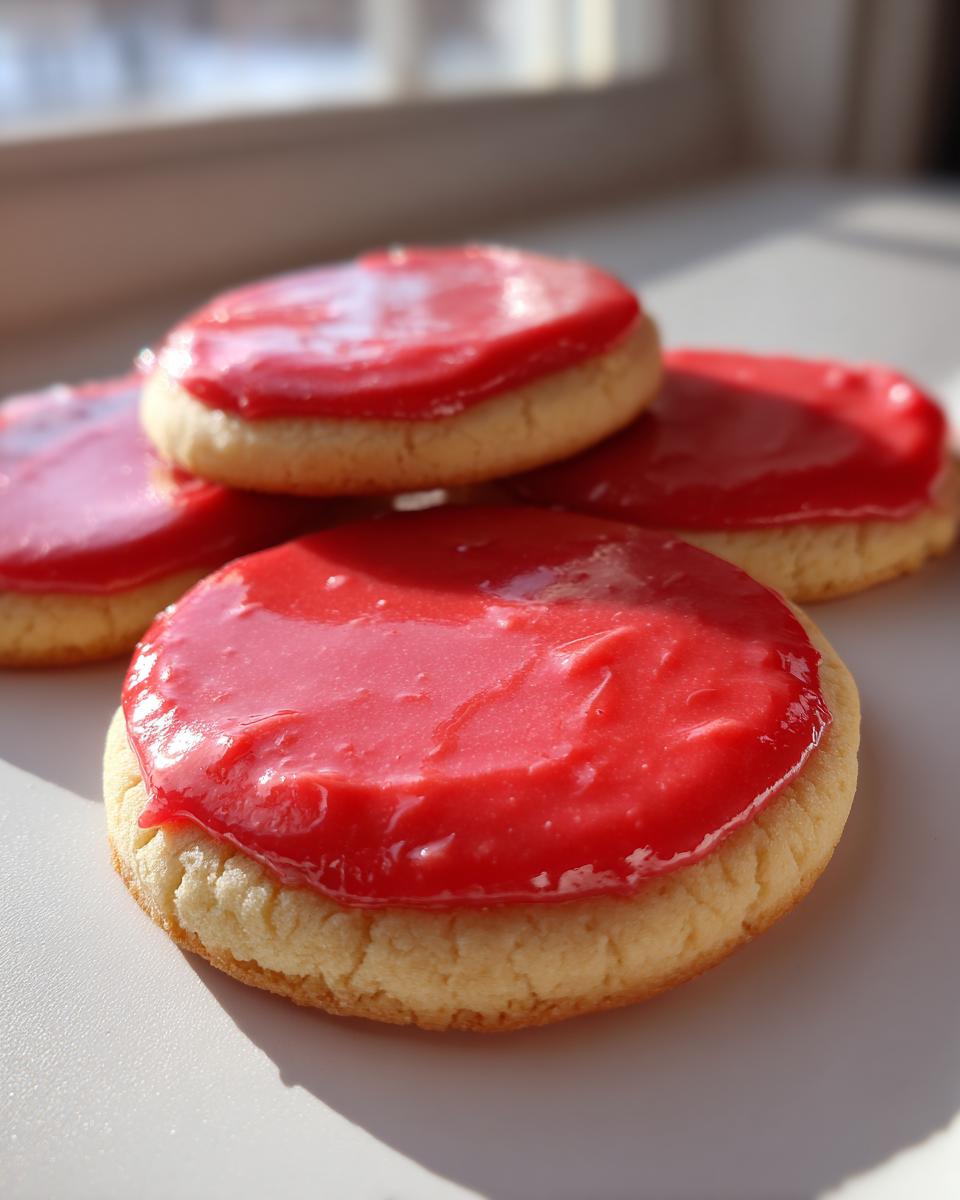
Honestly, once you nail this technique, you’ll never go back to those runny, slow-drying powdered sugar glazes that take days to set. The magic here is that we get that beautiful, professional look without all the fuss that traditional royal icing demands. This recipe is my go-to because it dries rock-hard, which is essential if you plan on stacking your cookies for gifting or putting them in cookie boxes—they won’t stick together!
You get a gorgeously smooth cookie icing tutorial result that looks like it took hours when it really only took minutes to mix. Forget worrying about smudges days later; this hard setting cookie glaze creates a durable, long-lasting finish. Plus, the slight vanilla flavor gives you that perfect glossy sugar cookie frosting crunch that just screams ‘holiday baking success.’ Wow, I love peeling the plastic wrap off the bowl and seeing how perfectly smooth it is!
Royal Icing Alternative Recipe vs. Traditional Royal Icing
The main difference is zero stress! Traditional royal icing relies heavily on raw egg whites, and honestly, that freaks me out a little bit, especially when making large batches for school events. By using meringue powder instead, we dodge those raw egg concerns entirely while still getting that incredible hard, shatter-proof finish. It’s foolproof for beginners, I promise!
Essential Ingredients for a Smooth cookie icing tutorial
When you’re aiming for that perfect, glassy finish, you can’t just wing it! The precision of the ingredients makes all the difference in creating a reliable sugar cookie icing recipe that sets beautifully. You’ll need just a handful of things, but preparing them right is key to getting that crack-free surface every time. Everything needs to be measured carefully because we are building structure here, not just making simple sugar water!
Here’s what you need for about two dozen medium cookies:
- 4 cups powdered sugar, and you absolutely must sift this first—no lumps allowed!
- 1/2 cup meringue powder. This is my secret weapon for reliability!
- About 1/2 cup warm water, but we’ll add this slowly.
- 1 teaspoon clear vanilla extract. Clear keeps the white icing super bright!
- 1/4 teaspoon light corn syrup (optional for that extra shine!).
Ingredient Notes and Substitutions for your sugar cookie icing recipe
Let’s talk about meringue powder. It might look strange on the shelf, but it’s what replaces the raw egg whites and gives us that safe, reliable hardening power. If you absolutely must skip the corn syrup for a corn syrup free cookie icing, that’s totally fine! Just feel safe knowing you can omit it, or substitute it with an equal amount of a clear syrup substitute if you’re chasing that added gloss. Don’t substitute the powdered sugar, though; we need that ultra-fine texture!
How to Make This Easy decorating icing for sugar cookies
Okay, here’s the fun part—mixing up this amazing sugar cookie icing recipe! Seriously, grab your electric mixer because doing this by hand gets your wrist sore fast. First things first, in a big bowl, give that powdered sugar and the meringue powder a really good whisk together while they are still dry. We need them perfectly married before we add moisture, or you’ll end up with dry clumps stuck everywhere!
Next, slowly start pouring in your warm water while the mixer is running on low speed. You’ll watch this mixture transform right before your eyes. Keep adding that water until you see stiff peaks forming—that means the icing is thick enough to hold its shape straight up if you lift the beater out. That’s your base stiffness!
After you hit those stiff peaks, drop in your clear vanilla and the optional corn syrup right at the end, and just mix for a few seconds until it’s incorporated. Don’t overbeat it once the liquid is fully in! If you stop here, you have the perfect consistency for outlining those intricate shapes on your cut-out cookies without it running all over the place. Now head over to my favorite dessert recipes for cookie ideas to use this glorious icing on!
Mastering Icing Consistency: Cookie decorating consistency guide
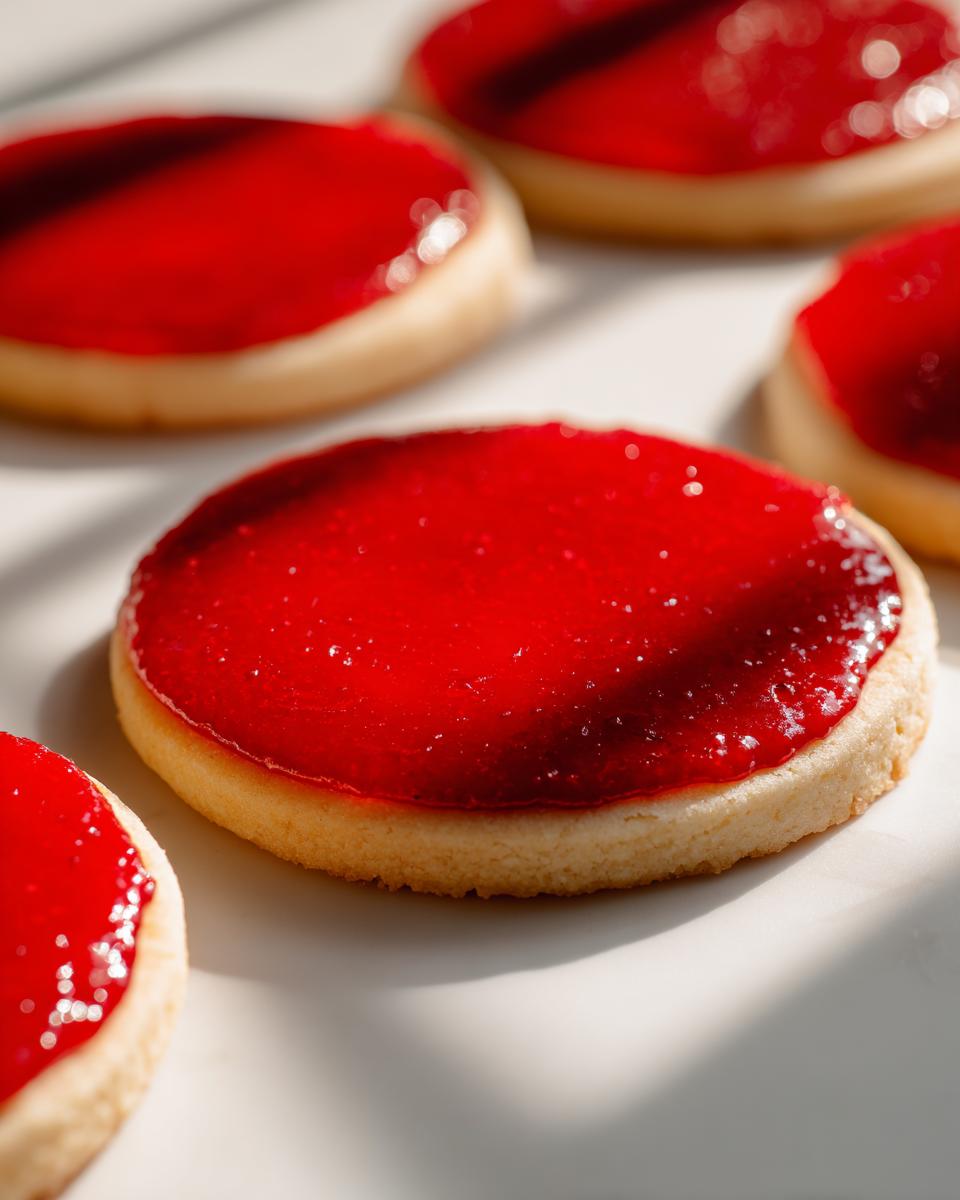
If you take one thing away from this whole post, let it be this: consistency is everything when you use this sugar cookie icing recipe. If your icing is too runny, it just bleeds right over your edges—a total disaster! Conversely, if it’s too stiff, you can’t get that beautiful, smooth flood that makes your cookies shine.
There are two main consistencies you need to master. First, for outlining those delicate shapes, you want a stiff peak. This means when you lift your mixer off, the icing stands right up in a sturdy little mountain that won’t fall over. This helps build a dam so your thinner icing stays put!
Second, the flooding consistency is the trickiest, but once you get it, you get it for life. This is where we use the famous 15-second rule. Take a little bit of your icing, put it on a spoon, and drizzle a line right across the top of the icing bowl. You need to time how long it takes for that line to melt back into the surface. If it disappears completely in 10 to 15 seconds, you have perfect Icing consistency for flooding cookies! If it takes almost no time, add a whisper of powdered sugar. If it hasn’t disappeared at all, add water a teaspoon at a time. It’s amazing how much water these recipes can handle!
Remember, this is the secret coating that’s going to dry hard, so don’t be afraid to let it set up firm before moving on to the next step. Check out the experts over at Emma’s Cake Studio if you need another visual example of that perfect set!
Application Techniques for a Bakery style cookie icing
Now that you have your stiff outline icing and your perfectly flowing flood icing, it’s time to make these cookies look like they came straight from a professional bakery! This is where patience pays off, so don’t rush this two-step application process. First, load your piping bag with the stiff-consistency sugar cookie icing recipe you prepared. We start by tracing the outer edge of your cut-out cookie. This outline acts as a sturdy little dam, or a wall, to keep the thinner flooding icing exactly where we want it to stay!
Once you’ve traced every cookie you’re working on, you need patience—I know, baking requires waiting! Let those outlines dry for about 15 to 30 minutes. You just want them firm to the touch so they don’t immediately collapse when the flood icing hits them. This waiting period is crucial for achieving that crisp edge we love. If you want more general baking wisdom that helps with any recipe hesitation, I always turn to the great tips over at King’s Cook!

After the outlines have crusted over, switch to your piping bag fitted with a slightly wider tip, filled with the runny flood consistency. Fill in the space you outlined completely. If you did the 15-second rule correctly, the icing should look like a puddle that slowly smooths itself out. I always gently tap my cookie sheet on the counter a few times to force any hidden air bubbles to pop right on the surface. Then, we let them sit. Seriously, let them dry at room temperature for at least six hours, but overnight is best, so they get that signature hard shell!
Tips for Success with your sugar cookie icing recipe
You’ve mixed it, you’ve flooded it, and now you want to make sure it looks perfect for tomorrow! Achieving that flawless, ready-to-gift look is all about a few little tricks I picked up over the years. First, when you’re coloring your batches, please use gel food coloring, not the liquid kind you get at the grocery store. Liquid coloring adds way too much water and will ruin your consistency, turning your stiff outline icing into a floppy mess. My personal tip? Mix all the dye you think you need into ONE bowl first, then divide it. It saves you from color mismatches!
Secondly, regarding achieving that ultimate smooth cookie icing tutorial look: make sure you are tapping your cookies hard on the counter after flooding. I used to think a gentle tap was enough, but no! You need a firm tap to get those little air bubbles, which look like tiny craters when dry, to rise and pop. Finally, when you put the left-over icing away, plastic wrap is your best friend. Press that wrap directly down onto the surface of the icing in the bowl—don’t just cover the bowl. That direct contact stops that hard crust from forming on top, which is so annoying to scrape off later! For more great starter tips, check what the folks over at Vita Recipe Hub suggest for beginners!
Storage & Reheating Instructions for Leftover sugar cookie icing recipe
Don’t you hate pulling out icing the next day only to find it’s turned into a concrete block? Oops! To keep this amazing sugar cookie icing recipe workable, you have to cover it correctly. When you’re done decorating, take a piece of plastic wrap—the cheap stuff works fine—and press it right down onto the surface of the icing in the bowl. Direct contact is key! That plastic barrier stops air from touching the surface and forming that awful crust.
If it does get crusty anyway (it happens!), don’t toss it! Just scrape off the dry top layer. Then, slowly add just a few drops of water—start small—and gently stir it in until it comes back to that perfect consistency. If you over-add water, just mix in a tiny bit more of your sifted powdered sugar. It’s so easy to revive this stuff!
Frequently Asked Questions About This sugar cookie icing recipe
I know baking questions pop up constantly, especially when you’re trying to get that professional finish! I gathered up some of the most common things people ask once they’ve mixed up their first batch of this sugar cookie icing recipe. Don’t worry if you thought you missed something—we’re covering it now!
How long does this icing take to dry completely?
This is the big one for anyone wanting to stack cookies! Generally, you need to let them sit out for about 6 to 12 hours until the surface is completely hard to the touch. If you live somewhere really humid, like near the coast, it can take longer. Humidity is definitely the arch-enemy of a fast-drying, hard setting cookie glaze, so try to keep them in a room with good air circulation if you can!
Can I use milk instead of water in this sugar cookie icing recipe?
Oh, you totally can, but here’s my honest take: pure water or even a tiny bit of lemon juice creates the firmest, cleanest set that dries rock solid. If you use milk, it introduces fat, which makes for a slightly softer set, sort of halfway between a hard glaze and a soft frosting. If you want that crisp shell traditional decorators love, stick to water/vanilla mix. Milk works great if you are making a quick, simple topping but maybe not for serious stacking!
What is the difference between this and standard sugar cookie frosting?
This is a really important distinction for achieving that smooth cookie icing tutorial look! Standard sugar cookie frosting, usually buttercream, stays relatively soft and creamy after it dries—it’s delicious, but it will smudge easily. This recipe, being a royal icing alternative recipe, uses meringue powder to create a structure that dries into a thin, hard, glossy shell. So, this one gives you a satisfying, crisp bite, while buttercream gives you that soft, fluffy texture!
Estimated Nutritional Data for This sugar cookie icing recipe
Okay, so we know this sugar cookie icing recipe tastes amazing, but let’s be real about what’s in it. Since this is pure sugar and meringue powder, it’s going to be high in sweetness, which is why we eat it in small dollops, right? Remember, these numbers are just estimates based on the recipe as written, so they’re a good guide, but maybe not something we check too closely before a holiday party!
- Serving Size: 1/4 cup
- Calories: 400
- Sugar: 100g
- Protein: 2g
- Fat: 0g
Just aim for the cookie to be the star, and let this icing be the beautiful, glossy star’s perfect little accessory!
PrintHard Setting Sugar Cookie Icing Recipe (Royal Icing Alternative)

Make smooth, glossy sugar cookie icing that dries hard, perfect for decorating cut-out cookies and gifting. This recipe is easy and sets firm for stacking.
- Prep Time: 15 min
- Cook Time: 0 min
- Total Time: 15 min
- Yield: Covers about 2 dozen medium cookies 1x
- Category: Baking Decoration
- Method: Mixing
- Cuisine: American
- Diet: Vegetarian
Ingredients
- 4 cups powdered sugar, sifted
- 1/2 cup meringue powder
- 1/2 cup warm water (approximate)
- 1 teaspoon clear vanilla extract
- 1/4 teaspoon light corn syrup (optional, for gloss)
Instructions
- In a large bowl, whisk together the sifted powdered sugar and meringue powder until fully combined.
- Add the warm water slowly, mixing on low speed with an electric mixer until the mixture forms stiff peaks.
- Add the vanilla extract and corn syrup (if using). Mix briefly until just combined.
- Check the consistency. For outlining, the icing should hold a stiff peak. For flooding, add water, one teaspoon at a time, until the icing flows slowly off the spoon and smooths into itself in about 10-15 seconds (15-second rule).
- Divide the icing into bowls for coloring, if desired. Use gel food coloring for best results.
- Transfer icing to piping bags fitted with small tips for outlining cookies. Let the outline dry for 15-30 minutes.
- Fill the outlined areas with the thinner flooding consistency icing. Gently tap the cookie on the counter to release air bubbles and smooth the surface.
- Allow cookies to dry completely at room temperature for 6 to 12 hours, or until the surface is completely hard to the touch.
Notes
- For a corn syrup free cookie icing, omit the corn syrup and add 1/2 teaspoon of light corn syrup substitute or use slightly less water.
- Icing consistency is key: Stiff icing is for outlining; thinner icing (10-15 second flow) is for flooding.
- This hard setting cookie glaze is different from buttercream frosting, which stays soft.
- Store unused icing covered tightly with plastic wrap pressed directly onto the surface to prevent a crust from forming.
Nutrition
- Serving Size: 1/4 cup
- Calories: 400
- Sugar: 100
- Sodium: 5
- Fat: 0
- Saturated Fat: 0
- Unsaturated Fat: 0
- Trans Fat: 0
- Carbohydrates: 100
- Fiber: 0
- Protein: 2
- Cholesterol: 0