

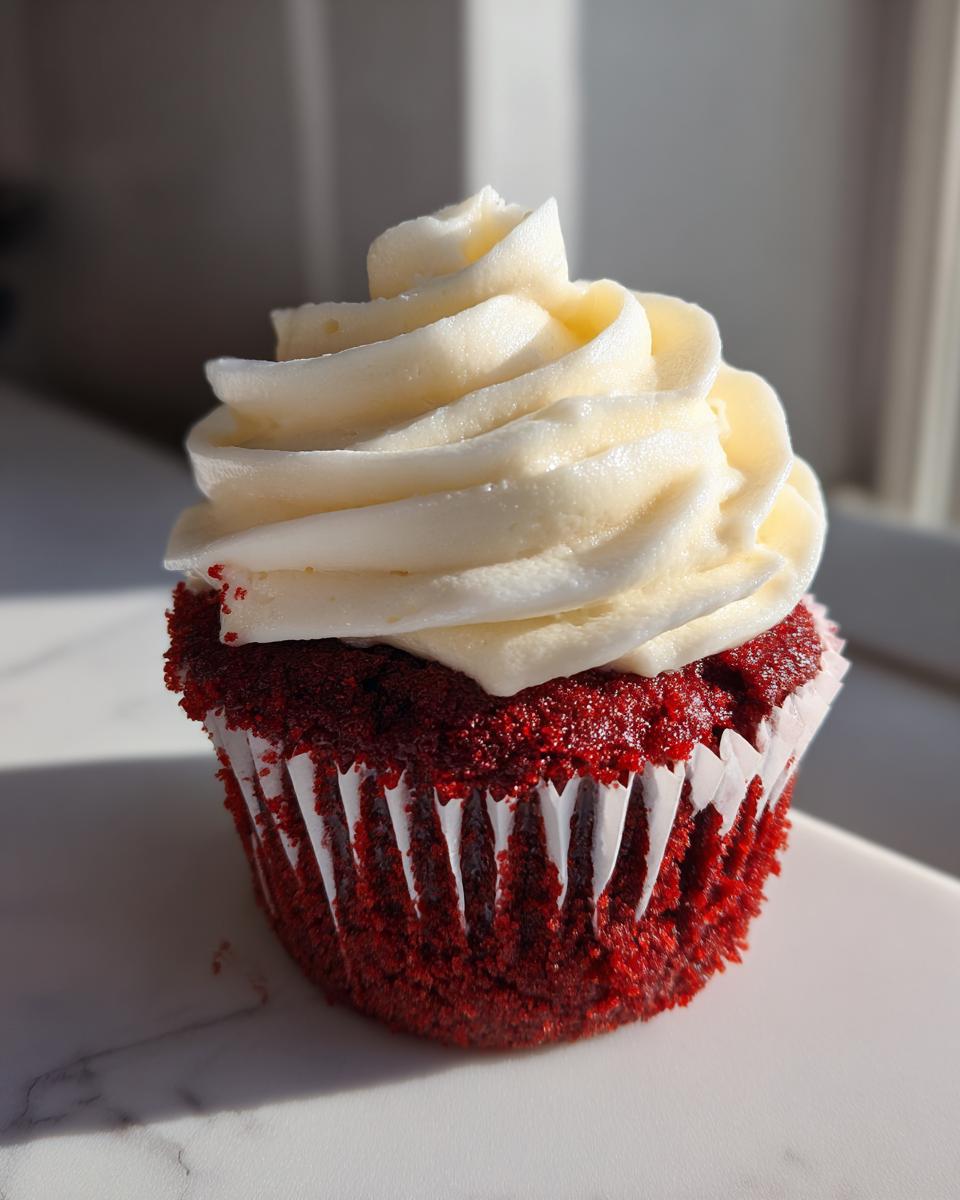
Listen, if you think achieving those perfect, bakery-style desserts means taking a weekly trip to the fancy shop downtown, I’m here to prove you totally wrong. My absolute favorite thing to bake for someone special—or just for myself on a Tuesday—is the classic, dramatic beauty of homemade red velvet cupcakes. Forget dry, crumbly failures! I’ve spent years perfecting the ratio of cocoa to vinegar to buttermilk in my kitchen so that every single time, you get the ultimate moist red velvet cupcakes paired with the most stable, tangy cream cheese frosting imaginable. This isn’t just a recipe; it’s my promise to you that you’ll nail this elegant dessert with absolute confidence.
- Why You Will Master These Moist Red Velvet Cupcakes
- Gathering Ingredients for Your Red Velvet Cupcakes
- Step-by-Step Instructions for Perfect Red Velvet Cupcakes
- Crafting the Best Cream Cheese Frosting for Cupcakes
- Expert Tips for Bakery Style Red Velvet Cupcakes Results
- Ingredient Spotlight: The Science Behind the Velvet
- Variations on Classic Red Velvet Cupcakes
- Storage and Reheating Instructions for Red Velvet Cupcakes
- Frequently Asked Questions About Red Velvet Cupcakes
Why You Will Master These Moist Red Velvet Cupcakes
I know why you’re here—you want that melt-in-your-mouth texture and that gorgeous color, right? Well, you’re going to love this recipe because it keeps things wonderfully simple while delivering on taste. This isn’t some fussy cake; this is pure comfort baking made easy!
- You get truly moist red velvet cupcakes every single time—no exceptions!
- The resulting cake has a genuinely tender crumb.
- The recipe is quick enough for a weeknight treat but elegant enough for special occasion baking.
- We use simple steps to ensure the final product looks just like a bakery style red velvet treat.
- You get the perfect tang from the buttermilk that balances the subtle cocoa flavor.
Gathering Ingredients for Your Red Velvet Cupcakes
Alright, let’s get our ingredients lined up! This is where we set the stage for success. For the absolute best results in these red velvet cupcakes, you need to make sure everything is at the right temperature, especially that butter and cream cheese for the frosting later. Don’t worry, I’ve made this list super clear so you don’t forget anything at the store. If you want a carrot cake recipe that’s just as reliable, check out my notes on moist carrot cake—the principles of good baking are the same!
For the Tender Crumb Cupcakes
The key to the texture here is the interaction between the acid and the base, which starts with the buttermilk. Don’t skip it!
- 1 1/2 cups all-purpose flour
- 1 teaspoon baking soda
- 1 teaspoon unsweetened cocoa powder
- 1/2 teaspoon salt
- 1 cup granulated sugar
- 1/2 cup unsalted butter, softened
- 2 large eggs
- 1 teaspoon vanilla extract
- 1 cup buttermilk
- 1 tablespoon white vinegar
- 1 teaspoon red gel food coloring (high-quality recommended)
See that buttermilk? That’s what helps give these red velvet cupcakes that beautiful, slight tang and works with the baking soda for a light, yet structured, final crumb.
For the Best Cream Cheese Frosting for Cupcakes
For the frosting, we need richness without sogginess. This means the butter and cream cheese simply *must* be softened correctly—soft enough to indent easily, but not looking oily or melty.
- 8 ounces cream cheese, softened
- 1/2 cup (1 stick) unsalted butter, softened
- 3 cups powdered sugar, sifted
- 1 teaspoon vanilla extract
- 1/4 teaspoon salt
Step-by-Step Instructions for Perfect Red Velvet Cupcakes
Okay, we have our beautiful ingredients—now for the fun part! I’m going to walk you through exactly how I make my red velvet cupcakes so they always achieve that signature velvety texture. It all comes down to patience during mixing, not rushing the oven, and definitely not overdoing it when combining the wet and dry ingredients. Trust me, gentle handling here is what separates a good cupcake from an *amazing* one. If you want to see my base recipe for vanilla cupcakes, I use similar creaming techniques in my vanilla cupcake recipe!
Preparing the Red Velvet Cupcake Batter
First things first: get that oven cranked up to 350°F (175°C) and get your liners into that muffin tin. Don’t bake them naked! While that warms up, whisk your dry stuff—flour, baking soda, cocoa, and salt—in one bowl. In a bigger bowl, cream that softened butter and sugar until it looks light and fluffy. Then add your eggs, one at a time. In a separate little glass, mix your buttermilk, vinegar, and that gorgeous red gel coloring until the color is super even.
Now for the trickiest bit where beginners sometimes go wrong: the alternating additions. Add about a third of your dry mixture, mix gently, then half of your red buttermilk mix. Repeat, making sure you *start and end* with the dry ingredients. Mix only until you don’t see big streaks of flour anymore. If you mix too much here, you lose that delicate crumb we’re aiming for!
Baking and Cooling Your Red Velvet Cupcakes
Spoon your batter into those lined cups—fill them only about two-thirds full, or you’ll get those funny mushroom tops! Pop them into the preheated oven. Set your timer for 18 minutes, but use a toothpick tester around the 20-minute mark. If it comes out clean, they’re done! Let them sit in the pan for exactly five minutes—no more, no less—before moving them to a wire rack to cool completely. If you try to frost them while they are even slightly warm, you’ll get a melted mess! Patience pays off here.
Crafting the Best Cream Cheese Frosting for Cupcakes
This frosting is non-negotiable, honestly. You can’t have proper red velvet cupcakes without that creamy, slightly tangy topping. The secret to getting a frosting that looks stunning on top and actually *stays* pretty—without melting off into a puddle—is all about how you treat your cold ingredients. Remember, they need to be softened, but not warm. If they are too soft, your frosting will be runny, and we want beautiful swirls, not sad puddles!
First, grab your softened cream cheese and softened butter and beat them together vigorously until they are perfectly smooth and totally lump-free. I usually spend a good minute just on this step. Then, start adding your sifted powdered sugar a cup at a time. Sifting is crucial—it prevents those tiny, crunchy sugar lumps. Once it’s all mixed in, take a deep breath and walk away from the mixer for about 30 seconds.
Now, turn that mixer up to medium-high speed and let it run for a solid two to three minutes. That beating time is key! It whips air into the mixture, making the frosting light, fluffy, and stable enough to hold its shape. Don’t forget to scrape down the bowl halfway through! Tasting is encouraged, but remember, this frosting is tangy perfection that complements the rich cake beautifully. If you love decorating and piping, you might want to check out my guide on making perfect sugar cookies for more tips on pipe consistency!
Expert Tips for Bakery Style Red Velvet Cupcakes Results
If you want that rich, vibrant hue that looks amazing in photos and tastes even better, you have to pay attention to two little details in this recipe. I learned this the hard way when I tried using liquid food coloring once—yikes! The extra water totally threw off the batter balance, and I ended up with slightly greyish, sad little cakes. Don’t make my mistake!
Use Gel Coloring Only: Trust me on this one: always opt for high-quality red *gel* food coloring. Gels are concentrated pigments, so you only need a tiny bit (about a teaspoon) to get that deep, beautiful color without adding excess liquid. That liquid disrupts the chemistry needed for those moist red velvet cupcakes we’re obsessed with.
The Magical Acid Duo: Never skip combining the buttermilk and vinegar! That combination creates the necessary acid that chemically reacts with the baking soda. This reaction is what gives you the light, open, velvety structure in the final bake. It’s the whole secret to the “velvet” part of the name! If you skip the acid, you are halfway to a dense cake. For more baking science and reliable acid-based recipes, you should definitely poke around my posts on buttermilk cupcake recipes. It makes all the difference!
Ingredient Spotlight: The Science Behind the Velvet
I always want you to know *why* a recipe works, not just that it works! When you understand the science hidden inside these beautiful treats, you stop being intimidated and start feeling like a culinary chemist. The core magic in achieving that signature flavor and texture isn’t just the red dye; it’s a delightful little chemical reaction happening inside the batter.
The buttermilk and vinegar combination is crucial. They are both acidic, and when they meet the baking soda (a base), it creates carbon dioxide bubbles. These bubbles are what lighten our cake and give it that famous, soft quality—the “velvet.” If we only used plain milk, you’d end up with flatter, denser results, which is just not what we want when we’re aiming for perfection.
Then there’s the cocoa powder. Most people think red velvet is a chocolate cake, but if you look at the small amount we use (just one teaspoon!), you realize it’s just there for a subtle background flavor note. That small amount of natural cocoa reacts with the acid too, which historically used to turn the cake slightly reddish-brown before modern food coloring came along. It’s all about that perfect balance!
Variations on Classic Red Velvet Cupcakes
While this classic recipe is truly the gold standard for red velvet cupcakes, I love encouraging home bakers to play around once they’ve mastered the original mix. Once you’ve nailed the texture, you can easily start turning this into different elegant dessert ideas!
A tiny secret I use to deepen the flavor is adding about half a teaspoon of instant espresso powder along with the dry ingredients. It doesn’t make them taste like coffee, but it really intensifies that subtle chocolate note from the cocoa powder. You could also swap out some of that vanilla extract for almond extract for a little unexpected twist.
If you’re looking for more foundational recipes that can be adapted easily, take a peek at my favorite way to bake a classic pound cake—that structure holds up to so many add-ins!
Storage and Reheating Instructions for Red Velvet Cupcakes
We worked hard for that incredible moisture, so we definitely need to protect it! If you’ve already frosted your red velvet cupcakes, you really want to keep them covered at room temperature for up to two days. If your kitchen is super hot, placing them in the fridge is okay, but let them sit out for about 30 minutes before serving so the frosting softens up nicely.
If you haven’t frosted them yet, wrap the cooled cupcakes tightly in plastic wrap. They stay perfectly soft like this on the counter for about three days! Honestly, I don’t recommend reheating once they are frosted—you risk melting that gorgeous cream cheese topping. If you absolutely must warm an unfrosted cake, 10 seconds in the microwave is the absolute maximum time!
Frequently Asked Questions About Red Velvet Cupcakes
Can I skip the buttermilk when making these moist red velvet cupcakes?
Oh, please don’t! Buttermilk is absolutely VITAL here. It’s the key ingredient that provides the necessary acid to react with the baking soda, which gives you that fantastic tender crumb cupcakes structure. If you’re desperate, you can create a substitute by adding a tablespoon of white vinegar or lemon juice to one cup of regular milk and letting it sit for five minutes. But for the best cream cheese frosting for cupcakes experience, I really urge you to use the real stuff!
Why isn’t the color of my red velvet cupcakes bright enough?
This happens when you use the wrong coloring! If you use standard liquid food coloring, you have to use so much of it that it throws off the chemistry of the batter and sometimes turns the cakes a brownish-red color. My biggest recommendation to achieve that intense, beautiful color needed for valentines day cupcakes is to stick to a high-quality red *gel* paste. A little bit goes a very long way without adding extra liquid!
Can I use a different frosting instead of cream cheese?
You certainly can, but then you’re missing out on the classic flavor profile! The tanginess of the cream cheese frosting is what cuts through the richness of the cake perfectly. If you must switch, a vanilla buttercream is the next best thing, but it won’t give you that same signature taste. If vanilla is more your speed, check out the techniques I use on my easy pumpkin bread recipe for whipping light frostings!
Is this recipe too complicated for a beginner baking red velvet?
Not at all! I designed this recipe specifically to be an easy red velvet recipe that delivers fluffy red velvet dessert quality. The steps are very straightforward: mix dry, mix wet, alternate gently. If you can work an electric mixer, you can totally master these. It’s a fabulous starting point for anyone looking to try out homemade red velvet treats!
PrintThe Ultimate Moist Red Velvet Cupcakes with Tangy Cream Cheese Frosting
Bake classic red velvet cupcakes that are perfectly moist, tender, and topped with a stable, tangy cream cheese frosting. This easy recipe delivers bakery-style results for any special occasion.
- Prep Time: 20 min
- Cook Time: 20 min
- Total Time: 40 min
- Yield: 12 servings 1x
- Category: Dessert
- Method: Baking
- Cuisine: American
- Diet: Vegetarian
Ingredients
- 1 1/2 cups all-purpose flour
- 1 teaspoon baking soda
- 1 teaspoon unsweetened cocoa powder
- 1/2 teaspoon salt
- 1 cup granulated sugar
- 1/2 cup unsalted butter, softened
- 2 large eggs
- 1 teaspoon vanilla extract
- 1 cup buttermilk
- 1 tablespoon white vinegar
- 1 teaspoon red gel food coloring (high-quality recommended)
- 8 ounces cream cheese, softened
- 1/2 cup (1 stick) unsalted butter, softened
- 3 cups powdered sugar, sifted
- 1 teaspoon vanilla extract
- 1/4 teaspoon salt
Instructions
- Preheat your oven to 350°F (175°C). Line a 12-cup muffin tin with paper liners.
- In a medium bowl, whisk together the flour, baking soda, cocoa powder, and salt. Set this dry mixture aside.
- In a large bowl, cream together the softened butter and granulated sugar until light and fluffy. Beat in the eggs one at a time, mixing well after each addition. Stir in the vanilla extract.
- In a small bowl, mix the buttermilk, vinegar, and red gel food coloring until the color is uniform.
- Alternate adding the dry ingredient mixture and the buttermilk mixture to the wet ingredients, beginning and ending with the dry ingredients. Mix only until just combined; do not overmix.
- Spoon the batter evenly into the prepared cupcake liners, filling each about two-thirds full.
- Bake for 18 to 20 minutes, or until a toothpick inserted into the center comes out clean. Let the cupcakes cool in the pan for 5 minutes before transferring them to a wire rack to cool completely.
- To make the frosting, beat the softened cream cheese and butter together in a large bowl until smooth.
- Gradually add the sifted powdered sugar, beating until fully incorporated. Mix in the vanilla extract and salt. Beat on medium-high speed for 2-3 minutes until the frosting is light and fluffy.
- Once the cupcakes are completely cool, pipe or spread the cream cheese frosting onto each one.
Notes
- Use red gel food coloring instead of liquid for the most intense, vibrant color without affecting the batter consistency.
- Buttermilk is necessary for the classic tang and reaction with the baking soda to create a tender crumb.
- For the best frosting stability, ensure your cream cheese and butter are properly softened but not warm.
Nutrition
- Serving Size: 1 cupcake
- Calories: 380
- Sugar: 45g
- Sodium: 280mg
- Fat: 20g
- Saturated Fat: 12g
- Unsaturated Fat: 8g
- Trans Fat: 0.5g
- Carbohydrates: 48g
- Fiber: 1g
- Protein: 4g
- Cholesterol: 65mg