
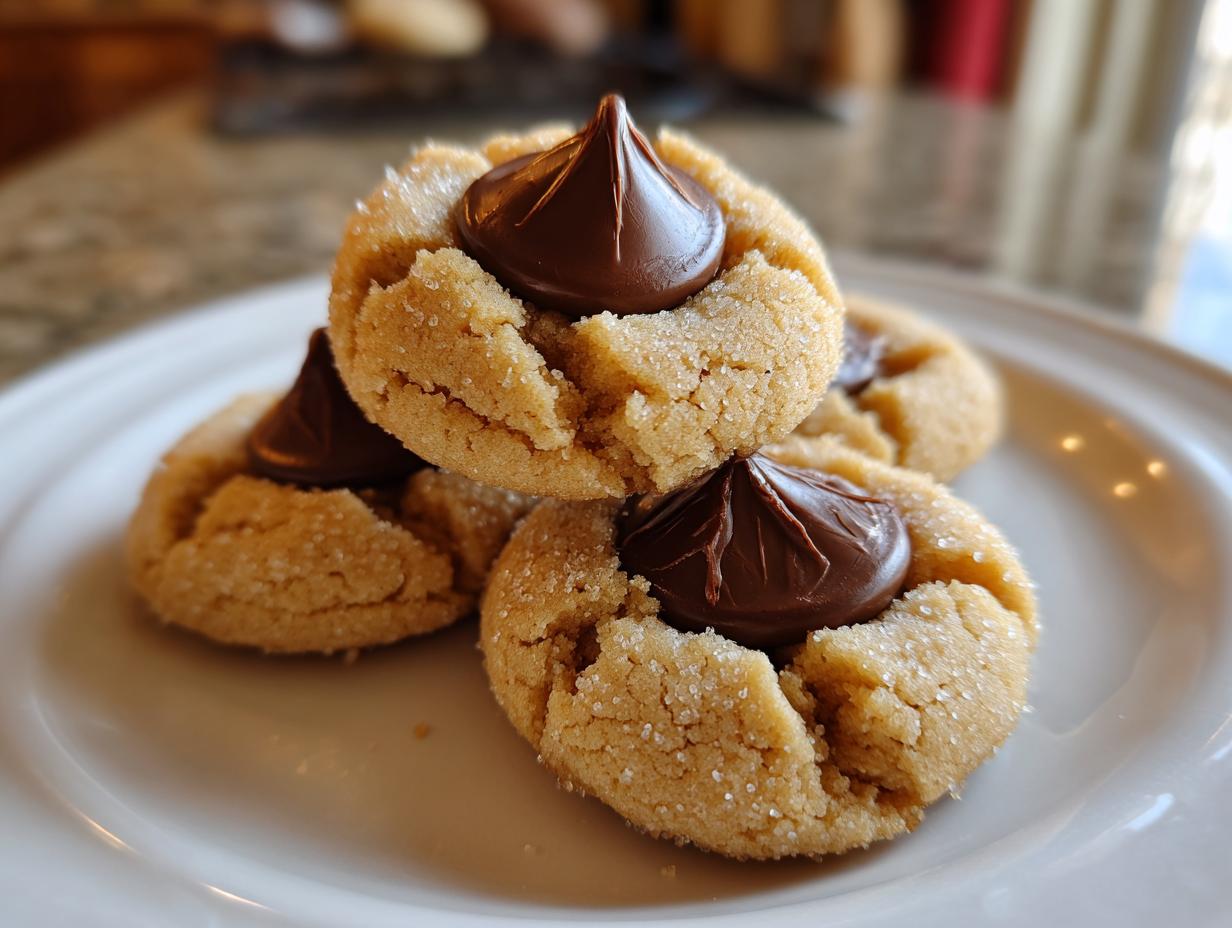
Oh, the holidays! There is just something about that first batch of cookies—the smell of vanilla and warm peanut butter fills the house, and suddenly, you’re instantly transported back to childhood baking projects. If you’ve ever been disappointed by a Peanut Butter Blossom that came out hard as a rock the next day, I totally get it. That’s why I spent serious time testing and re-testing this recipe. I promise you, Kings Cook readers, this version is the absolute ultimate recipe for Peanut Butter Blossom cookies that stay perfectly soft and chewy for days. We focus on the reliable science behind the texture, so you can feel wonderful baking these nostalgic treats with confidence!
- Why This is the Best Peanut Butter Blossom Recipe You Will Ever Make
- Gathering Your Ingredients for Perfect Peanut Butter Blossom Cookies
- Step-by-Step Instructions for Classic Peanut Butter Blossom Cookies
- Tips for Success When Baking Your Peanut Butter Blossom Cookies
- Making Peanut Butter Blossoms for Holiday Cookie Swap Treats
- Storage and Reheating Instructions for Soft Cookie Recipe
- Variations on the Classic Peanut Butter Blossom
- Frequently Asked Questions About Homemade Peanut Butter Blossoms
- Estimated Nutritional Data for Peanut Butter Blossom Cookies
Why This is the Best Peanut Butter Blossom Recipe You Will Ever Make
I know, I know. Everyone claims they have the “best” cookie recipe out there, right? But stick with me here, because this one is different. I rigorously test every single batch to make sure you get those perfect, slightly crackled tops—the hallmark of a great Crackle Top Cookie Recipe—while guaranteeing a center that stays soft, not crumbly. This isn’t just another drop cookie recipe; it’s about nailing the ratios so you have the Best Peanut Butter Cookies on the block every time you bake. If you love my chocolate chip cookies, you’ll appreciate the same dedication to texture in these iconic treats. If you want another winner for your platter, check out my recipe for classic chocolate chip cookies!
Secrets to Chewy Peanut Butter Blossoms That Stay Soft
The real secret to keeping these Peanut Butter Blossom Cookies chewy isn’t just luck; it’s in the balance. We use quite a bit of brown sugar here, and that molasses content is crucial. It holds moisture better than plain white sugar, keeping them softer longer. Please trust me on this: do not overbake! I pull these out when they look slightly pale in the middle. They firm up as they rest. And while you might see tips about using all shortening, I find that sticking to quality butter, like the recipe calls for, provides the right flavor foundation. Everything works together to avoid that second-day hardness!
Gathering Your Ingredients for Perfect Peanut Butter Blossom Cookies
Okay, let’s talk about ingredients! This is where the structural integrity of our Peanut Butter Blossom Cookies comes from, so accuracy matters here. When you’re aiming for the absolute best, you stick to the list! Feel free to pull out your stand mixer now, but make sure your butter is actually softened, not melted—that makes a huge difference.
- 1 cup (2 sticks) unsalted butter, softened
- 3/4 cup creamy peanut butter
- 3/4 cup granulated sugar
- 3/4 cup packed brown sugar
- 2 large eggs
- 1 teaspoon vanilla extract
- 2 1/4 cups all-purpose flour
- 1 teaspoon baking soda
- 1/2 teaspoon baking powder
- 1/2 teaspoon salt
- 1/4 cup granulated sugar, for rolling
- 1 bag (about 36) Hershey’s Kisses, unwrapped
Ingredient Notes and Substitutions for Your Peanut Butter Blossom
First off, let’s talk temperature. Those two large eggs? They need to be at room temperature so they blend beautifully into the creamed butter mixture without causing it to seize up. Same goes for the butter! I mentioned creamy peanut butter above, and I stick to it for the smoothest dough base that gives us that lovely crackle later.
Now, if you’re baking in a high-altitude area, you might need a tiny tweak! While this recipe is generally reliable, keep an eye on your baking soda; sometimes you need a slight decrease when you’re way up high. Finally, remember that vanilla is just the baseline flavor—it’s supporting the star, which is that salty peanut butter!
Step-by-Step Instructions for Classic Peanut Butter Blossom Cookies
Are you ready? We’ve got our ingredients, and now it’s time to bring this showstopper to life! The process is super quick, which is why these are fantastic for Easy Holiday Baking. Just remember that timing is everything, especially concerning that chocolate Kiss at the end. Don’t rush the creaming step; it’s where we build air for that soft texture we want!
- First things first, get your oven preheated to 375 degrees Fahrenheit. I always line my baking sheets with parchment paper—it seriously saves cleanup time later, and I hate scraping baked-on sugar!
- Now grab your mixing bowl. Cream together your softened butter, that creamy peanut butter, the 3/4 cup granulated sugar, and your brown sugar. You want this mixture to look fluffy and light yellow. Seriously beat it for a good couple of minutes until it changes texture.
- Next, beat in your two large eggs, one at a time, making sure each one is fully incorporated before adding the next. Then mix in that splash of vanilla extract.
- In a separate bowl, whisk together your dry stuff: flour, baking soda, baking powder, and salt. Whisking them stops weird clumps from forming later.
- Slowly add your dry blend into your wet mixture, mixing on low speed. Stop mixing the second you see the last bit of flour disappear. Overmixing is the enemy of a chewy cookie, I promise!
- Pour the reserved 1/4 cup of sugar into a shallow dish—this is your sugar coating, the secret sauce for that classic look.
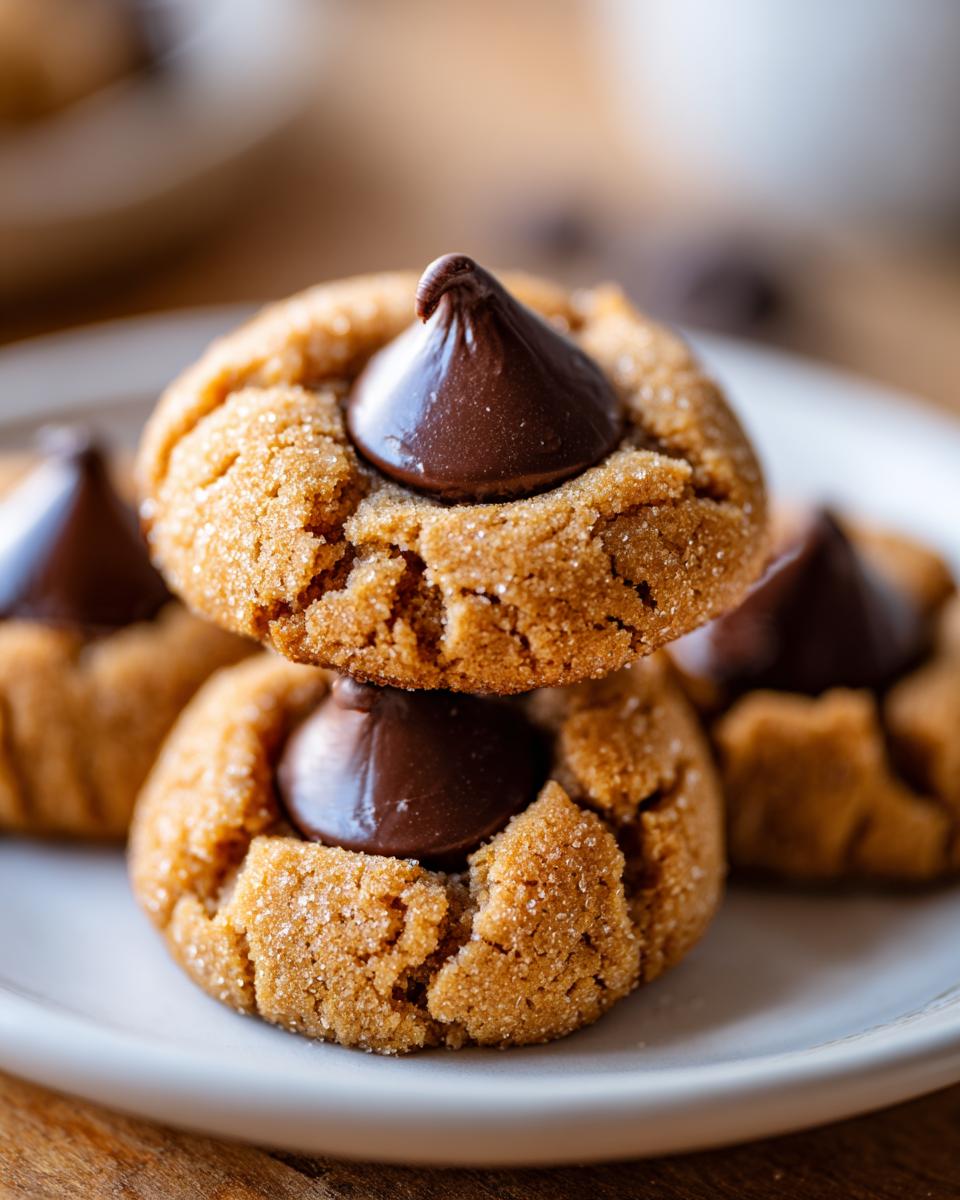
- Roll your dough into nice, neat 1-inch balls and roll each ball thoroughly in the sugar until it’s completely coated. This is essential for the final look, and you can see why this recipe is a proven winner for any homemade peanut butter cookie enthusiast.
- Place those sugared balls about 2 inches apart on your prepared sheets.
- Bake them for 8 to 10 minutes total. Here’s the trick: pull them out when the edges look set, but the very centers still look a little soft or puffy. This gives us that perfect melt later.
- As soon as they come out of the oven, gently press one unwrapped Hershey’s Kiss right into the center of each warm cookie. The residual heat does the work! For more tips, check out this great guide on getting the best chewy peanut butter blossoms.
- Let them sit on the hot pan for about five minutes—this lets the chocolate melt just right—before carefully moving them to a cooling rack to finish.
Achieving the Signature Crackle Top Cookie Recipe
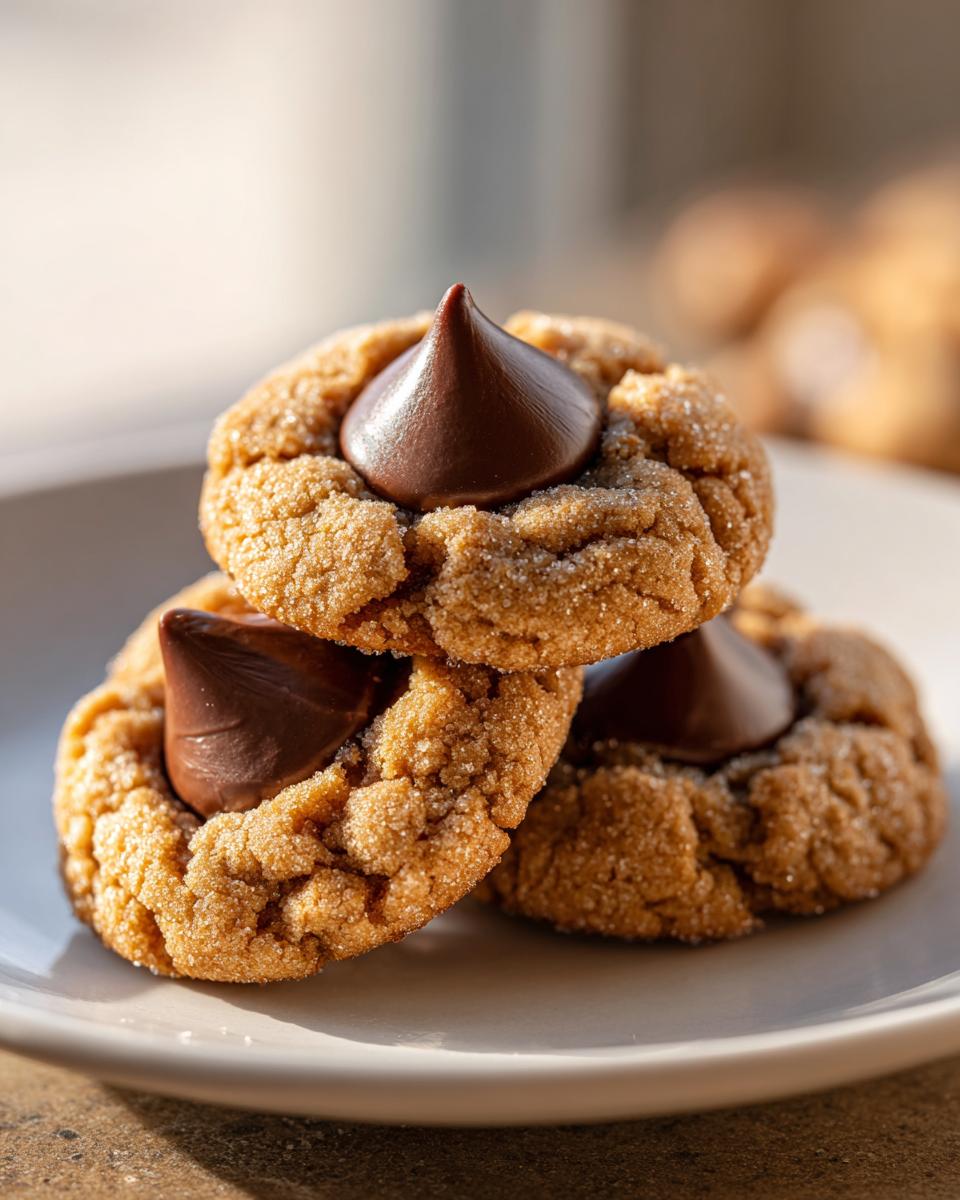
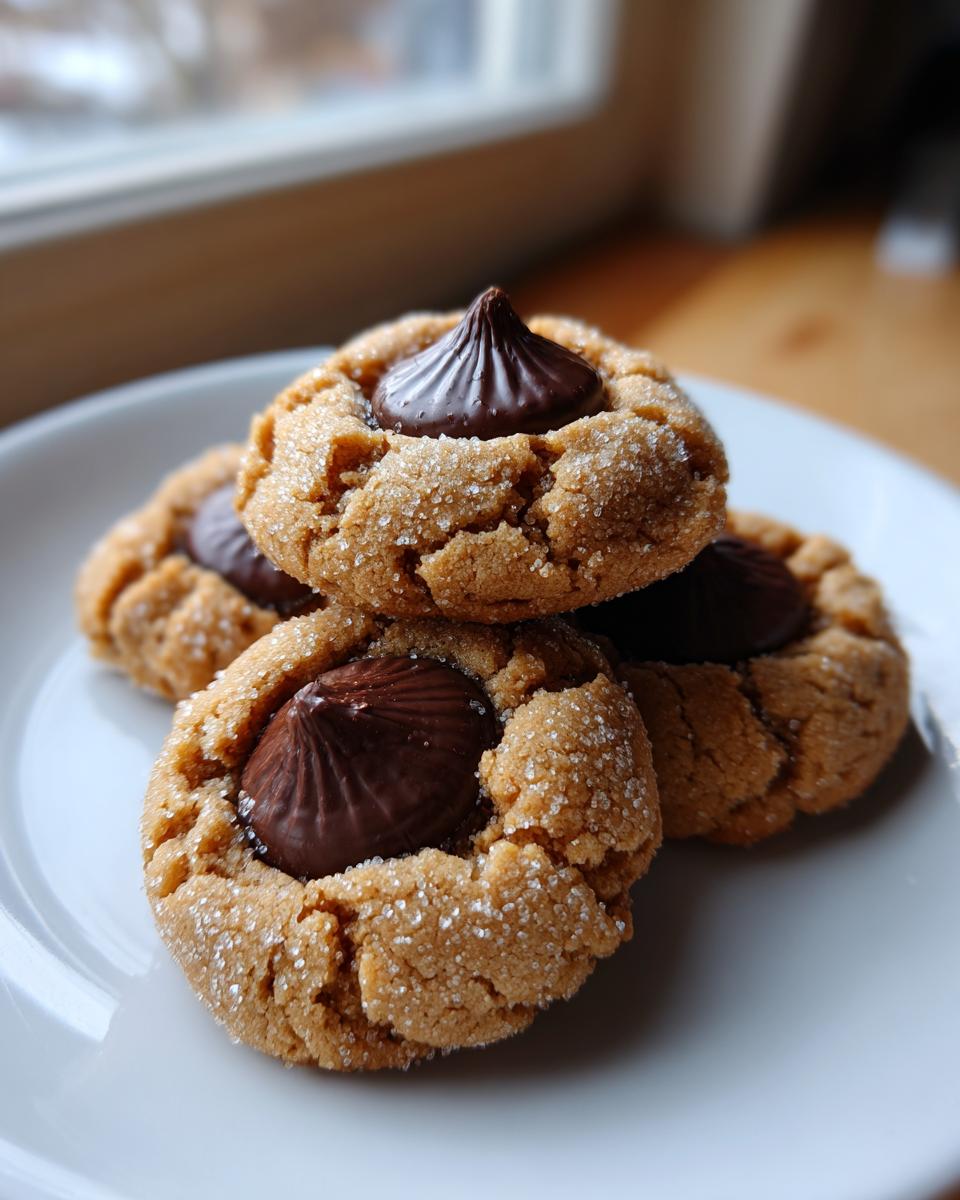
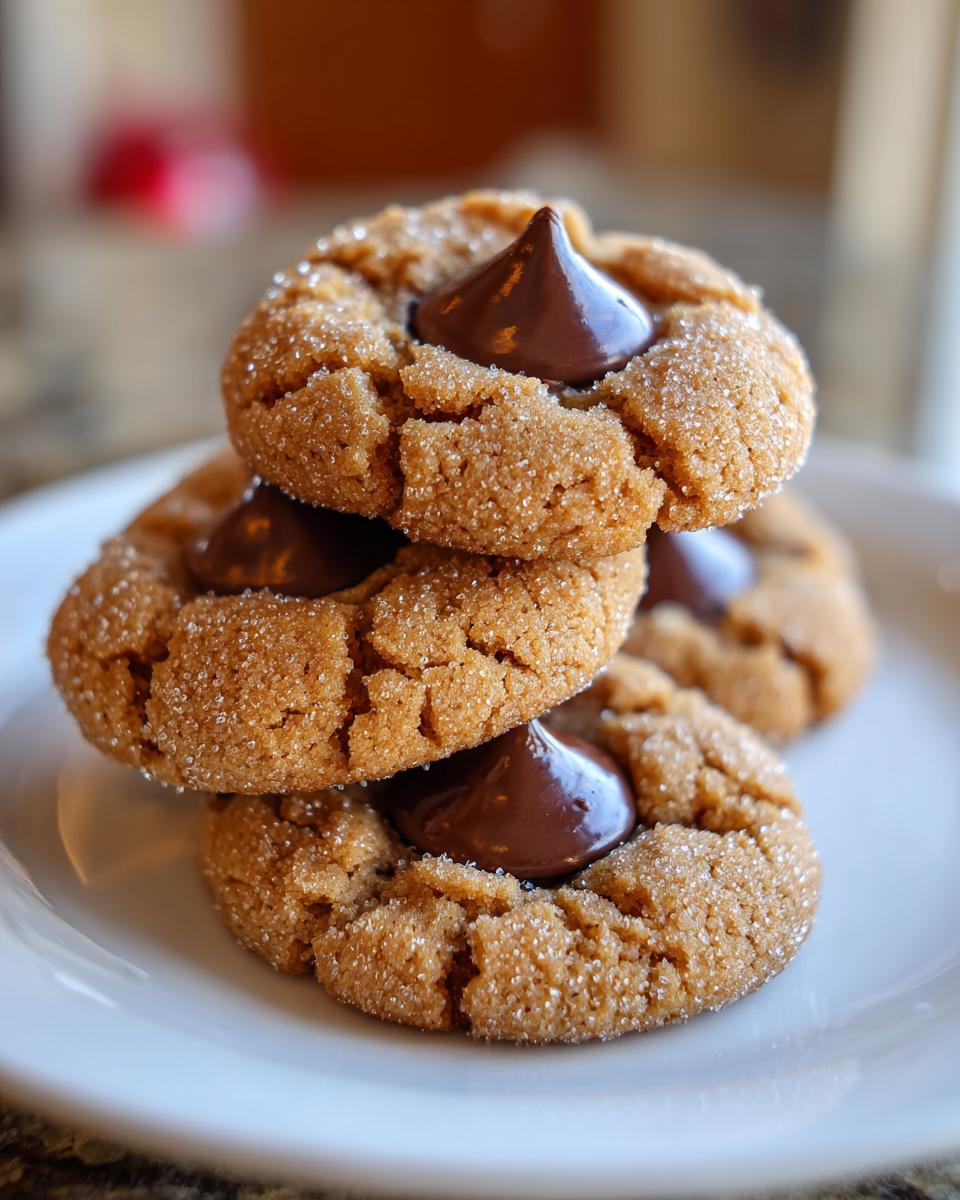
That gorgeous, crackled surface you see on the best Peanut Butter Blossom Cookies is all thanks to Step 6 and 7! When you roll the dough balls generously in that final granulated sugar coating, the sugar crystals prevent the surface from setting too fast. As the cookie spreads slightly in the oven, the sugar catches and creates those irresistible little fissures. It works perfectly every time for a show-stopping Crackle Top Cookie Recipe!
Tips for Success When Baking Your Peanut Butter Blossom Cookies
Baking needs just a few little nudges sometimes to go from good to truly spectacular, and with these Peanut Butter Blossom Cookies, it’s all about timing. My biggest piece of advice, and I call this one of Kate’s Pro Tips, is to embrace the slightly underbaked center. Seriously, that 8- or 9-minute mark is where the magic happens for that satisfyingly soft bite. If you wait until they look fully done, they’ll be hard by the time they cool!
Also, please remember not to overmix once you add the flour! Mixing too long develops gluten and makes for a tough cookie that won’t have that classic, slightly crumbly edge. This same attention to temperature is why my chocolate chip cookies turn out so reliably chewy. For more amazing insights into perfecting your classics, take a look at these great proven secrets for achieving that perfect texture!
Making Peanut Butter Blossoms for Holiday Cookie Swap Treats
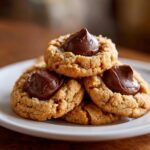
You simply cannot have a proper Christmas cookie platter without the iconic Peanut Butter Blossom. They are absolutely perfect for setting out on a festive tray or packing up for a big cookie exchange! The best part about using this recipe for your Holiday Cookie Swap Treats is that these cookies travel really well. Because they have that lovely, chewy center and a firm chocolate top, they don’t crumble apart easily when stacked.
When I package them up for gifting, I always make sure the chocolate has fully set, which usually takes about an hour after cooling. I layer them between squares of parchment or wax paper in tins. These truly nail that feeling of Nostalgic Christmas Cookies. They always vanish first, trust me! If you’re looking for another visually stunning option for your swap, my decorated sugar cookies are always a big hit, too. You can find my tips for making those beautiful and reliable right here!
For tips specifically on making sure your chocolate tops look perfect during transport, you should definitely check out this great guide on classic sweet and salty Christmas cookies. Sometimes a tiny bit of extra care right before boxing them up makes all the difference!
Storage and Reheating Instructions for Soft Cookie Recipe
You’ve made the perfect batch of Peanut Butter Blossom Cookies, and now you want them to stay soft! Here’s the crucial part: you absolutely need an airtight container. Once they are fully cooled—and I mean completely cool, or you’ll get condensation—stack them with small squares of wax paper in between layers.
These are great keepers! They stay wonderfully soft on the counter for about three to four days. Honestly, I never recommend refrigeration for this specific Soft Cookie Recipe because the cold air tends to dry out the peanut butter portion. If you have extras leftover after a week, the freezer is your friend, but countertop storage is best for daily snacking.
Variations on the Classic Peanut Butter Blossom
While I swear by the classic combination—creamy peanut butter and milk chocolate Kisses—I totally get wanting to mix things up, especially if you’re making a big batch for a party! Don’t feel like you have to stick to the script just because I did. If you want a little texture happening, try swapping in crunchy peanut butter instead of creamy. It gives the cookie base a bit more bite!
If you’re feeling really adventurous, the chocolate center is where you can play. Dark chocolate Kisses give you a wonderful salty-sweet contrast. Or, you can ditch the Kisses entirely and press a peanut butter chip or even a small chocolate wafer right into the middle while the cookie is warm. Find more fun takes on peanut butter cookies on my site!
If you want to see some really fun, inventive ways people have adapted this classic, you absolutely must check out the inspiration over here on Peanut Butter Blossom Bars—turning it into a bar completely changes the game!
Frequently Asked Questions About Homemade Peanut Butter Blossoms
I want you to have zero kitchen stress here, so let’s tackle a few things people often ask me about when they are baking these wonderful Homemade Peanut Butter Blossoms. Having answers ready means you can focus on enjoying the process instead of worrying! These classic cookies are usually foolproof, but little things can trip us up sometimes.
Can I use crunchy peanut butter in my peanut butter blossom recipe?
Yes, absolutely! If you love texture, go for crunchy peanut butter. Just know that because the pieces are bulkier, it can slightly change how the dough balls up, and you might get a slightly less pronounced crackle on top than when using creamy. But the flavor? Fantastic!
Why are my cookies spreading too much?
This is almost always one of two things! Make sure your butter wasn’t too warm when you started creaming—if it’s oily, the structure collapses too fast. The other big culprit is oven temperature. Ovens lie! I always recommend investing in a cheap oven thermometer because if your oven is running too cool, the cookies spread before the dough sets. Check that heat!
If you’re looking for even more background on making reliable Christmas Cookie Recipes, I always suggest checking out the community tips shared by others!
Estimated Nutritional Data for Peanut Butter Blossom Cookies
I always like to include this information just so you have a general idea of what you’re enjoying, especially when sharing these treats at parties or cookie swaps. Remember, this data is based on the ingredient list provided and assumes a standard serving size of one cookie. Because we all bake slightly differently—and how much filling you use varies!—these are always estimates you can use as a guideline.
- Serving Size: 1 cookie
- Calories: 160
- Sugar: 14g
- Sodium: 105mg
- Fat: 8g
- Saturated Fat: 3g
- Unsaturated Fat: 5g
- Trans Fat: 0g
- Carbohydrates: 20g
- Fiber: 1g
- Protein: 3g
- Cholesterol: 20mg
It’s a pretty classic breakdown for a cookie that has that lovely balance of peanut butter and sweet chocolate! Just enjoy them—they are worth every single calorie when they are this perfectly chewy.
PrintThe Ultimate Chewy Peanut Butter Blossom Cookies: Classic Recipe for Soft Holiday Treats
Make the best Peanut Butter Blossom cookies that stay soft and chewy long after baking. This classic recipe delivers the perfect sweet and salty bite, ideal for your Christmas cookie swap.
- Prep Time: 15 min
- Cook Time: 10 min
- Total Time: 25 min
- Yield: 3 dozen cookies 1x
- Category: Dessert
- Method: Baking
- Cuisine: American
- Diet: Vegetarian
Ingredients
- 1 cup (2 sticks) unsalted butter, softened
- 3/4 cup creamy peanut butter
- 3/4 cup granulated sugar
- 3/4 cup packed brown sugar
- 2 large eggs
- 1 teaspoon vanilla extract
- 2 1/4 cups all-purpose flour
- 1 teaspoon baking soda
- 1/2 teaspoon baking powder
- 1/2 teaspoon salt
- 1/4 cup granulated sugar, for rolling
- 1 bag (about 36) Hershey’s Kisses, unwrapped
Instructions
- Preheat your oven to 375 degrees Fahrenheit. Line baking sheets with parchment paper.
- In a large bowl, cream together the softened butter, peanut butter, 3/4 cup granulated sugar, and brown sugar until the mixture is light and fluffy. This step helps create a softer cookie.
- Beat in the eggs one at a time, then mix in the vanilla extract.
- In a separate medium bowl, whisk together the flour, baking soda, baking powder, and salt.
- Gradually add the dry ingredients to the wet ingredients, mixing on low speed until just combined. Do not overmix the dough.
- Place the remaining 1/4 cup of granulated sugar in a shallow dish.
- Roll the dough into 1-inch balls. Roll each ball in the reserved sugar until fully coated.
- Place the sugared balls about 2 inches apart on the prepared baking sheets.
- Bake for 8 to 10 minutes. The edges should be set, but the centers should look slightly underbaked to ensure a chewy texture.
- Immediately upon removing the cookies from the oven, gently press one unwrapped Hershey’s Kiss into the center of each warm cookie. The residual heat will slightly melt the chocolate.
- Let the cookies cool on the baking sheet for 5 minutes before transferring them to a wire rack to cool completely.
Notes
- For the softest cookies that last, do not overbake. Pull them out when the edges look set but the center still looks soft.
- If you want a more intense peanut butter flavor, use a natural, unsweetened peanut butter, but ensure it is well stirred before measuring.
- To achieve the classic crackle top, roll the dough balls thoroughly in the sugar before baking.
- These cookies are excellent for holiday cookie swaps and gift-giving.
Nutrition
- Serving Size: 1 cookie
- Calories: 160
- Sugar: 14g
- Sodium: 105mg
- Fat: 8g
- Saturated Fat: 3g
- Unsaturated Fat: 5g
- Trans Fat: 0g
- Carbohydrates: 20g
- Fiber: 1g
- Protein: 3g
- Cholesterol: 20mg