
Oh, what’s more comforting than a plate piled high with creamy mashed potatoes just begging for a blanket of rich, dark sauce? For me, nothing beats it! If you’ve ever felt the panic of realizing you’re out of pan drippings but still need that perfect, savory topping, well, you’re in the right place. I’m Kate Connolly, and I want to show you how to make the most incredible homemade brown gravy from scratch. Forget those chalky packets; this recipe is quick, surprisingly easy, and delivers that glorious, velvety texture every single time—all without needing a roast in sight! Let’s make your next meal feel like royalty.
- Why This Homemade Brown Gravy Recipe Works (No Drippings Needed)
- Gathering Ingredients for Your Brown Gravy From Scratch
- Stovetop Gravy Instructions for Velvety Brown Gravy
- Tips for Success with Your Brown Gravy From Scratch
- Serving Suggestions for This Comfort Food Gravy
- Make Ahead Gravy Mix for Future Homemade Brown Gravy
- Storage and Reheating Instructions for Homemade Brown Gravy
- Frequently Asked Questions About Making Brown Gravy
- Sharing Your Homemade Brown Gravy Creations
Why This Homemade Brown Gravy Recipe Works (No Drippings Needed)
I get it—sometimes you just need gravy ASAP, and there’s no fatty roast sitting around waiting to be used. That’s why this recipe is my go-to! It’s engineered to taste deep and savory even though it’s so fast. This is your ultimate no drippings gravy secret weapon.
- It relies on a perfect balance of beef and chicken broth to mimic that complex, meaty flavor profile without drippings.
- The technique builds flavor right into the roux, ensuring you get a rich result quickly.
- It creates a truly velvety brown gravy consistency that coats food beautifully.
Speed and Simplicity: Your Quick Savory Sauce
You seriously won’t believe this is from scratch! The entire process, from melting the butter to serving, takes less than 20 minutes. It’s the perfect easy brown gravy recipe for those weeknight mash-ups when you need a quick savory sauce to keep everyone happy.
Gathering Ingredients for Your Brown Gravy From Scratch
Okay, gathering your supplies is key! Since we aren’t relying on drippings, the quality of your broth makes a huge difference in this brown gravy from scratch. Use the best beef broth you can find—it really sings! Everything else you need is probably sitting right now.
- 60g salted butter
- 35g all-purpose flour
- 480ml beef broth (don’t skip this powerhouse!)
- 240ml chicken broth
- 0.5g dried thyme
- 1g onion powder
- 1g garlic powder
- 0.5g ground black pepper
- 1g salt (taste as you go!)
Ingredient Notes and Substitutions for Homemade Brown Gravy
If you want a super deep, rich color, feel free to swap the chicken broth for more beef broth. If you’re making this vegetarian, vegetable broth works beautifully to make a lovely buttery brown gravy. Remember, the dry ingredients here—flour, thyme, and powders—are exactly what you use if you whip up the make ahead gravy mix later on!
Stovetop Gravy Instructions for Velvety Brown Gravy
Now we move onto the heat! This is where the magic happens, and I promise, if you don’t rush this part, you’ll have the best homemade brown gravy you’ve ever tasted. Remember, we are building flavor from the ground up. We need to create what cooks call a roux, which is just melted butter and flour, but it’s the single most important step for that gorgeous, thick texture.
Mastering the Basic Roux Gravy Recipe
Grab a medium saucepan and get that butter melted over medium heat. Don’t let it brown too much; we just want it fully liquid. Now, whisk in your flour quickly. You need to cook this whisking mixture for about two full minutes. Keep stirring! You’re looking for the color to change from pale white to a light, sandy brown. If it smells nutty—like roasted nuts, not burnt toast—you’ve nailed it. That lovely color adds depth to your final basic roux gravy recipe.
Achieving the Perfect Consistency in Your Homemade Brown Gravy
This next bit requires patience—if you dump all the broth in at once, you get lumps, and nobody wants that! Slowly, slowly, whisk in the beef and chicken broth, a little drizzle at a time. Once it looks super smooth, toss in your seasonings. Bring the whole wonderful thing up to a gentle simmer, then drop the heat way down. Let it bubble gently for 5 to 10 minutes, stirring every minute or so. That simmering time is what transforms it into a smooth, velvety brown gravy that happily clings to your spoon.
Tips for Success with Your Brown Gravy From Scratch
You’ve already mastered the roux, which is half the battle for any homemade brown gravy! Now, let’s talk color adjustment—this is where I sometimes get a little intense in the kitchen. If your gravy looks more yellow than deep brown after you finish the roux, don’t panic! Just keep cooking that roux for another minute or two over medium heat, stirring constantly, until it gets noticeably darker. I once cooked mine a bit too long while watching the mixer, and it gave the gravy the most amazing dark, almost smoky flavor! Just watch it like a hawk so it doesn’t burn.
For thickness, remember that gentle simmer is your friend. If you’re serving this over roast beef, you might want that extra body, so let it simmer the full 10 minutes. If it seems too thick when you try to pour it, just whisk in a splash more warm broth until it loosens up perfectly for your potatoes.

Serving Suggestions for This Comfort Food Gravy
Okay, the best part about having this comfort food gravy ready to go is realizing just how many things it makes better! Obviously, it’s divine poured liberally over fluffy mashed potatoes—that’s practically a requirement, right?
But don’t limit yourself! I use this same sauce for my meatloaf, it’s fantastic over simple roasted chicken, and it’s amazing drizzled over turkey sandwiches or biscuits. When you have a quick, rich homemade brown gravy like this on hand, dinner leftovers instantly feel like a freshly made feast.
Make Ahead Gravy Mix for Future Homemade Brown Gravy
You know those days when you need that perfect homemade brown gravy but you only have fifteen minutes to spare? That’s when this trick saves my sanity! You can totally prepare the dry ingredients ahead of time and store them away. It’s just the flour, seasonings—thyme, onion powder, garlic powder, salt, and pepper—all mixed up tight.
When you’re ready to make your brown gravy from scratch next time, just use about 4 tablespoons of that stored dry mix per cup of liquid (broth). Melt your butter, whisk in the mix, and then continue just like the main recipe. It keeps stocked up and totally cuts down on evening prep time!
Storage and Reheating Instructions for Homemade Brown Gravy
This rich sauce stores wonderfully, which is great because I always end up with leftovers! You can keep this homemade brown gravy right in the fridge in an airtight container for up to four days. When you go to reheat it, just know it will be super thick—that’s the butter setting up! You absolutely must use the stovetop for the best results.
Pop it into a small pan over medium-low heat and whisk constantly. If it seems like cement, just add a splash of warm broth or even water until you bring back that signature velvety brown gravy texture you loved right out of the pot!
Frequently Asked Questions About Making Brown Gravy
I know you might still have a few lingering questions about ditching the powdered stuff and mastering brown gravy from scratch. That’s totally normal! Learning the technique for thickening gravy without drippings is usually the biggest hurdle people face, but I promise it’s worth it.
How do I fix my homemade brown gravy if it turns out too thin?
Oh, that happens to the very best of us, even when we simmer patiently! If your homemade brown gravy looks a little too soupy after the 10 minutes are up, don’t sweat it—we’ll fix it fast. The easiest way is to make a quick slurry. Just mix one tablespoon of cornstarch with two tablespoons of cold water in a tiny cup until it’s smooth. Whisk that slurry into your simmering gravy, and it should thicken up within a minute or two. If you’re not in a rush, you can also just keep simmering it on very low heat, stirring often, until the extra liquid evaporates.
Can I use this recipe for a KFC Style Gravy Copycat?
That’s a great question! People love that classic, slightly peppery, smooth taste, and honestly, yes, you absolutely can get very close with this base. The key to that smoky, familiar flavor often comes from the specific combination of spices and a good quality beef base. Because we use both chicken and beef broth here, and include onion and garlic powder, this recipe provides that rich, savory profile you’re looking for in a KFC Style Gravy Copycat. Give it a taste test once it’s thickened, and feel free to add an extra pinch of pepper!
Also, if you want to make it totally vegetarian, just swap the beef and chicken broths out for vegetable broth. It still makes a fantastic, rich sauce for your veggies or potatoes!
Sharing Your Homemade Brown Gravy Creations
Seriously, I am so proud of you for tackling this recipe! Making real, fantastic homemade brown gravy from scratch instead of grabbing a packet is a huge step in feeling totally confident in the kitchen. That velvety texture you made is something to brag about!
I would absolutely love to see what deliciousness you poured all over—was it mashed potatoes? Maybe you finally made that roast beef that needed a perfect partner? Please snap a picture and tag me on social media! Knowing that Kings Cook helped bring a little more joy and flavor to your dinner table is truly why I do all this testing and tasting.
If you loved how simple this was, please consider leaving a star rating right here on the recipe card! It helps other home cooks find reliable recipes, and honestly, hearing from you makes my day. Happy cooking, everyone!
PrintVelvety Homemade Brown Gravy Without Pan Drippings

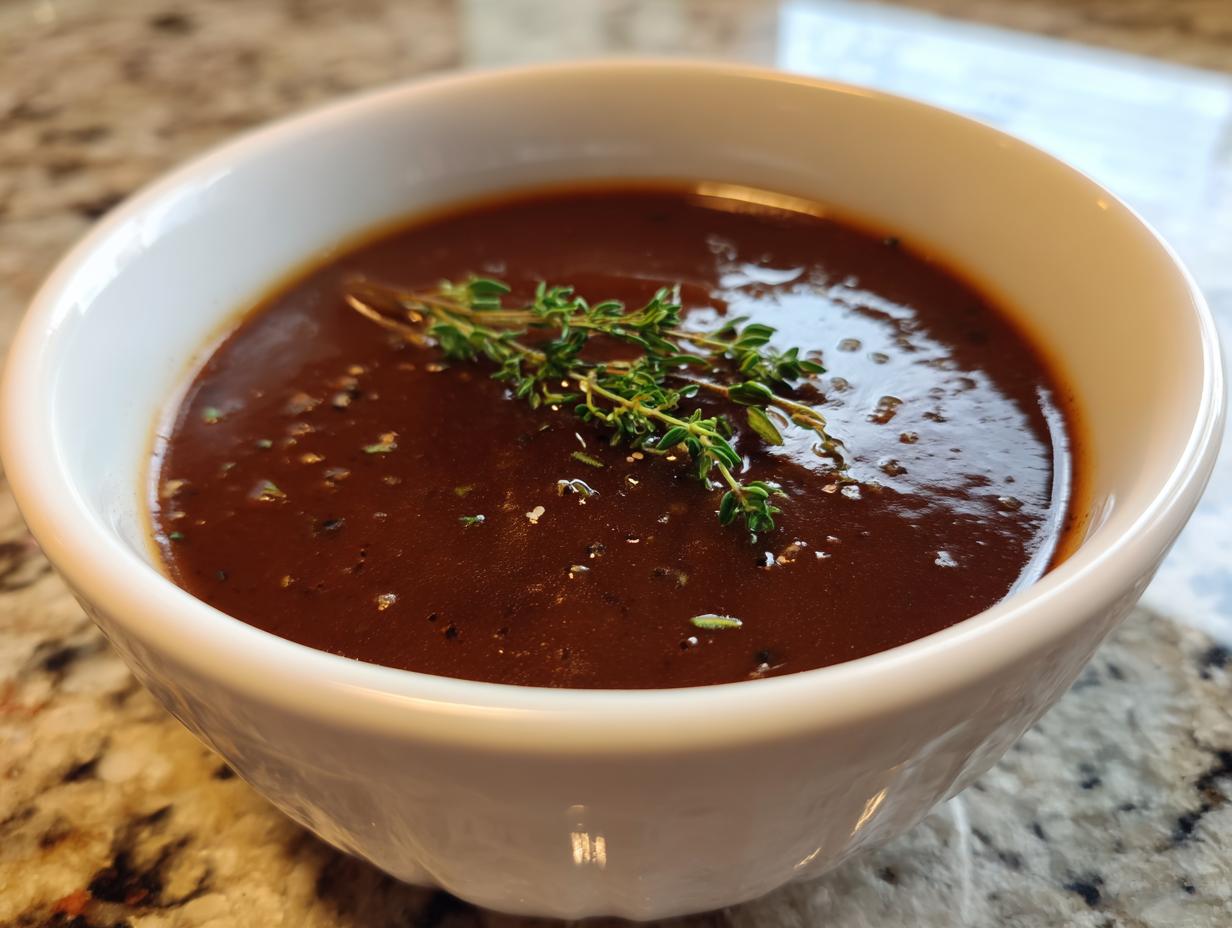
Make rich, savory brown gravy from scratch on the stovetop in under 20 minutes. This easy recipe uses broth instead of meat drippings, resulting in a smooth, classic sauce perfect for mashed potatoes or meatloaf.
- Prep Time: 5 min
- Cook Time: 15 min
- Total Time: 20 min
- Yield: 4 servings 1x
- Category: Side Dish
- Method: Stovetop
- Cuisine: American
- Diet: Vegetarian
Ingredients
- 60 g salted butter
- 35 g all-purpose flour
- 480 ml beef broth
- 240 ml chicken broth
- 0.5 g dried thyme
- 1 g onion powder
- 1 g garlic powder
- 0.5 g ground black pepper
- 1 g salt (or to taste)
Instructions
- Combine the butter in a medium saucepan over medium heat. Allow the butter to melt completely.
- Whisk the flour into the melted butter. Cook this roux, stirring constantly, for 1 to 2 minutes until it turns a light, nutty brown color. Do not let it burn.
- Slowly whisk in the beef broth and chicken broth, a little at a time, ensuring no lumps form. Continue whisking until the liquid is smooth.
- Add the dried thyme, onion powder, garlic powder, salt, and pepper to the mixture. Stir well to combine the seasonings.
- Bring the gravy to a simmer, stirring frequently. Reduce the heat to low and let it cook for 5 to 10 minutes, or until the gravy thickens to your desired consistency. This is your stovetop gravy instructions for a perfect finish.
- Taste the gravy and adjust salt and pepper as needed. Serve this comfort food gravy hot over your favorite dishes.
Notes
- For a darker color, cook the roux for an extra minute or two until it reaches a deeper brown shade.
- If you prefer a thicker gravy for roast beef, increase the flour slightly or let it simmer longer.
- To make a make ahead gravy mix, combine the dry ingredients (flour, thyme, onion powder, garlic powder, salt, pepper) and store in an airtight container. Use 4 tablespoons of mix per 1 cup of liquid when preparing.
Nutrition
- Serving Size: 1/2 cup
- Calories: 140
- Sugar: 1
- Sodium: 550
- Fat: 10
- Saturated Fat: 6
- Unsaturated Fat: 4
- Trans Fat: 0
- Carbohydrates: 9
- Fiber: 0
- Protein: 3
- Cholesterol: 25