
Do you ever get that midday slump, craving something easy and satisfying to tide you over? I totally get it! That’s why I’m so excited to share my go-to recipe for homemade granola bars with you today. Forget those crumbly, overly sweet store-bought versions; these DIY bars are where it’s at! We’re talking about a snack that’s not just healthier and way tastier, but totally customizable to *your* cravings. It brings me back to my roots, honestly. Back home, food was always about comfort and connection, and helping you feel that same confidence and joy in your own kitchen – just like I talk about over on my About page – is exactly why I started Kings Cook. With my background in nutrition science, I know we can create something amazing together, something simple, reliable, and truly delicious!
- Why You'll Love This Homemade Granola Bar Recipe
- Your Perfect Granola Bars Will Need
- Crafting Your Delicious Granola Bars
- Tips for Perfect Granola Bars Every Time
- Storing Your Homemade Granola Bars
- Frequently Asked Questions About Granola Bars
- Nutritional Information for Your Granola Bars
- Share Your Homemade Granola Bar Creations!
Why You’ll Love This Homemade Granola Bar Recipe
Seriously, you’re going to want to make these!
- Super Easy: We’re talking minimal fuss, people! Combine ingredients, press, bake, and cool. That’s pretty much it. No fancy tricks needed.
- Totally Customizable: This is *your* granola bar. Want more nuts? Go for it! Prefer tart cranberries over sweet raisins? Absolutely! You’re the boss here.
- Healthier & Tastier: You control exactly what goes in. No weird preservatives or sky-high sugar content. Just wholesome goodness that tastes way better than anything from a box.
- Perfect Portion Control: Great for packing in lunches, grabbing before a workout, or just satisfying that 3 PM hunger pang without going overboard.
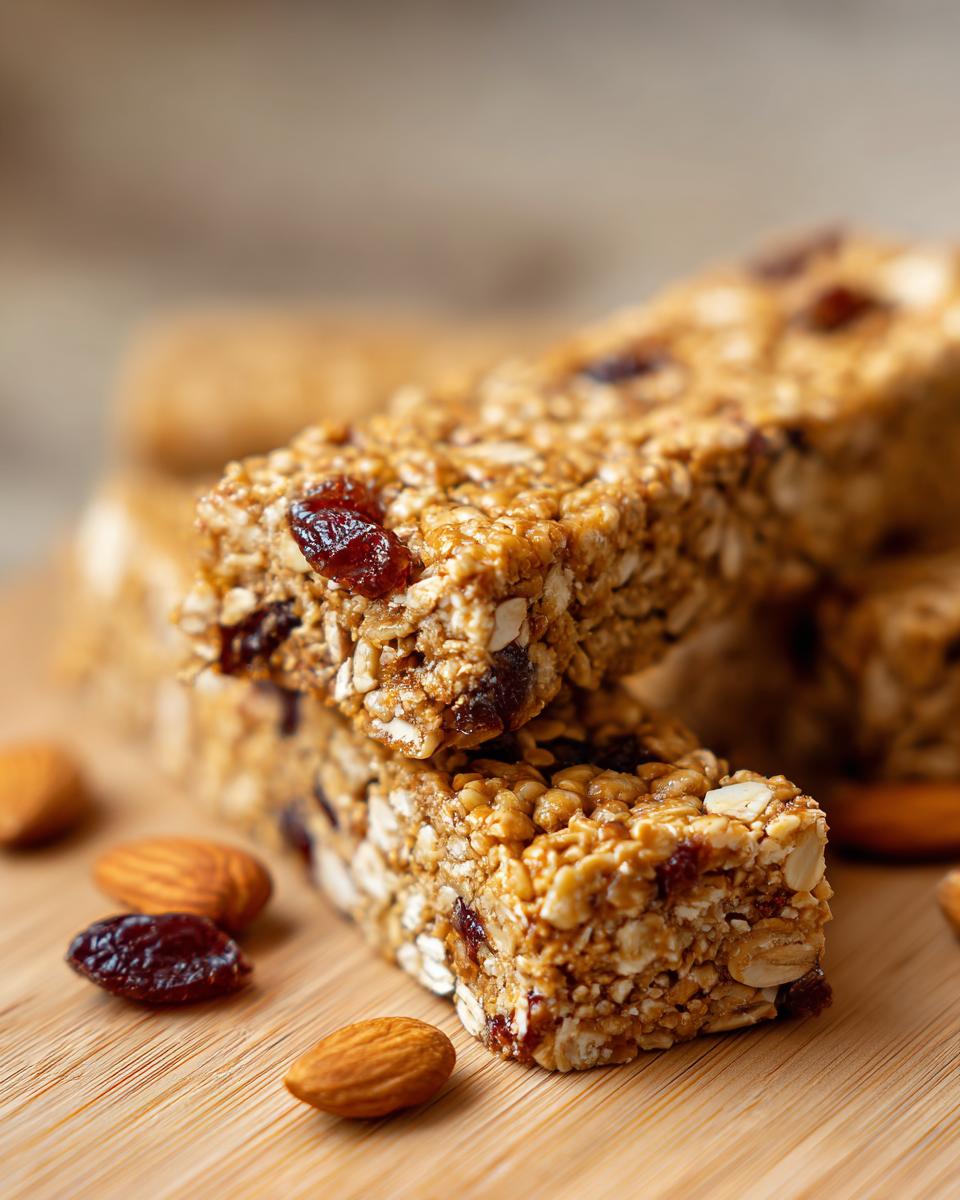
Your Perfect Granola Bars Will Need
Building the best homemade granola bars is all about the right mix. Trust me, these ingredients are simple, easy to find, and work like magic together. You’ll need:
- 2 cups rolled oats: These give our bars that classic sturdy chew. Make sure they’re rolled oats, not instant!
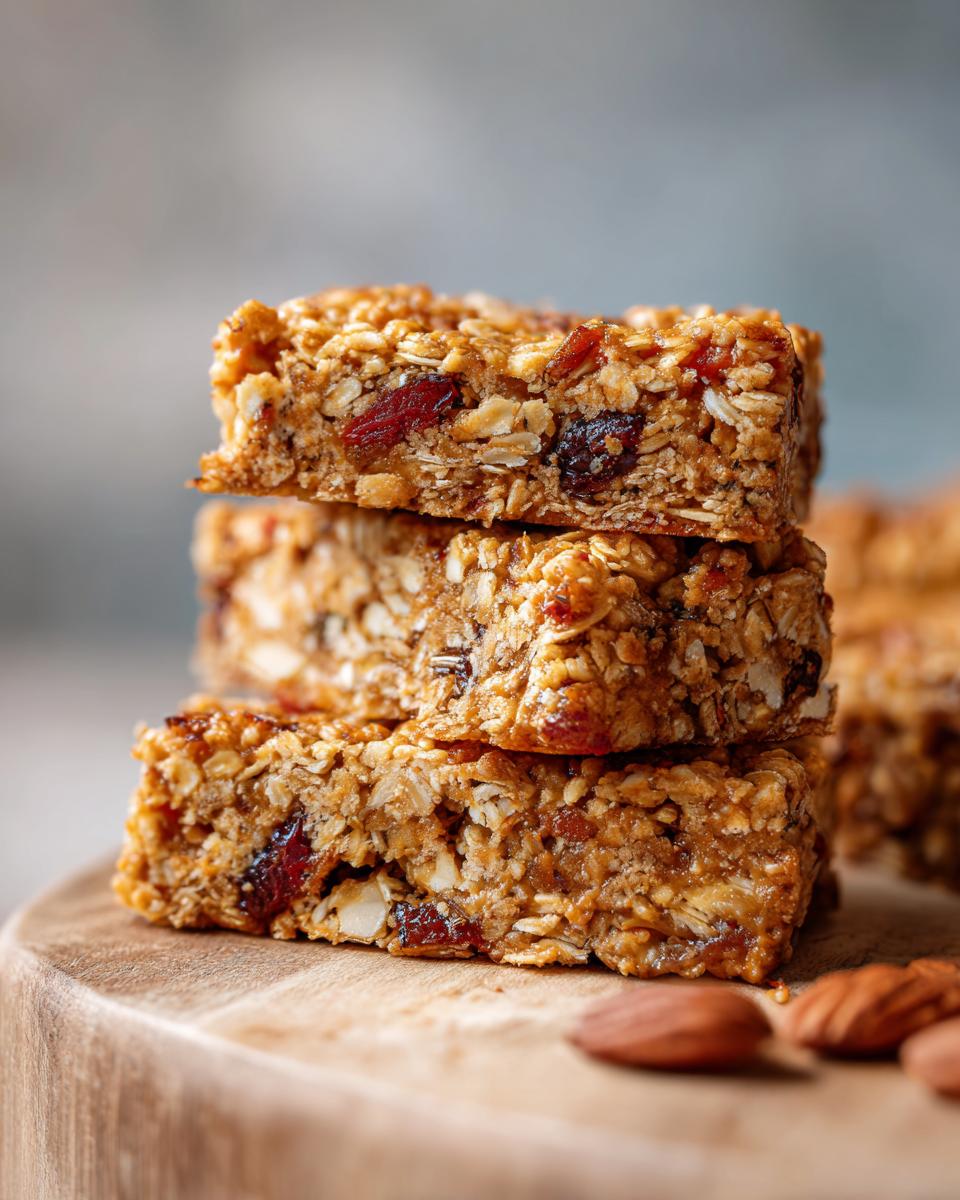
- 1 cup chopped nuts: Almonds, walnuts, or pecans – whatever you love! Chopping them means you get that lovely nutty bite throughout.
- 1/2 cup dried fruit: I usually go for raisins or dried cranberries, but chopped apricots are divine too. They add little pockets of sweetness.
- 1/4 cup seeds: Sunflower seeds or pumpkin seeds are great for extra crunch and nutrients. Chia seeds work too if you have them!
- 1/2 cup peanut butter or almond butter: This is our sticky binder! Make sure it’s smooth and creamy so it mixes in easily.
- 1/3 cup honey or maple syrup: The other part of our binder, bringing in just the right amount of sweetness.
- 1 teaspoon vanilla extract: Just a splash to really wake up all those flavors.
- 1/4 teaspoon salt: Don’t skip this! It balances the sweetness and makes everything taste even better.
- Optional: 1/2 cup chocolate chips: Because sometimes, you just need a little chocolate, right? Stir these in at the end!
Crafting Your Delicious Granola Bars
Alright, let’s get baking! Making these incredible granola bars is really pretty straightforward, and I promise, the kitchen will smell amazing. Think of it like building blocks for deliciousness. Grab your apron, and let’s get this dough – well, mixture – going!
Step 1: Prepare Your Baking Pan and Oven
First things first, let’s get our oven nice and toasty to 350°F (175°C). While it’s warming up, grab an 8×8 inch baking pan. Lining it with parchment paper is your best friend here. Just let a little hang over the edges – it makes getting those perfect bars out SO much easier later on, kind of like how I prep my apple crisp!
Step 2: Combine Dry Ingredients for Granola Bars
In your biggest mixing bowl – the one that feels like it can handle anything – toss in the rolled oats, your lovely chopped nuts, chewy dried fruit, and those little seeds. Give it a gentle stir just to make sure everything’s mixed up and ready for its close-up.
Step 3: Create the Binder for Your Granola Bars
Now for the sticky magic! In a separate microwave-safe bowl (or pretty much any small saucepan), combine your peanut butter (or almond butter!) and honey (or maple syrup). Pop it in the microwave for about 30 to 60 seconds. You just want it warm enough to get lovely and smooth and easily pourable. Give it a good stir until it’s all blended together.
Step 4: Add Flavor Enhancers
Tiny touches make all the difference, right? Pour that teaspoon of vanilla extract and the quarter teaspoon of salt right into your warm peanut butter mixture. Stir it all up until it’s perfectly combined.
Step 5: Combine Wet and Dry for Granola Bars
Time to bring it all together! Pour that glorious, warm binder mixture over your dry ingredients in the big bowl. Get in there with a spatula or a sturdy spoon and mix, mix, mix! We want every single oat and nut to be coated in that deliciousness. If you’re feeling fancy and decided to add those chocolate chips, stir them in now!
Step 6: Pressing the Granola Bar Mixture
This step is super important for getting those bars to hold their shape. Scrape the whole mixture into your prepared baking pan. Now, press down. Really, *really* press down firmly and evenly. I like to use the bottom of a measuring cup or even just my hands (make sure they’re clean!) to pack it in there as much as possible. The tighter you pack it, the less crumbly your finished granola bars will be!
Step 7: Baking Your Homemade Granola Bars
Into the preheated oven they go! Bake for about 20 to 25 minutes. You’re looking for the edges to turn a lovely golden brown. That’s your sign they’re ready to start setting.
Step 8: The Importance of Cooling Granola Bars
Okay, now comes perhaps the hardest part: waiting! You absolutely, positively *have* to let these cool completely in the pan. I know, I know, the smell is torture! But if you try to cut them while they’re warm, they’ll just fall apart. Patience, my friend, will be rewarded!
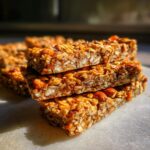
Step 9: Cutting Your Granola Bars
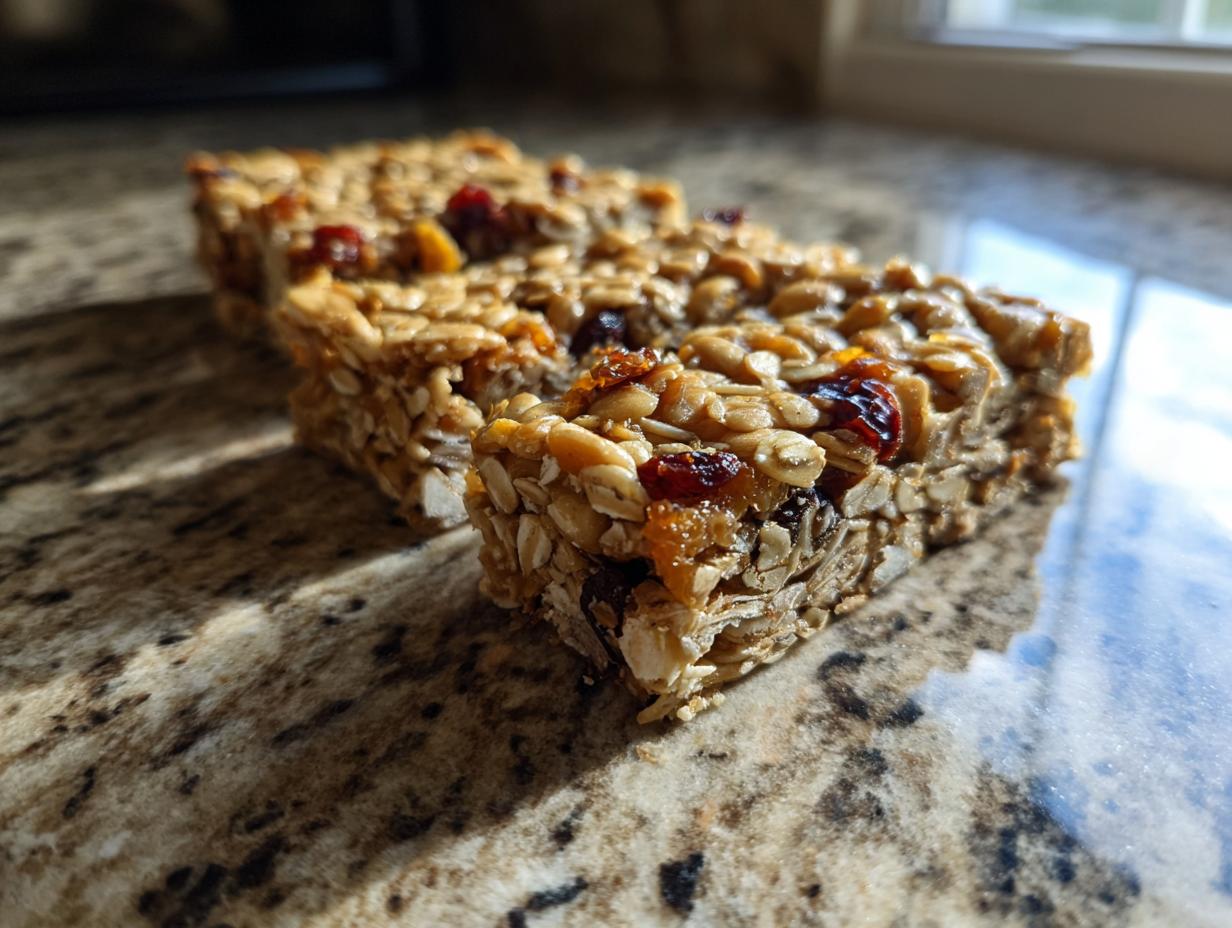
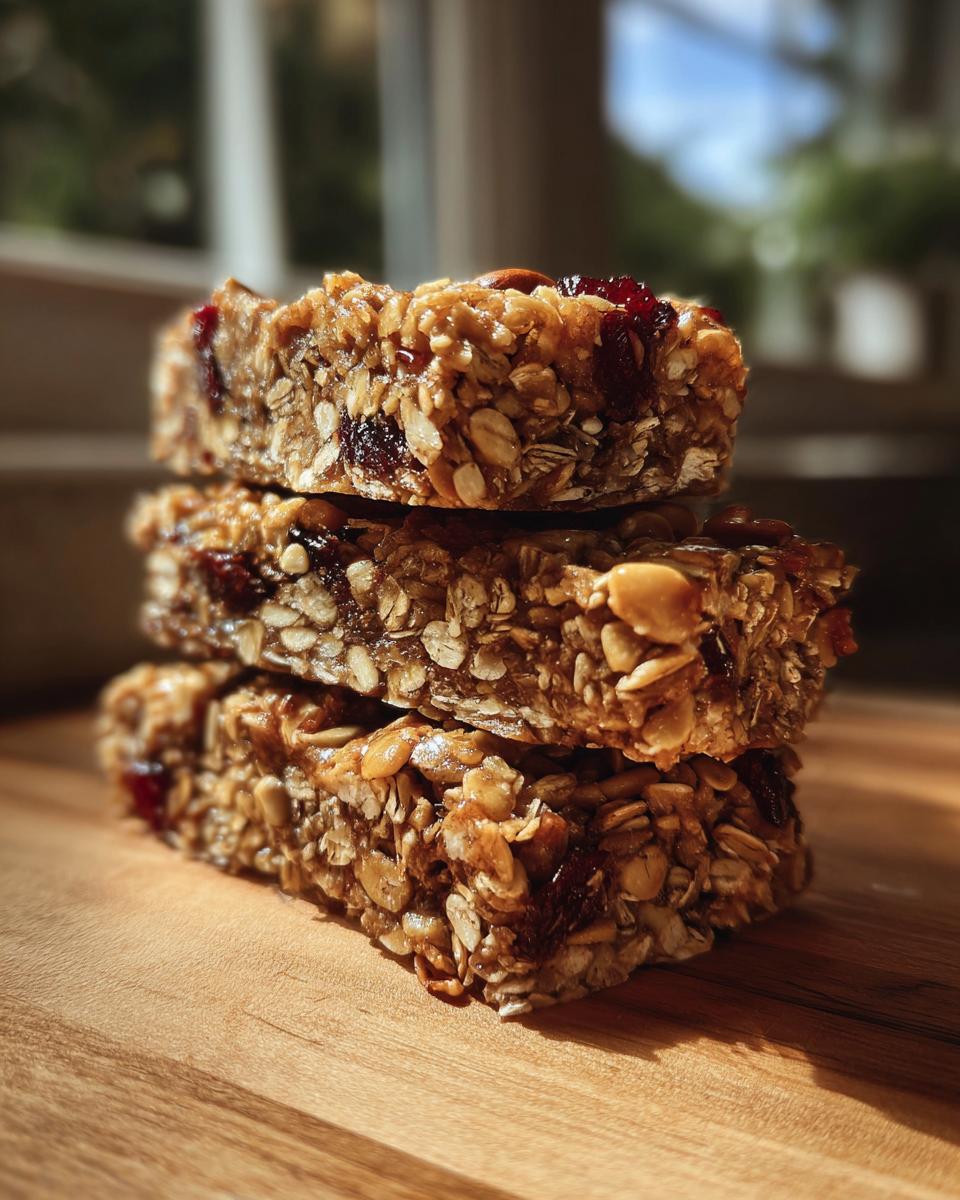
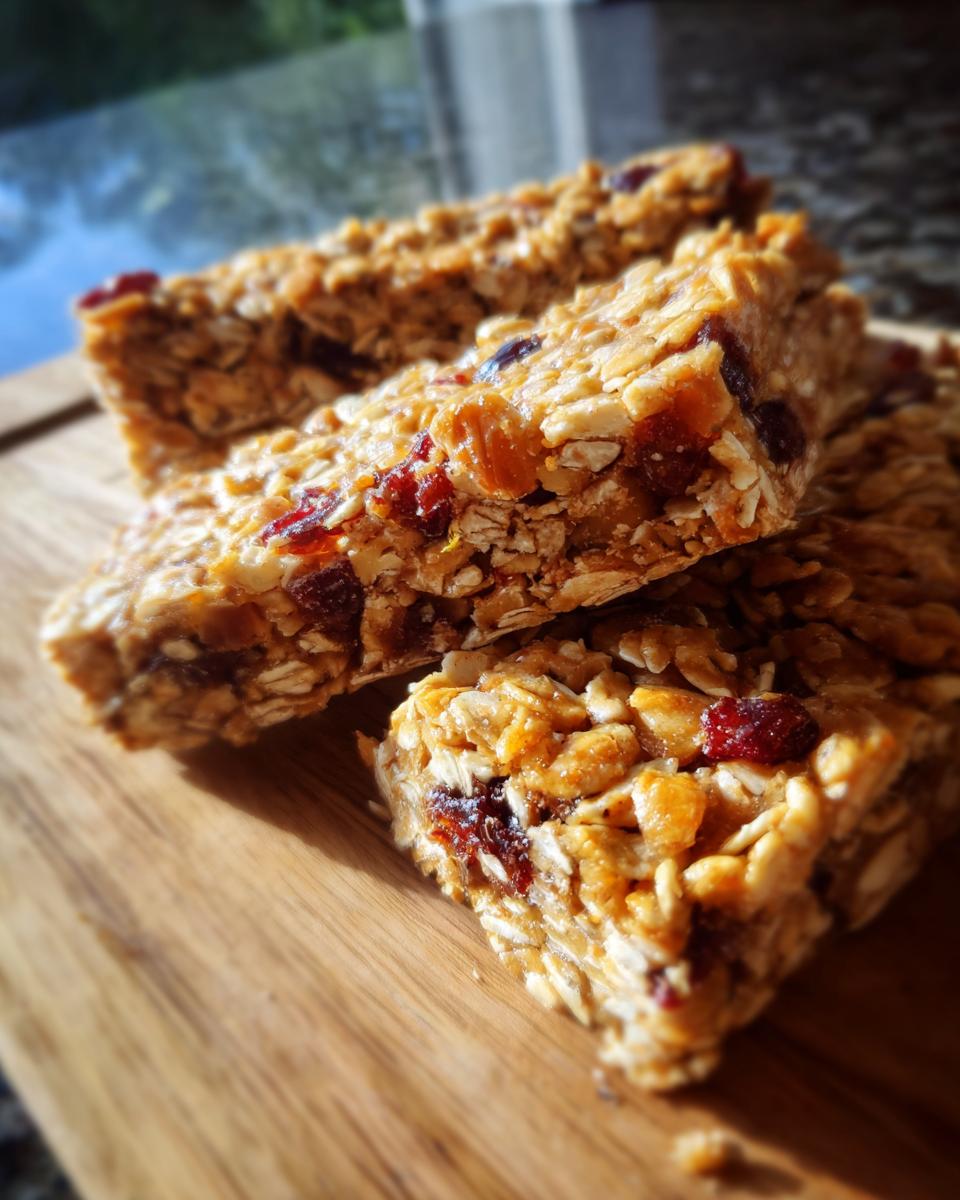
Once they’re totally cool – and I mean *completely* cool – carefully grab those overhanging parchment paper edges and lift the whole slab right out of the pan. Place it on a cutting board and slice into your desired bar size. Voila! Perfect homemade granola bars, ready to go!
Tips for Perfect Granola Bars Every Time
You know, there are a few little tricks I’ve picked up over the years that make all the difference when you’re making granola bars. It’s all about nailing that texture you love, whether you’re a chewy-on-the-go person or you like a little crunch to your snack! For those super chewy bars, make sure you’re really pressing that mixture into the pan as firmly as you can. Think of it like packing snow for a snowball fight! The tighter it’s packed, the less likely it is to crumble.
If you’re dreaming of crunchy bars, you can bake them a few minutes longer, but the real secret is in the binder – a little less sweetener and a bit more nut butter can help them firm up. Or, if you’re not in the mood for baking at all (I get it!), my no-bake granola bars are a lifesaver. You just mix everything up, press it into the pan, and let the fridge do the work! You can find a similar technique in my no-bake oatmeal cookie recipe, or even my no-bake banana pudding. The key is letting them chill until nice and firm.
And don’t be afraid to play around with the ingredients! Want to add some puffed rice cereal for extra crispiness? Go for it! A sprinkle of cinnamon or a dash of nutmeg can add another layer of warm flavor too. The beauty of homemade is that it’s completely yours!
Storing Your Homemade Granola Bars
Now that you’ve made these delicious granola bars, you’ll want to keep them fresh! They’re best stored in an airtight container. At room temperature, they’ll stay yummy for up to a week. If you want to keep them around a bit longer, or if your kitchen is on the warmer side, pop them in the refrigerator. They’ll last beautifully for a couple of weeks in there. Either way, they’re perfect for grabbing on the go!
Frequently Asked Questions About Granola Bars
Got questions about whipping up the best homemade granola bars? I’ve got you covered! Making snacks from scratch opens up a world of possibilities, and it’s totally normal to have a few things you want to check. Here are some of the most common things people ask me:
Can I make these granola bars gluten-free?
Absolutely! It’s super simple. Just make sure you use certified gluten-free rolled oats. Everything else in this recipe is naturally gluten-free, so you’re good to go! This is a great way to adapt a favorite recipe for those with dietary needs, just like we aim for with many of my recipes.
What if I don’t have peanut butter? Or I want a different flavor?
No problem at all! While peanut butter is fantastic, you can totally swap it out. Almond butter is a delicious alternative, and cashew butter works wonderfully too. For a different vibe, tahini will give it a unique, nutty flavor, or you can even use sunflower seed butter for a nut-free option. Just make sure whatever you use is smooth and creamy so it binds everything together nicely, similar to how the binder works in my chewy oatmeal raisin cookies!
How can I make my granola bars crunchier?
If you’re digging a crunchier texture, there are a couple of things you can do! First, press the mixture into the pan *really* firmly. Second, you can bake them a few minutes longer, keeping an eye on them so they don’t burn. Another trick is to toast your oats and nuts before mixing them in – just spread them on a baking sheet and toast lightly in the oven until they’re fragrant. This adds a fantastic depth of flavor and crunch!
My bars are too crumbly. What did I do wrong?
Oh, crumbly bars are the worst! Usually, this happens for one of two reasons: you didn’t press the mixture into the pan firmly enough, or it didn’t cool completely before cutting. Make sure you really pack that mixture down, and then be patient and let those bars cool all the way in the pan before you even *think* about slicing them. That cooling time is key for them to set up properly!
Nutritional Information for Your Granola Bars
Just a heads-up, the nutrition info for these yummy granola bars is an estimate, based on the ingredients I’ve listed! Things can change a bit depending on the exact brands you use, especially your nut butter and dried fruits. But generally, you’re looking at about 250 calories per bar, with around 14g of fat (mostly good fats from nuts and seeds!), 6g of protein, 30g of carbs, and about 4g of fiber. Sweet!
Share Your Homemade Granola Bar Creations!
Now that you’ve got the scoop on making the most amazing granola bars, I’d absolutely love to hear from you! Did you try this recipe? What kinds of goodies did you mix in? Please, leave a comment below, give the recipe a star rating, or share your kitchen triumphs with me! You can also reach out directly through my contact page. I can’t wait to see what deliciousness you create!
PrintHomemade Granola Bars
Create your own chewy or crunchy granola bars using oats, nuts, dried fruits, and a sweet binder. These bars are a healthier, customizable alternative to store-bought snacks.
- Prep Time: 15 min
- Cook Time: 25 min
- Total Time: 40 min
- Yield: 12 bars 1x
- Category: Snacks
- Method: Baking
- Cuisine: American
- Diet: Vegetarian
Ingredients
- 2 cups rolled oats
- 1 cup chopped nuts (almonds, walnuts, pecans)
- 1/2 cup dried fruit (raisins, cranberries, apricots)
- 1/4 cup seeds (sunflower, pumpkin, chia)
- 1/2 cup peanut butter or almond butter
- 1/3 cup honey or maple syrup
- 1 teaspoon vanilla extract
- 1/4 teaspoon salt
- Optional: 1/2 cup chocolate chips
Instructions
- Preheat your oven to 350°F (175°C). Line an 8×8 inch baking pan with parchment paper.
- In a large bowl, combine the rolled oats, chopped nuts, dried fruit, and seeds.
- In a separate microwave-safe bowl, combine the peanut butter and honey (or maple syrup). Heat for 30-60 seconds, stirring until smooth and pourable.
- Add the vanilla extract and salt to the peanut butter mixture and stir well.
- Pour the wet ingredients over the dry ingredients and mix until everything is evenly coated. If using chocolate chips, stir them in now.
- Transfer the mixture to the prepared baking pan. Press down firmly and evenly with the back of a spoon or your hands. The firmer you press, the better the bars will hold together.
- Bake for 20-25 minutes, or until the edges are golden brown.
- Let the bars cool completely in the pan before cutting. This is crucial for them to set properly.
- Once cooled, lift the parchment paper out of the pan and cut into bars.
Notes
- For no-bake bars, skip the oven step. Press the mixture firmly into a parchment-lined pan and refrigerate for at least 2 hours, or until firm, before cutting.
- Store granola bars in an airtight container at room temperature for up to a week, or in the refrigerator for longer storage.
- Feel free to customize with your favorite nuts, seeds, and dried fruits.
Nutrition
- Serving Size: 1 bar
- Calories: 250
- Sugar: 15g
- Sodium: 50mg
- Fat: 14g
- Saturated Fat: 2g
- Unsaturated Fat: 12g
- Trans Fat: 0g
- Carbohydrates: 30g
- Fiber: 4g
- Protein: 6g
- Cholesterol: 0mg