
Are you tired of serving plain, boring white rice on the side? I totally get it. Sometimes you just need a flavorful, comforting side dish that doesn’t take up half your cooking time when you’re trying to get a big meal on the table. You need something that feels a little bit special but is secretly super simple. That’s why I spent ages perfecting this garlic butter rice recipe. It’s one of the most requested recipes from my Sunday Suppers because it uses basic, accessible ingredients you already have. Trust me, this version has been tested and re-tested until it’s perfectly reliable every single time. It’s quickly become a new family favorite here at home! If you want to know more about why I started sharing these tested recipes, you can always check out what I share on the About Page.
- Why This Garlic Butter Rice Recipe Works for Weeknight Side Dishes
- Ingredients for Perfect Garlic Butter Rice
- How to Make Garlic Butter Rice Step-by-Step
- Tips for Success with Your Flavorful Rice Sides
- Pairing Your Garlic Butter Rice: Great Rice Pairings for Chicken and More
- Storage and Reheating Instructions for Homemade Rice Recipes
- Frequently Asked Questions About Rice with Butter and Garlic
- Estimated Nutritional Data for Garlic Butter Rice
- Share Your Thoughts on This Easy Rice Recipe
Why This Garlic Butter Rice Recipe Works for Weeknight Side Dishes
We all need reliable easy side dish recipes, and this one hits all the marks! It’s not flashy, but it delivers huge savory flavor that makes even simple meals feel gourmet. This is the side dish that always steps up when you’re trying to figure out quick dinner ideas without stressing out. It’s designed to be dependable for busy home cooks like us.
- It uses ingredients you likely already have in your pantry.
- The flavor is rich and deep, thanks to fresh garlic and savory broth.
- It’s incredibly versatile—goes great with chicken, steak, or veggies!
If you are looking for more options like this for busy evenings, check out my collection of weeknight recipes.
Ready in Under 35 Minutes
Seriously, 35 minutes total! That’s the sweet spot for busy evenings. We want dinner on the table fast, right? Because the rice cooks unattended once it boils, you can use that time to whip up whatever main course you’re making. This is the ultimate 30 minute side that actually tastes like you spent way more time fussing over it. It’s quick magic!
Mastering Fluffy Rice Recipe Texture
The trick to getting that amazing texture isn’t just about the water ratio; it’s about the process. We toast the raw rice first, which really locks in that starchiness, preventing a gummy mess. Then, that crucial resting period after it comes off the heat is what lets all that steam redistribute. Follow those two steps, and you’ll always get a perfect, light, and fluffy rice recipe, which is essential for great garlic butter rice!
Ingredients for Perfect Garlic Butter Rice
When we talk about making killer garlic butter rice, the ingredients list is short, which means quality really matters. I’ve written out exactly what you need below, but let me tell you, you can’t cheat on the garlic! I insist on using four cloves of *fresh*, minced garlic. Powdered garlic just won’t give you that aromatic punch we are after in these savory rice dishes. Also, grab unsalted butter—we are controlling the salt level ourselves with the broth and seasonings, so we need that control!
- 1 tablespoon olive oil
- 4 tablespoons unsalted butter (divided)
- 4 cloves fresh garlic, minced (non-negotiable!)
- 1 small yellow onion, finely chopped
- 1 1/2 cups long grain white rice, uncooked
- 2 1/2 cups chicken broth
- 1/2 teaspoon salt
- 1/4 teaspoon black pepper
- 2 tablespoons fresh parsley, chopped (for garnish)
Ingredient Notes and Substitutions
Okay, let’s talk customization, because that’s what makes a recipe ours, right? I highly, highly recommend the chicken broth for your liquid. Water is fine if you are against broth, but using chicken broth—as many great cooks do for savory rice dishes—builds a layer of salty, savory richness into every single grain of rice. It’s what makes this garlic butter rice taste restaurant-quality!
If you’re keeping this vegetarian, please feel free to swap that chicken broth out for high-quality vegetable broth. It still gives you those deep flavors without the meat base. Another quick note: fresh parsley for finishing is key. It brightens everything up at the end. Dried herbs just won’t cut it here when we are aiming for this level of flavor!
How to Make Garlic Butter Rice Step-by-Step
Okay, let’s get down to business! Making truly spectacular garlic butter rice isn’t complicated at all, but you have to respect the timing. I’ve broken my tested method down so you get that robust flavor boost without any burnt bits. When you follow these steps exactly, you unlock the magic that makes this such a fantastic side! I saw a great breakdown on how they handle the broth over at Cooking Classy, and it validated my process for building flavor!
We are making a seriously buttery rice recipe here, so don’t skimp on the initial fat investment!
Sauté Aromatics and Toast the Rice
First up, we heat the olive oil and melt down 2 tablespoons of your butter in a medium pot over medium heat. Toss in your finely chopped onion and let it soften up until it’s translucent—that takes about three minutes. Now, the quick but important part: add your minced garlic. You only cook this for about one minute until you can really smell it. Pay attention! If the garlic turns even a hint brown, it gets acrid, and you have to start over. Oops!
Right after the garlic is fragrant, dump in your uncooked rice. You *must* toast this rice by stirring it constantly for two full minutes. You’ll see the edges of the grains start to look a little see-through. I find this toasting step is what prevents gummy rice later on. For more tips on developing deep flavor in your sides, feel free to check out my post on delicious side dishes!
Simmering and Resting for Perfect Garlic Butter Rice
Once the rice is toasted, pour in your chicken broth, salt, and pepper. Bring that whole magnificent pot up to a roaring boil. As soon as it hits that boil, you need to instantly drop your heat way down to the lowest setting possible. Cover it tightly—and I mean TIGHTLY—and let it simmer for 15 to 18 minutes. This is critical: Do not lift that lid! Peeking releases the steam we need to cook the rice perfectly.
When the time is up, take the pot completely off the burner. That final step is just as important as the cooking: Let it stand, still covered, for five solid minutes. This resting time is key to reaching that ultimate comfort food rice texture. Finally, remove the lid, stir in the last 2 tablespoons of cold butter and the fresh parsley. Fluff it gently with a fork, and you have the best garlic butter rice ready to go!
Tips for Success with Your Flavorful Rice Sides
Look, I’ve made batches of this garlic butter rice where it came out perfectly fluffy, and honestly, I’ve made batches that were a little sticky. It’s all about those little details that separate a good side dish from a great one! Even though this is one of my most reliable flavorful rice sides, these extra expert tips really seal the deal and elevate it when you need something truly remarkable.
The single most important tip I have for you—and it’s noted in the recipe notes—is rinsing your rice. Yes, you have to do it! Take your uncooked long-grain rice and put it in a fine-mesh strainer. Run cold water over it until the water running out the bottom is totally clear, not cloudy. Why bother? Well, the cloudiness is excess surface starch. When you toast the rice without rinsing, that starch burns or gets gummy when it hits the liquid.
Rinsing this starch away is how you guarantee those individual, fluffy grains we love so much in our garlic butter rice, especially when you’re trying to make an impressive but easy side dish. Don’t skip it, even if you are in a rush!
Also, I mentioned this before, but I’ll say it again: when the rice is simmering, keep that heat on low! If the heat is too high, you end up steaming the top but scorching the bottom, which leaves you with crunchy grains mixed with mushy grains. We are aiming for uniformity here. A low, slow simmer during that 15-minute covered period is how you ensure every single grain is tender at the same time. That dedication to temperature control makes all the difference in any of my homemade rice recipes; it shows you’re serious about flavor!
Pairing Your Garlic Butter Rice: Great Rice Pairings for Chicken and More
One of the best things about this garlic butter rice is that it sheds the title of ‘boring side dish’ instantly. Because it’s so savory and buttery, it honestly works with almost anything you throw on the plate! It’s the perfect canvas. When I make a big batch, I usually plan meals around it for the next few days because the possibilities are endless.
This is definitely one of the best rice pairings for chicken recipes I know. If you’re grilling chicken breasts, tossing them on the grill and serving them right over a bed of this rice makes the whole thing feel instantly better. The smoky char from the grill plays so nicely with the buttery garlic notes.
But what about when you want something richer? This rice is fantastic alongside red meat. If you’re looking for a showstopper steak recipe, you absolutely have to check out my Perfect Ribeye Steak guide. That richness, combined with this simple, flavorful rice, is unbelievable. It’s the best side dish for steak because it doesn’t compete with the flavor profile of the meat; it just complements it beautifully.
For something traditional but still quick, this rice is a total winner for Southern cooking too. If you’re making something like my Chicken Fried Steak, the rice acts as the perfect, comforting base to soak up any extra gravy you drizzle on. It elevates those home-style meals immediately!
Don’t forget seafood, either! Shrimp scampi or simple pan-seared scallops tossed with a lemon-herb sauce are so good over this rice. It just takes minutes to make, but it brings that restaurant vibe to your table. See? It’s not just rice; it’s the foundational component for so many delicious weeknight side dishes!
Storage and Reheating Instructions for Homemade Rice Recipes
Honestly, I rarely have leftovers of this garlic butter rice—it disappears so fast! But when I do manage to save some, I want to make sure the reheating process brings back that wonderful fluffy texture and buttery goodness. You don’t want dry, hard clumps on your plate the next day, right? Proper storage is key to keeping this rice with butter and garlic tasting great.
For storage, let the rice **cool down completely** before sealing it up. Putting warm rice into a closed container encourages condensation, which can make the texture strange later. Put it in an airtight container—a glass container works really well—and store it in the fridge. It stays perfectly delicious and safe to eat for about three to four days. Because this rice has butter in it, it will obviously firm up a bit when chilled, but don’t worry!
When it’s time to reheat, the secret is adding back a little moisture. You can use the microwave or the stovetop. I prefer the stovetop for the best results. Transfer the leftover rice to a saucepan over low heat. Add just a tablespoon or two of water or chicken broth—start small! Cover it tightly and let it gently steam for about five minutes. This gentle steam melts the butter back in and rehydrates those grains beautifully, making it taste almost fresh-made again.
If you are in a hurry and using the microwave? Scoop the rice into a microwave-safe bowl, sprinkle a tiny bit of water over the top, cover it with a damp paper towel, and heat in 30-second bursts, fluffing in between. This steaming method helps you keep that wonderful texture that makes this such a satisfying comfort food rice side. I never reheat all of my leftovers at once, so I can keep the main batch sealed tight in the fridge. That way, every serving is as close to perfect as possible!
Frequently Asked Questions About Rice with Butter and Garlic
When I first started sharing this garlic butter rice recipe, I got so many questions! It’s natural when you’re trying something new for dinner, especially for a side dish that feels like new territory. Don’t worry, I’ve compiled the most common things I hear from readers who are trying to master this rice with butter and garlic for the first time. We want perfect results every time you cook, so let’s address those lingering doubts!
Can I use pre-cooked rice instead of uncooked rice for this garlic butter rice?
You totally *can* use leftover cooked rice in a pinch, but I have to be honest: it won’t be the same amazing dish. The magic of this recipe comes from toasting the raw rice in the butter and aromatics first—that’s what builds the layers of flavor and gives us that ideal texture. If you skip that step by dumping in pre-cooked rice, you miss out on that richness!
If you must use leftovers, I would skip the toasting step entirely and just gently sauté the garlic and onions. Then, add your cooked rice along with the broth, stirring constantly over medium heat until it’s warmed through and has absorbed some of that flavor. You’ll need less cooking time, but remember, you won’t get that fantastic, fluffy texture we are gunning for with the uncooked grains.
What is the best type of rice for this savory rice dish?
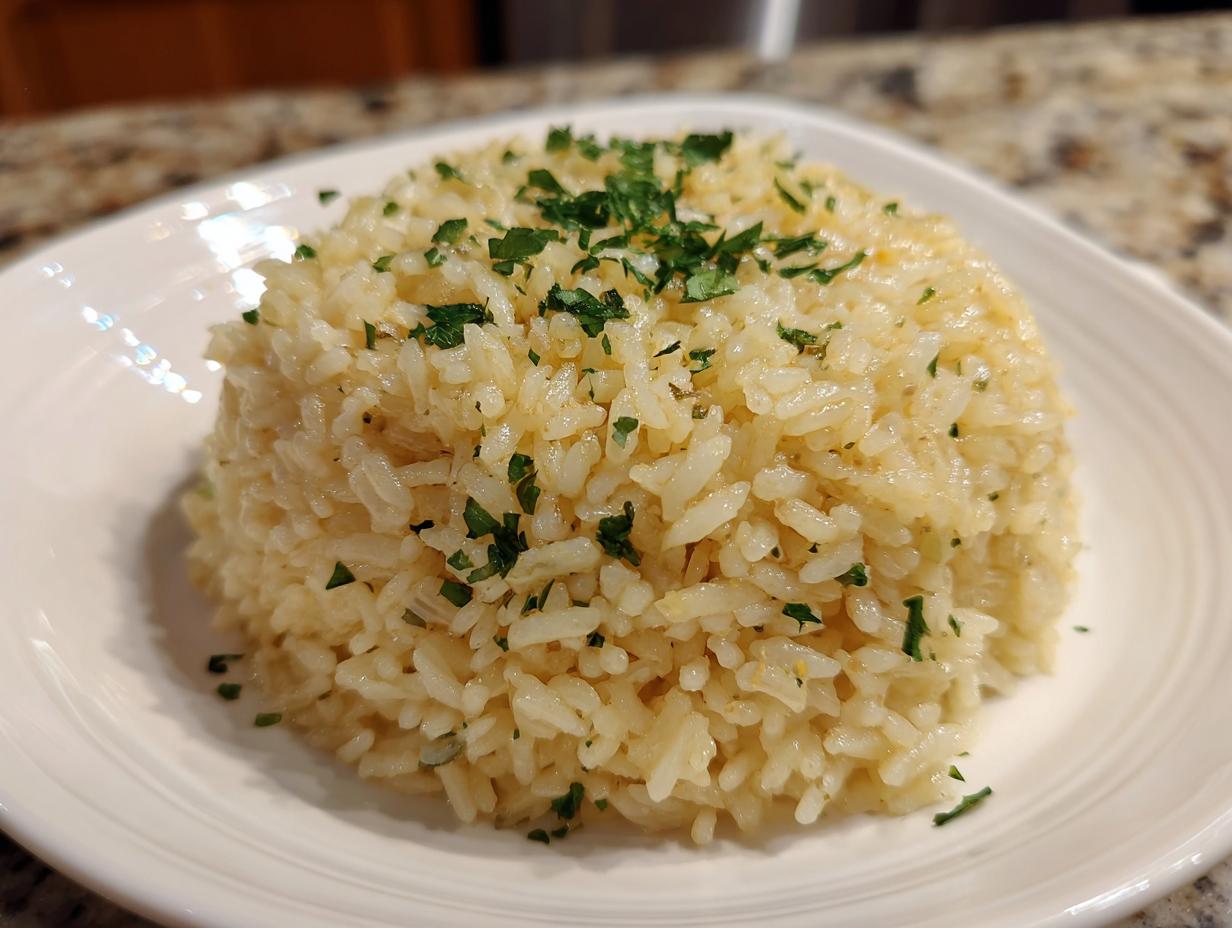
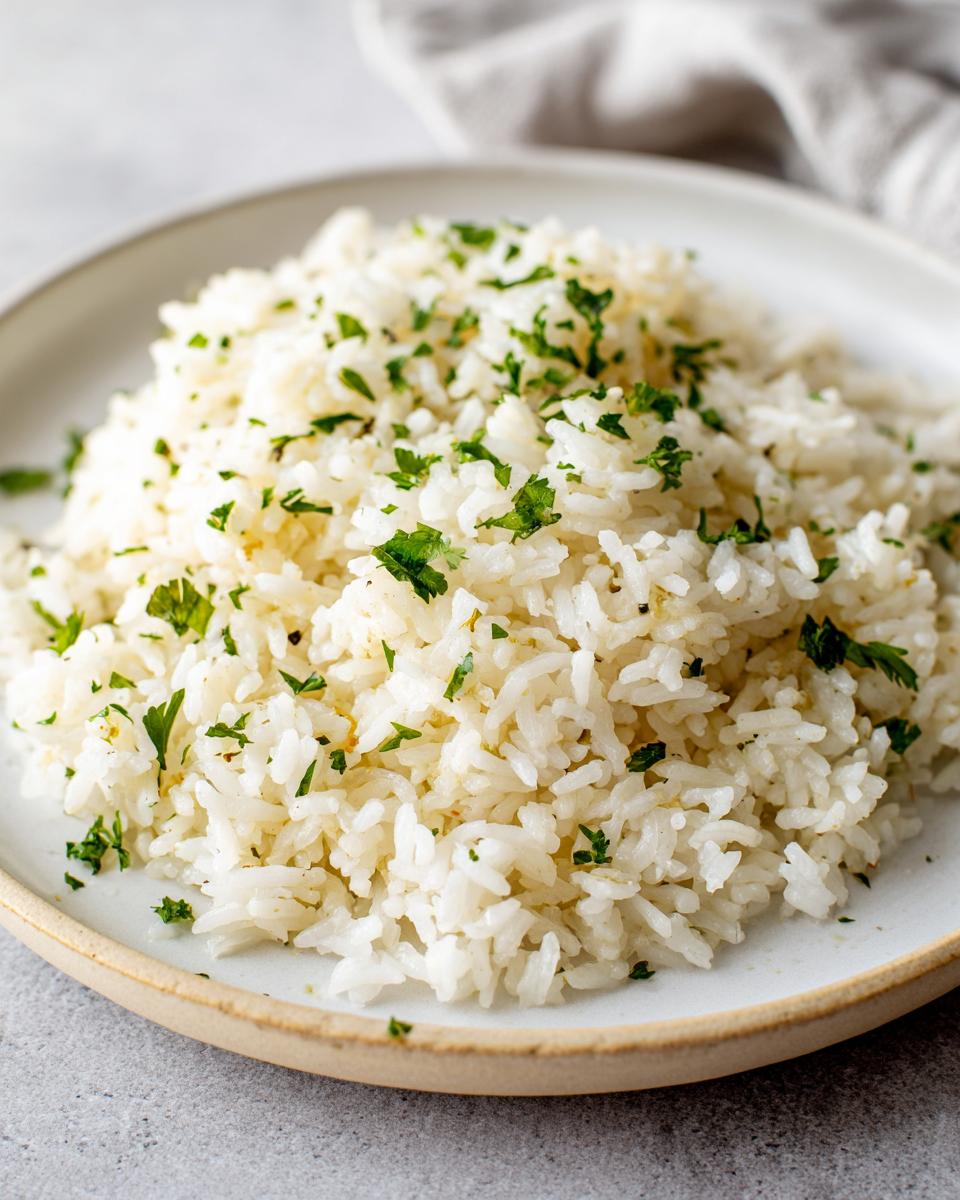
For this specific recipe, which is designed for maximum fluffiness and butter absorption, long-grain white rice is absolutely the standard and the winner. It keeps its shape beautifully through the toasting and simmering process. That’s what I used in all my testing, and it delivers the reliable results you see in the pictures!
Now, if you want to experiment, Basmati or Jasmine rice will also work for this savory rice dish. Just be aware that these aromatic long-grain varieties tend to be a bit stickier and more fragrant than standard white rice. If you use them, you might find the resulting texture is slightly less separate and fluffy than what you get with standard long grain, but it will still taste delicious!
How do I prevent my garlic butter rice from becoming gummy?
This is the biggest fear people have when cooking rice, but we’ve built anti-gummy failsafes right into the steps! There are two crucial moments where you prevent stickiness. First, you must completely rinse the rice until the water runs clear before you even start cooking. That removes the surface starch that causes clumping.
Second, and this is non-negotiable, you cannot stir the rice while it’s simmering! Once you cover that pot and turn the heat down low, hands off! Stirring releases the starch while it’s cooking, making it gluey. And finally, remember that resting period! Five minutes off the heat allows the moisture to redistribute evenly instead of steaming out. If you follow those three rules—rinse, don’t stir, and rest—your garlic butter rice will be perfectly fluffy every time. If you’re looking for some quick meal inspiration to go alongside this rice, stop by my easy lunch ideas for other simple inspiration!
Estimated Nutritional Data for Garlic Butter Rice
I always include the nutrition breakdown because it’s helpful to know what you’re eating, especially with comfort food like this garlic butter rice! But listen, I need you to treat this information as a general guideline, okay? I’m a cook, not a registered dietitian! These numbers are estimated based exactly on the ingredients listed here—the long-grain white rice, the specific amount of butter and oil, and the chicken broth I used.
If you swap the chicken broth for vegetable broth, or if you use a different brand of butter, the numbers will change a little bit. Always remember that portion size makes the biggest difference! These estimates are based on four hearty servings from the full recipe.
- Serving Size: 1 cup cooked
- Calories: 320
- Fat: 11g
- Saturated Fat: 6g
- Carbohydrates: 50g
- Protein: 6g
- Sodium: 450mg (This is the highest variable—it depends heavily on your broth!)
- Sugar: 1g
- Fiber: 1g
See? It’s a pretty balanced side dish when you look at it that way, especially if you are pairing it with lean protein. The sodium content can creep up if you use a super salty broth, so I always recommend tasting your broth before you add the extra half teaspoon of salt listed in the main ingredient list. You’re in control of that specific variable, which is a great way to keep your easy rice recipe perfectly tailored to your needs!
Share Your Thoughts on This Easy Rice Recipe
Now that you’ve made it through the steps and you’ve got that amazing, savory, fragrant garlic butter rice filling your house with wonderful aromas, I really want to hear what you think! This recipe is one of my absolute favorites to share because it’s so fast and so reliable, but your experience matters so much to me.
Did it work out perfectly on the first try? Did you manage to keep your hands off the lid while it was steaming? Even more importantly, what did you pair it with? I love getting new ideas for rice pairings for chicken or other main dishes. Did you try it with a steak from my recipes, or did you just enjoy it plain because it tasted so good?
Please take just a moment to rate this easy rice recipe below using a star system (1 star being, “Oh, Kate, what have you done?” and 5 stars being, “I’m making this forever!”). Also, drop a comment sharing your tips or questions. Every single comment truly helps other cooks who are just scrolling by, wondering if they should trust this recipe. It builds this wonderful community we are creating here at Kings Cook!
If you ever have a specific question about a step or ingredient substitution that hasn’t been covered, feel free to pop over to my Contact Page and send me a note directly. Happy cooking, everyone. I hope this becomes a staple on your table!
PrintEasy 30-Minute Garlic Butter Rice with Chicken Broth
Make flavorful garlic butter rice quickly. This simple side dish uses basic ingredients like white rice, butter, fresh garlic, and chicken broth for a rich, savory taste ready in under 30 minutes.
- Prep Time: 10 min
- Cook Time: 25 min
- Total Time: 35 min
- Yield: 4 servings 1x
- Category: Side Dish
- Method: Stovetop Cooking
- Cuisine: American
- Diet: Low Fat
Ingredients
- 1 tablespoon olive oil
- 4 tablespoons unsalted butter
- 4 cloves fresh garlic, minced
- 1 small yellow onion, finely chopped
- 1 1/2 cups long grain white rice, uncooked
- 2 1/2 cups chicken broth
- 1/2 teaspoon salt
- 1/4 teaspoon black pepper
- 2 tablespoons fresh parsley, chopped (for garnish)
Instructions
- Heat the olive oil and 2 tablespoons of the butter in a medium saucepan over medium heat.
- Add the chopped onion and cook until soft, about 3 minutes.
- Add the minced garlic and cook for 1 minute until fragrant. Do not let the garlic burn.
- Add the uncooked rice to the saucepan and toast, stirring constantly, for 2 minutes until the edges of the grains look slightly translucent.
- Pour in the chicken broth, salt, and pepper. Bring the mixture to a boil.
- Once boiling, reduce the heat to low, cover the saucepan tightly, and simmer for 15 to 18 minutes, or until all the liquid is absorbed. Do not lift the lid during this time.
- Remove the saucepan from the heat and let it stand, covered, for 5 minutes.
- Remove the lid. Add the remaining 2 tablespoons of butter and fluff the rice gently with a fork.
- Stir in the fresh parsley before serving.
Notes
- For fluffier rice, rinse the uncooked rice under cold water until the water runs clear before toasting it in step 4.
- This rice pairs well with grilled chicken, steak, or roasted vegetables.
- You can substitute vegetable broth for chicken broth if you prefer a vegetarian option.
Nutrition
- Serving Size: 1 cup cooked
- Calories: 320
- Sugar: 1
- Sodium: 450
- Fat: 11
- Saturated Fat: 6
- Unsaturated Fat: 5
- Trans Fat: 0
- Carbohydrates: 50
- Fiber: 1
- Protein: 6
- Cholesterol: 23