
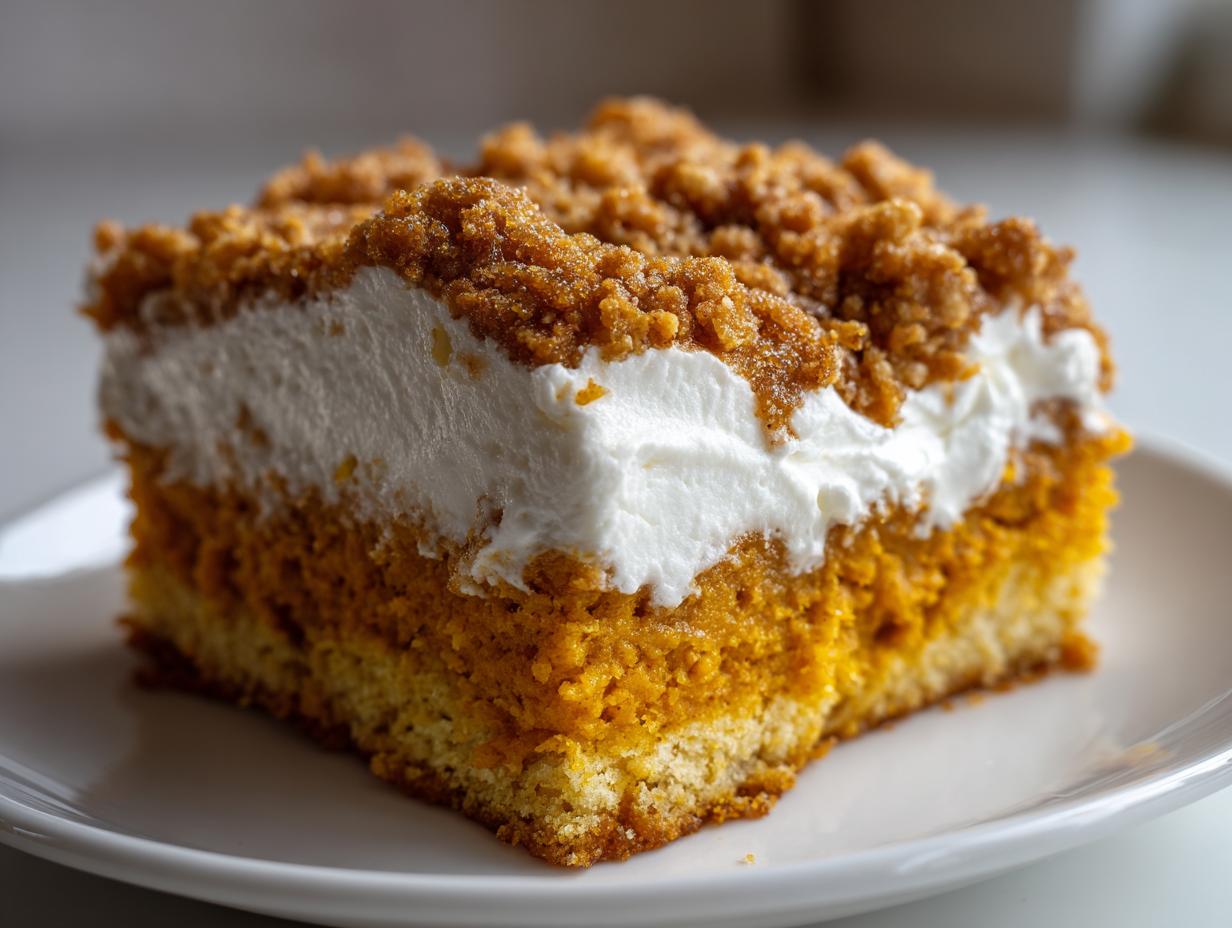
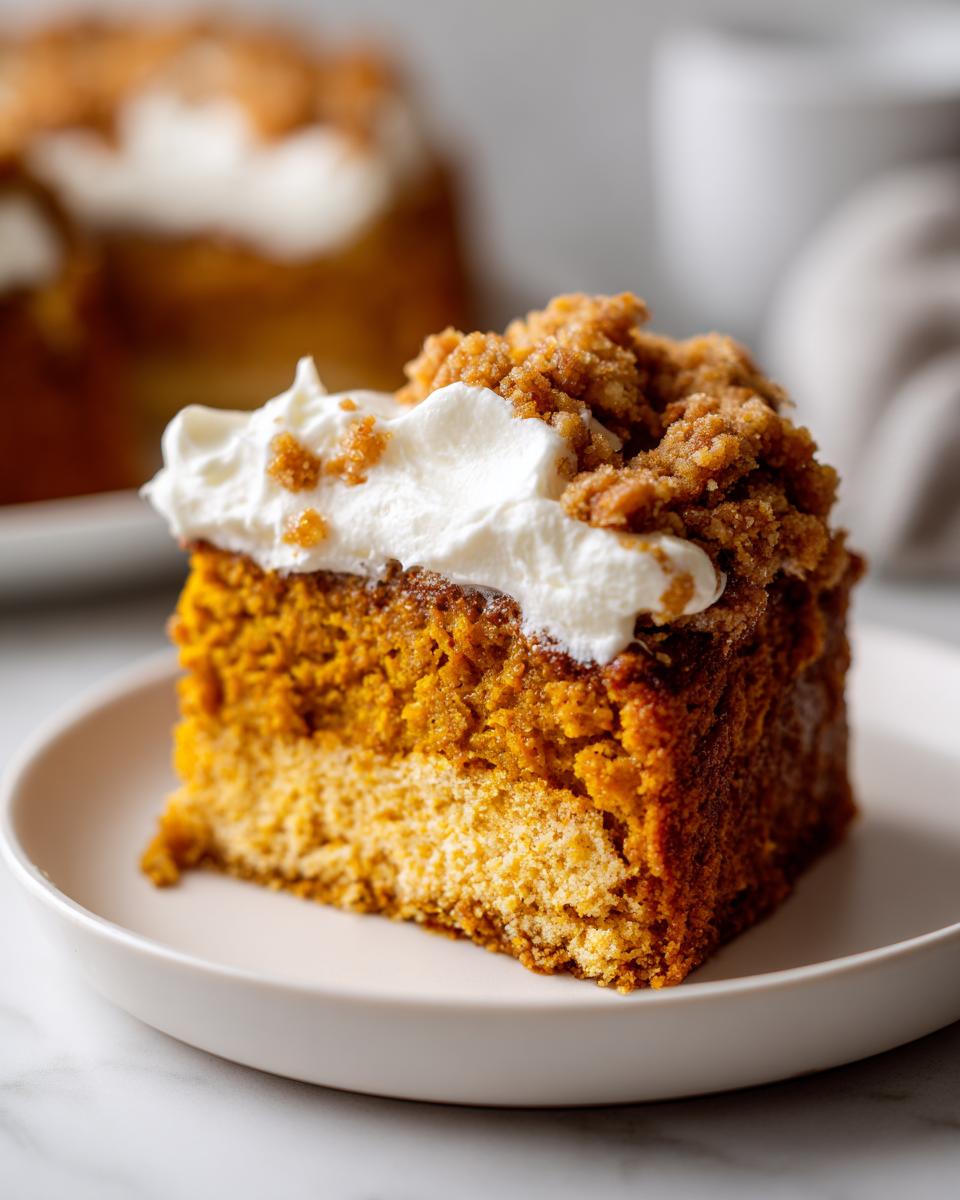
If you think fall baking has to mean spending all day wrestling with pie crusts or complicated layered cakes, I have amazing news for you! As we head into the busiest dessert season, we need recipes that deliver HUGE flavor without stressing us out. That’s precisely what this **pumpkin crunch** cake is all about. It’s a dream dessert because it gives you that perfect textural contrast—a creamy, warmly spiced pumpkin layer hugged by a buttery, crunchy topping. Trust me, I have tested this batch more times than I care to admit on busy weeknights, and it is absolutely a no-fail recipe that consistently gets rave reviews from everyone who tries it. If you love an easy dessert that always wows, you’ll want to check out my easy pumpkin bread recipe too!
- Why This Easy Pumpkin Crunch Cake Recipe Works (E-E-A-T Focus)
- Gather Your Ingredients for the Ultimate Pumpkin Crunch
- Step-by-Step: Making the Perfect Pumpkin Crunch Dessert
- Tips for a Foolproof Pumpkin Crunch Every Time
- Storage and Serving Suggestions for Your Pumpkin Crunch
- Variations on the Classic Pumpkin Crunch Dessert
- Frequently Asked Questions About Making Pumpkin Crunch
- Nutritional Estimate for This Crowd-Pleasing Pumpkin Treat
- Share Your Experience with This Pumpkin Crunch Recipe
- Nutritional Estimate for This Crowd-Pleasing Pumpkin Treat
- Share Your Experience with This Pumpkin Crunch Recipe
Why This Easy Pumpkin Crunch Cake Recipe Works (E-E-A-T Focus)
When I put a recipe on Kings Cook, it means I’ve made it until it’s absolutely foolproof. That’s my promise to you! This particular **pumpkin crunch** cake isn’t just delicious; it’s unbelievably reliable, which is everything when you’re hosting during the holidays. You can trust that the results will look and taste incredible, even if you’re brand new to baking.
Here’s why this recipe is the reigning champion of my fall baking lineup:
- It’s a true **crowd-pleasing pumpkin treat**. Seriously, one pan disappears every time!
- The prep time is so quick—we are talking about 20 minutes before it even sees the inside of the oven. That’s gold during Thanksgiving week.
- You get that amazing payoff of a perfectly **guaranteed texture** every single time. That contrast between smooth and crunchy is perfection.
- If you’re looking for the best pumpkin crunch dessert that doesn’t require a stand mixer or fancy techniques, this is it.
Gather Your Ingredients for the Ultimate Pumpkin Crunch
Okay, the best part about this **pumpkin crunch** recipe is how simple the ingredient list is. You probably have most of this stuff in your pantry already! We aren’t dealing with a dozen bowls or tricky items here. It’s a superstar dessert built on pantry staples.
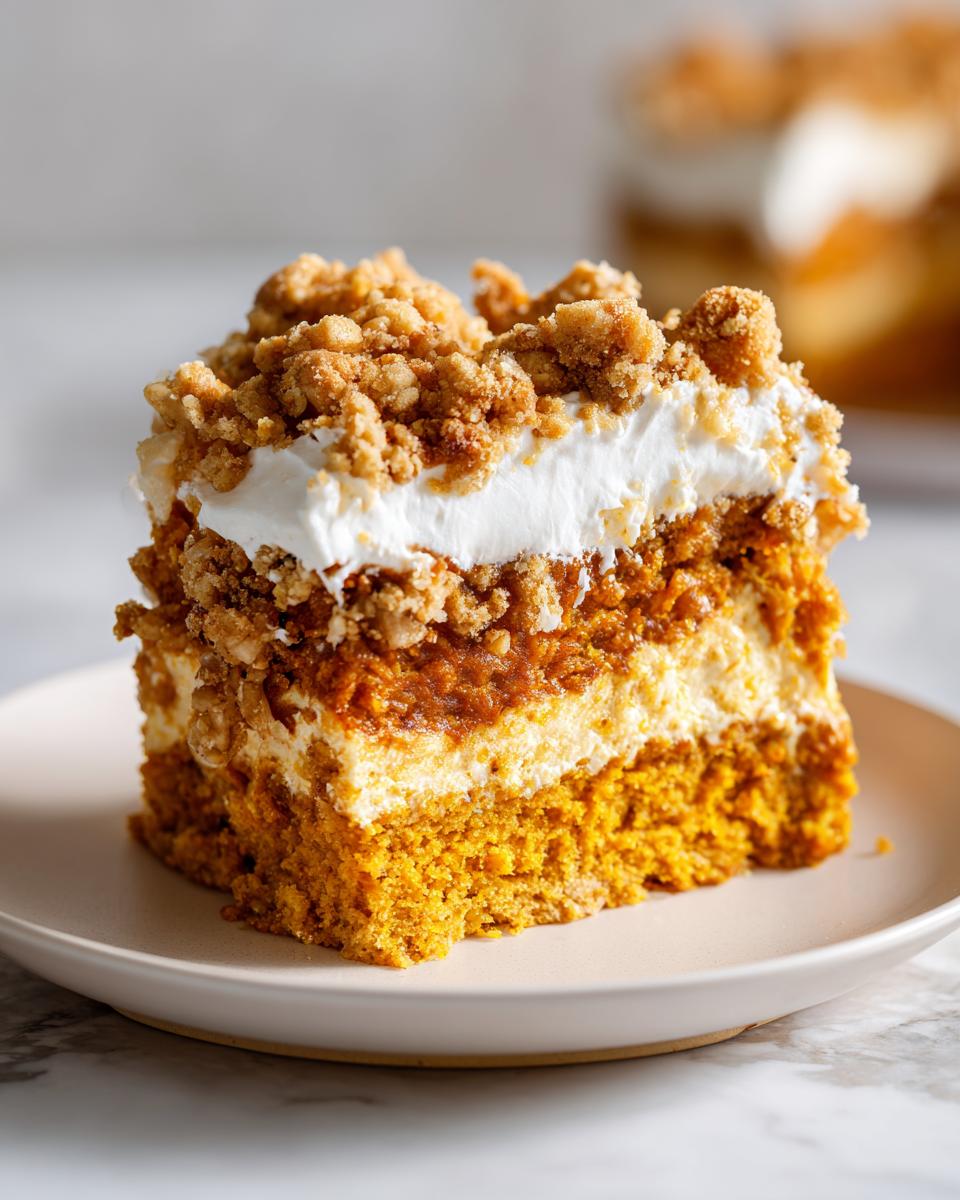
We are essentially making a crust/topping mix, a filling, and then adding the final topping after baking. Here’s exactly what you’ll need for 12 generous servings of this **layered pumpkin dessert**:
For the Buttery Pecan Streusel (Crust & Topping):
- 1 box (15.25 ounces) yellow cake mix. (Don’t overthink this; the yellow mix is classic here!)
- 1 cup chopped pecans. (If you hate pecans, you can absolutely use walnuts, but pecans hold that crunch better, which is why I stick to them!)
- 1/2 cup (1 stick) unsalted butter, melted. (Melt it gently; we don’t want it sizzling hot.)
For the Creamy Pumpkin Filling:
- 1 can (15 ounces) pure pumpkin puree. See, this is where you have to be careful! You want the *pure* stuff, not pumpkin pie filling. That’s the secret to nailing that amazing **creamy pumpkin filling recipe** without it tasting artificial.
- 1 can (14 ounces) sweetened condensed milk. This is what makes it thick and rich!
- 2 large eggs. Make sure these are at room temperature if you have time; it helps everything mix smoothly.
- 1 teaspoon ground cinnamon
- 1/2 teaspoon ground nutmeg
- 1 teaspoon vanilla extract
For the Final Topping:
- 1 container (8 ounces) frozen whipped topping, thawed. You’ll spread this on only after the cake has fully cooled down. No cheating on cooling time here!
That’s it! Once you’ve got these wholesome ingredients together, you’re practically ready to bake. You can read a bit more about how I select ingredients in my About Page if you’re curious!
Step-by-Step: Making the Perfect Pumpkin Crunch Dessert
This is where our magic happens! Because this gorgeous dessert is layered—a base, a filling, and a top—we need to tackle the components one by one. Don’t sweat the layers, though; it’s honestly even easier than making a standard cake. Remember to preheat your oven to 350 degrees F and lightly grease that 9×13 inch baking dish before you start mixing anything.
Preparing the Buttery Pecan Streusel Topping
First up is that crispy texture we all love! In a medium bowl, combine your dry yellow cake mix and those chopped pecans. Now, pour that melted butter right over the top. Use a fork—I mean *really* use it—and toss everything together until it looks like coarse, buttery crumbs. This is your key to that stunning **buttery pecan streusel topping**.
Quick check: You need to split this crumb mixture! Take about two-thirds of it and press it firmly into the bottom of your greased dish. That’s your base. Put the remaining one-third aside; that goes on top later. Don’t mix it up!
Creating the Smooth Creamy Pumpkin Filling
Time for the star! Grab a different bowl—we don’t want any cake mix residue in here. Whisk together the pure pumpkin, the sweetened condensed milk, the two eggs, cinnamon, nutmeg, and vanilla extract. Whisk until it’s completely smooth. This simple mixing process ensures you get that perfect, **creamy pumpkin filling recipe** that sets up beautifully and makes this a true **no-fail pumpkin crunch**.
Assembly and Baking the Pumpkin Crunch
Layering is simple: Pour that smooth pumpkin filling right over the base layer of crumbs you already pressed down. Then, grab that reserved one-third of the buttery pecan crumbs and sprinkle it—just sprinkle, don’t press!—evenly over the filling.
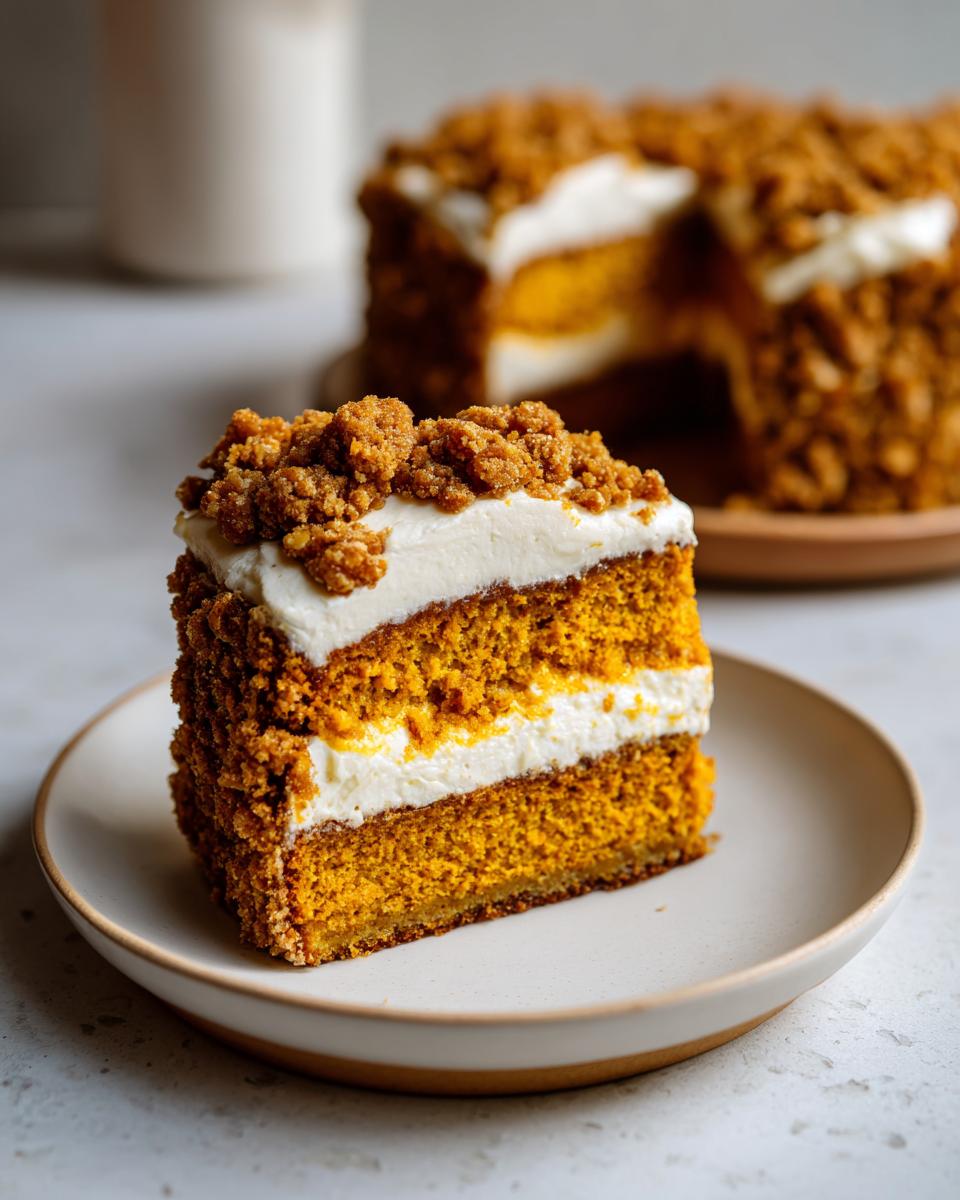
Pop it into the 350°F oven for about 45 to 55 minutes. You know it’s done when the topping is golden brown, and the center looks mostly set. The toothpick test is your guide here. Once it’s out, you absolutely must let this **layered pumpkin dessert** cool completely—that’s a good hour or two on the rack—before you even *think* about spreading on the whipped topping. Patience pays off!
For more simple baking inspiration, check out my tips for weeknight dinner recipes—sometimes you need a quick win before a big bake!
Tips for a Foolproof Pumpkin Crunch Every Time
I hear from so many people who worry this dessert won’t set up right, or they’ll lose that crucial crunch! Don’t you worry one bit. Baking, especially when you’re combining liquids and dry cake mixes like this, requires just a couple of little tricks I learned the hard way. Remember, the goal here is a perfectly set, sliceable dessert that still feels tender, not a liquid mess in the middle!
First, let’s talk about setting the filling. That sweetened condensed milk is doing a lot of heavy lifting, but those two eggs need time to work their magic. If you pull the dish out when the center still looks very jiggly, you’re going to get soup. Bake it until the edges look firm and the middle has just a tiny bit of wobble—like gelatin that’s *almost* set. The cooling time is just as important as the baking time, so don’t rush it! Cooling for that full hour on the counter before chilling is non-negotiable for a clean slice.
Next up: maximizing that crunch texture. You want that top layer to be golden, not burned, and you want the crust underneath to stay distinct. If you notice on your oven that the top is browning way faster than the center is setting, I highly recommend tenting that whole dish loosely with aluminum foil for the last 10 to 15 minutes of baking. That traps some heat but shields the crust from too much direct sun, keeping it from burning while the middle finishes cooking.
There’s also a whole world of inspiration out there, especially if you’re interested in regional takes! People often ask me about the famous ones from the islands. If you want to see an authentic local take, because this dessert is huge in Hawaii, you should definitely check out the history and recipes for the Hawaiian pumpkin crunch cake style for inspiration. Sometimes swapping the yellow cake mix for a spice cake mix offers a deeper flavor profile, too!
For general best practices in my kitchen, always refer back to my About Page—it covers all my core beliefs on reliable baking methods!
Storage and Serving Suggestions for Your Pumpkin Crunch
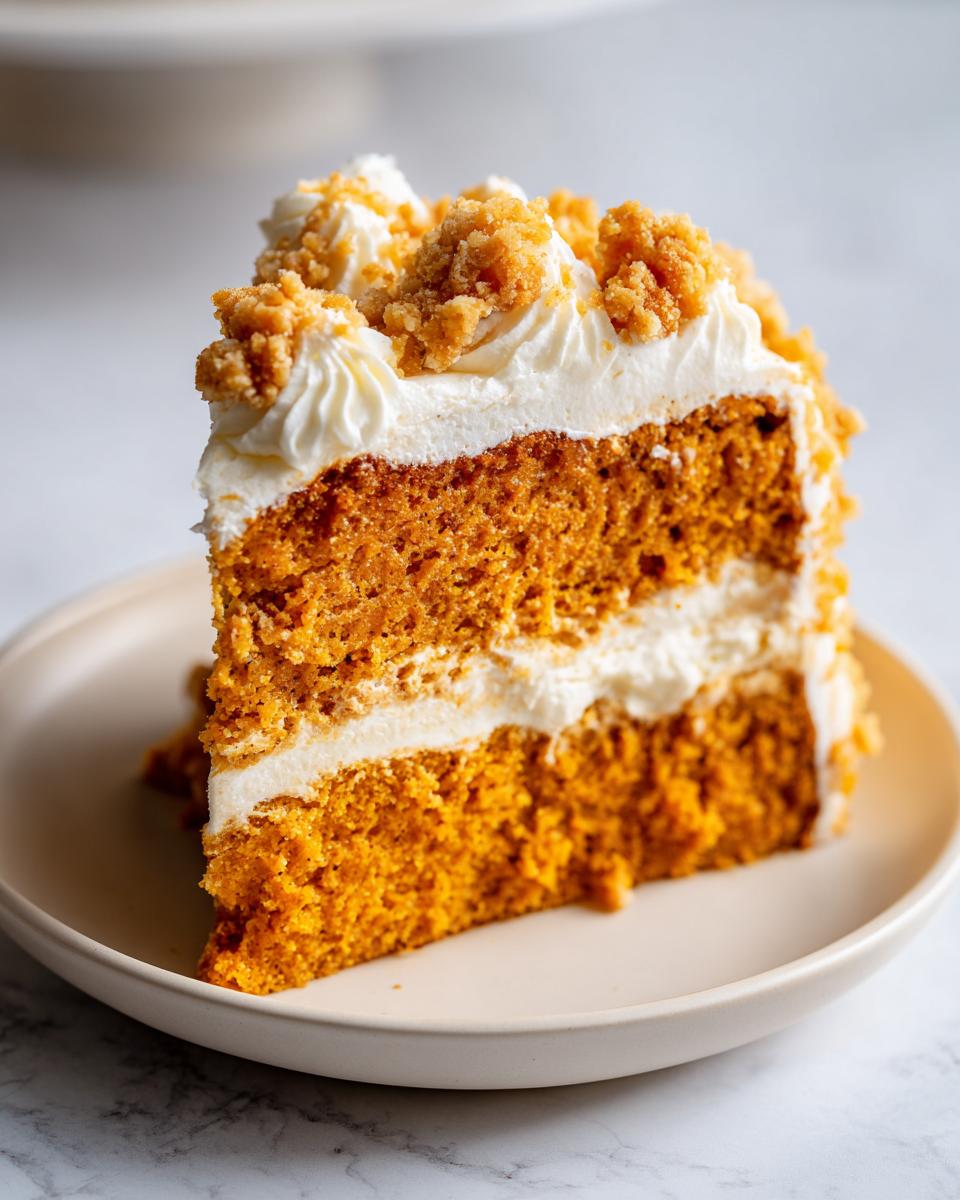
I need to be upfront about serving this beautiful **pumpkin crunch**. While it bakes up warm and smells incredible, you absolutely cannot cut into it right away! Cooling is mandatory—first on the counter for about an hour, and then it needs a solid two hours in the fridge. This chilling time is what lets that creamy pumpkin layer firm up so you can slice it neatly.
When serving, I love to pair this rich, **autumn spice dessert** with a strong cup of coffee or maybe an extra scoop of vanilla ice cream. It cuts the richness perfectly! If you have leftovers (unlikely, but I hope so!), cover the whole dish tightly with plastic wrap and keep it in the refrigerator. This treat stays wonderfully fresh, moist, and perfectly textured for about three, maybe four days when chilled. Don’t even think about warming it up; it’s 100% better cold straight from the fridge. For more incredible dessert ideas, take a look at my collection of best dessert recipes!
Variations on the Classic Pumpkin Crunch Dessert
Even though this recipe is a tried-and-true winner, I absolutely *love* when you all start customizing things! That’s the joy of home cooking, right? You can totally tweak this **pumpkin crunch** to match whatever mood you’re in, or whatever you happen to have on hand when the craving hits.
If you’re looking for something a little deeper than the classic yellow cake flavor, try swapping it out! Instead of the yellow cake mix, grab a spice cake mix. Because the spice mix already has cinnamon and nutmeg built into it, it just boosts that warm, cozy flavor profile—it makes it taste even more like an authentic **autumn spice dessert**!
And speaking of texture, we talked about pecans, but what if your kids hate them, or you’re trying to find a good pumpkin crisp alternative? You can swap those pecans out for chopped walnuts, or even slivered almonds. Sometimes, for fun, I just throw in some rolled oats along with the cake mix and nuts. It changes the texture slightly, making the topping feel a little more rustic, almost like a crisp topping!
Another simple adjustment I sometimes make is swapping out the vanilla extract for a little splash of almond extract. It’s unexpected, but that tiny hint of almond plays SO well with the cinnamon and pumpkin. Just be careful—a little almond extract goes a long, long way! These small changes keep things exciting year after year, even though the heart of this recipe stays the same.
Frequently Asked Questions About Making Pumpkin Crunch
I know that when you’re trying out a new favorite, like this **pumpkin crunch** masterpiece, you always have a few little questions pop up. Don’t worry, I’ve been there! These questions cover the common things I get asked about ingredients, timing, and how this sweet treat measures up to the famous versions out there. This should clear up anything you need to know to make this one of your go-to **simple Thanksgiving desserts**!
Can I make this Pumpkin Crunch Cake ahead of time?
Yes, you absolutely can, and I often recommend it! Remember how I stressed the chilling? That’s because the flavor actually deepens and the texture keeps setting up nicely overnight. You can bake the whole thing, let it cool completely, add the whipped topping, and chill it up to 24 hours before you plan to serve it. The only thing I wouldn’t do ahead of time is add the whipped topping, though it usually zips along fine for a few hours. If you are making it the day before, just cover it tightly and keep it chilled. It’s ready when you are!
What if I don’t have pecans for the buttery pecan streusel topping?
No pecans? No problem at all! While pecans give you that classic, slightly buttery crunch, we can easily substitute. Walnuts are my second choice, as they offer a similar hearty texture. If you are avoiding nuts completely, try swapping that cup of pecans for one cup of rolled oats mixed in with the cake mix and butter. It will create a slightly chewier, almost crisp-like topping, which is delicious in its own right! It won’t be the exact texture of the **buttery pecan streusel topping**, but it will still be fantastic.
Is this the same as Sam Choy’s famous Hawaiian Pumpkin Crunch Cake?
That’s a great question, and one I get asked a lot because the Hawaiian version is so popular! While this recipe shares the same incredible structure—creamy pumpkin base with a baked-on crunch topping—it is my slightly adapted, easier version built for the continental baker. The traditional **Hawaiian pumpkin crunch cake** often uses a spice cake mix instead of yellow, giving it a deeper flavor, and sometimes skips the final whipped topping layer that I love. If you want to dive into the authentic inspiration, I highly recommend looking up the details from Sam Choy’s recipes, like the one that was shared by Hawaii News Now!
My filling feels too runny even after baking. What went wrong?
If your **creamy pumpkin filling recipe** isn’t setting up, it usually comes down to one of two things. First, make sure you used pure pumpkin puree, not pumpkin pie mix, because the mix has added liquid. Second, and most often, it needs more time! Make sure you are baking long enough for the center to become mostly set, not just the edges. If the middle jiggles a lot when you gently shake the pan, give it another 5 to 10 minutes. Cooling and chilling time are your best friends here, too; that final chill locks everything into place so you get beautiful slices!
For more general troubleshooting, feel free to check my About Page!
Nutritional Estimate for This Crowd-Pleasing Pumpkin Treat
Now, I always tell people that when you are enjoying a rich, **layered pumpkin dessert** like this for a potluck or holiday, you likely aren’t counting every calorie, but it’s good to have an idea! Please remember that these numbers are just estimates based on standard grocery store ingredients, and they can change based on the exact brands you use. So take this as a general guide for one generous slice:
- Calories: Around 380
- Fat: About 20g
- Carbohydrates: Roughly 48g
- Protein: About 5g
- Sugar: Comes in around 35g (that’s the condensed milk and cake mix working their magic!)
It’s a decadent treat, but honestly, it’s worth every single bite when everyone asks for seconds!
Share Your Experience with This Pumpkin Crunch Recipe
I hope this recipe brings as much joy to your kitchen table as it does to mine! Seeing your creations is seriously the best part of my day. When you make this **pumpkin crunch**, don’t keep it a secret!
I’d be absolutely thrilled if you took a picture and shared it on social media, tagging me so I can see your beautiful layers. And please, please, leave a star rating and let me know in the comments below how it went. Did you use walnuts instead? Did you serve it with ice cream? Your feedback helps me know what works best for all of you who are building your own collection of **fall favorite pumpkin recipes**. If you ever need to get in touch, my contact page is always open here: https://kingscook.com/contact/. Happy baking, everyone!
PrintThe Ultimate Easy Pumpkin Crunch Cake Recipe for Fall
Make this simple, layered Pumpkin Crunch Cake. It features a moist pumpkin filling topped with a buttery yellow cake mix and pecan streusel crunch. This is a reliable, crowd-pleasing dessert perfect for Thanksgiving or any autumn gathering.
- Prep Time: 20 min
- Cook Time: 50 min
- Total Time: 170 min
- Yield: 12 servings 1x
- Category: Dessert
- Method: Baking
- Cuisine: American
- Diet: Vegetarian
Ingredients
- 1 box (15.25 ounces) yellow cake mix
- 1 cup chopped pecans
- 1/2 cup (1 stick) unsalted butter, melted
- 1 can (15 ounces) pure pumpkin puree
- 1 can (14 ounces) sweetened condensed milk
- 2 large eggs
- 1 teaspoon ground cinnamon
- 1/2 teaspoon ground nutmeg
- 1 teaspoon vanilla extract
- 1 container (8 ounces) frozen whipped topping, thawed (for topping)
Instructions
- Preheat your oven to 350 degrees F. Lightly grease a 9×13 inch baking dish.
- In a medium bowl, combine the dry yellow cake mix and chopped pecans. Pour the melted butter over the mixture and toss with a fork until the mixture resembles coarse crumbs.
- Press about two-thirds of this crumb mixture evenly into the bottom of the prepared baking dish. This forms your base layer.
- In a separate bowl, whisk together the pumpkin puree, sweetened condensed milk, eggs, cinnamon, nutmeg, and vanilla extract until smooth. This is your creamy pumpkin filling.
- Pour the pumpkin filling mixture evenly over the crust layer in the baking dish.
- Sprinkle the remaining one-third of the cake mix and pecan crumb mixture evenly over the pumpkin filling.
- Bake for 45 to 55 minutes, or until the topping is golden brown and the center is mostly set. A toothpick inserted near the center should come out mostly clean.
- Let the dessert cool completely on a wire rack, about 1 to 2 hours.
- Once cooled, spread the thawed whipped topping evenly over the top layer.
- Chill the Pumpkin Crunch Cake for at least 2 hours before slicing and serving.
Notes
- For a true Hawaiian Pumpkin Crunch style, you can substitute the yellow cake mix with a spice cake mix for a deeper flavor profile.
- This dessert tastes best when served cold. Allow ample time for chilling.
- If you prefer a crispier topping, you can bake the topping layer separately and sprinkle it on after the cake has cooled completely.
Nutrition
- Serving Size: 1 slice
- Calories: 380
- Sugar: 35
- Sodium: 250
- Fat: 20
- Saturated Fat: 8
- Unsaturated Fat: 12
- Trans Fat: 0
- Carbohydrates: 48
- Fiber: 2
- Protein: 5
- Cholesterol: 45