
Oh, friend, when life gets hectic and you need a sweet treat *right now*, you don’t need complicated recipes that call for three kinds of specialty flour. I get it! That’s why I developed and rigorously tested these unbelievably easy **cool whip cookies**. Seriously, if you think baking is intimidating, these will change your mind completely. We are talking about using just three common pantry staples to whip up the softest, fluffiest cookies you’ve ever experienced. They come together faster than ordering takeout, and because everything here has to be reliable, you can trust me—these are foolproof, melt-in-your-mouth magic every single time.
- Why You Will Love These Simple Cool Whip Cookies
- Gathering Your Ingredients for Cool Whip Cookies
- Step-by-Step Instructions for Perfect Cool Whip Cookies
- Expert Tips for Making the Best Airy Cookies Recipe
- Storage and Reheating Instructions for Whipped Topping Cookies
- Making Cool Whip Cookies for Holiday Baking Hacks
- Serving Suggestions for Quick Dessert Ideas
- Frequently Asked Questions About These Simple Baking Recipes
- Nutritional Snapshot of One Cool Whip Cookie
Why You Will Love These Simple Cool Whip Cookies
Life is too short for fussy baking, especially when you need a treat fast. These **cool whip cookies** are my go-to when I need something impressive right away. They check every box for easy baking, and honestly, the texture is just unreal.
Maximum Simplicity: Only 3 Ingredient Cool Whip Cookies
- You truly only need three staple items. If you have cake mix, egg, and whipped topping, you’re ready to go! This makes them the perfect recipe for beginners or those emergency sweet cravings. Forget complex creaming methods; these are the best 3 ingredient cookies around.
Texture That Melts In Your Mouth
- The Cool Whip doesn’t bake out entirely; it keeps the batter incredibly soft and airy. The resulting cookie is fluffy, light, and has that wonderful quality of being a true melt in your mouth cookie. They don’t spread much, meaning you get a perfect pillow shape every time.
Gathering Your Ingredients for Cool Whip Cookies
Okay, this is maybe the best part because it requires almost no effort! Since this recipe relies on just a few items, the quality and state of those ingredients really matter, even for something this simple. I’ve tested this formula countless times to make sure the ratios are perfect for that airy, beautiful **cool whip cookie** texture. You’ll see that the recipe calls for only four things total, including the optional sugar coating!
Ingredient Clarity and Preparation Notes
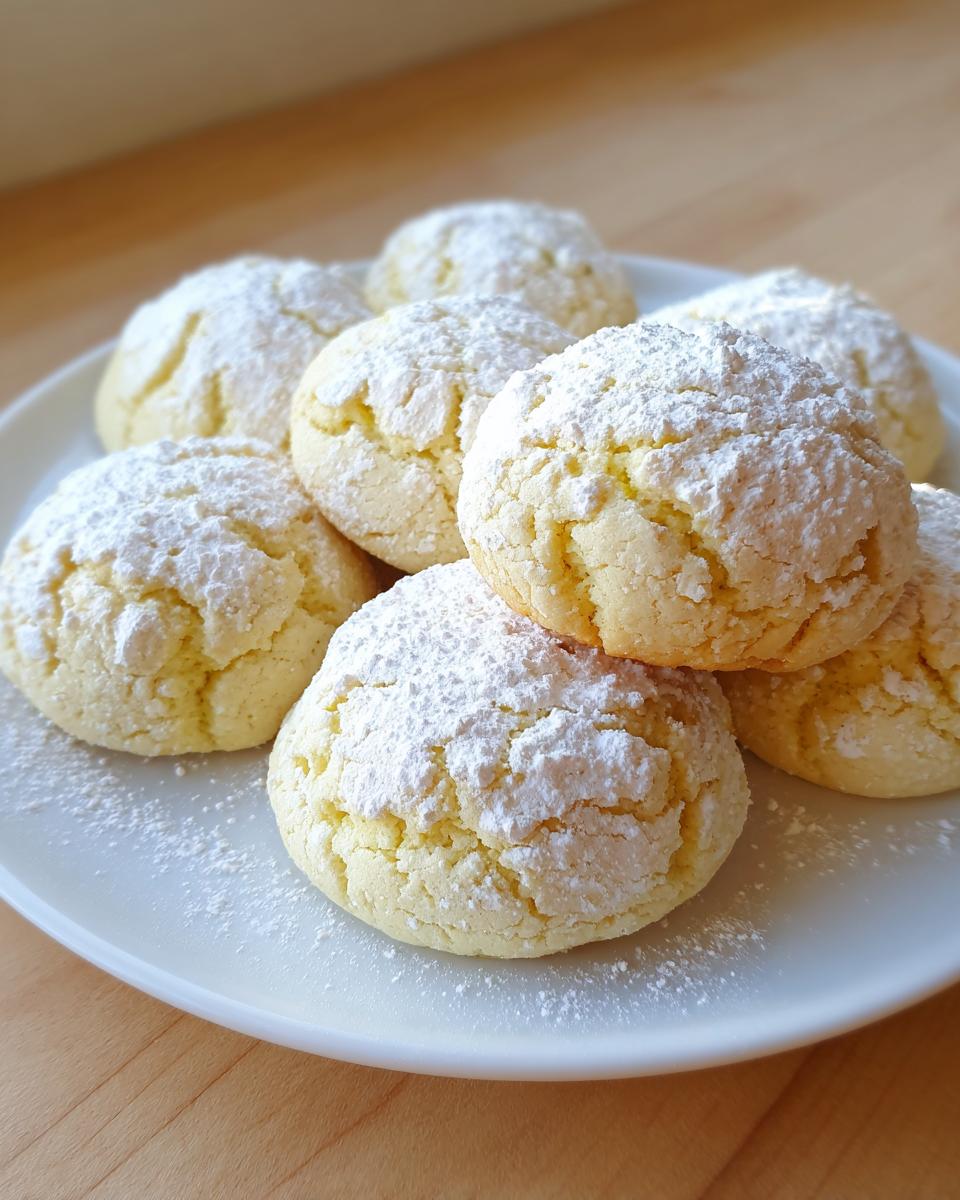
We need to make sure you have the right stuff ready before you even think about turning on the oven. First, the cake mix—you’ll grab one standard 15.25-ounce box. Trust me; any flavor works wonders here, but I always start with vanilla or yellow cake mix when I want a pure, sweet base.
The absolute key here is the whipped topping. You *must* use the frozen kind, like Cool Whip, and it needs to be fully thawed. If it’s still icy or half-frozen when you mix it, the dough won’t come together right, and you’ll end up with streaks instead of smooth dough. Plus, we’re skipping butter entirely, which is another win for quick cleanup!
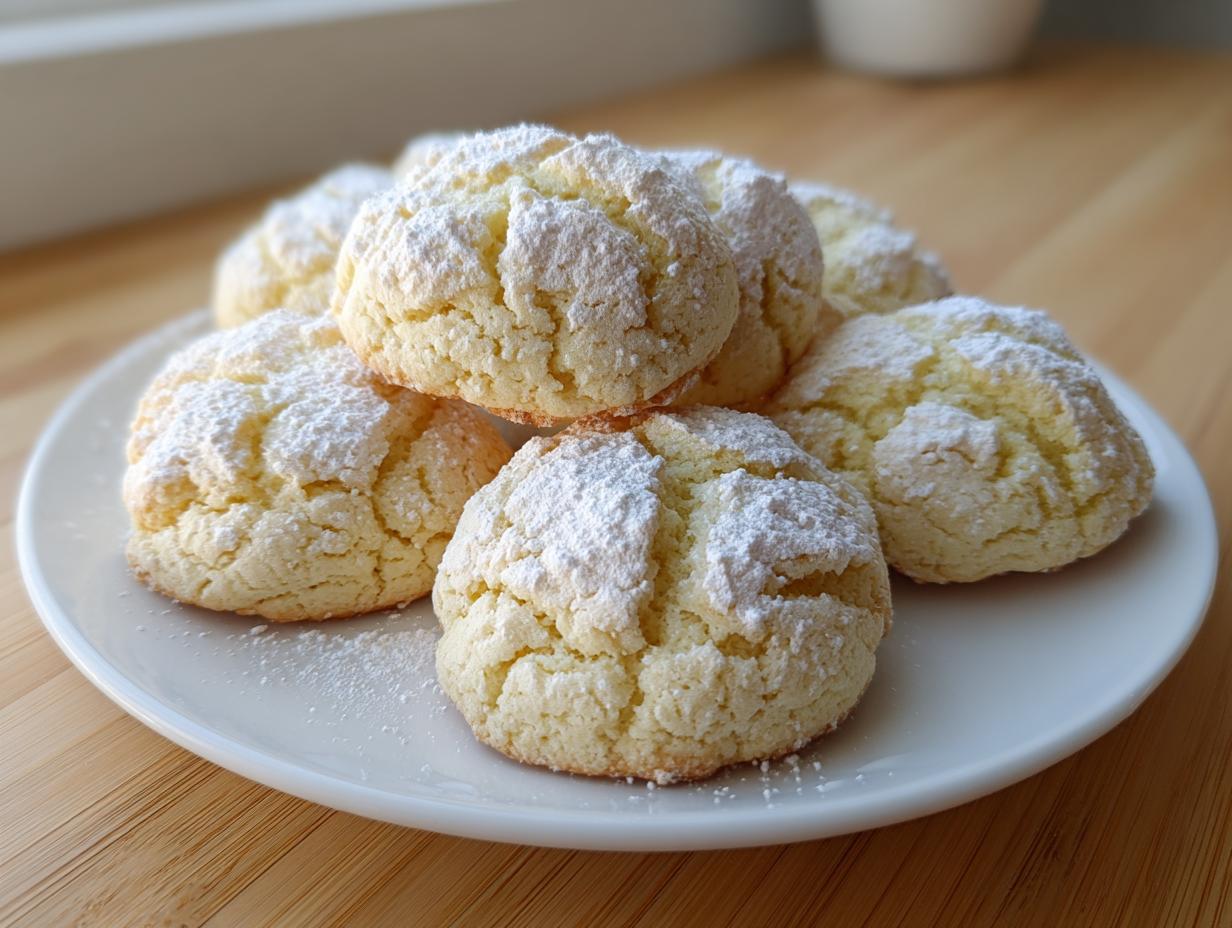
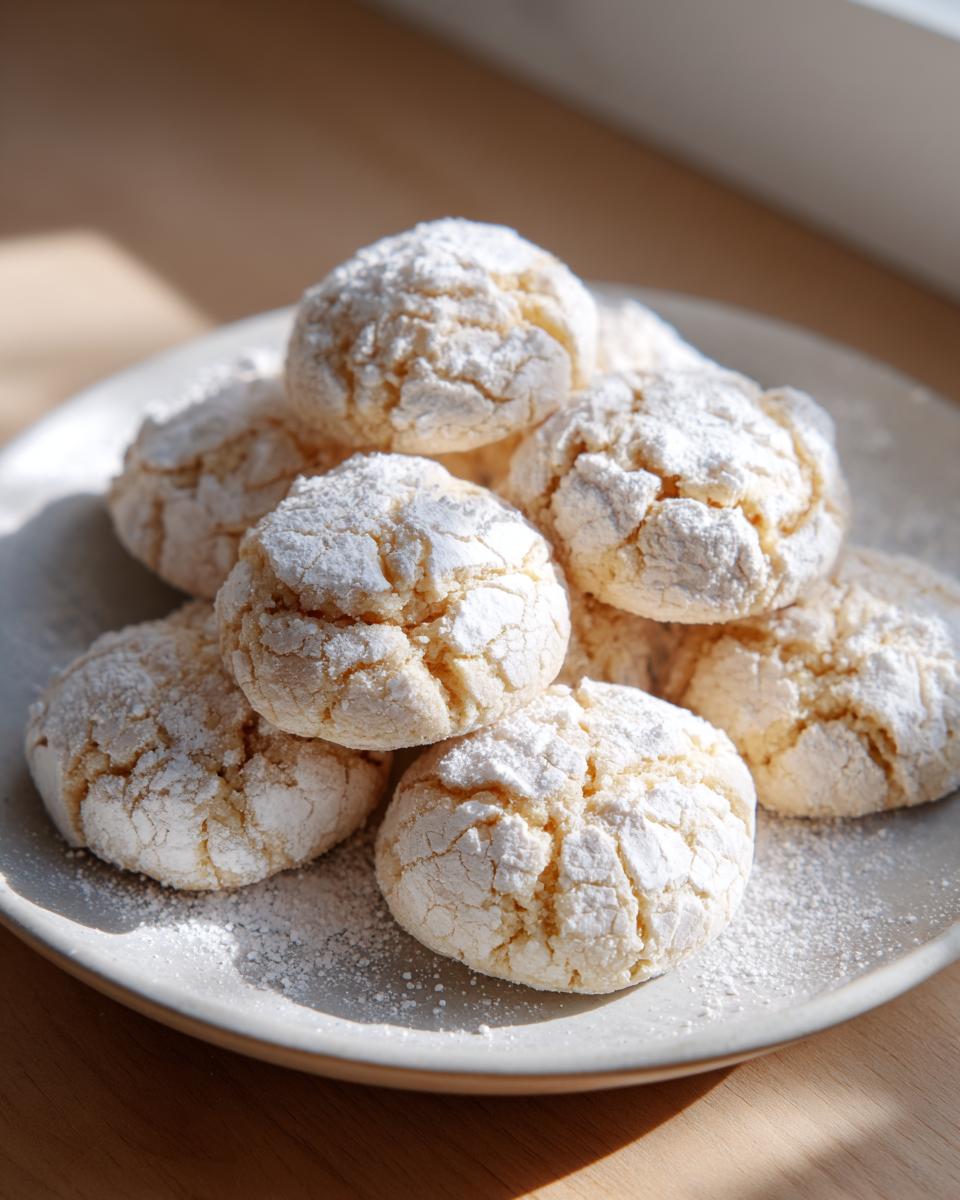
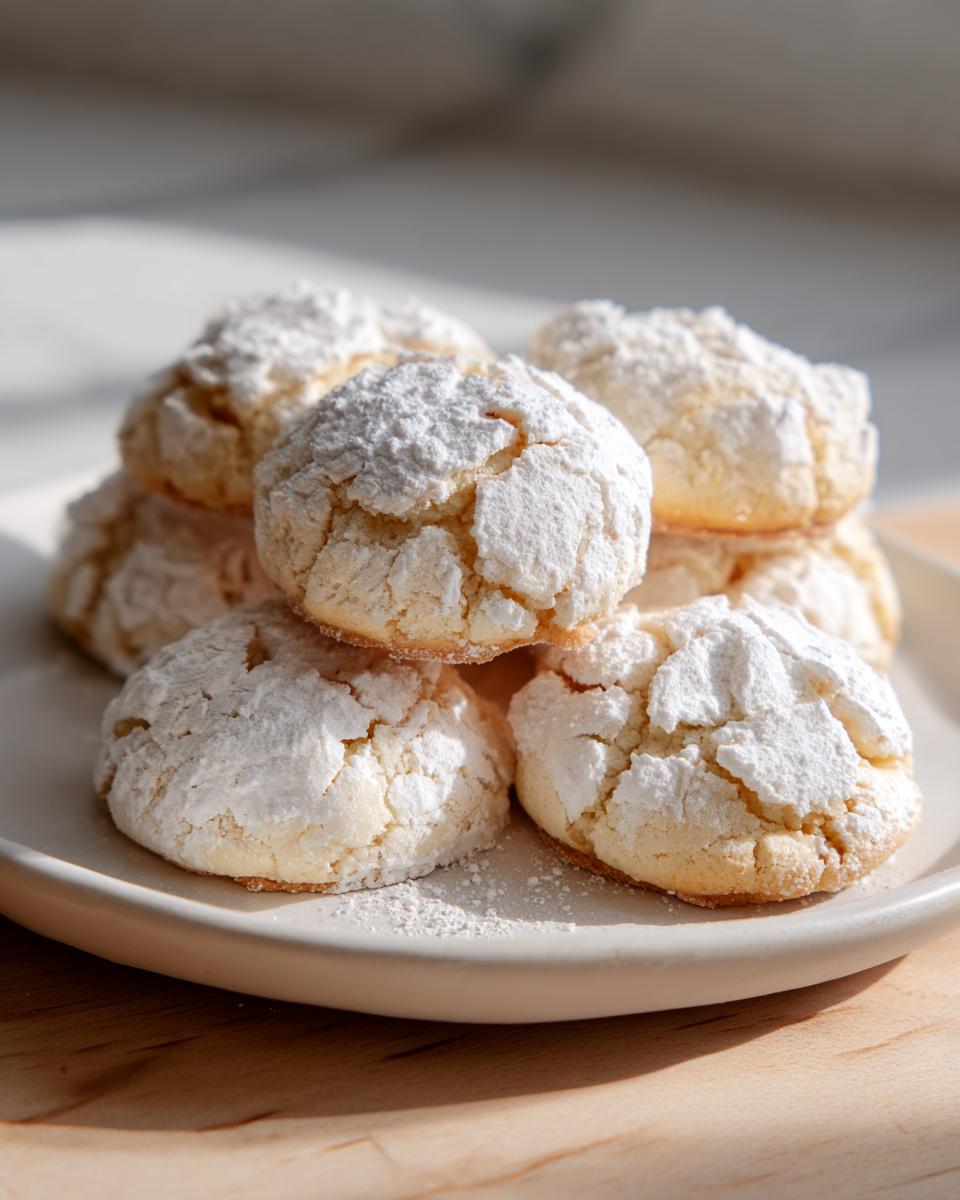
Finally, just one large egg binds everything. Oh, and if you want those gorgeous, snowy, crackled tops—the hallmark of a classic crinkle cookie—make sure you have a bowl of powdered sugar ready for rolling. It’s completely optional, but honestly? It’s what takes these **cool whip cookies** from simple to stunning!
Step-by-Step Instructions for Perfect Cool Whip Cookies
Alright, let’s get these amazing **cool whip cookies** into the oven! Don’t let the simplicity fool you; following these steps ensures you get that signature light, airy texture that makes this recipe so famous. Remember, we are working with a very delicate dough here, so a little gentleness goes a long way!
Mixing the Dough for Fluffy Cookies
First things first: get your oven warmed up to 350°F (175°C) and line your baking sheets with parchment paper. Trust me on the parchment; it makes cleanup a breeze. Now for the mixing! Dump your dry cake mix right into a big bowl. Then, add in that thawed whipped topping. Mix those two together first until they are just combined—it will look crumbly, almost like damp sand—and then toss in your single egg. Stir just until everything comes together into a soft dough. I can’t stress this enough: **do not overmix**! Overmixing develops gluten and you’ll lose that fluffy quality we are striving for.
Shaping and Rolling Your Cool Whip Cookies
If you want those show-stopping, snow-covered tops, this is where the magic happens! Have a shallow dish filled with powdered sugar ready to go. Scoop out rounded tablespoons of that soft dough and gently roll them between your palms to form neat little balls.
If you’re skipping the sugar, you can throw some sprinkles on now! But if you want that true “hack” look, roll the dough ball completely in the powdered sugar until it’s totally coated. These become fantastic crinkle cookies easy to make! Space them about 2 inches apart on your prepared sheets.
Baking Time and Cooling
Pop them into your preheated oven for just 9 to 12 minutes. Since the dough is so unique, you’re looking for specific visual cues: the edges should look set, but the centers will still look wonderfully soft. If you’re aiming for a slightly chewier cookie, pull them closer to the 9-minute mark. Don’t worry, they firm up while resting!
Crucially, let them sit right there on the hot baking sheet for about 5 minutes after they come out. This lets them stabilize so they don’t crumble when you try to move them. After that quick rest, transfer them carefully to a wire rack to cool completely. If you’re ready for more tips on keeping your cookies perfect, check out my guide to perfect chocolate chip cookies—the techniques overlap!
Expert Tips for Making the Best Airy Cookies Recipe
Now that you know the basic steps for these incredible **cool whip cookies**, I want to share a few things I’ve learned over all my testing sessions. I’m big on making sure you have confidence in the results, and sometimes tiny adjustments make a huge difference in the final texture. These little hacks are what move a recipe from “good” to “must-make-every-week!”
Adjusting Texture: Chewy vs. Fluffy Cool Whip Cookies
Because the whipped topping creates such a unique structure, you have a fantastic amount of control over whether you want a slightly chewy cookie or one that’s truly pillowy and light. If you are someone who likes a little resistance when you bite into a cookie—something that feels substantial—I recommend pulling them out right at 9 minutes. They should still look a little soft in the center, but they’ll firm up beautifully as they cool on the sheet. That brief resting time is key for a chewy result.
On the flip side, if you want that truly melt-in-your-mouth, airy cookie experience, bake them closer to the 12-minute mark. You want the edges to look definitely set before you even think about pulling them out. Either way, remember they bake fast, so keep an eye on that oven! These cookies are so quick, they’re basically instant gratification!
Flavor Variations Using Cake Mix Hacks
Seriously, you can turn this simple recipe into a huge flavor playground just by swapping out the boxed mix. This is where the true fun of cake mix cookies hacks comes in! If you use chocolate cake mix, you end up with these dark, rich, fudgy little spheres—dust them in powdered sugar and they look like dark crinkle cookies. It’s amazing.
Want something bright for spring? Use lemon or even funfetti cake mix! The little sprinkles inside the funfetti mix bake up beautifully, especially if you skip the powdered sugar coating and just let them be. I love that you can create all these wildly different **cool whip cookies** with zero extra effort. If you are looking for even more ways to decorate basic doughs, be sure to see my notes on how I ice my sugar cookies; some of those smooth icing techniques would look lovely on these plain spheres!
Storage and Reheating Instructions for Whipped Topping Cookies
Because these **cool whip cookies** are so soft and airy—that’s the beauty of them!—we have to be a little careful with how we store them so they don’t deflate or get sticky. Unlike a chewy cookie that hangs out on the counter for days, these prefer a little more consideration for lasting freshness.
The absolute best way to keep them fresh is to store them in an airtight container at room temperature. They’re so simple that they don’t require refrigeration, and honestly, putting them in the fridge can sometimes make them taste a little stale faster, which is the opposite of what we want!
When stacking them in the container, I always place a small piece of wax paper or parchment paper between the layers. This prevents the powdered sugar coating—if you used it—from sticking to the cookie above it, keeping those pretty little cracks intact. They are actually best the day they are baked, but they should stay wonderfully soft for about three to four days if stored correctly. If you need to bring them back to life after a couple of days, just pop one on a microwave-safe plate for about 5 to 8 seconds. That tiny bit of warmth makes them feel fresh-from-the-oven soft again!
Making Cool Whip Cookies for Holiday Baking Hacks
You know how much I love finding ways to simplify holiday baking? Between all the family traditions and the endless party planning, sometimes you just need a recipe that delivers maximum festive cheer with minimal brainpower. That’s where these **cool whip cookies** shine brightest! They are absolutely perfect for quick contributions to cookie swaps or when you realize you promised treats for an impromptu office party tomorrow.
If you skip rolling these in the powdered sugar—which is totally fine if you want a less sweet cookie—you open up a whole new world for **holiday baking hacks**! This is your chance to personalize them for whatever gathering you’re attending. Think about what flavors scream “holiday” to you.
For a classic Christmas look, you can mix a half teaspoon of peppermint extract right into the dough when you add the egg. They bake up lighter and fluffier, and then you just top them with some festive red and green sprinkles *before* they go into the oven. Imagine a tray full of those light, fluffy mounds dotted with sparkle—wow! Or, if you’re making chocolate **cool whip cookies**, a tiny dash of orange zest makes them taste like a fancy chocolate confection.

These simple swaps make them feel custom-made for the season without adding any extra mixing time. They are just as good as my richer, more intense recipes like those gooey butter cookies, but they come together in less than half the time. Easy, festive, and so utterly soft!
Serving Suggestions for Quick Dessert Ideas
Sometimes the hardest part of baking something quick is figuring out what to pair it with, right? Since these **cool whip cookies** have such a light, airy texture, they scream for a beverage that can handle that softness without being too heavy. They are truly the champions of **quick dessert ideas** when you need something impressive but fast.
If you are making a batch of the classic vanilla or yellow cake mix cookies—especially rolled in that snowy powdered sugar—honestly, a tall glass of cold milk is the perfect companion. It’s classic for a reason! The milk cools the cookie down just enough so you can really enjoy that melt-in-your-mouth experience.
But if you’re serving these as an easy finale to a dinner party, I have a couple of other suggestions. The lighter texture pairs beautifully with something acidic or citrusy to cut through the sweetness. Think about making a pot of lightly sweetened iced tea, or even pairing them with a slightly tart fruit salad on the side.
For the adults who want something a bit special, I often make a simple, slightly sweet vodka fizz or just a light Moscato when serving these. If you need inspiration for what to sip alongside your simple treats, I always keep a few favorite easy recipes handy over on my drink and cocktail recipes page. A light, bubbly drink and these soft cookies? Perfection, and hardly any effort at all!
Frequently Asked Questions About These Simple Baking Recipes
It’s totally normal to have questions whenever you try a new baking “hack,” even when the recipe is this straightforward! When I first tested these **cool whip cookies**, I had a whole list of substitution worries too. Don’t fret—I’ve answered the most common things folks ask below, so you feel completely confident before mixing up your batch.
Can I make these cool whip cookies without egg?
This is a tough one, and my honest answer is that I wouldn’t recommend it for this specific recipe. The egg does a lot of heavy lifting here! Since we aren’t using any butter or commercial chemical leaveners like baking soda or powder, that single egg is responsible for binding the wet (whipped topping) and the dry (cake mix) components together, giving the dough just enough structure so it doesn’t turn into a puddle in the oven. If you skip it, you’re likely going to end up with a flat, oily mess rather than our beloved **fluffy cookies**.
What is the best cake mix to use for fluffy cookies?
The good news is that almost any standard 15.25 oz boxed cake mix works perfectly! Yellow, white, or even chocolate mixes give fantastic results. People often ask if they need a “fluffy” cake mix, but honestly, the hero here is the whipped topping. That stabilized topping is what traps the air and creates that puffy texture. So go ahead and use whatever flavor you’re craving! It’s one of the best parts of these **minimal ingredient desserts**.
Can I use heavy cream instead of Cool Whip?
No, you really can’t substitute liquid heavy cream for the thawed whipped topping, and here’s why: Cool Whip (or any high-quality frozen whipped topping) has stabilizers built in. When it thaws, it holds a light, airy shape that mixes in beautifully with the cake powder to form a dough. If you tried to use liquid heavy cream, you’d end up adding far too much moisture too quickly, and you wouldn’t get that signature soft dough texture required for great **cool whip cookies**. You’d just have sweet, sloppy batter.
Nutritional Snapshot of One Cool Whip Cookie
I always like to give a little peek at what’s inside, even when we are cheating our way to glorious cookies! Because these **cool whip cookies** are so wonderfully simple—just cake mix, an egg, and whipped topping—the nutrition label is surprisingly straightforward. It’s nice to know exactly what you’re enjoying when you grab one of these incredibly soft treats.
But please remember, these numbers are just estimates! Since we are using a boxed cake mix, which can vary wildly based on brand and flavor, these figures are based on averages for a standard serving size of one cookie. If you skip the powdered sugar roll, your sugar and carb counts will dip slightly, just a little kitchen note for you!
- Serving Size: 1 cookie
- Calories: 140
- Sugar: 16g
- Fat: 6g (with 3g being saturated fat)
- Carbohydrates: 20g
- Protein: 2g
See? Not bad at all for something that tastes this satisfying! Enjoy them guilt-free, especially since they qualified as one of the easiest **minimal ingredient desserts** you’ll ever make. They really are a win-win for busy weeknights and sweet cravings!
PrintEasy 3-Ingredient Cool Whip Cookies

You can make these soft, fluffy cookies using just three pantry staples: cake mix, frozen whipped topping, and an egg. They are quick to prepare and yield a melt-in-your-mouth texture perfect for last-minute treats.
- Prep Time: 10 min
- Cook Time: 12 min
- Total Time: 22 min
- Yield: 24 cookies 1x
- Category: Dessert
- Method: Baking
- Cuisine: American
- Diet: Vegetarian
Ingredients
- 1 box (15.25 ounces) cake mix (any flavor)
- 1 container (8 ounces) frozen whipped topping, thawed
- 1 large egg
- Powdered sugar, for rolling (optional)
Instructions
- Preheat your oven to 350°F (175°C). Line baking sheets with parchment paper.
- In a large bowl, combine the dry cake mix and the thawed whipped topping. Mix them together until just combined.
- Add the egg to the mixture and stir until a soft dough forms. Do not overmix.
- If you want crinkle cookies, place powdered sugar in a shallow dish.
- Scoop rounded tablespoons of dough and roll them into balls. If using powdered sugar, roll each ball completely in the sugar until coated.
- Place the dough balls about 2 inches apart on the prepared baking sheets.
- Bake for 9 to 12 minutes, or until the edges are set. The centers will look soft.
- Let the cookies cool on the baking sheet for 5 minutes before transferring them to a wire rack to cool completely.
Notes
- You can use any flavor of cake mix for variety, such as chocolate, vanilla, or lemon.
- For a chewier cookie, slightly underbake them. For a fluffier cookie, bake closer to 12 minutes.
- If you skip rolling them in powdered sugar, these are excellent for decorating with sprinkles before baking.
Nutrition
- Serving Size: 1 cookie
- Calories: 140
- Sugar: 16
- Sodium: 150
- Fat: 6
- Saturated Fat: 3
- Unsaturated Fat: 3
- Trans Fat: 0
- Carbohydrates: 20
- Fiber: 0
- Protein: 2
- Cholesterol: 15