
The invitations are out, the calendar is circled, and suddenly you realize you need a truly impressive appetizer that doesn’t require you to slave over a hot stove for hours. Does that sound familiar? Oh, I’ve been there! When game day rolls around or the holidays start ramping up, the pressure to create amazing party finger foods can feel huge. That’s exactly why I perfected this cheese ball recipe. Trust me, this isn’t some fussy, complicated dip. This is the simple, reliable showstopper you can whip up the day before. Check out my main guide on all things cheese ball recipe here!
For years, I’ve tested every blend of cheese and seasoning to make absolutely sure this classic version is the best. It’s rich, it’s savory, and it always disappears first. When you’re hosting, you need recipes that work every single time, and this one is rock solid. If you’re tired of reading complicated guides, just follow these straightforward steps for a guaranteed crowd-pleasing appetizer.
- Why This Classic Cheese Ball Recipe is Your New Go-To Party Finger Food
- Ingredients for the Best Cheese Ball Recipe
- How to Prepare This Simple Cheese Ball Recipe Step-by-Step
- Tips for the Ultimate Cheddar Cheese Ball Success
- Flavor Variations for Your Cheese Ball Recipe
- Serving Suggestions: What to Pair with Your Cheese Ball Recipe
- Storage and Reheating Instructions for This Cheese Ball Recipe
- Frequently Asked Questions About the Classic Cheese Ball Recipe
- Quick Facts and Estimated Nutrition for This Cheese Ball Recipe
Why This Classic Cheese Ball Recipe is Your New Go-To Party Finger Food
Honestly, when hosting, the less time I spend fussing right before guests arrive, the better! This cheddar cheese ball is what I like to call foolproof entertaining. It truly hits that sweet spot between looking fancy and being ridiculously easy. It’s the one flavor profile that just works for everyone, from coworkers at a holiday party to family during the Super Bowl.
Here are the main reasons I rely on this one every single time:
- It’s the ultimate make ahead party snack. Seriously, you make it, wrap it, and forget it until serving day!
- It’s an undeniably easy holiday appetizer that everyone flocks to. Tell people it’s a classic cream cheese appetizer and they line up.
- It involves zero baking! You literally just mix and chill.
I remember one year during my Aunt Carol’s huge anniversary party—everything was going wrong with the main course. I was sweating bullets! But because I had made this cheese ball two days before and tucked it away, I quickly rolled it in pecans, set out some pretzels, and suddenly, everyone was calm and happy again, gathered around that beautiful appetizer centerpiece. It saved my bacon that night! If you love that kind of stress-free success, you might also want to check out my jalapeño poppers recipe, too!
Ingredients for the Best Cheese Ball Recipe
When we talk about the best cheese ball recipe, we’re talking about respecting the ingredients. You don’t need twenty things here; you need the *right* things. I always make sure to use sharp cheddar. Why sharp? Because the mild stuff just gets lost when mixed with cream cheese, and we want that flavor to pop!
You’ll need to have these items ready before you even think about mixing:
- 8 ounces cream cheese, and this is important, it must be softened. That means leaving it out on the counter for about an hour before you start.
- 8 ounces sharp cheddar cheese, finely shredded. I shred my own; the pre-shredded stuff has anti-caking agents that make the texture just a little off.
- 1 teaspoon Worcestershire sauce—this is my secret weapon for depth!
- 1/2 teaspoon garlic powder and 1/4 teaspoon onion powder for that savory kick.
- A dash of salt and pepper, because flavor needs balancing.
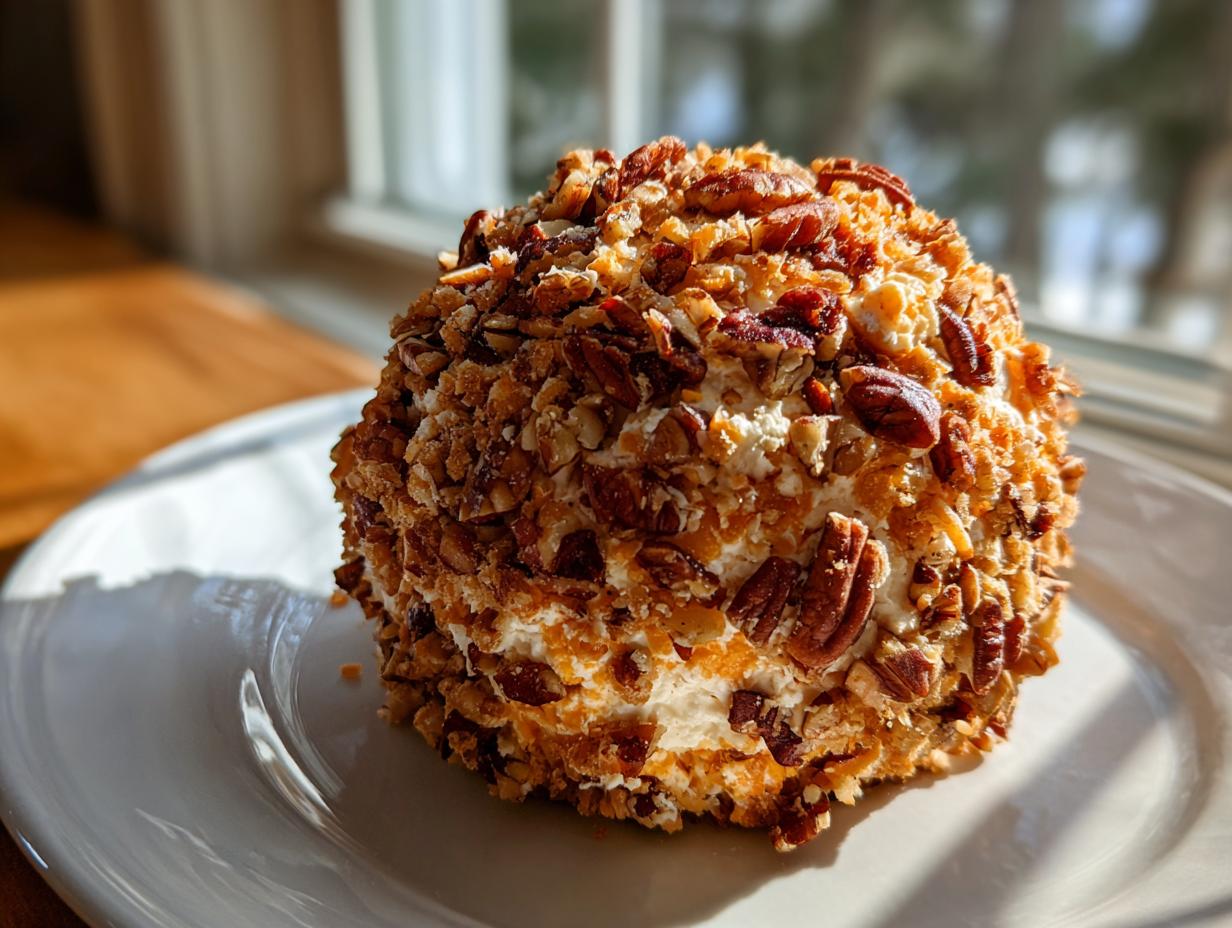
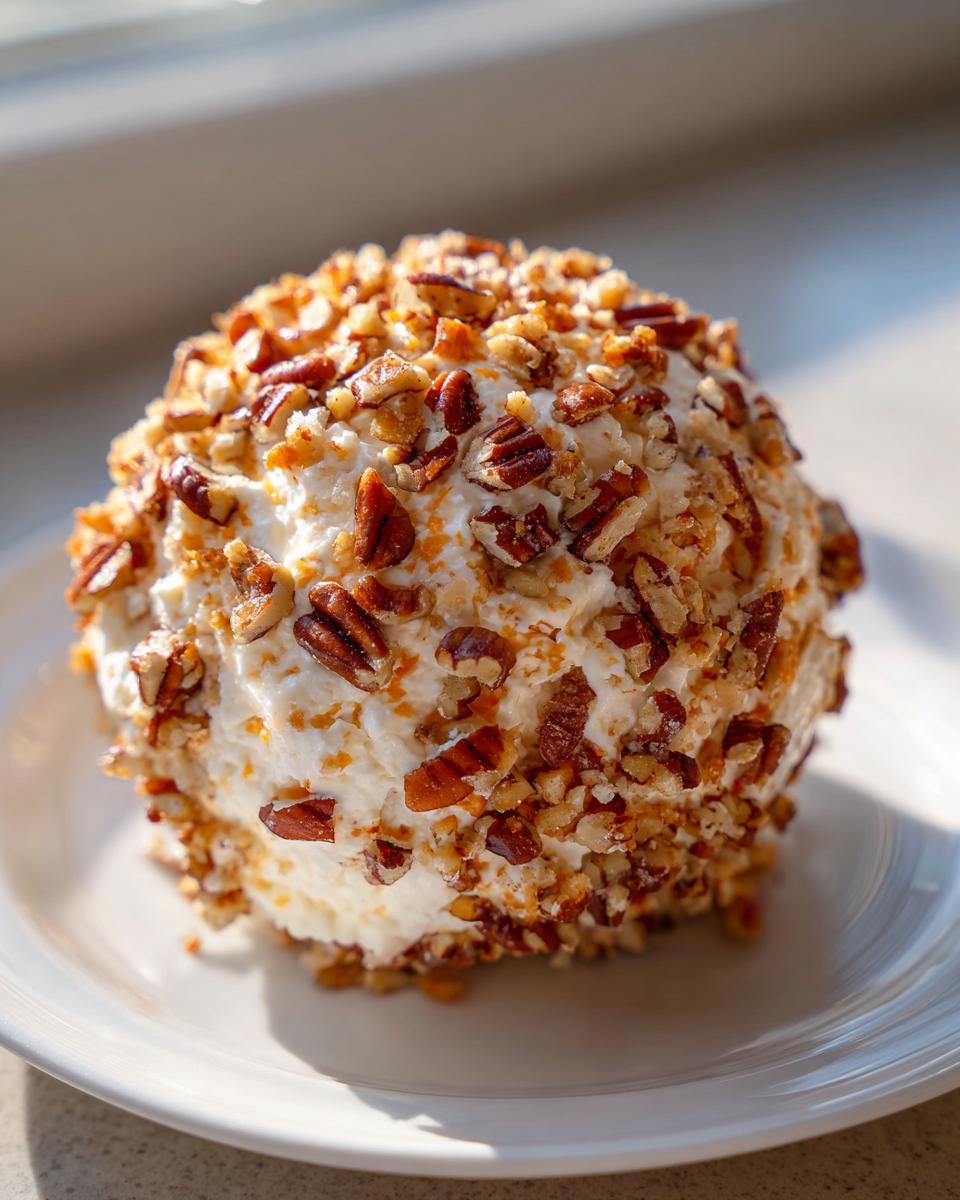
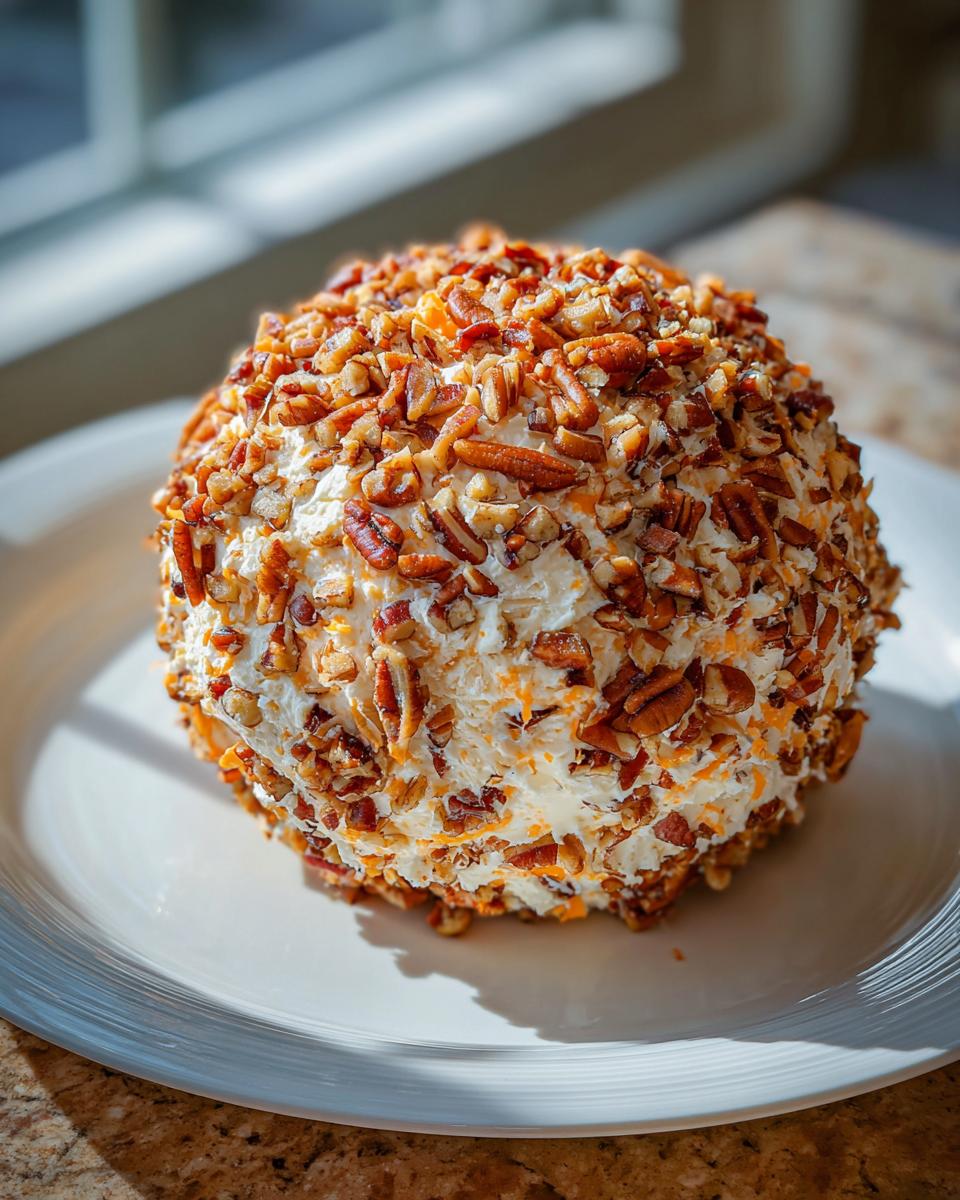
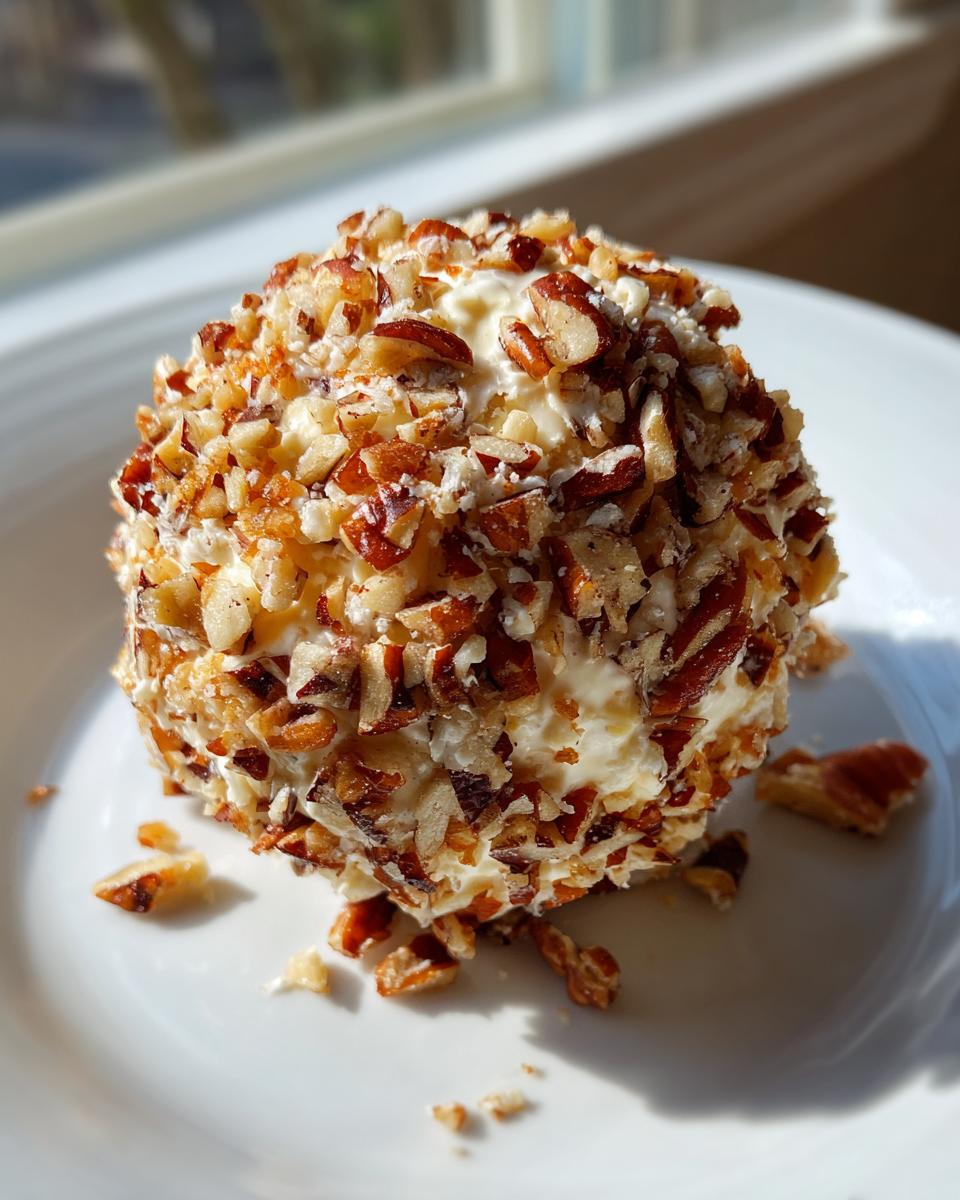
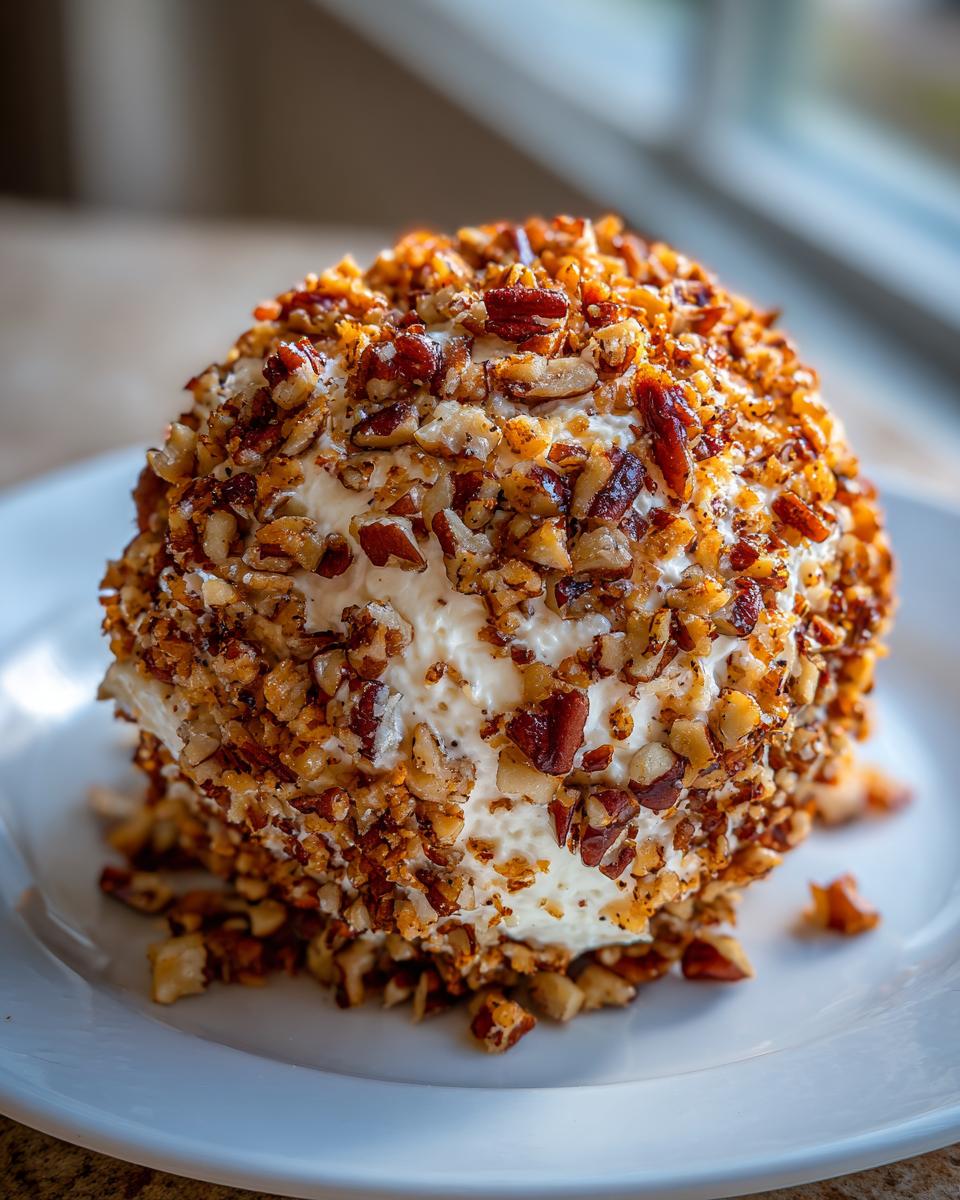
- And finally, 1 cup of finely chopped pecans for coating. If I’m not using pecans, sometimes I’ll switch to bacon bits, but the classic texture comes from the nuts.
Having everything measured out and ready to go makes this process nearly instant. It’s why I love this recipe for the holidays when I’m running around putting out other appetizers, like my famous deviled eggs recipe, easy classic.
How to Prepare This Simple Cheese Ball Recipe Step-by-Step
You’ll be amazed at how quickly this comes together. Since this is a no-bake situation, the key isn’t cooking time; it’s preparation time and chill time. I always make sure my cream cheese is genuinely soft—room temperature soft. If it’s cold, you end up with lumps, and we absolutely want to avoid lumps!
Mixing the Cream Cheese Appetizer Base
Start by grabbing a good mixing bowl. We aren’t using a stand mixer for this; a sturdy wooden spoon or a hand mixer on low speed is perfect. Toss in your softened cream cheese first and beat it until it’s light and fluffy on its own. This pre-whipping action is my pro-tip for getting that perfectly smooth, uniform base for your cream cheese appetizer.
Once the cream cheese looks luxurious, add in the shredded cheddar, the Worcestershire sauce, garlic powder, onion powder, salt, and pepper. Mix everything on low speed. Keep going until there are absolutely no streaks of white cream cheese or visible clumps of cheddar. You want one cohesive, happy cheesy mixture. If you’re also making my bruschetta recipe, tomato basil Italian appetizer, this mixing stage is about the same level of effort!
Chilling the Cheese Ball for Perfect Shaping
Once it’s perfectly mixed, move the dough onto a large sheet of plastic wrap. Use the wrap to help you fold and press the mixture into a beautiful, tight ball shape. The tighter you get it, the better it holds its form later!
Now comes the hardest part: waiting! Wrap that ball up tightly and pop it into the fridge. It needs a minimum of two hours, but honestly, I aim for four. Chilling is crucial because it firms up the fats in the cream cheese and cheddar. This firmness is what allows you to roll it smoothly in the pecans later without tearing the surface or getting sticky fingerprints all over it. You can totally do this two days in advance! Just keep it wrapped well in the fridge until you’re ready for Step 4.
Tips for the Ultimate Cheddar Cheese Ball Success
Okay, we’ve mixed it, we’ve chilled it—now let’s talk about making sure this thing goes from “nice appetizer” to “legendary party centerpiece.” The secret sauce is really in the temperature and consistency management. I learned this the hard way when I tried to rush one right before a holiday potluck. Disaster!
My biggest piece of advice revolves around the cream cheese itself. If you didn’t soften your cream cheese correctly, your mixture will look grainy, even after mixing for five minutes. You must let it sit out! It needs to be soft enough that if you press firmly, your finger leaves a distinct mark without resistance. That perfect temp allows it to blend seamlessly with the shredded cheddar.
When it comes time to coat it in those gorgeous pecans, you want the ball cold—ice cold, almost firm to the touch. If it’s too soft, the coating sticks unevenly, and you end up with bald spots. Don’t roll it aggressively! Think of it like gently tumbling delicate laundry. Just a light roll or press in the nuts ensures full coverage. If you’re worried about the coating sliding off too quickly, you can actually coat it right before you serve it, even if it’s been chilling for two full days. For more tips on quick fixes for party food, you can look at my stuffed mushrooms recipe guide for inspiration!
Flavor Variations for Your Cheese Ball Recipe
While I absolutely adore the classic pecan coating, sometimes you need to shake things up, right? This cheese ball recipe is so flexible that you can treat the base mixture like a blank canvas for whatever flavors you’re craving for game day or a cocktail party. It’s fantastic how satisfying these savory cheese logs can be when you switch up the outside!
If you’re looking to take this in a totally different direction, you have to try the smoky option. Just swap out the pecans for finely crumbled, crispy bacon bits—hello, bacon cheese ball recipe! That salty crunch against the sharp cheddar is just divine. It turns a simple spread into something really hearty.
For the ultimate crowd-pleasing dip vibes, you can pivot hard into my favorite flavor bomb: ranch! Just stir a tablespoon of dry ranch seasoning mix right into the cheese mixture back in Step 1—that creates a killer ranch cheese ball recipe. You can coat this one in fresh parsley or even some dried chives for a nice color contrast. It’s an amazing upgrade perfect for when you need quick entertaining ideas! Check out how I use seasoning mixes in my pigs in a blanket recipe for more inspiration!
Serving Suggestions: What to Pair with Your Cheese Ball Recipe
So, you’ve got your perfect, beautifully coated cheese ball, and it’s chilling beautifully on the counter, ready to be the star of the show. What do you put around it? This is where you can really make your appetizer centerpiece shine! Because this cheese ball is so rich and sturdy, it pairs wonderfully with lots of different textures.
My absolute favorite pairing is always sturdy crackers. Think water crackers, those little rye chips, or even savory bagel chips. Anything that won’t immediately snap under pressure when someone tries to scoop up a good portion. If you’re looking for something lighter, carrot sticks, celery, and maybe some crunchy bell pepper strips are fantastic for dipping.
While this isn’t technically a dip, it certainly occupies the same spot on the snack table, so you can treat it like one of the other crowd pleasing dips you might be serving! If you need a truly liquid option nearby, remember you can always check out my recipe for hummus recipe, creamy chickpea dip to round out your platter. Just remember to arrange everything appealingly—the look of those appetizers with crackers tells guests, “Come eat me!”
Storage and Reheating Instructions for This Cheese Ball Recipe
One of the main reasons I love this so much is how well it travels and stores. Remember, this whole thing is a fantastic easy appetizer no bake solution, which usually means it keeps really well! If you haven’t coated your ball yet—that smooth, un-wrapped form—you can keep it wrapped tightly in the fridge for up to two full days. That’s your ultimate prep window!
Once you roll that beautiful sphere in the pecans, it’s best enjoyed within about 12 hours for peak freshness, especially if you’re having a party. If you have leftovers (ha! I doubt it!), wrap that coated ball back up tightly and place it in the fridge. It’ll still be perfectly good the next day, though the pecans might soften up just a tiny bit. For more amazing make-ahead inspiration, take a peek at my ideas for savory cheese logs!
Frequently Asked Questions About the Classic Cheese Ball Recipe
I know you might have a few lingering questions before you dive into mixing. That’s totally fine! When it comes to serving something like this that’s meant to be the star of the show, you want to feel totally confident. Here are some of the common things I hear about this classic cheese ball recipe.
Can I use different types of cheese besides sharp cheddar?
Yes, you absolutely can play with your cheese selection! While I stand by the sharp cheddar for flavor punch, I’ve seen people substitute it with Monterey Jack for a milder melt, or even mix in some smoked gouda for a deeper, smokier flavor. Just make sure whatever you use is well-shredded and that you still use the full amount of cream cheese as the binder. This keeps it firm enough to hold its shape as a lovely appetizer centerpiece.
What should I use if I really don’t like pecans on my cheese ball?
Pecans are traditional, but they aren’t mandatory! If you have nut allergies or just prefer something else, you have so many options that work great for those party finger foods. My go-to swaps are crispy, crumbled bacon (which pairs amazingly with the cheddar) or using a mix of dried parsley and everything bagel seasoning for color and tang. You can also use crushed pretzels if you want that salty crunch.
Can I freeze the cheese ball mixture before coating it?
That’s a brilliant question for those of us who like to prep way ahead! Yes, you can freeze the plain, plastic-wrapped ball for up to a month. If you decide to freeze it, just let it thaw in the refrigerator overnight before you plan to coat it. It’s the ideal make ahead party snack solution! However, I wouldn’t recommend freezing it *after* it’s coated in nuts, as the moisture change can ruin the coating’s texture.
How far in advance can I set this out on my serving platter?
Since this is a chilled spread, you want to keep it cool for food safety and texture. If it’s a quick party (say, only a couple of hours), you can leave it out. For longer events or if your entertaining space is warm, I always suggest keeping it on a platter nestled over a large bowl of ice—this serves as a great visual trick and keeps it firm. You can always check out more awesome snack ideas for big events in my guide to appetizer recipes for game day!
If you want even more fantastic ideas, I saw a huge list of other ideas over at the Inspired Hour. Sometimes inspiration strikes best when you see a whole table of options!
Quick Facts and Estimated Nutrition for This Cheese Ball Recipe
You know I believe in giving you the full picture around here, from the mixing technique to the final serving size. Transparency is key, especially when you’re planning spreads for family and friends! While these numbers are just estimates—because how sharp your cheddar is or how much of the pecan coating your family eats can change things slightly—it gives you a great starting point for planning your food for the day.
This information is based on making the recipe as written and serving 12 reasonable little scoops. Remember, since this is a favorite easy holiday appetizer, we definitely focus on quality over quantity here!
Here’s the breakdown:
- Prep Time: 15 quick minutes
- Cook Time: 0 minutes (Hooray for no-bake!)
- Total Time: About 2 hours 15 minutes (Thanks to that essential chilling time!)
- Yield: 12 servings
- Category: Appetizer / Party Finger Foods
- Dietary Note: Vegetarian
And for the nutrition breakdown per serving (approximately 1.5 oz):
- Calories: 150
- Fat: 14g (A good chunk of that is the healthy fat from the pecans!)
- Saturated Fat: 7g
- Protein: 6g
- Carbohydrates: 2g
- Sugar: 1g
- Sodium: 210mg
Just a quick disclaimer: Since I don’t run a lab here, these nutritional facts are based on standard product estimates. If you load up on extra Worcestershire sauce or swap the pecans for bacon bits, those numbers are going to shift a little! But for planning purposes, this gives you a fantastic idea of what you’re serving up.
PrintThe Best Classic Cheese Ball Recipe: Easy Make-Ahead Party Snack

Make this classic cheese ball recipe for your next gathering. It is a simple, make-ahead party snack featuring cheddar and cream cheese, coated in pecans. This crowd-pleasing appetizer is perfect for holidays or game day.
- Prep Time: 15 min
- Cook Time: 0 min
- Total Time: 2 hr 15 min
- Yield: 12 servings 1x
- Category: Appetizer
- Method: No Bake
- Cuisine: American
- Diet: Vegetarian
Ingredients
- 8 ounces cream cheese, softened
- 8 ounces sharp cheddar cheese, shredded
- 1 teaspoon Worcestershire sauce
- 1/2 teaspoon garlic powder
- 1/4 teaspoon onion powder
- 1/4 teaspoon salt
- 1/4 teaspoon black pepper
- 1 cup finely chopped pecans (for coating)
Instructions
- In a medium bowl, combine the softened cream cheese, shredded cheddar cheese, Worcestershire sauce, garlic powder, onion powder, salt, and pepper. Mix until completely smooth and well combined.
- Place the mixture onto a piece of plastic wrap. Shape the mixture into a ball.
- Wrap the cheese ball tightly in the plastic wrap. Chill in the refrigerator for at least 2 hours, or up to 2 days. Chilling helps the ball firm up for easier coating.
- When ready to serve, spread the chopped pecans on a plate or shallow dish.
- Remove the chilled cheese ball from the plastic wrap and roll it gently in the chopped pecans until the entire surface is coated.
- Place the finished cheese ball on a serving platter. Serve immediately with crackers, pretzels, or fresh vegetables.
Notes
- You can prepare this appetizer up to two days ahead of time. Keep it tightly wrapped in the refrigerator until you are ready to coat and serve it.
- For a different flavor, substitute the pecans with chopped bacon bits, dried parsley, or a mix of everything bagel seasoning.
- If you want a ranch cheese ball recipe variation, add 1 tablespoon of dry ranch seasoning mix to the cheese mixture in step 1.
Nutrition
- Serving Size: 1.5 oz
- Calories: 150
- Sugar: 1
- Sodium: 210
- Fat: 14
- Saturated Fat: 7
- Unsaturated Fat: 7
- Trans Fat: 0
- Carbohydrates: 2
- Fiber: 0
- Protein: 6
- Cholesterol: 35