
Oh, the holidays and parties used to be such a HUGE production, didn’t they? I just love looking back at those old photos of tables groaning with appetizers, and right there in the center, stealing the show, was always the cheese ball. Honestly, there’s just something so fun and classic about a creamy, dreamy cheese ball that screams celebration. It’s one of those retro-chic stunners that never, ever goes out of style. My own grandma always had one at her gatherings, usually studded with nuts and a little parsley. I practically grew up with that delightful ball of cheesy goodness on a platter, and it always got rave reviews. We’re going to recreate that magic together, making the absolute best cheese ball recipe that’s as simple to whip up as it is to devour! You can learn more about my kitchen philosophy and how I approach recipes like this over on my About Page!
- Why You'll Love This Classic Cheese Ball Recipe
- Ingredients for Your Perfect Cheese Ball
- How to Make a Cheese Ball: Step-by-Step Guide
- Tips for the Ultimate Cheese Ball
- Creative Cheese Ball Variations and Coatings
- Serving Your Festive Cheese Ball
- Make-Ahead and Storage for Your Cheese Ball
- Frequently Asked Questions about Cheese Ball Recipes
- Estimated Nutritional Information
- Share Your Cheese Ball Creations!
Why You’ll Love This Classic Cheese Ball Recipe
Get ready to be the star of your next party because this cheese ball recipe is a total winner! Here’s why you’ll absolutely love it:
- Super Easy to Make: Seriously, it takes minutes to mix everything up. No fancy techniques needed!
- Crowd-Pleaser Guaranteed: Who can resist a creamy, cheesy delight? It’s a guaranteed hit for everyone.
- So Versatile: You can mix in almost anything and roll it in all sorts of goodies. Get creative!
- Festive Centerpiece: It looks absolutely gorgeous on any appetizer platter, adding that touch of retro charm.
- Make-Ahead Magic: Prep it before your guests arrive and stress less. It just gets better with time!
- Pure Comfort Food: It’s that delicious, nostalgic bite that always feels like coming home.
Ingredients for Your Perfect Cheese Ball
Alright, let’s gather our goodies! The beauty of this classic cheese ball recipe is that it uses ingredients you probably already have in your fridge or pantry. It’s all about simplicity and getting that perfect flavor combination. Trust me, these are the ones that make all the difference:
- 8 ounces cream cheese, make sure it’s softened so it mixes up nice and smooth.
- 8 ounces sharp cheddar cheese, shredded. I find sharp cheddar gives it the best punch of flavor!
- 1/4 cup green onions, chopped up really fine. They add just a subtle bite.
- 1/4 cup chopped pecans (optional). If you like a little crunch *inside* the cheese ball, go for it!
- 1 teaspoon Worcestershire sauce. This is like a little secret weapon for depth of flavor.
- 1/2 teaspoon garlic powder. Can’t have a party appetizer without a little garlic, right?
- 1/4 teaspoon black pepper. Just to give it a nice little kick.
- For the Coating:
- 1 cup finely chopped pecans or walnuts – your choice! This is what gives our cheese ball that beautiful, rustic look.
- 1/4 cup fresh parsley, chopped. Adds a lovely pop of color and freshness.
How to Make a Cheese Ball: Step-by-Step Guide
Making the perfect cheese ball is really more about rhythm than anything else. Once you get the hang of it, you’ll be whipping these up without even thinking! I love this part because it’s where the magic really starts to happen. Just follow along with these simple steps, and you’ll have a show-stopping appetizer in no time. It’s so straightforward, even if you’re just starting out in the kitchen, you’ll totally nail it. If you need quick lunch inspiration, check out my easy lunch ideas!
Mixing the Cream Cheese Party Ball Base
First things first, grab a medium-sized bowl. You want your cream cheese to be nice and soft, almost like room temperature butter, so it blends smoothly. Toss in your softened cream cheese, the shredded cheddar, those finely chopped green onions, your optional pecans if you’re using them, a splash of Worcestershire sauce for that depth, garlic powder, and a little black pepper. Now, just mix it all up! I like to use a sturdy spoon or even my hands for this – get in there and combine everything until it’s smooth and uniformly colored. No streaks allowed!
Chilling Your Cheese Ball Mixture
This step is SO important, don’t skip it! Once your cheese mixture is all combined, cover the bowl with plastic wrap. Pop it into the refrigerator for at least one hour. This chilling time is crucial because it firms up the mixture, making it much easier to shape into a ball without it getting all melty and messy. You’ll know it’s ready when it feels firm to the touch.
Preparing the Coating for Your Cheese Ball
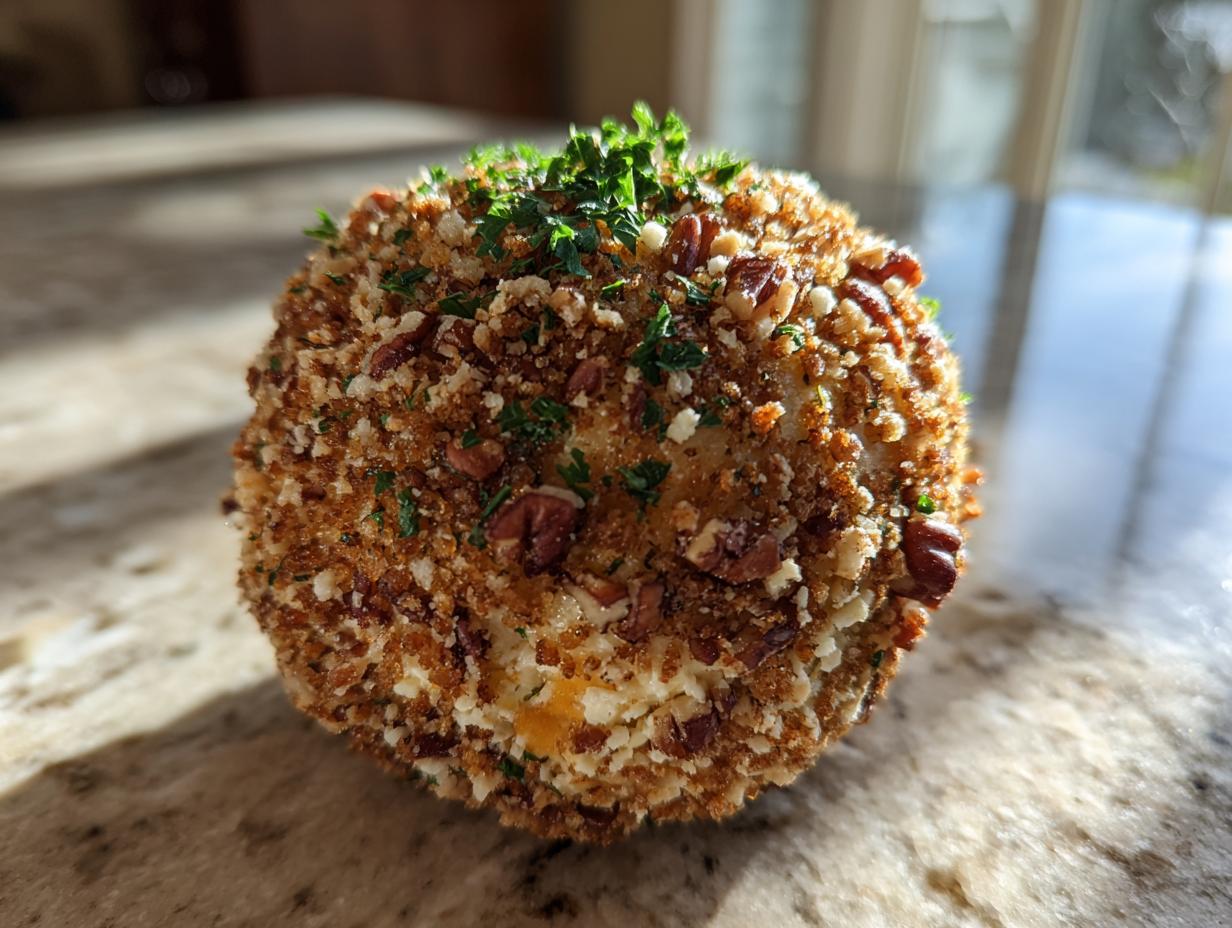
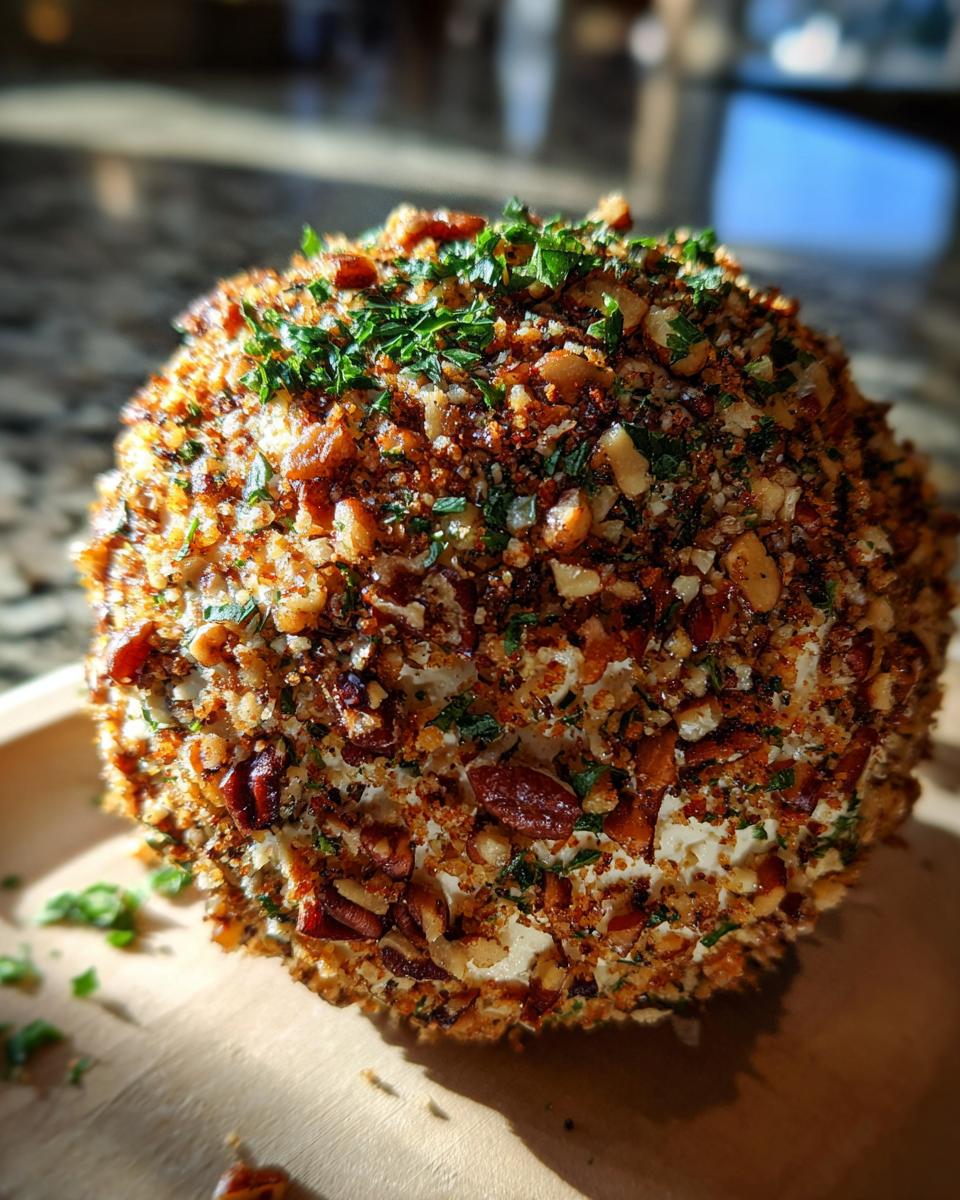
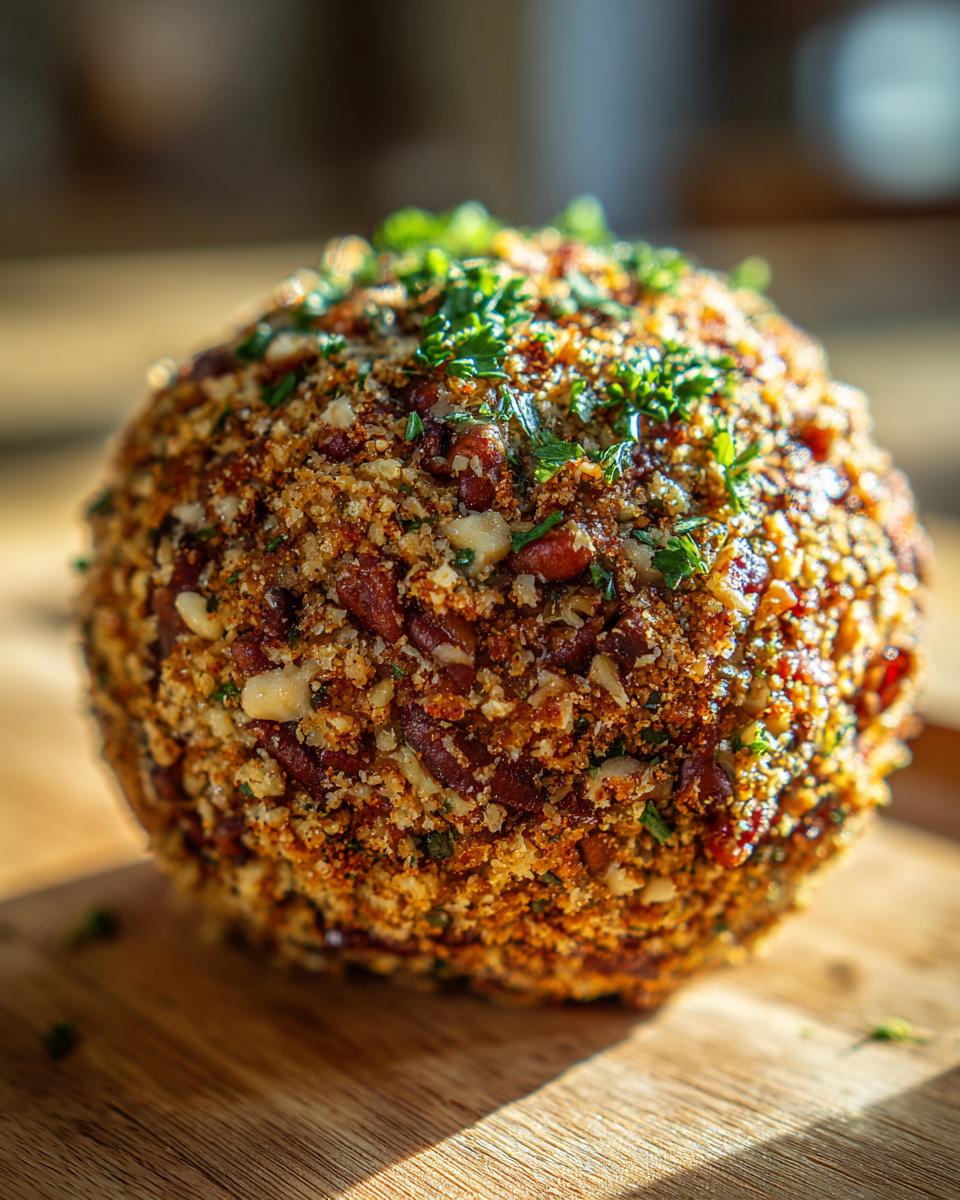
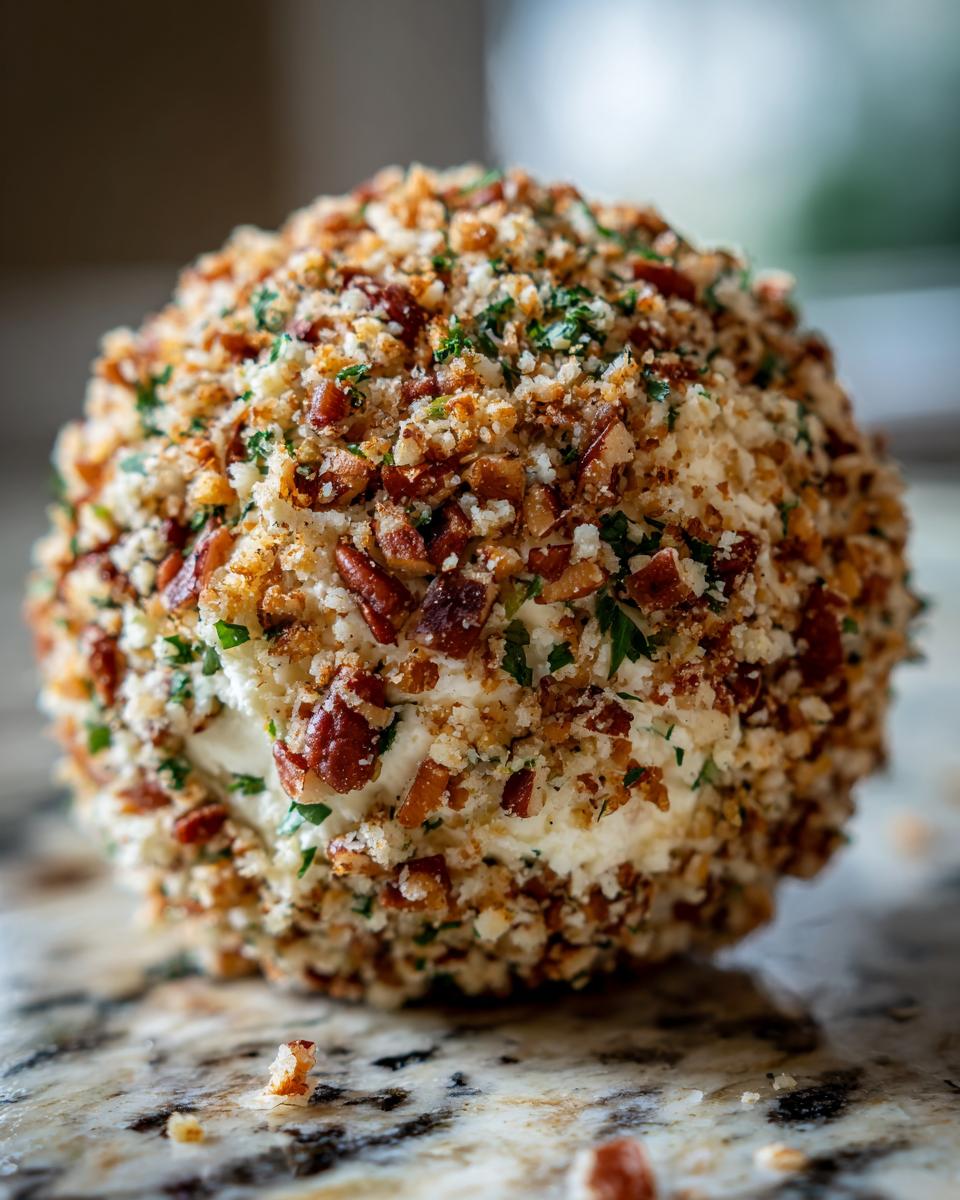
While your cheese mixture is chilling, let’s get the coating ready. Grab a shallow dish – a pie plate works perfectly. Mix together your finely chopped pecans or walnuts with that lovely fresh parsley. Give it a good stir so it’s all combined and ready for the main event. This is what’s going to give our cheese ball that gorgeous outer layer.

Shaping and Rolling the Cheese Ball
Okay, time for the fun part! Once your cheese mixture has chilled and is nice and firm, it’s shaping time. Lightly dampen your hands with a little water or use a dab of butter if they feel sticky. Gently scoop out the cheese mixture and start shaping it into a nice, round ball. Don’t overwork it, just coax it into shape. Then, carefully place the formed ball into your prepared coating dish. Roll it around gently, pressing ever so slightly so those nuts and herbs stick all over. You want an even coating all the way around for that perfect look!
Tips for the Ultimate Cheese Ball
Want to make sure your cheese ball is absolutely perfect? A few little tricks up your sleeve can make all the difference between a good cheese ball and a fabulous one that everyone talks about! I’ve learned a few things over the years, from my grandma and from a few oopsies in my own kitchen, that really elevate this classic appetizer. You can find more about my kitchen philosophy over on my About Page!
Ingredient Quality Matters for Your Cheese Ball
You know, it sounds simple, but using good quality ingredients really does make a huge difference for your cheese ball. When you start with a really good, full-fat cream cheese and a sharp cheddar that you love the taste of, the whole thing just tastes so much better. It’s the foundation, and a strong foundation means a delicious outcome every time!
Achieving the Perfect Cheese Ball Texture
The biggest thing for that perfect texture is chilling! Don’t rush that step. If your mixture is too warm, it’ll be a goopy mess when you try to shape it. Also, make sure your cream cheese is really soft before you start mixing. If it’s lumpy, your whole cheese ball will be lumpy. A gentle hand when you shape and roll also helps keep it smooth and prevents it from getting overworked.
Creative Cheese Ball Variations and Coatings
Okay, so the classic cheese ball is amazing, right? But the REALLY fun part is how you can totally make it your own! Don’t be afraid to play around. My grandma always said the best recipes are the ones you adapt. For mixing into the cheese base, besides those yummy pecans, you could stir in some chopped pimento peppers for a little sweetness and color – they’re so classic! Or, if you’re a ranch fan like me, a tablespoon of ranch seasoning mixed in is just divine. It adds this amazing savory kick. You could even try adding some finely diced jalapeños for a little heat, kind of like my jalapeño cheddar cornbread! And for coatings? Oh, the possibilities are endless! Beyond the nuts and parsley, try rolling some chopped cooked bacon for a salty crunch, or even some finely chopped dried cranberries for little pops of festive tartness. You can even chop up some different herbs like chives or dill and mix them with the nuts. It’s all about making your cheese ball uniquely yours!
Serving Your Festive Cheese Ball
Now that you’ve got this glorious cheese ball, let’s talk about how to show it off best! The most important thing is a great platter—or even just a nice serving dish. I love using my favorite ceramic ones from the appetizer section on the site. Surround your beautiful cheese ball with a variety of crackers – think sturdy ones that won’t break, like water crackers or some nice hearty whole wheat ones. Mini toasts or even some slices of baguette are fantastic too. Don’t forget a spreader or a small knife right there so your guests can scoop up their cheesy goodness easily!
Make-Ahead and Storage for Your Cheese Ball
One of the best things about this classic cheese ball is how perfectly it fits into your party prep! You can absolutely get a head start, which is a lifesaver when you’re hosting. For the best results, I like to make the cheese mixture, chill it, and even shape and coat it up to 2 days in advance. Just make sure to wrap it really well in plastic wrap once it’s coated, and then pop it back in the fridge. If you see any nuts looking a little dry right before serving, you can always give it a gentle roll in a little extra coating. It’s like a little touch-up that makes it look freshly made! If you need ideas for speedy weekday meals, check out my weeknight dinner recipes!
Frequently Asked Questions about Cheese Ball Recipes
Got questions about making that perfect cheese ball? I totally get it! It’s one of those appetizers you just want to get *just right*. Here are a few things folks often ask me, and I’m happy to share my thoughts:
Can I freeze a cheese ball?
You can freeze a cheese ball! I’d recommend freezing it before you roll it in the coating, though. Just wrap it up super tight. When you’re ready to serve, let it thaw in the fridge overnight and then roll it in fresh coatings. Sometimes freezing can change the texture a tiny bit, but it’s still really good!
What are the best crackers for a cheese ball?
Oh, this is fun! For a classic cheese ball, I absolutely love a good sturdy cracker. Think water crackers, hearty whole wheat crackers, or even some seeded ones. Mini toasts are great too! If you want something a bit different, some crisp baguette slices or even some mini pretzel breads are delicious partners.
How long does a cheese ball last in the refrigerator?
Your make-ahead cheese spread is pretty resilient! Once it’s all prepared and coated, it will last beautifully in the refrigerator for about 3 to 4 days. Just make sure it’s covered well, and it’ll be ready for snacking whenever the craving strikes!
Estimated Nutritional Information
Just a heads-up, the nutritional info for this yummy cheese ball is definitely an estimate, since it can change depending on exactly what you use. But, generally speaking, a serving (about 2 tablespoons) tends to be around 120 calories, with roughly 11g of fat, 4g of protein, 2g of carbs, and about 150mg of sodium. Perfect for enjoying without totally derailing things!
Share Your Cheese Ball Creations!
I absolutely LOVE seeing what you all create in your kitchens! Have you made this cheese ball? Did you try a fun variation or a crazy coating? Please share your experiences, tell me what you thought, or leave a rating below! And if you snap any photos, tag me on social media – I’d be thrilled to see your handiwork! You can also always reach out through my contact page with any questions!
PrintClassic Cheese Ball Recipe

A retro-chic cheese ball perfect for parties and holidays, featuring a blend of cheeses, seasonings, and a crunchy coating.
- Prep Time: 20 min
- Cook Time: 0 min
- Total Time: 1 hr 20 min
- Yield: 10-12 servings 1x
- Category: Appetizer
- Method: No Bake
- Cuisine: American
- Diet: Vegetarian
Ingredients
- 8 ounces cream cheese, softened
- 8 ounces shredded sharp cheddar cheese
- 1/4 cup finely chopped green onions
- 1/4 cup finely chopped pecans (optional, for mixing in)
- 1 teaspoon Worcestershire sauce
- 1/2 teaspoon garlic powder
- 1/4 teaspoon black pepper
- 1 cup finely chopped pecans or walnuts (for coating)
- 1/4 cup chopped fresh parsley (for coating)
Instructions
- In a medium bowl, combine the softened cream cheese, shredded cheddar cheese, chopped green onions, optional chopped pecans, Worcestershire sauce, garlic powder, and black pepper.
- Mix until well combined and smooth.
- Cover the bowl and refrigerate for at least 1 hour to allow the mixture to firm up.
- In a shallow dish, combine the coating ingredients: finely chopped pecans or walnuts and chopped fresh parsley.
- Once the cheese mixture is firm, shape it into a ball using your hands.
- Roll the cheese ball in the coating mixture, pressing gently to ensure it adheres evenly.
- Transfer the coated cheese ball to a serving platter.
- Cover and refrigerate until ready to serve.
- Serve with your favorite crackers or bread.
Notes
- For a different flavor, you can add 2 tablespoons of finely chopped pimento or a tablespoon of ranch seasoning to the cheese mixture.
- You can also roll the cheese ball in chopped bacon, dried cranberries, or a mix of herbs for varied coatings.
- This cheese ball can be made up to 2 days in advance.
Nutrition
- Serving Size: 2 tablespoons
- Calories: 120
- Sugar: 1g
- Sodium: 150mg
- Fat: 11g
- Saturated Fat: 6g
- Unsaturated Fat: 5g
- Trans Fat: 0g
- Carbohydrates: 2g
- Fiber: 1g
- Protein: 4g
- Cholesterol: 30mg