
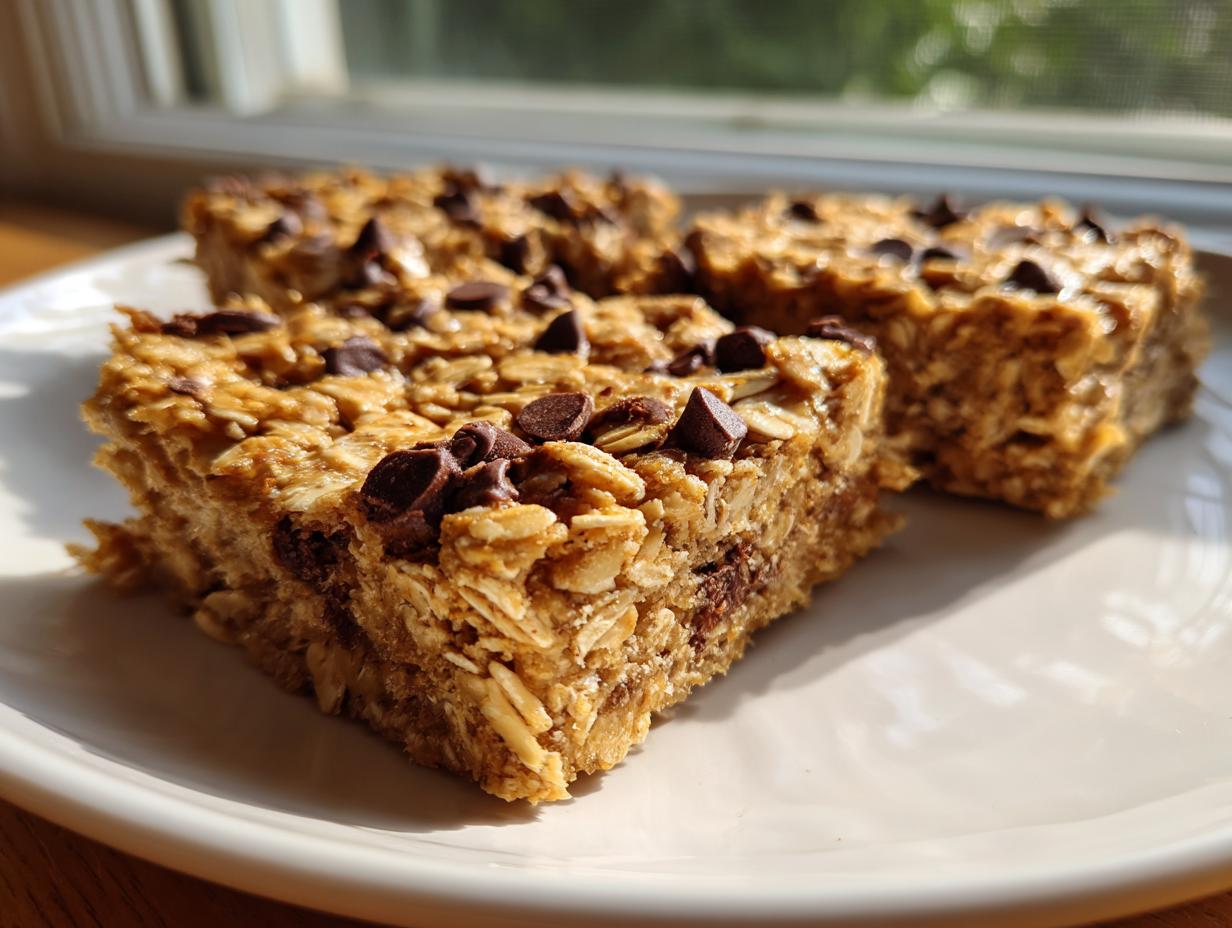
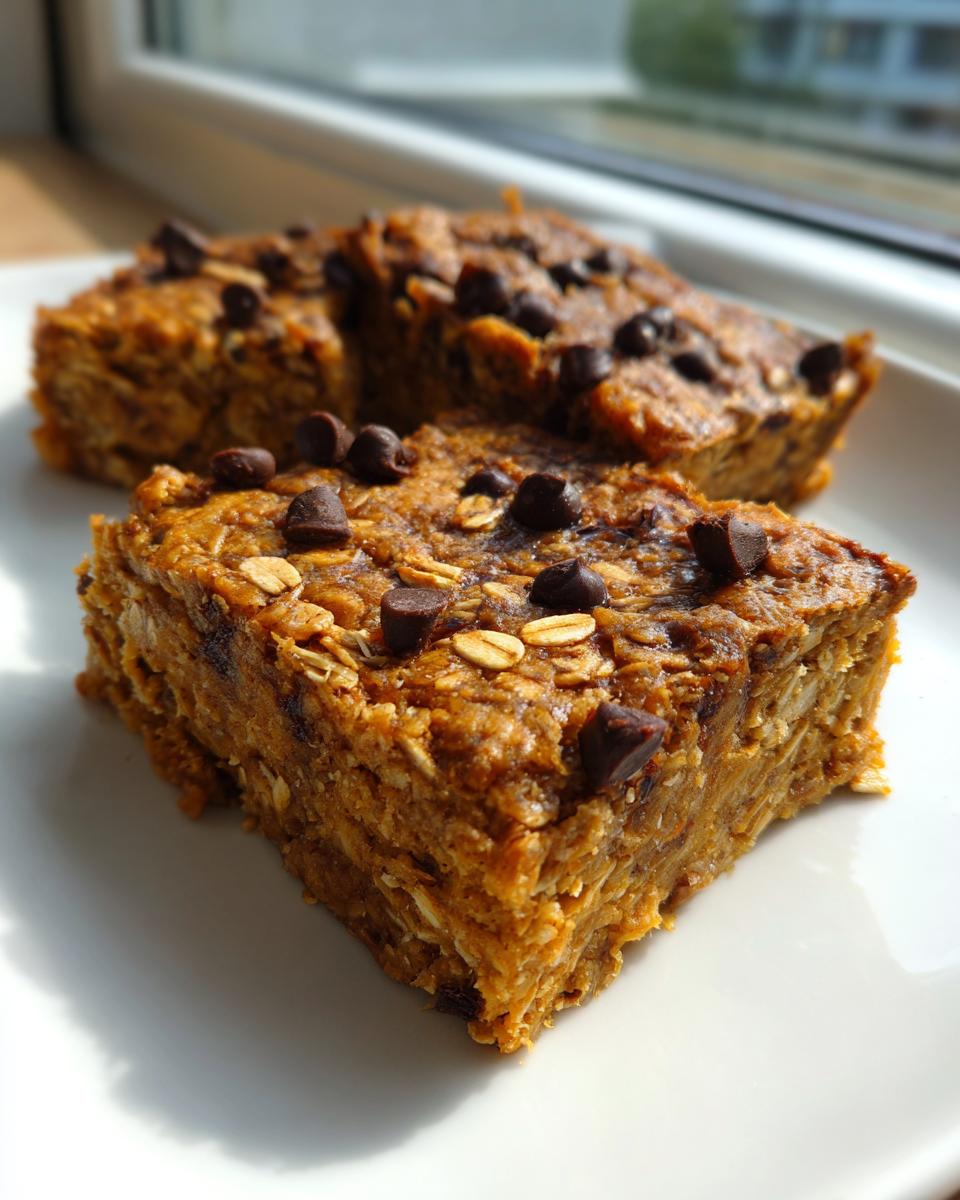
Are you tired of scrambling every morning, wishing you had something truly satisfying and ready to grab on your way out the door? I totally get it. Life gets busy, but that doesn’t mean we should settle for flavorless, store-bought snacks. That’s why I spent ages perfecting these Chewy Banana Oatmeal Breakfast Bars—they are my go-to solution for reliable, portable food that actually tastes like a treat. Every single one of my recipes here at Kings Cook is rigorously tested right here in my home kitchen, designed specifically for the American home cook using simple, accessible ingredients. Trust me, these oatmeal bars are about to save your mornings!
- Why These Banana Oatmeal Bars Are Your New Favorite Homemade Oat Snacks
- Gathering Ingredients for Chewy Banana Oatmeal Bars
- How to Prepare Easy Oatmeal Bars (Baked Method)
- Tips for Success with Your Chewy Oat Bars Recipe
- Storage and Make Ahead Snacks for Your Oatmeal Bars
- Variations: Turning Basic Oatmeal Bars into Fun Fruity Oatmeal Squares
- Serving Suggestions for Healthy Breakfast Bars
- Frequently Asked Questions About Making Oatmeal Bars
- Nutritional Snapshot of These Wholesome Oatmeal Treats
- Share Your Experience Making These Simple Ingredient Bars
Why These Banana Oatmeal Bars Are Your New Favorite Homemade Oat Snacks
When I developed this recipe, I focused on three things the busy home cook needs most: texture that lasts, zero fuss, and real flavor from simple ingredients. That’s what sets these apart from every other oat square you’ve tried.
The secret is letting the super-ripe banana do most of the heavy lifting. It coats those oats and gives us that satisfying, slightly squishy, perfectly chewy texture that makes them addictive. Plus, if you’re trying to keep up with school lunches or just need something quick, these are a dream.
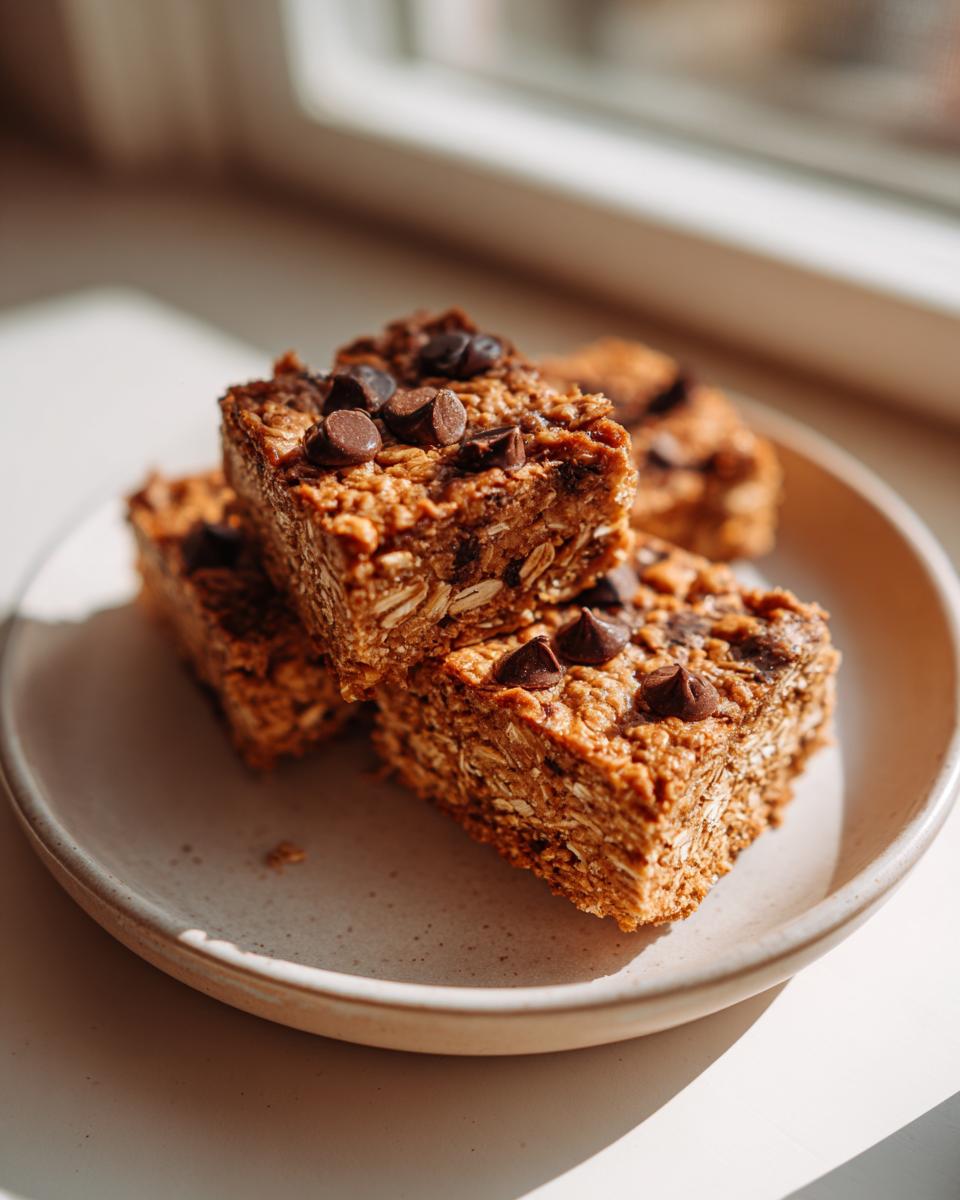
- They achieve an incredible chewy texture that doesn’t crumble everywhere the second you pick it up.
- They are the ultimate Portable Breakfast Ideas—pack them the night before and go!
- Using whole rolled oats makes them excellent for energy, putting them firmly in the category of satisfying Homemade Oat Snacks.
If you’ve been looking for a reliable snack that feels wholesome, this is it. They are ready to bake in under 10 minutes, and you probably have all the necessary items in your pantry right now!
Gathering Ingredients for Chewy Banana Oatmeal Bars
Before we even think about turning on the oven, we need to round up our supplies. You won’t need anything fancy here, which is why I love this recipe for those busy mornings. We’re aiming for simple ingredient bars that taste anything but simple!
For the base structure, you’ll need 2 cups of your standard rolled oats—not the instant kind, please! We also have our dry helpers: 1 teaspoon of baking soda, just half a teaspoon of salt, and 1 teaspoon of warm ground cinnamon to keep things cozy. These are the backbone of these fantastic oatmeal bars.
For the wet magic, we need half a cup of melted unsalted butter or coconut oil, half a cup of light brown sugar packed tightly into your measuring cup, one large egg, and a splash of vanilla. The star, of course, is that mashed banana. Here’s the expert tip: the riper those bananas are, the better. If their skins are peppered with black spots, they’re sweet enough to keep that brown sugar measurement right where it is. Overripe bananas mean more natural sugar, which is exactly what we want for these wholesome treats!
Ingredient Notes and Simple Substitutions for Your Oatmeal Bars
I always try to keep my recipes flexible. If you don’t have butter on hand, melted coconut oil works beautifully and helps them stay slightly firmer when cool. For the mix-ins, grab whatever makes you happy! Chocolate chips are my go-to when I’m making them for dessert, but walnuts or pecans add a nice crunch for those Simple Ingredient Bars.
Now, if you or your kids need Gluten Free Oat Bars, this recipe is already halfway there! Just ensure you swap out your regular rolled oats for certified gluten-free ones. It’s nearly the exact same instruction, but you get to keep enjoying these amazing homemade oat snacks.
How to Prepare Easy Oatmeal Bars (Baked Method)
Alright, let’s get baking! This process is so quick that you barely have time to clear the measuring cups before it’s ready for the oven. First things first: preheat your oven to 350°F (175°C). While that’s warming up, line an 8×8 inch pan with parchment paper. Make sure you leave a little overhang on two opposite sides—this is crucial because it acts as a sling later for lifting the whole slab of oatmeal bars out clean.
In one bowl, whisk together your dry ingredients: oats, baking soda, salt, and cinnamon. In a separate, bigger bowl, you’ll whisk the wet ingredients vigorously until they look smooth—that’s the melted butter, brown sugar, mashed banana, egg, and vanilla all blending together happily. Then, dump the dry into the wet and stir gently! You just want everything incorporated; seriously, stop stirring the second you don’t see any dry streaks remaining. Overmixing is the enemy of chewy!
Now for the pressing part! This is my big expert tip for ensuring these don’t fall apart. Transfer the batter to your prepared pan and use the back of a sturdy spatula (or even your clean hands) to press that mixture down really firmly. I mean, compact it! You want it tightly packed so they hold their shape when cutting. Pop it in the oven for about 20 to 25 minutes until the edges look golden brown.
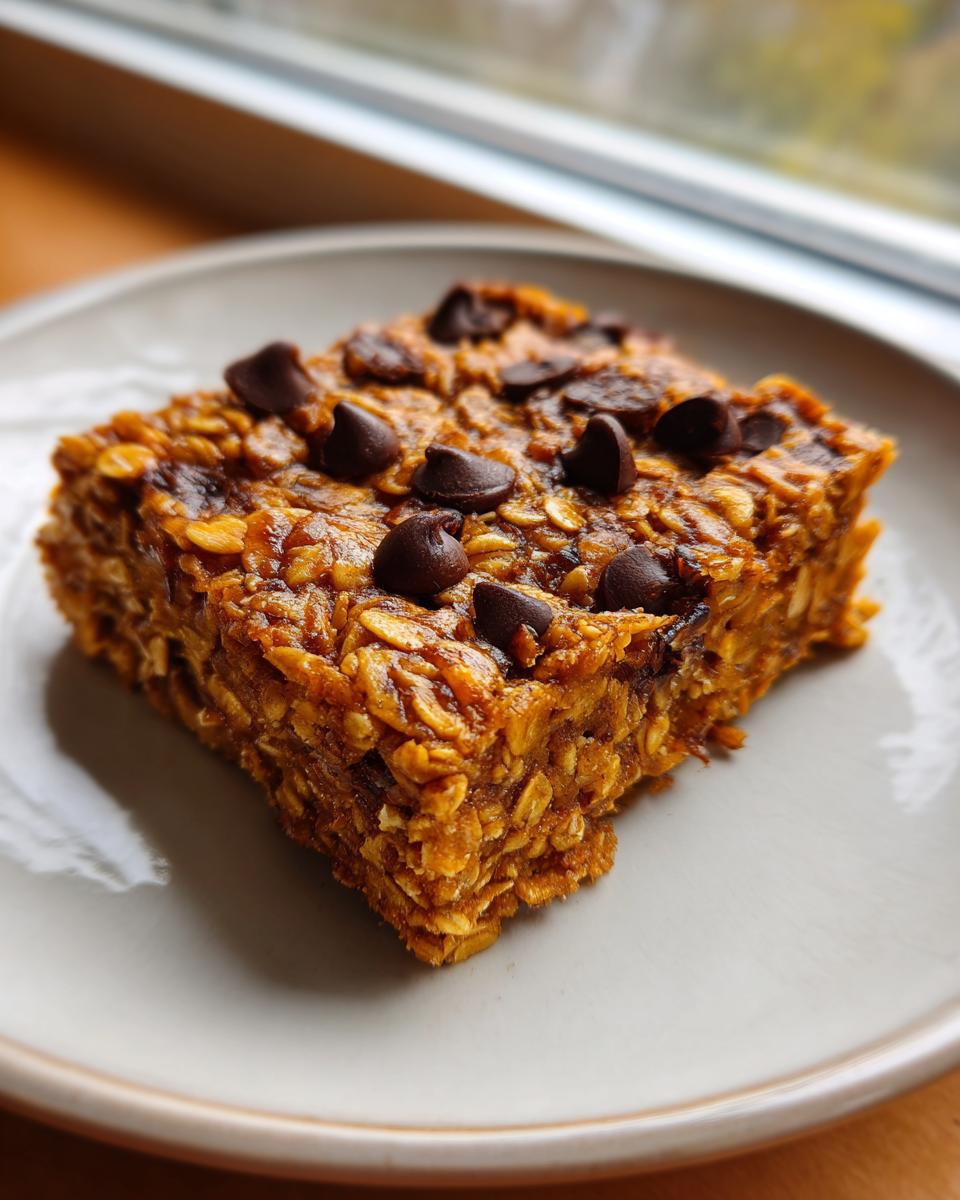
And here’s the hardest part: cooling. You absolutely must let these oatmeal bars cool completely in the pan before you even think about cutting them. If you try to slice them warm, they will crumble, and we don’t want sad, crumbly results!
Making No Bake Oatmeal Bars: A Quick Alternative
If the oven seems like too much effort, or if it’s scorching hot outside, we can absolutely make these work as No Bake Oatmeal Bars! You skip the entire preheating and baking process, of course. Just mix all your wet and dry ingredients together—make sure that banana is well incorporated—press it down firmly into your lined pan, and then transfer it straight into the refrigerator. You need about two hours in the cold for them to set up properly before slicing. They’re slightly softer than the baked ones, but just as yummy for a quick snack!
Tips for Success with Your Chewy Oat Bars Recipe
I learned my biggest baking lesson with these bars the hard way! The very first time I made a batch, I was too impatient. I let them cool for maybe ten minutes on the counter, tried to cut them, and ended up with a huge pile of delicious, warm, messy oat crumble instead of neat squares. It was a tragedy!
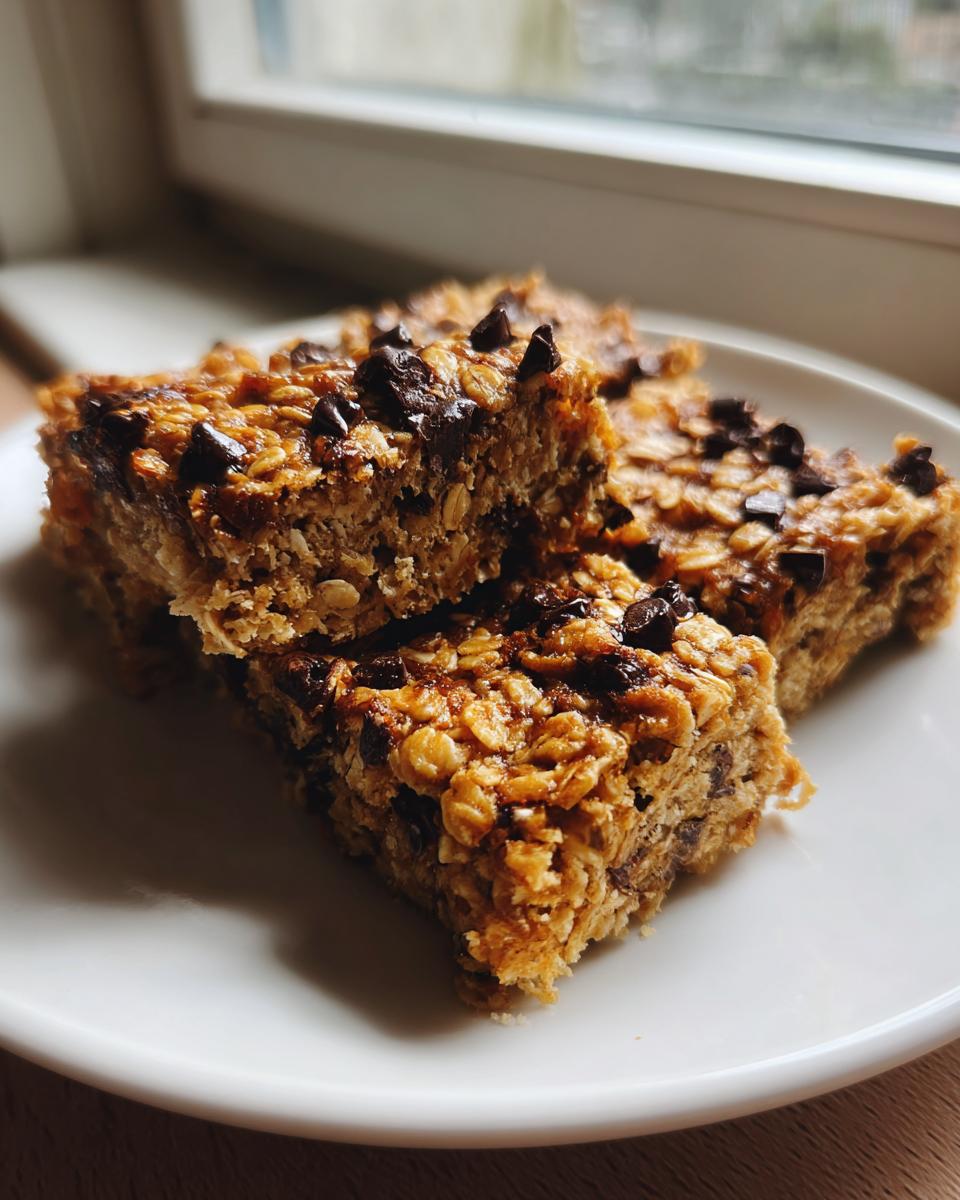
Seriously, promise me you’ll give them the full cooling time. That time allows the butter and the banana to firm up around the oats, making the structure solid. This is the true secret to a perfect Chewy Oat Bars Recipe.
Also, remember that critical step of pressing the mixture firmly into the pan? Do not be shy with that pressure! The harder you compact them before baking, the less likely they are to crumble when you finally slice into them later on. If you follow those two pointers—patience in cooling and firmness in pressing—you’ll have fantastic, sturdy oatmeal bars every time!
Storage and Make Ahead Snacks for Your Oatmeal Bars
One of the reasons I adore these banana oat bars so much is how perfectly they transition from a fresh bake to reliable Make Ahead Snacks. You bake them once, and suddenly your breakfast situation for the week is solved! Because these bars are so wholesome and packed with good binding ingredients like mashed banana, they are wonderfully stable.
For short-term storage, just keep them right on the counter in an airtight container. They stay wonderfully moist at room temperature for about four days. If you’re packing them up for little lunches, make sure you cut them neatly and wrap individual Oat Bars for Lunchboxes in plastic wrap or small reusable silicone bags. This keeps them fresh and prevents them from sticking to each other!
If you need them to last even longer, yes, you can totally freeze them! Just layer them with wax paper inside a freezer-safe container. They thaw out beautifully on the counter in about 30 minutes, ready for an anytime snack.
Variations: Turning Basic Oatmeal Bars into Fun Fruity Oatmeal Squares
This banana base recipe is amazing on its own, but what I love most about keeping things simple is how easily you can pivot! You don’t need a whole new recipe card to switch things up for the week. We can transform these oatmeal bars into something entirely different just by adding a few extras during Step 4 when you fold in your mix-ins.
Once you master the chewy texture, you can start experimenting! Here are three ways I love to shake up the menu and create fun Fruity Oatmeal Squares or cozy treats.
Cinnamon Roll Inspired Twist (Hello, Cozy Flavors!)
If you’re craving that warm, gooey cinnamon roll flavor but in a portable bar shape, this one is for you. Don’t worry, this still falls under the category of Easy Oatmeal Bars!
How to do it: Skip the chocolate chips entirely. Instead, mix 1 teaspoon of extra cinnamon with 2 tablespoons of brown sugar right in a small separate bowl. Sprinkle this mix evenly over the batter once it’s pressed into the pan. For an extra kick that mimics that famous glaze, try adding just three tablespoons of melted butter drizzled over the top before baking. It gives the top a slightly crisp, caramelized edge that tastes just like a bakery favorite. You can see how other bakers take this idea and run with it when you look up recipes like the ones suggesting Cinnamon Roll Oatmeal Bars!
Swap for Other Fruits
If you aren’t feeling banana that day, zero problems! You can easily substitute the mashed banana with half a cup of unsweetened applesauce or even pumpkin puree. Just remember that using applesauce might make the bars slightly less sturdy, so you might want to opt for the ‘chill before baking’ note from my recipe details when you do this swap. These turn into fantastic fall-themed oatmeal bars!
Go Fruity with Dried Goodness
For a chewiness boost that packs a bit more tartness, swap out the optional chocolate chips for dried fruit. I love using dried cranberries mixed with finely chopped apricots. It gives these a vibrant color and a serious punch of flavor. Make sure you chop any larger dried fruits like dates or apricots into smaller pieces before adding them in so they distribute evenly through your Fruity Oatmeal Squares.
Serving Suggestions for Healthy Breakfast Bars
So, how do we turn these already great oatmeal bars into a full, satisfying morning meal? Honestly, they are perfect just as they are for a quick desk snack or packed in a lunchbox. But if you have five extra minutes, jazzing them up makes them feel like a real treat!
My favorite way is warming one up slightly and serving it crumbled over a dollop of plain Greek yogurt. The warmth melts the banana just a tiny bit, making it soft, and the cool yogurt is such a nice contrast. Don’t forget a good cup of hot coffee on the side!
If you’re using these as your main energy source before a workout, they pair great with a smear of peanut butter for some extra protein. These truly are the best Healthy Breakfast Bars, whether you eat them solo or dress them up!
Frequently Asked Questions About Making Oatmeal Bars
I know you’ve probably got some questions swirling around now that you see how easy these are. When I first started experimenting with oatmeal bars, I had so many questions myself, especially about substitutions! I’ve gathered the ones I hear the most often so we can make sure your batch turns out perfect.
There’s really no barrier to making these delicious Easy Oatmeal Bars; it’s all about mastering those little tweaks!
Can I substitute the banana in these oatmeal bars?
Oh, absolutely you can! While I think the banana adds the best natural moisture and sweetness, sometimes you just don’t have any ripe ones sitting around. If you can’t use banana, I have tested a great swap for you.
You can substitute the mashed banana with half a cup of unsweetened applesauce OR half a cup of pumpkin puree. They both work well to keep the mixture bound together. The only tiny thing to watch for is that since applesauce adds a little extra moisture, you might want to follow my tip from earlier and chill the bars for 30 minutes before baking. This ensures you still get those nice, soft, chewy results for your oat bars!
Why are my baked oatmeal bars crumbly?
This is the most common issue, and it usually comes down to one of two things that I’ve learned the hard way! First, did you press the mixture down firmly enough into that pan? Remember, we aren’t making light, fluffy cookies here; we need to compact them! Second, and this is the big one—did you cut them while they were still warm? Cutting before they have cooled completely is a recipe for crumble disaster. Patience is key for getting those perfect squares for your Homemade Oat Snacks!
How do I ensure my homemade oat snacks are kid-friendly?
These are fantastic for the kids because they are full of energy and very customizable! If you are packing these Homemade Oat Snacks in lunchboxes, first, make sure you skip all nuts if allergies are a concern. The base recipe is naturally nut-free if you use coconut oil instead of nut butter as a swap.
If you are using the chocolate chip option, I suggest going for mini chocolate chips. They distribute so much better throughout the batter than the standard size, ensuring that every single one of your Kid Friendly Oat Snacks has a bit of chocolate goodness!
How long do these oatmeal bars last?
Because these are made with whole ingredients and don’t have many preservatives like store-bought versions, they are best eaten fresh, but they last quite well! I keep mine stored in an airtight container at room temperature, and they stay perfectly moist and delicious for about four days. If you need them to last longer, pop them in the freezer for up to three months. Bring them out the night before, or just let a single bar thaw on the counter for 20 minutes for a chewy, satisfying treat!
Nutritional Snapshot of These Wholesome Oatmeal Treats
You want wholesome, and I want you to feel great about what you’re feeding your family, so here is a look at the estimated nutrition packed into these Wholesome Oatmeal Treats.
Remember, since we are using real ingredients like natural sugar from bananas and butter, these numbers are just a guide! If you swap the butter for oil, or if you add a cup of nuts instead of chocolate chips, things will obviously shift around a bit. But for a standard batch cut into 16 portions, here is what you can generally expect:
- Serving Size: 1 bar
- Calories: 180
- Sugar: 10g
- Protein: 4g
- Fiber: 3g
- Fat: 8g
I always say that 10 grams of sugar in a homemade bar that keeps you full until lunch is a win compared to the mystery ingredients in packaged snacks! These are designed to be satisfying fuel, not a dessert splurge, which is why they are such a fantastic option for Healthy Breakfast Bars.
Share Your Experience Making These Simple Ingredient Bars
I truly believe the best recipes are the ones we share and adapt together. Now that you have my tried-and-true method for the best oatmeal bars, I would absolutely love to hear how they turned out for you!
Did you stick with the pure banana version, or did you try swapping in some dried cranberries? Did you find the secret to getting them perfectly chewy? Don’t hold out on me!
Please leave a rating below for the recipe, and if you made any fun modifications—especially if you turned them into one of those delightful Fruity Oatmeal Squares—share a picture or drop a comment telling me all about it in the section below. Happy baking, and thank you so much for letting me share a bit of my kitchen confidence with you!
PrintChewy Banana Oatmeal Breakfast Bars
Make these chewy banana oatmeal bars for a simple, portable breakfast or snack. This recipe uses basic ingredients and yields wholesome, satisfying bars perfect for lunchboxes.
- Prep Time: 10 min
- Cook Time: 25 min
- Total Time: 35 min
- Yield: 16 bars 1x
- Category: Breakfast
- Method: Baking
- Cuisine: American
- Diet: Vegetarian
Ingredients
- 2 cups rolled oats
- 1 teaspoon baking soda
- 1/2 teaspoon salt
- 1 teaspoon ground cinnamon
- 1/2 cup melted unsalted butter or coconut oil
- 1/2 cup packed light brown sugar
- 1 large ripe banana, mashed (about 1/2 cup)
- 1 large egg
- 1 teaspoon vanilla extract
- 1/2 cup chocolate chips or chopped nuts (optional)
Instructions
- Preheat your oven to 350°F (175°C). Line an 8×8 inch baking pan with parchment paper, leaving an overhang on two sides for easy removal. Lightly grease the paper.
- In a medium bowl, whisk together the rolled oats, baking soda, salt, and cinnamon. Set this dry mixture aside.
- In a separate large bowl, combine the melted butter (or oil), brown sugar, mashed banana, egg, and vanilla extract. Whisk until smooth.
- Add the dry oat mixture to the wet ingredients. Stir gently until just combined. Do not overmix.
- Fold in the optional chocolate chips or nuts, if using.
- Press the mixture evenly into the prepared baking pan. Use the back of a spatula or your fingers to compact the mixture firmly.
- Bake for 20 to 25 minutes, or until the edges are golden brown and the center is set.
- Remove the pan from the oven and let the bars cool completely in the pan on a wire rack. Cooling is important for them to set properly.
- Once cool, use the parchment paper overhang to lift the entire block of bars out of the pan. Cut into 12 or 16 squares.
Notes
- For a firmer bar, chill the mixture in the pan for 30 minutes before baking.
- If you prefer a no-bake version, skip steps 1 and 4. Mix all ingredients together, press into the pan, and chill in the refrigerator for at least 2 hours until firm before cutting.
- These homemade oat snacks store well in an airtight container at room temperature for up to 4 days.
Nutrition
- Serving Size: 1 bar
- Calories: 180
- Sugar: 10g
- Sodium: 120mg
- Fat: 8g
- Saturated Fat: 4g
- Unsaturated Fat: 4g
- Trans Fat: 0g
- Carbohydrates: 25g
- Fiber: 3g
- Protein: 4g
- Cholesterol: 20mg