
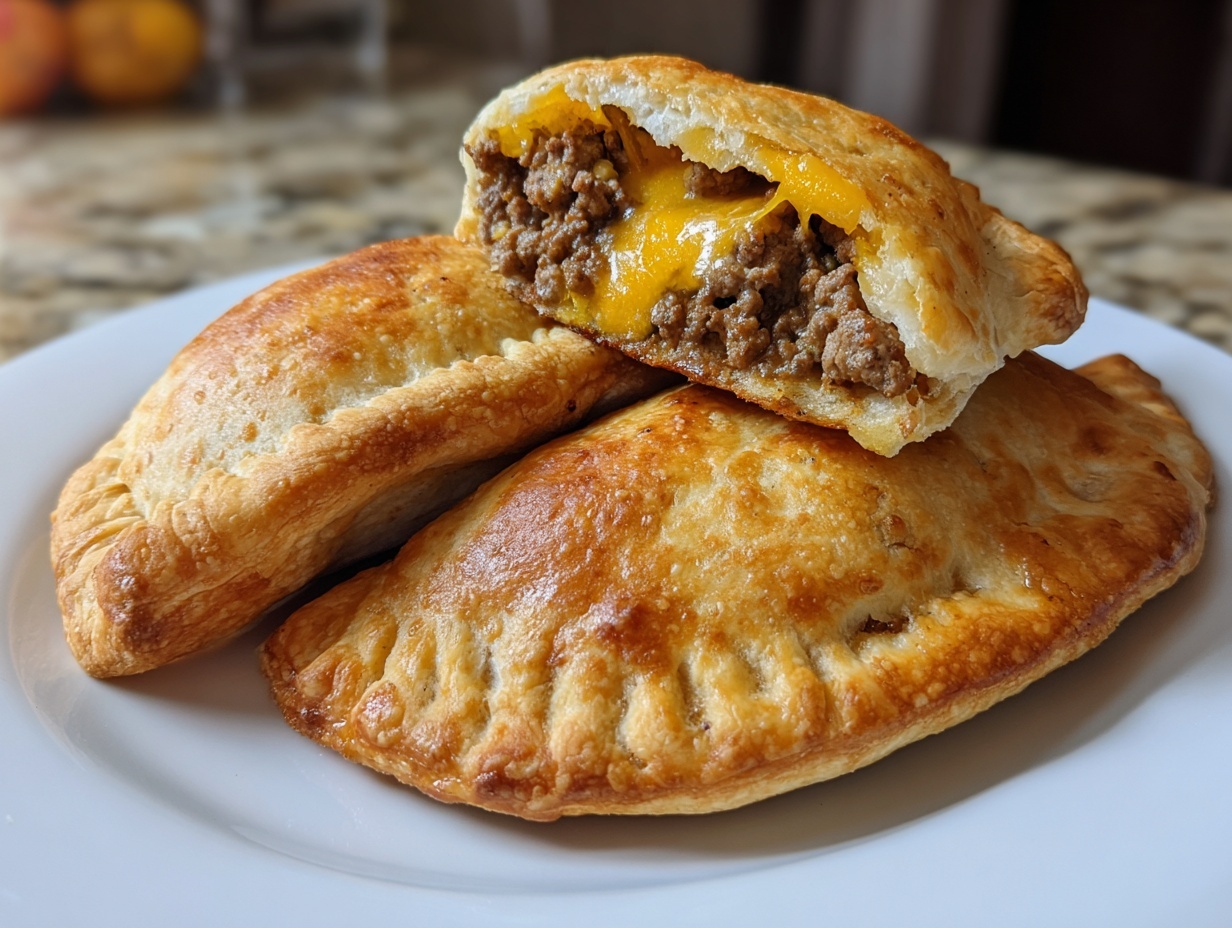
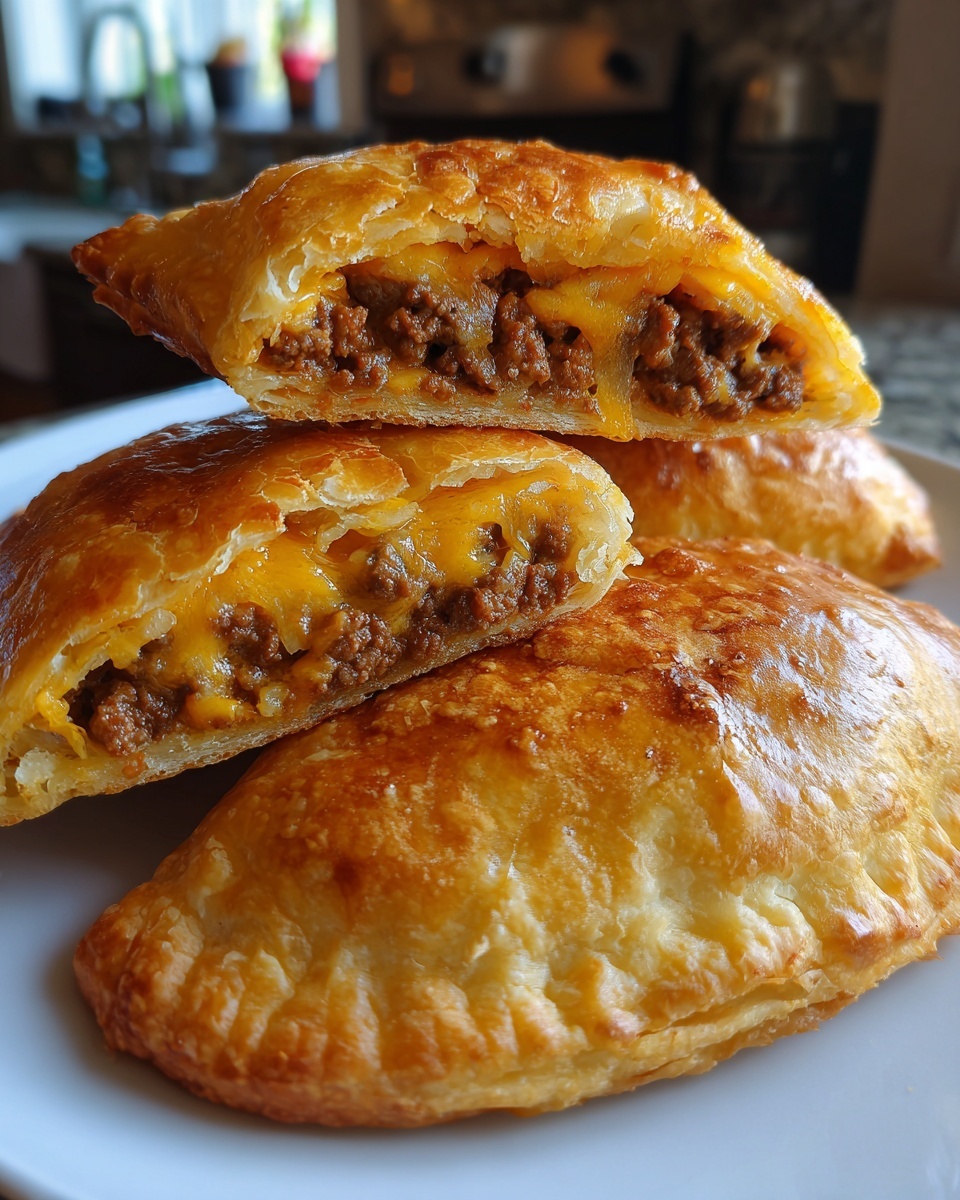
Are you ever hit with that serious craving for a juicy, cheesy, perfectly built burger, but the thought of firing up the grill and dealing with the cleanup feels like too much effort after a long day? Trust me, I totally get it! That’s why I tweaked and perfected this recipe for the Ultimate Homemade Cheeseburger Pockets. Imagine all that savory ground beef and gooey cheddar, tucked inside a flaky, golden pastry shell. Wow! These are the easy dinner recipes I live for when I need a family favorite supper on the table without a fuss. They make great quick weeknight dinners, and they truly taste like real burgers!
- Why These Ultimate Homemade Cheeseburger Pockets Are a Family Favorite Supper
- Gathering Ingredients for Your Cheeseburger Pockets
- How to Prepare the Ultimate Cheeseburger Pockets
- Tips for Success When Making Savory Baked Snacks
- Serving Suggestions for Your Cheeseburger Pockets
- Storage and Reheating Instructions for Leftover Cheeseburger Pockets
- Frequently Asked Questions About Cheeseburger Pockets
- Estimated Nutritional Information for One Cheeseburger Pocket
- Share Your Ultimate Cheeseburger Pockets Creations
- Estimated Nutritional Information for One Cheeseburger Pocket
- Share Your Ultimate Cheeseburger Pockets Creations
Why These Ultimate Homemade Cheeseburger Pockets Are a Family Favorite Supper
When I’m trying to figure out what to make after a truly chaotic Tuesday, these pockets are what save the day. They hit that perfect sweet spot: they are ultimate comfort food recipes but they feel special enough that the kids actually cheer when I pull them out of the oven. Honestly, they are big hits and definitely count as kid approved meals here in my house. They tick every box for a busy cook like me!
Perfect for Quick Weeknight Dinners
The best part? They’re genuinely fast. We’re talking 15 minutes of prep and only 18 minutes of baking time. When the total time is under 40 minutes, that fits perfectly into those quick weeknight dinners slot. You get that full burger satisfaction without standing over a hot stove dripping grease everywhere. It’s streamlined deliciousness, that’s what it is.
Making Freezer Friendly Meals with Cheeseburger Pockets
I’ve learned that thinking ahead is my best defense against takeout menus. These pockets are fabulous for making ahead because they freeze beautifully. You just assemble them, seal them up tight, and pop them in the freezer. It’s so smart to already have these freezer friendly meals ready to go for those days when you have zero energy left. Just pull them out and bake them a little longer!
Gathering Ingredients for Your Cheeseburger Pockets
Okay, let’s get down to business! For these cheeseburger pockets to taste exactly like a perfect burger wrapped in pastry, you need the right lineup. I’ve listed everything you need right here. Remember, precision in ingredients leads to the best results when you’re aiming for that amazing, simple ground beef dinner result.
- 1 pound ground beef
- 1 small onion, finely chopped
- 1 teaspoon salt
- 1/2 teaspoon black pepper
- 1 teaspoon garlic powder
- 1/2 teaspoon Worcestershire sauce
- 1 cup shredded cheddar cheese
- 1 package (14.1 ounces) refrigerated crescent roll dough or puff pastry
- 1 egg, beaten (for egg wash)
Ingredient Notes and Substitutions for Cheeseburger Pockets
A couple of quick notes on those ingredients! If you want to really punch up that classic burger flavor in your cheeseburger pockets, try sneaking in 1 teaspoon of dried mustard powder with the other seasonings—it’s fantastic. Also, you have a choice with the dough: Crescent roll dough comes out flakier and lighter, while puff pastry gives you a richer, more layered bite. Both are amazing, but they change the texture of the final savory baked snacks just a bit!
How to Prepare the Ultimate Cheeseburger Pockets
This is where you turn simple ingredients into something truly special! Don’t rush this part, but don’t worry—these cheeseburger pockets come together faster than you think. First things first, get your oven ready. We need it preheated to 375 degrees Fahrenheit, and I always line my baking sheet with parchment paper immediately. It seems like an extra step, but trust me, it stops any cheese that might escape from gluing itself to the pan forever! We’re aiming for that perfect, leak-free bite, just like the ones you see online, like that great Cheesy Cheeseburger Pockets recipe.
- Preheat your oven to 375 degrees Fahrenheit. Line a baking sheet with parchment paper.
- In a skillet over medium heat, cook the ground beef and chopped onion until the beef is fully browned and the onion is soft. Drain off any excess grease.
- Stir the salt, pepper, garlic powder, and Worcestershire sauce into the cooked beef mixture. Cook for one minute more. Remove from heat and let cool slightly.
- Once the beef mixture is cool enough to handle, stir in the shredded cheddar cheese.
- Unroll the crescent roll dough or puff pastry onto a lightly floured surface. If using crescent rolls, separate them into individual triangles. If using puff pastry, cut it into squares large enough to hold a filling.
- Place about 2 tablespoons of the beef and cheese mixture onto the wider end of each dough triangle or in the center of each square.
- Fold the dough over the filling to create a triangle or square pocket. Press the edges firmly together with a fork to seal the pocket completely. Make sure the seal is tight to prevent cheese leakage.
- Place the sealed pockets onto the prepared baking sheet. Brush the tops lightly with the beaten egg wash.
- Bake for 15 to 18 minutes, or until the pastry is golden brown and puffed.
- Let the handheld meals cool slightly before serving. These are great for portable lunch ideas.
Cooking the Beef Filling for Cheeseburger Pockets
When you’re cooking the ground beef and onion, make sure you’re patient enough to completely drain off any excess grease after browning. Honestly, I take mine right over the sink and use a couple of paper towels just to soak up every last drop. Soggy filling equals soggy crust, and we absolutely need golden pastry for these cheeseburger pockets! Once the grease is gone, add in your seasonings and let it cook just a hair longer to wake up those flavors before you stir in that lovely cheddar cheese.
Assembling and Sealing Your Handheld Meals
This is the crucial moment! If you had to pick one thing that tells you if your cheeseburger pockets will leak, it’s the seal. When you fold that dough over, really press the edges down firmly with the tines of a fork. You want them completely crimped shut across the whole seam, otherwise, that hot, melty cheese is going to burst out and burn onto your baking sheet while they bake. We want all that cheesiness locked tight inside these perfect handheld meals!
Tips for Success When Making Savory Baked Snacks
I’ve made these types of handheld meals dozens of times, and while the basic directions are super simple, mastering the little details is what turns these into truly amazing crescent roll recipes. These aren’t just food; they are little edible gold parcels, and we want them locked up tight!
My number one piece of advice for achieving that show-stopping golden crust is the egg wash. Don’t skip brushing the tops lightly with that beaten egg! It creates that gorgeous sheen and helps the pastry brown evenly. If you want an extra deep, rich brown color, you can mix a tiny splash of water into the egg before beating it. It really makes these savory baked snacks look professional.
Now, let’s talk about cheese blowout, the nemesis of every stuffed pastry recipe. Even if you think you sealed your cheeseburger pockets well, sometimes the steam builds up and finds the weakest point. To combat this sneaky cheese escape artist, after you crimp the edges with the fork, go back over the seal with the back of a clean finger or the side of a spoon and press down *again*. This effectively double-seals the edges, giving the cheese nowhere to go but stay exactly where it belongs—inside the pocket!
Also, make sure your filling is truly cooled before you stuff the dough. If the beef and cheese mixture is warm, it compromises the structure of the cold dough, making it sticky, tearing easily, and encouraging leakage right away. A little patience when cooling the meat makes a huge difference in the end product!
Serving Suggestions for Your Cheeseburger Pockets
The best part about these cheeseburger pockets is that they bring all the joy of a backyard barbecue wrapped up neatly in pastry, meaning you don’t need a plate piled high to feel satisfied. They are fantastic on their own, but just like a real burger, they benefit from the right little extras on the side. I find that keeping the sides light and bright cuts through the richness of the beef and cheddar perfectly.
For that complete, familiar burger flavor recipes experience, you absolutely have to have condiments ready! Ketchup and yellow mustard are non-negotiable for dipping. If you have them on hand, a small bowl of finely diced dill pickles or even some mild banana peppers is amazing for adding a little crunch and tang.
For a proper meal, skip the heavy fries and instead pair your pockets with something simple and fresh. We often have these with a big bowl of carrot sticks and celery, or maybe a simple side salad with a sharp vinaigrette. It keeps the meal feeling light but filling. Remember, they taste best when they are piping hot, right out of the oven, so make sure your dipping sauces are ready to go before those ground beef pockets head into the oven!
If you are ever stuck on what to do with leftover ground beef, remember these are a great go-to for a simple ground beef dinner idea next time. It’s all about versatility in my kitchen!
Storage and Reheating Instructions for Leftover Cheeseburger Pockets
No matter how hard I try not to, I rarely manage to eat every single one of these delicious cheeseburger pockets in one sitting! They are just too good, and knowing they are in the fridge for later is comforting. Since these are fantastic freezer friendly meals, you have a couple of easy options for storing extras. You want to keep that pastry flaky, so how you store them matters!
If you’re planning to eat them within three or four days, pop any cooled leftovers into an airtight container. You can stack them carefully with small squares of parchment paper between the layers of cheeseburger pockets so they don’t stick together. Keep them in the refrigerator. They hold up really well this way, which is great for packing the next day.
Now, if you made a huge batch and want to save them long-term, refer back to those instructions where we froze them raw—that’s honestly the best method for freshness. If you already baked them and want to freeze the cooked ones, let them cool down completely first. Store them in a freezer-safe bag or container, again with parchment between them. They should be good in the freezer for about two months.
Reheating Your Cheeseburger Pockets for Maximum Crispness
Here’s the thing about reheating: if you zap cheeseburger pockets in the microwave, you get a soft, sauna-like crust, and no one wants a soggy burger pocket! We are aiming for that same golden deliciousness we had right out of the oven, so we have to use dry heat to revive that flaky pastry.
For refrigerated leftovers, the oven is always my top choice. Preheat your oven or toaster oven to about 350 degrees Fahrenheit, and just reheat them on a small baking sheet for about 8 to 10 minutes. Watch them closely, but that low, slow heat warms the beef and cheese right through while re-crisping the crust perfectly. That makes them taste almost homemade all over again!
The Quickest Way to Reheat Frozen Pockets
If you’re heating up the ones you froze raw (added to the baking time earlier), just throw them straight onto the sheet from frozen, and add about 5 to 7 minutes to the original baking time. They might look done on the outside but still be cool in the middle if you rush them, so checking the internal temperature (or just cutting one open!) is smart.
If you are reheating fully cooked, frozen cheeseburger pockets, you need a little more time. I’d recommend 350°F for about 15 minutes, flipping them halfway through. If you’re desperate and the microwave is the only option, only zap them for about 30 to 45 seconds—just enough to get the cheese warm—and then quickly toss them in a hot toaster oven for a minute or two to bring back some crispness. It’s a little extra work, but totally worth saving that flaky texture!
Frequently Asked Questions About Cheeseburger Pockets
I always appreciate when you all send in your questions! It means you’re out there making these cheeseburger pockets, and that makes my day. Dealing with new recipes can sometimes bring up tricky spots, so let’s knock out a few common ones right here. If you’re using your crescent roll recipes skills, these tips will help you master the dough part, too!
Can I use different types of cheese in these cheeseburger pockets?
Oh, absolutely you can play with the cheese here! Cheddar is classic because it’s got that bright flavor that mimics American cheese on a burger, but if you want maximum melt factor—you know, the cheese pull that stops traffic—you should mix the cheddar with something softer. I highly recommend adding half a cup of Monterey Jack or even Pepper Jack if you like a tiny bit of kick. Mixing cheeses helps ensure that even if one variety doesn’t stretch perfectly, the other one holds the flavor profile of the cheeseburger pockets together. It’s a guaranteed way to get gooey centers!
What makes these different from homemade hot pockets?
That’s a great question! When people talk about ‘homemade hot pockets,’ they usually mean relying on a very specific blend of processed fillings, often savory like pepperoni pizza or beef and vegetable. While ours are technically a stuffed pastry, the main difference here is the flavor blueprint: we are explicitly mimicking a classic grilled hamburger. That means the seasoning—onion powder, Worcestershire sauce, garlic—is calibrated to taste EXACTLY like that juicy, seasoned ground beef patty you love. Other savory baked snacks might be cheesy, but these cheeseburger pockets have that distinct, tangy burger flavor running through them!
Are these good for portable lunch ideas?
They are honestly one of my favorite portable lunch ideas! Since we bake these until they are fully cooked and golden, they hold up really well when cooled. They don’t get soggy instantly like a sandwich might. I usually pack them for my older kids in their lunch boxes without reheating them. By lunchtime, they are savory, cheesy, and still satisfying. I just make sure to wrap them individually in parchment paper or foil inside their container so they don’t steam each other up too much. Give them a try for your next packed meal! If you need speed, check out this quick homemade hot pockets recipe for inspiration on timing!
Estimated Nutritional Information for One Cheeseburger Pocket
When we are counting macros or just trying to keep track of what we log for the day, knowing the basics helps! Remember that these numbers are estimates based on using the standard crescent roll dough and the yield of 8 pockets from the recipe. Nutrition facts can swing a little depending on the fat content of your ground beef or the specific dough you choose. But for planning purposes, here is what you can generally expect from one of these fantastic cheeseburger pockets.
- Serving Size: 1 pocket
- Calories: 350
- Sugar: 2g
- Sodium: 550mg
- Fat: 22g
- Saturated Fat: 10g
- Unsaturated Fat: 12g
- Trans Fat: 0.5g
- Carbohydrates: 20g
- Fiber: 1g
- Protein: 18g
- Cholesterol: 65mg
See? Not bad at all for such a hearty, comforting meal! They pack a good punch of protein, which is always a win for a simple ground beef dinner.
Share Your Ultimate Cheeseburger Pockets Creations
I always tell you I want you to feel confident in the kitchen, and the best way to build that confidence is by trying things out and seeing what happens! Now that you have my perfected recipe for these cheeseburger pockets, I truly want to see what you come up with. Did you add bacon? Did you use puff pastry instead of crescent rolls? Spill the beans!
Please leave your review and rating right below this post—it helps other cooks know if this recipe is right for their family’s easy dinner recipes rotation. And if you snap a picture while they’re hot and golden, please share it on social media and tag me! I love seeing the Kings Cook community in action. Happy cooking, everyone, and I can’t wait to hear all about your amazing results!
PrintUltimate Homemade Cheeseburger Pockets

Make cheesy, handheld meals that taste like your favorite burger using simple ground beef and flaky pastry. These are perfect for quick weeknight dinners or freezer friendly meals.
- Prep Time: 15 min
- Cook Time: 18 min
- Total Time: 33 min
- Yield: 8 servings 1x
- Category: Dinner
- Method: Baking
- Cuisine: American
- Diet: Vegetarian
Ingredients
- 1 pound ground beef
- 1 small onion, finely chopped
- 1 teaspoon salt
- 1/2 teaspoon black pepper
- 1 teaspoon garlic powder
- 1/2 teaspoon Worcestershire sauce
- 1 cup shredded cheddar cheese
- 1 package (14.1 ounces) refrigerated crescent roll dough or puff pastry
- 1 egg, beaten (for egg wash)
Instructions
- Preheat your oven to 375 degrees Fahrenheit. Line a baking sheet with parchment paper.
- In a skillet over medium heat, cook the ground beef and chopped onion until the beef is fully browned and the onion is soft. Drain off any excess grease.
- Stir the salt, pepper, garlic powder, and Worcestershire sauce into the cooked beef mixture. Cook for one minute more. Remove from heat and let cool slightly.
- Once the beef mixture is cool enough to handle, stir in the shredded cheddar cheese.
- Unroll the crescent roll dough or puff pastry onto a lightly floured surface. If using crescent rolls, separate them into individual triangles. If using puff pastry, cut it into squares large enough to hold a filling.
- Place about 2 tablespoons of the beef and cheese mixture onto the wider end of each dough triangle or in the center of each square.
- Fold the dough over the filling to create a triangle or square pocket. Press the edges firmly together with a fork to seal the pocket completely. Make sure the seal is tight to prevent cheese leakage.
- Place the sealed pockets onto the prepared baking sheet. Brush the tops lightly with the beaten egg wash.
- Bake for 15 to 18 minutes, or until the pastry is golden brown and puffed.
- Let the handheld meals cool slightly before serving. These are great for portable lunch ideas.
Notes
- For extra flavor, add 1 teaspoon of dried mustard powder to the beef mixture.
- If you plan to freeze these, assemble them completely, brush with egg wash, and freeze them on the baking sheet until solid. Transfer the frozen pockets to a freezer bag. Bake from frozen, adding 5-7 minutes to the baking time.
- Serve these savory baked snacks with ketchup, mustard, or pickles on the side for a complete burger flavor experience.
Nutrition
- Serving Size: 1 pocket
- Calories: 350
- Sugar: 2
- Sodium: 550
- Fat: 22
- Saturated Fat: 10
- Unsaturated Fat: 12
- Trans Fat: 0.5
- Carbohydrates: 20
- Fiber: 1
- Protein: 18
- Cholesterol: 65