
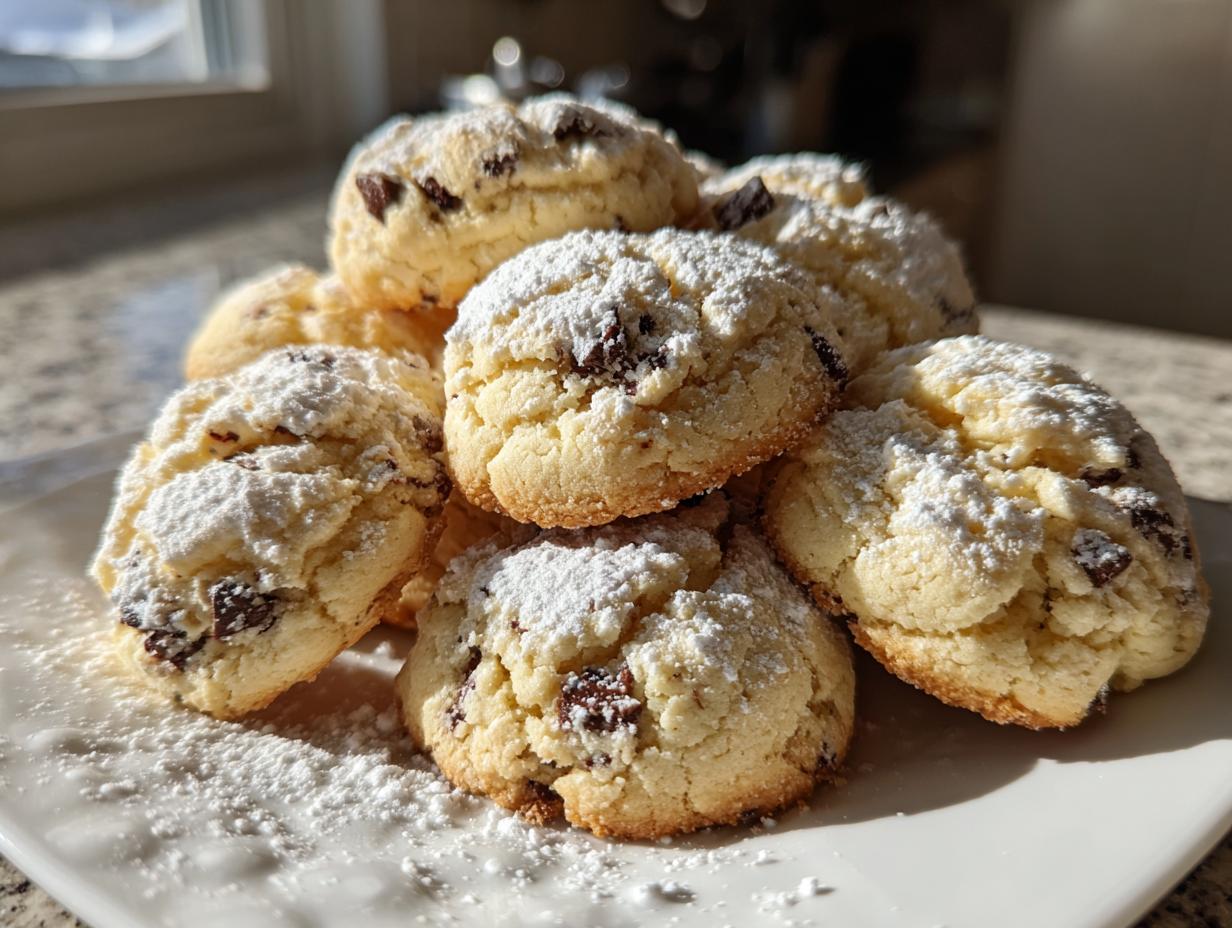
Oh my goodness, are you tired of heavy desserts that take hours to assemble? I know I am sometimes! If you often find yourself scrolling, wishing for that authentic, creamy taste of a Sicilian cannoli but without having to deep fry shells, then stop right here. I have spent ages tinkering, and I finally landed on The Ultimate Soft Cannoli Cookies! These are my best discovery for capturing that rich ricotta flavor in a handheld treat, studded with chocolate chips, of course. Trust me, Kate Connolly wouldn’t put it on the site unless it was rigorously tested, and these soft baked cookies deliver pure Italian joy every single time. They are ready faster than you can find a clean pastry bag!
- Why You Will Love These Soft Cannoli Cookies
- Essential Ingredients for Perfect Cannoli Cookies
- Step-by-Step Instructions for Making Cannoli Cookies
- Expert Tips for Perfect Soft Cannoli Cookies
- Storage and Make Ahead Tips for Your Cannoli Cookies
- Variations on Classic Cannoli Cookies
- Serving Suggestions for These Italian Cookie Recipes
- Frequently Asked Questions About Cannoli Cookies
- Estimated Nutritional Data for Your Cannoli Cookies
Why You Will Love These Soft Cannoli Cookies
These aren’t just cute little Italian cookie recipes; they are pure comfort food made easy. If you are looking for something that tastes authentically Sicilian but comes together fast, this is your winner. You simply have to try these!
- They have that signature creamy filling flavor right in the dough—no piping required!
- The texture is perfectly soft and almost cake-like, not stiff or crumbly.
- This recipe is exceptionally quick, making it ideal for weeknight cookie baking or unexpected guests.
- They are fantastic make ahead cookies for your next big party dessert spread!
Essential Ingredients for Perfect Cannoli Cookies
A reliable recipe starts with reliable ingredients, right? If you’re hunting for the best homemade cookies, don’t skimp here. For these cannoli cookies, the secret weapon is definitely the ricotta, but everything else is pantry-friendly. Remember, this is an easy dessert recipe, so stock up!
For the Creamy Cannoli Cookies Dough
- 1 cup unsalted butter, softened (Make sure it’s nice and soft!)
- 1 cup granulated sugar
- 1 large egg
- 1 teaspoon vanilla extract
- 1/2 teaspoon orange zest (This brightens everything up!)
- 1 cup whole milk ricotta cheese, drained very well
- 3 cups all-purpose flour
- 1 teaspoon baking powder
- 1/2 teaspoon salt
- 1/2 cup mini chocolate chips (I prefer mini so they distribute evenly!)
Optional Glaze and Garnish for Cannoli Cookies
We don’t have to glaze them, but honestly, why wouldn’t we? It just takes two minutes, and it takes these from a nice treat to a proper party dessert.
- For Glaze: 1 cup powdered sugar, 2 tablespoons milk, 1/4 teaspoon almond extract
- For Garnish: Chopped pistachios (if you are feeling extra fancy for your cookie exchange recipes!)
Step-by-Step Instructions for Making Cannoli Cookies
Okay, this is where the magic really happens! You’ve got your ingredients ready—remember to have that ricotta drained completely, or we’ll have trouble mixing later. Once you’re set, these steps will get you amazing, soft baked cookies in no time. If you’ve ever struggled with sugar cookie shapes, you might want to check out my tips for handling delicate doughs like this one right here.
Preparing the Dough Base
First thing first: preheat that oven to 350°F (175°C) and get your sheets ready with parchment paper. Now, grab your mixer! Cream together your softened butter and sugar until it looks light and fluffy—this is key! Beat in the egg, vanilla, and that bright orange zest. Once that’s mixed up, gently add in your well-drained ricotta cheese and mix until it’s smooth. In a separate bowl, whisk your flour, baking powder, and salt together really well before adding them in.
Mixing and Scooping Your Cannoli Cookies
Add the dry ingredients to the wet stuff gradually while mixing on low speed. Seriously, stop mixing as soon as you see it just come together. Overmixing these ricotta cookies is the fastest way to lose that soft texture we crave! Once combined, gently fold in those mini chocolate chips—be tender with them. Scoop rounded tablespoons of dough onto your prepared sheets, leaving about two inches apart. If you want them a *little* flatter, just gently press the tops with the bottom of a drinking glass.
Baking and Cooling the Cannoli Cookies
Time to bake! Pop those trays into the 350°F oven for about 10 to 12 minutes. This is crucial: you want the edges to look *lightly* golden, but the centers should still look soft and maybe a tiny bit underdone. They firm up as they cool! Let them hang out on the baking sheets for five minutes before carefully moving them to a wire rack to cool completely. Never try to glaze a warm cookie; it’ll just melt right off!
Finishing with Glaze (Optional)
If you decided to go all out, wait until the cookies are totally cool. Whisk the powdered sugar, milk, and almond extract together until you get a beautifully smooth consistency—thick enough to stay put, but thin enough to drizzle. Then, just drizzle it right over the tops and sprinkle on those chopped pistachios if you have them. So pretty!
Expert Tips for Perfect Soft Cannoli Cookies
Listen up, because I’m sharing the biggest secret to nailing these creamy ricotta cookies: the ricotta cheese itself! If you skip draining it, your dough is going to be a sticky mess, and you won’t get that perfect texture. I mean it—press that whole milk ricotta in a sieve for at least 30 minutes, maybe even longer if your kitchen is humid. That attention to detail is what separates a good cannoli cookie from the best one.
Also, don’t be afraid of the citrus! The orange zest wakes up all those rich dairy notes. If you aren’t feeling orange, lemon zest is an equally authentic way to go. And remember, these are baked just until set, not browned. That slight softness in the center is exactly what you want for that satisfying bite!
Storage and Make Ahead Tips for Your Cannoli Cookies
This is such great news, especially since these little gems are wonderful for holiday trays or cookie exchanges! If you’re looking to get ahead, you absolutely can prep these make ahead cookies. You should definitely freeze them *before* you add any glaze. Trust me on this one—glaze and freezing just don’t mix well!
For freezing, just place the completely cooled cookies—no frosting yet—in a single layer on a cookie sheet. Pop that sheet in the freezer for about an hour until they are solid. Then, transfer those frozen beauties into a good airtight container. You can keep them happy in the freezer for up to three months. When you need them, just pull out what you want and let them thaw completely on the counter before you even think about adding that pretty glaze.
To keep them soft on the counter, store them in a container at room temperature. Don’t use the fridge; that tends to dry out cookies faster. If you’re keeping them for just a few days, keeping them in the container with a slice of bread can help maintain that soft texture we worked so hard to achieve. These are just perfect for planning ahead!
Variations on Classic Cannoli Cookies
I love that these **cannoli cookies** are built on a fantastic, sturdy base, which means we can totally play around with them! They are fantastic as written, but if you want to jazz them up for a cookie exchange or just get a little wild in the kitchen, I have a few tricks up my sleeve that still honor those traditional Italian cookie recipes.
First off, let’s talk nuts! If you picked up pistachios for the garnish, why not mix some right into the dough too? About a quarter cup of finely chopped pistachios folded in with the chocolate chips adds a wonderful earthy crunch. It’s a lovely Sicilian dessert touch that complements the sweetness perfectly. Just make sure they are chopped small, so you don’t end up with giant hard bits.
We used orange zest, which is classic, but feel free to swap it out! Lemon zest gives you a brighter, zippier cookie, while a tiny pinch of cinnamon alongside the citrus is always welcome in my book, especially if you plan on making these for holiday baking ideas. Don’t feel locked into my exact recipe; make it *your* signature Italian sweet snack!
Another simple switch is pulling back on the chocolate chips and adding a little espresso powder instead. Not much, just half a teaspoon! It gives these cookies a wonderful mocha undertone that pairs beautifully with the creamy ricotta. See? Easy tweaks that make you look like a dessert genius!
Serving Suggestions for These Italian Cookie Recipes
So, you’ve made these incredible **cannoli cookies**—they are soft, they are creamy, and they are officially cooling on the rack. Now what? Part of the fun of baking these great Italian cookie recipes is figuring out the perfect moment to serve them!
These absolutely shine as part of a big, beautiful dessert spread for a party. They look marvelous next to anything shiny, like a simple fruit platter or maybe even something savory to balance the sweetness. If you happen to be making my three-ingredient tomato basil bruschetta for an appetizer earlier in the day, these are the perfect closer to keep that Italian theme going strong! You can find that simple bruschetta recipe if you need it.
But honestly, my favorite way to eat them is super simple. These cookies are perfect for dipping! They are sturdy enough that they don’t totally crumble, especially since they have that slightly dense texture. Pair one or two of these creamy filling cookies next to a strong, dark cup of coffee—espresso if you have it—and you’ve got yourself the perfect afternoon pick-me-up. They are wonderful served slightly warm alongside a scoop of vanilla bean gelato too, leaning into that whole dessert cookie vibe.
If you’re assembling a holiday tray, group them with your other sweet Italian snacks—maybe some biscotti. The slight citrus note in these cookies cuts through richer treats beautifully. They are truly versatile, whether you want a serious dessert course or just a little afternoon indulgence.
Frequently Asked Questions About Cannoli Cookies
I know you’ve probably got a few lingering questions, especially when trying out a recipe like this that blends a classic dessert into a new format. Don’t stress! I’ve pulled together the most common things people ask me about these **cannoli cookies** so you can bake with total confidence.
Can I use mascarpone instead of ricotta in these cannoli cookies?
You totally *can*, but just know you’ll change the texture slightly! Ricotta is naturally lighter and has a bit more water content which contributes to that soft, almost cake-like crumb we aim for in these cookies. Mascarpone is much richer and holds more fat. If you swap it in, the cookie might end up a little denser, maybe richer, but still delicious! Just make sure whatever you use is well-drained.
How do I keep my cannoli cookies soft?
The softness comes from two main things, sweetie. First, don’t overbake them! Seriously, pull them out when the centers still look just a tiny bit soft—they firm up on the cooling rack. Second, storage—always store them tightly sealed at room temperature, perhaps with an extra slice of plain bread tucked in the container to help hold the moisture. Avoid the fridge entirely!
Are these cookies considered traditional Italian cookie recipes?
That’s a great question about authenticity! While they are absolutely bursting with the flavors found in traditional Sicilian desserts—the ricotta, the zest—they aren’t a centuries-old classic in themselves. These are actually a modern, super fun twist! Think of them as an easy, handheld homage to the original cannoli shell filling. They borrow all the best parts so you don’t have to deal with the fried shells. If you want more time-tested Italian cookie recipes, check out my collection here!
Estimated Nutritional Data for Your Cannoli Cookies
I always like to give you a rough idea of what you’re working with here, because balancing indulgence with knowing what you’re eating is important! Since these ricotta cookies are made with real butter and rich ricotta cheese, they are definitely a treat, but that creaminess is what makes them taste so good!
For reference, here is the ballpark estimate for one of these glorious **cannoli cookies**. Please remember, because we’re baking from scratch and slight variations in ingredient brands can happen, these are always just estimates for comparison.
- Serving Size: 1 cookie
- Calories: About 180
- Sugar: 15g (That comes mostly from the dairy and the sugar we creaming!)
- Fat: 9g total
- Saturated Fat: 5g
- Carbohydrates: 22g
- Protein: 3g
- Cholesterol: 30mg
See? Not bad at all for a homemade dessert cookie, especially considering how satisfying they are. They are perfect for those holiday baking ideas when you need something sweet but portion-controlled. Enjoy every bite!
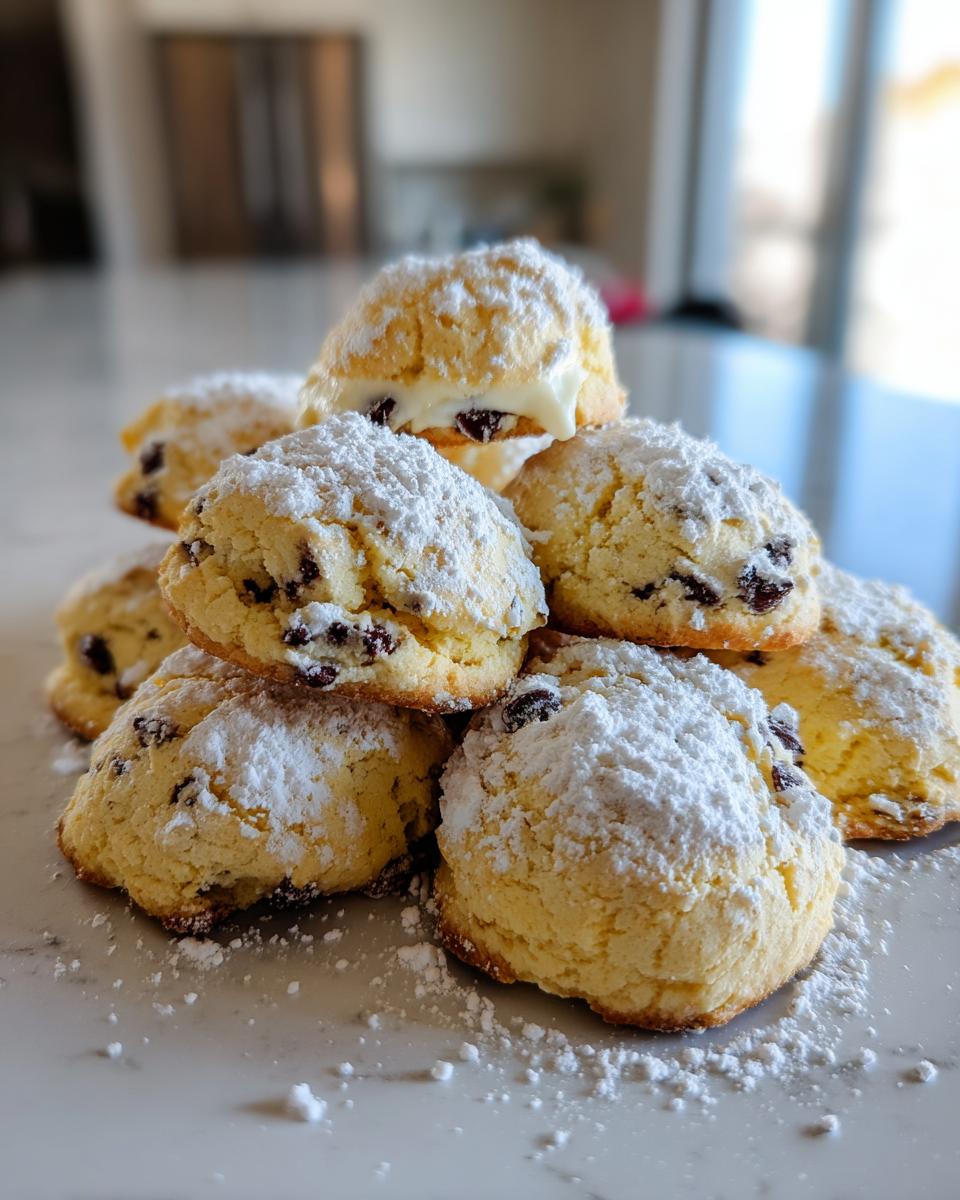
PrintThe Ultimate Soft Cannoli Cookies with Creamy Ricotta Filling and Chocolate Chips

You can make these easy Cannoli Cookies that capture the rich flavor of the classic Italian dessert in a soft, handheld cookie form. These cookies feature a creamy ricotta base, mini chocolate chips, and a hint of citrus zest.
- Prep Time: 20 min
- Cook Time: 12 min
- Total Time: 32 min
- Yield: 24 cookies 1x
- Category: Dessert
- Method: Baking
- Cuisine: Italian
- Diet: Vegetarian
Ingredients
- 1 cup unsalted butter, softened
- 1 cup granulated sugar
- 1 large egg
- 1 teaspoon vanilla extract
- 1/2 teaspoon orange zest
- 1 cup whole milk ricotta cheese, drained well
- 3 cups all-purpose flour
- 1 teaspoon baking powder
- 1/2 teaspoon salt
- 1/2 cup mini chocolate chips
- For Glaze (Optional): 1 cup powdered sugar, 2 tablespoons milk, 1/4 teaspoon almond extract
- For Garnish (Optional): Chopped pistachios
Instructions
- Preheat your oven to 350°F (175°C). Line baking sheets with parchment paper.
- In a large bowl, cream together the softened butter and granulated sugar until light and fluffy.
- Beat in the egg, vanilla extract, and orange zest until just combined.
- Add the well-drained ricotta cheese and mix until smooth.
- In a separate bowl, whisk together the flour, baking powder, and salt.
- Gradually add the dry ingredients to the wet ingredients, mixing on low speed until just combined. Do not overmix.
- Gently fold in the mini chocolate chips.
- Drop rounded tablespoons of dough onto the prepared baking sheets, leaving about 2 inches between each cookie. You can lightly flatten them with the bottom of a glass if desired.
- Bake for 10 to 12 minutes, or until the edges are lightly golden. The centers should remain soft.
- Let the cookies cool on the baking sheets for 5 minutes before transferring them to a wire rack to cool completely.
- If making the glaze, whisk together the powdered sugar, milk, and almond extract until smooth. Drizzle over the cooled cookies and sprinkle with chopped pistachios, if using.
Notes
- Make sure your ricotta cheese is very well-drained. Excess moisture will make the cookie dough too wet to handle. Press it in a fine-mesh sieve for at least 30 minutes.
- For a more traditional flavor, substitute the orange zest with lemon zest.
- These cookies freeze well before glazing. Place cooled cookies in an airtight container and freeze for up to three months. Thaw before glazing and serving.
Nutrition
- Serving Size: 1 cookie
- Calories: 180
- Sugar: 15g
- Sodium: 95mg
- Fat: 9g
- Saturated Fat: 5g
- Unsaturated Fat: 4g
- Trans Fat: 0g
- Carbohydrates: 22g
- Fiber: 1g
- Protein: 3g
- Cholesterol: 30mg