
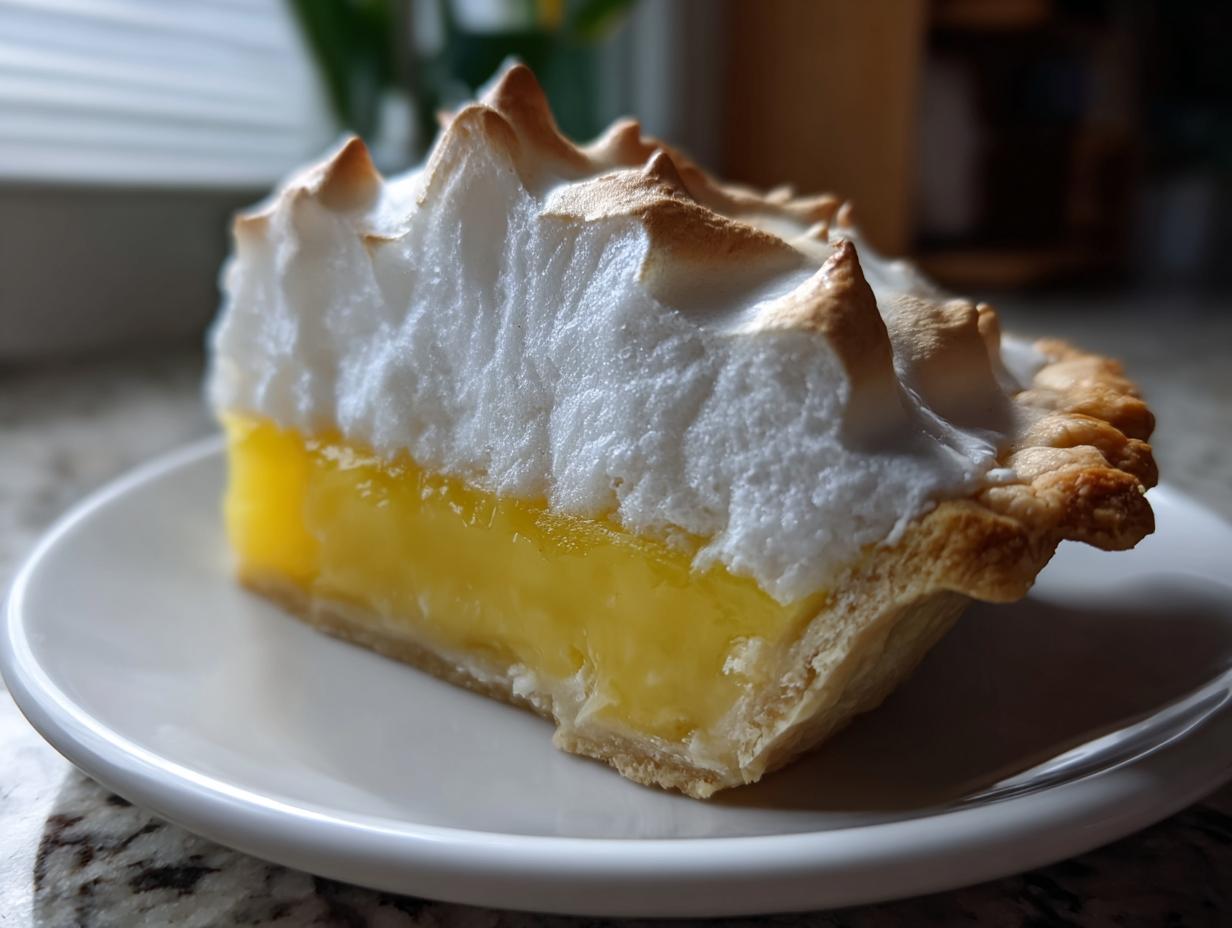
There is just something truly transporting about a perfect slice of a classic dessert, isn’t there? You bite in, and suddenly you’re right back at some wonderful family celebration. If you’re ready to conquer the king of citrus classics, you’ve come to the absolute right place! Today, we are making my ultimate, fail-safe, **lemon pie** recipe. I know meringue can look intimidating, but trust me when I say this version—refined over years of taste tests right here in my Kings Cook kitchen—delivers that incredible, sunshiny tang you crave alongside towering, stable meringue peaks. We’re going to ditch the stress and bake up something showstopping!
- Why This Classic Lemon Meringue Pie is the Best Lemon Pie You Will Make
- Ingredients Needed for Your Homemade Lemon Pie
- Step-by-Step Instructions for the Perfect Lemon Pie
- Ingredient Notes and Substitutions for Your Lemon Pie
- Tips for Success When Making a Classic Lemon Meringue Pie
- Serving Suggestions for This Refreshing Summer Pie
- Storage and Reheating Instructions for Lemon Pie
- Frequently Asked Questions About Lemon Pie
- Share Your Tangy Sweet Pie Creations
Why This Classic Lemon Meringue Pie is the Best Lemon Pie You Will Make
I truly believe this is the **best lemon pie** recipe out there, and it’s all thanks to mastering two key layers. Forget those runny fillings that weep into the crust! My method guarantees a **silky lemon filling** that sets up beautifully firm while still maintaining that decadent, smooth texture. We achieve this because we pour the meringue onto a HOT filling—that’s the trick to locking everything in place and preventing shrinkage, a little tip I learned from my culinary training.
If you’ve ever been scared off by meringue, don’t be! This structure is so dependable, it’s almost foolproof. You can check out some other celebrated versions online, like this great guide to the [classic lemon meringue pie recipe], but honestly, my tried-and-true steps are what keep my pies perfect every time.
Achieving Stable, Glossy Meringue Peaks
This is where we build trust in the recipe! Make sure your egg whites are truly at room temperature. Cold whites just won’t whip up with the necessary volume. When you start beating them, wait until you get soft peaks, then sprinkle in the cream of tartar—it acts like a magic stabilizer! Don’t stop until you have stiff, glossy peaks that hold their shape when you lift the whisk.
The Secret to a Zesty Lemon Pie Filling
A great **lemon pie** needs that sharp, bright flavor to cut through the sweetness—it shouldn’t taste like sweet sugar soup! That’s why I insist on using both fresh lemon juice AND fresh zest. That zest holds all the essential oils, giving us that vibrant punch that makes every bite a true **zesty lemon dessert** experience. Don’t skimp on the lemon; it makes all the difference!
Ingredients Needed for Your Homemade Lemon Pie
Okay, let’s get organized! Having everything measured out before you start cooking is the secret to keeping that filling smooth and stress-free. This **lemon pie from scratch** needs just a few core components, but the details matter here. I know some folks skip making their own crust, but if you’re feeling brave, my guide to the [best homemade butter pie crust] pairs perfectly with this tangy center!
Here’s exactly what you need on hand:
- 1 (9 inch) unbaked pastry crust (make sure it’s cooled if you pre-baked it!)
- 1 1/2 cups granulated sugar
- 1/4 cup cornstarch
- 1/4 teaspoon salt
- 1 1/2 cups cold water
- 4 large egg yolks, lightly beaten
- 1/2 cup fresh lemon juice (please, use fresh squeezed!)
- 1 tablespoon lemon zest
- 4 large egg whites, at room temperature
- 1/4 teaspoon cream of tartar
Step-by-Step Instructions for the Perfect Lemon Pie
Preparing the Crust and Silky Lemon Filling
First things first, we need a home for our gorgeous filling! Preheat your oven to 350 degrees F, and bake that 9-inch pastry crust until it’s just lightly golden, like a perfect sunkissed beach day. Once it’s done, take it out and let it cool completely on a wire rack—this is super important, or your filling gets soupy! While that’s cooling, grab a medium saucepan. Whisk together your sugar, cornstarch, and salt until they’re completely blended. Now, slowly, slowly whisk in the cold water until everything looks smooth. No lumps allowed here, so keep whisking until it’s beautiful!
Tempering Eggs and Setting the Tangy Sweet Pie Filling
Time for the most important part of our **tangy sweet pie**! In a separate bowl, lightly beat your four egg yolks. We need to introduce them to the hot sugar mixture slowly, or they will scramble! Take about one cup of that hot sugar liquid and pour it into the yolks while whisking constantly—that’s called tempering, and it stops the eggs from cooking too fast. Once tempered, pour that mixture right back into the saucepan with the rest of the hot liquid. Return it to medium heat and stir like crazy until the filling thickens up and starts bubbling gently. You want it thick enough that a spoon dragged across the bottom leaves a clear trail for a second.
Once it thickens, pull it off the heat instantly! Stir in your fresh lemon juice and that bright zest. Pour this velvety smooth filling straight into your completely cooled crust. Now we move fast to the meringue!
Whipping the Meringue and Final Bake for Your Lemon Pie
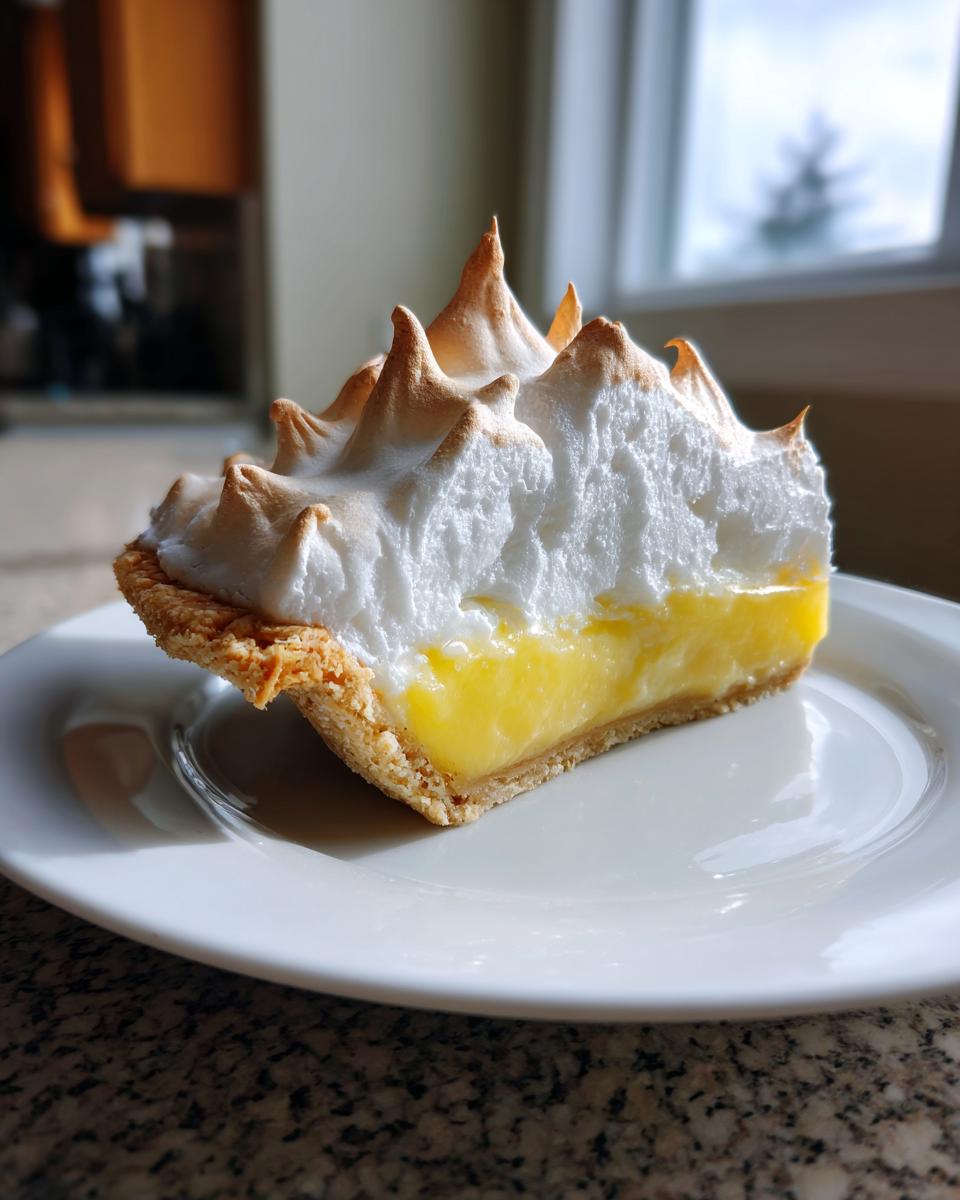
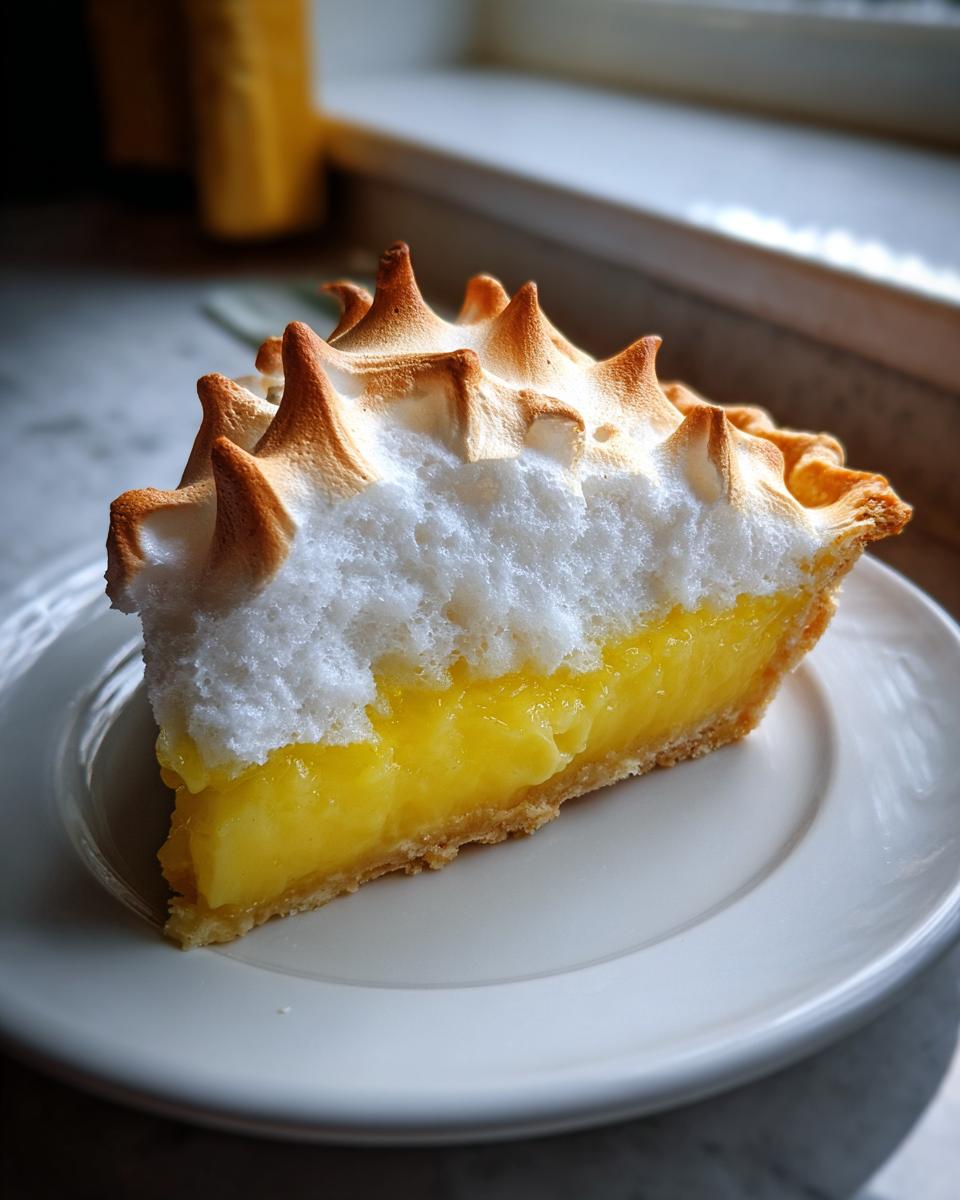
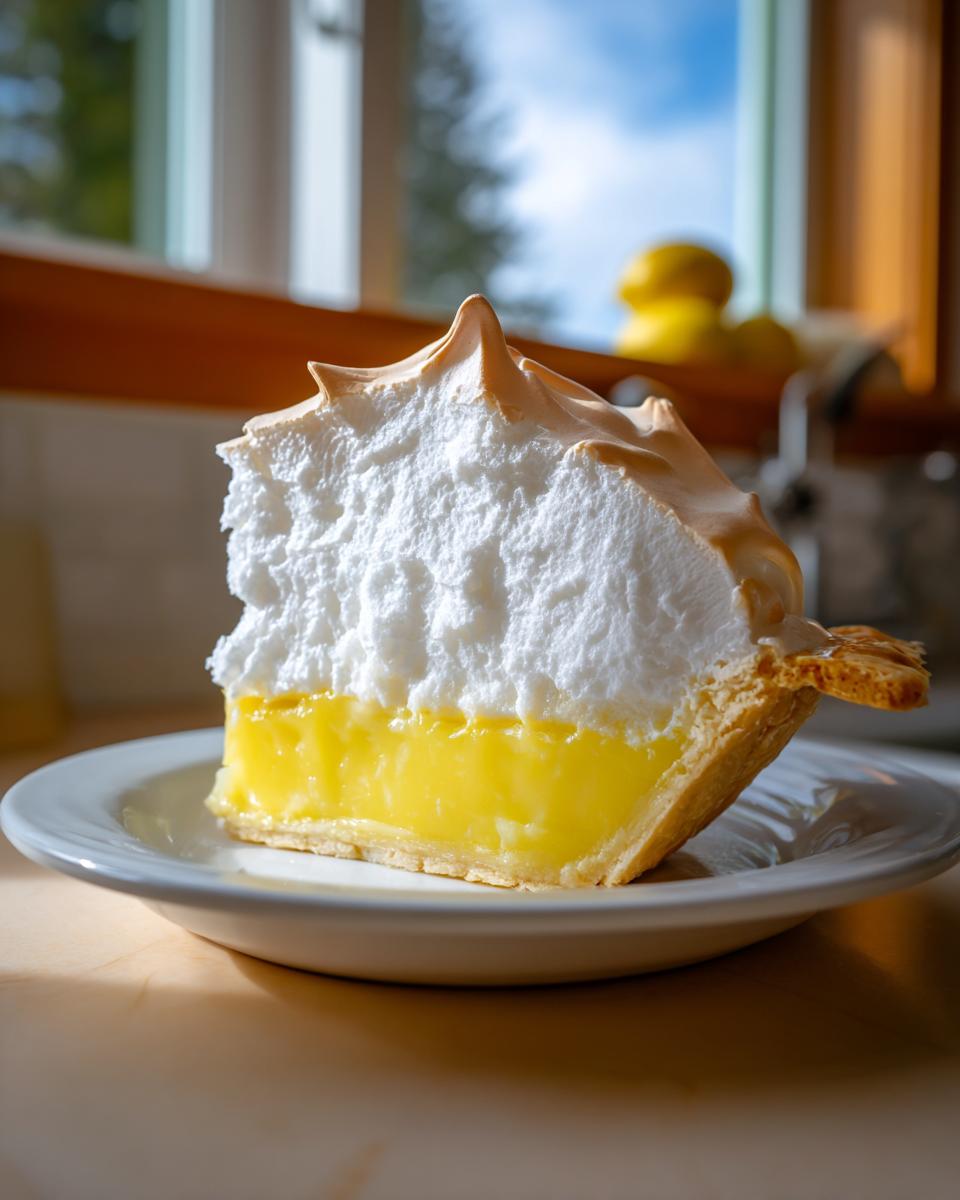
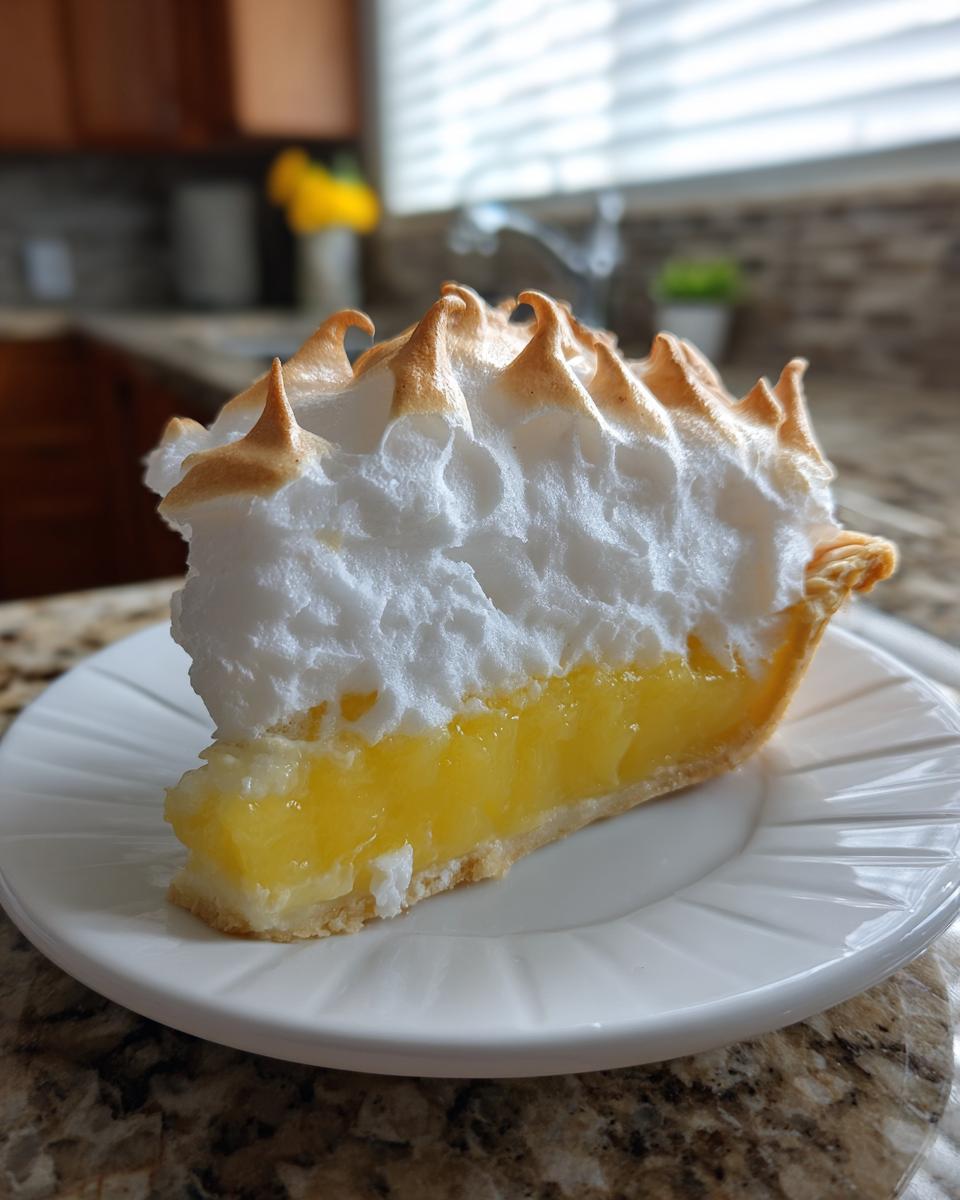
Get those four egg whites into a clean, grease-free bowl—even a tiny bit of fat will stop them from whipping up! Beat them until they form soft peaks. Now add that tiny bit of cream of tartar; that’s your meringue insurance policy! Keep beating until you get those stiff, glossy peaks—they should stand straight up without flopping over. Gently mound that meringue over your hot filling. Make sure it touches the crust all the way around; this seals it in and stops it from shrinking away as it bakes. Pop the whole thing in the oven for just 12 to 15 minutes, until the tips are nicely golden brown. You’ve made a **lemon pie**! Wait, wait—the hardest step is next: let it cool for a minimum of four hours. Patience is key for the filling to set perfectly!
Ingredient Notes and Substitutions for Your Lemon Pie
I often get asked about shortcuts when making a **lemon pie** from scratch, and I totally get it! Sometimes you need a **quick lemon dessert**. The pastry crust is traditional, but if you’re short on time, you can absolutely swap it out for a pre-made **graham cracker crust lemon pie**!
If you go that route, those buttery crumbs are amazing with this tangy filling. You can save yourself time, though I’ll always sing the praises of a homemade crust—you can find my toffee graham cracker option [here] if you want to try that version!
Also, about those lemons: please use real lemons! Bottled juice just doesn’t have that authentic, electric flavor we are aiming for here. For the egg whites, make sure they are completely free of any trace of yolk. That yolk is fat, and fat is the enemy of a fluffy meringue!
Tips for Success When Making a Classic Lemon Meringue Pie
Even when you follow the directions perfectly, sometimes lemon meringue pies try to fight you! They are divas, honestly. But I’ve learned a few tricks over the years that stop those common issues dead in their tracks, ensuring your **lemon pie** always looks magazine-ready. These are the little details that take you from a good baker to a great one!
My biggest piece of advice, which I mentioned quickly before, is ensuring that meringue seals the deal. You absolutely must spread that meringue right to the edge of the crust—all the way to the pastry rim. If there is any exposed filling or gap, the top layer of the hot meringue will shrink as it cools, pulling away from the sides and causing those frustrating little beads of moisture to form underneath. That moisture is called ‘weeping,’ and it ruins the gorgeous look of the meringue!
Another major point for keeping things stable is the filling consistency. You have to cook that custard until it is truly hot and bubbling gently for a minute after thickening. If the filling isn’t hot enough when you add the meringue, the temperature difference causes steam to get trapped, leading to weeping again. It’s a balancing act between getting the filling hot enough and not overcooking the egg yolks!
Also, if you’re planning on making this pie ahead of time, you have to remember that meringue does not like humidity. If you live somewhere sticky, it’s often better to bake the filling and meringue the same day you plan to serve it. If you absolutely must bake early, follow the cooling instructions exactly and keep it refrigerated, but remember that the meringue texture starts to change overnight. For more insight on handling tricky elements, sometimes I check out other reliable sources, like the tips found in this trusted [lemon meringue pie guide].
Serving Suggestions for This Refreshing Summer Pie
Now that you’ve wrestled that gorgeous lemon pie into submission and it has set up perfectly, the fun part—serving it! Because this pie is so rich and has that great, tart punch, you don’t need much to go alongside it. In fact, it’s wonderful all on its own, especially once you’ve browned that meringue tip!
If you are planning a big holiday spread or a summer barbecue where you want something light to balance the richness, I always suggest pairing it with fresh fruit. Think simple; sliced strawberries or blueberries look amazing against that stark white meringue. The freshness of the berries just screams **refreshing summer pie**!
We often serve this baby after a large meal, and honestly, a small slice alongside a strong cup of coffee or an iced tea is the best pairing imaginable. That bitterness cuts right through the sweetness and the richness of the custard. If you happen to be serving something heavy for the main course, like roast chicken or a rich pasta, you might want a brighter salad to start off the meal, perhaps something with citrus to keep that theme going! I have a fantastic [arugula and fennel citrus salad recipe] that would be perfect as a palate cleanser before the big dessert reveal.
Just remember, because the filling is so dense and flavorful, a little slice goes a long way. Don’t feel like you need a giant wedge for everyone!
Storage and Reheating Instructions for Lemon Pie
You’ve done the hard part—now you need to make sure your gorgeous creation lasts! Storing a meringue-topped pie can be tricky because that fluffy topping just hates moisture, but we can handle it. Frankly, the best way to enjoy this **lemon pie** is the day you make it, when that meringue is crisp and the filling is perfectly cool and set.
Here’s the deal with leftovers: You must refrigerate it immediately after it has cooled almost completely (after those 4 hours!). However, you can’t just toss it in the fridge uncovered. The cold air inside your fridge is humid enough to make the meringue beads up and weep. I usually cover the pie loosely with plastic wrap, making sure the film doesn’t touch the meringue peaks at all. If you can, use toothpicks stuck strategically around the edges to prop up the wrap—think of it like creating a tiny tent over your beautiful dessert!
How long does it last? Honestly, the filling will be fine clinging to its silky texture for about three days in the fridge, but the meringue starts to degrade after day two. After day three, the meringue will likely be a little deflated and maybe a little wet, but the filling is still incredibly tangy and delicious. If you’re in this situation, just gently scrape off the meringue layer, and enjoy the amazing, rich lemon filling with a dollop of freshly whipped cream!
And please, don’t even try to reheat this pie! Baking it again will completely melt your structured filling and turn that lovely meringue into a sticky puddle. This **lemon pie** is meant to be served cool and crisp—save your oven heat for the next batch!
Frequently Asked Questions About Lemon Pie
I always get the best questions after people try this recipe for the first time! It’s totally normal to have a few queries when dealing with custards and meringue, especially when you want that perfect, tall top. Here are some things I hear all the time about making the **best lemon pie**.
Can I make this a no bake lemon pie variation?
That is such a common question, especially when summer hits and you don’t want to turn on the oven! This particular recipe—the classic meringue style—absolutely requires baking because we are cooking the custard filling on the stovetop and then setting it in the oven under the meringue. If you’re looking specifically for a **no bake lemon pie**, you’ll need a different approach, usually one that relies on sweetened condensed milk and perhaps some gelatin to get that chill-set creaminess. I recommend searching for a specific **quick lemon dessert** recipe geared towards being no-bake if that’s what you’re after!
How long must the lemon pie cool before slicing?
Oh, this is the hardest test of all—waiting! I know you want to dive right in, but you absolutely must let this pie cool for a minimum of four hours before you even think about cutting into it. If you slice it too early, you’re going to get a runny mess because the cornstarch thickener needs that chilling time to fully lock everything into that beautiful, **creamy lemon pie** structure.
I usually bake my pie the afternoon before I plan to serve it. That way, it sets overnight in the fridge, and when company arrives, it’s perfectly firm and ready to go!
What is the difference between this and a lemon icebox pie?
That’s a great distinction to make because they are worlds apart! This recipe is a classic baked meringue pie—it involves cooking a custard filling on the stove, pouring it into a pre-baked shell, topping it with meringue, and baking the top layer to brown. It’s rich and tangy.
A **lemon icebox pie**, on the other hand, is never baked (except maybe the crust). It’s the ultimate **refreshing summer pie** because the filling relies on heavy cream, whipped topping, or condensed milk, and it sets completely in the refrigerator. Think of the icebox pie as being lighter and creamier, while this classic **lemon pie** is denser, more custard-like, and has that spectacular cloud of toasted meringue on top!
Share Your Tangy Sweet Pie Creations
Wow, you made it! I am so incredibly proud of you for diving in and tackling this truly classic **lemon pie**. Whether your meringue peaked like the mountains of Montana or maybe sunk just a *tiny* bit (we’ve all been there, I promise!), the fact that you created something tangy, sweet, and homemade means you won!
Now, I am dying to hear all about it! Did you manage a perfect slice? Did the citrus wake everyone up at the dinner table? Please take a minute and leave a quick rating right below the recipe card. Three stars, five stars—it all helps me know what’s working across all your kitchens. Five stars for me means you want to make it next week, probably!
If you ran into any bumps, or if you tried a substitution that worked brilliantly, drop a comment below. I check every single one, and I love chatting with you about technique. If you need to reach out directly with a detailed question, you know where to find me on the [Contact Page]!
Happy baking, and thank you again for letting me come into your kitchen today!
PrintGrandma’s Classic Lemon Meringue Pie Recipe

Bake this classic lemon meringue pie for a showstopping, tangy dessert. You will achieve a perfectly set, silky lemon filling and tall, stable meringue peaks with these straightforward steps.
- Prep Time: 25 min
- Cook Time: 30 min
- Total Time: 55 min
- Yield: 8 servings 1x
- Category: Dessert
- Method: Baking
- Cuisine: American
- Diet: Vegetarian
Ingredients
- 1 (9 inch) unbaked pastry crust
- 1 1/2 cups granulated sugar
- 1/4 cup cornstarch
- 1/4 teaspoon salt
- 1 1/2 cups cold water
- 4 large egg yolks, lightly beaten
- 1/2 cup fresh lemon juice
- 1 tablespoon lemon zest
- 4 large egg whites, at room temperature
- 1/4 teaspoon cream of tartar
Instructions
- Preheat your oven to 350 degrees F. Bake the pastry crust according to package directions until lightly golden. Let it cool completely on a wire rack.
- In a medium saucepan, whisk together the sugar, cornstarch, and salt. Gradually whisk in the cold water until smooth.
- Cook the mixture over medium heat, stirring constantly, until it thickens and bubbles. Reduce the heat and cook for one minute more, still stirring. Remove from heat.
- In a separate bowl, lightly beat the egg yolks. Slowly temper the yolks by whisking about one cup of the hot sugar mixture into the yolks. Then, pour the tempered yolk mixture back into the saucepan with the remaining hot mixture.
- Return the saucepan to medium heat. Cook, stirring constantly, until the filling thickens again and just begins to bubble. Do not let it boil vigorously. Remove from heat immediately.
- Stir in the lemon juice and lemon zest into the hot filling. Pour the silky lemon filling into the cooled, pre-baked pastry crust.
- In a clean, grease-free bowl, beat the egg whites with an electric mixer until soft peaks form. Add the cream of tartar and continue beating until stiff, glossy peaks form.
- Spread the meringue evenly over the hot lemon filling, making sure the meringue touches the edges of the crust all around to prevent shrinking. Create decorative swirls with the back of a spoon.
- Bake for 12 to 15 minutes, or until the meringue is lightly golden brown.
- Cool the pie completely on a wire rack for at least 4 hours before slicing. This allows the filling to set properly.
Notes
- For the best meringue stability, use room temperature egg whites and ensure your mixing bowl is completely free of any grease or yolk residue.
- To prevent the meringue from weeping (beading moisture), make sure you cook the lemon filling until it is very hot before spreading the meringue on top.
- If you prefer a quicker dessert, you can substitute the pastry crust with a graham cracker crust.
Nutrition
- Serving Size: 1 slice
- Calories: 350
- Sugar: 45g
- Sodium: 200mg
- Fat: 18g
- Saturated Fat: 6g
- Unsaturated Fat: 12g
- Trans Fat: 0g
- Carbohydrates: 48g
- Fiber: 1g
- Protein: 6g
- Cholesterol: 120mg