
Oh, I know that feeling! You’re craving that incredible, crunchy Tex-Mex comfort food—the kind that usually means a trip to the fryer and definitely means feeling heavy afterward. But what if I told you we can stop feeling guilty about our favorite meals? I’m thrilled to share my secret for making truly amazing Baked Chicken Chimichangas that deliver that deep-fried crunch using just your oven. Trust me, after rigorously testing several methods so you don’t have to, I found the *exact* trick to get those tortillas perfectly golden and hold all that juicy filling in place. This recipe is ridiculously easy and perfect for those busy nights when a full weeknight dinner is non-negotiable!
- Why You Will Master These Baked Chicken Chimichangas
- Essential Ingredients for Perfect Baked Chicken Chimichangas
- Step-by-Step Instructions for Crispy Baked Chimichangas
- Tips for Success with Baked Chicken Chimichangas
- Ingredient Notes and Substitutions for Healthier Chimichangas Recipe
- Serving Suggestions for Your Restaurant Style Chimichangas at Home
- Storage and Reheating Instructions for Leftover Baked Chicken Chimichangas
- Frequently Asked Questions About Baked Chicken Chimichangas
- Nutritional Estimates for Guilt-Free Chimichangas
Why You Will Master These Baked Chicken Chimichangas
Honestly, making restaurant-quality Mexican food at home shouldn’t feel like a huge production, and with this recipe for Baked Chicken Chimichangas, it just isn’t. I want you to feel confident pulling these out of the oven looking like you spent hours on them. Here is exactly why this recipe is a guaranteed win for your weeknight rotation:
- The Crisp Factor is Real: I know, I know, baking usually means sad, floppy tortillas. Not here! We use a specific brushing technique that guarantees a genuinely crispy shell. They come out golden brown every single time.
- Weeknight Friendly Speed: Seriously, this comes together faster than ordering takeout. You spend maybe 15 minutes prepping the filling, and then the oven does all the hard work. Hello, easy weeknight Mexican dinner!
- Guilt-Free Comfort Food: You get all that rich flavor from the creamy chicken filling without submerging everything in oil. These are your new favorite healthier chimichangas recipe option.
- No Frying Mess: Say goodbye to oil splatter all over your stovetop! Baking keeps cleanup incredibly simple, which, trust me, is a massive win after a long day.
- Perfectly Zesty Filling: The slight tang from the salsa or green sauce mixed with the spices means the inside is just as exciting as the outside crunch. It hits that satisfying Tex-Mex flavor note we all crave.
- Family Approved Texture: Even the pickiest eaters love these because the inside stays juicy and warm, contrasting perfectly with that crunchy, golden exterior.
Essential Ingredients for Perfect Baked Chicken Chimichangas
Okay, let’s talk about what actually goes into these gems. When you’re trying to achieve that Crispy Baked Chimichangas texture in the oven, every ingredient plays a role. You don’t need a massive shopping list, but the quality of what you choose *does* matter, especially that sauce!
I’ve broken down what you’ll need for the filling and the all-important exterior coating. It all comes together so fast, which is why this makes such a fantastic Tex Mex dinner idea easy!
For the Creamy, Zesty Chicken Filling
This filling is what gives you that rich, satisfying center, making these truly feel like a Restaurant Style Chimichangas at Home experience.
- You’ll need 2 cups of cooked, shredded chicken breast. If you’re short on time, grab a rotisserie chicken—it saves you a ton of effort but still yields juicy results!
- To get that signature creaminess, grab 1/2 cup of cream cheese that you’ve let sit out so it’s nice and softened.
- Blend that with 1/4 cup of sour cream. This balances the richness.
- Cheese time! 1/2 cup of shredded Monterey Jack melts beautifully without getting too oily.
- Here’s your flavor secret: 1/4 cup of salsa or, even better, green enchilada sauce. This is key for that zesty punch!
- For seasoning, we’re using 1 teaspoon of chili powder, 1/2 teaspoon of cumin, and 1/4 teaspoon of garlic powder.
- Don’t forget salt and pepper to taste, of course!
Oh, and if you really want to lean into that authentic Chi Chis Style Baked Chicken vibe? Toss in a tiny, tiny pinch of dried Mexican oregano when you mix the spices in. It elevates the flavor instantly!
For Achieving Golden Brown Baked Tortillas
This part is crucial for success if you want your Baked Chicken Chimichangas to live up to the “crispy” promise. We need the tortillas pliable before rolling, and then we need to protect them during baking!
- You need 8 large flour tortillas—the burrito size works best because they wrap up tight.
- For the coating that makes them turn that gorgeous, crackly brown color, you have two really good options: a good quality cooking spray that coats evenly, or you can brush them liberally with 2 tablespoons of olive oil.
The key here is ensuring you get that fat coating on the outside; it acts just like the oil in a fryer, but safely in your oven! This simple step is what prevents the tortilla from drying out and ensures you get those perfect Golden Brown Baked Tortillas.
Step-by-Step Instructions for Crispy Baked Chimichangas
Now for the fun part—putting it all together! I promise that once you see how easy it is to assemble these Baked Chicken Chimichangas, you’ll wonder why you ever ordered them out. Remember, the goal today is maximum crunch with minimum effort. We are aiming for a perfect easy Mexican dinner that tastes like it took hours!
Preparing the Filling Mixture
First things first: get that oven cranking to 400°F (200°C) and have your baking sheet ready. We want everything hot! In a medium bowl, just dump in your shredded chicken, the softened cream cheese, sour cream, Monterey Jack, and all your spices and salsa. Now, mix it up really well. I mean *really* well. You want a uniform, creamy filling where everything is distributed evenly. This mixture, folks, is the absolute heart of your Baked Chicken Chimichangas, so make sure it tastes delicious before you roll!
Rolling and Sealing Your Quick Chicken Tortilla Rolls
Tortillas can be fussy, so listen up! Pop your 8 large flour tortillas in the microwave for just 15 seconds. This softens them up beautifully, preventing them from tearing when you roll. Lay a tortilla flat, place about 1/4 cup of that amazing chicken mixture near one edge. Now, here’s the sealing trick: fold the sides (left and right) inward over the filling first. Then, roll it up tightly from the bottom like you’re wrapping a present. Place it seam-side down on your prepared pan. Repeat for all of them!
The Secret to Golden Brown Baked Tortillas
This is the magic step that turns these into true Oven Fried Chicken Chimichangas! Take your cooking spray or olive oil—whatever you chose—and lightly brush the tops and sides of every single rolled chimichanga. Don’t skimp; you want a nice visible coating. Then, into that screaming hot oven they go for 15 to 20 minutes. Remember to flip them exactly halfway through! You’re looking for that deep, appetizing golden brown color everywhere. When they come out, the crunch will shock you!
Tips for Success with Baked Chicken Chimichangas
Look, I’ve burned plenty of things in my life, so I know the little hiccups that can trip you up when trying to make Baked Chicken Chimichangas crispy. Since we switched from deep-frying to baking, we have to be smart about keeping the outside crackly and the inside warm and delicious. Follow these tips, and you’ll guarantee yourself the best crunchy result!
First and foremost: Temperature is everything. Don’t put these in a lukewarm oven! You need that 400°F heat to instantly start crisping the outside of the tortilla before the moisture from the filling starts turning the bottom soggy. Seriously, let your oven fully preheat, or you might as well skip the oil brushing entirely.
Speaking of oil, don’t be shy with the brushing in the last five minutes of baking! I’ve found that if they look a little pale halfway through, giving them a second, *very light* coat of spray or oil right before the flip really locks in that golden color. It’s the secret to making them look professional.
- Shredded Chicken Hack: If you’re using leftover chicken, make absolutely sure it’s not swimming in liquid! Squeeze out any excess sauce or broth before mixing it into the cheese filling. Too much liquid in the filling is the number one cause of sad, soft bottoms on your Crispy Baked Chimichangas.
- Don’t Overfill: This is crucial for the seam-side down technique. If you put more than about 1/4 cup of filling in a large tortilla, you’ll struggle to get a tight roll, and the filling will burst out during baking. Nobody wants a chimichanga explosion!
- Use Parchment (Or a Rack!): If you are worried about the bottom getting damp, place a wire cooling rack on top of your baking sheet, and place the rolls on the rack. This lets the air circulate underneath, giving you a more evenly cooked and crisp shell all the way around. It’s a great trick for getting that true Oven Fried Chicken Chimichangas texture!
If you ever need a quick snack idea after this, check out my suggestions for easy lunch ideas—sometimes you just need something simple the next day!
Ingredient Notes and Substitutions for Healthier Chimichangas Recipe
I get so many questions about swaps! Look, I designed this recipe to be hearty and delicious, but I also know everyone keeps slightly different things in their fridge. When we talk about making these Healthier Chimichangas Recipe friendly, sometimes easy substitutions are the answer. We want to stick close to that classic Tex-Mex flavor, but flexibility is key for a fast family meal.
The filling is where most of the questions come up, especially regarding the creaminess. If you don’t have cream cheese on hand—don’t panic! You can absolutely swap it out.
- Cream Cheese Swap: Try using 1/2 cup of full-fat Greek yogurt instead. It brings a lovely tanginess and that necessary smooth binding texture, helping keep this a Less Oil Chimichanga Recipe while cutting down on fat slightly. Make sure the yogurt is thick, though!
- Chicken Source Convenience: If you skip the whole pre-cooking step, grabbing a store-bought rotisserie chicken is my favorite short-cut. Just shred about half of it. However, make sure that rotisserie bird isn’t overly salty, or you’ll need to cut back on the salt later in the seasoning blend.
- Cheese Alternatives: Monterey Jack is classic because it melts so nicely, but if you only have a cheddar blend, go for it! Pepper Jack is also fun if you want to introduce a little underlying heat into your Shredded Chicken Mexican Rolls.
- Heat Level Control: The recipe calls for salsa or green enchilada sauce. If you want more spice, use a hotter salsa or swap out some of the mild green sauce for a teaspoon of diced jalapeños (fresh or jarred). That’s your main source of heat control for these Baked Chicken Chimichangas.
The most important thing is to keep the ratio of wet (creamy ingredients) to dry (shredded chicken) mostly balanced. Too much wet, and your tortillas will get soggy when baking, no matter how much you spray them!
Serving Suggestions for Your Restaurant Style Chimichangas at Home
You worked hard getting those Baked Chicken Chimichangas perfectly golden and crispy, so now we have to send them over the top with the right toppings! This is where you really make them feel like they came straight from your favorite Tex-Mex spot. The key when topping something so rich and savory is balance. You need something cool and fresh to cut through that creamy filling and the heat from the spices.
Don’t just settle for a blob of sour cream! Think about layering textures and temperatures. Since these are already a fantastic Tex Mex dinner idea easy, let’s keep the presentation easy but impressive.
Here are my must-haves for loading up these Shredded Chicken Mexican Rolls:
- Cool Contrast: You absolutely need sour cream, but even better? Mix a little lime juice into it first! It makes it zingy and light.
- Freshness is Next to Deliciousness: Shredded iceberg lettuce gives you that satisfying light crunch. It adds volume without adding any weight to the meal.
- The Green Goodness: You can never, ever go wrong with extra salsa, but if you want the absolute best pairing for this zesty chicken filling, you need homemade guacamole. I swear, the fresh flavor of avocado just sings next to cumin and chili powder. You can find my favorite simple recipe right here!
- A Squirt of Sunshine: Fresh lime wedges are essential. A quick squeeze right before you take that first bite brightens up every single flavor component.
- The Extra Spark: If you have them, a sprinkle of chopped cilantro right over the top adds that gorgeous, fresh herbal note that screams Tex-Mex perfection.
Serve them with a little dish of your toppings on the side so everyone can build their perfect bite. Enjoy! You totally nailed those Guilt-Free Chimichangas!
Storage and Reheating Instructions for Leftover Baked Chicken Chimichangas
Now, as much as I hope you eat every single one of these divine Baked Chicken Chimichangas fresh out of the oven—because that’s when they are at their absolute peak crunch—they sometimes make the best leftovers for lunch the next day! The good news is that since these are already a Less Oil Chimichanga Recipe, they reheat much better than their deep-fried cousins.
If you have any of these beauties left over, here is how I handle them. First, make sure they are completely cooled down before storing them away. Cramming warm food into a container traps steam, and steam is the sworn enemy of crispiness, no matter how amazing your filling is!
For Refrigeration or Freezing:
- In the Fridge: Store leftover chimichangas in an airtight container. They should last happily for about three to four days. The filling stays moist, but you will notice the tortilla softening up over time. That’s okay! We fix that easily.
- Freezing for Later: If you want to keep these for a future easy weeknight Mexican dinner emergency, wrap each chimichanga tightly in plastic wrap first, and then tuck them all into a heavy-duty freezer bag. They freeze perfectly for up to two months.
This is where we get our crunch back! You absolutely must avoid the microwave if you want these to taste good again. Microwaving causes the tortilla to steam, and they will go totally limp. Don’t do it!
To bring back that glorious, golden shell on your Baked Chicken Chimichangas, you have two top-tier options:
- The Oven Method (Best for a larger batch): Preheat your oven to 350°F (175°C). Lay the chimichangas directly on a baking sheet or a rack on top of a sheet (the rack is better!). Bake them for about 10 to 12 minutes, flipping halfway through. This method slowly heats the creamy filling while drying out the exterior just enough to make it delightfully crisp again. It’s the best way to restore that texture!
- The Air Fryer Method (Best for one or two): If you have an air fryer, this is truly the fastest route to resurrection. Set it to 350°F (175°C) and cook for about 5 to 7 minutes. Shake the basket once halfway through. They come out incredibly crunchy and taste almost brand new!
Doing this restoration process ensures that even leftovers of your Less Oil Chimichanga Recipe can deliver that satisfying crunch we talked about earlier. Happy eating!
Frequently Asked Questions About Baked Chicken Chimichangas
I get it—when you’re trying a new technique, especially one that promises that deep-fried texture without the deep-fry oil, you have questions! I’ve pulled together the most common things folks ask me about perfecting these Baked Chicken Chimichangas so you can feel totally prepared before you even crank up the oven.
Don’t hesitate to reach out if your specific question isn’t here. Sometimes the simplest thing is what trips us up, but we’ll get it sorted together!
How crispy do my Baked Chicken Chimichangas actually get?
This is the big one! Are they *as* crispy as deep-fried? Honestly, you won’t believe how close they get. Because we are using a very hot oven (400°F) and brushing every surface with oil or cooking spray, you achieve a fantastic, crunchy, golden shell. They are definitely Crispy Baked Chimichangas, not soft ones! The texture is sturdy and satisfying, but because we aren’t submerging them, they are not quite as shatteringly crisp as their deep-fried cousins. But for a healthier version, this is the absolute maximum crunch you can get, and it’s perfect for an appetizers and snacks platter!
What exactly is the secret to that ‘Chi-Chi’s Style Baked Chicken’ flavor?
People love that restaurant flavor, and it really comes down to two things in our filling: the creamy binder and the background spice. The binder is that combination of cream cheese and sour cream; it gives the filling a richness that mimics what restaurants use. Flavor-wise, the key to that specific zing you’re looking for is using green enchilada sauce instead of red salsa in the chicken mixture, combined with that pinch of cumin and garlic powder. That little bit of tartness from the green sauce just makes the whole thing taste authentic. It really elevates these simple Shredded Chicken Mexican Rolls!
Can I use ground beef or shredded pork instead of chicken?
Absolutely, you can swap the protein! This recipe is incredibly forgiving, which is why it works so well as an Easy Weeknight Mexican Dinner staple. If you use ground beef, you’ll need to cook it through first and drain off *all* the grease before mixing it into the cheese filling; otherwise, excess grease can make the tortillas soggy. If you use shredded pork (Carnitas style!), make sure it’s not too wet or too vinegary before stirring it in. Flavor wise, you might want to bump up the chili powder slightly when using beef!
Is it okay if my tortillas tear while I’m rolling them up?
Listen, tearing happens to the best of us, especially when you’re making Quick Chicken Tortilla Rolls for the first time. If your tortilla tears, don’t throw it out! Simply place the seam-side down on the baking sheet anyway. The sides usually seal up a bit during baking, and the oil/spray helps hold the integrity. If the tear is large, just use the piece you have; try to tuck the filling in, and then you can use another full tortilla to wrap that one up like a double layer. It still tastes great, even if it doesn’t look perfect for your Instagram feed!
Nutritional Estimates for Guilt-Free Chimichangas
Now, I know many of us choose this recipe because we want a Healthier Chimichangas Recipe option, and skipping the deep fryer certainly helps us keep things lighter! That said, I’m a cook, not a registered dietitian, and I really want to be upfront with you about the numbers.
The nutritional facts you see listed with recipes like these—even the ones that come right off my internal test cards—are always just estimates. They are a great guideline, especially when you’re trying to track things, but please handle them with a grain of salt! We are using real, whole ingredients here, and that means there’s always going to be some variation.
The size of your tortillas, how much oil you used to brush the outside, and exactly what brand of salsa you decide to use for that zesty kick in your Guilt-Free Chimichangas all play a huge role. For example, if you go super heavy on the sour cream as a topping, that’s going to change the math significantly!
So, while this recipe uses far less fat overall than a traditional fried version, I always recommend these figures as a starting point only. If you have strict dietary requirements, the best thing you can do is plug in the exact brands and measurements you used into your favorite online tracker. That way, you get the most accurate portrait of what fills your plate when you devour these amazing Baked Chicken Chimichangas!
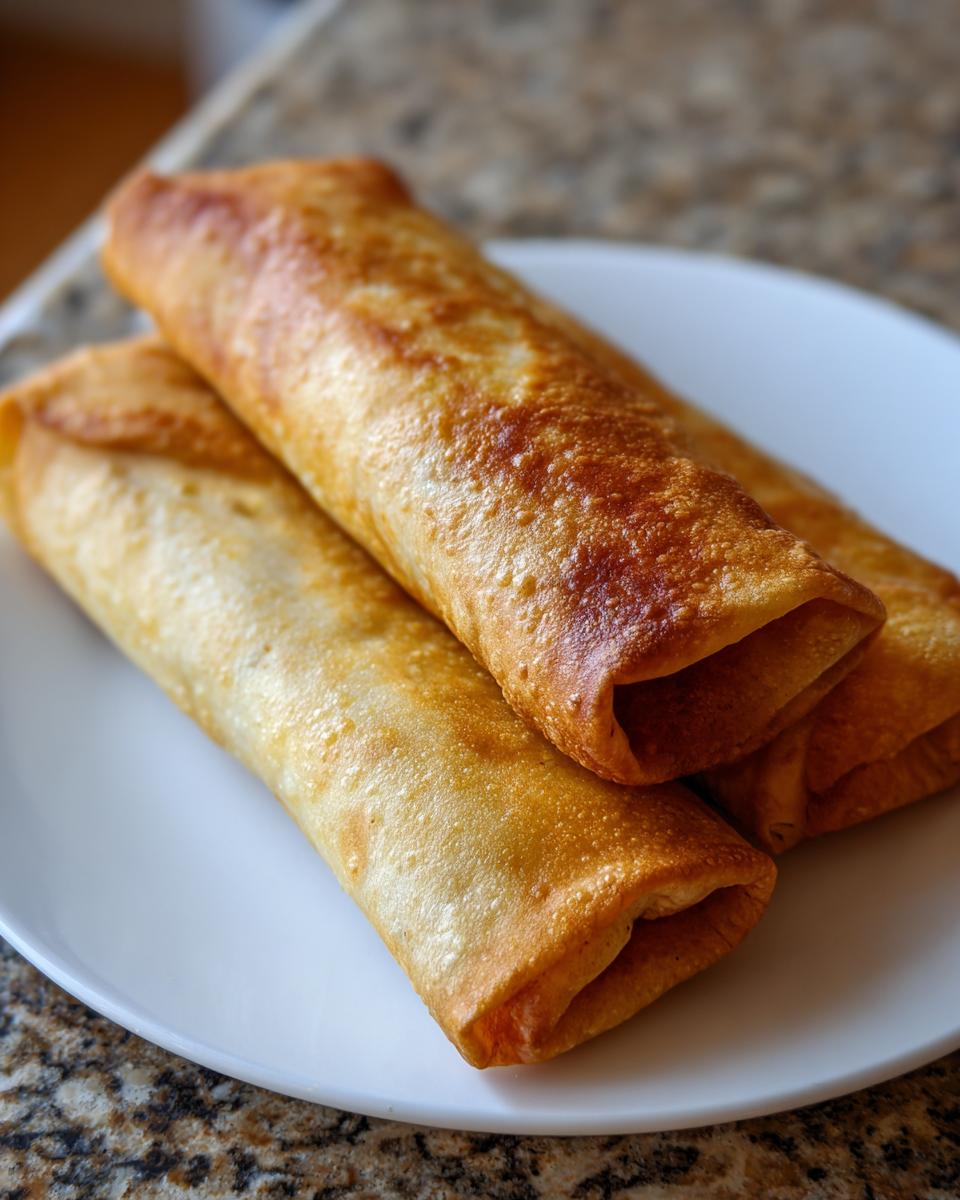
PrintCrispy Oven-Baked Chicken Chimichangas (Chi-Chi’s Style)
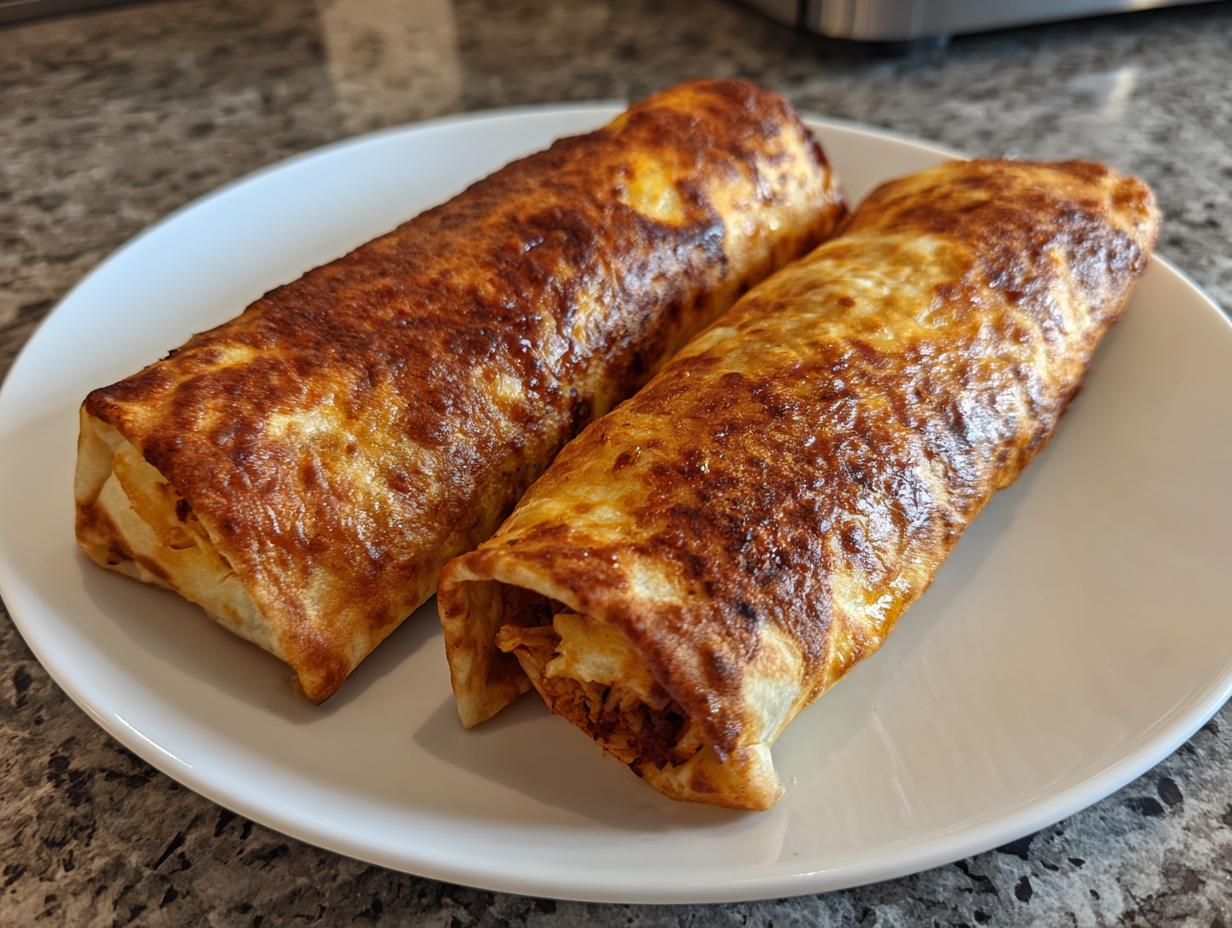
You can make restaurant-style chicken chimichangas at home without deep frying. This easy recipe delivers crispy, golden tortillas filled with zesty, juicy shredded chicken, perfect for a healthier weeknight dinner.
- Prep Time: 15 min
- Cook Time: 20 min
- Total Time: 35 min
- Yield: 4 servings 1x
- Category: Dinner
- Method: Baking
- Cuisine: Tex-Mex
- Diet: Vegetarian
Ingredients
- 2 cups cooked, shredded chicken breast
- 1/2 cup cream cheese, softened
- 1/4 cup sour cream
- 1/2 cup shredded Monterey Jack cheese
- 1/4 cup salsa or green enchilada sauce
- 1 teaspoon chili powder
- 1/2 teaspoon cumin
- 1/4 teaspoon garlic powder
- Salt and pepper to taste
- 8 large flour tortillas (burrito size)
- Cooking spray or 2 tablespoons olive oil for brushing
- Optional toppings: extra salsa, guacamole, sour cream
Instructions
- Preheat your oven to 400°F (200°C). Lightly grease a baking sheet or line it with parchment paper.
- In a medium bowl, combine the shredded chicken, softened cream cheese, sour cream, Monterey Jack cheese, salsa or enchilada sauce, chili powder, cumin, garlic powder, salt, and pepper. Mix until the filling is well combined and creamy.
- Warm the tortillas briefly in the microwave (about 15 seconds) to make them pliable and prevent tearing.
- Place about 1/4 cup of the chicken mixture near one edge of a tortilla. Fold in the sides of the tortilla, then tightly roll the tortilla up like a burrito. Place the seam-side down on the prepared baking sheet. Repeat with the remaining filling and tortillas.
- Lightly brush the tops and sides of the rolled chimichangas with cooking spray or olive oil. This step helps achieve the golden brown, crispy texture.
- Bake for 15 to 20 minutes, flipping them halfway through, until the tortillas are golden brown and crispy.
- Serve immediately with your favorite toppings.
Notes
- For the crispiest baked chimichangas, ensure your oven temperature is hot enough and do not skip brushing the tortillas with oil or spray before baking.
- You can prepare the chicken filling ahead of time and store it in the refrigerator for up to two days.
- If you want a Chi-Chi’s style flavor, use a slightly spicier green enchilada sauce in the filling mixture.
Nutrition
- Serving Size: 2 chimichangas
- Calories: 450
- Sugar: 3
- Sodium: 650
- Fat: 18
- Saturated Fat: 8
- Unsaturated Fat: 10
- Trans Fat: 0
- Carbohydrates: 45
- Fiber: 3
- Protein: 28
- Cholesterol: 85