

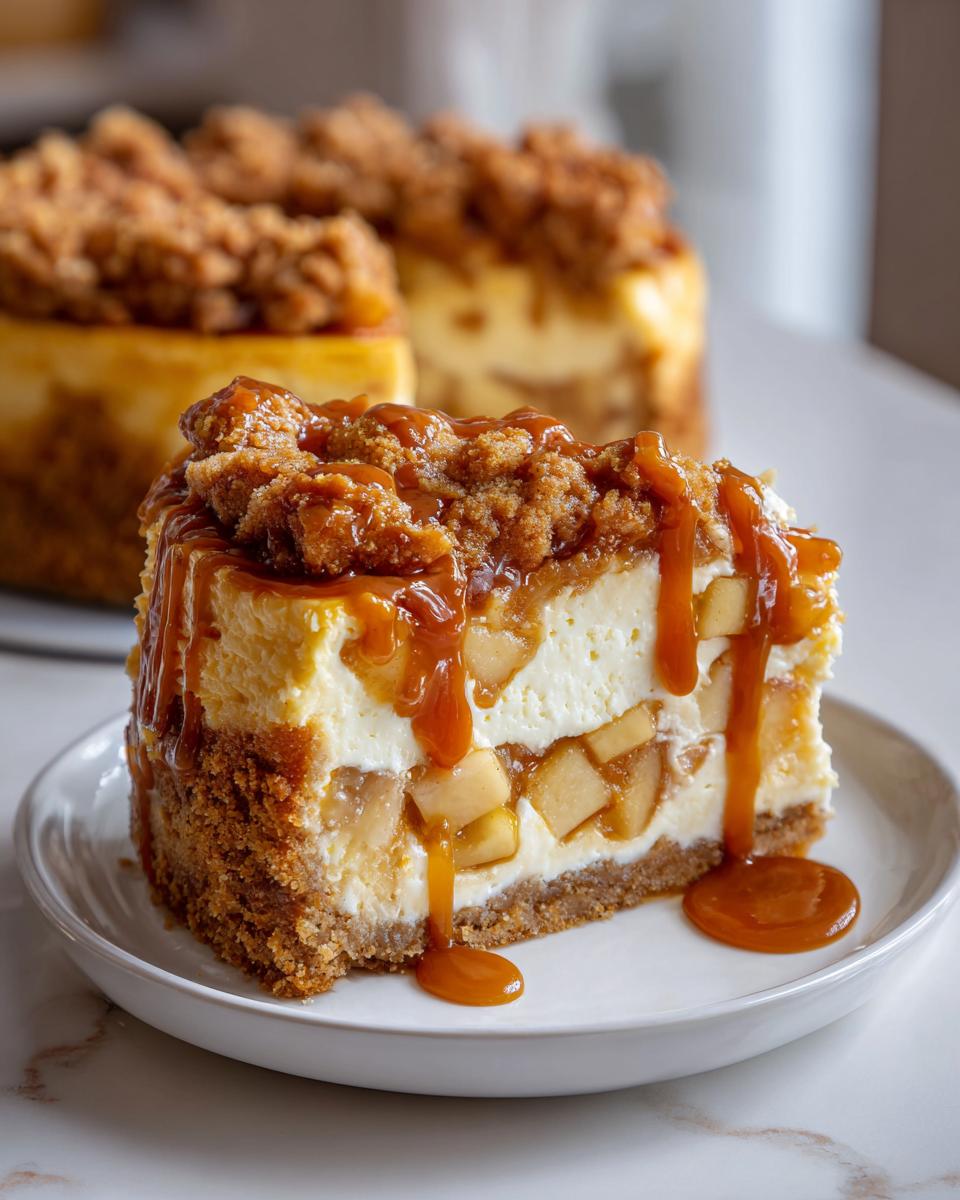
Okay, stop whatever you are doing right now because I’ve finally cracked the code on the dessert that stops everyone in their tracks. You know how much we all adore a slice of creamy cheesecake AND we absolutely cannot live without warm, spiced apple pie? Well, I took those two comfort-food champions and slammed them right together! This Salted Caramel Apple Pie Cheesecake is my personal show-stopping masterpiece, featuring a super creamy filling, sweet spiced apples tucked inside, and a buttery cinnamon crumble on top, ready for a drizzle of caramel. Trust me, when Kate Connolly promises a recipe that actually works, especially for your **holiday baking projects**, you know you’re getting the best, most reliable version out there.
- Why This Salted Caramel Apple Pie Cheesecake Recipe Works (Expert Tips)
- Gathering Ingredients for Your Apple Pie Cheesecake
- Step-by-Step Instructions for the Best Apple Pie Fusion Dessert
- Mastering the Apple Crumble Topping Dessert
- Tips for Success: Achieving a Gourmet Cheesecake Ideas Finish
- Storage and Reheating Instructions for Your Apple Pie Cheesecake
- Frequently Asked Questions About Apple Pie Cheesecake
- Estimated Nutritional Data for This Comfort Food Cheesecake
- Share Your Kings Cook Apple Pie Cheesecake Creations
Why This Salted Caramel Apple Pie Cheesecake Recipe Works (Expert Tips)
I tried making this apple pie cheesecake about five times before I finally called it perfect. My first attempts were either too dense or they cracked right down the middle! That’s why I’m sharing my hard-won secrets with you now so you can skip the frustration and jump straight to serving a truly **show stopping dessert**. The real difference comes down to two things: layering technique and controlled baking temperature. This isn’t just a dessert; it’s a sophisticated, layered fall dessert that tastes incredible.
When I finally got the texture right, it was because I stopped rushing the cooling process. Seriously, patience here pays off big time! If you want that incredibly smooth, melt-in-your-mouth filling without any ugly cracks, you have to treat it gently. For reliable results every time you bake, I always rely on exact measurements and gentle mixing methods. If you’re looking for great supporting recipes to practice before the holidays, check out my tips for the basic apple pie technique; it really helps with the apple topping!
The Secret to a Crack-Free Baked Cheesecake Recipe
For any proper Baked Cheesecake Recipe, especially one this decadent, you absolutely must use a water bath, or as the fancy chefs call it, a bain-marie. It sounds complicated, but it’s so simple! You wrap your springform pan tightly—I mean *tightly*—in foil, and then you place that whole thing into a larger pan filled with hot water before it goes in the oven.
Why do we do this for this kind of creamy apple dessert? The water bath creates a moist, steamy environment around the cheesecake. This gentle, humid heat cooks the cheesecake slowly and evenly. It stops the edges from setting way faster than the center, which is the number one cause of those awful cracks!
Gathering Ingredients for Your Apple Pie Cheesecake
Okay, you know my promise here at Kings Cook: we only use accessible, wholesome ingredients you can find at any regular grocery store. No specialty shops needed for this amazing apple pie cheesecake! However, since this is a layered dessert, getting organized with your ingredients beforehand is going to make your baking time so much smoother. Trust me on this one; staring at a list of 20 things halfway through mixing is chaos! I have everything broken down below so you can shop smart.
We need ingredients for three amazing parts: the crust, the spiced apple topping, and the creamy filling itself. It all comes together for what I call the best apple pie fusion dessert!
- For the Buttery Graham Cracker Crust:
- 1 1/2 cups graham cracker crumbs
- 1/4 cup granulated sugar (just the regular white kind)
- 6 tablespoons unsalted butter, melted
- For the Cinnamon Apple Topping:
- 3 cups sliced apples (Granny Smith or Honeycrisp work best for that nice tartness!)
- 1/2 cup brown sugar (the dark, moist kind is best here)
- 1 teaspoon ground cinnamon
- 1/4 teaspoon ground nutmeg
- 2 tablespoons cornstarch
- 1/4 cup water
- For the Cheesecake Filling:
- 3 (8 ounce) packages cream cheese, make sure it’s softened up!
- 1 1/2 cups granulated sugar
- 1 teaspoon vanilla extract
- 1/4 cup sour cream (full-fat, please!)
- 3 large eggs
- For the Apple Crumble Topping & Drizzle:
- 1/2 cup all-purpose flour
- 1/4 cup packed brown sugar
- 1/4 cup rolled oats
- 4 tablespoons cold unsalted butter, cut into little pieces
- 1/2 cup salted caramel sauce (for that final, glorious drizzle)
We’ve got all the staples here, just like I promised in my apple cinnamon muffins recipe. It’s all manageable!
Ingredient Notes and Buttery Graham Cracker Crust Substitutions
Let’s talk specifics so your crust is perfect. For the buttery graham cracker crust, make sure that butter is fully melted so it binds everything together nicely. Don’t measure right to the top of the cup with your crumbs; pack them lightly!
For the apples, don’t skip the Granny Smiths if you can find them. They hold their shape really well and their tartness cuts through the richness of the cheesecake layer perfectly. If you can’t find them, Honeycrisp is a good second choice.
Now about the dairy! The recipe calls for sour cream, which adds a lovely tanginess to balance all that sweetness. If you’re out of sour cream, full-fat plain Greek yogurt is a great stand-in—it has a similar texture and acidity. And for the cream cheese, always use full-fat bricks. The light versions often have too much water, and that messes with the texture we need for this Thanksgiving cheesecake!
Step-by-Step Instructions for the Best Apple Pie Fusion Dessert
Alright, time to get that oven working! Remember how I stressed the importance of the water bath? That starts right now. Go ahead and preheat your oven to 350°F (175°C). Then, wrap that 9-inch springform pan really well—I mean really well—with heavy-duty aluminum foil. You want that wrap to go up the sides a bit so no water seeps in while it bakes. Secure! Then, set that wrapped pan aside.
First up is the base layer. We’re making that crisp, buttery foundation you love. Mix your graham cracker crumbs, the small bit of sugar you reserved for the crust, and the melted butter right in a bowl until it looks like wet sand. Press this firmly and evenly into the bottom of your prepared pan. Pop it into the oven for exactly 10 minutes while you get the apple filling ready. Once done, take it out and let it hang out on the counter to cool a touch.
Creating the Perfect Cinnamon Apple Topping
This is where those wonderful fall smells start filling your kitchen! In a saucepan—not a microwave bowl, we need direct heat here—toss in your sliced apples, the 1/2 cup of brown sugar, cinnamon, nutmeg, cornstarch, and water. Cornstarch is key here; it turns your apple juice into a beautiful, thick sauce, which we need so the apples don’t just run everywhere when we cut the cake later. Cook this mixture over medium heat, stirring every so often, until the apples start getting tender and the sauce thickens up nicely. That usually takes between 8 to 10 minutes. Pull it off the heat and let it cool down completely before adding it to the batter. Warm filling on cold batter equals soup!
Assembling and Baking Your Creamy Apple Dessert
While those apples cool, whip up the main event! Get your softened cream cheese and the 1 1/2 cups of sugar mixing until they are just beautiful and smooth. Don’t overdo the mixing here; we are keeping some air in there! Then, beat in the vanilla and the sour cream. Now, add the eggs one at a time, mixing just until you can’t see the yellow anymore. Stop right there! Overmixing the eggs develops air that just causes cracks later on.
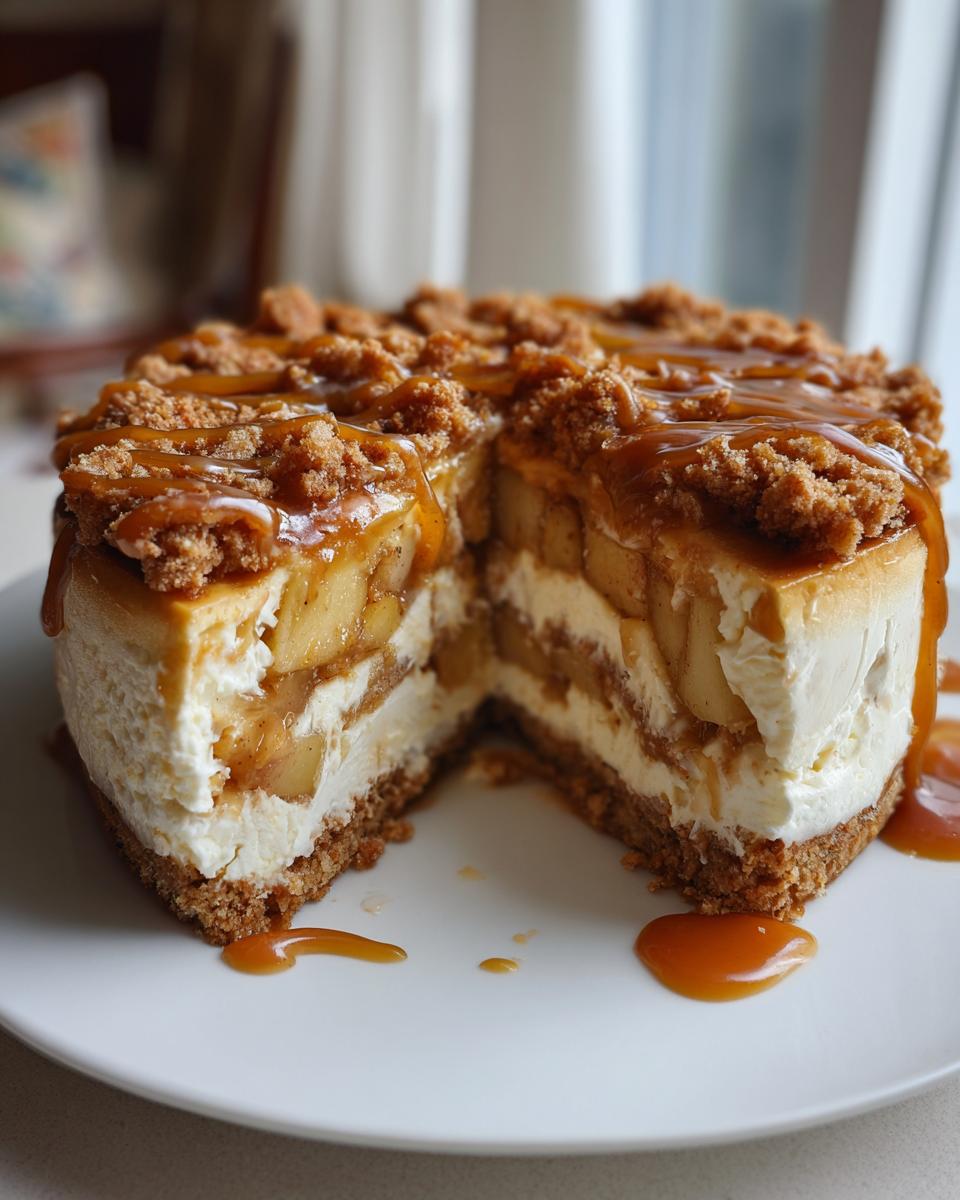
Now we assemble the layers of your apple pie cheesecake. Pour half of that creamy batter over your cooled crust. Then, spoon about half of your cooled apple mixture evenly over that batter. Next, gently pour the rest of the cheesecake batter over the apples, and top that with the remaining apple mixture. This layering keeps everything balanced.
Next step: The crumble! Prepare that topping separately (we’ll talk more about the technique in a minute), and then sprinkle it evenly over that very top layer of apples. Once everything is in the pan, it’s time for the water bath. Carefully set your foil-wrapped springform pan into that larger roasting pan. Now, put it in the oven, and *then* pour in the hot water until it’s halfway up the sides of the springform. Bake for about 60 to 75 minutes. You’ll know it’s ready when the edges look firm, but the very center still has a tiny, gentle jiggle when you nudge the pan. Turn the oven off, crack the door open, and let it cool *in* the oven for a full hour. Seriously, don’t skip that slow cool-down! For more tips on creamy desserts, take a look at my recipe for caramel apple cheesecake.
Mastering the Apple Crumble Topping Dessert
This crumble topping is what takes our **Apple Crumble Topping Dessert** from just brilliant to absolutely unforgettable. It gives that lovely textural contrast to the smooth cheesecake beneath it. You just mix your flour, the 1/4 cup of packed brown sugar, and your rolled oats in a small bowl.
Now for the magic part: cutting in the cold butter. You want that butter to stay cold and separate. I use my fingers for this because I can feel when it’s right, but a pastry blender works great too! You just rub the cold butter pieces into the dry ingredients until the whole mix looks like coarse, uneven crumbs. Think small peas and dried sand mixed together. Don’t let it warm up too much!
Once your cheesecake comes out of its long cooling session, sprinkle this topping evenly over the top layer of apples. It bakes up golden and crunchy, adding that perfect home-baked flavor right on top of the creamy base. If you love this kind of oat crunch, you might also want to check out my classic apple crisp recipe!
Tips for Success: Achieving a Gourmet Cheesecake Ideas Finish
You’ve baked it patiently, now let’s make sure the presentation is worthy of a Gourmet Cheesecake Ideas feature! Getting this dessert perfect means paying attention right up until you slice into it.
First, the chilling time is not optional! Once it’s cooled on the counter, it needs to go into the fridge, covered, for a minimum of six hours. Seriously, I make mine the day before. That overnight chill makes the filling up perfectly so you get those clean slices we talked about.
Second, when you take it out of the water bath and let it finish cooling on the rack, make sure you carefully remove all that aluminum foil wrapping *before* it goes into the fridge. If you leave the wet foil on, it can steam the sides of the crust and make it soggy. We want that crust crisp!
Third comes the caramel. Don’t just pour it randomly! Warm your salted caramel sauce just slightly—maybe 10 seconds in the microwave until it’s nicely pourable but still thick. Use a spoon to drizzle it back and forth across the top in nice, even ribbons. That visual contrast against the crumble is stunning!

Finally, when you do slice it, run your sharp knife under very hot water, wipe it completely dry, and then make your cut. Wipe and re-heat the knife again between every single slice. This keeps the knife hot enough to cut cleanly through the firm cheesecake and the soft apples without dragging everything sideways. It’s a little extra work, but it makes a huge difference in how beautiful your final serving plates will look. If you’re looking for other ways to make your desserts look spectacular, I have a few easy pumpkin bread decorating tricks that apply here, too!
Storage and Reheating Instructions for Your Apple Pie Cheesecake
This is definitely a dessert best made ahead of time, which makes it perfect for busy weekends or big holiday dinners. Once your Apple Pie Cheesecake is completely chilled and set, cover the top loosely with plastic wrap—just make sure the wrap isn’t touching the caramel drizzle unless you are using wax paper over the top first!
You can keep this beauty refrigerated for up to five days. Since it’s so moist because of those apples, it stays fantastic! I usually find the flavor actually deepens by day two, which is wild for a cheesecake, right?
If you want to serve it closer to room temperature for the best flavor payoff, just take the whole thing out of the fridge about 30 minutes before company arrives. Don’t leave it sitting out for longer than two hours total, though, because we need to keep that cream cheese happy and chilled!
Now, if you want to enjoy just *one* slice slightly warm—maybe you just can’t wait for the full chilled experience—you *can* reheat it gently. Don’t microwave the whole cake, please! Just take the slice you want to eat and set it on a microwave-safe plate. Heat it at 50% power for about 10 to 15 seconds, just to take the deep chill off the cream cheese. You don’t want it hot like a coffee cake, just barely warm so the caramel gets a little gooey again. It’s a great little trick for a cozy night in!
Frequently Asked Questions About Apple Pie Cheesecake
I know when you tackle a big project like this apple pie cheesecake, you’re going to have questions! That’s totally normal when you’re aiming for something this spectacular. I’ve gathered up the ones I get asked the most from my readers who are whipping up their own Thanksgiving cheesecake or just having a fun weekend baking session. I want to make sure you feel supported all the way to that first, glorious bite! If you want more inspiration after mastering this, check out my full list of the best dessert recipes.
Can I make this a No Bake Apple Pie Cheesecake?
That’s a fair question! If you’re short on oven time, you might be thinking about the No Bake Apple Pie Cheesecake route. Honestly, for this specific recipe, no, you really need to bake it. Why? Because the structure of this recipe—the combination of the cream cheese filling being set by gentle heat, the apples softening perfectly, and that buttery crumble getting toasted—all relies on the oven and that crucial water bath. A no-bake version usually relies on things like gelatin or tons of stabilized whipped cream to hold up, and you’ll get a much lighter, stiffer texture than the deep, creamy richness we are aiming for here!
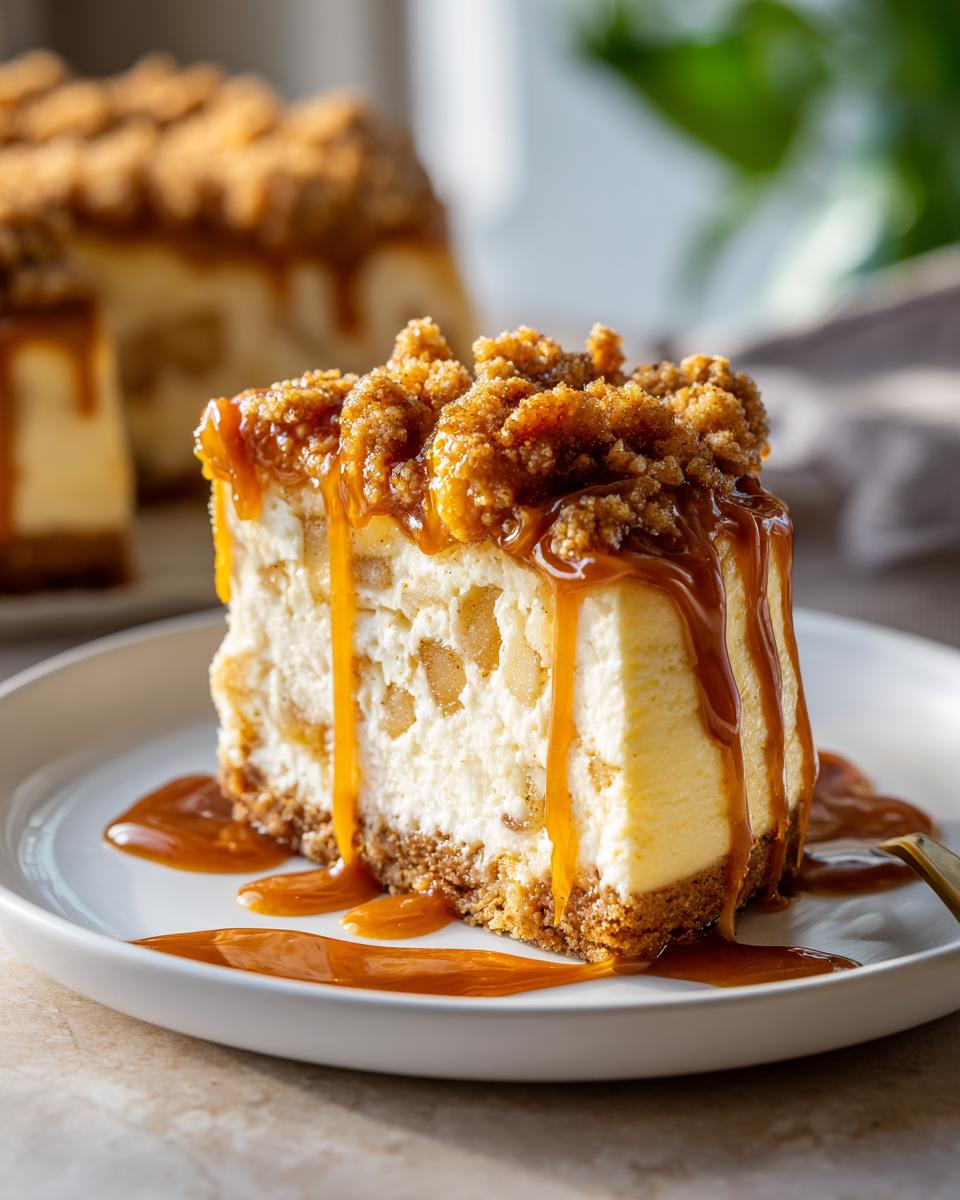
What is the best way to slice this layered fall dessert?
This is the question I get right after “How do I stop it from cracking?” Cutting it clean is key to showing off those gorgeous layers of apple and cream, right? You’ve got a dense crust, thick filling, soft apples, and a crunchy topping; they all behave differently when you slice them!
My big secret for cutting any good cheesecake is making sure you have a very sharp, thin knife, and you dip it into a cup of very hot water, wiping it completely dry right before you make the cut. You push straight down—no sawing!—take your slice out, and then you repeat the hot water, dry, slice process for the next piece. It takes a minute longer, but you get gorgeous portions of this layered fall dessert.
Can I skip the salted caramel drizzle?
You absolutely can! If you aren’t a caramel fan or just want something simpler, feel free to skip it. The cake is incredibly flavorful on its own. At the very least, I would recommend a dusting of powdered sugar right before serving if you skip the caramel. It just gives it that finished bakery look.
Estimated Nutritional Data for This Comfort Food Cheesecake
If you’re tracking macros or just curious about what you’re diving into with this incredible Comfort Food Cheesecake, here are the estimated numbers based on the recipe provided. Remember, this is an indulgence, and slicing it thinner than a 12th of the cake is going to change these numbers dramatically!
This data is based on one generous slice:
- Serving Size: 1 slice
- Calories: 450
- Fat: 28g
- Saturated Fat: 17g
- Carbohydrates: 48g
- Sugar: 45g
- Protein: 7g
- Cholesterol: 110mg
Just a little reminder here—since we’re using lots of cream cheese and butter, the fat content is what it is! These are just estimates, of course, and your actual numbers will shift based on the exact brands of caramel or cream cheese you decide to use.
Share Your Kings Cook Apple Pie Cheesecake Creations
I am so over the moon excited for you to try this recipe, especially if you’re planning a big gathering. Seriously, this Thanksgiving Cheesecake will steal the show!
Once you’ve made it, please come back and leave me a rating and a comment below telling me how it went. Did the crumble stay crispy? Did your water bath work like magic? I love hearing about your cooking wins! Knowing that *you* felt that rush of accomplishment Kate talks about is why I share these recipes.
And please, take a picture! Seriously, snap a photo of that beautiful layered dessert and tag me on social media when you serve it up. I always check out what you all are creating over on the testing boards because seeing your success is my favorite part of running Kings Cook.
If you enjoyed perfecting your skills here and now feel like a kitchen royalty tackling complex desserts, do check out my About Page to read why I started this whole journey! And hey, if you want to see how one reviewer tackled adding that magnificent caramel drizzle, you should definitely check out the beautiful results in this post here!
Step-by-Step Instructions for the Best Apple Pie Fusion Dessert
Alright, time to get that oven working! Remember how I stressed the importance of the water bath? That starts right now. Go ahead and preheat your oven to 350°F (175°C). Then, wrap that 9-inch springform pan really well—I mean really well—with heavy-duty aluminum foil. You want that wrap to go up the sides a bit so no water seeps in while it bakes. Secure! Then, set that wrapped pan aside.
First up is the base layer. We’re making that crisp, buttery foundation you love. Mix your graham cracker crumbs, the small bit of sugar you reserved for the crust, and the melted butter right in a bowl until it looks like wet sand. Press this firmly and evenly into the bottom of your prepared pan. Pop it into the oven for exactly 10 minutes while you get the apple filling ready. Once done, take it out and let it hang out on the counter to cool a touch.
Creating the Perfect Cinnamon Apple Topping
This is where those wonderful fall smells start filling your kitchen! In a saucepan—not a microwave bowl, we need direct heat here—toss in your sliced apples, the 1/2 cup of brown sugar, cinnamon, nutmeg, cornstarch, and water. Cornstarch is key here; it turns your apple juice into a beautiful, thick sauce, which we need so the apples don’t just run everywhere when we cut the cake later. Cook this mixture over medium heat, stirring every so often, until the apples start getting tender and the sauce thickens up nicely. That usually takes between 8 to 10 minutes. Pull it off the heat and let it cool down completely before adding it to the batter. Warm filling on cold batter equals soup!
Assembling and Baking Your Creamy Apple Dessert
While those apples cool, whip up the main event! Get your softened cream cheese and the 1 1/2 cups of sugar mixing until they are just beautiful and smooth. Don’t overdo the mixing here; we are keeping some air in there! Then, beat in the vanilla and the sour cream. Now, add the eggs one at a time, mixing just until you can’t see the yellow anymore. Stop right there! Overmixing the eggs develops air that just causes cracks later on.
Now we assemble the layers of your apple pie cheesecake. Pour half of that creamy batter over your cooled crust. Then, spoon about half of your cooled apple mixture evenly over that batter. Next, gently pour the rest of the cheesecake batter over the apples, and top that with the remaining apple mixture. This layering keeps everything balanced.
Next step: The crumble! Prepare that topping separately (we’ll talk more about the technique in the next section), and then sprinkle it evenly over that very top layer of apples. Once everything is in the pan, it’s time for the water bath. Carefully set your foil-wrapped springform pan into that larger roasting pan. Now, put it in the oven, and *then* pour in the hot water until it’s halfway up the sides of the springform. Bake for about 60 to 75 minutes. You’ll know it’s ready when the edges look firm, but the very center still has a tiny, gentle jiggle when you nudge the pan. Turn the oven off, crack the door open, and let it cool *in* the oven for a full hour. Seriously, don’t skip that slow cool-down! For more tips on creamy desserts, take a look at my recipe for caramel apple cheesecake.
Mastering the Apple Crumble Topping Dessert
This crumble topping is what takes our Apple Crumble Topping Dessert from just brilliant to absolutely unforgettable. It gives that lovely textural contrast to the smooth cheesecake beneath it. You just mix your flour, the 1/4 cup of packed brown sugar, and your rolled oats in a small bowl.
Now for the magic part: cutting in the cold butter. You want that butter to stay cold and separate. I use my fingers for this because I can feel when it’s right, but a pastry blender works great too! You just rub the cold butter pieces into the dry ingredients until the whole mix looks like coarse, uneven crumbs. Think small peas and dried sand mixed together. Don’t let it warm up too much!
Once your cheesecake comes out of its long cooling session, sprinkle this topping evenly over the top layer of apples. It bakes up golden and crunchy, adding that perfect home-baked flavor right on top of the creamy base. If you love this kind of oat crunch, you might also want to check out my classic apple crisp recipe!
Tips for Success: Achieving a Gourmet Cheesecake Ideas Finish
You’ve baked it patiently, now let’s make sure the presentation is worthy of a Gourmet Cheesecake Ideas feature! Getting this dessert perfect means paying attention right up until you slice into it.
First, the chilling time is not optional! Once it’s cooled on the counter, it needs to go into the fridge, covered, for a minimum of six hours. Seriously, I make mine the day before. That overnight chill makes the filling up perfectly so you get those clean slices we talked about.
Second, when you take it out of the water bath and let it finish cooling on the rack, make sure you carefully remove all that aluminum foil wrapping *before* it goes into the fridge. If you leave the wet foil on, it can steam the sides of the crust and make it soggy. We want that crust crisp!
Third comes the caramel. Don’t just pour it randomly! Warm your salted caramel sauce just slightly—maybe 10 seconds in the microwave until it’s nicely pourable but still thick. Use a spoon to drizzle it back and forth across the top in nice, even ribbons. That visual contrast against the crumble is stunning!
Finally, when you do slice it, run your sharp knife under very hot water, wipe it completely dry, and then make your cut. Wipe and re-heat the knife again between every single slice. This keeps the knife hot enough to cut cleanly through the firm cheesecake and the soft apples without dragging everything sideways. It’s a little extra work, but it makes a huge difference in how beautiful your final serving plates will look. If you’re looking for other ways to make your desserts look spectacular, I have a few easy pumpkin bread decorating tricks that apply here, too!
Storage and Reheating Instructions for Your Apple Pie Cheesecake
This is definitely a dessert best made ahead of time, which makes it perfect for busy weekends or big holiday dinners. Once your Apple Pie Cheesecake is completely chilled and set, cover the top loosely with plastic wrap—just make sure the wrap isn’t touching the caramel drizzle unless you are using wax paper over the top first!
You can keep this beauty refrigerated for up to five days. Since it’s so moist because of those apples, it stays fantastic! I usually find the flavor actually deepens by day two, which is wild for a cheesecake, right?
If you want to serve it closer to room temperature for the best flavor payoff, just take the whole thing out of the fridge about 30 minutes before company arrives. Don’t leave it sitting out for longer than two hours total, though, because we need to keep that cream cheese happy and chilled!
Now, if you want to enjoy just *one* slice slightly warm—maybe you just can’t wait for the full chilled experience—you *can* reheat it gently. Don’t microwave the whole cake, please! Just take the slice you want to eat and set it on a microwave-safe plate. Heat it at 50% power for about 10 to 15 seconds, just to take the deep chill off the cream cheese. You don’t want it hot like a coffee cake, just barely warm so the caramel gets a little gooey again. It’s a great little trick for a cozy night in!
Frequently Asked Questions About Apple Pie Cheesecake
I know when you tackle a big project like this apple pie cheesecake, you’re going to have questions! That’s totally normal when you’re aiming for something this spectacular. I’ve gathered up the ones I get asked the most from my readers who are whipping up their own Thanksgiving cheesecake or just having a fun weekend baking session. I want to make sure you feel supported all the way to that first, glorious bite! If you want more inspiration after mastering this, check out my full list of the best dessert recipes.
Can I make this a No Bake Apple Pie Cheesecake?
That’s a fair question! If you’re short on oven time, you might be thinking about the No Bake Apple Pie Cheesecake route. Honestly, for this specific recipe, no, you really need to bake it. Why? Because the structure of this recipe—the combination of the cream cheese filling being set by gentle heat, the apples softening perfectly, and that buttery crumble getting toasted—all relies on the oven and that crucial water bath. A no-bake version usually relies on things like gelatin or tons of stabilized whipped cream to hold up, and you’ll get a much lighter, stiffer texture than the deep, creamy richness we are aiming for here!
What is the best way to slice this layered fall dessert?
This is the question I get right after “How do I stop it from cracking?” Cutting it clean is key to showing off those gorgeous layers of apple and cream, right? You’ve got a dense crust, thick filling, soft apples, and a crunchy topping; they all behave differently when you slice them!
My big secret for cutting any good cheesecake is making sure you have a very sharp, thin knife, and you dip it into a cup of very hot water, wiping it completely dry right before you make the cut. You push straight down—no sawing!—take your slice out, and then you repeat the hot water, dry, slice process for the next piece. It takes a minute longer, but you get gorgeous portions of this layered fall dessert.
Can I skip the salted caramel drizzle?
You absolutely can! If you aren’t a caramel fan or just want something simpler, feel free to skip it. The cake is incredibly flavorful on its own. At the very least, I would recommend a dusting of powdered sugar right before serving if you skip the caramel. It just gives it that finished bakery look.
Estimated Nutritional Data for This Comfort Food Cheesecake
If you’re tracking macros or just curious about what you’re diving into with this incredible Comfort Food Cheesecake, here are the estimated numbers based on the recipe provided. Remember, this is an indulgence, and slicing it thinner than a 12th of the cake is going to change these numbers dramatically!
This data is based on one generous slice:
- Serving Size: 1 slice
- Calories: 450
- Fat: 28g
- Saturated Fat: 17g
- Carbohydrates: 48g
- Sugar: 45g
- Protein: 7g
- Cholesterol: 110mg
Just a little reminder here—since we’re using lots of cream cheese and butter, the fat content is what it is! These are just estimates, of course, and your actual numbers will shift based on the exact brands of caramel or cream cheese you decide to use.
Share Your Kings Cook Apple Pie Cheesecake Creations
I am so over the moon excited for you to try this recipe, especially if you’re planning a big gathering. Seriously, this Thanksgiving Cheesecake will steal the show!
Once you’ve made it, please come back and leave me a rating and a comment below telling me how it went. Did the crumble stay crispy? Did your water bath work like magic? I love hearing about your cooking wins! Knowing that *you* felt that rush of accomplishment Kate talks about is why I share these recipes.
And please, take a picture! Seriously, snap a photo of that beautiful layered dessert and tag me on social media when you serve it up. I always check out what you all are creating over on the testing boards because seeing your success is my favorite part of running Kings Cook.
If you enjoyed perfecting your skills here and now feel like a kitchen royalty tackling complex desserts, do check out my About Page to read why I started this whole journey! And hey, if you want to see how one reviewer tackled adding that magnificent caramel drizzle, you should definitely check out the beautiful results in this post here!
PrintSalted Caramel Apple Pie Cheesecake with Cinnamon Crumble
Make this show-stopping dessert that combines creamy cheesecake, spiced apple pie filling, and a buttery cinnamon crumble topping, finished with salted caramel.
- Prep Time: 35 min
- Cook Time: 75 min
- Total Time: 110 min
- Yield: 12 servings 1x
- Category: Dessert
- Method: Baking
- Cuisine: American
- Diet: Vegetarian
Ingredients
- 1 1/2 cups graham cracker crumbs
- 1/4 cup granulated sugar (for crust)
- 6 tablespoons unsalted butter, melted
- 3 (8 ounce) packages cream cheese, softened
- 1 1/2 cups granulated sugar (for filling)
- 1 teaspoon vanilla extract
- 1/4 cup sour cream
- 3 large eggs
- 3 cups sliced apples (like Granny Smith or Honeycrisp)
- 1/2 cup brown sugar
- 1 teaspoon ground cinnamon
- 1/4 teaspoon ground nutmeg
- 2 tablespoons cornstarch
- 1/4 cup water
- 1/2 cup all-purpose flour (for crumble)
- 1/4 cup packed brown sugar (for crumble)
- 1/4 cup rolled oats
- 4 tablespoons cold unsalted butter, cut into pieces
- 1/2 cup salted caramel sauce (for drizzling)
Instructions
- Preheat your oven to 350°F (175°C). Wrap the outside of a 9-inch springform pan tightly with heavy-duty aluminum foil.
- Prepare the crust: Mix graham cracker crumbs, 1/4 cup sugar, and melted butter. Press the mixture firmly into the bottom of the prepared springform pan. Bake for 10 minutes. Set aside to cool slightly.
- Prepare the apple topping: In a medium saucepan, combine sliced apples, 1/2 cup brown sugar, cinnamon, nutmeg, cornstarch, and water. Cook over medium heat, stirring often, until the apples soften slightly and the sauce thickens, about 8 to 10 minutes. Remove from heat and let cool.
- Prepare the cheesecake filling: Beat the softened cream cheese and 1 1/2 cups sugar with an electric mixer until smooth. Beat in vanilla extract and sour cream. Add eggs one at a time, mixing just until combined after each addition. Do not overmix.
- Assemble the layers: Pour half of the cheesecake batter over the cooled crust. Spoon half of the cooled apple mixture evenly over the batter. Pour the remaining cheesecake batter over the apples. Top with the remaining apple mixture.
- Prepare the crumble topping: In a small bowl, combine flour, 1/4 cup brown sugar, and oats. Cut in the cold butter using a pastry blender or your fingers until the mixture resembles coarse crumbs. Sprinkle this crumble evenly over the top layer of apples.
- Bake the cheesecake: Place the foil-wrapped springform pan into a larger roasting pan. Carefully pour hot water into the roasting pan until it reaches halfway up the sides of the springform pan (this is a water bath). Bake for 60 to 75 minutes, or until the edges are set but the center still has a slight jiggle.
- Cool the cheesecake: Turn off the oven, crack the door open slightly, and let the cheesecake cool in the oven for 1 hour. Remove from the water bath and let it cool completely on a wire rack.
- Chill: Cover the cheesecake and refrigerate for at least 6 hours, or preferably overnight, before serving.
- Serve: Before serving, remove the sides of the springform pan. Drizzle generously with salted caramel sauce.
Notes
- Baking the cheesecake in a water bath prevents cracking and keeps the texture creamy.
- Chill time is essential for the cheesecake to fully set before slicing.
- You can substitute the crumble topping with a simple graham cracker crust layer if you prefer a smoother top.
Nutrition
- Serving Size: 1 slice
- Calories: 450
- Sugar: 45
- Sodium: 250
- Fat: 28
- Saturated Fat: 17
- Unsaturated Fat: 11
- Trans Fat: 0.5
- Carbohydrates: 48
- Fiber: 2
- Protein: 7
- Cholesterol: 110