
Sometimes, the most humble ingredients can transform into something breathtakingly elegant, don’t you think? I’m here to show you that turning simple, bright oranges into gorgeous, glossy, and delightfully chewy candied orange slices is easier than you could ever imagine. Forget the complicated gourmet techniques for a second—this is my go-to, reliable recipe designed to give you stunning results every single time. If you’ve ever felt intimidated by making beautiful edible decorations or gifts, toss that worry aside. We’re going to conquer this together, and I promise you’ll feel like royalty serving these up!
- Why You Will Love Making Homemade Candied Orange Slices
- Gathering Ingredients for Perfect Candied Orange Slices
- Step-by-Step Instructions for Easy Candied Orange Slices
- How to Dry Candied Oranges for the Best Texture
- Finishing Touches: Sugar Coating or Chocolate Dipped Candied Oranges
- Storage and Keeping Your Candied Orange Slices Fresh
- Creative Ways to Use Your Homemade Candied Orange Slices
- Frequently Asked Questions About Making Candied Orange Slices
- Share Your Kitchen Successes
- Share Your Kitchen Successes
Why You Will Love Making Homemade Candied Orange Slices
Honestly, this recipe has earned its permanent spot in my go-to collection because it knocks it out of the park every time without demanding all day in the kitchen. Making your own candied orange slices is such a satisfying kitchen project! Here are just a few reasons why I think you’ll start reaching for this method all the time:
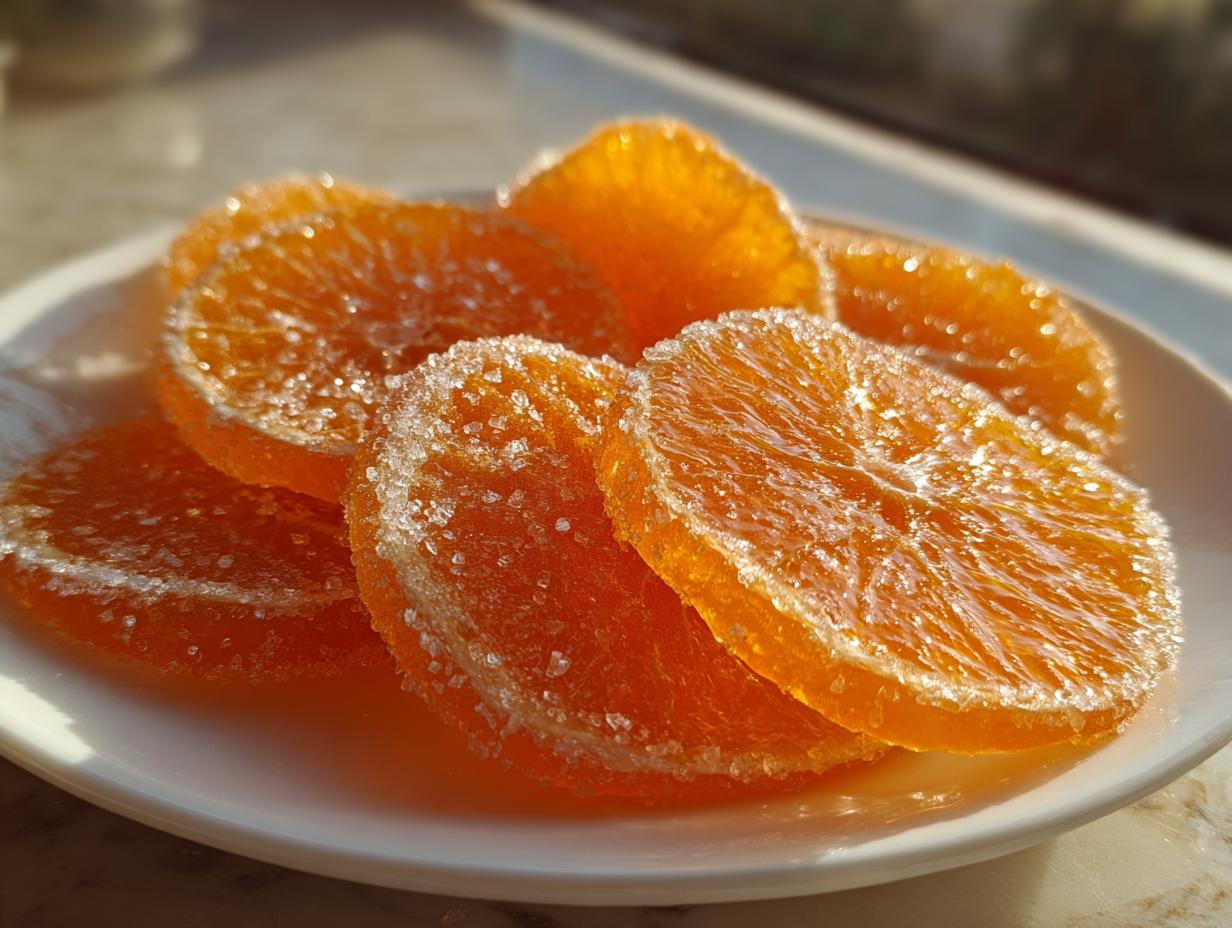
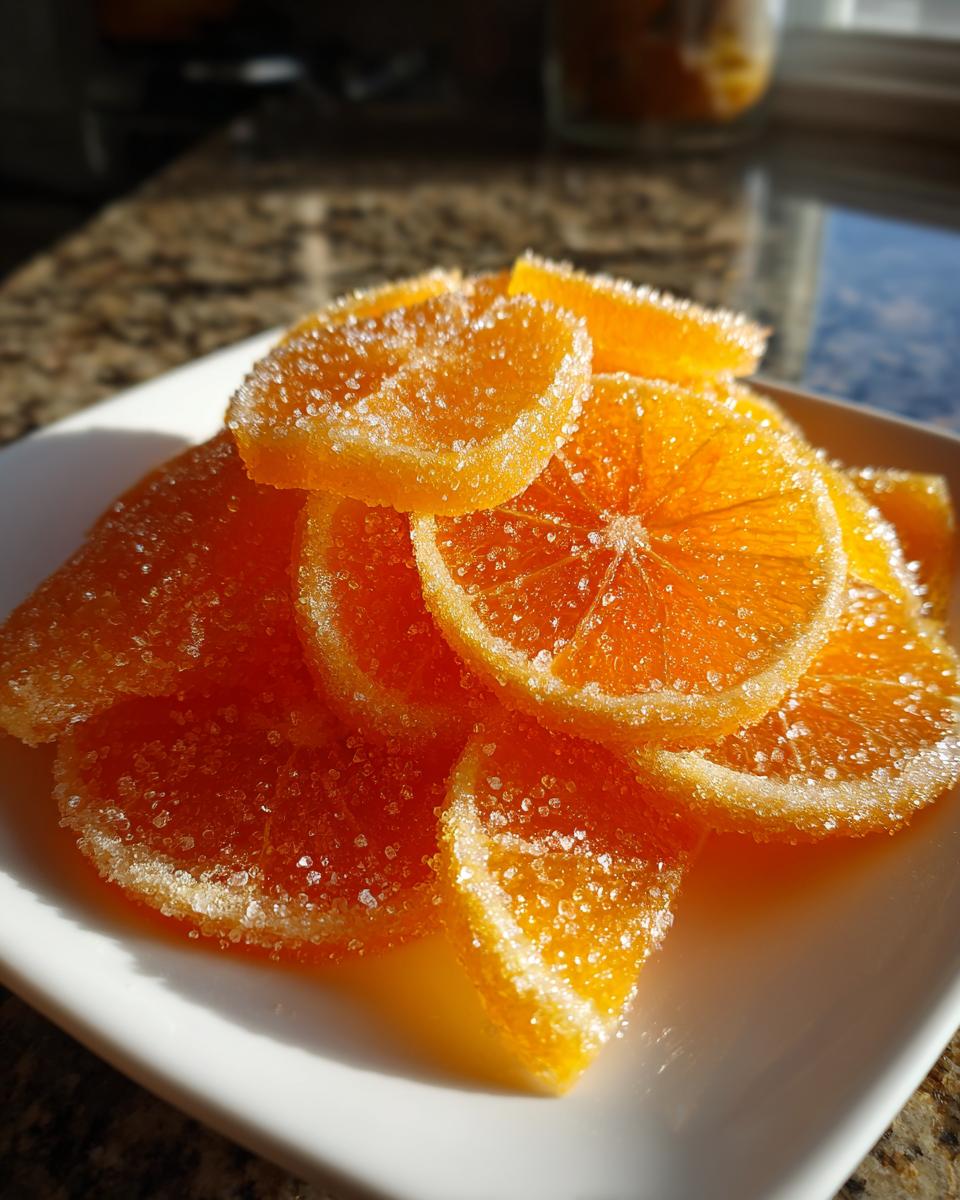
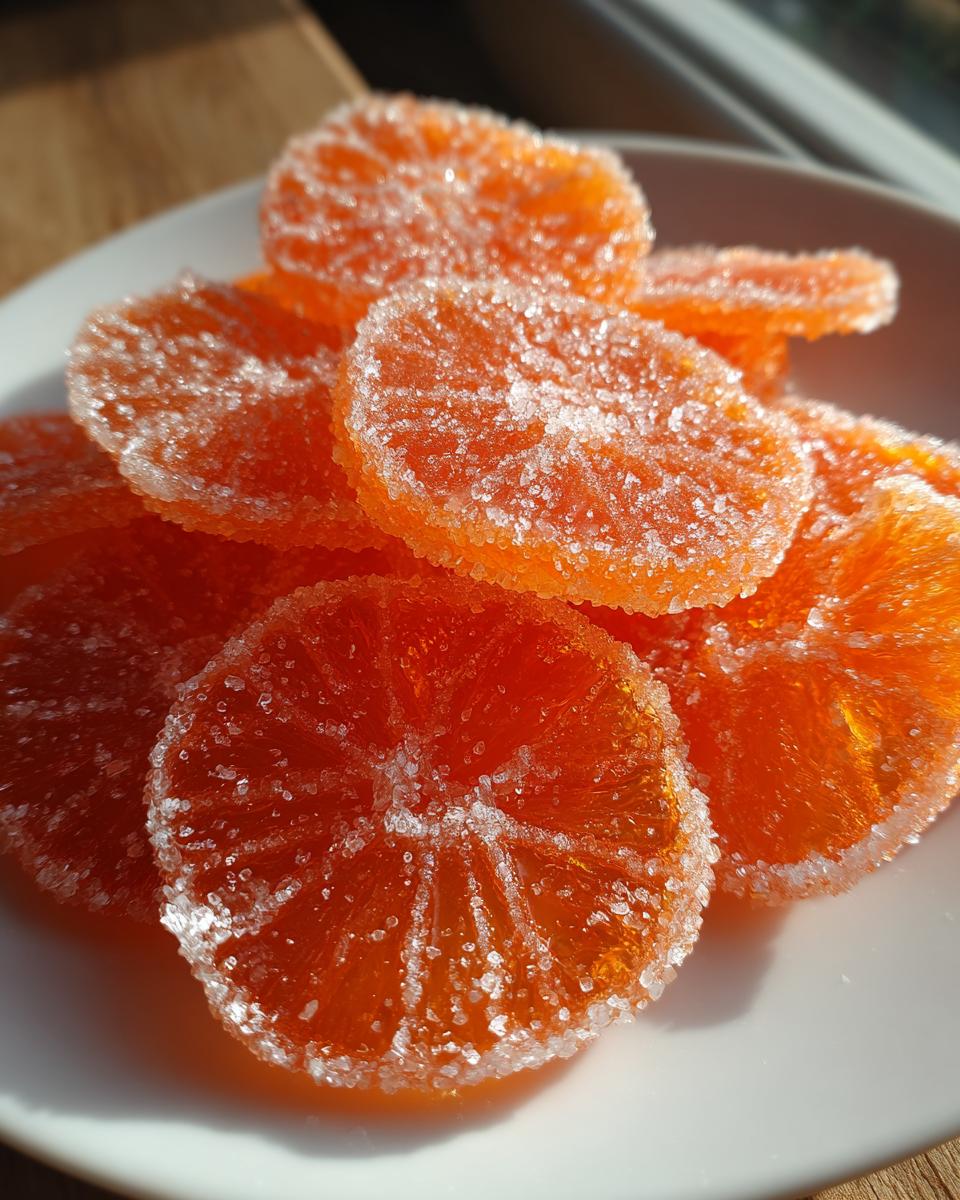
- Incredible Visual Appeal: When they are done right, these slices turn into jewel-toned gems! They are beautifully translucent and glossy, instantly elevating whatever you put them on. They feel fancy, but the process isn’t fussy at all.
- That Perfect Sweet & Tangy Balance: We aren’t just making pure sugar here, folks. The slow simmer lets the citrus flavor shine through. You get that complex, sweet and tangy orange slices flavor that makes you reach for another one immediately.
- Unbeatable Versatility: Seriously, these are the workhorses of my pantry! Use them as a gorgeous dessert topping with orange flavor, toss them onto a charcuterie board, or just snack on them straight from the jar.
- Amazing for Gifting: If you’re hunting for DIY edible gifts fruit that look expensive but were made with simple pantry staples, look no further. Pack them up in a cute tin, and you have an elegant homemade present ready to go!
- They Make Fantastic Chewy Orange Candy: Once they’re dried properly, you get this wonderful soft, slightly chewy bite. It’s not rock hard, it actually has texture, which is exactly what you want in the best edible candied fruit.
Gathering Ingredients for Perfect Candied Orange Slices
Okay, since we want these candied orange slices to be absolute showstoppers—glossy, perfectly sweetened, and not bitter—we need to start with the right fruit. Trust your chef here: choosing the right orange is half the battle! I’ve found that using Navel or Cara Cara oranges gives you the best look because they are firm and have those beautiful, rich colors inside. Remember, these need to survive a long simmer, so avoid super thin-skinned varieties.
You only need a few things to make this magic happen, which is why I call this an easy citrus candy recipe. We’re making a very simple syrup, so grab your sugar and water, plus a little secret weapon: fresh lemon juice.
Ingredient Notes and Substitutions for Candied Orange Slices
That small splash of lemon juice I mentioned? Don’t skip it! It’s crucial because its acidity stops the super-saturated sugar syrup from crystallizing. It also helps balance out the sweetness so you get that addictive flavor profile. When you are selecting your oranges, try to find ones that are unblemished and heavy for their size; those are packed with juice and zest! If you decide to go for the deluxe version later, we’ll be using dark chocolate, which is a gorgeous pairing for the tangy orange. If you need a recipe idea to put that chocolate-dipped goodness on later, check out my notes on fudgy brownies—they are an amazing base!
For more fantastic tips on ingredient selection, I loved reading over the advice shared by the team at Just So Savory, which you can find here: Candied Orange Slices Recipe.
Step-by-Step Instructions for Easy Candied Orange Slices
Alright, let’s get to the fun part! This is where we take those firm little citrus rounds and gently transform them into something truly spectacular. The key to making these treats successfully—and avoiding that super bitter rind taste—is patience. Luckily, most of the time spent here is hands-off, letting the heat and syrup do the heavy lifting for us. Stick with these steps, and you’ll have beautiful, glossy results.
Preparing and Blanching the Orange Slices
First things first, we need to wash those oranges really well since we are using the entire peel! Once they are spotless, grab a sharp knife (be careful, steady hands are best here!) and slice them thinly. I aim for about 1/8 of an inch thick. If they are too thick, they take forever to soften; too thin, and they fall apart easily. After slicing, we have to banish any lingering bitterness. We do this by blanching. This means pouring cold water over the slices, bringing it to a roaring boil, and then immediately draining it all out. You have to repeat this whole cycle—cover, boil, drain—three times total. Seriously, don’t skip this! It’s the secret to getting that perfect flavor balance in your final sweet and tangy orange slices.
Simmering to Achieve Translucent Orange Candy
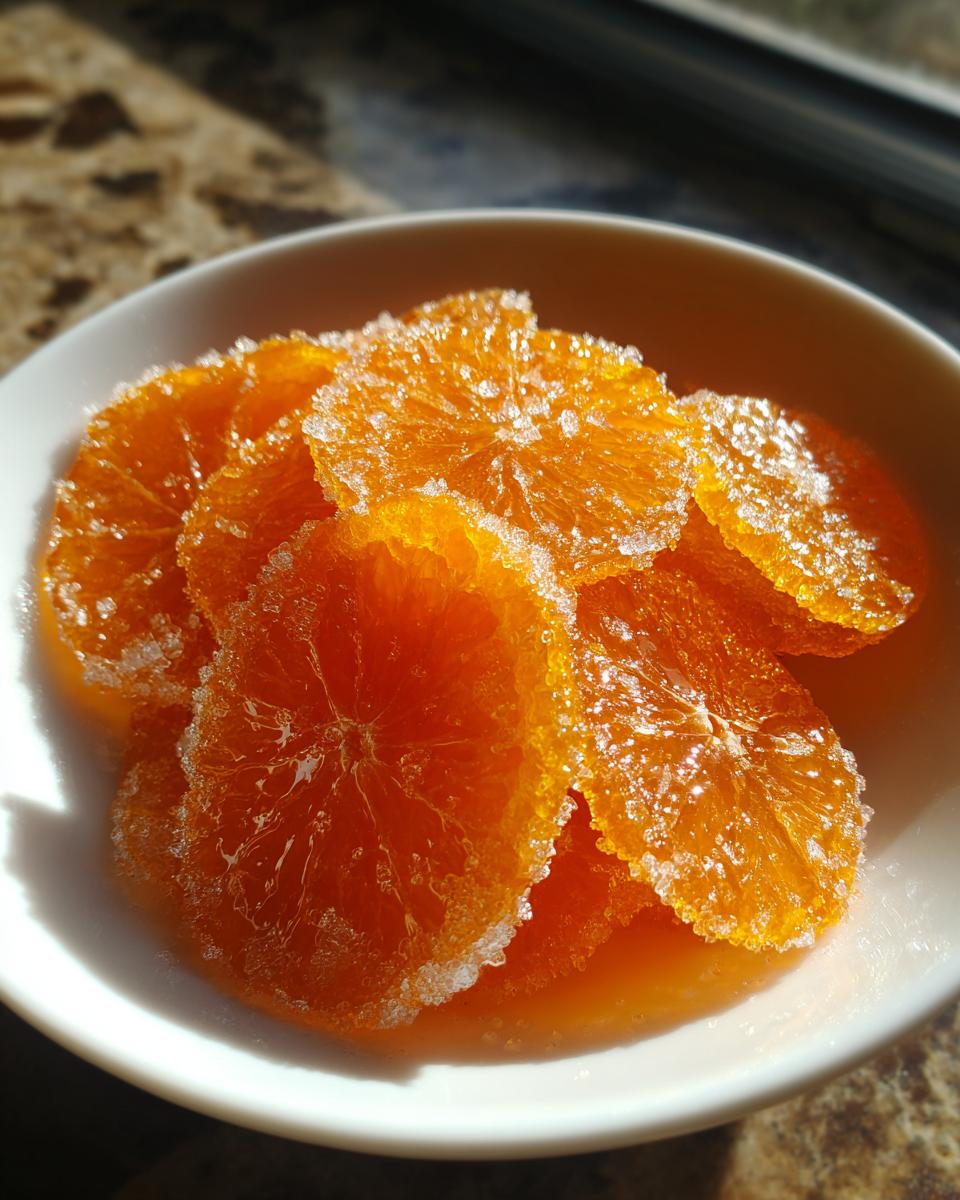
Once those slices are blanched, we switch gears and make our simple syrup candied fruit bath. It’s a straightforward 1:1 ratio of water and sugar—4 cups of each in the pot. Bring that to a boil just until the sugar completely dissolves. Then, gently slide in your blanched orange slices and that little bit of lemon juice. Now, this is crucial: drop the heat down low. We want a very gentle simmer, just a little bubble here and there. You’re going to let them cook for at least an hour, sometimes an hour and a half. Keep watching them! They are done when they look wonderfully plump and start turning that gorgeous, slightly see-through color. That’s when you know you’re about to achieve perfect candied orange slices.
For more ideas on using that beautiful citrus zest, check out this great source on making candy with fresh orange zest!
The Critical Cooling and Soaking Phase
Trust me on this next part—you are going to be tempted to pull them out right away, but DON’T! Once the simmer time is up, take the pot completely off the heat. We need the slices to rest in that hot, dense syrup. If you can manage it, leave them in the syrup for four hours minimum, but honestly, leaving them overnight is what makes the absolute best texture. This long, slow soak infuses every bit of sugar deep into the peel, ensuring you get that perfect soft, chewy orange candy consistency instead of a crunchy exterior. It’s worth the wait, I promise!
How to Dry Candied Oranges for the Best Texture
Now that those little orange jewels have soaked up all that glorious syrup, it’s time to get them ready for their final transformation! This drying stage is super important because it’s what separates a sticky, gooey mess from that beautiful, slightly tacky, yet wonderfully chewy texture we are aiming for. Getting the drying right is key to mastering how to dry candied oranges.
My preferred method is always letting them air dry. You need a sturdy wire cooling rack—the kind you use for cookies. Place that rack over a baking sheet, which will catch any syrup drips (we don’t want sticky counters!). Carefully lift the slices out of the syrup using a slotted spoon. Lay them flat on the rack, making sure none of them are touching. If they overlap, they’ll just fuse together into one giant orange raft, and we don’t want that!
You need to let them sit like this for several hours. I usually leave mine out overnight if I can. Every couple of hours, I pop out to the kitchen to gently flip them over. This ensures that the bottoms dry evenly, too. They should look shiny and feel slightly firm when you touch them, but still have a little give to them—that means they are perfectly chewy!
For those days when humidity is high, or maybe you just can’t wait 12 hours for them to dry, the kitchen notes definitely offer a workaround! You can use a very low oven. Set your oven to about 200°F (or 95°C) and let the slices bake for an hour or two. Remember to flip them halfway through that low-and-slow bake. This gentle heat encourages evaporation without actually cooking them further. Either way—air or oven—the goal is to dry them just enough so they aren’t sticky anymore. You’ve got this!
Finishing Touches: Sugar Coating or Chocolate Dipped Candied Oranges
Okay, your candied orange slices are perfectly dried—they look like little jewels! Now you have the best part: deciding how you want to present them. You have two fantastic options here, depending on what vibe you are going for. Do you want a bright, sparkling look, or are you leaning toward rich, decadent indulgence? Honestly, both approaches create an amazing gourmet orange garnish.
For the simplest, classic look, you just need a small bowl of extra granulated sugar. Once the slices are dry but still have that slight tackiness on the outside—that’s the perfect sticking point!—gently toss them in the sugar. Make sure every side gets a light coating. These sugar-dusted slices are fantastic for topping muffins or eating right out of the jar.
But if you want to kick things up a notch, we need to talk about the showstopper: chocolate dipped candied oranges. This is how you turn a simple citrus treat into a truly elegant homemade dessert. You’ll need to melt down some good quality dark chocolate—I love the contrast it provides against the bright orange flavor. You don’t need to cover the whole slice; just dip about half, maybe leaving a little orange showing at the top edge. Then, place them back on that wire rack to set up completely.
If you dip them, I highly recommend sprinkling a tiny pinch of flaky sea salt right on top of the wet chocolate. It sounds fancy, but it is so good! For a decadent way to use these finished slices, try crumbling them over my rich fudgy brownies—it’s heavenly! If you need specific inspiration on the dipping process, check out this fantastic tutorial on chocolate dipped candied orange slices.
Storage and Keeping Your Candied Orange Slices Fresh
We’ve done the simmering, the drying, and maybe even the dipping—now we have to make sure these little beauties last! The great thing about making candied orange slices is that they are inherently preserved by all that sugar, which is why they count as a long-lasting edible candied fruit. But we still need to treat them right so they stay chewy and don’t get weird or sticky!
The absolute best way to store your finished slices is in an airtight container. I usually grab a pretty canning jar or a container with a really tight-sealing lid. The enemy here is humidity! If air gets in, they can start to absorb moisture from the room and turn back into that gooey state we worked so hard to dry them out of.
You want to keep them tucked away in a cool, dark pantry or cupboard. Don’t stick them in the fridge unless your kitchen is incredibly humid; sometimes the cold air can actually make them sweat once they warm up again! The good news is that if you dried them well—remember those tips about the wire rack?—they should stay perfectly delicious, shiny, and chewy for up to two full weeks. That’s plenty of time to ration them out slowly. If you managed to keep them on a holiday platter longer than that, they might get a little harder, but they are still totally safe to eat! Knowing they last a while makes this recipe extra worthwhile, don’t you think?
Creative Ways to Use Your Homemade Candied Orange Slices
Now that you’ve mastered the simmering and drying for your beautiful candied orange slices, the best part begins: figuring out where to put all these delicious, jewel-like treats! Seriously, once you have these made, you’ll find excuses to use them everywhere. They just make everything look instantly fancier and taste brighter. I always make sure to have an extra jar on hand because they are too good to hoard, even though I definitely try!
For me, the versatility is what makes this easy citrus candy recipe a keeper:
- The Star of Charcuterie Boards: This is probably my favorite use when guests come over. Forget the plain dried fruit! Tuck your shiny slices right next to some salty prosciutto, creamy Brie, or that amazing cheddar cheese ball I shared last year. The sweetness and tartness cut through the richness of the cheese perfectly.
- Elegant Cake Decoration: If you’re frosting a Bundt cake, a layer cake, or even small cupcakes, placing a candied slice—maybe even one of those dipped in chocolate!—right on top makes it look like it came from a high-end Parisian bakery. They add height and color instantly. You only need one or two to make a huge impact as a dessert topping with orange notes.
- Cocktail Hour Flair: I love putting a slice on the rim of a crisp Gin and Tonic or even sticking one into a festive holiday punch. It reminds me of my grandmother—she always loved using edible garnishes to make simple drinks feel special for the holidays.
- Holiday Platter Power: As we head toward the darker months, these bright orange slices feel like holding a little piece of summer sunshine. Arrange them on a silver tray for holiday gatherings; people will grab them first, trust me. They are sturdy and look spectacular on any festive presentation.
- Crumble Topping Upgrade: Grab a few of those finished slices, roughly chop them up, and toss them into your next fruit crisp or crumble topping right before baking. The bits caramelize beautifully and add a really surprising burst of citrus complexity to the warm apples or berries.
See? So many ways to use them beyond just snacking! Enjoy showing off your incredible new skill with these show-stopping homemade candied orange slices recipe components!
Frequently Asked Questions About Making Candied Orange Slices
I always get so many questions when readers try this recipe for the first time, and honestly, that’s fantastic! It means you’re getting adventurous in the kitchen! Since making candied orange slices involves a lot of time waiting for the magic to happen, it’s natural to wonder about the little details. Here are the top things I hear most often about getting that perfect texture for your chewy orange candy.
Can I use thinner or thicker orange slices for candying?
You absolutely can adjust the thickness, but you have to adjust your timing! I really prefer the 1/8-inch thickness because it yields the most beautiful, translucent result once it’s soaked up all that syrup. If you slice them thinner than that, say almost paper-thin, they might start breaking down and dissolving into the syrup during the simmer phase, which is never fun! If you go thicker, you’ll need to simmer them longer—maybe an extra 30 minutes or more—to ensure the core of the rind softens up enough. Remember, we’re aiming for tender, not tough!
What is the best way to use leftover orange syrup?
This is one of my favorite questions because that leftover syrup is liquid gold! Never, ever toss it down the drain! It’s just water and sugar, but it’s infused with beautiful, potent orange essence. You can use it exactly like a regular simple syrup to sweeten iced tea or pour it over vanilla ice cream. I have started using a little bit of it in my morning coffee instead of plain sugar, or even using it in winter cocktails. If you are making my apple cinnamon muffins, a tiny drizzle on top before they bake adds a lovely zest!
How long does it take to make chewy orange candy?
When people ask about the timeline for making these homemade candied orange slices recipe components, I always have to give them the realistic answer, which involves patience! If you are just looking at active cooking time, it’s really only about two hours of simmering and prepping. But to get that perfect, truly rich flavor and the best texture for this easy citrus candy recipe, you need the cooling time. So, plan on about 90 minutes of active cooking, then at least 4 hours of passive soaking, and then another 6 to 8 hours (or overnight) for drying. For the absolute best chewy orange candy texture, give yourself a full 12 to 15 hours total, most of which is hands-off!
Share Your Kitchen Successes
I genuinely get so excited when you all try my recipes! Making these beautiful, tangy treats is all about building your confidence in the kitchen, and I want to hear all about how they turned out for you. Did you go for the sugar coating or did you dip all of yours in chocolate? Did they make it onto a dessert board, or did you sneak them all yourself before anyone else got a chance? Please leave a rating for the recipe below and tell me your own tips or tricks in the comments! If you’ve got pictures of your show-stopping candied orange slices, be sure to tag me on social media—I’d love to cheer you on! You can read a little more about my philosophy on cooking confidently over on the About page!
PrintEasy Homemade Candied Orange Slices: The Perfect Sweet & Tangy Garnish and Treat

Learn how to make beautiful, glossy, and chewy candied orange slices at home. This easy citrus candy recipe uses fresh oranges and simple syrup, resulting in a sweet and tangy treat perfect for garnishing desserts or enjoying as an edible gift.
- Prep Time: 20 min
- Cook Time: 90 min
- Total Time: 12 hours 50 min
- Yield: About 3 dozen slices 1x
- Category: Dessert
- Method: Simmering and Drying
- Cuisine: American
- Diet: Vegetarian
Ingredients
- 2 large Navel or Cara Cara oranges (best oranges for candying)
- 4 cups water
- 4 cups granulated sugar
- 1 tablespoon fresh lemon juice
- Optional: Extra granulated sugar for coating
- Optional: 4 ounces dark chocolate for dipping
Instructions
- Prepare the oranges: Wash the oranges well. Slice them thinly, about 1/8 inch thick, ensuring you keep the peel intact. Discard the very ends of the oranges.
- Blanch the slices: Place the orange slices in a medium saucepan and cover them completely with cold water. Bring the water to a boil over high heat, then immediately drain the slices. Repeat this boiling and draining process two more times to reduce bitterness.
- Make the simple syrup: In the same saucepan, combine 4 cups of water and 4 cups of sugar. Bring the mixture to a boil over medium-high heat, stirring until the sugar dissolves completely.
- Simmer the oranges: Add the blanched orange slices and the lemon juice to the sugar syrup. Reduce the heat to low and simmer gently for about 1 to 1.5 hours. The slices should become translucent and tender.
- Cool in syrup: Remove the saucepan from the heat. Let the orange slices cool completely in the syrup for at least 4 hours, or preferably overnight, to fully absorb the sweetness.
- Drain and dry: Carefully remove the slices from the syrup using a slotted spoon. Place them in a single layer on a wire cooling rack set over a baking sheet. Allow them to air dry for several hours, turning them occasionally.
- Finish the slices (Optional): For a sugar coating, gently toss the slightly tacky slices in extra granulated sugar. For chocolate dipped candied oranges, melt the dark chocolate. Dip half of each dried slice into the melted chocolate and place them back on the wire rack. Let the chocolate set completely before serving.
- Store: Store the finished candied orange slices in an airtight container at room temperature for up to two weeks.
Notes
- Use firm, unblemished oranges for the best appearance. Navel, Cara Cara, or Blood Oranges work well.
- If you want a quicker dry time, you can bake the slices in a very low oven (200°F or 95°C) for about 1 to 2 hours, flipping halfway through, until they are dry but still slightly chewy.
- Save the leftover orange syrup; it makes a wonderful simple syrup for cocktails or sweetening iced tea.
Nutrition
- Serving Size: 2 slices
- Calories: 180
- Sugar: 40g
- Sodium: 2mg
- Fat: 0.5g
- Saturated Fat: 0.3g
- Unsaturated Fat: 0.2g
- Trans Fat: 0g
- Carbohydrates: 46g
- Fiber: 1g
- Protein: 0.5g
- Cholesterol: 0mg