
Hi there, friend! If you’re anything like me, when the weather turns cool, you start craving desserts that feel like a warm hug. Forget those complicated pastry recipes that need three days of work! I want something elegant enough for company but perfectly cozy for a Tuesday night.
That’s why I’m thrilled to share this recipe for the ultimate simple, elegant, and warm fruit dessert: the best baked pears you will ever make. Seriously, I’ve made this dozens of times to get it just right. It uses just a handful of staple ingredients to create something truly beautiful. If you’ve ever felt intimidated by baking fruit, let me show you how easy it is to achieve that perfect, tender sweetness right in your own home kitchen. You’ve got this!
- Why You Will Love This easy baked pears recipe
- Gathering Ingredients for cinnamon honey baked pears
- Step-by-Step Instructions to Make baked pears
- Tips for Perfect warm fruit dessert
- Making baked pears with goat cheese for an elegant pear dessert
- Storage and Reheating Instructions for baked pears
- Serving Suggestions for this simple holiday dessert
- Frequently Asked Questions About Baked Fruit
- Nutritional Estimates for Your Dessert
Why You Will Love This easy baked pears recipe
Honestly, I think this recipe wins because it checks all the boxes for what a perfect weeknight dessert should be. It’s the kind of thing you can throw together while the main course is winding down and still feel like you served something spectacular. Trust me, this easy baked pears recipe is going into heavy rotation this season.
- Minimal Effort, Maximum Impact: We’re talking less than 15 minutes of active prep time before it goes into the oven. It’s the definition of gourmet made easy.
- Perfectly Cozy Flavor: The honey and cinnamon bake down into this sticky, warm caramel that clings to the tender fruit. It just *smells* like comfort!
- Naturally Sweetened: I lean on the natural sugars of the ripe pear, boosted by just a touch of honey. You feel a little less guilty serving this than a heavy cake!
- It’s Naturally Gluten Free: This is such a relief when hosting friends with dietary needs! No special flours required—it’s just fruit, spice, and nuts.
- Elegant Presentation: Halving the pears and scooping out the center makes them look so intentional and beautiful on the plate. It’s a wonderful alternative to apple crisp when you want something lighter.
- Quick Baked Fruit Win: If you need a healthy dessert fast, this one is your hero. It’s ready alongside your after-dinner coffee.
Gathering Ingredients for cinnamon honey baked pears
Okay, the beauty of these cinnamon honey baked pears is that they rely on incredibly simple, high-quality ingredients. You don’t need ten things; you need the right four or five things to make the magic happen. When you’re buying your fruit, remember this tip I learned years ago: always go for a firmer pear like Bosc or Anjou for baking. Bartlett pears are delicious, but they tend to break down too much when heated, and we want them to hold their gorgeous shape!
Pears and Glaze Components
Here is the list of what you need to assemble before we even think about turning on the oven. Keep everything measured out nearby—it makes the actual assembly so much faster!
- Four firm ripe pears (Bosc or Anjou are my favorites to keep their shape!)
- Four tablespoons of local honey—drizzle it in, don’t dollop!
- Two teaspoons of ground cinnamon. Don’t skip measuring this; cinnamon is key here!
- One teaspoon of pure vanilla extract. You can smell the difference when you use the real stuff, trust me.
- One-quarter cup of plain water. This little bit of water goes into the base of the dish to create steam and prevent scorching.
Topping Ingredients for baked pears with walnuts
We need a little crunch to contrast that soft, yielding fruit. This is where the walnuts come in to turn our simple fruit into a truly elegant dessert. For these baked pears, you only need:
- One-quarter cup of roughly chopped walnuts.
Step-by-Step Instructions to Make baked pears
Alright, now that we have everything measured out, it’s time to put this gorgeous dish together. Making incredible baked pears is less about complicated steps and more about knowing a few key techniques. Don’t worry; I’m going to walk you through every single one. I promise this process is so straightforward, you’ll be wondering why you haven’t been making this warm fruit dessert every week!
As you get ready, remember how much I love showing people that home cooking can be simple and rewarding. If you need a refresher on other great baking projects after this, you can always check out my recipe for super classic apple pie. Now, let’s get these pears into the oven!
Prepping the Pears and Oven Setup
First things first: we need to get our environment ready. Preheat your oven to 375°F (190°C). That’s a little lower than some fruit bakes, which helps the honey caramelize instead of burning too fast.
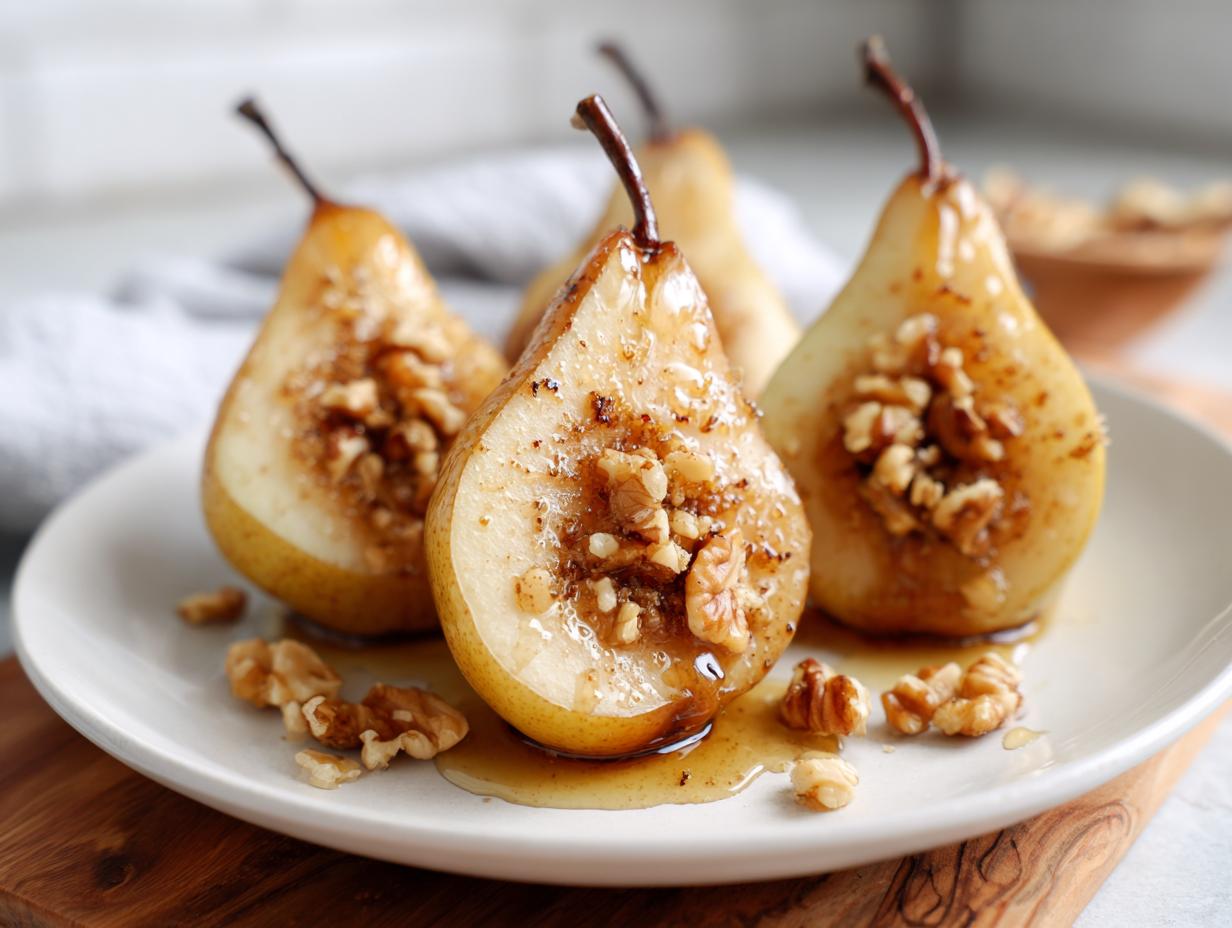
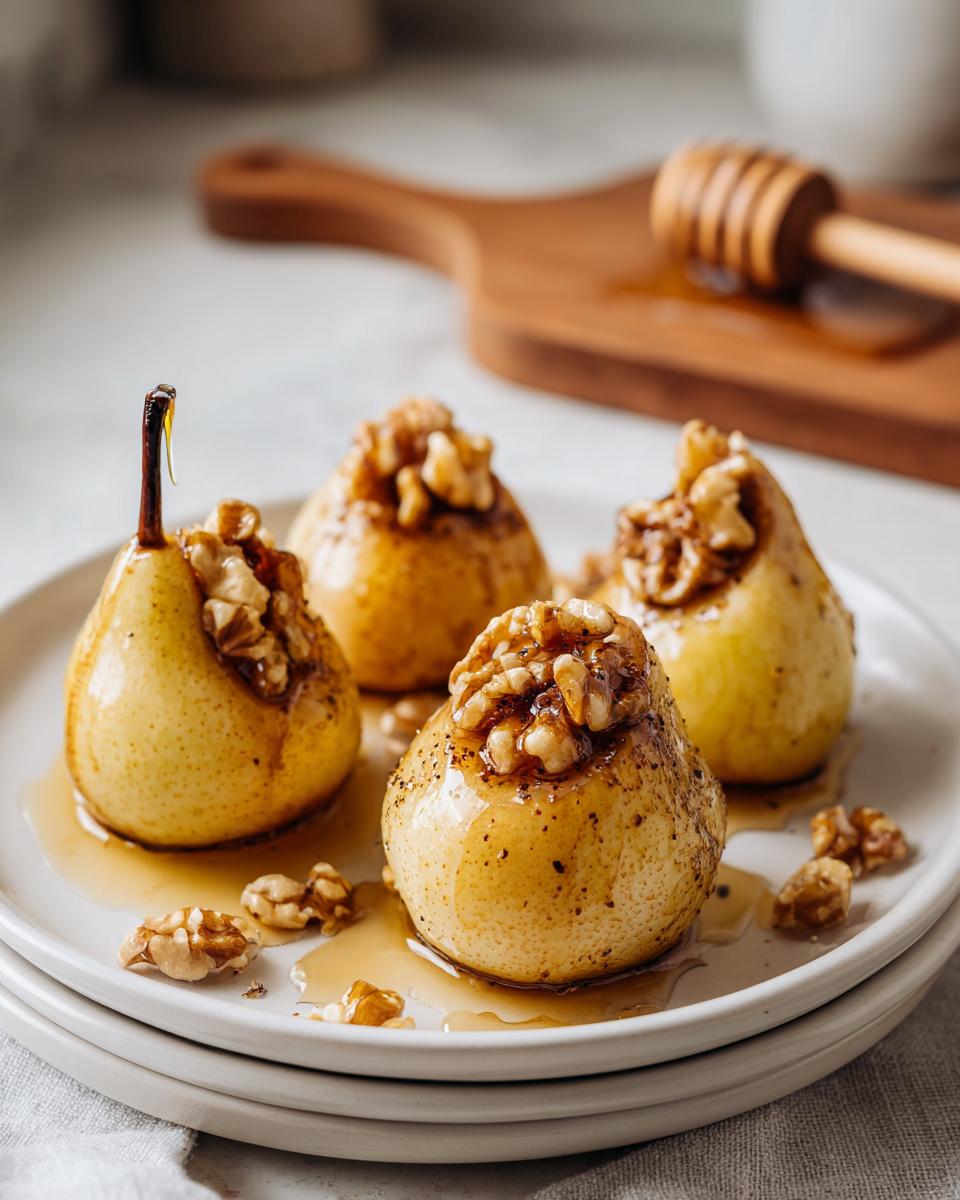
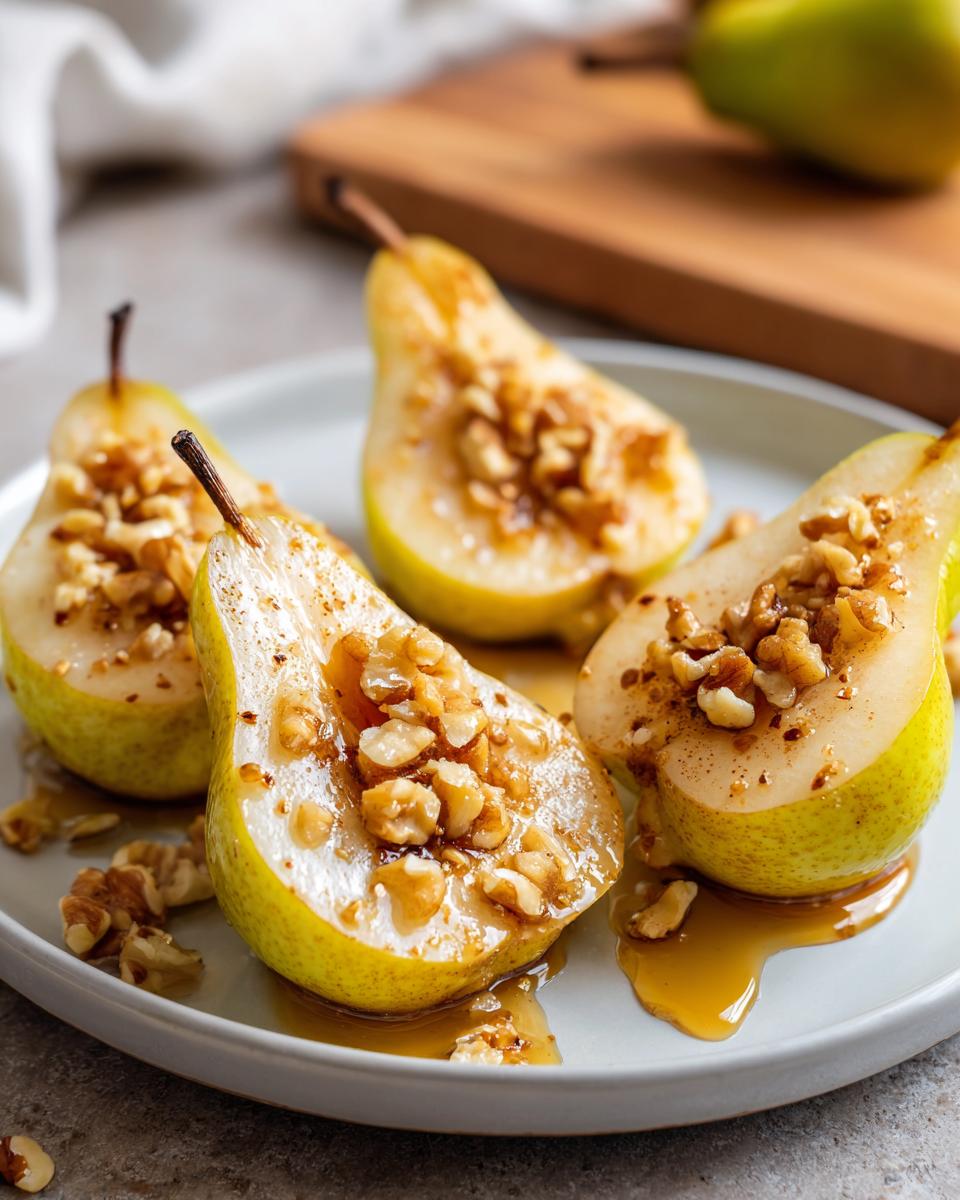
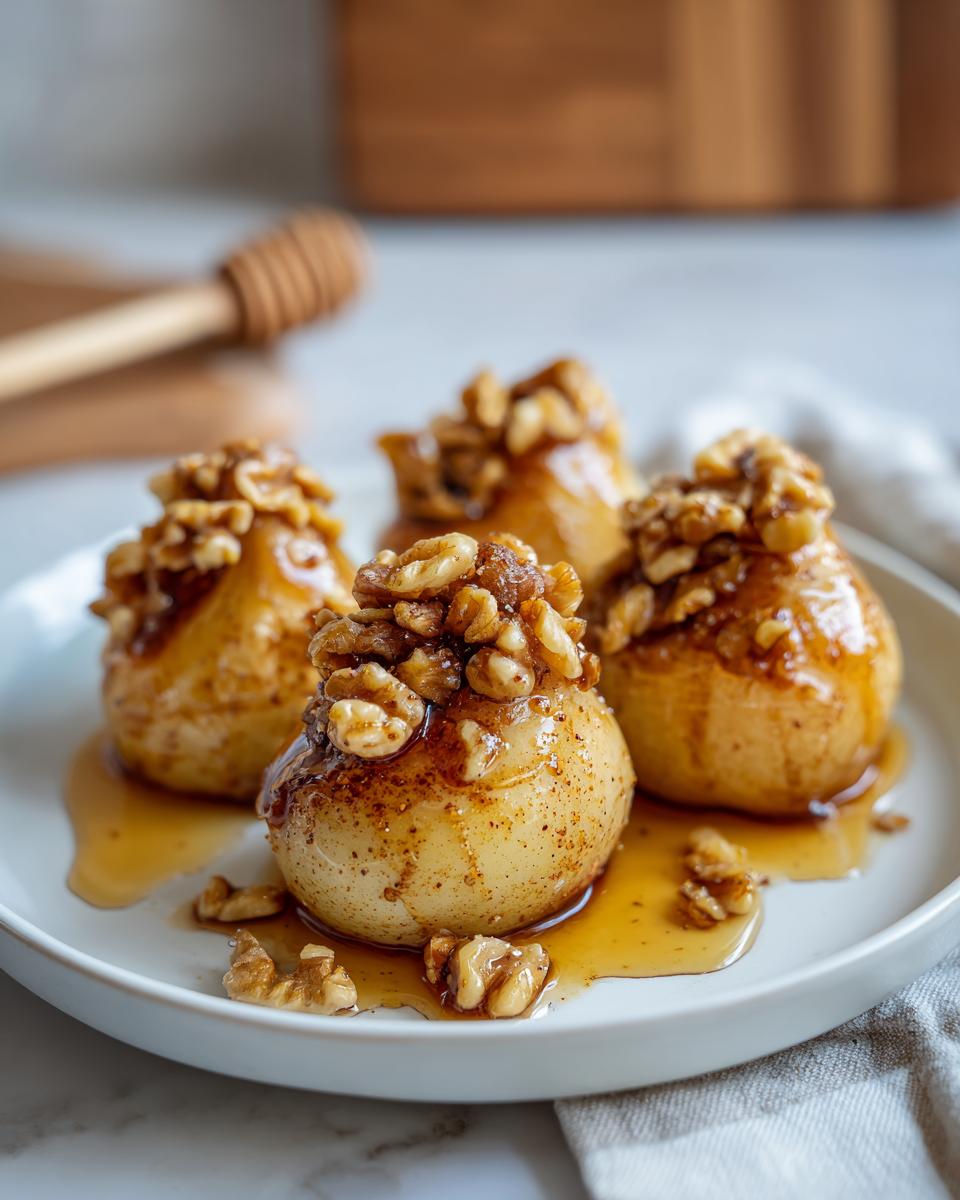
Next, grab a small baking dish—one that can fit your four pear halves comfortably without them touching too much. Give it a quick light grease. Now, for the pears themselves: wash them well, then slice them right down the middle, from stem to bottom. Take a small spoon, or even a melon baller if you have one, and gently scoop out all those seeds and the little bit of tough core material. We want a clean boat ready to hold our glaze!
Creating the Honey Cinnamon Glaze for baked pears
In a tiny bowl—the one you used to measure your spices, perhaps?—we’re going to combine our moisture and flavor bombs. Whisk together the honey, the ground cinnamon, and that lovely vanilla extract until it’s all one sticky, fragrant mixture. This is what separates a plain baked fruit from a truly special dessert!
Once you have your glaze ready, place the cored pear halves cut-side up in your greased dish. Now, take a small spoon and drizzle that sweet honey-cinnamon mixture evenly over the cut surface of each half. We are building fantastic flavor for these baked pears!
Baking Technique and Basting
Before these go into the oven, you need a little security blanket for the fruit, which also helps keep them tender. Pour the quarter cup of water directly into the bottom of the baking dish—around the pears, not over the glaze filling. This creates the steam we need to keep things moist, which is how we guarantee that melt-in-your-mouth texture. This little trick is one of my favorite ways to ensure great moisture, just like in my other favorite fruit bakes!
Into the oven they go for about 30 to 40 minutes. The indicator that they are perfectly done is when you can easily pierce the thickest part of the pear with a fork—it should give gently. This is where we build trust, folks! About halfway through baking (say, after 20 minutes), pull the dish out carefully and use a spoon to drizzle some of that syrupy liquid from the bottom of the pan back over the tops of the pears. This basting step ensures they don’t dry out and maximizes that caramelized flavor. When they are tender, pull them out, sprinkle on your walnuts, and let them rest just a minute before serving warm.
Tips for Perfect warm fruit dessert
You know, baking shouldn’t feel like rocket science. It should feel like a cozy treat waiting to happen! Achieving the absolute best texture and flavor in a warm fruit dessert like this often comes down to just one or two tiny tweaks. Since we tested this recipe so many times—really, you wouldn’t believe how many pears we went through—I have a few pointers to help you nail it every time you make these baked pears with cinnamon sugar.
If you are looking for more ways to use warm spices in your baking, you might also want to check out my recipe for apple cinnamon muffins, which uses a very similar spice profile!
Ingredient Notes and Substitutions
This section is all about making the recipe work for *your* pantry and your preferred flavor profile. Sometimes we run out of honey, or maybe you just crave that slightly more complex flavor that only brown sugar brings. It’s okay to adapt things, as long as you respect the structure of the bake!
We talked about the goat cheese variation already, but it’s worth repeating how amazing that sweet and savory combination is. If you want to try a sweet and savory pears experience, just wait until the pears are almost done and then pop just a little crumble of soft goat cheese right on top of the honey glaze. It melts down beautifully and adds the perfect tangy contrast!
Another swap I sometimes make, especially if I want a deeper caramel note, is swapping half the honey for dark brown sugar. You won’t need to change the water amount at all. If you do this, you’ll get almost caramelized baked pears without adding additional baking time. For those who might be searching for something healthier, remember that even with the honey, this dish keeps things relatively light compared to many other baked goods. You can see more great ideas for healthy baking over at Bake & Savor, too!
Making baked pears with goat cheese for an elegant pear dessert
Now, let’s talk about taking these already delicious baked pears from cozy weeknight treat to show-stopping, impressive entry. Because I know some of you are hosting brunches or perhaps you just like that little bit of tang to cut through sweetness—we absolutely have to discuss the sweet and savory option. This is how you create an incredibly elegant pear dessert, and honestly, it is shockingly easy.
If you’re looking for other appetizers that hit that sweet spot between savory and impressive, you should take a look at my recipe for stuffed mushrooms—they give you that same “Wow, you made this?” feeling.
The key to success when adding cheese is timing. We are aiming for warm, slightly melty goat cheese, *not* browned, crispy chunks. If you add it too early, the texture gets weird and it can actually burn under the direct heat of the oven.
So, here is the secret timing for this variation:
- Bake the pears as directed in the main recipe (the 30 to 40 minute bake time).
- When you have about 5 minutes left on the timer—meaning the pears are tender but still perfectly holding their shape—carefully take the baking dish out of the oven.
- Quickly crumble or dollop a small amount of soft goat cheese (about 1-2 teaspoons) right into the center cavity of each pear, covering the cinnamon honey glaze.
- Slide them back into the oven for those final 5 minutes. You’ll watch the cheese just soften up beautifully.
It transforms the entire dish! The tanginess of the cheese plays so well against the vanilla and the warm spice. For even more flavor combinations using tangy cheese and fruit, you can see how Beatrice pairs this concept over at Recipes by Beatrice. It’s a fabulous, balanced bite that makes these baked pears feel special!
Storage and Reheating Instructions for baked pears
Great news! One of the best things about making these baked pears is that they are actually better the next day, kind of like a favorite cozy fall bake. They absorb all that delicious cinnamon syrup overnight, making them even more tender. I always make sure I have at least one pear left over just for breakfast!
But since food safety is always priority number one in my kitchen—right after flavor, of course—we need to talk about proper storage. You want to make sure we keep that wonderful, soft texture intact.
Here is what I do:
- Cool Down First: Always let your leftover baked pears cool down completely to room temperature before you even think about putting a lid on them. Trapping steam in a container leads to sogginess, and we hate soggy fruit!
- Refrigeration is Key: Once cooled, transfer the leftover pears and any remaining syrup into an airtight container. I use glass containers because they don’t stain, but any good, sealed container works great. They will easily last for up to four days in the refrigerator.
Now for the best part: knowing how to reheat them so they taste like they just came out of the oven! You have two good options here, depending on if you’re having a quiet morning or rushing through a busy one.
Reheating in the Oven (Best Texture)
If you have about 10 minutes to spare, the oven is the way to go if you want to truly bring back that fresh-baked texture. Preheat your oven to a gentle 350°F (175°C). Place the pear halves (and any syrup you want to spoon over them) into a small, oven-safe dish. Pop them in for about 8 to 10 minutes. This gentle heat warms them through evenly without making the walnuts mushy or drying out the fruit. It’s my preferred method for a comfort food dessert experience!
Quick Reheat in the Microwave
If you are grabbing one quick pear for a snack, the microwave is your friend! Place one pear half on a microwave-safe plate. I like to add a tiny teaspoon of water right next to the pear on the plate to prevent the syrup from thickening too much. Heat it for about 30 to 45 seconds, depending on your microwave’s power. Check to make sure it’s piping hot throughout before you enjoy this quick pear recipe!
Serving Suggestions for this simple holiday dessert
This is the grand finale, my friends! After all that easy work, you deserve to serve these glorious baked pears in a way that feels special. Even though this is such a simple holiday dessert, the presentation can honestly trick people into thinking you spent all day fussing in the kitchen. It’s my favorite kind of holiday magic!
When it comes to garnishes, I like to keep things fairly light so the beautiful caramelized fruit still shines through. You’ve already got those wonderful walnuts in there providing texture, but here are the pairings that I think really take these over the top:
- Classic Vanilla Bean: You can never, ever go wrong with a scoop of high-quality vanilla ice cream. The cold, creamy texture contrasts perfectly with the warm, spiced pear. It’s pure comfort food heaven.
- A Touch of Tang: If you want something a bit lighter than ice cream, try a dollop of crème fraîche or lightly sweetened heavy cream. It adds richness without being overly sweet.
- Powdered Sugar Finish: Honestly, if you’re in a huge rush, just set the warm pears on a nice plate and use a tiny sifter to dust them lightly with powdered sugar right before serving. It looks so delicate and perfect!
- Crème Anglaise (Fancy Option!): If you’re feeling ambitious, making a quick homemade custard sauce—a light crème anglaise—is incredible. It’s easier than you think, I promise!
If you are looking for other show-stopping, yet simple, recipes that are perfect for serving guests during the holidays—maybe something savory to start the meal?—you have to check out my recipe for a classic cheese ball. But for the grand finish, these pears, served warm with a little drizzle of any leftover syrup from the pan, are just unbeatable.
For even more cozy inspiration, especially if you’re thinking about Mediterranean flair, you can see how others serve up their warm fruit dishes over at The Mediterranean Living blog. Enjoy every bite!
Frequently Asked Questions About Baked Fruit
I totally get it! When you find a recipe you love, you start thinking about all the little ways you might change it up or if you can prep it ahead of time. That’s the sign of a successful, reliable recipe, right? Answering these questions upfront helps you feel super confident when you pull that dish out of the oven. If you’re already thinking about other appetizers you can serve alongside these, maybe check out my classic bruschetta recipe!
Can I use any type of pear for this recipe?
This is such a common question, and the answer really comes down to shape holding power! Firm pears, like Bosc or Anjou, are the MVPs for this dish. They have a lovely density that lets them soften beautifully while holding onto their structural integrity. If you use soft pears, like a very ripe Bartlett, they are probably going to turn into a delicious pear mush in the oven—which is great for a puree, but not what we want when we slice them in half like this. Stick to firm and slightly under-ripe for the best looking baked pears!
How do I make these baked pears gluten free?
Good news travels fast! The beauty of this cinnamon honey baked pears recipe is that it’s naturally fantastic for those avoiding gluten. We aren’t using any flour in the glaze, and we rely on walnuts for the topping, which keeps this recipe perfectly wholesome. You are already set to make a fantastic gluten free pear dessert without changing a single step! Just double-check the label on any store-bought vanilla extract or any potential toppings you might consider, just to be sure.
Can I prepare the pears ahead of time?
Yes, absolutely! I love making these as part of my weekend prep. You can totally core the pears and even mix up the honey-cinnamon glaze ahead of time. I recommend preparing the fruit, placing the halves in your baking dish (covered tightly, of course), and keeping them in the fridge for up to 24 hours. Don’t add the water to the bottom of the dish until right before they go into the oven, though!
When you’re ready to bake, just pull the dish out of the fridge, spoon the glaze on, add that small amount of water to the bottom, and increase your baking time by about 5 to 8 minutes since the fruit is starting colder. It works perfectly for a quick weeknight meal!
Nutritional Estimates for Your Dessert
I always think it’s helpful to have a general idea of what we are eating, especially when we aim for something like these healthy baked pears. When I whip these up, I’m not obsessing over every milligram, but it’s nice to know that this is a relatively light, comforting choice after dinner. Remember, these numbers are just estimates based on the exact ingredients listed in the recipe card—so if you use a ton more honey or swap in pecans instead of walnuts, these figures will shift a bit!
This recipe focuses on natural fruit sugars and healthy fats from the nuts, making it a wonderful comfort food dessert option overall.
Here are the general estimates for one serving (which is one pear half):
- Calories: 220
- Sugar: 35g (Mostly natural fruit/honey sugars!)
- Fat: 5g
- Protein: 2g
- Fiber: 7g (Hello, happy digestion!)
- Sodium: Just 5mg
A quick note here: Because we are focusing on pure fruit, honey, and nuts, this recipe comes out wonderfully low in sodium, which is something I appreciate when I’m keeping things wholesome. If you find yourself swapping in ingredients—maybe you use store-bought caramel instead of the honey glaze, or perhaps you add that tangy goat cheese—always take those additions into account for your final tally!
Print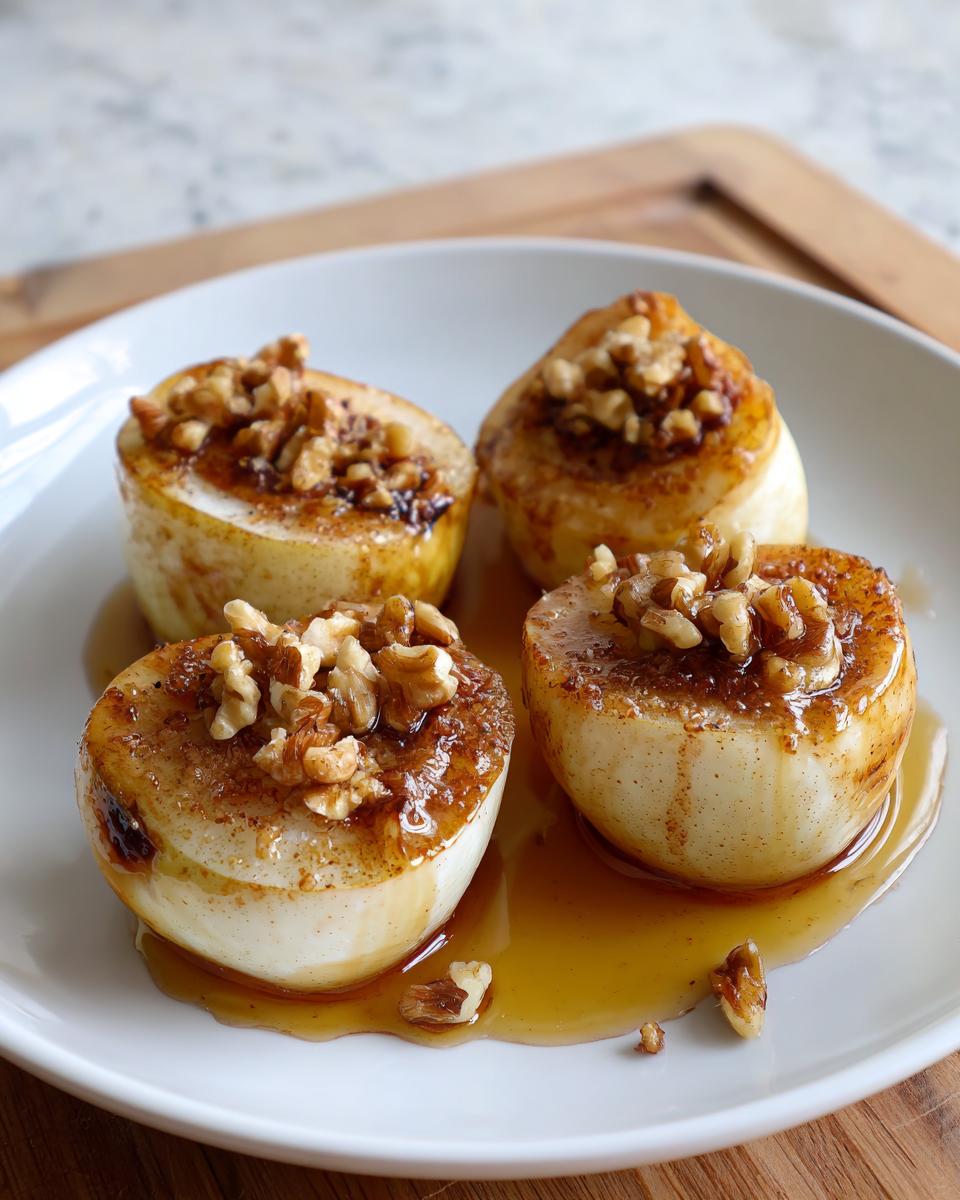
Classic Cinnamon Honey Baked Pears with Walnuts
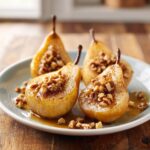
Make these Classic Cinnamon Honey Baked Pears for a simple, elegant, and warm fruit dessert. This recipe uses natural sweeteners and spices for a comforting flavor.
- Prep Time: 10 min
- Cook Time: 35 min
- Total Time: 45 min
- Yield: 4 servings 1x
- Category: Dessert
- Method: Baking
- Cuisine: American
- Diet: Vegetarian
Ingredients
- 4 firm ripe pears (like Bosc or Anjou)
- 4 tablespoons honey
- 2 teaspoons ground cinnamon
- 1 teaspoon vanilla extract
- 1/4 cup water
- 1/4 cup chopped walnuts
Instructions
- Preheat your oven to 375°F (190°C). Lightly grease a small baking dish.
- Wash the pears. Cut each pear in half lengthwise and use a melon baller or small spoon to scoop out the core and seeds.
- In a small bowl, mix the honey, cinnamon, and vanilla extract together to create the glaze.
- Place the pear halves cut-side up in the prepared baking dish.
- Spoon the honey-cinnamon mixture evenly over the cut surface of each pear half.
- Pour the 1/4 cup of water into the bottom of the baking dish. This prevents the pears from sticking and creates steam.
- Bake for 30 to 40 minutes, or until the pears are tender when pierced with a fork. Basting them with the pan liquid halfway through helps them stay moist.
- Remove the dish from the oven. Sprinkle the chopped walnuts over the warm pears.
- Serve warm. This is a great healthy baked pears option.
Notes
- For a sweet and savory pears twist, try adding a small crumble of goat cheese on top during the last 5 minutes of baking.
- If you prefer a richer flavor, substitute brown sugar for half of the honey.
- These baked pears are naturally gluten free.
Nutrition
- Serving Size: 1 pear half
- Calories: 220
- Sugar: 35g
- Sodium: 5mg
- Fat: 5g
- Saturated Fat: 1g
- Unsaturated Fat: 4g
- Trans Fat: 0g
- Carbohydrates: 45g
- Fiber: 7g
- Protein: 2g
- Cholesterol: 0mg