
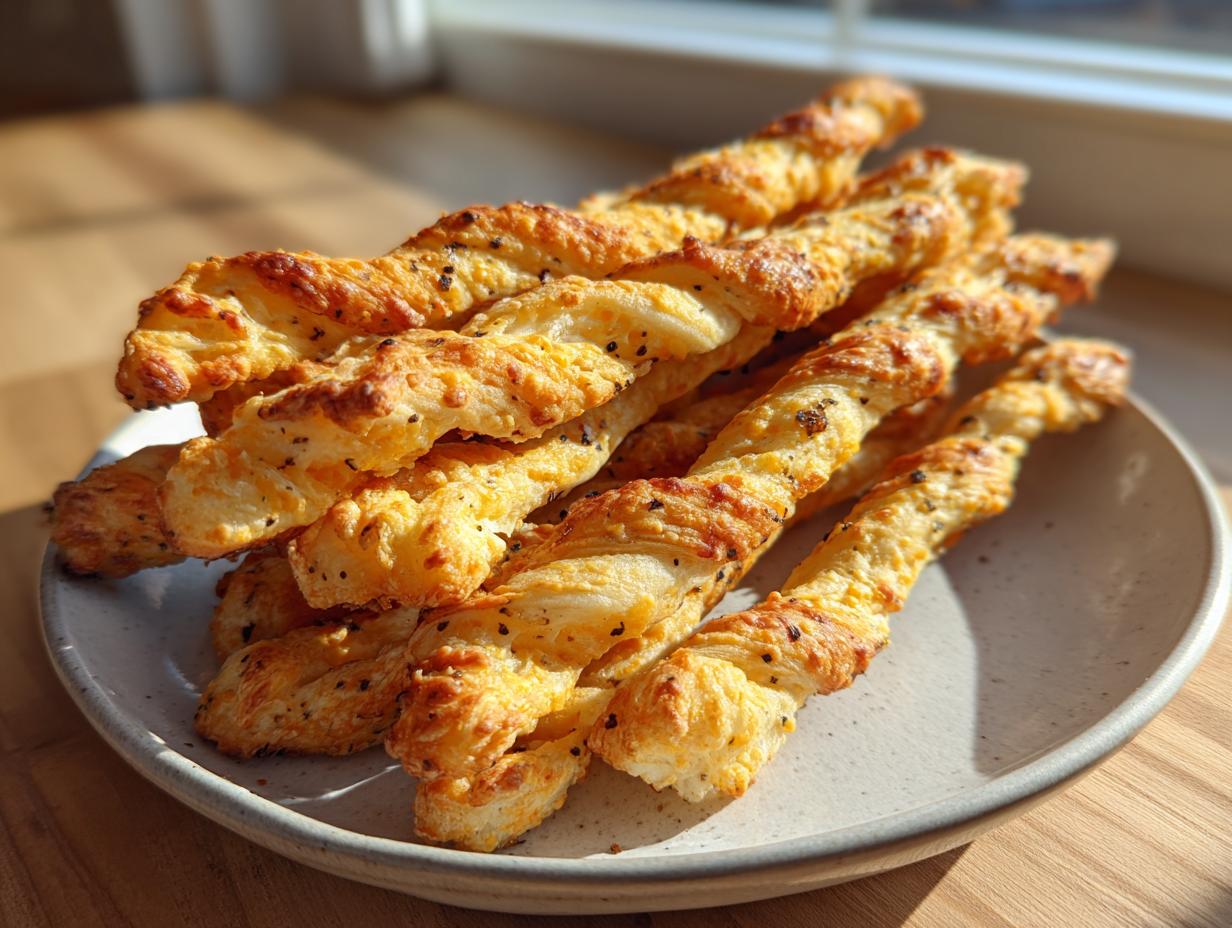
If you are looking for that one, single, can’t-be-stopped party appetizer that vanishes the moment you set it on the table, stop scrolling right now. These cheese straws are genuinely the best! I remember serving these at my very first big neighborhood potluck; people kept asking where I bought them, and I just beamed because I knew I’d nailed the recipe.
We’re diving deep into the world of classic, crispy Southern cheese straws today. Forget those soft, doughy things you might have had elsewhere; my focus here is on achieving that shatteringly crisp, savory bite that makes these so addictive. Trust me, once you master this simple technique, you’ll never go back to store-bought crackers again. Head over to my Appetizers & Snacks collection for more crowd-pleasing ideas!
- Why These Are the Best Crispy Cheese Straws You Will Ever Bake
- Ingredients for Classic Cheddar Cheese Straws Recipe
- How to Make Perfect Crispy Cheese Straws: Step-by-Step Instructions
- Tips for Success When Making Homemade Cheese Straws
- Storage and Reheating Instructions for Your Cheese Straws
- Variations: Spice and Herb Additions to Your Cheese Straws
- Serving Suggestions for Party Appetizers Cheese
- Frequently Asked Questions About Making Cheese Straws
- Sharing Your Classic Cheddar Cheese Straws
Why These Are the Best Crispy Cheese Straws You Will Ever Bake
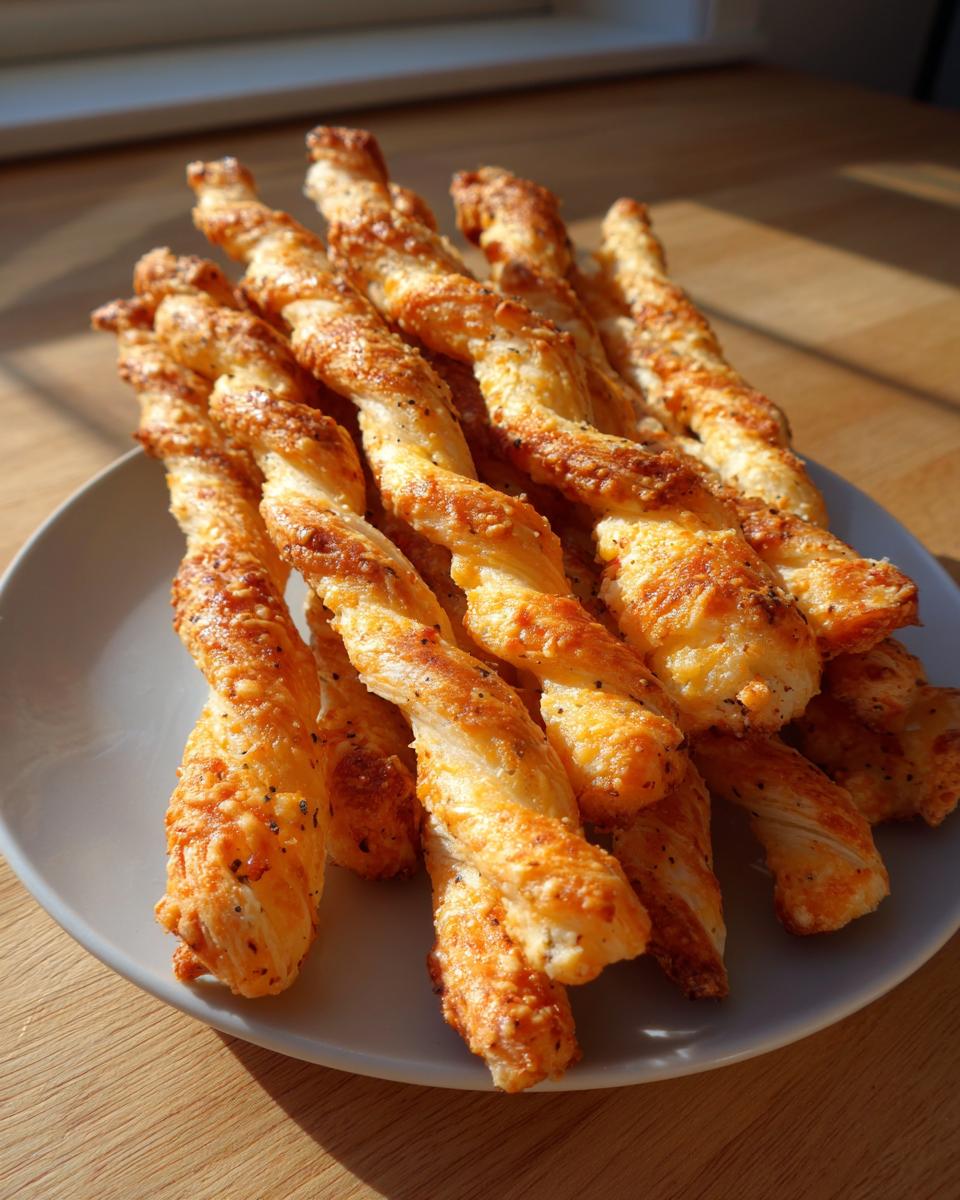
I promise you, getting that satisfying crunch is my main mission when I bake these. So many recipes end up soft or chewy, which is fine for, say, breadsticks, but not for perfect cheese straws! We are aiming for that quintessential, flaky, savory snap that defines a true Southern classic. When you see those golden edges, you know you’re on the right track.
If you want a recipe that truly delivers on texture and flavor for your next party appetizer, here’s what sets this version apart:
- They are shatteringly crisp—no chewing required here!
- We rely exclusively on freshly grated, sharp cheddar for maximum flavor impact.
- These are the ultimate make-ahead entertaining snacks; they hold up beautifully.
- Inspired by the best traditional recipes, like those you’ll see detailed over at Cut + Cook + Taste, it’s all about keeping the butter cold!
Follow the chilling steps, and I guarantee you’ll create the crunchiest Southern cheese straws around.
Ingredients for Classic Cheddar Cheese Straws Recipe
Okay, let’s talk ingredients. Because this is a recipe where the quality of just a few things really shines through—especially the cheese—you won’t need a pantry full of specialty items. The key to great texture, which we talked about, really hinges on two players: ice-cold butter and freshly grated, sharp cheddar cheese. Don’t cheat yourself by buying that pre-shredded bag; it just won’t melt and crisp up the same way for your homemade cheese straws!
Ingredient List for Homemade Cheese Straws
- 1 1/2 cups all-purpose flour
- 1/2 teaspoon salt
- 1/4 teaspoon cayenne pepper
- 1/4 teaspoon black pepper
- 1/2 cup (1 stick) cold unsalted butter, cut into small pieces
- 8 ounces sharp cheddar cheese, freshly grated
- 1 large egg white, lightly beaten
- 1 tablespoon cold water
How to Make Perfect Crispy Cheese Straws: Step-by-Step Instructions
Now for the fun part: bringing these gorgeous little bites together! Remember, achieving those amazing, crispy cheese straws is all about temperature control, especially keeping things cold. If your kitchen is warm, just pop your ingredients back in the fridge for a few minutes if they start to feel soft. Follow these steps closely, and you’ll have the most incredible buttery cheese crackers imitation you can imagine!
Mixing the Dry Ingredients and Cutting in the Butter
First up, we whisk everything dry—your flour, salt, and those tiny hints of spice—in a big bowl (Step 1). The real magic begins when you add the cold butter pieces (Step 2). You need to use a pastry blender, or just your fingertips (work quickly so the heat from your hands doesn’t melt the butter!), until the whole mixture looks like coarse sand or little pea-sized crumbs. Why cold butter? Because those little pockets of butter create steam while baking instead of just melting flat. That steam is your secret weapon for achieving that flaky, utterly crisp texture!
Forming the Stiff Dough for Your Cheese Straws
Next, stir in all that beautiful, freshly grated sharp cheddar until everything is evenly mixed in (Step 3). Once the cheese is distributed, we add the binder: the egg white mixed with a tablespoon of cold water (Step 4). Mix this in until it just comes together into a stiff dough. Here’s my big warning: Do not overmix! Overmixing develops the gluten in the flour, and that gives you tough, chewy crackers instead of light, crisp straws. Stop the moment it looks unified.
Cutting and Twisting the Cheese Straw Strips
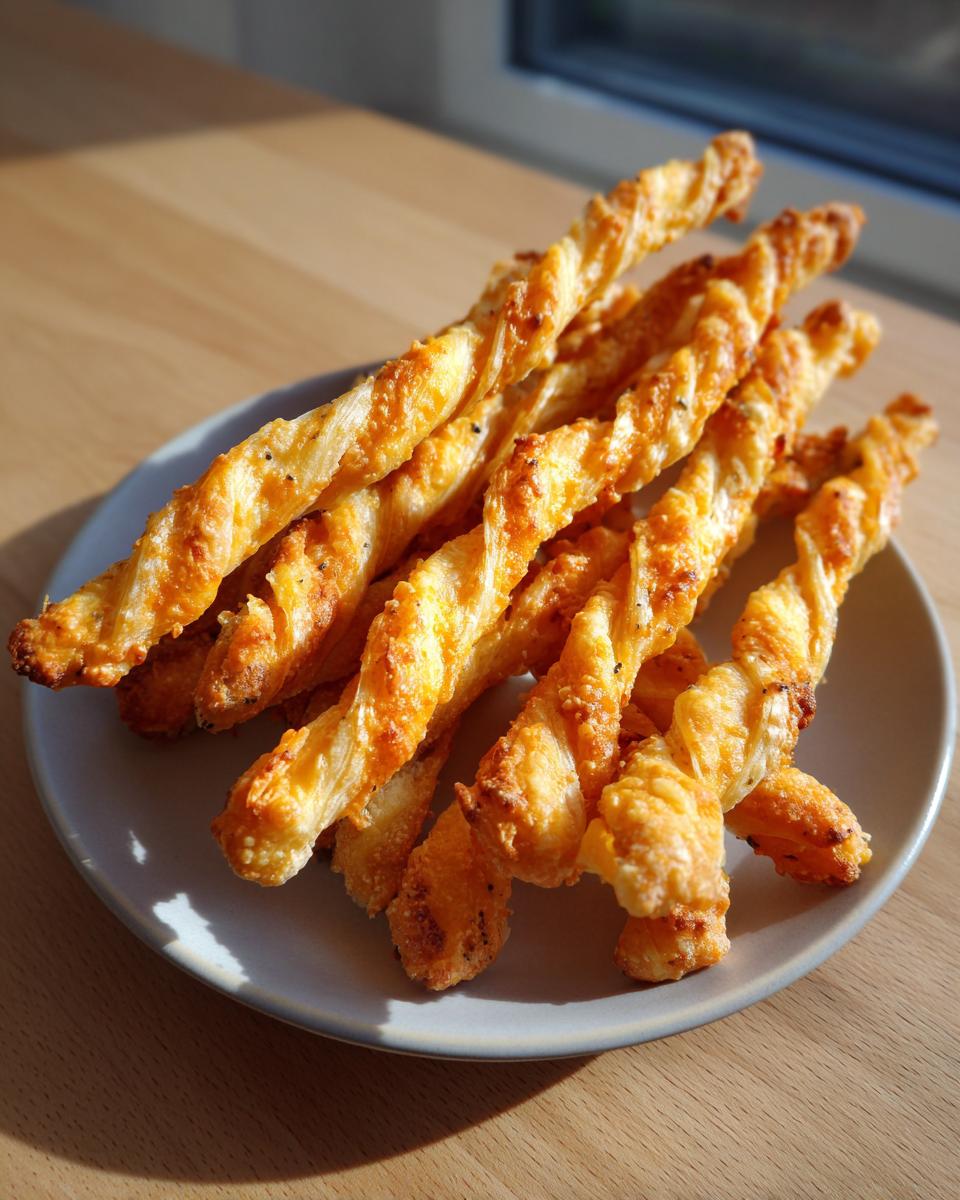
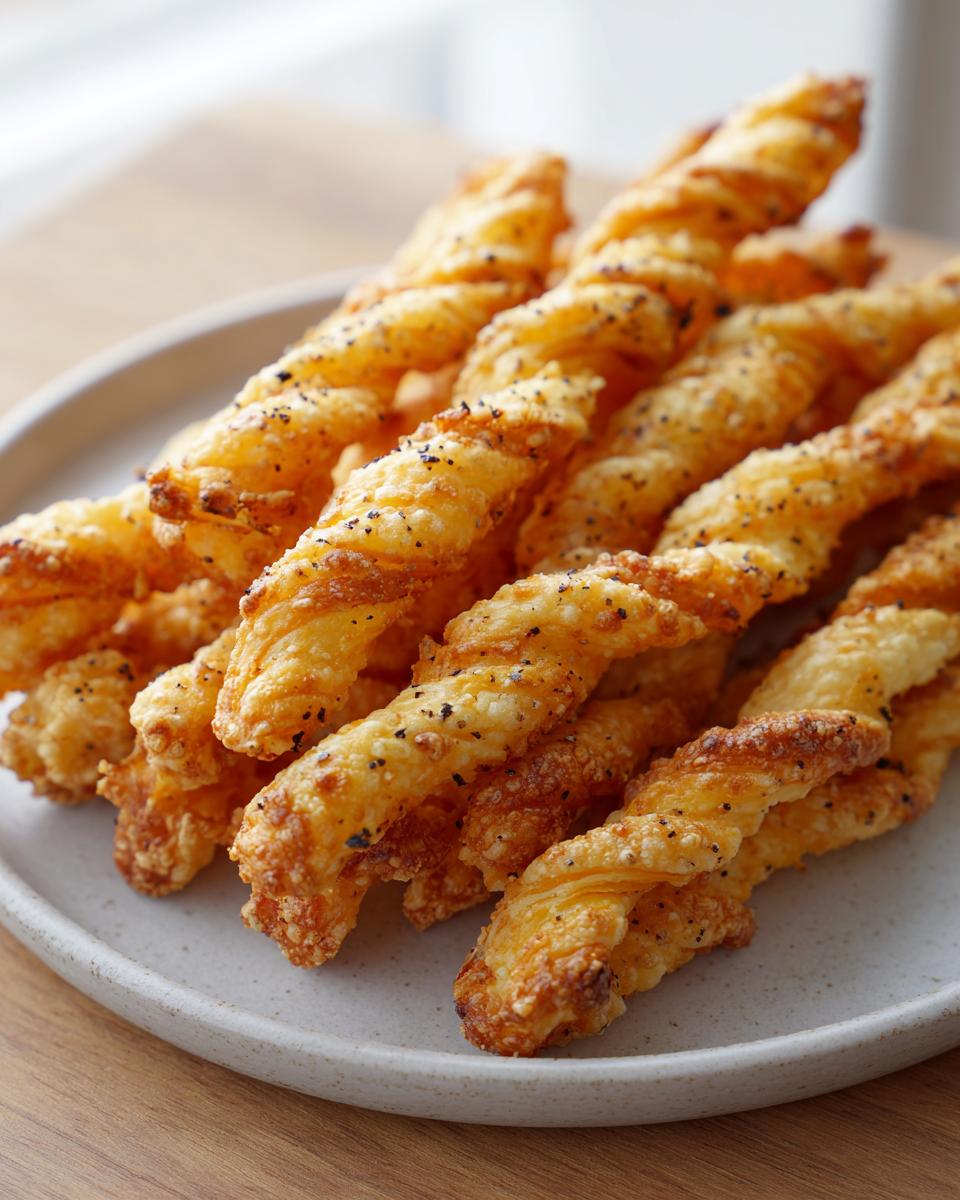
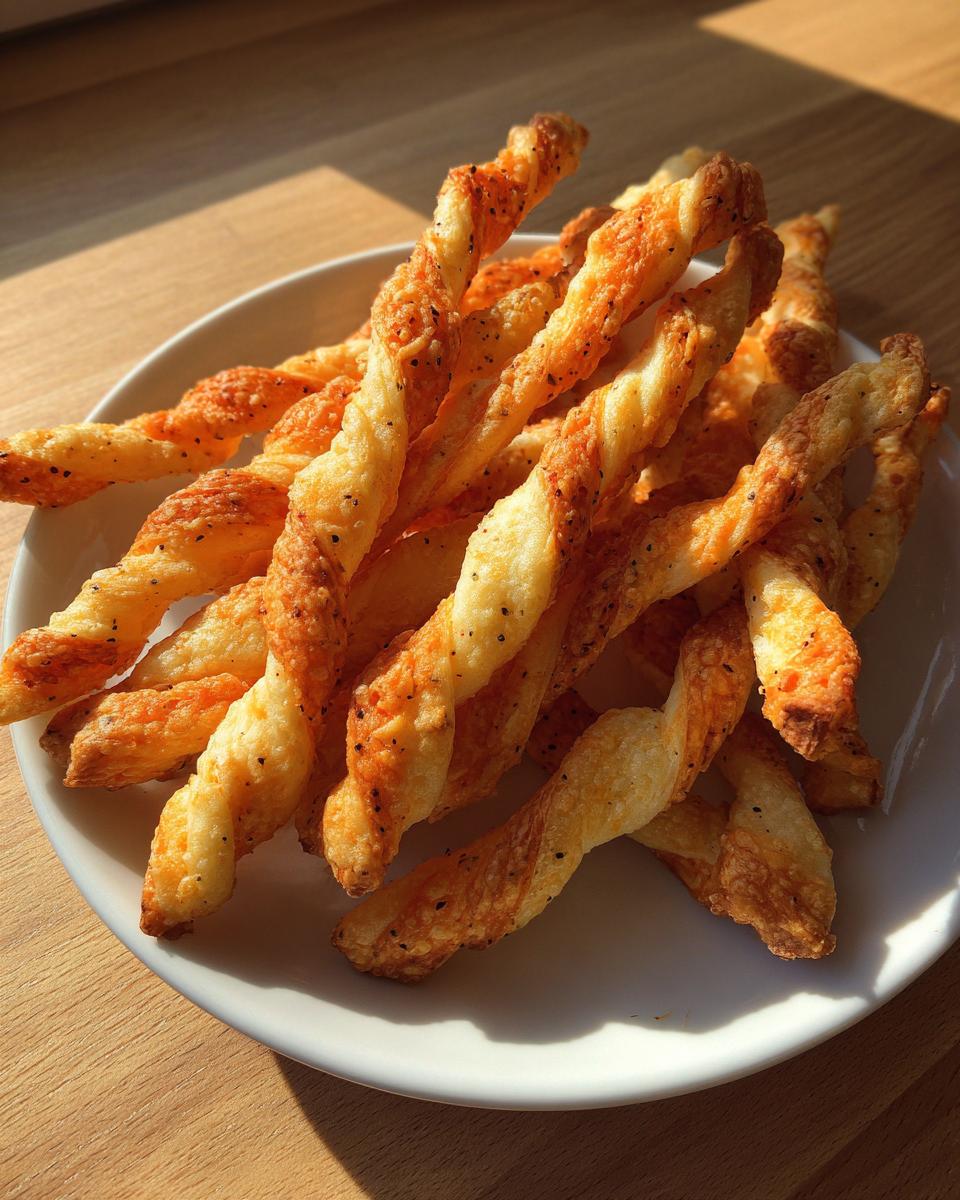
Divide that stiff dough in half (Step 5)—it makes it easier to handle. Lightly flour your surface, because this dough can be a little crumbly. Roll each piece out until it’s nice and thin, aiming right around an eighth of an inch thick. This thickness is crucial for achieving that quick bake and ultimate crispness. Now, cut them into strips, about half an inch wide and maybe four to five inches long (Step 6). If you want that classic party look, give each one a little gentle twist.
Baking Time for Golden, Crisp Cheese Straws
Arrange your cut strips on parchment-lined baking sheets, leaving a small space between them (Step 7). Bake these babies at 400 degrees Fahrenheit. They usually take between 10 to 14 minutes (Step 8). You’re looking for the edges to be visibly golden brown. They might still seem a little soft right when they come out, but don’t panic! Transfer them immediately to a wire rack. They firm right up and become deliciously crisp as they cool down. Check out this great article on Serious Eats for another perspective on that crispy texture!
Tips for Success When Making Homemade Cheese Straws
I’ve learned a few things over the years making these for gatherings. Since these are such a wonderful savory cheese snack, we want them perfect every single time. Don’t worry, these are still incredibly easy cheese straws to manage, but paying attention to these small details is what takes them from good to the MUST-HAVE appetizer on the table.
First, let’s chat cheese. You absolutely must use freshly grated sharp cheddar. I cannot stress this enough! Pre-shredded cheese has anticaking agents mixed in, and those prevent the cheese from melting smoothly and achieving that perfect, shatteringly crisp texture we are looking for. Take the extra minute to grate it yourself!
Another tip I always pass along is that you can actually prepare the dough ahead of time, which is a lifesaver when you’re entertaining. Wrap the dough tightly in plastic wrap and chill it for up to two whole days. This resting period actually helps flavor develop, even though the bake time is so quick!
Also, remember that you can easily swap out the cheddar for flavor layering. Try substituting half of that cheddar with finely grated Parmesan cheese—it adds a salty, nutty punch that works wonders. These little tweaks ensure your homemade cheese straws are always the star of the show!
Storage and Reheating Instructions for Your Cheese Straws
One of the best things about these savory snacks is that you don’t have to stress about baking them right before your guests arrive. They are built to last, which is why they are one of my favorite entertaining snacks to keep on hand!
When it comes to storage, airtight containers are your best friend here. Since these are baked until very dry and crisp, they don’t need refrigeration. You can keep baked cheese straws stored on your counter at room temperature for up to a week. If they start to lose a tiny bit of snap after a few days—which can happen if they get exposed to any moisture—don’t worry! Just pop them back into a 300-degree oven for about 5 minutes until they re-crisp. It works like magic every single time.
Remember that tip about making the dough ahead? That’s my go-to strategy. You can prepare the dough, wrap it tightly in plastic wrap, and tuck it away in the refrigerator for up to 48 hours. When you’re ready to bake, just pull it out, let it sit on the counter for about 15 minutes to warm up just slightly (so it’s rollable, not rock hard), and then proceed with the cutting and baking instructions. I haven’t tried freezing the baked straws, but because they are so dry, I believe they would freeze just fine layered between wax paper in a sturdy container!
Variations: Spice and Herb Additions to Your Cheese Straws
While the base recipe I gave you produces truly classic, savory cheese straws, half the fun of baking at home is making something that’s perfectly *yours*, right? I love taking risks with flavor, especially when it comes to party appetizers. The dough is so versatile; it really acts as a blank, buttery canvas! I’ve seen people bake these for everything from elegant wine nights to big game days, and a slight flavor twist can totally change the vibe.
If you want to kick up the heat level—and let’s face it, sometimes you just need that little kick—don’t be shy with the cayenne! You can easily double the cayenne pepper in the dry mix to make honest-to-goodness spicy cheese straws. Or, you could add a pinch of smoked paprika along with it for a little smoky depth. Just make sure you taste your dough mixture (before adding the egg white binder!) to check the spice level before committing.
If you prefer herbs over heat, you have tons of options! My favorite way to elevate these is by incorporating fresh rosemary. Rosemary and sharp cheddar are a match made in heaven. When mixing in your grated cheddar, toss in about a teaspoon of finely chopped fresh rosemary leaves. If you’re feeling fancy, you can even swap out half that cheddar for finely grated Parmesan—check out this lovely Rosemary Parmesan version I saw for inspiration. That substitution makes them taste less like a standard cracker and more like fine savory shortbread. If you are looking for more creative ideas for your next gathering, I have a great recipe for stuffed mushrooms that always disappears fast!
Remember, whatever flavor variation you try, the technique for making those straws shatteringly crisp remains the same: keep the butter cold and don’t overmix the dough!
Serving Suggestions for Party Appetizers Cheese
Once you have a batch of these perfectly golden, crispy things cooling on the rack, the next question is always: What do I serve them with? Honestly, these cheese straws are fantastic completely on their own—they are practically a savory shortbread recipe that’s easy enough for game day snacking. But if you’re assembling a larger spread, let’s talk about how to make them shine as the ultimate party appetizer cheese element!
Since these straws are so sharp, buttery, and slightly spicy, they pair beautifully with cooling dips or strong, vibrant beverages. I often serve them right alongside a big bowl of my creamy [Spinach Artichoke Dip Recipe Link Here]—the smooth, cool texture is the perfect contrast to the crunch of the hot cheese flavor.
If you’re setting out a charcuterie board, these are fantastic stand-ins for boring crackers. Tuck them right among some sharp olives, fig jam, and some good prosciutto. They look so much more elegant than standard store-bought fare, making your whole spread feel instantly gourmet, even if you whipped the straws up in thirty minutes!
And what about drinks? For game day appetizers, nothing beats an ice-cold beer, but if you’re serving these at a cocktail hour, they are wonderful with a crisp, dry white wine like Sauvignon Blanc. The wine cuts right through the richness of the cheddar. For something fun, try crafting one of my signature cocktails—you can find some easy recipes over at my Drink & Cocktail Recipes page! The goal is always simple elegance, and these straws deliver that effortlessly.
Frequently Asked Questions About Making Cheese Straws
I totally get it—even with the best recipe, sometimes questions pop up while you’re elbow-deep in flour and cheese! That’s totally normal. When I first started making these for parties, I had a million little doubts that kept me up at night instead of relaxing before the guests arrived. Below are some of the things my friends always ask me about making these fantastic savory cheese snacks.
Can I use pre-shredded cheese in my cheese straws?
Oh, friend, please don’t! If you take only one piece of advice from me about these cheese straws, let it be this: freshly grate your cheese! Pre-shredded cheddar is coated with starches—like potato starch or cellulose—to keep those shreds from clumping up in the bag. Those anti-caking additives wreak absolute havoc on the texture we are after. They stop the cheese from melting properly into the dough, meaning you end up with sad, slightly gritty little bits instead of that smooth, crispy, buttery melt that makes these famous.
How do I ensure my cheese straws are extra crispy?
Crispiness comes down to two major factors, and thankfully, they are super easy to control! First, you must use ice-cold butter. When the cold butter hits the hot oven, it creates steam pockets, which results in a flaky, airy texture instead of a dense one. Second, make sure you bake them long enough! They should be golden brown all over, not just pale yellow. They will firm up even more as they cool down on the wire rack, so don’t pull them out too early just because the timer went off. A little extra time until golden means maximum shatter!
What is the best cheese pairing besides sharp cheddar for these savory cheese snacks?
Sharp cheddar is king here because of its incredible flavor and oil content, but exploring other cheeses makes these savory cheese snacks even more exciting! If you want something a little milder but supremely nutty, try replacing half the cheddar with genuine Parmigiano-Reggiano. Parmesan melts differently, so keep the cheddar ratio high if you are worried about texture, but the flavor boost is amazing.
Another wonderful variation that pairs beautifully with a little cayenne pepper is Gruyère cheese. Gruyère brings a wonderfully earthy, almost sweet complexity compared to the sharp tang of cheddar. It still melts beautifully and works perfectly for those holiday party spreads. Feel free to experiment with those pairings!
Sharing Your Classic Cheddar Cheese Straws
Well, that’s it! You’ve made it through the process, and I sincerely hope you’re holding a plate of the most fragrant, crispy, golden cheese straws you’ve ever encountered. Seriously, I want to hear all about it! Did they vanish as fast in your house as they do in mine?
Please, please, leave a rating and a comment below. Let me know what kinds of guests you served them to, or maybe if you changed up the spice level a bit. Knowing that you felt confident in the kitchen and that this recipe worked exactly as promised for your event is truly why I do all this work here at Kings Cook.
If you snap a picture of your glorious platter of appetizers, tag me on social media! I absolutely love seeing your creations come to life. Don’t forget to check out my About Page to learn a little more about my culinary journey. Happy baking, my friend. I can’t wait to see what you create!
PrintClassic Crispy Southern Cheddar Cheese Straws

Make these classic Southern cheese straws for a savory, crispy party appetizer. This recipe uses sharp cheddar and cold butter to guarantee a flaky texture.
- Prep Time: 20 min
- Cook Time: 14 min
- Total Time: 34 min
- Yield: About 4 dozen 1x
- Category: Appetizer
- Method: Baking
- Cuisine: American
- Diet: Vegetarian
Ingredients
- 1 1/2 cups all-purpose flour
- 1/2 teaspoon salt
- 1/4 teaspoon cayenne pepper
- 1/4 teaspoon black pepper
- 1/2 cup (1 stick) cold unsalted butter, cut into small pieces
- 8 ounces sharp cheddar cheese, freshly grated
- 1 large egg white, lightly beaten
- 1 tablespoon cold water
Instructions
- In a large bowl, whisk together the flour, salt, cayenne pepper, and black pepper.
- Cut in the cold butter using a pastry blender or your fingertips until the mixture resembles coarse crumbs.
- Stir in the freshly grated sharp cheddar cheese until evenly distributed.
- In a small bowl, whisk the egg white and cold water together. Add this mixture to the flour and cheese mixture. Mix until a stiff dough forms. Do not overmix.
- Divide the dough in half. On a lightly floured surface, roll each half into a rectangle about 1/8 inch thick.
- Cut the dough into strips about 1/2 inch wide and 4 to 5 inches long. You can twist the strips slightly for a classic look.
- Place the strips on baking sheets lined with parchment paper, leaving a small space between them.
- Bake in a preheated oven at 400 degrees Fahrenheit (200 degrees Celsius) for 10 to 14 minutes, or until the edges are golden brown and the straws are crisp. Baking time depends on thickness.
- Transfer the cheese straws to a wire rack to cool completely. They will crisp up as they cool.
Notes
- Use freshly grated sharp cheddar cheese; pre-shredded cheese contains additives that prevent the best texture.
- Keep the butter very cold to achieve the flakiest, crispiest result, which is key for great party appetizers.
- You can substitute half the cheddar with Parmesan cheese for a different flavor profile.
- Prepare the dough ahead of time, wrap it tightly, and chill for up to two days before cutting and baking.
Nutrition
- Serving Size: 4 straws
- Calories: 85
- Sugar: 0.2
- Sodium: 140
- Fat: 6.5
- Saturated Fat: 4.0
- Unsaturated Fat: 2.5
- Trans Fat: 0.1
- Carbohydrates: 1.5
- Fiber: 0.1
- Protein: 3.5
- Cholesterol: 18