
Let’s be honest: opening a can of apple pie filling is just sad. You deserve so much better! When that craving hits for something cozy and deeply spiced, you need a filling that tastes like pure autumn magic. That’s why I’m handing over my absolute favorite apple pie filling recipe. This isn’t some fussy canning project; this is the best quick & easy stovetop apple pie filling recipe you’ll ever use, and trust me, those apple slices stay perfectly tender, never mushy. We’re going from zero to pie-ready goodness in under 30 minutes, and I promise you’ll never look back!
- Why This Apple Pie Filling Recipe Beats Store-Bought (E-E-A-T)
- Gathering Ingredients for Your Homemade Apple Pie Filling
- How to Make Apple Pie Filling from Scratch: The Quick Stovetop Apple Pie Filling Recipe
- Tips for Success with Your Apple Pie Filling Recipe
- Versatile Uses for This Apple Pie Filling Recipe
- Storage and Freezer Friendly Apple Filling Instructions
- Frequently Asked Questions About This Apple Pie Filling Recipe
- Estimated Nutritional Data for This Apple Pie Filling Recipe
- Share Your Experience Making This Apple Pie Filling Recipe
Why This Apple Pie Filling Recipe Beats Store-Bought (E-E-A-T)
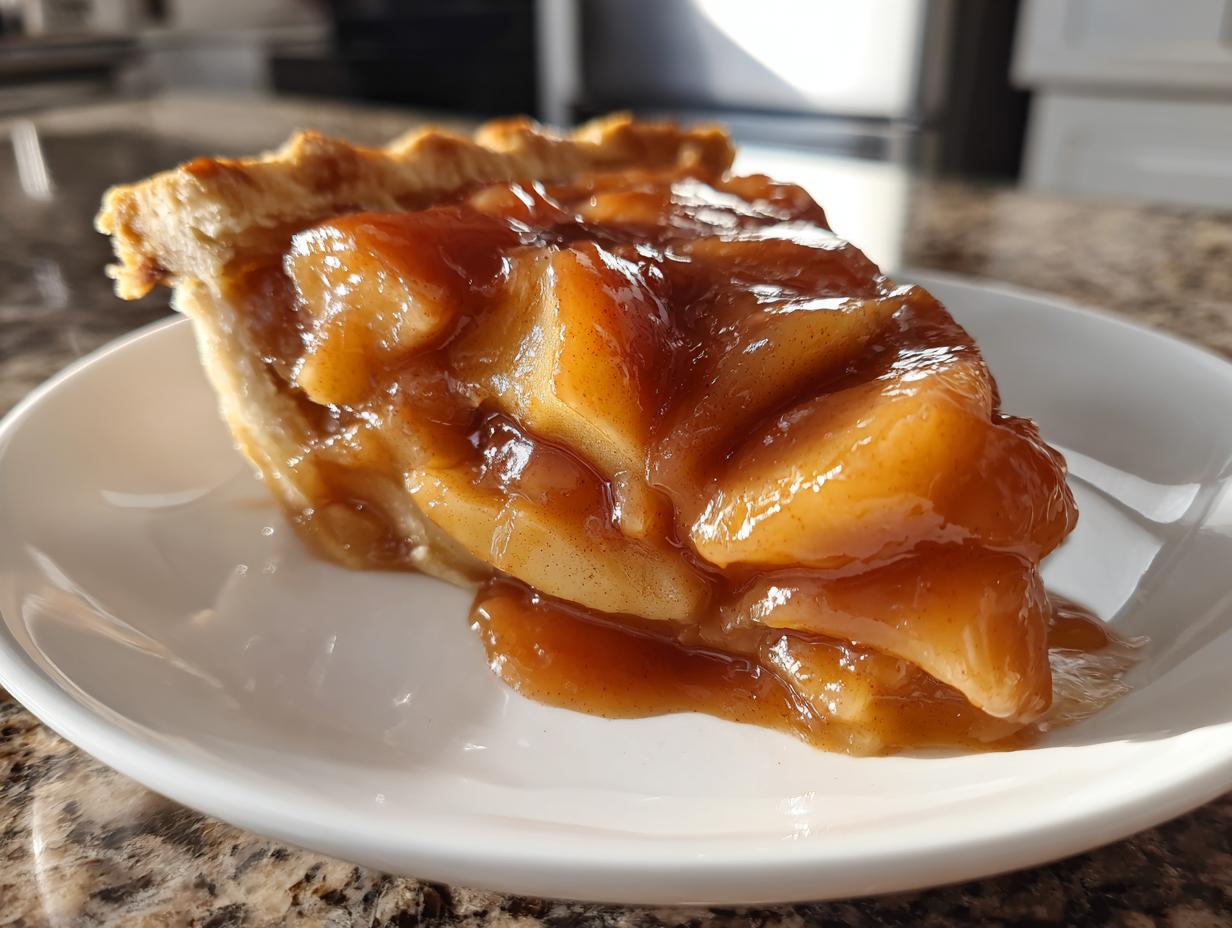
If you’ve ever choked down that overly sweet, slightly gelatinous stuff from a can, you already know why we’re making this best apple pie filling from scratch today! There is just no comparison. When you make this recipe, you control everything—the spice levels, the sugar balance, and most importantly, the texture. This is the ultimate canned apple pie filling alternative, and it tastes intensely flavorful because we are cooking it quickly right on the stove, not simmering for hours.
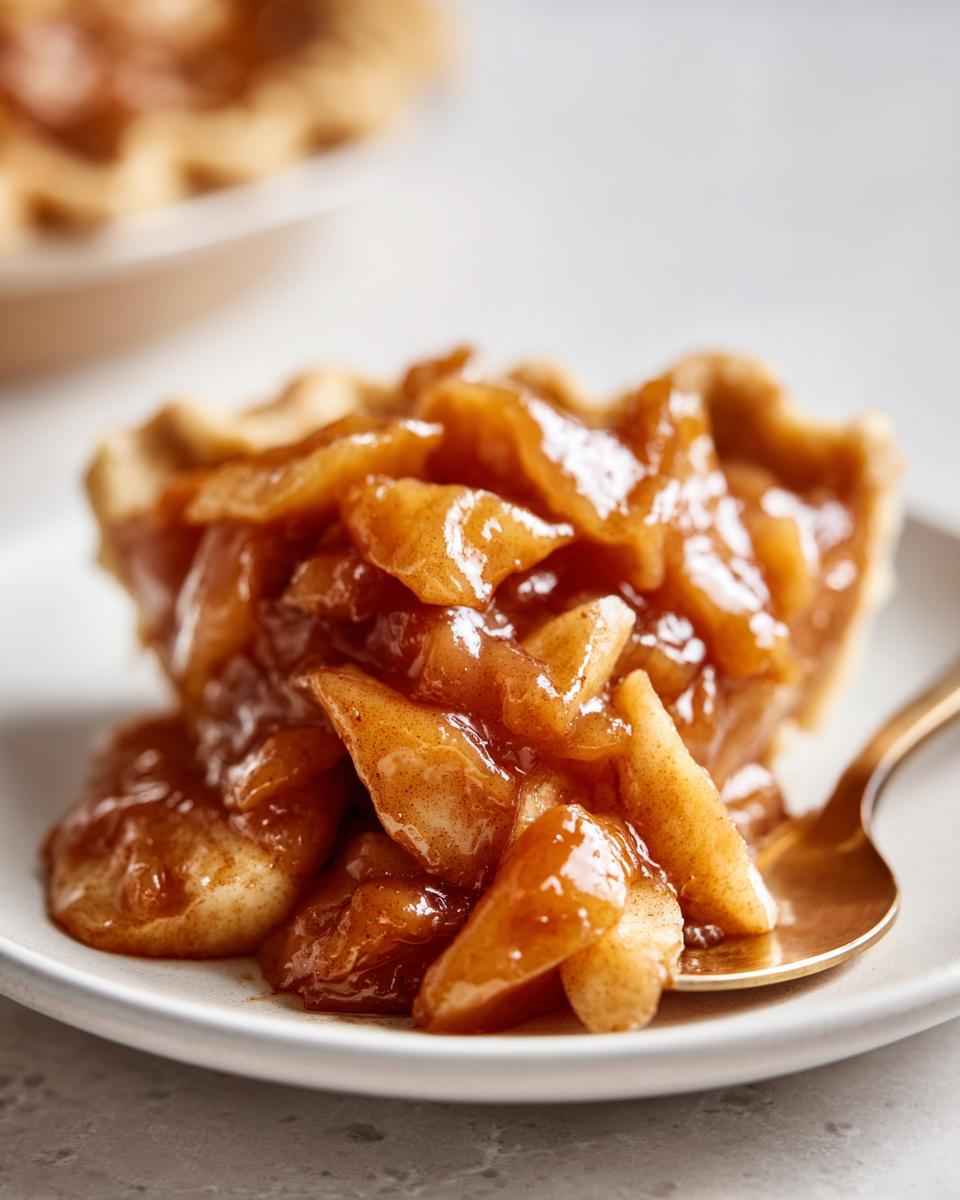
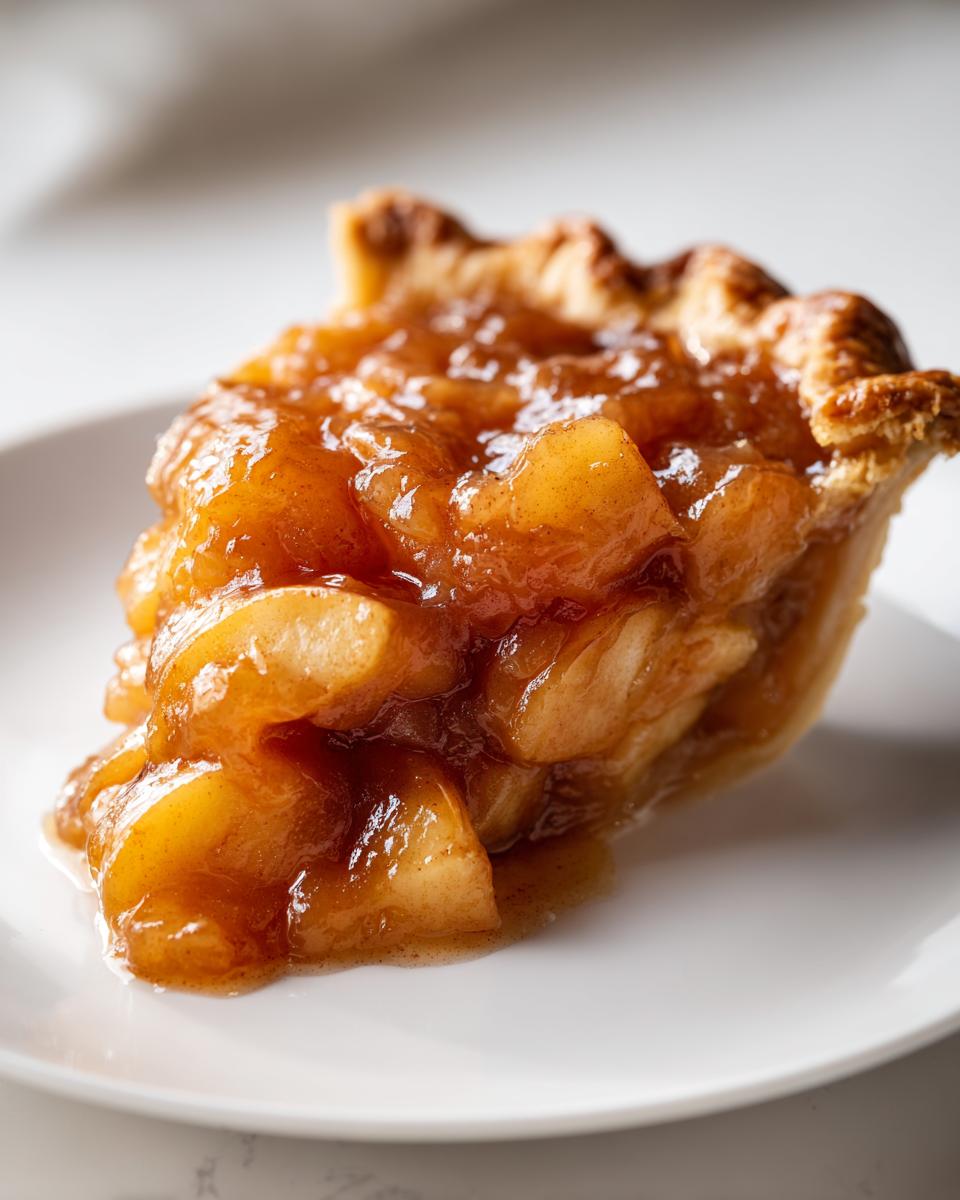
Achieving Tender Apple Slices Filling Every Time
The magic here is the stovetop method, which gently cooks the apples down just enough that they are soft but still hold their shape delightfully. This is how you get that perfect tender apple slices filling! Unlike mass-produced fillings that often turn to applesauce, our approach keeps the slices intact. When you use firm apples, they soften beautifully in that thick, glossy glaze. That’s the real secret to a stellar pie!
Gathering Ingredients for Your Homemade Apple Pie Filling
Okay, let’s get organized! Having everything prepped before you hit the heat is the key to making this apple pie filling recipe come together so fast. You only need simple pantry staples, plus some gorgeous fruit to make this the best homemade apple pie filling around. Don’t worry about complicated additions; the measurements below provide the perfect balance of spice and sweetness for one standard 9-inch pie.
Best Apples for Pie Filling Selection
If you want that fantastic chew, you *have* to pick your apples wisely! For the absolute winning formula, I always recommend using a mix. Granny Smiths bring that tartness we need to cut through the sugar, and firm varieties like Honeycrisp or Fuji hold their shape beautifully during that quick stovetop cook. This combination is what makes the best apples for pie filling in my book.
Customizing Your Brown Sugar Apple Filling Flavor
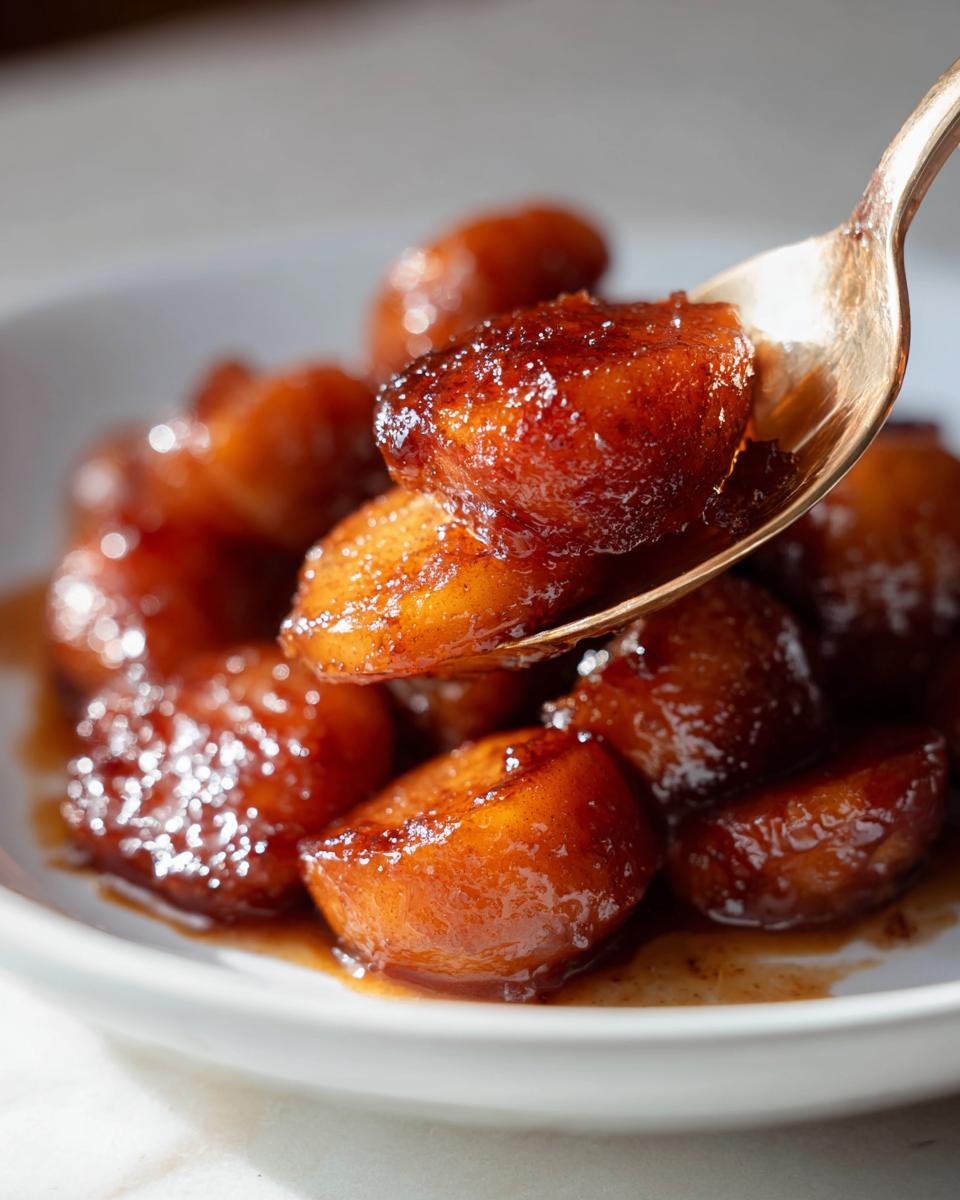
This is where the cozy warmth comes from! We use both white and dark brown sugar here—that molasses in the brown sugar really deepens the flavor! The spices—cinnamon, nutmeg, and a tiny pinch of allspice—transform this into a classic cinnamon apple filling recipe. If you love deep molasses notes, you’re going to go wild for this brown sugar apple filling.
How to Make Apple Pie Filling from Scratch: The Quick Stovetop Apple Pie Filling Recipe
Alright, this is the best part! Get ready to witness how fast you can create this incredible homemade apple pie filling using the stovetop method. Seriously, this quick apple pie filling recipe mocks any jarred version you’ve ever seen. We are moving fast, so make sure your apples are sliced and your sugars are mixed before you turn on the burner! Once this is done, you can go whip up my famous apple crisp recipe!
Prepping Apples and Mixing Dry Ingredients for the Apple Pie Filling Recipe
First things first: peel, core, and slice those lovely apples—aiming for uniform quarter-inch thickness makes all the difference in the final texture! Toss them right away with your lemon juice to keep them looking bright while you assemble the solids. In a separate little bowl, whisk together all your sugars and cozy spices until they are thoroughly combined. Now, pour that whole sugary, spicy blend over the apple slices and toss everything gently until they are fully coated. You want every slice to be ready for its close-up, flavor-wise!
Thickening the Glaze for Your Easy Apple Pie Filling
Now we move to the heat! Dump the apple and sugar mix into your skillet over medium heat. Let them cook undisturbed for about five to seven minutes. You’re looking for them to barely start softening; don’t let them get mushy! While they’re softening, quickly mix that cornstarch and water until it’s smooth—that’s your thickening agent. Pour that slurry right into the pan and stir constantly. In just another minute or two, you’ll see the liquid transform into this beautiful, glossy glaze. Pull it off the heat immediately after that and stir in your two tablespoons of butter until it melts right in. That’s it! You officially have perfect easy apple pie filling ready to go. For more stove-top inspiration, check out this great resource on quick stovetop apple pie filling!
Tips for Success with Your Apple Pie Filling Recipe
Making this easy apple pie filling is super straightforward, but there’s one step I must stress if you want a perfect pie crust foundation. Don’t rush the cooling process! If you try to sneak warm filling into your pie dough, you are guaranteeing a soggy bottom crust, and frankly, no one has time for that sad outcome. Plus, hot filling will steam out all over the place, making a mess.
Cooling the Apple Pie Filling Recipe Before Use
Once that beautiful, glossy glaze has formed and the butter is melted in, take the pan right off the heat. Spread the filling out onto a shallow baking sheet or into a wide, shallow bowl. This allows the surface area to increase and speeds up cooling considerably. Wait until it’s completely cooled down—room temperature is fine, chilled is even better—before you even *think* about pouring it into your dough. This patience pays off huge when you slice into that beautifully crisp crust!
If you’re making my classic apple pie recipe, this cooling step is essential for structural integrity!
Versatile Uses for This Apple Pie Filling Recipe
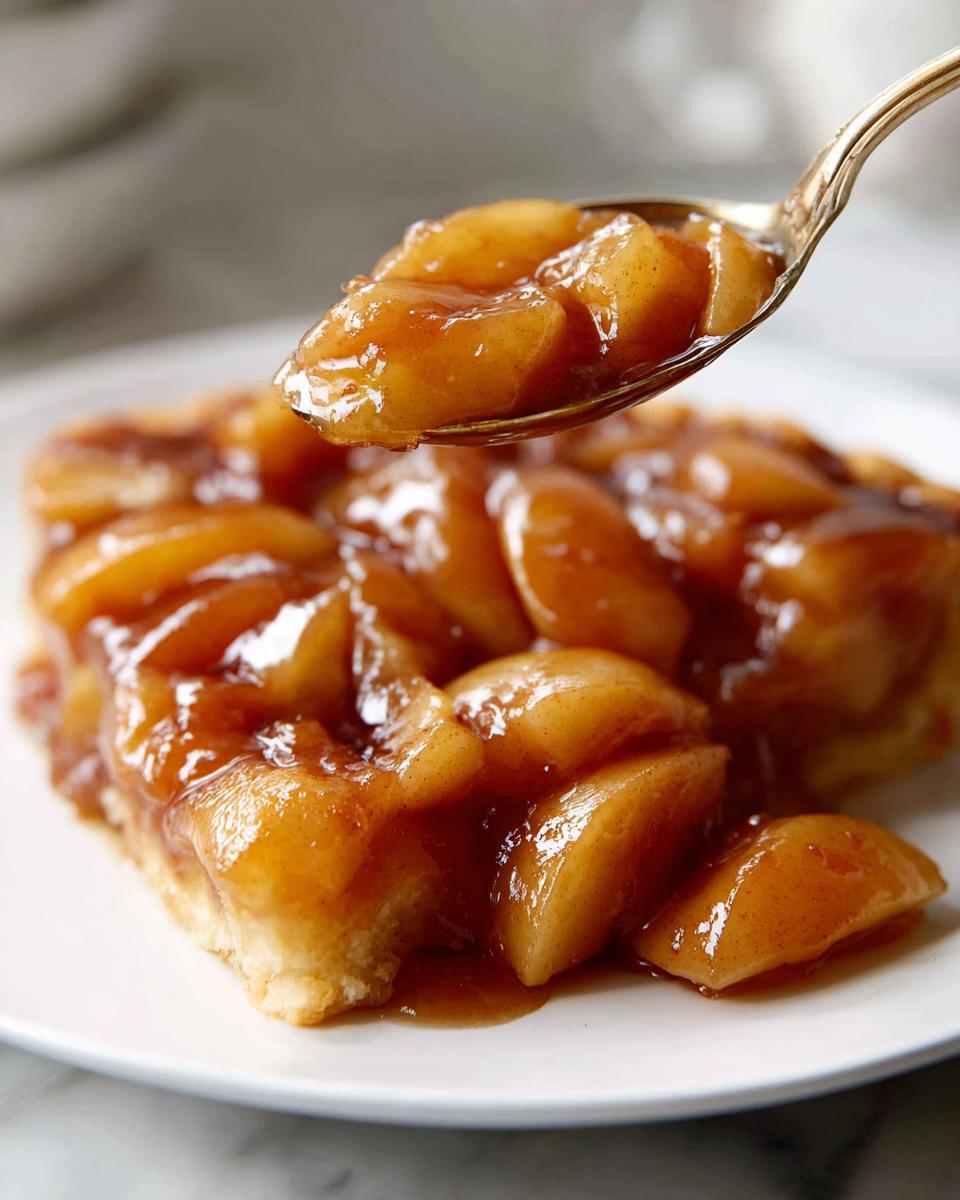
While this is undeniably the best apple pie filling recipe for a classic double-crust pie, honestly, that filling is too good to keep hidden under pastry! My family often demands I make a batch just to have it on hand for other things—it’s that addictive. It makes a fantastic, rustic spiced apple topping when you don’t feel like making a full dessert. I love spooning this warm filling right over my fluffy pancakes on a Sunday morning, or dolloping it onto crisp vanilla ice cream.
Don’t forget about using this apple pie filling for turnovers, folding it into puff pastry before baking for quick treats. It’s also perfect mixed into muffin batter—try adding a quarter cup of this filling into my apple cinnamon muffins recipe for an extra burst of flavor! You can even freeze leftovers specifically for filling quick tarts or serving over toast.
Storage and Freezer Friendly Apple Filling Instructions
Now that you’ve made the most amazing apple pie filling recipe known to humankind, the biggest question is: how do I stop myself from eating it all right now? Don’t worry, that’s a sign you did great! But seriously, storing this correctly ensures you have that perfect, warm flavor ready for your next baking project. The most important rule, and I can’t stress this enough for food safety, is that the filling absolutely must be completely cooled down before it goes anywhere near a tight lid or a freezer bag.
If you trap heat, you create condensation, which breaks down those beautiful apple slices and can lead to spoilage faster. For refrigeration, pop the cooled filling into any airtight container—a glass one is my favorite for leftovers—and it will keep beautifully for about a week. That’s perfect for a couple of quick breakfasts or maybe some waffle toppings!
If you made a double batch (and you should always make a double batch!), this recipe is incredibly freezer friendly apple filling. Once totally cooled, transfer it into heavy-duty freezer-safe bags or containers. Lay the bags flat on a baking sheet while freezing just to make them save space later; you can stack them once they are solid blocks. It lasts wonderfully for up to three months, meaning you’ve got pie potential locked away for the whole year! If you need some inspiration on freezing and reheating tips specifically for pie fillings, check out this resource on homemade apple pie filling with brown sugar recipe advice.
Frequently Asked Questions About This Apple Pie Filling Recipe
I know you might have a few lingering questions, especially when moving away from that pre-made stuff! That’s totally normal. It’s my job to make sure you feel 100% prepared before you start filling those beautiful pie shells. Here are the things folks ask me most often about this apple pie filling recipe.
Can I use apples other than Granny Smith in this apple pie filling recipe?
Oh, absolutely! While Granny Smith gives us that wonderful tart backbone, the main thing to look for is firmness. If you use all sweet apples, your filling might turn a little too soft during the quick cook time. I love mixing Granny Smith with something sweet and crisp like Honeycrisp or Fuji—that dual texture is fantastic! Just avoid super soft varieties like McIntosh unless you plan to cook them for a shorter window. Balancing tartness and firmness is the name of the game for a great texture.
How do I adjust the spice level in this cinnamon apple filling recipe?
This is all preference, my friend! If you want a really bold, warming flavor profile that tastes like a cozy autumn day, go ahead and bump that cinnamon up by half a teaspoon. I know some bakers absolutely adore nutmeg, so adding an extra dash of that works wonders too. If you’re worried about overpowering the apple flavor, start small. You can always add more spice when you are tasting the glaze right before melting in the butter, but you certainly can’t take it out once it’s in there! This keeps our cinnamon apple filling recipe flexible.
Is this stovetop apple pie filling safe for canning?
That’s a very important question, and here’s my honest answer: No, this specific stovetop apple pie filling recipe isn’t balanced for safe, reliable home canning right out of the skillet. Canning requires very specific acid levels and processing times to prevent spoilage, and because this recipe is designed for quick stovetop use (meaning lower heat and shorter cook times), it doesn’t meet those strict safety requirements. If you want to preserve your batch, please cool it fully and use the freezer instructions I shared above instead!
Estimated Nutritional Data for This Apple Pie Filling Recipe
I want to be super clear about this part: since we are cooking with fresh fruit and adjusting sugars to taste, these numbers are always an estimate! They are calculated based on the exact ingredient list provided for one full batch divided into six servings (the amount needed for one standard 9-inch pie). Use this information as a guideline, but remember that swapping apples or sugar amounts will change these figures slightly. I always find it helpful to know generally where we stand when indulging in a slice of homemade goodness!
- Serving Size: 1/6 of filling
- Calories: 245
- Sugar: 42g
- Sodium: 2mg
- Fat: 3g
- Saturated Fat: 2g
- Unsaturated Fat: 1g
- Trans Fat: 0g
- Carbohydrates: 55g
- Fiber: 3g
- Protein: 0g
- Cholesterol: 8mg
Share Your Experience Making This Apple Pie Filling Recipe
Now that you’ve tossed those apples in cinnamon and butter and created the most unbelievably delicious homemade apple pie filling, I’m dying to know how it turned out! Did you stick to the classic pie? Or did you use it as a topping for ice cream like my family often demands?
Take a minute to come back here and leave a star rating for the recipe. Positive ratings really help other home bakers feel confident trying my tried-and-true best dessert recipes. Sharing your experience helps me know what’s working perfectly in your kitchens!
Tell me what kind of apples you ended up using! Every batch of this filling tells a slightly different story based on the fruit, and I love hearing the variations bakers come up with. Happy cooking!
PrintThe Best Quick Homemade Apple Pie Filling Recipe

Make this easy stovetop apple pie filling from scratch. It features tender apple slices in a sweet, spiced glaze, tasting much better than store-bought alternatives. This recipe is freezer friendly and perfect for pies or crisps.
- Prep Time: 15 min
- Cook Time: 10 min
- Total Time: 25 min
- Yield: One 9-inch pie filling (about 6 servings) 1x
- Category: Dessert
- Method: Stovetop
- Cuisine: American
- Diet: Vegetarian
Ingredients
- 6 medium apples (Granny Smith, Honeycrisp, or a mix)
- 3/4 cup granulated sugar
- 1/4 cup brown sugar
- 1 tablespoon lemon juice
- 1 teaspoon ground cinnamon
- 1/4 teaspoon ground nutmeg
- 1/8 teaspoon ground allspice
- 1/4 cup water
- 2 tablespoons cornstarch
- 2 tablespoons unsalted butter
Instructions
- Peel, core, and slice the apples into uniform 1/4-inch thick pieces. Place the slices in a large bowl and toss them with the lemon juice to prevent browning.
- In a separate small bowl, whisk together the granulated sugar, brown sugar, cinnamon, nutmeg, and allspice. Add this dry mixture to the apples and toss gently to coat.
- In a small cup, mix the water and cornstarch until the cornstarch is completely dissolved, creating a slurry. Set this aside.
- Place the apple mixture into a large, deep skillet or saucepan over medium heat. Cook for 5 to 7 minutes, stirring occasionally, until the apples begin to soften slightly. You want them tender, not mushy.
- Pour the cornstarch slurry into the apples and stir constantly. Continue cooking for 1 to 2 minutes until the liquid thickens into a glossy glaze.
- Remove the skillet from the heat. Stir in the butter until it melts completely into the filling.
- Let the apple pie filling cool completely before using it in your pie crusts, tarts, or for freezing.
Notes
- For the best texture, use a mix of firm, tart apples like Granny Smith and sweeter apples like Honeycrisp or Fuji.
- This filling is freezer friendly; cool completely, then store in an airtight container for up to 3 months.
- Use this spiced apple topping for pancakes, waffles, or spooned over vanilla ice cream.
Nutrition
- Serving Size: 1/6 of filling
- Calories: 245
- Sugar: 42g
- Sodium: 2mg
- Fat: 3g
- Saturated Fat: 2g
- Unsaturated Fat: 1g
- Trans Fat: 0g
- Carbohydrates: 55g
- Fiber: 3g
- Protein: 0g
- Cholesterol: 8mg