
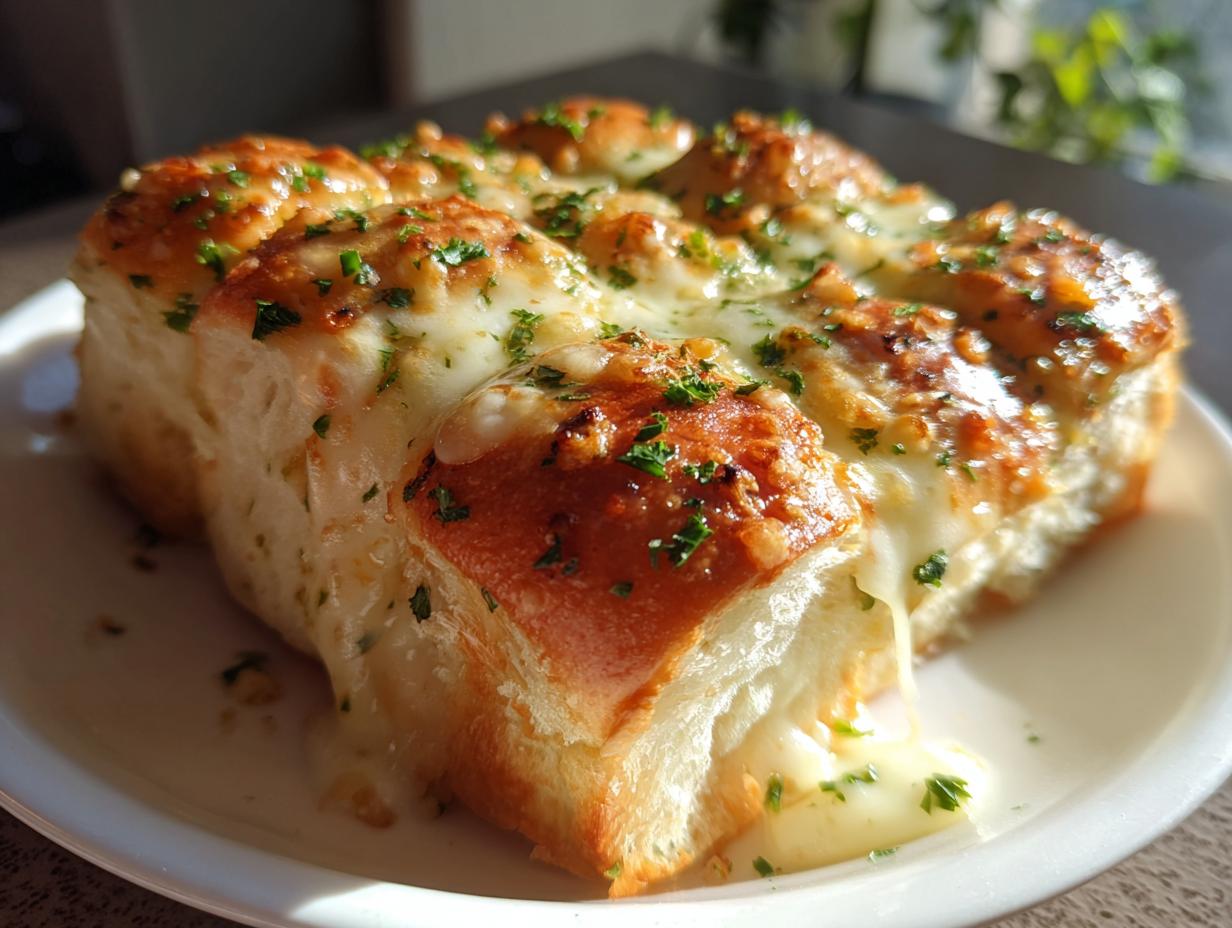
When you need a side dish that seriously satisfies the crowd, forget the standard loaf. We’re talking about turning those cute, sweet King’s Hawaiian rolls into decadent, savory goodness! I’m Kate Connolly, and trust me, this iteration of **hawaiian roll garlic bread** is the real deal. If you’ve seen this floating around online—maybe on TikTok—know that I’ve stress-tested this ridiculously easy recipe until it was perfect. It’s hands-down the fastest, cheesiest pull-apart bread you will ever make. It transforms from a simple store-bought pack to a warm, gooey masterpiece in about 20 minutes total. If you struggle with timing your sides, you need this recipe in your rotation! It pairs perfectly with almost anything, from a simple weeknight pasta to a big holiday spread. Check out my go-to secrets for amazing weeknight dinner recipes.
- Why This Cheesy Hawaiian Roll Garlic Bread is a Must-Make
- Gathering Ingredients for Your Hawaiian Roll Garlic Bread
- Step-by-Step Instructions for the Best Hawaiian Roll Garlic Bread
- Tips for Perfect Pull Apart Bread Every Time
- Serving Suggestions for Your Sweet Roll Appetizer
- Storage and Reheating Instructions for Leftover Hawaiian Roll Garlic Bread
- Frequently Asked Questions About This Easy Garlic Bread
- Nutritional Estimates for Your Comfort Food Bread
- Share Your Experience Making This Hawaiian Roll Garlic Bread
Why This Cheesy Hawaiian Roll Garlic Bread is a Must-Make
Honestly, this recipe hits all the right notes, especially when you’re in a hurry. We developed this to be the best possible combination of speed and decadence. It’s why I keep coming back to it when guests show up unexpectedly!
- This is one of my top appetizers and snacks because it’s so reliable.
Ready in Under 20 Minutes
Seriously, grab the rolls, mix the butter, and you’re done with prep in five minutes flat. That fast turnaround means you can whip this up as a last-minute contribution to a potluck or serve it instantly as a wonderful Quick Dinner Side while the main course finishes cooking.
Soft, Sweet, and Savory Flavor Profile
You get that famous buttery sweetness from the rolls, but we totally counteract it with pungent fresh garlic and salty cheese. The magic is in the texture—it comes out so incredibly soft and fluffy on the inside. It’s the ultimate comfort food!
Gathering Ingredients for Your Hawaiian Roll Garlic Bread
This recipe is so simple because it relies almost entirely on what you find in that sweet roll package! But since we’re making this the *best* version, precision matters, especially with the garlic. Trust me, using fresh ingredients here makes a huge difference in the final outcome. We want maximum flavor impact in under 20 minutes, right?
The Garlic Butter Base for Buttery Garlic Rolls
For the butter mixture, you’ll need the full half-cup of unsalted butter, fully melted—nothing sad and half-softened will do here! Then, you absolutely must use four honest cloves of garlic, minced finely. Don’t even think about grabbing the jarred stuff unless you’re totally desperate; fresh garlic melts into the butter beautifully and gives you that sharp, warm flavor we are aiming for. Toss in a quarter-cup of fresh parsley, chopped up—this adds color because we are skipping the green stuff inside the roll—plus just a half-teaspoon of salt and a tiny pinch of pepper.
Cheese Selection for Cheesy Garlic Rolls
Okay, this is where it gets really fun and hits that cheesy viral factor everyone loves! You need one full cup of shredded mozzarella cheese. Mozzarella is your soft, stretchy superstar; it gives you that glorious cheese pull. To keep it from tasting like a pizza bagel, we balance it with a quarter-cup of grated Parmesan cheese. Parmesan brings a salty, nutty depth that ties the sweet roll to the savory garlic. Don’t skimp here; the cheese is vital for that golden-brown top!

Step-by-Step Instructions for the Best Hawaiian Roll Garlic Bread
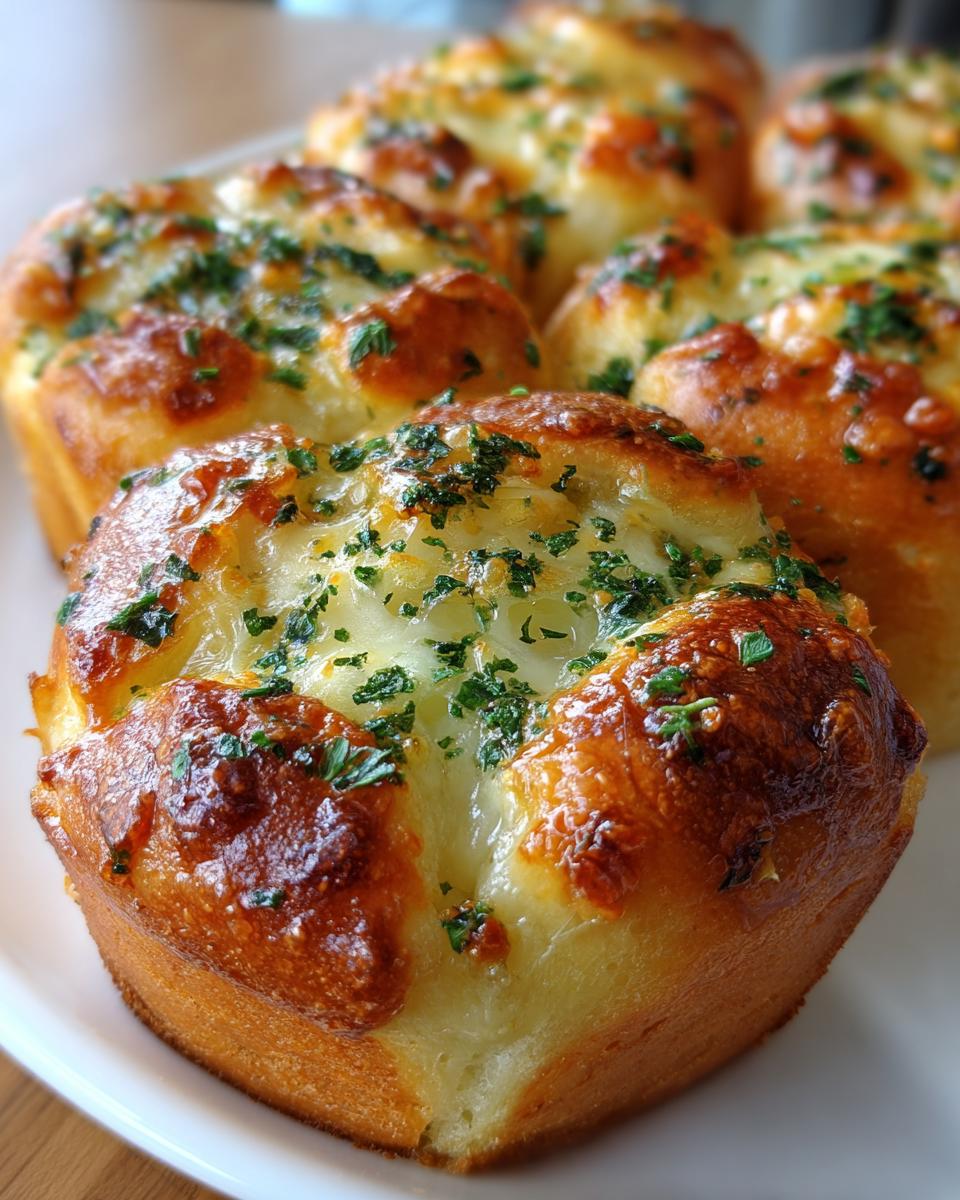
Okay, let’s get into the actual assembly! This process moves fast, so have your dish ready before you start mixing your butter. The key to this entire dish—and what makes it such a great side dish—is keeping those sweet little rolls hugged together the entire time. They need to bake as one unit so they pull apart beautifully later on. You’ll see how quickly we go from raw ingredients to pure cheesy magic!
Prep Work: Oven and Dish Setup
First things first: crank that oven up to 350°F (175°C). Don’t start anything until it’s fully heated! Next, grab an 8×8 inch baking dish. You just need to grease it lightly. Don’t worry about fiddling with parchment paper this time; we want the rolls touching the sides slightly to keep them perfectly plump. Then, carefully tuck the entire package of rolls—still connected in their tray, remember—right into that prepared dish. If you are using a regular pan, arrange them snugly side-by-side.
Creating and Applying the Garlic Butter Mixture
While the oven warms, quickly whisk together that melted butter, those four cloves of minced garlic, the parsley, salt, and pepper in a small bowl. It should smell intoxicating already! Now, slowly drizzle this glorious garlic butter all over the top of the connected rolls. This is important: grab a pastry brush or even use the back of a spoon to gently encourage that butter down into every single crack and crevice between the rolls. Don’t just let it sit on top!
Baking and Achieving Perfect Melt
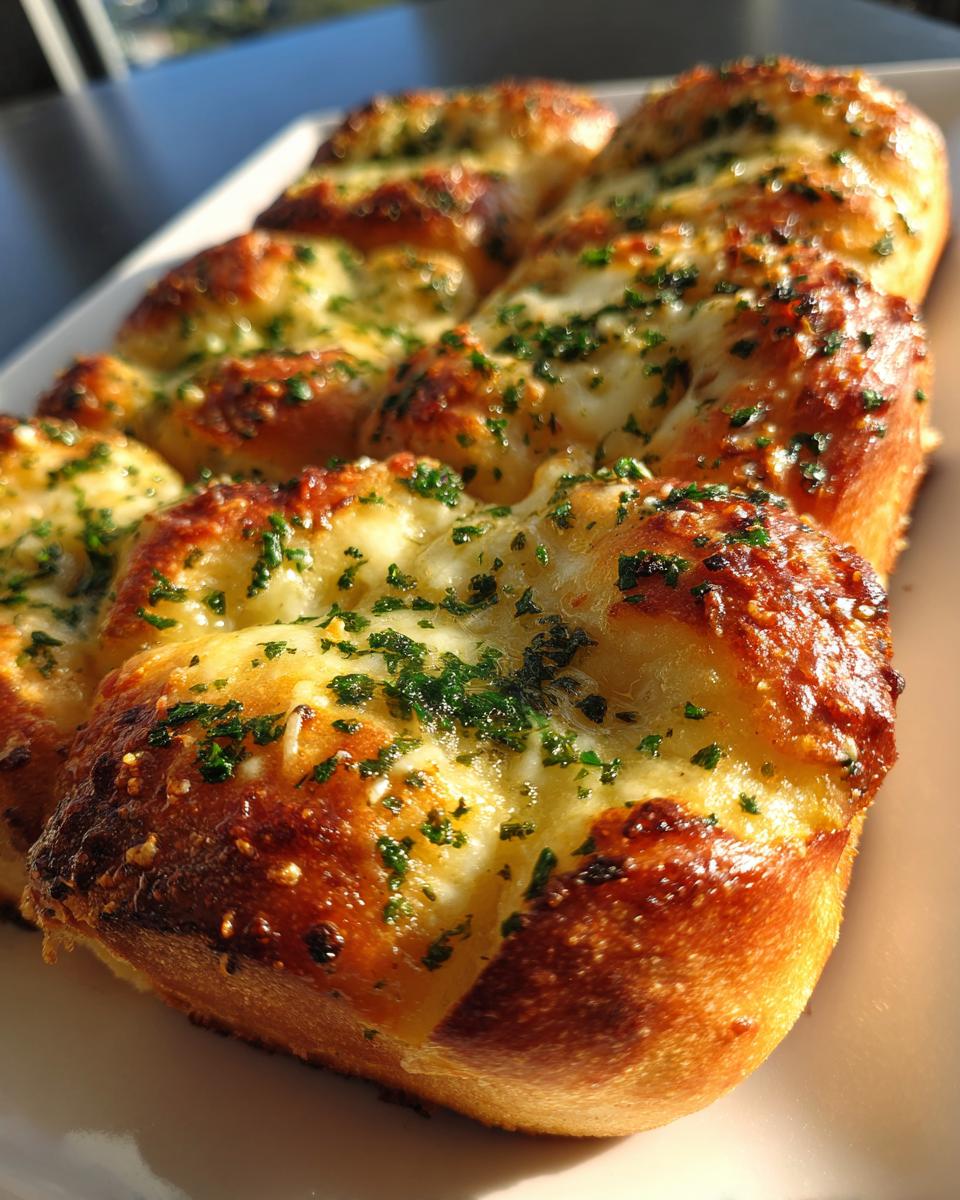
We have a two-part baking process here to guarantee the perfect outcome for your **pull apart bread**. First, cover that dish tightly with aluminum foil—this steams the rolls slightly so they stay super soft inside. Pop it in the hot oven for exactly 10 minutes. When those ten minutes are up, carefully pull off that foil. Now we expose the cheese! Bake it uncovered for another 5 to 7 minutes. You know it’s done when the mozzarella is bubbly and just starting to get those gorgeous little golden-brown spots. Let it rest for just two minutes after it comes out before you tear into it!
Tips for Perfect Pull Apart Bread Every Time
Even though this recipe is ridiculously simple, little tweaks can take it from “great” to “how did you make this?!” I learned a few tricks over the testing process that I have to pass along. We want maximum flavor and zero dry spots, especially when we are trying to achieve that soft, irresistible texture that makes people grab a second roll immediately.
Ingredient Hacks and Flavor Boosts
I slipped a little secret right into the notes for a reason: try adding a half-teaspoon of onion powder to your garlic butter blend! It doesn’t overpower the garlic, but it adds such a lovely baseline flavor that makes the whole thing deeper. Also, regarding the parsley—if you’re out of fresh, don’t sweat it. Just swap it for about a teaspoon of dried parsley flakes. The fresh stuff is brighter, but the dried works just fine when mixed into melted butter; the flavor blooms during those initial covered baking moments.
Avoiding Dry Hawaiian Roll Garlic Bread
This is the tip that separates the *good* bread from the *amazing* bread, truly. That initial 10 minutes covered with foil is crucial, and you absolutely cannot skip it! Because the rolls are already baked goods, if you just blast them with heat right away with the cheese on top, you risk drying out the soft sides before the butter even gets a chance to fully soak in and steam them up. The foil traps the moisture from the melting butter and the rolls themselves, ensuring that perfect, steamy interior. When you take the foil off, you let the cheese melt and brown, but by then, the internal structure is protected. Remember to check out my tips for other great dinner rolls recipes for comparison!
Serving Suggestions for Your Sweet Roll Appetizer
This bread is so rich and delicious, you might think it only belongs on the holiday table, but I use it all the time! Because it’s so buttery, it shines best next to things that aren’t too heavy themselves. It’s my absolute favorite pairing when serving a big pot of creamy Broccoli Cheddar Soup—it’s perfect for dipping!

Of course, no one says no to pairing this with pasta! Whether you’re making a simple sauce or tackling my classic Spaghetti and Meatballs, tearing off a cheesy, buttery knob of this bread is mandatory. And if you’re hosting, this transforms instantly into the best **Party Appetizer Bread**. Just line them up on a pretty platter and watch them disappear before the main course is even ready!
Storage and Reheating Instructions for Leftover Hawaiian Roll Garlic Bread
Now, if you actually have any leftovers—which I highly doubt because they disappear so fast—you need to store them right. Don’t just leave them out uncovered on the counter! If you have extras, keep them in an airtight container at room temperature for up to maybe two days. They keep their softness best that way.
To reheat, skip the microwave if you can—it makes them rubbery fast! I swear by the oven method. Wrap the rolls loosely in foil and pop them into a 300°F oven for about 5 to 8 minutes. That gentle heat warms everything through and brings that buttery softness right back. Enjoy that fresh **Comfort Food Bread** feeling all over again!
Frequently Asked Questions About This Easy Garlic Bread
If you still have some burning questions about making this super popular side dish, jump right in here! I’ve answered the things I get asked the most when people try this for the first time. It’s honestly so forgiving, but a few tips can make sure your loaf comes out absolutely perfect for your next gathering.
Can I make this hawaiian roll garlic bread without cheese?
You certainly can! If you have a dairy restriction or just aren’t feeling the cheese vibe that day, just leave it off. However, I have to warn you, omitting the cheese changes the texture quite a bit. The cheese helps lock in moisture on the top layer. If you skip it, you might want to pull the foil off about 2 minutes earlier than the recipe says so the tops don’t get too crusty.
What if I only have dried herbs for my Garlic Butter Rolls?
That’s a super common question, especially if you can’t make it to the store! When swapping dried parsley for fresh, you always need less because dried herbs are much more concentrated. Use about one teaspoon of dried parsley flakes for every quarter-cup of fresh parsley the recipe calls for. Mix that in with your butter and garlic, and you’ll still get that lovely herbaceous flavor in your **Garlic Butter Rolls**.
I always recommend checking out some of the other viral recipes out there too, like this one when you’re looking for inspiration, but trust me, my tested version is reliable! This link shows another way people are making it.
Nutritional Estimates for Your Comfort Food Bread
I know we aren’t baking this bread for its health benefits—it’s pure comfort, right? But for those who track things, here are the estimates per roll. Remember, these numbers are just a starting point because the exact brand of rolls and cheese you use will change things slightly! These estimates are based on one serving size of one roll.
- Calories: 220
- Total Fat: 13g
- Carbohydrates: 22g
- Protein: 5g
- Sugar: 8g
So yes, it’s rich, but oh my goodness, it’s worth every single bite when you’re craving that perfect blend of sweet and savory **Hawaiian Roll Garlic Bread**!
Share Your Experience Making This Hawaiian Roll Garlic Bread
I truly hope you enjoyed whipping up this super easy **hawaiian roll garlic bread**! I put so much care into testing this recipe here at Kings Cook, and the best part is seeing it grace *your* tables. Please let me know if you made it successfully! Drop a rating below and tell me in the comments how it paired with your dinner. I love hearing from you all, and remember, you can always learn more about my kitchen philosophy over at my About page. Happy cooking!
PrintCheesy & Quick Hawaiian Roll Garlic Bread

Make soft, buttery, and cheesy garlic bread using King’s Hawaiian sweet rolls. This pull-apart bread is ready fast and works as a perfect side dish or appetizer.
- Prep Time: 5 min
- Cook Time: 15 min
- Total Time: 20 min
- Yield: 12 rolls 1x
- Category: Side Dish
- Method: Baking
- Cuisine: American
- Diet: Vegetarian
Ingredients
- 1 package (12 count) King’s Hawaiian Sweet Rolls
- 1/2 cup unsalted butter, melted
- 4 cloves garlic, minced
- 1/4 cup fresh parsley, chopped
- 1/2 teaspoon salt
- 1/4 teaspoon black pepper
- 1 cup shredded mozzarella cheese
- 1/4 cup grated Parmesan cheese
Instructions
- Preheat your oven to 350°F (175°C). Lightly grease an 8×8 inch baking dish.
- Keep the Hawaiian rolls connected in their original plastic tray or arrange them closely together in the prepared baking dish. Do not separate the rolls.
- In a small bowl, combine the melted butter, minced garlic, chopped parsley, salt, and pepper. Mix well to create the garlic butter.
- Pour the garlic butter mixture evenly over the top of the connected rolls. Use a pastry brush or spoon to spread the butter into the crevices between the rolls.
- Sprinkle the mozzarella cheese and Parmesan cheese evenly over the top of the rolls.
- Cover the baking dish tightly with aluminum foil.
- Bake for 10 minutes covered.
- Remove the foil and bake for an additional 5 to 7 minutes, or until the cheese is melted, bubbly, and lightly golden brown.
- Let the bread cool for 2 minutes before pulling apart and serving warm.
Notes
- For extra flavor, add 1/2 teaspoon of onion powder to the garlic butter mixture.
- This bread is excellent served alongside pasta dishes or soup.
- If you do not have fresh parsley, use 1 teaspoon of dried parsley flakes instead.
Nutrition
- Serving Size: 1 roll
- Calories: 220
- Sugar: 8
- Sodium: 350
- Fat: 13
- Saturated Fat: 7
- Unsaturated Fat: 6
- Trans Fat: 0.3
- Carbohydrates: 22
- Fiber: 1
- Protein: 5
- Cholesterol: 35