
If you’ve ever scrolled past those incredible bakery-case desserts and thought, “There is no way I can make that at home,” I want you to stop thinking that right now! I promise you, achieving that restaurant-quality dessert is totally possible, and this **White Chocolate Raspberry Cheesecake** is going to be the centerpiece of your next gathering. My goal here at Kings Cook is always to give you recipes that are totally reliable, and this cheesecake isn’t just pretty; it’s genuinely fail-proof.
We are tackling the number one fear of every cheesecake baker right here: cracks! This recipe is specifically designed to deliver that coveted, unbelievably creamy, silky texture every single time. When you follow my steps, you’re not just baking a **creamy cheesecake dessert**; you’re mastering a showstopper that tastes like it cost a fortune. You can trust that I’ve tested this until the texture was absolutely perfect before sharing it with you, so let’s get started on your absolute new favorite baking project!
- Why This White Chocolate Raspberry Cheesecake is Your New Favorite Elegant Dessert Recipe
- Ingredients for the Fail-Proof Creamy White Chocolate Raspberry Cheesecake
- Step-by-Step Instructions for Your Baked Cheesecake With Raspberry Swirl
- Mastering the No Crack Cheesecake Technique for Perfect Results
- Tips for Success with Your White Chocolate Raspberry Cheesecake Recipe
- Make Ahead Dessert Recipe and Storage for Your White Chocolate Raspberry Cheesecake
- Serving Suggestions for Your Showstopper Holiday Dessert
- Frequently Asked Questions About This Creamy Cheesecake Dessert
- Estimated Nutritional Data for One Slice of White Chocolate Raspberry Cheesecake
Why This White Chocolate Raspberry Cheesecake is Your New Favorite Elegant Dessert Recipe
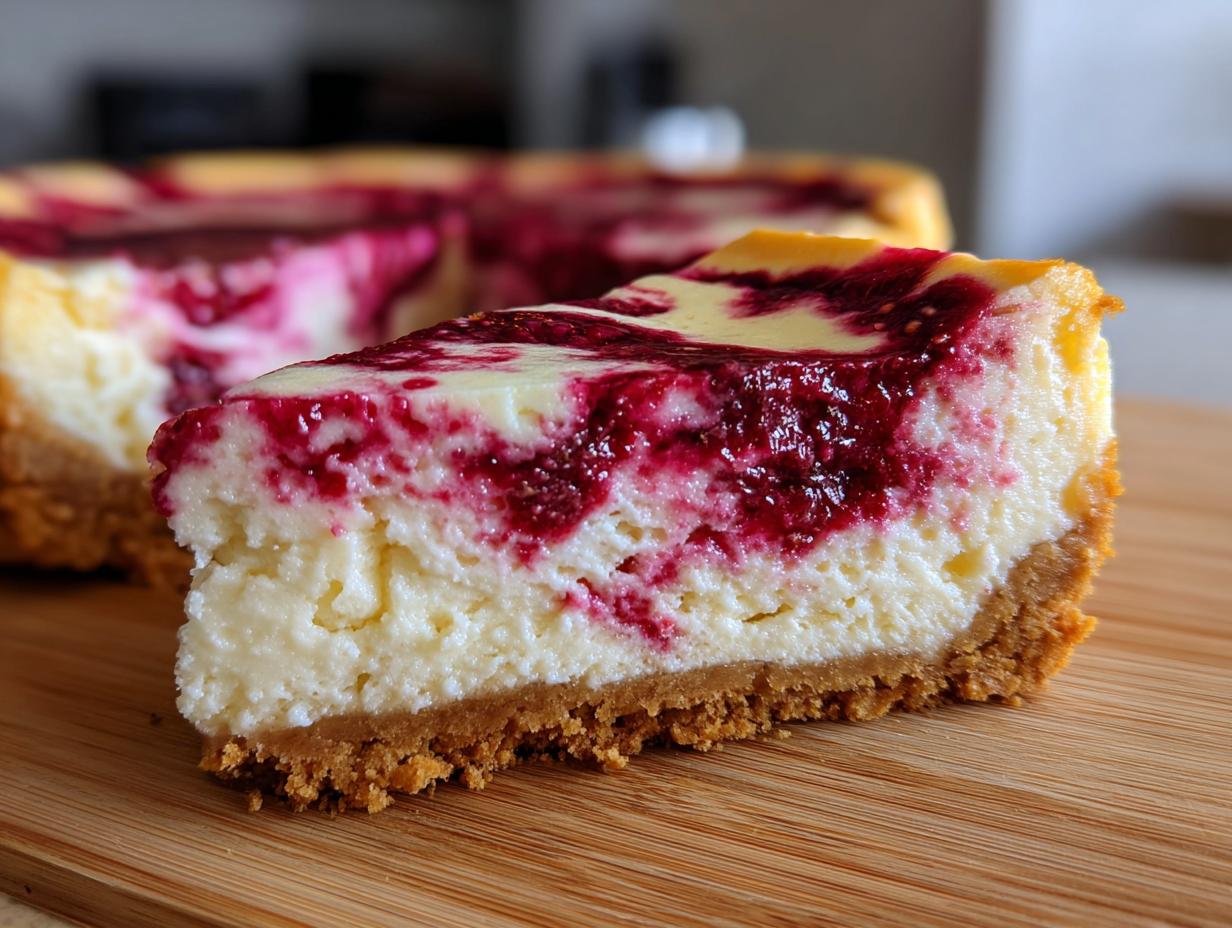
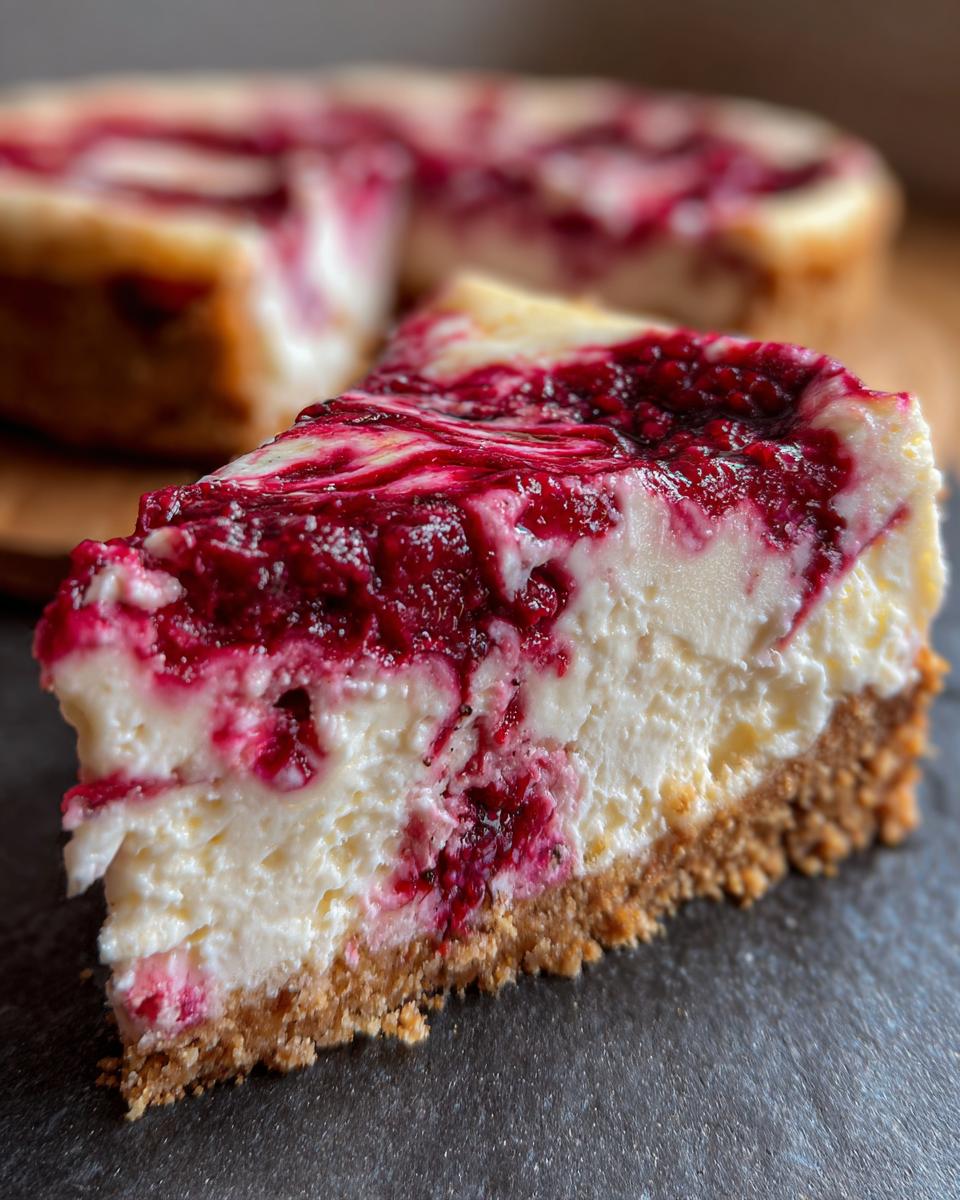
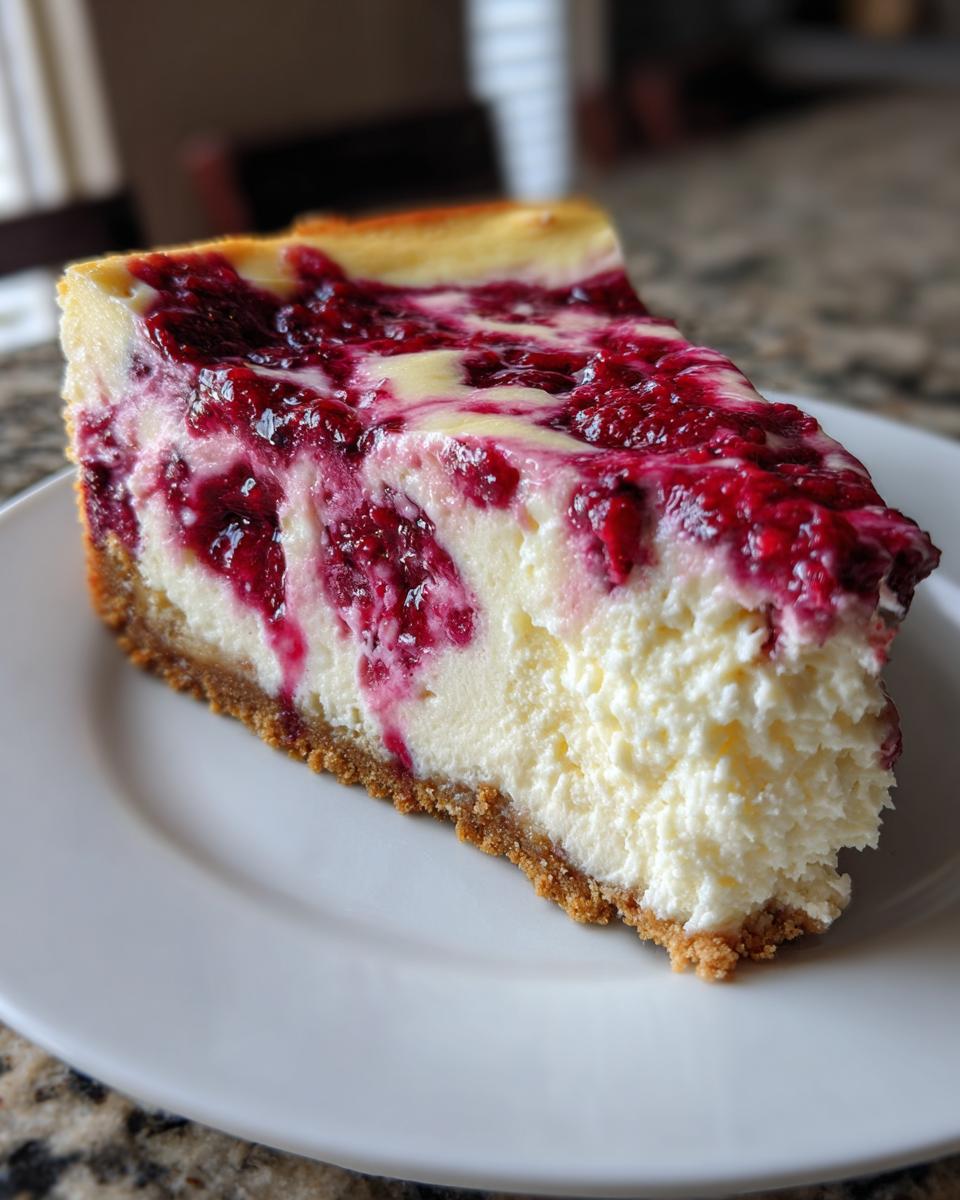
This isn’t just any cheesecake; it’s the ultimate **elegant dessert recipe** for when you need something truly impressive. What makes it stand out for me is the visual appeal—that gorgeous, vibrant raspberry swirl cutting through the rich white chocolate layer. It just screams celebration!
I’ve tried recipes that looked good but tasted dense or grainy, but honestly, this one beats them all. It’s destined to be your go-to **showstopper holiday dessert** because it’s made with pure patience and attention to detail, ensuring that rich, creamy result you crave.
Achieving the Silky White Chocolate Filling Texture
The secret to that dreamy, smooth texture is surprisingly simple: temperature control! You absolutely must use softened cream cheese and room-temperature eggs and sour cream. When all your dairy is cool, those ingredients clump up, and that’s how you get lumps. Trust me, I learned the hard way after realizing I poured my white chocolate in while it was still too hot—it solidified things fast!
Also, make sure that melted white chocolate cools down just a bit before you mix it into the cream cheese base. A slightly cooler chocolate integrates beautifully, giving you that perfect **silky white chocolate filling** without seizing up.
The Perfect Buttery Crust Dessert Base
For presentation points, I always stick to the classic graham cracker crust. It provides the perfect crunchy, buttery contrast to the smooth filling, hitting all those necessary dessert notes. We’re making a sturdy **buttery crust dessert** foundation here that can handle a thick layer of filling!
Now, if you’re feeling adventurous or just need a quick swap, the recipe notes mention you can absolutely use crushed Oreos instead of graham crackers if you prefer that chocolate cookie base. Either way, press that crust down firmly—it’ll thank you later!
Ingredients for the Fail-Proof Creamy White Chocolate Raspberry Cheesecake
When we’re aiming for that perfect, no-crack, showstopper result, the ingredients list isn’t just a suggestion—it’s a blueprint! It’s so important to get these measurements just right to ensure we get that decadent, creamy texture. I’ve organized everything into our three main parts: the base, the filling magic, and that beautiful raspberry element.
Remember, your ingredients need to cooperate with you in the kitchen! For the filling, please make sure that cream cheese is truly soft, and those eggs and the sour cream are sitting out on the counter for at least an hour before you even think about turning the mixer on. This is huge for keeping things smooth!
Here is everything you’ll need for this amazing **White Chocolate Raspberry Cheesecake Recipe**:
For the Buttery Graham Cracker Crust
- 1 1/2 cups graham cracker crumbs
- 1/4 cup granulated sugar (for crust)
- 6 tablespoons unsalted butter, melted
For the Silky White Chocolate Filling
- 3 (8 ounce) packages cream cheese, softened
- 1 1/2 cups granulated sugar (for filling)
- 1 teaspoon vanilla extract
- 1/4 teaspoon salt
- 1 cup white chocolate, melted and cooled slightly
- 3 large eggs, room temperature
- 1/2 cup sour cream, room temperature
For the Vibrant Raspberry Swirl
- 1 cup raspberry sauce or puree (for swirl)
Step-by-Step Instructions for Your Baked Cheesecake With Raspberry Swirl
Okay, here we go! This is where the magic truly happens. Follow these steps precisely, and I promise you’ll feel like a pastry chef. Remember, building trust with your ingredients means being meticulous about the process, which leads to that gorgeous, professional-looking dessert. You’ll want to check out my whole collection of easy cheesecake instructions for more baking inspiration after this masterpiece!
Preparing the Buttery Crust Dessert and Water Bath Setup
First things first, let’s get that crust ready. You’ll mix the graham cracker crumbs, sugar, and melted butter, pressing it firmly into the bottom of your 9-inch springform pan. That firm press is key for a stable base! Once it’s packed tight, pop it into the fridge to chill for a good 30 minutes. Don’t skip this chilling time!
While that chills, set your oven to 325°F (160°C). Now, listen closely: we are wrapping that pan securely in heavy-duty aluminum foil—like wrapping a little mummy! You need to make sure it’s watertight because we’re putting it into a hot water bath. Place that foil-wrapped beauty inside a bigger roasting pan. This setup protects your **best cheesecake recipe** from cracking.
Mixing the Silky White Chocolate Filling
In your clean mixing bowl, that softened cream cheese needs a good five minutes on medium speed until it’s completely smooth—no lumps allowed! Then, we add the sugar gradually, mixing until everything is just combined. Remember that cooled, melted white chocolate we made earlier? Mix that in now until it’s perfectly incorporated.
This next part is vital for texture: the eggs. Add them one at a time, and I mean *one at a time*. Mix just until the yellow disappears after each egg. If you beat them too hard, you’ll whip in too much air, which leads to domes and cracks later! Finish it gently by mixing in the sour cream last. We are done mixing when it looks smooth, not fluffy! We are aiming for that perfect **perfect cheesecake texture tips** right here.
Assembling and Baking the White Chocolate Raspberry Cheesecake
Now we assemble our layers! Pour half of that smooth batter over your chilled crust. Drizzle on about half of your beautiful raspberry sauce, and take a knife to gently swirl it—don’t over-agitate it! Repeat with the remaining batter and the rest of the sauce for a lovely pattern. This layering technique creates such a good visual for your finished cheesecake treat. You just want a gentle ribbon of color running through that rich base.
Carefully move your roasting pan over to the oven rack. Now, pour hot water into that roasting pan until it comes about halfway up the outside of your cheesecake pan. It should be snug! Bake this beauty for about 60 to 75 minutes. You’ll know it’s done when the edges look firm but the very center still has a little jiggle, like firm Jell-O. Don’t bake it until the center is solid!
Mastering the No Crack Cheesecake Technique for Perfect Results
Listen, if you’ve done everything right up to this point—room temp ingredients, careful mixing, the perfect water bath—the last thing you want is for disaster to strike as it cools! We are going to use the ultimate **no crack cheesecake technique**, and it requires patience, which is honestly the hardest part!
Once the baking time is up (remember that slight jiggle in the center?), turn your oven off. Don’t pull it out, don’t open the door wide—just turn the heat off! Then, crack that oven door open just a tiny bit and let the cheesecake sit in the residual warmth for a whole hour. This slow transition is non-negotiable for achieving a pristine top.
Why does this work? Because the sudden temperature drop from a hot oven to a cool kitchen is what causes the proteins in the cheesecake to tighten up too fast, leading to those ugly sunken craters we want to avoid. That hour in the cooling oven lets everything relax gently. After that hour of patient waiting, you can finally remove it from the water bath and foil. Check out this helpful guide on baking tips if you want more reassurance!
Only once it’s completely cooled on the counter should it go into the fridge. Trust me, skipping the slow cooling process is the number one reason people end up scraping the top off their gorgeous **creamy cheesecake dessert**!
Tips for Success with Your White Chocolate Raspberry Cheesecake Recipe
Making this **White Chocolate Raspberry Cheesecake Recipe** a success relies on a few small details that add up to a huge difference in the end. I really want you to feel successful when you pull this out of the fridge, so let’s talk about those little game-changers that I figured out through trial and error right here in my kitchen.
First, let’s revisit the temperature thing—it’s so worth mentioning again because it’s critical for that smooth texture. If your filling looks slightly grainy even after mixing, it’s probably because your cream cheese was too cold. I will never forget the time I tried to rush this for a potluck; I microwaved the cream cheese for thirty seconds and it got weirdly soft and oily on the outside, but still cold in the middle. The resulting cheesecake was okay, but you could definitely feel tiny, firm bits in the filling. Learn from my impatience!
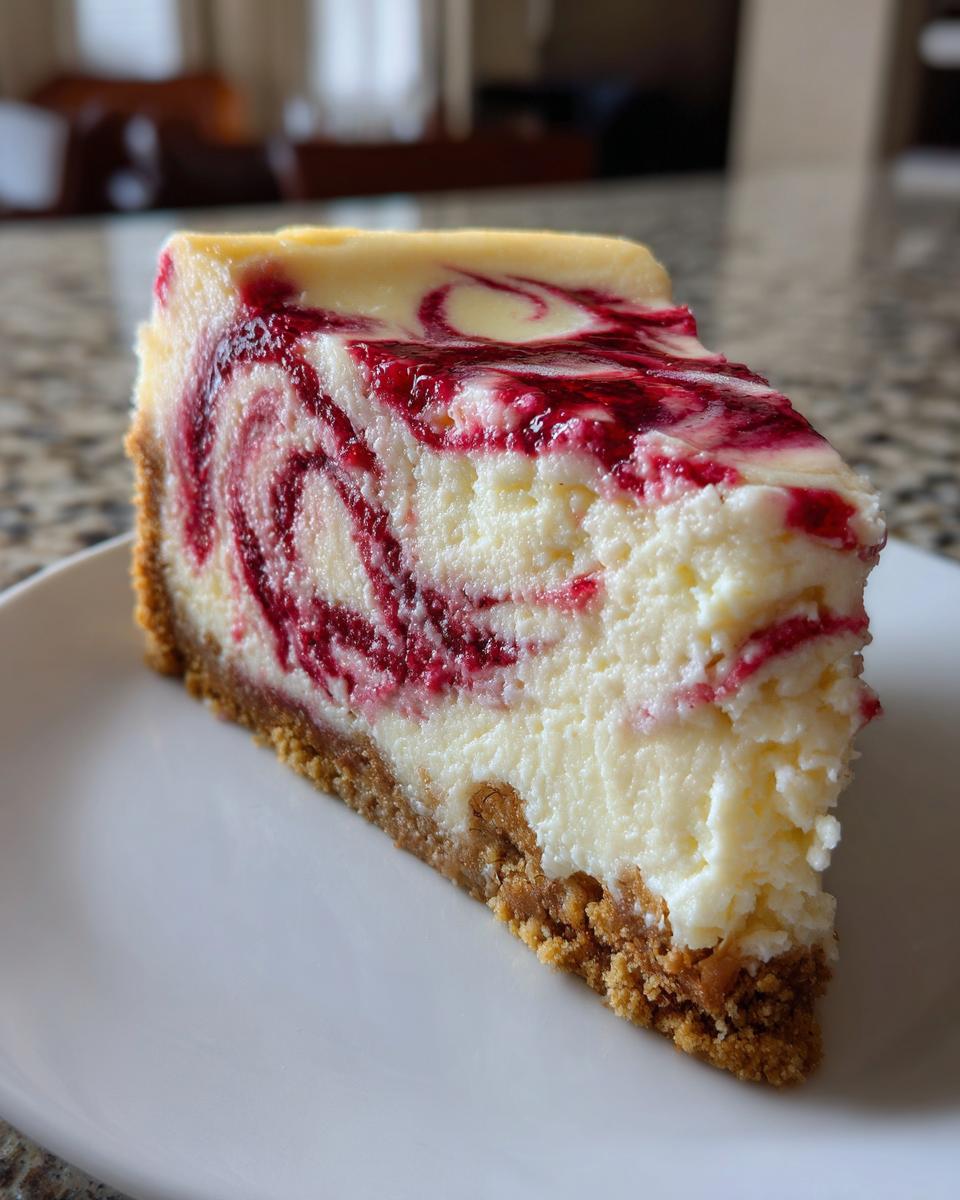
For the best swirl action, you really need the right consistency with your raspberry element. Thin jam or watery puree just bleeds into the batter and makes a pink mess rather than a dramatic swirl. The recipe calls for a thick sauce, and that’s because you want that beautiful ribbon effect running through your **best cheesecake recipe**. If you’re using fresh raspberries that you’ve pureed, you might need to simmer them down on the stove for about five minutes until they reduce slightly and thicken up. It’s worth the extra five minutes for that visual punch!
Oh, and one last thing—when you’re melting your white chocolate, please use a double boiler or short bursts in the microwave, scraping every 20 seconds. White chocolate burns faster than almost anything else, and burnt chocolate tastes awful and changes the entire flavor profile! Keep an eye on it so you can enjoy this gorgeous, reliable dessert.
If you want to see some other showstoppers that are just as reliable as this one, make sure you check out my collection of best dessert recipes for future parties!
Make Ahead Dessert Recipe and Storage for Your White Chocolate Raspberry Cheesecake
I absolutely love the fact that this **White Chocolate Raspberry Cheesecake Recipe** is designed to be a fantastic **make ahead dessert recipe**! Life gets busy, especially around the holidays or when you’re hosting big dinners. The good news is that cheesecake actually *gets better* after sitting in the cold. It lets those rich white chocolate flavors fully meld together.
You cannot rush this last—and maybe most satisfying—step. After you’ve gone through all the effort of the water bath and the slow cooling process, you need to give it proper chilling time to set up perfectly. So, plan ahead!
The minimum chilling time is six hours, but honestly, if you can manage it, let it chill overnight. This solidifies the entire structure, making it so much easier to slice cleanly. When it comes out of the fridge, you’ll be rewarded with that firm, velvety texture we worked so hard to achieve.
When storing leftovers—if you even have any—keep it covered tightly in the refrigerator. The foil or plastic wrap should touch the surface of the cheesecake slightly to prevent condensation from making the top sticky or damp. It keeps wonderfully for about four or five days. It’s truly one of the best make-ahead desserts for keeping taste and texture intact over several days!
Serving Suggestions for Your Showstopper Holiday Dessert
Alright, you’ve made the absolute perfect, crack-free **creamy cheesecake dessert**, and now it’s time to present this gorgeous creation! Since this recipe is such a visual winner, taking just a few simple steps for presentation turns it into that memorable **showstopper holiday dessert** you’ve been aiming for.
When it comes to serving this delicate beauty, how you garnish it can change the whole vibe. For Christmas or Valentine’s Day, I lean toward keeping the colors deep and rich, but for a summer gathering, we can brighten it up!
Here are my absolute favorite ways to dress up this cheesecake right before serving:
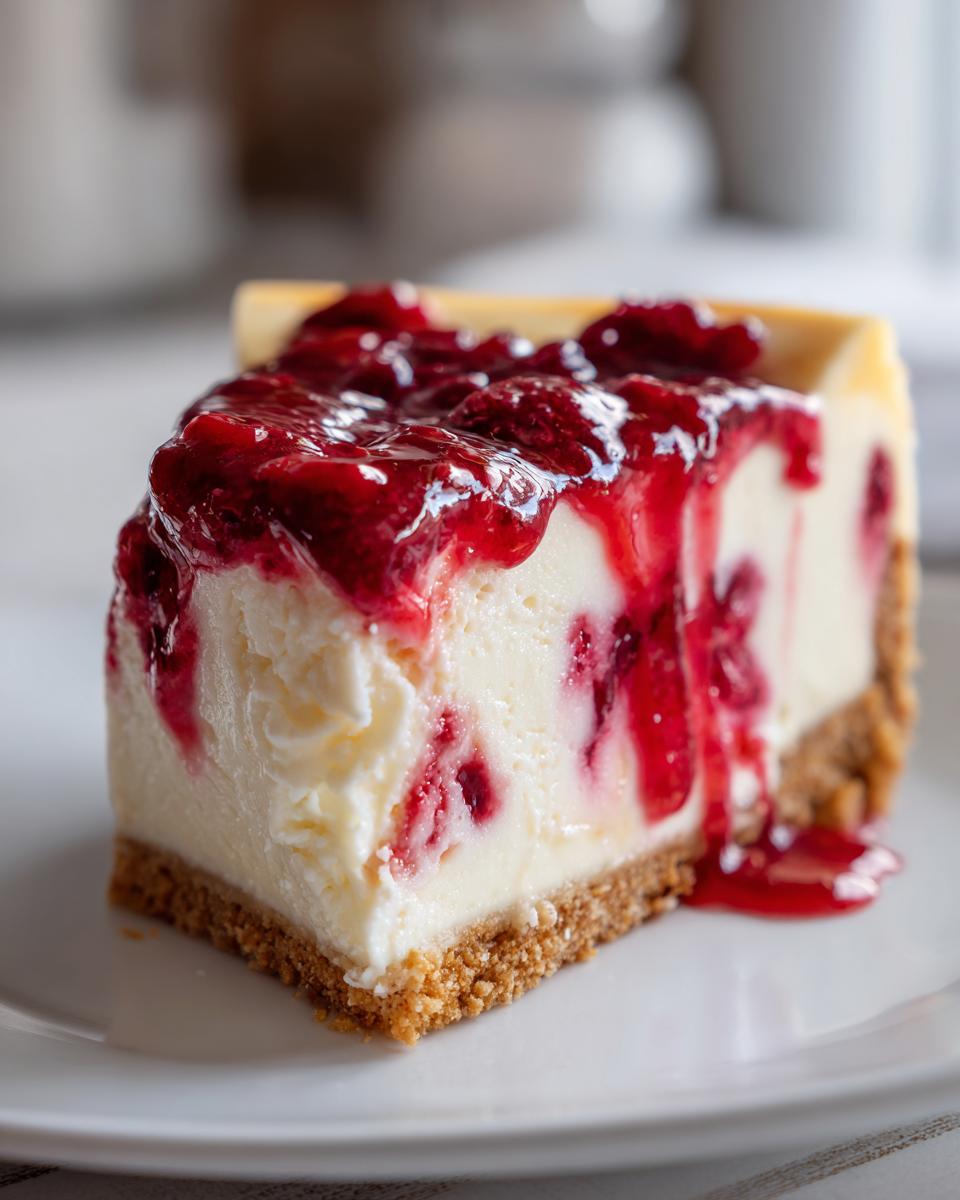
- The Fresh Berry Pop: You can never go wrong with fresh fruit. Arrange a beautiful ring of fresh raspberries and maybe a few whole, bright red strawberries around the edge of the cheesecake slice or floating on top of the entire thing. The tartness cuts through the richness perfectly.
- Simple Elegance: If you drizzled a lot of raspberry sauce inside already, sometimes less is more! A very light dusting of powdered sugar over the top looks incredibly elegant and professional. Use a fine-mesh sieve and just let it drift down—don’t dump it on thick!
- White Chocolate Shavings: For an extra hit of decadence, take a vegetable peeler and run it down the side of a good quality white chocolate bar to create curls. Sprinkle these lightly over the top. They melt beautifully in your mouth alongside the filling.
- A Touch of Green: This might sound weird, but a tiny sprig of fresh mint on top of each slice adds a beautiful contrast against the red and white. It just elevates it straight to gourmet status!
No matter how you choose to decorate it, remember that clean slicing is part of great presentation. Make sure your knife is very sharp and wipe it clean between every single cut. That way, every guest gets a pristine slice of this luxurious treat. If you need more ideas for dazzling your guests, check out my full collection of best dessert recipes!
Frequently Asked Questions About This Creamy Cheesecake Dessert
I know when you are trying a new, slightly complex **decadent cheesecake treat** like this, you likely have a few lingering questions. It’s totally normal! Cheesecake baking takes a bit of mind-reading, but once you know the secrets, you’ll feel like a pro. I’ve gathered the most common ones here to set you up for success.
Can I make a no-bake white chocolate raspberry cheesecake instead?
That’s a great question! While a no-bake version would certainly be faster, this entire recipe—the water bath, the specific addition of eggs, the slow cool down—is specifically designed to achieve that ultra-luxurious, dense, yet completely **creamy cheesecake dessert** texture that comes from baking. A no-bake method relies on gelatin or whipped cream to set, which gives you a much lighter, mousse-like consistency. If you try to skip baking here, you won’t get the velvety feel we’re aiming for in this **best cheesecake recipe**!
How do I make the raspberry swirl sauce recipe thicker?
If your raspberry sauce seems a little runny coming out of the jar—or if your homemade puree separated a bit—you can easily fix that before you layer it in. Just put that sauce into a small saucepan and let it simmer gently over medium-low heat. You’re not trying to cook it down heavily, just long enough for some of the water content to evaporate. Stir it frequently, and once you see it clinging slightly better to the back of a spoon, take it off the heat. Let it cool completely before swirling it into the batter. A thicker sauce gives you those beautiful, defined ribbons instead of just sinking to the bottom!
Is this a Cheesecake Factory Copycat recipe?
I totally get why folks ask that! We all know that restaurant-quality cheesecake can be amazing, and I’ve definitely aimed for that high bar when developing this **White Chocolate Raspberry Cheesecake Recipe**. The goal here was definitely to create something that rivals the quality and richness you’d get paying big bucks for a slice. While I haven’t copied them exactly, I assure you that achieving this **silky white chocolate filling** and vibrant **raspberry swirl cheesecake** right at home will give you results that feel just as special—maybe even better, since you know exactly how those high-quality ingredients were handled!
Estimated Nutritional Data for One Slice of White Chocolate Raspberry Cheesecake
Because this is such a rich and decadent treat, I always like to include a little heads-up about what you’re indulging in! This **showstopper holiday dessert** is certainly a splurge, but oh, is it worth it. Remember, these numbers are just estimates based on the specific ingredients and measurements listed in the recipe. If you use a different crust substitution or a super-sweet raspberry sauce, those figures might shift a bit.
I always treat this as a truly special occasion dessert, so no guilt allowed when you realize how much deliciousness is packed into each slice! Here is the breakdown per serving size:
- Serving Size: 1 slice
- Calories: 450
- Sugar: 35g (That’s where the white chocolate and sugar shine!)
- Fat: 30g
- Saturated Fat: 18g
- Carbohydrates: 40g
- Protein: 8g
- Sodium: 250mg
When you’re making a **gourmet cheesecake for guests**, you want that indulgence factor, and let me tell you, this hits the mark! It’s packed with satisfying fats and sugars that make it taste luxurious. Plan accordingly, and remember to store it properly in the fridge so it stays perfect for later!
PrintFail-Proof Creamy Baked White Chocolate Raspberry Cheesecake
Make a showstopper dessert with this creamy baked white chocolate raspberry cheesecake. This recipe focuses on achieving a silky texture and vibrant raspberry swirl using a simple water bath technique.
- Prep Time: 30 min
- Cook Time: 75 min
- Total Time: 8 hours 15 min
- Yield: 12 servings 1x
- Category: Dessert
- Method: Baking
- Cuisine: American
- Diet: Vegetarian
Ingredients
- 1 1/2 cups graham cracker crumbs
- 1/4 cup granulated sugar (for crust)
- 6 tablespoons unsalted butter, melted
- 3 (8 ounce) packages cream cheese, softened
- 1 1/2 cups granulated sugar (for filling)
- 1 teaspoon vanilla extract
- 1/4 teaspoon salt
- 1 cup white chocolate, melted and cooled slightly
- 3 large eggs, room temperature
- 1/2 cup sour cream, room temperature
- 1 cup raspberry sauce or puree (for swirl)
Instructions
- Prepare the crust: Mix graham cracker crumbs, 1/4 cup sugar, and melted butter. Press firmly into the bottom of a 9-inch springform pan. Chill for 30 minutes.
- Preheat your oven to 325°F (160°C). Wrap the outside of the springform pan tightly in heavy-duty aluminum foil to prevent water entry.
- Prepare the water bath: Place the foil-wrapped pan inside a larger roasting pan.
- Make the filling: Beat the softened cream cheese until smooth. Gradually add 1 1/2 cups sugar, vanilla, and salt. Beat until combined.
- Mix in the cooled melted white chocolate until smooth. Beat in eggs one at a time, mixing just until incorporated after each addition. Mix in the sour cream last. Do not overmix.
- Pour half of the cheesecake batter over the chilled crust. Drizzle half of the raspberry sauce over the batter. Gently swirl with a knife.
- Pour the remaining batter over the top, then drizzle with the remaining raspberry sauce. Create a final swirl pattern.
- Carefully pour hot water into the roasting pan until it reaches halfway up the sides of the springform pan.
- Bake for 60 to 75 minutes, or until the edges are set but the center still jiggles slightly.
- Turn off the oven, crack the oven door open slightly, and let the cheesecake cool inside the oven for 1 hour. This prevents cracking.
- Remove the cheesecake from the water bath and foil. Cool completely on a wire rack, then chill in the refrigerator for at least 6 hours, preferably overnight, before serving.
Notes
- Use room temperature ingredients for the filling to prevent lumps and ensure a smooth texture.
- For the best raspberry swirl, use a thick raspberry sauce rather than thin jam.
- To achieve a truly silky texture, avoid scraping down the sides of the bowl too much once the eggs are added.
- If you prefer an Oreo crust, substitute chocolate sandwich cookies for the graham crackers.
Nutrition
- Serving Size: 1 slice
- Calories: 450
- Sugar: 35g
- Sodium: 250mg
- Fat: 30g
- Saturated Fat: 18g
- Unsaturated Fat: 12g
- Trans Fat: 0.5g
- Carbohydrates: 40g
- Fiber: 1g
- Protein: 8g
- Cholesterol: 120mg