
When the summer heat hits, you need desserts that are shockingly refreshing and don’t require you to turn on your oven for hours! That’s why I’m so thrilled to share my absolute favorite way to beat the heat: homemade watermelon mochi. Forget those complicated pastry shells; this recipe is truly fantastic because it results in dough that is incredibly soft, beautifully chewy, and bursting with fresh fruit flavor.
I’ve worked hard to ensure this becomes your go-to summer snack. My promise here at Kings Cook is that every recipe you find is reliable, and this super simple microwave method for making watermelon mochi is no exception. It comes together so fast, leaving you with adorable, bite-sized treats that couldn’t be easier to manage!
- Why This Easy Watermelon Mochi Recipe Works So Well (Expert Tips)
- Gathering Ingredients for Your Watermelon Mochi
- Step-by-Step Instructions for Homemade Watermelon Mochi Balls
- Tips for Success When Making Watermelon Mochi
- Serving Suggestions for This Refreshing Summer Sweet
- Storage and Reheating Instructions
- Dietary Information for Watermelon Mochi
- Frequently Asked Questions About Watermelon Mochi
- Share Your Homemade Watermelon Mochi Creations
Why This Easy Watermelon Mochi Recipe Works So Well (Expert Tips)
If you’ve ever been scared off by traditional mochi making—all that steaming and endless kneading—then buckle up, friend! This recipe is my secret weapon for Easy Mochi Making, and it relies entirely on the trusty microwave. It’s fast, yes, but it delivers that signature soft and tender texture you crave in a wonderful Chewy Watermelon Dessert.
The reliability comes from properly exciting the starch molecules in the rice flour using short bursts of heat. It’s efficient and virtually foolproof once you see what the dough is supposed to look like. Trust me, once you nail this technique, you’ll be making mochi for every single holiday!
Achieving Perfect Chewy Watermelon Mochi Texture
The absolute MVP for that perfect chew is using glutinous rice flour, sometimes called mochiko. Regular rice flour just won’t cut it; it gives you a crumbly mess instead of that satisfying, pull-apart texture we’re aiming for. Seriously, don’t swap this ingredient! That wonderful, slightly gummy quality is what makes this a true Gluten Free Mochi delight.
Once cooked, the dough is super hot and sticky—that’s normal! The key step, which builds unbelievable trust in the process, is how you handle it with the starch. You need a mountain of potato starch or cornstarch to dust your board. This step isn’t optional; it prevents the dough from becoming one giant, inedible lump! You’re essentially creating a protective, slippery barrier while you work it into a pliable ball.
Gathering Ingredients for Your Watermelon Mochi
Okay, let’s talk about what you need to make these little gems. Since this Watermelon Mochi Recipe is all about that fresh, fruity taste, the ingredients are pretty straightforward—I kept it simple because who has time for complicated shopping lists in the summer?
You’ll need one cup of glutinous rice flour—and yes, that’s the non-negotiable item for the texture! Along with that, we use a quarter cup of regular sugar, three-quarters cup of water, and the star of the show: a quarter cup of fresh, strained watermelon juice. I tossed in some optional bits like watermelon extract if you want a real flavor punch, but water works just fine! You’ll also need a good half-cup of potato starch for dusting, which is key.
If you want to see how others have put together their versions of this fantastic summer treat, check out some inspiration here: this delicious recipe.
Ingredient Notes and Substitutions for Watermelon Mochi
The most important thing to know is that this recipe is naturally amazing because it fits perfectly into lots of dietary needs—it’s totally dairy-free and it is a spectacular example of a Gluten Free Mochi treat! We rely on the natural juice for that beautiful, soft pink hue. If your watermelon isn’t super vibrant, you can absolutely use a tiny drop of natural pink coloring, but I always prefer letting the fruit shine through.
The best flavor comes from the freshest, ripest watermelon you can find; don’t just use plain water if you can help it! The extract is fun, but the juice on its own is what makes this such a wonderfully refreshing sweet snack.
Step-by-Step Instructions for Homemade Watermelon Mochi Balls
This is where the magic happens, and I promise you, it’s far quicker than you think! We are ditching the stove for the microwave when making these incredible Homemade Mochi Balls. Just be careful, especially when handling hot bowls and sticky dough!
Mixing the Watermelon Mochi Batter
First up, grab a microwave-safe bowl—I usually use a glass one so I can peek inside! Whisk your mochiko (glutinous rice flour) and sugar together first. This gets the dry ingredients acquainted. Then, pour in your water and, crucially, your strained watermelon juice. Make sure that juice is strained well; we don’t want any chunky bits in this smooth batter! Whisk everything until it looks flawlessly smooth, like a lovely, thin pink pancake batter.
Cooking the Mochi Dough in the Microwave
Now for the cooking sequence, which is just three quick blasts. Cover your bowl loosely with plastic wrap—leave a tiny gap for steam to escape! Microwave on high for a full minute. Take it out (careful, it’s hot!) and stir it vigorously. It will start to look opaque. Cover it up and go back in for another minute. Stir again; it’s getting thick now! For the final session, give it only 30 to 60 seconds, until the dough turns glossy and translucent. That means the starch has cooked through.
Handling and Shaping Your Watermelon Mochi
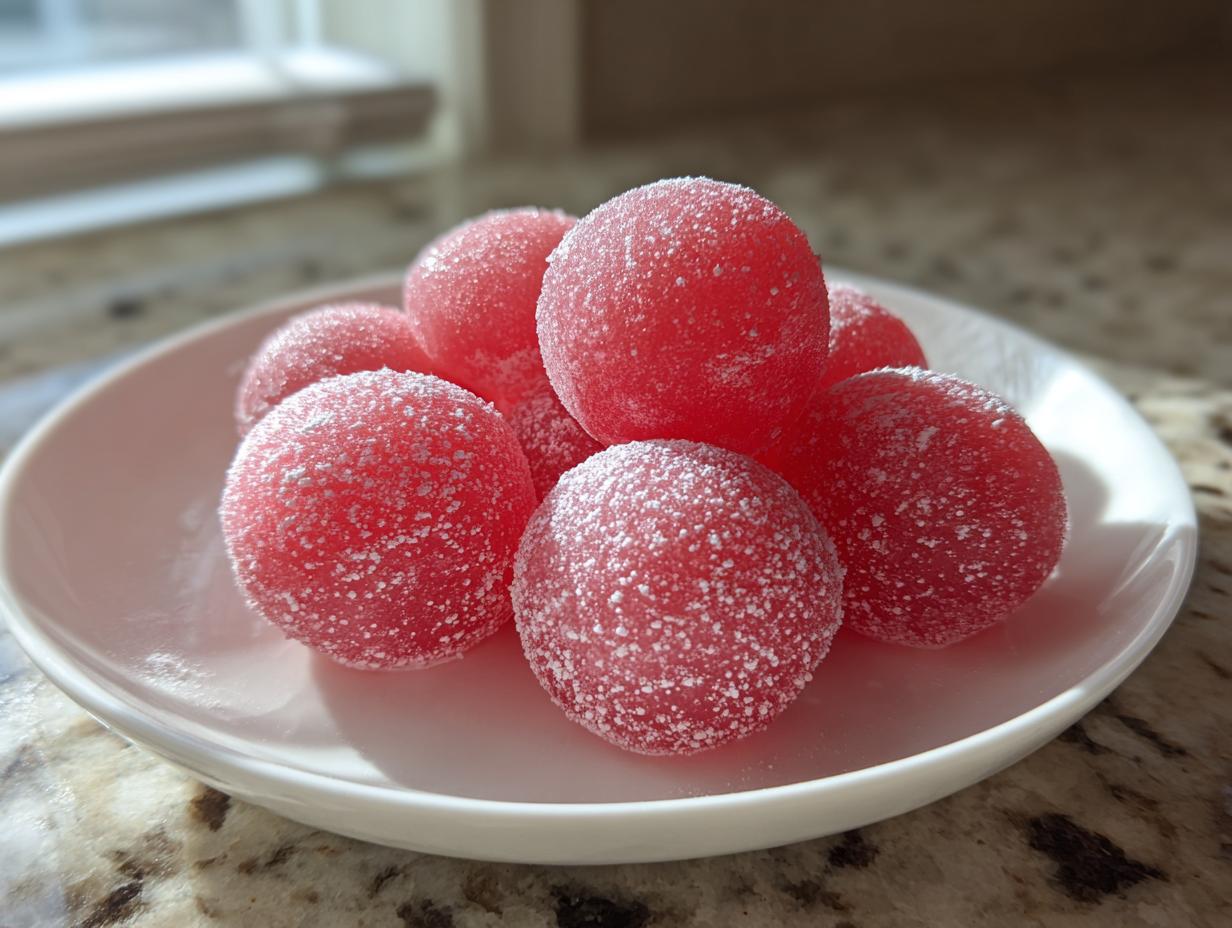
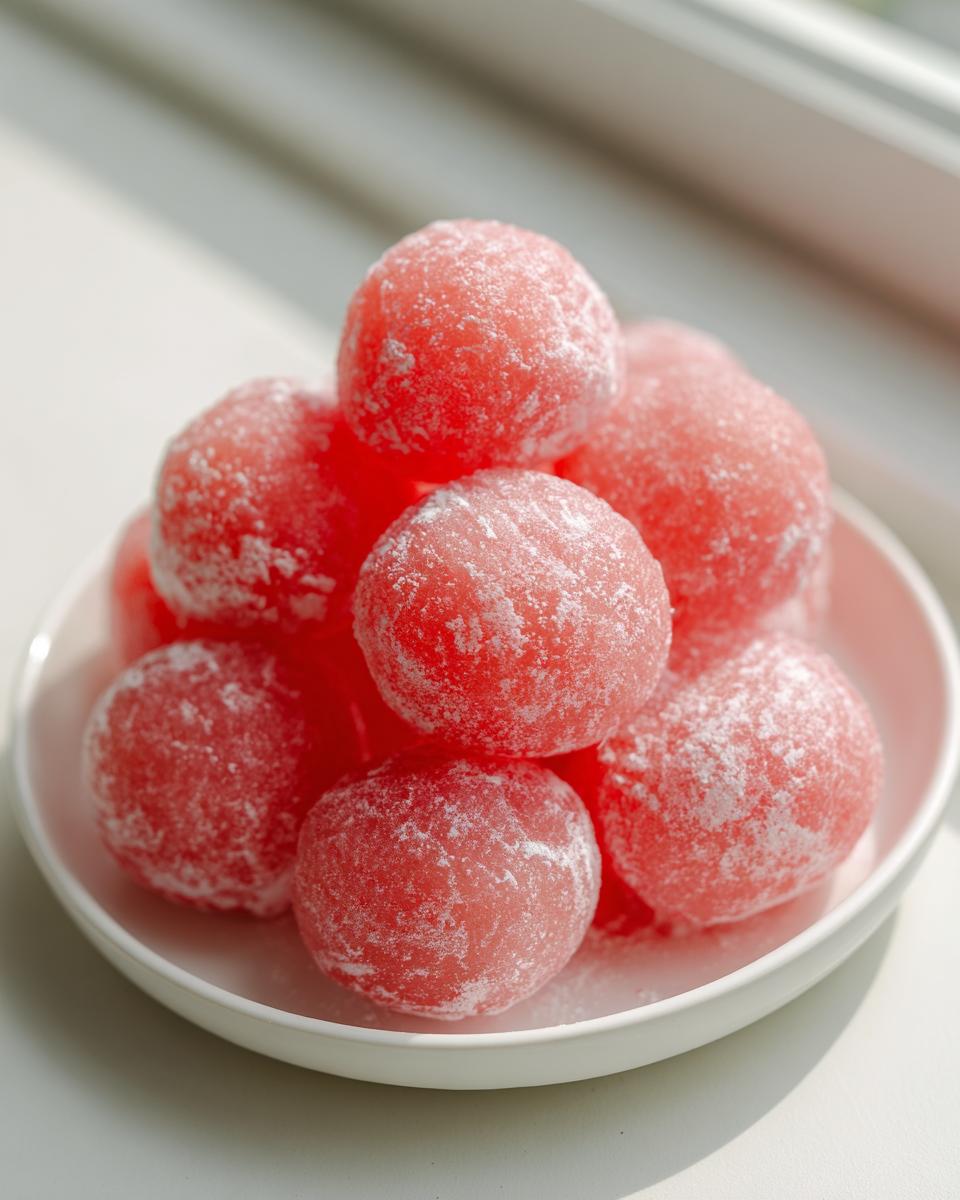
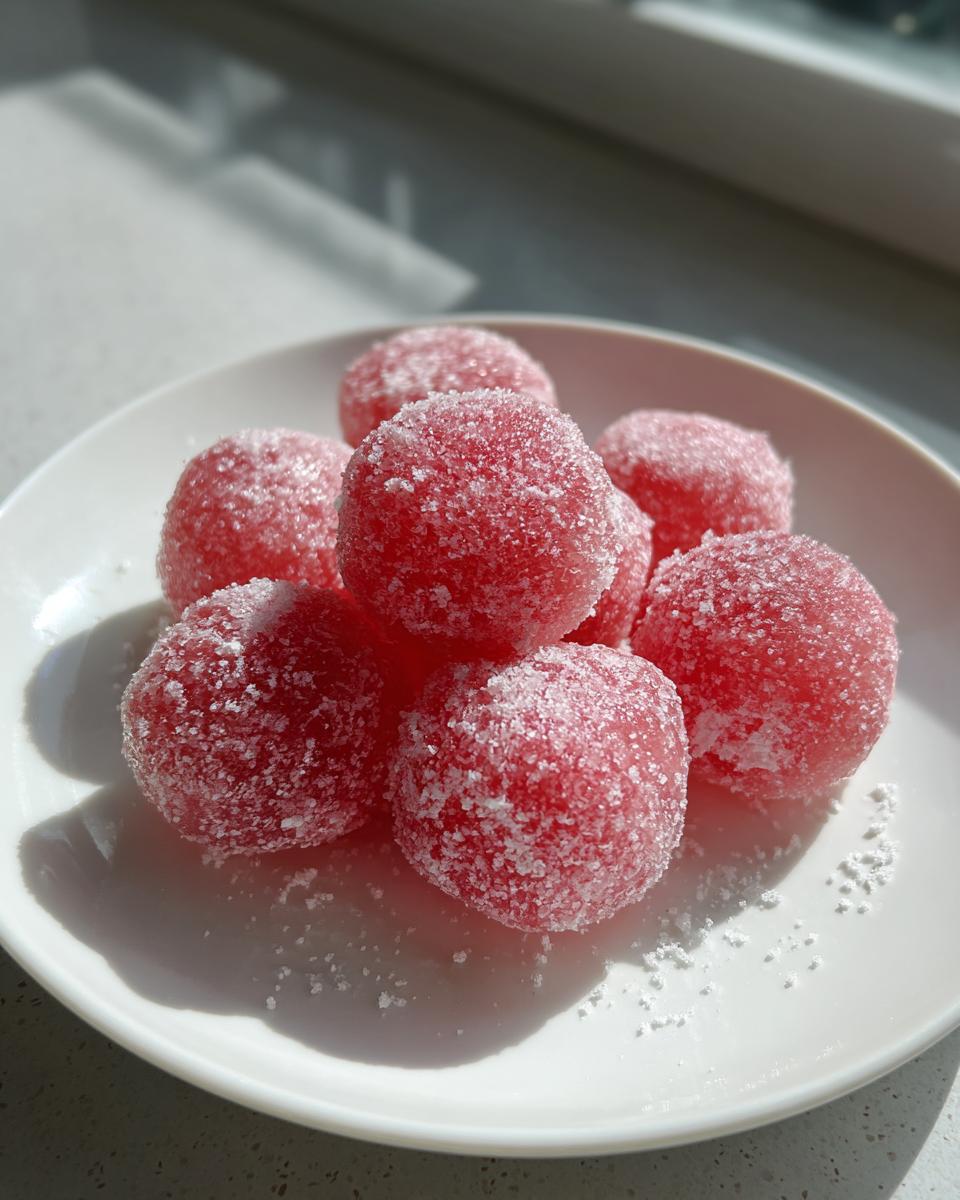
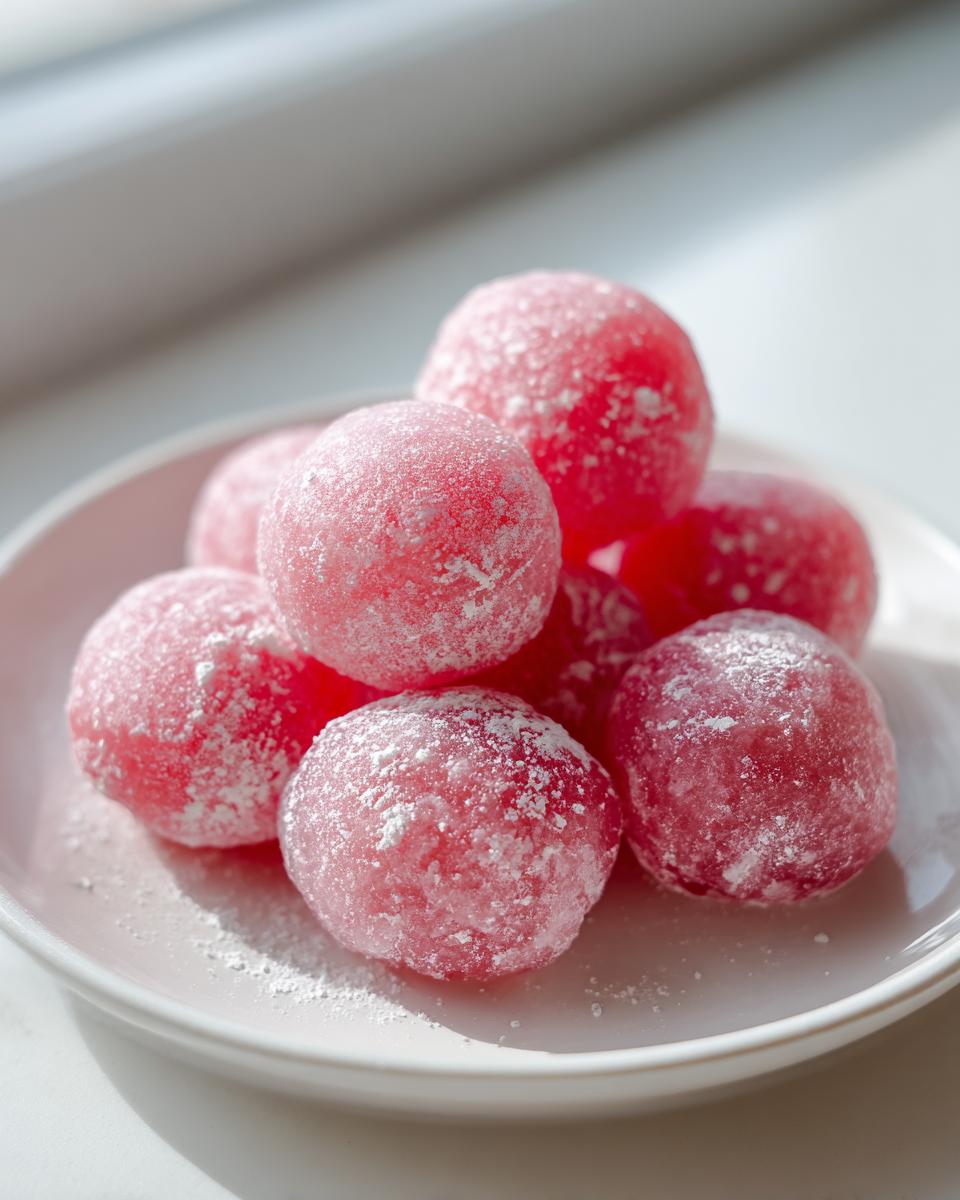
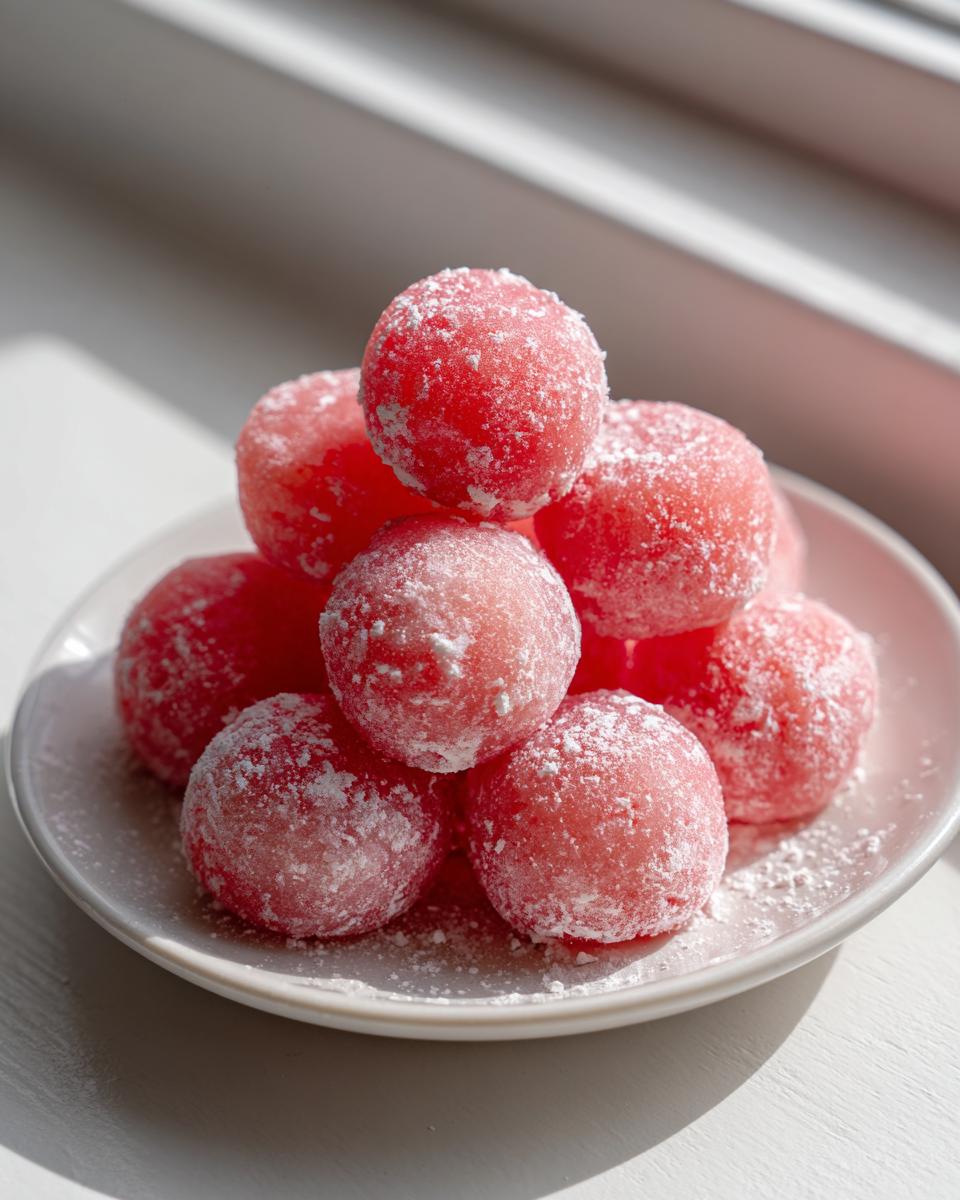
This is the messy but most fun part! Generously dust your clean counter or cutting board—I mean really coat it—with potato starch. Scrape the extremely sticky dough right onto the starch. Dust the top of the dough quickly, and then use a bench scraper to gently fold everything onto itself a few times using the surrounding starch to prevent sticking. You’re working it just enough until it forms a cohesive ball. Dust your hands, roll it into a nice log, and slice it into those perfect, little Bite Sized Dessert Ideas. Don’t forget to dust the little pieces one last time!
If you’re looking for a great recipe to pair this with later, maybe for a party next week, check out my recipe for fluffy apple cinnamon muffins for a completely different vibe!
Tips for Success When Making Watermelon Mochi
Making this Watermelon Mochi should feel fun, not frustrating! I’ve learned a few tricks over the years that prevent the classic mochi pitfalls. My biggest piece of advice centers around that sticky phase, because while we want soft, we definitely don’t want ‘gluey’ when we’re aiming for adorable Watermelon Flavored Snacks.
Here are the non-negotiable tips I use every single time to make sure your final pieces chill perfectly:
- Don’t Skimp on Dusting: I mean it—be generous with that potato or cornstarch when working the dough. If you think you have enough starch on your hands or the counter, add a little more! This is the only thing that saves you when the dough is scalding hot and trying to fuse with the countertop.
- Trust the Microwave Time—But Watch It: Three minutes total cooking time is usually perfect, but every microwave is different. During that last 30 seconds, hover! You are looking for an almost translucent sheen. If it looks chalky and thick still, give it 15 more seconds. Better to slightly overcook than undercook, as undercooked dough never gets chewy, it just gets gummy.
- Chill Time Is Essential: After you’ve cut your adorable little bites, don’t sneak one right away! While the dough is cooked hot, it needs to fully set at a cooler temperature to develop that satisfying, resilient chew. Pop them in the fridge for at least 30 minutes before serving. They taste so much better when they’re cold and firm up nicely!
For more handy baking advice on achieving perfect textures, feel free to check out my guide on bakery-style blueberry muffins—the creaming technique advice there is similar to what we need to avoid overworking this dough!
If you try these tips and they work for you, I’d love for you to take a peek at what Paula is doing over at Recipe by Paula for even more inspiration!
Serving Suggestions for This Refreshing Summer Sweet
Now that you have these perfect little pillows of refreshment, the real question is how to serve them! Because our watermelon mochi is so light and flavorful on its own, it doesn’t need much fuss, which is why this is one of my favorite Refreshing Summer Sweets. I love keeping things simple so the fresh fruit flavor really shines through.
Most often, I just give the finished pieces a final, light dusting of cornstarch or even some powdered sugar—it looks so pretty under the summer light! If you want a little textural contrast, try rolling a few of the chilled mochi balls in finely shredded, unsweetened coconut flakes; it adds a wonderful little chewiness on the outside. They are absolutely fantastic served cold, maybe alongside a tall glass of iced green tea? If you’re looking for something fun to sip on while you enjoy these, you must check out my favorite easy drink and cocktail recipes!
Storage and Reheating Instructions
Even though these little watermelon mochi bites disappear fast, you might have a few left over! I always store mine in an airtight container because, honestly, they dry out quickly if left exposed. Since they rely on moisture for that incredible chew, the fridge is the best spot for longevity, where they keep well for about four days.
Here’s the vital part to remember: if you pull them out of the fridge and they feel a bit tacky or sticky after sitting for a while, don’t panic! Just toss them lightly in a bit more potato starch or cornstarch right before you serve them. That little dusting brings their perfect texture right back. Avoid trying to microwave them to reheat, though—that just turns them gooey!
Dietary Information for Watermelon Mochi
I get asked all the time about dietary needs, and I love sharing good news! One of the best things about this simple watermelon mochi is what it *doesn’t* have. Because we rely only on rice flour, water, and fruit, this recipe is totally dairy-free. Even better, since rice flour is naturally gluten-free, this sweet treat fits perfectly into many dietary plans!
It’s such a relief to know we can enjoy something as fun and satisfying as this delicious rice cake without worry. If you are looking for more wholesome meal ideas that fit various needs, you might want to take a look at my quinoa salad recipe for something savory! And for more inspiration on easy, healthy swaps, check out this great guide on fresh eats here.
Frequently Asked Questions About Watermelon Mochi
I always get the same questions when people try making mochi for the very first time, so let’s clear up any doubts you might have about creating these perfect little pockets of summer joy!
Does the Watermelon Mochi taste strongly of watermelon?
That really depends on how much flavor your fruit has! If you use super ripe, incredibly juicy watermelon, the flavor will be bright, fresh, and present without being overwhelming. If you’re worried about it tasting too light, that’s why I listed the optional watermelon extract! Adding just a tiny bit of the extract boosts that fruity punch right up, making your Watermelon Flavored Snacks taste intensely summery. It’s totally up to your preference!
Can I use a different flour besides glutinous rice flour for this chewy dessert?
Oh, I really, really wish you could, but no! If you swap out the glutinous rice flour—the mochiko—you won’t get that signature texture we love so much. Regular all-purpose flour or even regular rice flour won’t hydrate the same way. They won’t create those long, stretchy starch chains necessary for that wonderfully soft and Soft Rice Cake Recipe texture. Sticking to mochiko is the biggest commitment you have to make here!
If you want to dive deeper into kitchen science and common questions, feel free to check out my general FAQ page for more tips!
Share Your Homemade Watermelon Mochi Creations
That’s it! You’ve officially made stunning, totally homemade watermelon mochi. Now, this part of the cooking adventure is where I absolutely need your help! I put my best techniques into this recipe, and I want to know how it worked out for you. Did you find the microwave timing just right? Did yours come out perfectly soft or did you have to use extra starch to handle them?
Please don’t be shy! Head down to the comments section below and leave me a rating—the stars help other cooks find this recipe, and I read every single comment. Tell me how you flavored yours or what you paired them with. If you snapped a picture of your colorful, bite-sized beauties, tag me on social media! Seeing your creations genuinely makes my day and keeps me excited to share more reliable recipes from my kitchen to yours. If you have any lingering questions after trying this out, feel free to reach out through my contact page!
PrintUltimate Easy & Refreshing Watermelon Mochi (Naturally Colored)

Make soft, chewy Watermelon Mochi at home. This easy recipe delivers a refreshing, bite-sized summer dessert using simple steps and natural fruit flavor.
- Prep Time: 10 min
- Cook Time: 3 min
- Total Time: 43 min
- Yield: About 18 pieces 1x
- Category: Dessert
- Method: Microwave
- Cuisine: Japanese Inspired
- Diet: Gluten Free
Ingredients
- 1 cup glutinous rice flour (mochiko)
- 1/4 cup granulated sugar
- 3/4 cup water
- 1/4 cup fresh watermelon juice (strained)
- 1 teaspoon watermelon extract (optional, for stronger flavor)
- 1/4 teaspoon natural pink or red food coloring (optional, for brighter color)
- 1/2 cup potato starch or cornstarch, for dusting
Instructions
- Mix the glutinous rice flour and sugar in a microwave-safe bowl.
- Add the water, watermelon juice, and optional extract/coloring to the dry ingredients. Whisk until the batter is smooth and lump-free.
- Cover the bowl loosely with plastic wrap. Microwave on high for 1 minute. Stir the mixture well.
- Cover and microwave for another 1 minute. Stir again. The mixture will start to thicken.
- Cover and microwave for the final 30 seconds to 1 minute, or until the dough is translucent and very sticky.
- Generously dust a clean work surface with potato starch or cornstarch. Scrape the hot mochi dough onto the starch.
- Dust the top of the dough lightly with more starch. Use a bench scraper or knife to gently fold and knead the dough in the starch until it is no longer overly sticky and forms a cohesive ball.
- Dust your hands with starch. Roll the mochi dough into a long log about 1 inch thick.
- Use the bench scraper to cut the log into small, bite-sized pieces (about 1 inch squares or rounds).
- Dust the finished pieces lightly with starch to prevent sticking. Chill the Watermelon Mochi for at least 30 minutes before serving for the best chewy texture.
Notes
- For the best results, use fresh, ripe watermelon for the juice. Strain the juice well to remove pulp.
- If you prefer a very light color, skip the optional food coloring and rely only on the natural juice.
- Store leftover mochi in an airtight container at room temperature for up to 2 days, or in the refrigerator for up to 4 days. Dust with fresh starch before serving if they become sticky.
- This recipe is naturally gluten-free and dairy-free.
Nutrition
- Serving Size: 1 piece
- Calories: 55
- Sugar: 4
- Sodium: 1
- Fat: 0
- Saturated Fat: 0
- Unsaturated Fat: 0
- Trans Fat: 0
- Carbohydrates: 12
- Fiber: 0
- Protein: 1
- Cholesterol: 0