
Are you ready to create the most unbelievably **Decadent Cheesecake Recipe** you’ve ever seen? Sometimes, you just need a showstopper, something that screams indulgence, and that’s exactly what this Ultimate Classic Baked **turtle cheesecake** delivers. I promise you, making this incredible layered dessert at home is much easier than it looks! Here at Kings Cook, my goal—just like Kate Connolly intended—is to give you reliable, rigorously tested recipes. If you’re whipping up something special for the family or just need a slice of heaven, this one is guaranteed to work for every American home cook. You can find more of my favorite amazing desserts right here: best dessert recipes.
- Why This Ultimate Baked turtle cheesecake is Your New Favorite Showstopper Dessert
- Gathering Ingredients for Your Homemade turtle cheesecake
- Step by Step Cheesecake Baking: Crafting the turtle cheesecake
- Tips for Success with Your turtle cheesecake
- Simple Variations for Your turtle cheesecake
- Serving Suggestions for This Indulgent Sweet Treats
- Storage and Reheating Instructions for Leftover turtle cheesecake
- Frequently Asked Questions About turtle cheesecake
- Share Your Decadent Cheesecake Recipe Creations
Why This Ultimate Baked turtle cheesecake is Your New Favorite Showstopper Dessert
If you’re looking for something that truly earns the title of **Showstopper Dessert**, stop right here. This isn’t just any dessert; it’s a complete experience! We’re talking about the ultimate combination of textures and tastes wrapped up in one incredibly rich slice. Even though it looks like something you’d order at a fancy bakery, I genuinely think this is the most accessible way to achieve a truly **Decadent Cheesecake Recipe** at home. It’s gourmet made simple, trust me on this one!
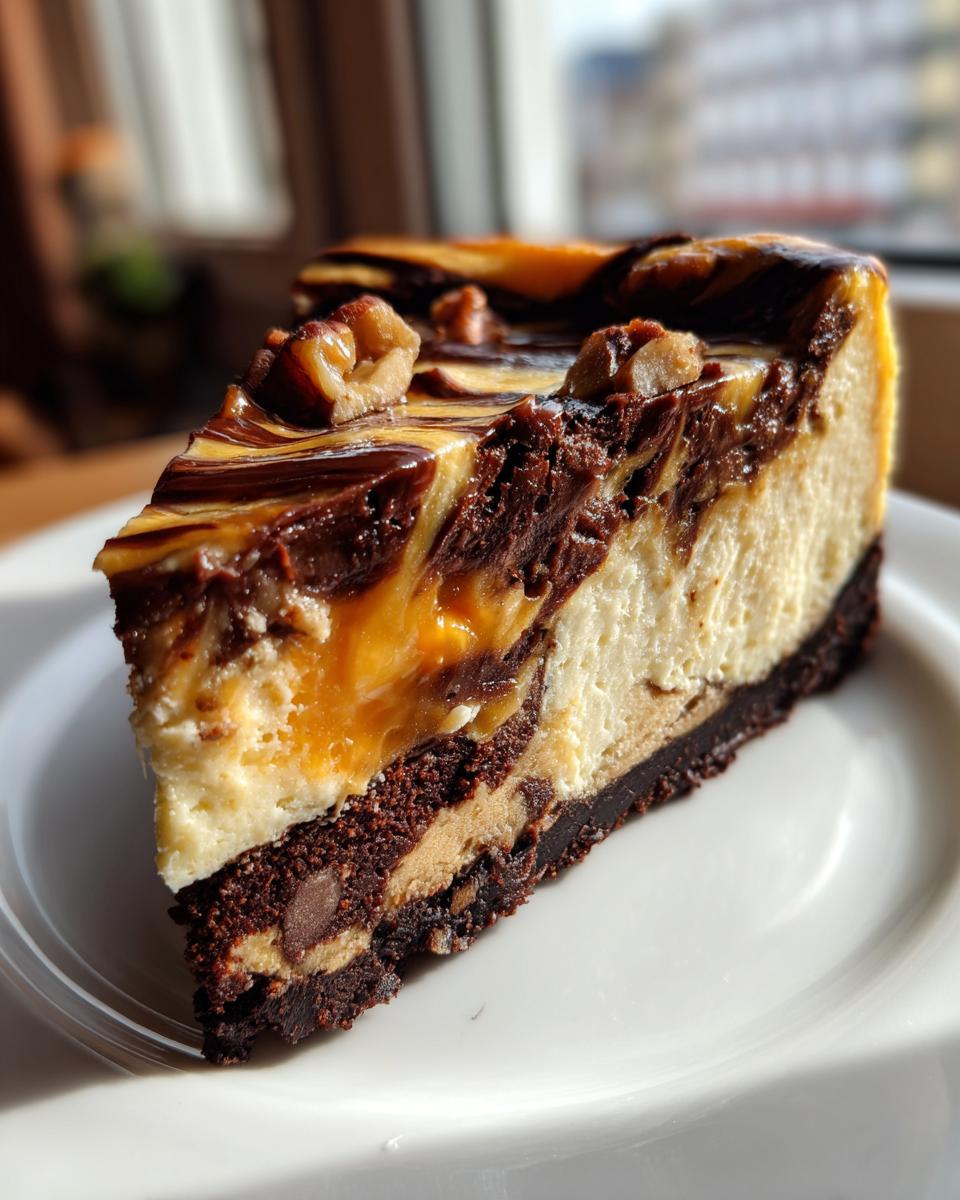
The Perfect Chocolate Caramel Pecan Dessert Balance
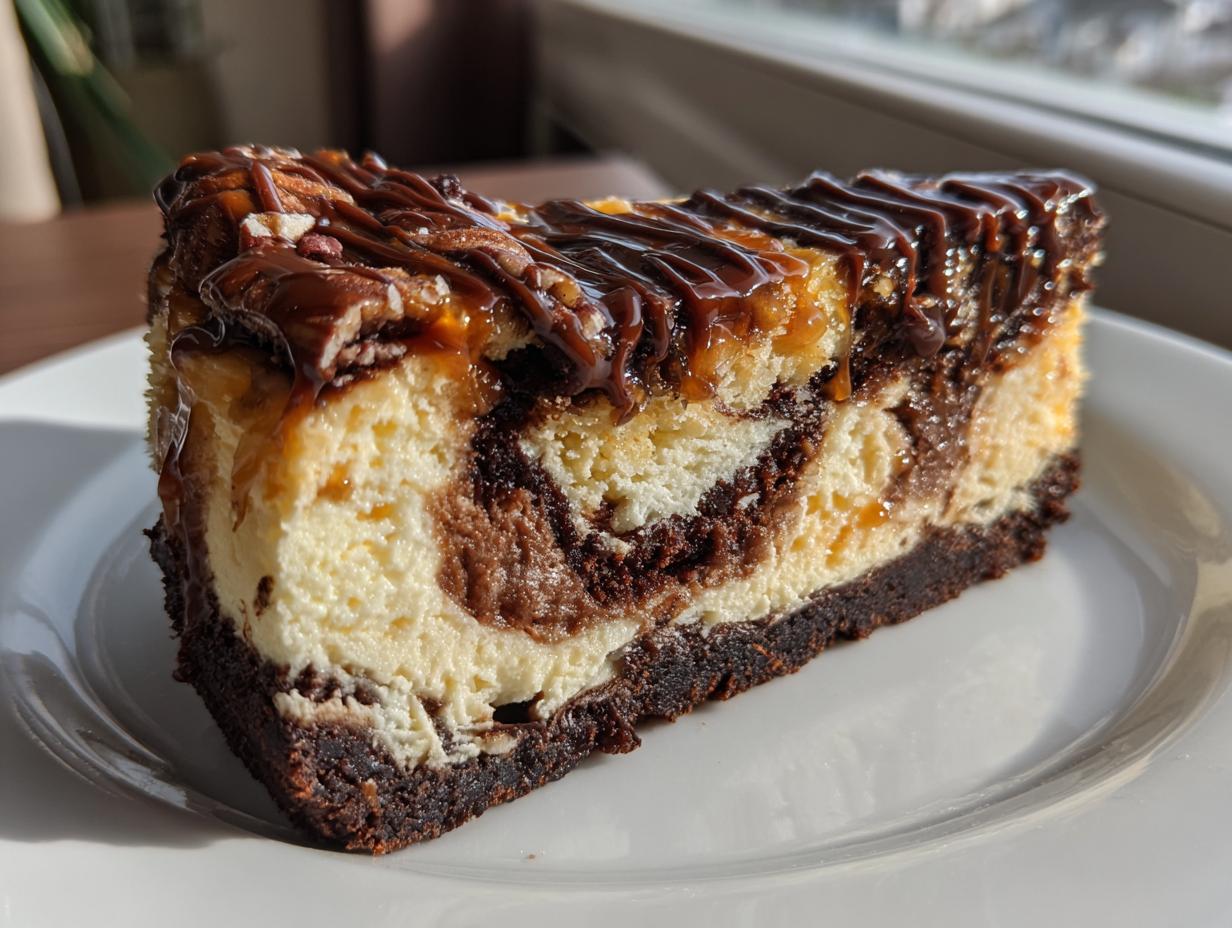
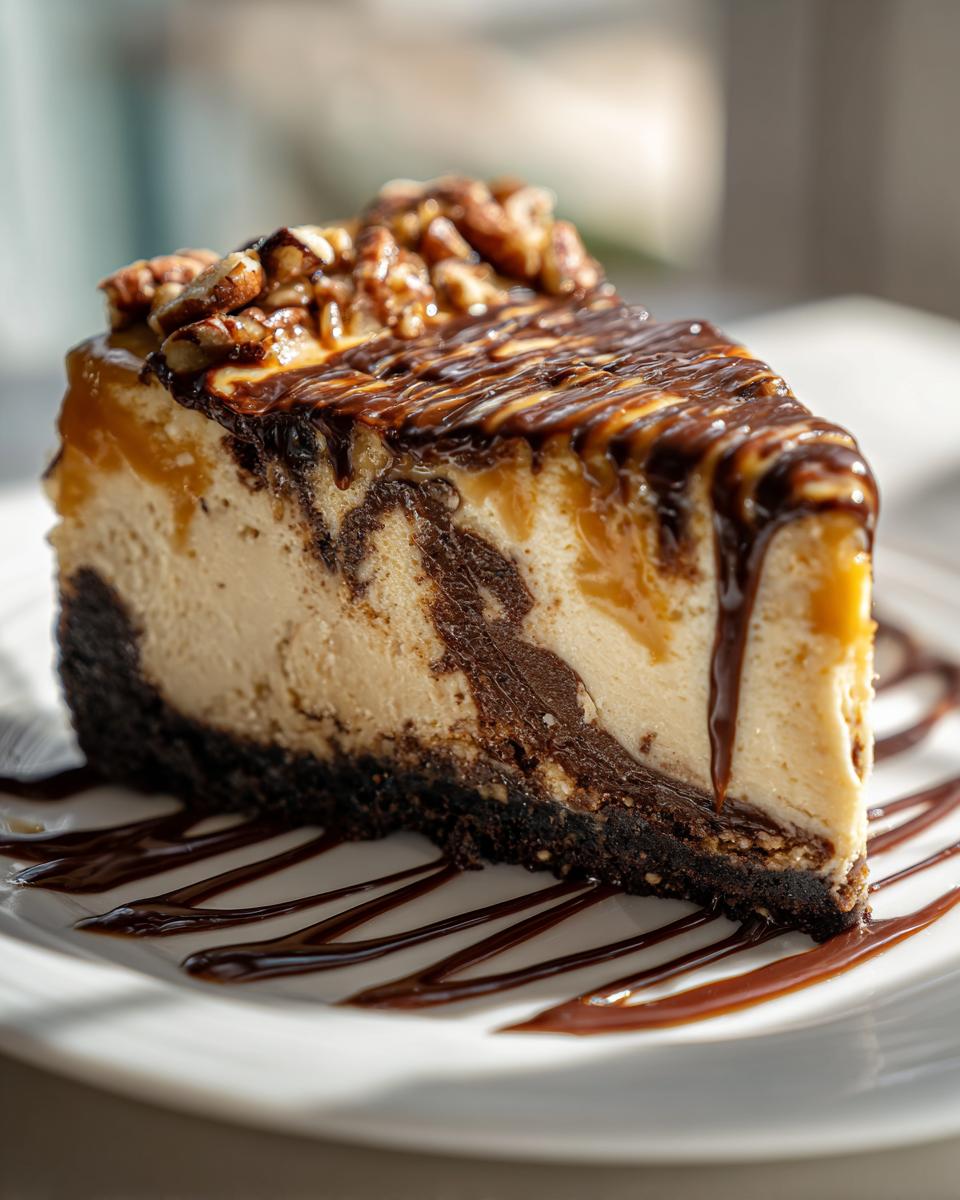
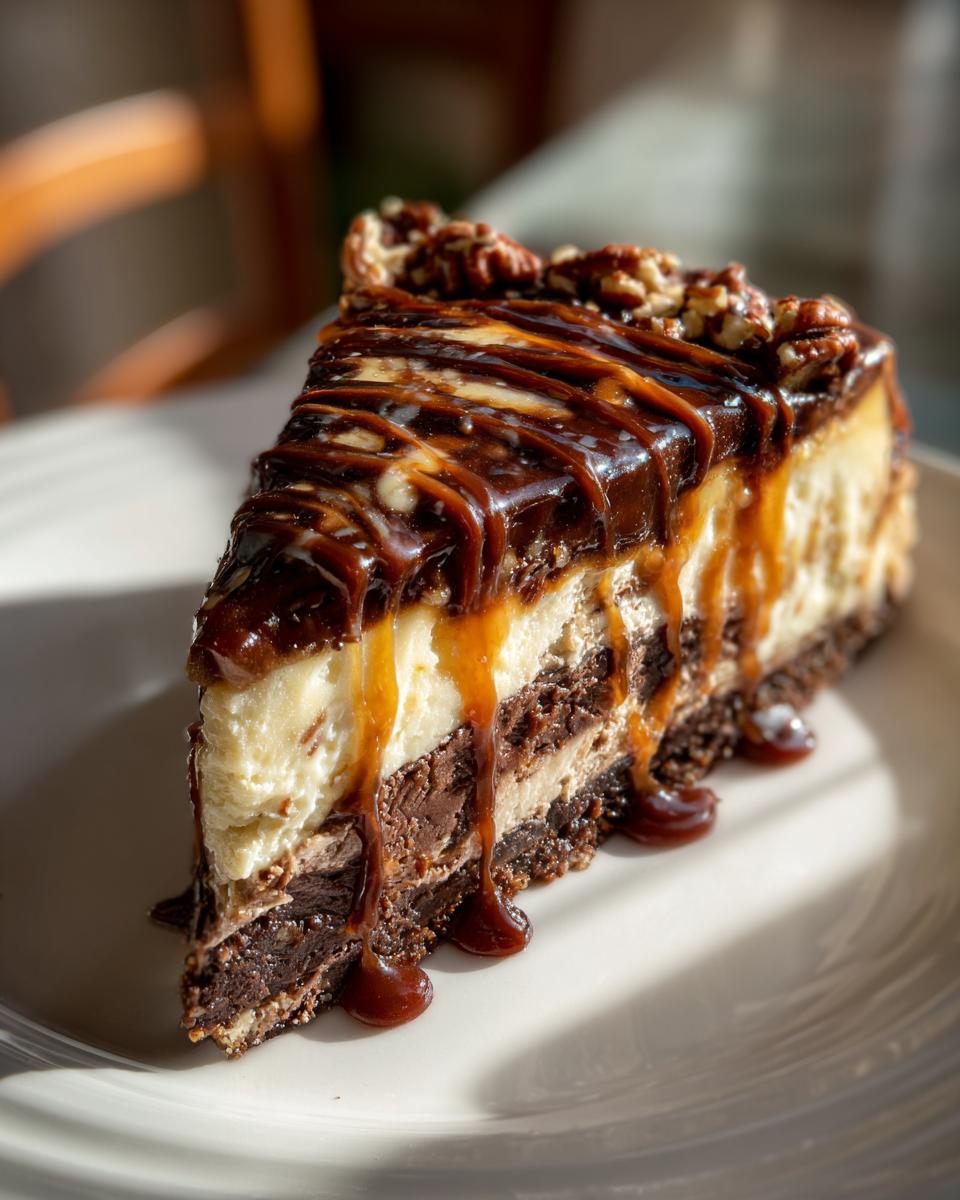
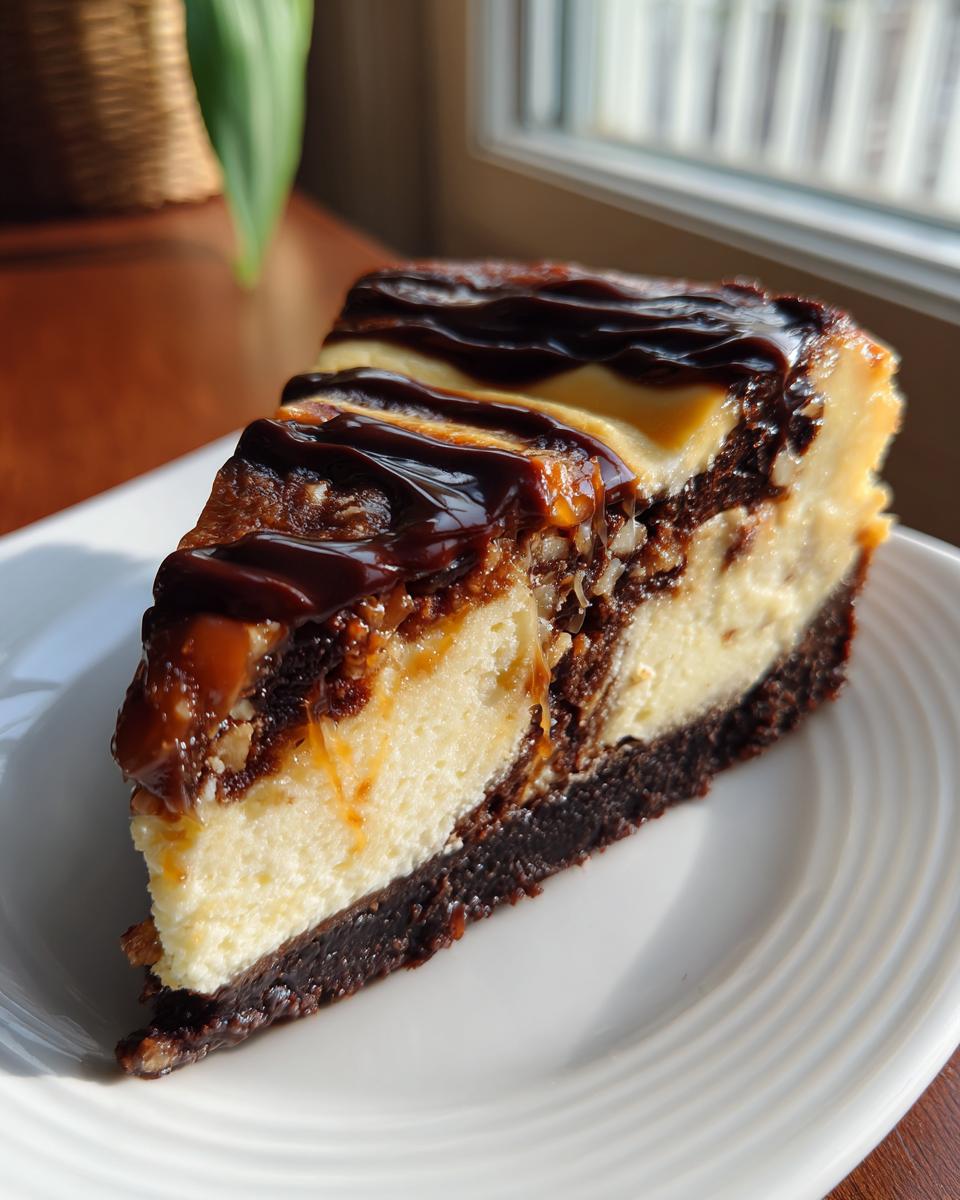
What makes a turtle dessert successful is the harmony between the three stars: the chocolate, the caramel, and the crunch. Our pecan crust gives you that necessary base texture right off the bat. Then, as you cut into the filling, you get that beautiful ribbon of salty-sweet caramel mixing with the deep, slightly bitter melted chocolate. Every forkful has a little something different, but they always work together perfectly. It’s pure indulgence!
Tips for Baking a Rich Creamy Desserts Base
Nobody wants a dry, cracked cheesecake! To get that incredibly smooth, luxurious feel—that signature of **Rich Creamy Desserts**—we have to treat the batter gently while it bakes. The essential step here is the water bath, or what some folks call a *bain-marie*. Don’t worry, it’s not complicated! It basically sets up a gentle, steamy oven environment that cooks the cream cheese slowly and evenly. This technique is our secret weapon for a velvety texture that never disappoints, and we’ll cover exactly how to set it up next.
Gathering Ingredients for Your Homemade turtle cheesecake
Okay, let’s talk shopping! Before we can swirl that gorgeous caramel, we need to make sure we have everything set aside. I always lay out my ingredients on the counter first—it saves so much hassle when you’re already excited to start mixing. Having everything measured and ready keeps that flow going smoothly, which is vital for a **Homemade Turtle Cheesecake**!
Pecan Crust and Filling Components
Get yourself ready for 12 servings of pure joy with these basics. Remember, the quality of your cream cheese really matters here since it’s the bulk of the dish. Check your list twice, especially for the fresh items!
- 1 1/2 cups chocolate wafer crumbs (Yep, those dark ones!)
- 1/4 cup granulated sugar (For the crust)
- 6 tablespoons unsalted butter, melted
- 24 ounces cream cheese, softened (This is key—let it sit out until it’s totally yieldy!)
- 1 1/2 cups granulated sugar (For the filling part)
- 1/4 cup all-purpose flour
- 1 teaspoon vanilla extract
- 1/4 teaspoon salt
- 4 large eggs (Make sure they are room temperature too!)
- 1/2 cup sour cream
- 1/2 cup semi-sweet chocolate chips, melted
- 1 cup salted caramel sauce (You can use your favorite store-bought jar or whip up a batch yourself!)
- 1 cup pecan halves, toasted
Step by Step Cheesecake Baking: Crafting the turtle cheesecake
Alright, this is where we turn ingredients into magic! Get your game face on because we are making the ultimate **turtle cheesecake**. Don’t let the steps scare you; we take this slow and steady, which is how we nail that perfect creamy texture every time. Follow these steps precisely, and you’ll have satisfied everyone who takes a bite—and you can find more of my favorite foolproof baking guides here: best dessert recipes!
Preparing the Crust and Water Bath Setup
First things first: Preheat your oven to 325°F (160°C). Now, this is important for the water bath later, so don’t skip it: wrap the outside of your 9-inch springform pan tightly in heavy-duty aluminum foil. I usually go for two or three layers to make sure no water sneaks in! For the crust, just mix those chocolate wafers, the first bit of sugar, and melted butter until it feels like damp sand. Press that firmly into the bottom of your pan—really pack it down well—and bake it for just 10 minutes. Let it cool for a minute while you mix the filling.
Creating the Decadent Filling and Swirling Technique
In your biggest bowl, beat that softened cream cheese with the rest of the sugar, flour, vanilla, and salt until it looks totally smooth. Then, beat in your eggs one at a time. I mean it: one at a time, mixing just enough to incorporate each one before adding the next. Overmixing eggs is how cracks happen! Once the sour cream is mixed in, we layer. Pour half the batter over the crust, then drizzle half your melted chocolate and half your caramel sauce. Use a knife to gently swirl those stripes—this is what makes it stunningly beautiful, our perfect **Caramel Swirl Cheesecake**.
Repeat with the remaining batter, chocolate, caramel, and half your toasted pecans sprinkled on top!
Baking, Cooling, and Chilling the turtle cheesecake
Time for the water bath! Place that foil-wrapped pan inside a larger roasting pan. Carefully pour hot water into the big pan until it just reaches halfway up the side of your springform pan. Bake this whole setup for about 60 to 75 minutes. You’re aiming for edges that look set, but the very center should still have a slight wobble. When it looks done, turn the oven OFF, prop the door open just an inch, and let it chill in that warm oven for a full hour. Seriously, don’t cheat this step! Then, cool it completely on the counter before covering it up tight and putting it in the fridge for at least six hours, but overnight? That’s the secret handshake for the creamiest **turtle cheesecake** of your life!
Tips for Success with Your turtle cheesecake
Making a dessert this glorious can feel intimidating, but these little tricks I snagged from years of making this **turtle cheesecake** mean you won’t sweat the small stuff. I want you to succeed, so listen up for my best advice on getting it out perfectly and making those pecans perfect!
First off, getting it out of the pan without disaster? That’s important! Even though we used lots of foil, sometimes the edges cling. Before you even think about unlatching that springform, run a really thin knife—one of those offset spatulas works great—around the entire edge. This little move breaks the seal and helps the cheesecake release cleanly when you unclip the sides. Don’t scratch the sides of the pan, just gently guide the knife between the cake and the metal.
Also, don’t forget the pecans! You want them toasted, not burnt, for the best flavor burst on top. Spread them in a single layer on a baking sheet and pop them into a 350°F oven for just 5 to 8 minutes. You have to watch them like a hawk because nuts go from perfect to charcoal in about 30 seconds flat. Once they smell amazing and look lightly golden, pull them out immediately!
Simple Variations for Your turtle cheesecake
I love that this recipe is flexible! While I am totally devoted to the baked version for that rich, dense feel, I totally get it—sometimes you just don’t want to use the oven, especially in the summer. Or maybe you need individual servings for a party! This **turtle cheesecake** is ready to adapt to your schedule.
If you’re trying to avoid the oven or just want something quicker, look into making a **No Bake Turtle Cheesecake Recipe**. The swap is pretty straight-forward! You still use the chocolate wafer crust, but we skip the baking time entirely. For the filling, you skip the eggs and sour cream. Instead, you whip up some heavy cream until it forms stiff peaks, then fold that into the cream cheese mixture along with your chocolate and caramel. It chills up beautifully firm and tastes just as luxurious. It’s a winner for a quick fix!
Another amazing way to serve this up? Think small! You can totally adapt this to be a **Mini Cheesecakes Recipe**. Instead of that big springform pan, line a standard muffin tin with cupcake liners. You only need about two tablespoons of crust mixture for each spot, and the filling time gets much shorter, usually around 15 to 20 minutes of baking time. These little guys are perfect grab-and-go treats for parties. You get all that amazing chocolate, caramel, and pecan flavor, but portion-controlled! You can find other great shortcuts and tips in my collection of essential recipes here: best dessert recipes.
Serving Suggestions for This Indulgent Sweet Treats
Wow, you made it! You have this towering, glorious **turtle cheesecake** ready to go. Now we have to decide how to serve this masterpiece. Since we’re dealing with one of the most **Indulgent Sweet Treats** imaginable—seriously, it’s chocolate, caramel, AND nuts on cream cheese—you really need things on the side that can cut through that richness without competing. Heavy desserts need a lighter friend on the plate!
The absolute best pairing, in my opinion, is a hot drink. A strong, freshly brewed dark roast coffee or a rich espresso is just perfect. The slight bitterness of the coffee cleanses your palate between bites of that sweet caramel swirl. It’s a match made in heaven, and my go-to for an after-dinner treat.
If you want something totally non-alcoholic, or if you are serving it midday, you need brightness. Forget heavy sauces! Think about a simple, super-fresh fruit salad. Strawberries, raspberries, maybe some tart green grapes—the acidity from the berries works wonders against all that brown sugar goodness. Just a small side scoop of fruit next to a slice of chilled cheesecake makes the whole thing feel slightly more balanced. And if you’re looking for something to sip alongside it, check out some of my favorite recipes for pairing drinks—I have a great section on cocktails and mocktails here: drink cocktail recipes.
One huge tip: always serve this chilled. It’s so much better when the cheesecake is firm from the fridge. When it warms up too much, that luscious filling can get a little too soft and heavy. Keep it cold, serve it quickly, and make sure everyone gets a little extra drizzle of caramel on top just before they dig in!
Storage and Reheating Instructions for Leftover turtle cheesecake
Oh boy, if you happen to have leftovers of this **turtle cheesecake**—which, honestly, only happens at my house if I hide a slice immediately—proper storage is how we keep that creamy perfection intact. This is definitely not a dessert you want to reheat, so we are focusing entirely on keeping it perfectly chilled and fresh!
Cheesecake is one of those desserts that actually benefits from being thoroughly chilled. Once you let it set overnight like I told you to, it firms up beautifully, which gives you those clean slices later. When you want to store the leftovers, cover the entire cheesecake tightly with plastic wrap. Make sure that wrap isn’t touching the top, especially if you added an extra caramel drizzle or nuts right before serving; we don’t want anything sticking or getting gooey unnecessarily. Pop it straight into the refrigerator.
It keeps really well, too! You can expect your **Homemade Turtle Cheesecake** to taste fantastic—almost as good as day one—for about four to five days in the fridge. Just keep it covered. When you’re ready for another slice, take it out about 15 minutes before serving. This lets it warm up just slightly from fridge-cold to perfectly chilled-and-creamy temperature, so you get the absolute best texture without it getting soft.
Now, about reheating: please, please don’t try to microwave or bake this again! Cheesecakes are based on eggs and dairy, and heating them up again just ruins that lovely, smooth texture, usually making them weep or get grainy. Trust me, the best way to enjoy second helpings is cold, straight from that chilly fridge!
Frequently Asked Questions About turtle cheesecake
I know you might have some last-minute worries, especially if this is your first time tackling a big, beautiful baked cheesecake! That’s totally normal. Baking is all about confidence, and answering these questions is my way of making sure you feel totally prepared to tackle this **Salted Caramel Cheesecake**.
Can I make the Salted Caramel Cheesecake topping ahead of time?
Absolutely, and I highly recommend it! If you’re using homemade caramel sauce, making it a day or two beforehand is actually a huge time saver on baking day. It needs to cool down completely anyway before you swirl it into the batter. Just store your caramel tightly sealed in the fridge. If you’re using store-bought, well, that’s already done for you! This just makes the final construction of your **Chocolate Caramel Pecan Dessert** so much smoother.
What is the secret to avoiding cracks in my baked turtle cheesecake?
If you followed my instructions, you’ve already got two of the biggest secrets nailed down: the water bath and the slow cool-down. The water bath is your shield against aggressive, uneven heat, keeping the environment steamy and gentle. But honestly, the patience required after baking is non-negotiable! Don’t panic when you pull it out; leave that door propped open and let it sit in the oven for that full hour. This gradual temperature decrease is how we avoid that terrible shrinking and cracking that makes bakers cry. It’s all about treating this **Rich Creamy Desserts** base with respect!
Is this considered a Holiday Cheesecake Ideas favorite?
Oh, without a doubt! If you are trying to figure out **Holiday Cheesecake Ideas** that will really wow your guests, you absolutely have to try this one. It looks incredibly sophisticated sitting on a dessert table—and since it has chocolate, nuts, and caramel, it feels celebratory! Since it needs that long chill time, it’s actually perfect for making a day before a big holiday meal. You do the work early, and then you just have to pull it out and admire it later!
Share Your Decadent Cheesecake Recipe Creations
Now that you have successfully navigated this journey to the ultimate **turtle cheesecake**, I really, truly want to hear all about it! That’s the best part of sharing recipes like this—seeing your amazing successes and the beautiful things you create in your own kitchens.
Did the swirl turn out exactly how you envisioned it? Did your family fight over the last slice? Seriously, please come back here and leave a rating and a quick comment explaining how it went for you. Knowing that someone else felt that rush of accomplishment after baking this **Decadent Cheesecake Recipe** makes all my testing worth it!
I love building this community around reliable, delicious food, and your feedback helps future bakers feel confident that they, too, can master this dessert. If you’ve got a picture, tag me on social media so I can see your gorgeous work! I can’t wait to read your thoughts, or feel free to browse my own story and mission here: about page. Happy baking, friends!
PrintUltimate Baked Turtle Cheesecake with Salted Caramel Swirl
Make this rich, creamy baked Turtle Cheesecake featuring a pecan crust, chocolate, salted caramel swirl, and toasted pecans. This recipe provides clear steps for an indulgent dessert perfect for special occasions.
- Prep Time: 30 min
- Cook Time: 75 min
- Total Time: 105 min
- Yield: 12 servings 1x
- Category: Dessert
- Method: Baking
- Cuisine: American
- Diet: Vegetarian
Ingredients
- 1 1/2 cups chocolate wafer crumbs
- 1/4 cup granulated sugar
- 6 tablespoons unsalted butter, melted
- 24 ounces cream cheese, softened
- 1 1/2 cups granulated sugar
- 1/4 cup all-purpose flour
- 1 teaspoon vanilla extract
- 1/4 teaspoon salt
- 4 large eggs
- 1/2 cup sour cream
- 1/2 cup semi-sweet chocolate chips, melted
- 1 cup salted caramel sauce (store-bought or homemade)
- 1 cup pecan halves, toasted
Instructions
- Preheat your oven to 325°F (160°C). Wrap the outside of a 9-inch springform pan tightly with heavy-duty aluminum foil.
- Prepare the crust: Mix chocolate wafer crumbs, 1/4 cup sugar, and melted butter until combined. Press the mixture firmly into the bottom of the prepared springform pan. Bake for 10 minutes. Let cool slightly.
- Prepare the filling: In a large bowl, beat the softened cream cheese, 1 1/2 cups sugar, flour, vanilla extract, and salt until smooth. Beat in the eggs one at a time, mixing just until combined after each addition. Mix in the sour cream.
- Pour half of the cream cheese mixture over the cooled crust. Drizzle half of the melted chocolate chips and half of the salted caramel sauce over the batter. Gently swirl with a knife.
- Pour the remaining cream cheese mixture over the top. Repeat the drizzle and swirl with the remaining chocolate chips and caramel sauce. Sprinkle half of the toasted pecans over the top.
- Place the foil-wrapped springform pan into a larger roasting pan. Carefully pour hot water into the roasting pan until it reaches halfway up the sides of the springform pan (this creates a water bath).
- Bake for 60 to 75 minutes, or until the edges are set but the center still jiggles slightly.
- Turn off the oven, prop the door open slightly, and let the cheesecake cool in the oven for 1 hour.
- Remove the cheesecake from the water bath and let it cool completely on a wire rack. Once cool, cover and refrigerate for at least 6 hours, or preferably overnight.
- Before serving, top the chilled cheesecake with the remaining toasted pecans and an extra drizzle of salted caramel sauce, if desired. Release the springform sides carefully.
Notes
- For a clean release, run a thin knife around the edge of the cheesecake before releasing the springform sides.
- To toast pecans, spread them on a baking sheet and bake at 350°F (175°C) for 5 to 8 minutes, watching closely to prevent burning.
- If you prefer a no-bake version, skip the oven steps. Chill the crust for 30 minutes. Mix the filling ingredients (omitting eggs and sour cream, using 1 cup heavy cream whipped to stiff peaks instead of sour cream), pour over the crust, and chill for 8 hours.
Nutrition
- Serving Size: 1 slice
- Calories: 550
- Sugar: 45g
- Sodium: 350mg
- Fat: 38g
- Saturated Fat: 20g
- Unsaturated Fat: 18g
- Trans Fat: 0.5g
- Carbohydrates: 50g
- Fiber: 2g
- Protein: 10g
- Cholesterol: 110mg