
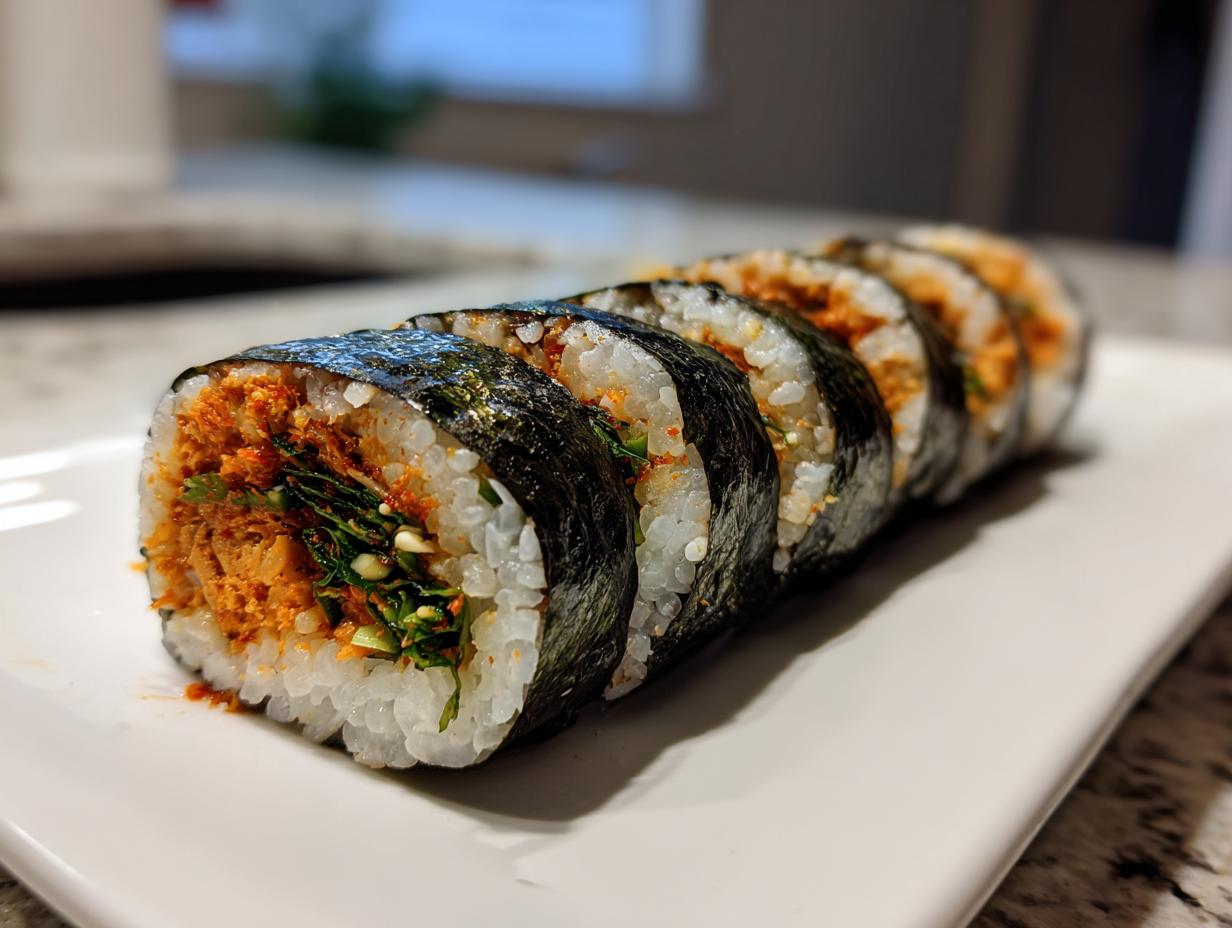
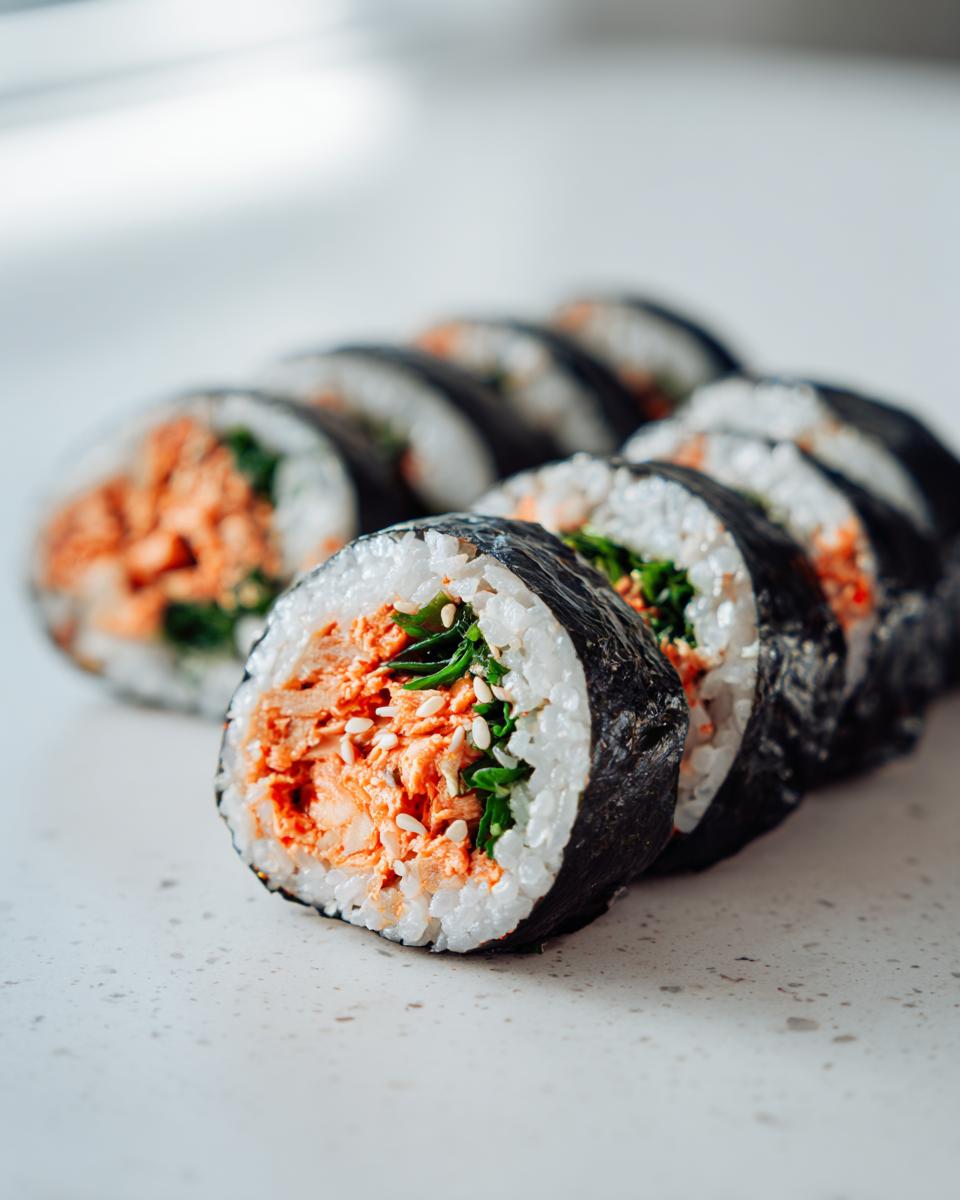
Are you ever in the mood for something incredibly fresh, vibrant, and bursting with flavor, but you only have about fifteen minutes? I totally get it! That rush for authentic Korean food without the takeout wait led me to perfect the absolute easiest recipe for homemade tuna kimbap. Forget those dry, sad versions you grab at the grocery store; these are wonderfully moist and satisfying. This recipe leans into the popular spicy version, which we sometimes call Chamchi Kimbap, thanks to a quick, zesty tuna mayo filling. As always here at Kings Cook, my goal is to bring you reliable, simple recipes that make you feel confident, and trust me, this batch of tuna kimbap delivers royal flavor in record time.
- Why This Easy Tuna Kimbap Recipe Beats Store-Bought
- Gathering Your Ingredients for Homemade Tuna Kimbap
- Step-by-Step Instructions: How to Make Tuna Kimbap at Home
- Expert Tips for Perfect Tuna Kimbap Rolling Technique
- Serving Suggestions for Your Tuna Kimbap
- Storage and Make Ahead Tips for Tuna Kimbap Snacks
- Frequently Asked Questions About Making Tuna Kimbap
- Nutritional Snapshot of Your Homemade Tuna Kimbap
- Share Your Homemade Korean Seaweed Rice Rolls Creations
Why This Easy Tuna Kimbap Recipe Beats Store-Bought
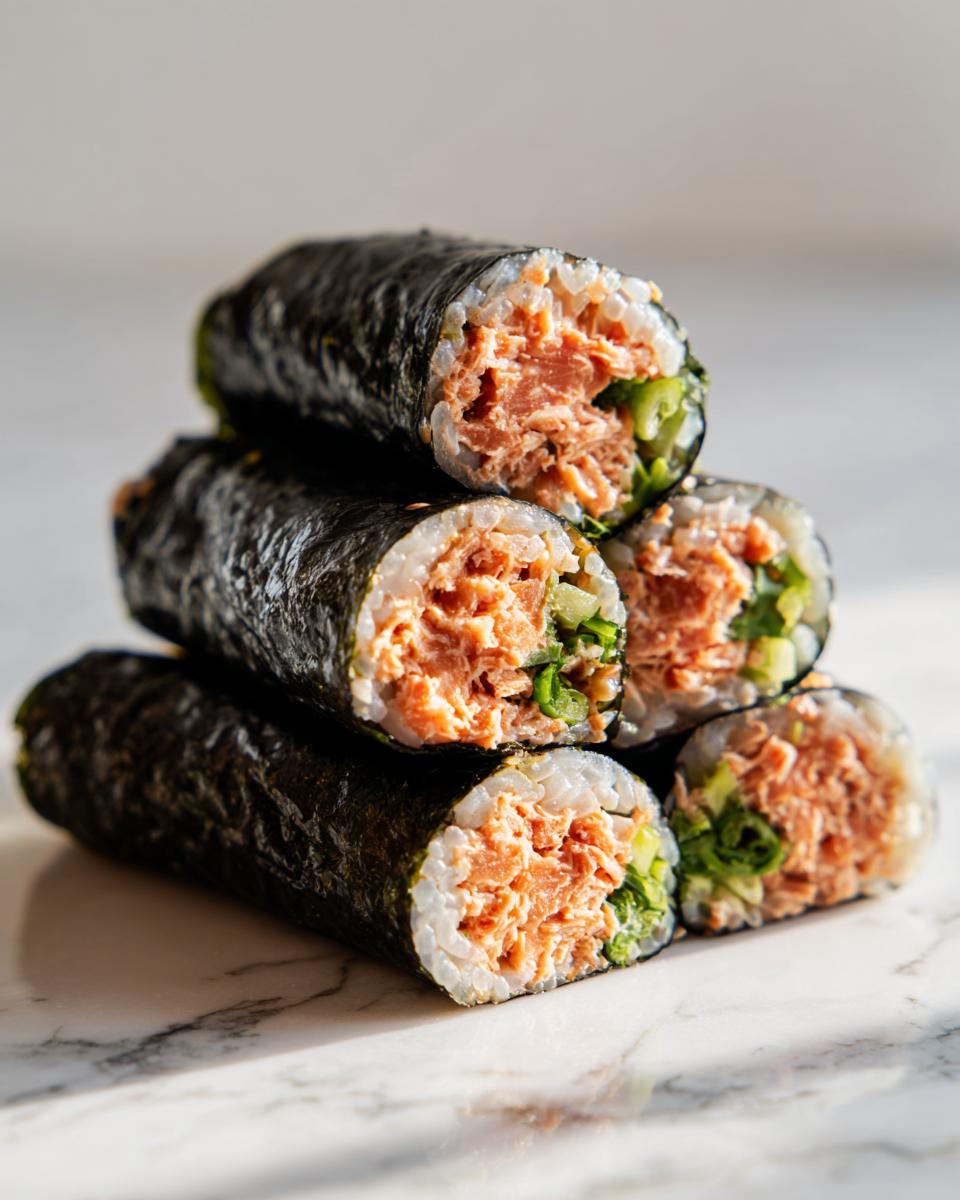
Honestly, once you make your own tuna kimbap, you’ll never go back to the pre-packaged stuff. Why? Because homemade tastes fresher, it’s packed exactly how *you* like it, and you keep that scary sodium count way down. It’s amazing how much flavor you get for minimal effort!
Quick Prep Time for Perfect Tuna Kimbap
This is the beauty of using pre-cooked rice—we’re talking about these amazing Quick Korean Seaweed Rice Rolls being ready in about 15 minutes total. We aren’t messing around with cooking vegetables here; you mix the filling and roll! That speed is why this is my go-to when a craving hits.
Customizing Your Spicy Mayo Tuna Filling
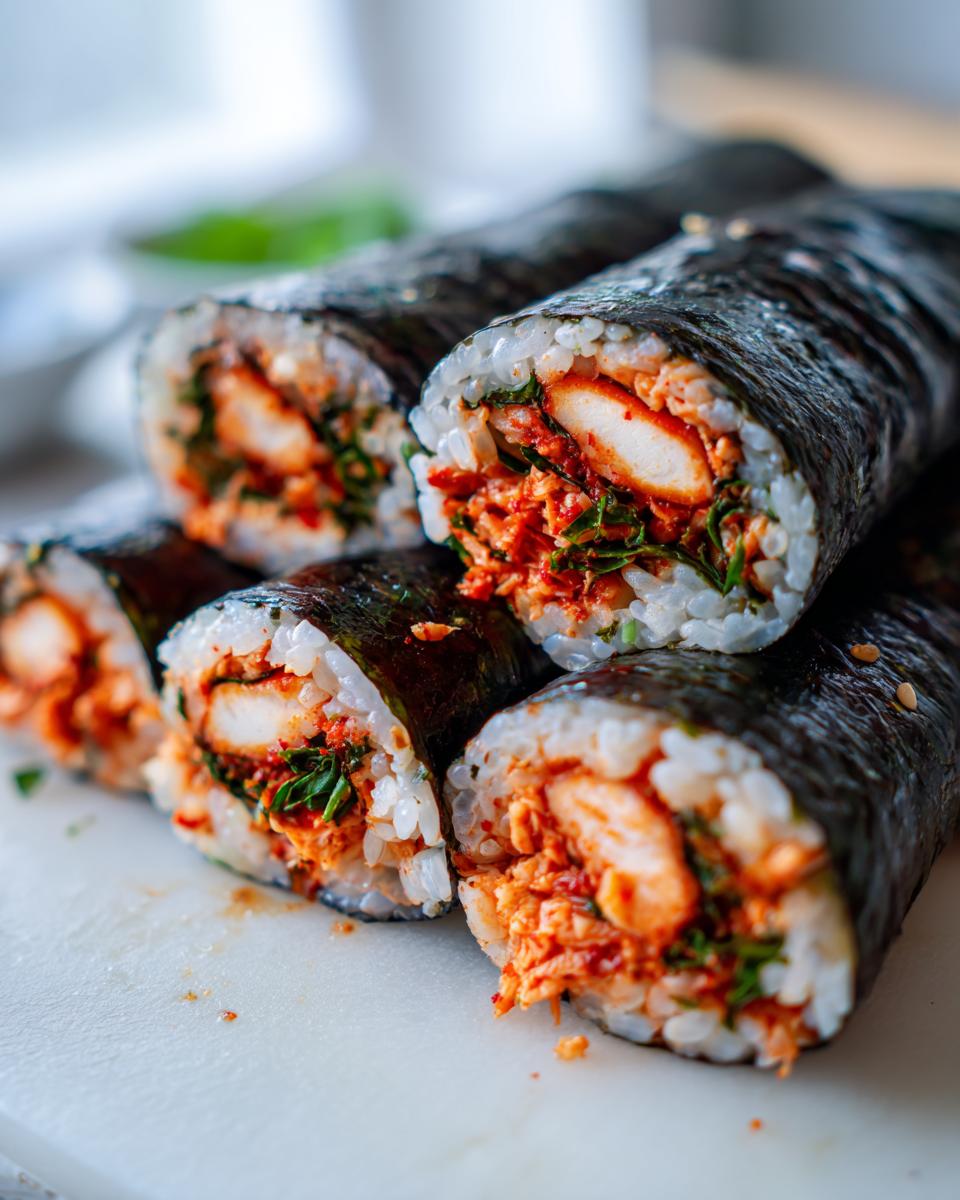
If you crave that delicious kick, my recipe gives you the perfect heat using sriracha, but you are totally in charge. Skip it entirely, and you have a classic Chamchi Kimbap instantly! I always recommend using Japanese mayonnaise, like Kewpie, because that little bit of extra tang makes the entire filling sing.
Gathering Your Ingredients for Homemade Tuna Kimbap
Since this recipe is so fast, the prep work is mostly getting your ingredients lined up, which is half the fun! Grab everything you need—the rice, the tuna, the greens, and the seaweed wraps. Don’t stress if you don’t have every single optional veggie; the core flavor here lives in that amazing tuna salad, making for a truly Easy Tuna Kimbap Recipe.
Ingredient Notes and Substitutions for Tuna Kimbap
When it comes to the mayo, please, please try to find the Japanese mayonnaise. It’s richer and slightly sweeter than the standard stuff, and it just makes the Spicy Mayo Tuna Filling so much better. If you absolutely cannot find it, regular mayo works, but you might want to add just a tiny splash of rice vinegar to brighten it up.
Now, about those perilla leaves—they give a really unique, almost minty, herbal scent that screams authentic when you bite in. If you are struggling to find them, don’t panic! You can skip them, or for a nice, crisp texture, substitute a few strips of crisp, cold cucumber right in the center. It won’t be *exactly* the same, but it keeps the roll fresh and delicious!
Step-by-Step Instructions: How to Make Tuna Kimbap at Home
Breaking down the process is what takes this from a project to a 15-minute meal, I promise. We start with making sure our rice is perfectly seasoned—that’s where 90% of the flavor of any good tuna kimbap comes from! Once that’s done, the assembly is super fast. We’re aiming for tight rolls that hold up well when you slice them.
Preparing the Seasoned Rice for Your Tuna Kimbap
First things first, you must use short-grain rice. If you use long-grain rice, it just won’t stick together correctly when you try to roll it, and we want that perfect, slightly sticky texture that holds all our fillings in place. While the rice is still warm—not piping hot, just warm—toss it into a bowl. Now, add your sesame oil, your little sprinkle of sesame seeds, and the salt. Use a spatula or wooden spoon to gently cut and fold everything together. You don’t want to smash those grains! Just mix until everything is evenly distributed. Set this aside to cool slightly while you mix up that spicy filling.
Assembling and Rolling the Spicy Tuna Kimbap Rolls
Lay your bamboo rolling mat down, and place one sheet of nori, shiny side down, on top. Now, take about half of your seasoned rice and spread it out evenly over the seaweed. You need to leave about an inch bare at the very top edge of the nori sheet—that’s the seal! Next, lay down your perilla leaves right down the middle. Then, right over those leaves, spoon your mixed-up spicy tuna filling into a neat line across the center. Don’t overfill, or it’ll squish out later when you roll it. This is where the Korean Lunch Box Food magic happens!
Okay, time to roll! Start at the bottom edge closest to you and gently lift the mat, tucking the edge of the nori over the filling. Roll it tight, pressing down as you go to compact everything. When you get to that bare strip of seaweed on the top, just dab a tiny bit of water on it with your finger—it acts like glue! Finish the roll and give it one final, gentle squeeze in the mat to set the shape. Repeat for the second roll. Seriously, mastering the art of spicy tuna kimbap rolls is all about firm, consistent pressure!
Expert Tips for Perfect Tuna Kimbap Rolling Technique
Listen, the rolling part is where most people get wiggly rolls, and nobody wants a floppy piece of tuna kimbap! The secret here is threefold: even rice coverage, firm tension, and a sharp, damp knife. When you spread the rice, make absolutely sure you aren’t pressing too hard; you want it fluffy enough to stick to itself but not mashed. Remember that 1-inch bare section at the top? Make sure that seal is good and moist so it doesn’t unroll halfway through its journey to your mouth.
For the tightest roll—which helps keep everything neat when you slice—picture yourself tucking everything in snugly before you apply the final roll pressure. We want compact cylinders, not loose logs!
And here is one of my best tricks: after rolling both wraps, brush the outside lightly with sesame oil and wrap each whole roll tightly in plastic wrap for about five minutes before you cut them. That plastic wrap acts like a temporary corset, setting the shape perfectly! When you slice, wipe your knife with a damp towel between every couple of cuts; that stops the rice from sticking and tearing the delicate seaweed. It’s these little touches that truly perfect your tuna kimbap presentation.
Check out this great guide on mastering the art of spicy tuna kimbap rolls for even more visual help if you need it!
Serving Suggestions for Your Tuna Kimbap
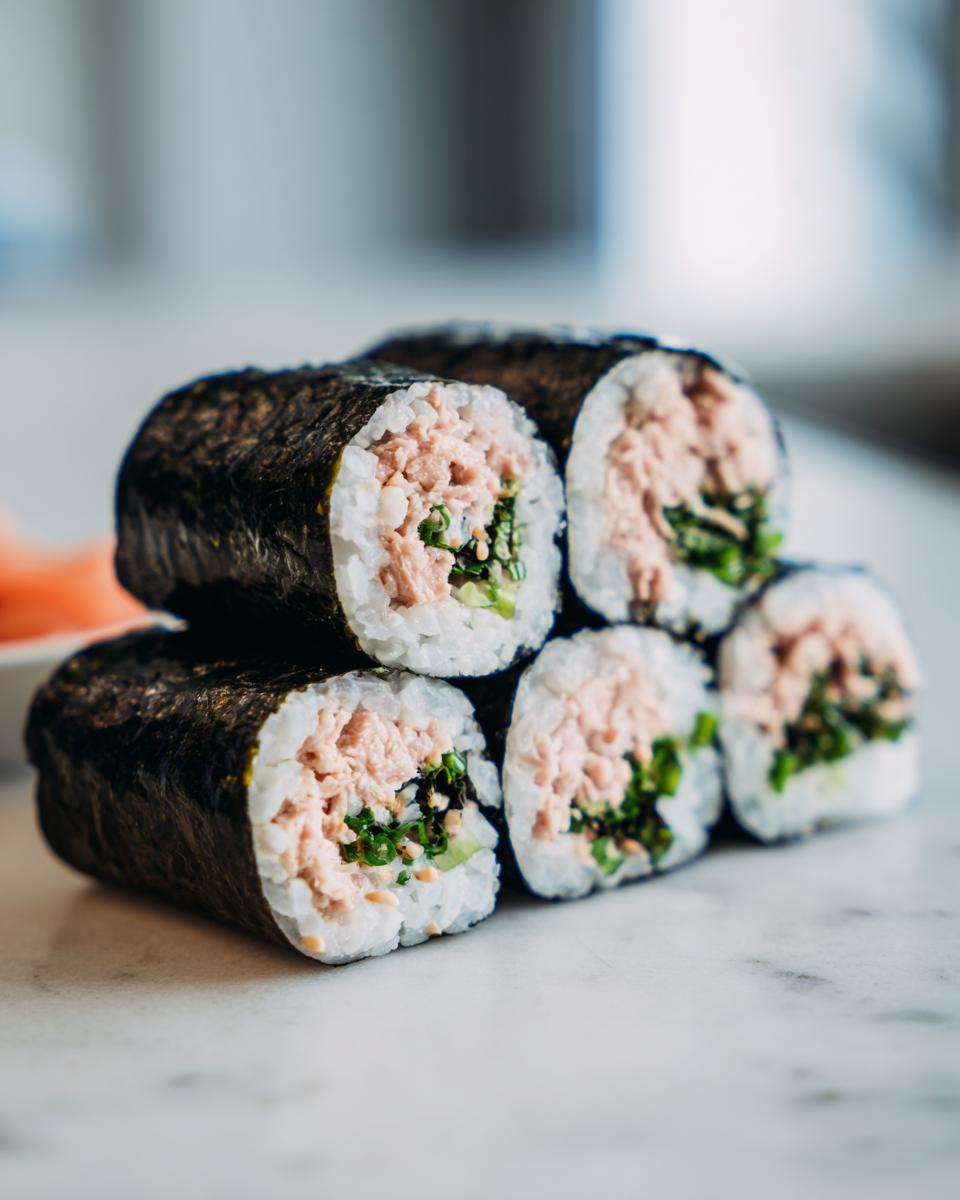
So, you’ve got two beautiful rolls of fresh tuna kimbap sitting there—what do you serve them with? Since these are so fantastic for snack time or packed lunches, you don’t need a huge spread. For dipping, a tiny bit of soy sauce mixed with a few drops of vinegar is perfect, or you can totally stick to the classic plain.
If you’re making these for a family meal or bringing them as part of a spread, they are stellar next to some quick kimchi or maybe even my recipe for creamy chickpea dip if you want a non-Korean side! They make unbeatable Korean Lunch Box Food because they are firm, easy to eat cold, and last well for hours.
Storage and Make Ahead Tips for Tuna Kimbap Snacks
One of my favorite things about these tuna kimbap rolls, besides how fast they come together, is that they are actually perfect for making ahead! This makes them superstar Make Ahead Kimbap Snacks, especially if you’re prepping lunches for the week or organizing food for a picnic. Remember that little trick I mentioned earlier about wrapping them tightly in plastic wrap? That doesn’t just help slicing; it keeps them fresh!
You can definitely make these rolls a few hours ahead of time—say, in the morning before work or school. They hold up great in the refrigerator in that tight plastic wrap. I find that they are best eaten the same day, but they hold up well for up to 24 hours. Any longer, and the seaweed starts to get a little chewy, which we definitely want to avoid! If you want to learn more about keeping your food ready for busy days, check out my make ahead snacks guide.
Frequently Asked Questions About Making Tuna Kimbap
When you’re diving into a new recipe like this delicious tuna kimbap, questions always pop up! I’ve gathered the ones I get asked most often about ingredients and technique. Hopefully, this helps clear up any last-minute concerns so you can get rolling!
Can I make Tuna Kimbap without cooking the rice?
Oh, honey, no, you really can’t! Cooking the rice is non-negotiable for fantastic tuna kimbap. You need short-grain white rice—often labeled as sushi rice—because it has the perfect starch content to get that sticky, pliable texture. If you use long-grain rice, it won’t stick together when you season and roll it, and your beautiful roll will just fall apart when you try to slice it. Trust me on this one; taking the time to cook the rice correctly is essential for structure!
What is the difference between Chamchi Kimbap and Spicy Tuna Kimbap Rolls?
This is a great question for understanding Korean menus! Chamchi Gimbap just means “Tuna Kimbap.” It’s the umbrella term. What we made here is the incredibly popular, modern, Americanized spicy version that uses sriracha and mayo. A more traditional or classic Chamchi Gimbap often skips the heat entirely and sometimes just uses tuna mixed with plain mayo, maybe some finely chopped onion, and fewer extras. So, if you want the original flavor, just skip the sriracha in the filling, and you’ve got the classic version!
Can I use regular mayonnaise instead of Japanese mayo in my Spicy Mayo Tuna Filling?
Yes, you certainly can, especially if you are putting together an Easy Tuna Kimbap Recipe in a pinch! Japanese mayonnaise, like Kewpie, has a flavor that is tangier and richer because it uses only egg yolks and often includes a touch of MSG or vinegar. It really deepens the flavor of the tuna mix. If you only have Hellmann’s or Duke’s on hand, go ahead and use it! It will still be delicious, but it will have a slightly less intense, milder taste profile.
Nutritional Snapshot of Your Homemade Tuna Kimbap
We all want food that tastes amazing, but knowing roughly what we are putting into our bodies is important too. Because this tuna kimbap recipe uses canned tuna and relies on rice and fresh fillings, it’s surprisingly balanced for a snack! Keep in mind that these numbers are just estimates, though, depending on which brand of tuna or mayo you use, so think of this as a fun general guide for your quick Korean seaweed rice rolls.
Per one roll (about 6 pieces), you are looking at roughly 350 calories, 15 grams of protein, and about 14 grams of fat. It’s a really satisfying snack that keeps you full without being overly heavy!
Share Your Homemade Korean Seaweed Rice Rolls Creations
Now comes the best part! I truly hope you enjoyed making this quick and flavorful tuna kimbap recipe. Did it turn out perfectly tight? Was your Spicy Mayo Tuna Filling just the right amount of heat for your family? Please take a moment to leave a rating below and let me know how it went! I absolutely love seeing your results, so tag me when you share photos of your beautiful Korean Seaweed Rice Rolls on social media!
Remember, we’re all learning and mastering our kitchens together here at Kings Cook. If you want to see more of my favorite easy weeknight meals, be sure to check out my About Page!
PrintEasy 15-Minute Spicy Tuna Kimbap (Chamchi Kimbap)
Make homemade Spicy Tuna Kimbap that beats store-bought versions. This quick Korean seaweed rice roll uses a flavorful, spicy tuna mayo filling and fresh vegetables, perfect for lunch boxes or easy snacks.
- Prep Time: 15 min
- Cook Time: 0 min
- Total Time: 15 min
- Yield: 2 rolls (about 12 pieces) 1x
- Category: Snack
- Method: Rolling
- Cuisine: Korean
- Diet: Vegetarian
Ingredients
- 2 cups cooked short grain rice
- 1 teaspoon sesame oil (for rice)
- 1 teaspoon sesame seeds (for rice)
- 1 teaspoon salt (for rice)
- 5.3 oz canned tuna in oil, drained
- 2 tablespoons green onion, very finely chopped
- 2 tablespoons Japanese mayonnaise (Kewpie recommended)
- 1 tablespoon sriracha sauce (adjust for spice level)
- 2 sheets nori or gim (roasted seaweed)
- 4 perilla leaves, washed and dried, stems removed
- 1/2 teaspoon sesame oil (for coating rolls)
- 1/2 teaspoon sesame seeds (for garnish)
- Optional filling: 1/2 cup shredded carrot, 1/2 cup cucumber strips
Instructions
- Prepare the seasoned rice: In a bowl, mix the cooked short grain rice with 1 teaspoon sesame oil, 1 teaspoon sesame seeds, and 1 teaspoon salt. Set aside.
- Make the spicy tuna filling: In a separate bowl, combine the drained canned tuna, chopped green onion, Japanese mayonnaise, and sriracha sauce. Mix well until fully combined. If using optional vegetables, mix them in now.
- Prepare the nori: Lay one sheet of nori, shiny side down, on a bamboo rolling mat.
- Layer the rice: Spread about half of the seasoned rice evenly over the nori, leaving a 1-inch border at the top edge.
- Add fillings: Place 2 perilla leaves over the rice. Spoon half of the spicy tuna mixture in a line across the center of the rice.
- Roll the kimbap: Starting from the bottom edge closest to you, tightly roll the mat, pressing gently to compact the filling. Moisten the top edge of the nori with a little water to seal the roll.
- Repeat the process for the second roll using the remaining ingredients.
- Finish the rolls: Brush the outside of each finished roll lightly with the remaining 1/2 teaspoon of sesame oil and sprinkle with sesame seeds.
- Slice the rolls: Use a sharp, damp knife to cut each roll into bite-sized pieces. Serve immediately or pack for a Korean lunch box snack.
Notes
- For a classic, non-spicy Chamchi Kimbap, omit the sriracha from the tuna mixture.
- If you do not have perilla leaves, you can substitute with a thin layer of pickled radish or skip this layer.
- To help the rolls slice cleanly, wrap the finished rolls tightly in plastic wrap for 5 minutes before cutting.
Nutrition
- Serving Size: 1 roll (6 pieces)
- Calories: 350
- Sugar: 3
- Sodium: 550
- Fat: 14
- Saturated Fat: 2
- Unsaturated Fat: 12
- Trans Fat: 0
- Carbohydrates: 45
- Fiber: 2
- Protein: 15
- Cholesterol: 30