
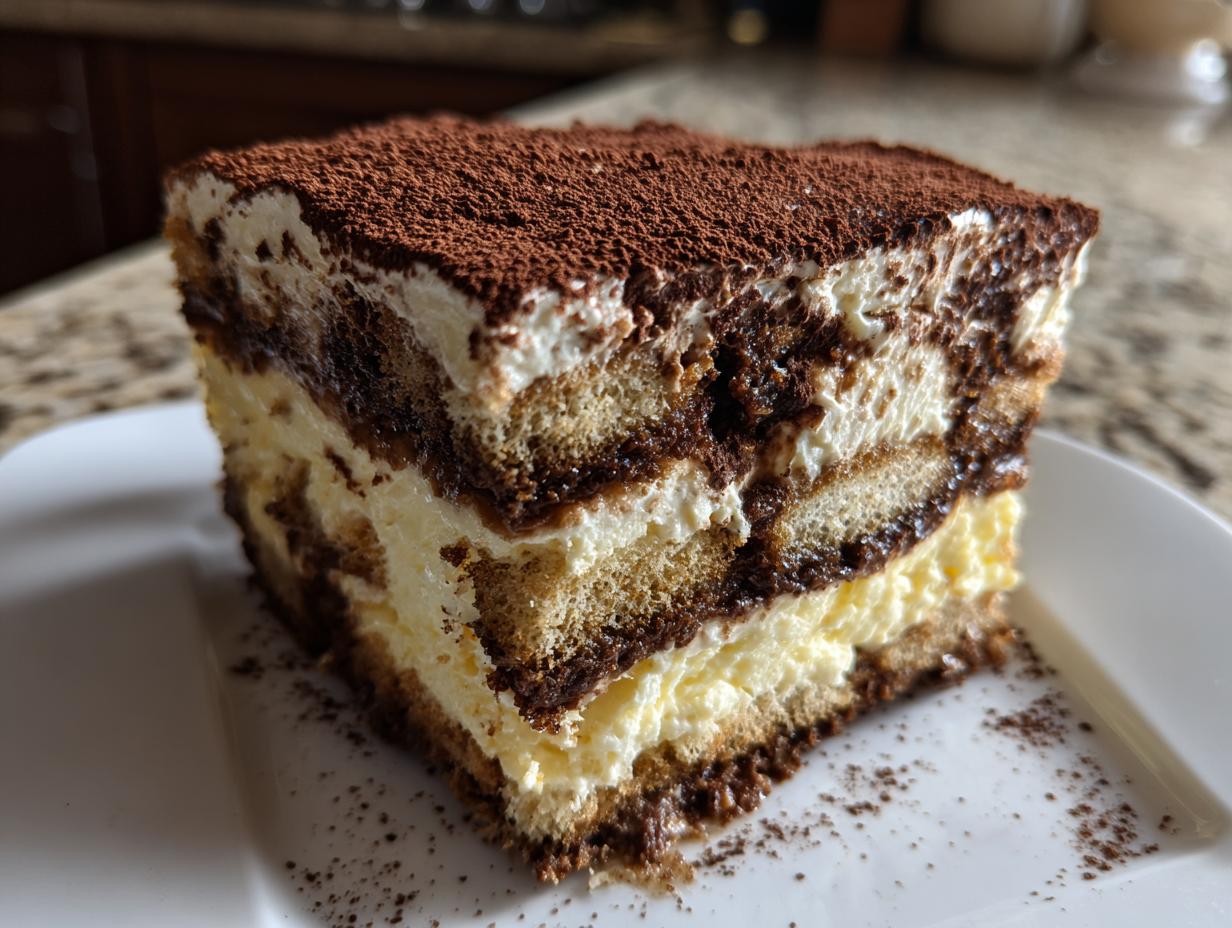
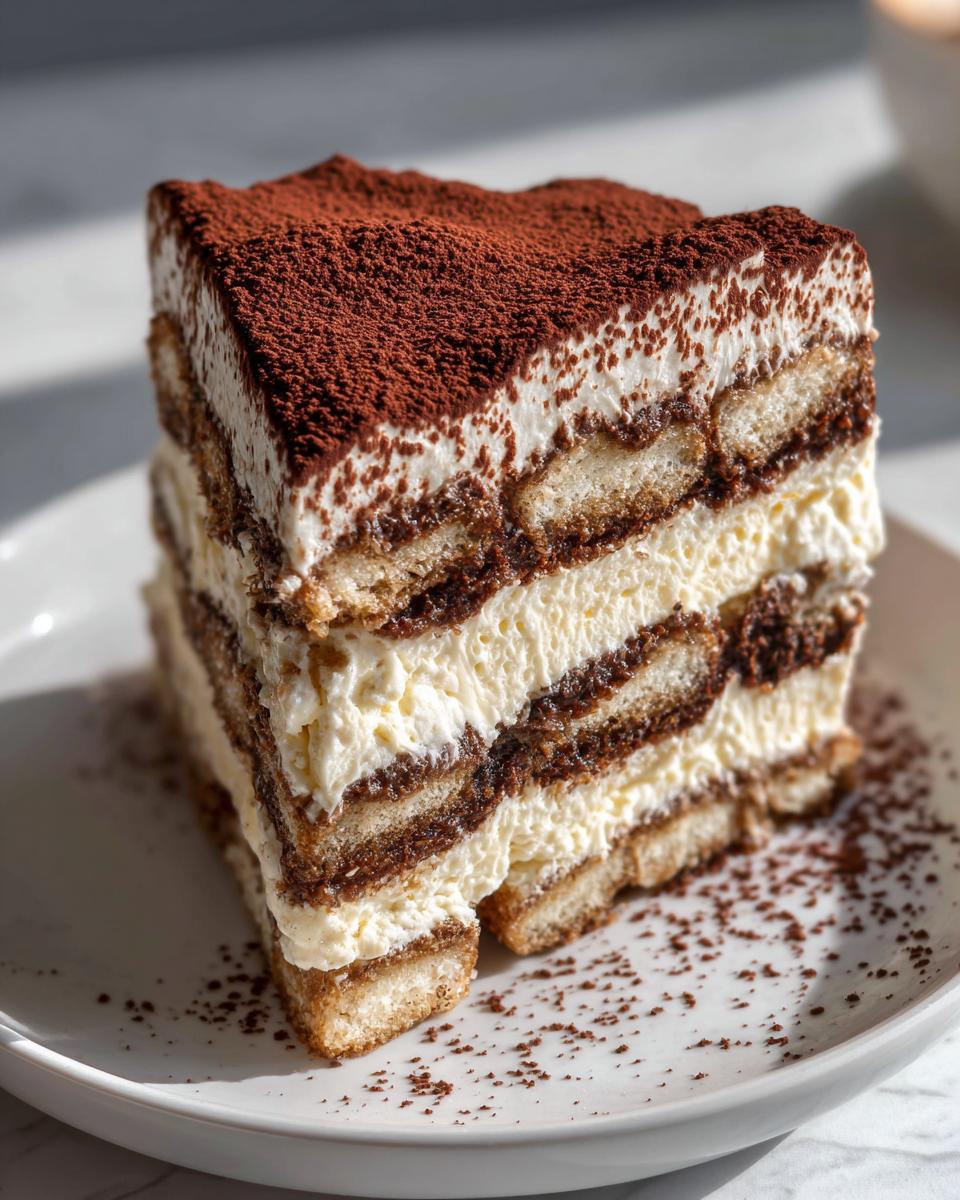
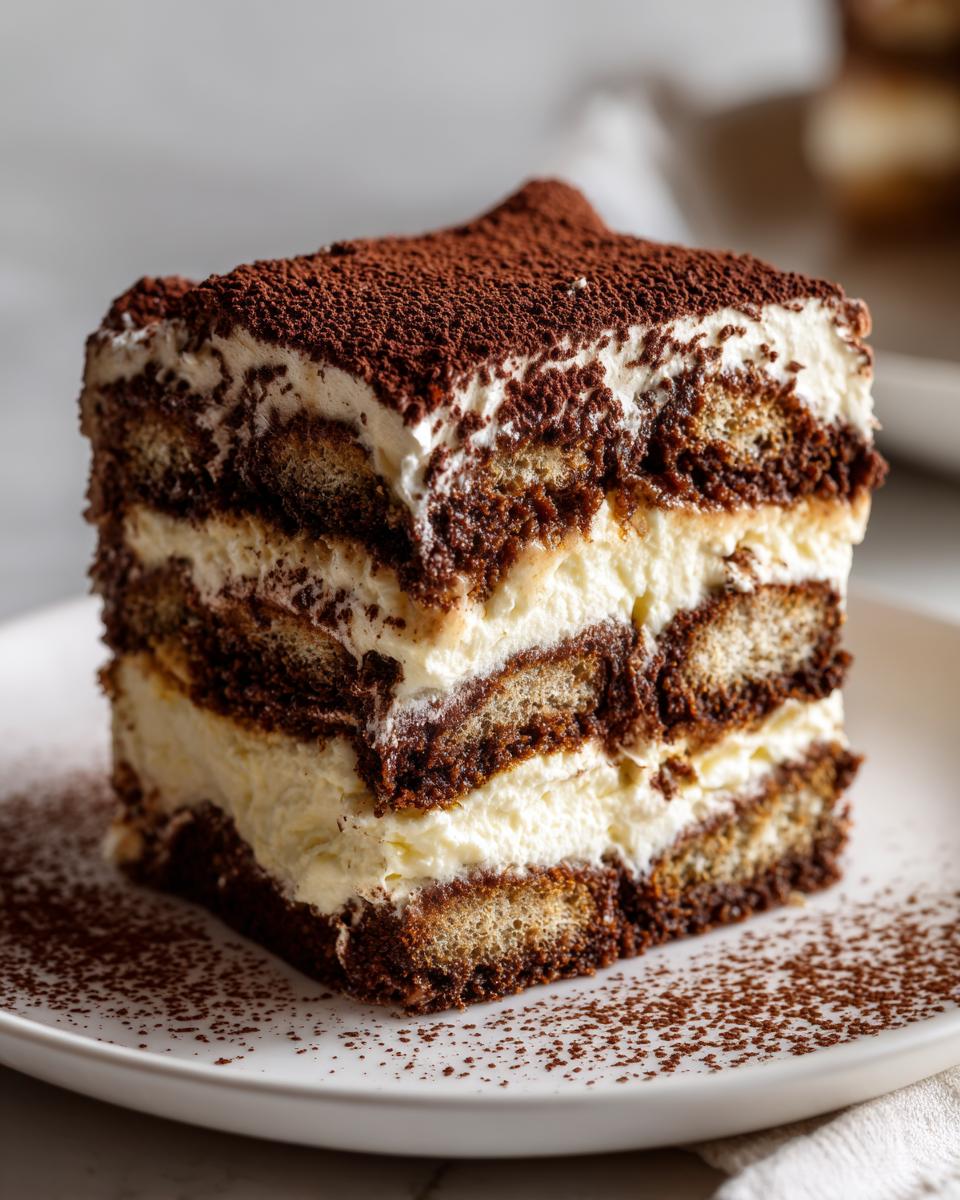
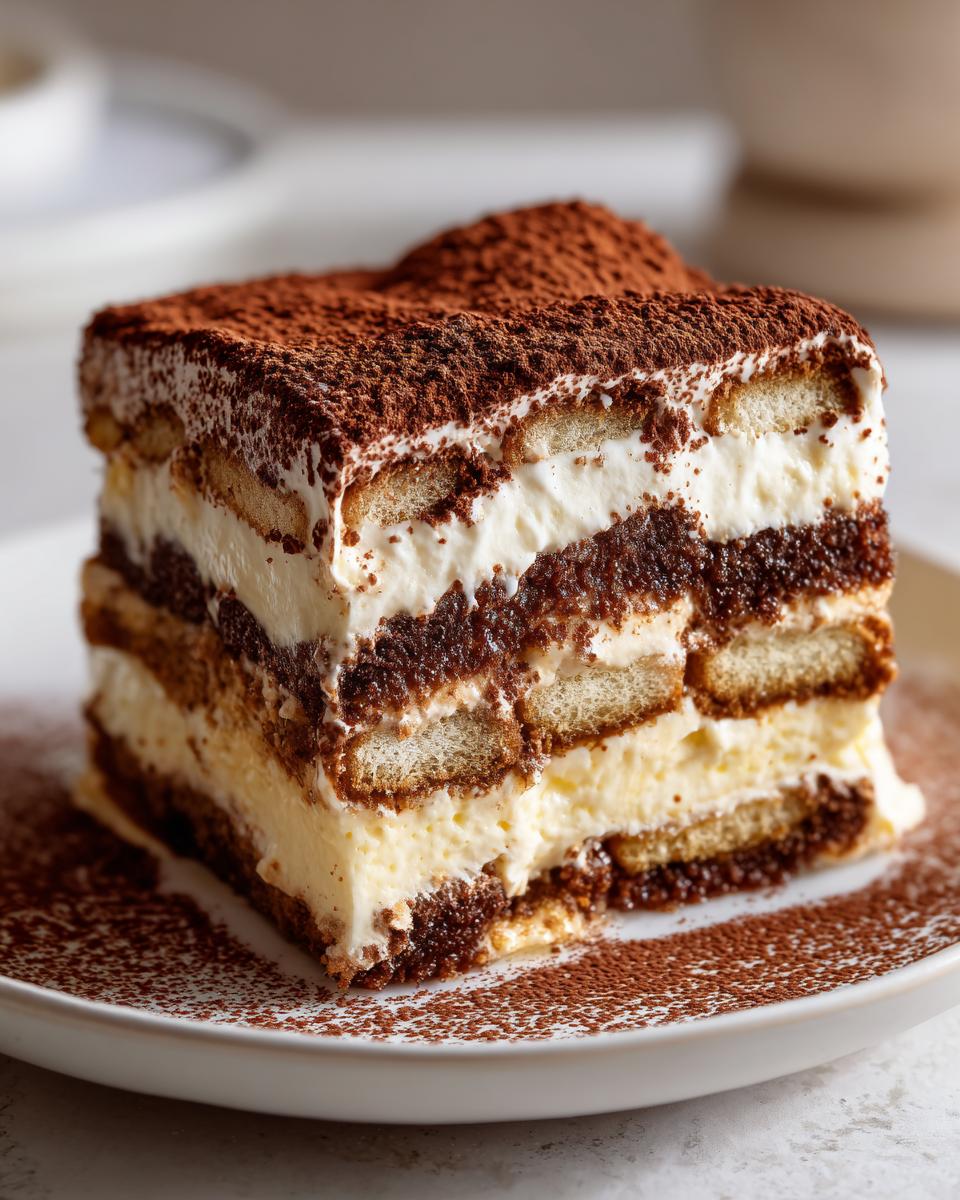
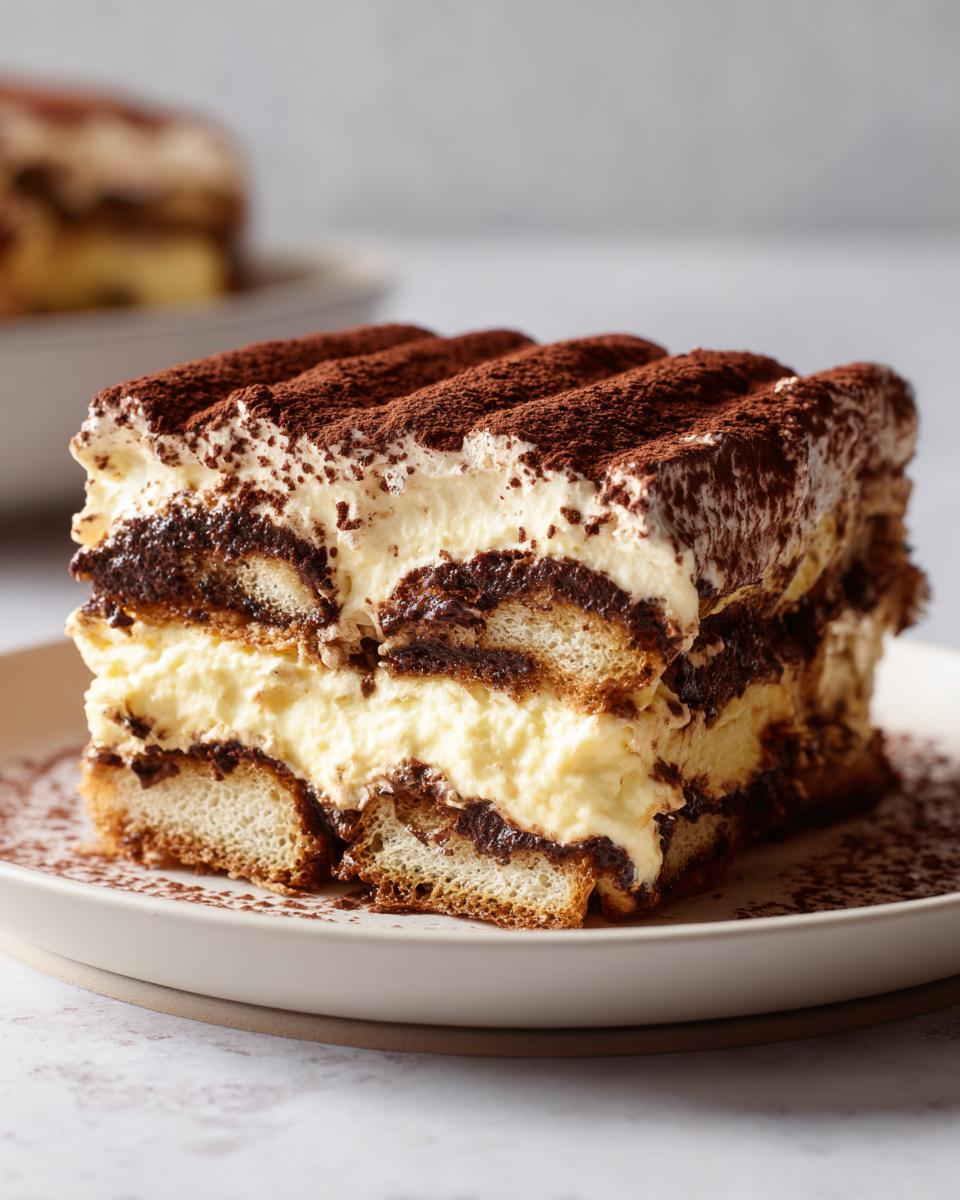
Oh my goodness, if you love those spectacular dessert mashups that feel way too fancy for your weeknight table, get ready! I’ve nailed down the recipe that combines the absolute best of two worlds: the deep, coffee-soaked romance of Tiramisu and the luxurious, creamy architecture of a classic cheesecake. I’m talking about the ultimate tiramisu cheesecake. I spent weeks testing this because I promised myself and you that any recipe here has to work every single time, and this no-bake version is unbelievably reliable.
Forget turning on that oven; we’re keeping things cool and focusing on that silky texture that just melts in your mouth. Trust me, this elegant dessert is going to be your new go-to for impressing everyone without any baking stress!
- Why This No Bake Tiramisu Cheesecake Recipe Works for You
- Essential Ingredients for Your Tiramisu Cheesecake Recipe
- Step-by-Step Instructions for No Bake Tiramisu Cheesecake
- Tips for the Best Creamy Cheesecake Experience
- Make Ahead Desserts: Storing Your Tiramisu Cheesecake
- Serving Suggestions for Your Decadent Dessert Recipes
- Variations: Baked Tiramisu Cheesecake and Kahlua Dessert Recipes
- Frequently Asked Questions About Tiramisu Cheesecake
- Estimated Nutritional Data for This Coffee Cheesecake
- Estimated Nutritional Data for This Coffee Cheesecake
Why This No Bake Tiramisu Cheesecake Recipe Works for You
I know life gets busy, and sometimes you want that luxury experience without the fuss of babysitting a water bath in the oven. That’s why this no bake tiramisu cheesecake is my absolute favorite!
It delivers on every promise: rich flavor, stunning presentation, and zero oven time. If you need a gorgeous make ahead dessert that tastes like it came from a fancy bakery, this is it.
- No More Oven Stress: Seriously, pop it in the fridge, and walk away! It sets up beautifully on its own, giving you back your precious evening.
- Unbeatable Texture: We’re hitting that sweet spot between the density you expect from a cheesecake and that airy fluffiness of traditional Italian desserts. It’s incredibly silky.
- Perfect for Parties: Since you make it ahead, you’re not scrambling to finish dessert when guests arrive. It’s ready to go from the fridge to the table!
A True Italian Inspired Desserts Fusion
What’s not to love? We pack it with bold, just-bitter-enough espresso soaking into those delicate ladyfingers, then layer it with a filling that boasts both tangy cream cheese and luxurious, sweet mascarpone. Finally, that dramatic dusting of cocoa powder at the end just seals the deal. It truly is the best combination of coffee and cream!
Essential Ingredients for Your Tiramisu Cheesecake Recipe
Okay, time to talk about what makes this dessert tick! For a recipe this elegant, using good quality ingredients is key—especially because the structure relies on chemical reactions rather than oven strength. I pulled all these notes straight from my recipe cards after testing, and I even linked my favorite place to stock up on reliable kitchen staples over here if you need ideas.
Don’t skip any of these details, like making sure the cheeses aren’t cold; that’s crucial for getting that perfectly smooth, luxurious texture in your finished tiramisu cheesecake.
For the Chocolate Cookie Crust
We’re leaning into the slight bitterness here to balance the sweet filling, which is why I insist on chocolate wafers—you can certainly use Oreos with the filling scraped out, too!
- 1 1/2 cups chocolate wafer cookie crumbs (make sure they are fine!)
- 1/4 cup granulated sugar (just a touch for binding)
- 6 tablespoons unsalted butter, melted
For the Espresso Soak and Ladyfingers
This is where the real Tiramisu magic happens! Make sure your espresso is strongly brewed and completely cooled down before you start dipping everything. Remember, we want flavor absorption, not a soaked, sinking mess.
- 1 1/2 cups strong brewed espresso, cooled
- 1 package (3 ounces) standard ladyfingers
Optional flavor boost: I love to mix 2 tablespoons of Kahlua or a nice dark rum right into the cooled espresso if I’m serving adults. It really bumps up that coffee flavor!
For the Creamy Mascarpone Cheesecake Filling
I can’t stress this enough: your cream cheese needs to be fully softened, and that expensive mascarpone needs to be close to room temperature. If they’re cold, you’ll get lumps, and nobody wants a lumpy, beautiful dessert, right?
- 2 (8 ounce) packages cream cheese, softened completely
- 1 cup granulated sugar
- 1 teaspoon vanilla extract
- 1 cup mascarpone cheese, room temperature
- 1 cup heavy whipping cream, cold (use that cold cream!)
- 1/2 cup powdered sugar (for whipping)
Step-by-Step Instructions for No Bake Tiramisu Cheesecake
Alright, let’s get this incredible dessert built! Because this is a no-bake version, the construction is everything. We want strong foundations and light, airy layers. Remember what I always say about dinner party desserts? They taste best when you aren’t stressed making them last minute, so we’ll get this chilling right away!
Creating the Chocolate Cookie Crust Base
First things first: make that base sturdy! Mix your cookie crumbs, sugar, and melted butter until it looks like wet sand. Press this mixture firmly into the bottom of your 9-inch springform pan. I use the bottom of a measuring cup to really tamp it down evenly. Once it’s packed tight, pop that crust into the freezer or fridge for at least 30 minutes. It needs to firm up before we get anything else near it.
Assembling the Espresso Dessert Layers
While that crust chills, get your cooled espresso ready. Now, be quick! Dip each ladyfinger into the coffee—one second on each side is usually enough. If you leave them soaking, they turn to mush when you cut the cheesecake later. Lay these dipped cookies snugly over your chilled crust. If you’re using two layers like this recipe calls for, make sure you have enough for both!
Mixing the Silky Cheesecake Filling
Grab your mixer! Beat that softened cream cheese and cup of sugar until it’s totally smooth—no lumps allowed here. Then, gently mix in the room-temperature mascarpone and vanilla until combined. Separately, whip your heavy cream and powdered sugar until you have stiff peaks—that’s the air keeping the whole thing light! Now, and this is important, you need to *gently fold* that whipped cream into the cheese mixture. Don’t stir vigorously, or you deflate all the volume you just added.
Final Assembly and Setting the Tiramisu Cheesecake
Time to layer! Spread half of that gorgeous filling over your ladyfinger layer. If your recipe calls for a second layer of cookies, add them now. Then, gently spread the remaining filling on top. Smooth the top nicely. Now, here is the hardest part: cover it loosely and slide it into the fridge for a minimum of 6 hours. Seriously, **overnight is best** for this incredible tiramisu cheesecake to set completely!
Tips for the Best Creamy Cheesecake Experience
Listen, even though this is a no-bake recipe, treating our ingredients with respect makes a world of difference between a good dessert and a truly spectacular one. Building reader trust is important to me, and that starts with sharing the little secrets that elevate a standard recipe into one of those *luxury desserts* you brag about later. If you follow these little pointers, your No Bake Tiramisu Cheesecake will be silky smooth every single time.
Ingredient Quality for Your Tiramisu Cheesecake
For a dessert this simple in structure, quality really shines through. Please, please splurge on the best mascarpone cheese you can find. It’s the star here, and the cheaper stuff can sometimes be a little watery or grainy. You want that dense, smooth, slightly sweet richness that only good mascarpone provides.
Also, remember that espresso soak? Don’t use weak instant coffee! You need rich, deeply brewed espresso—or even better, use an espresso powder mixed into hot water for maximum punch. That strong coffee flavor is what cuts through the richness of the cheeses, making you want another slice right away.
Avoiding Common No Bake Cheesecake Issues
The biggest enemy of a fluffy no-bake filling is overwhipping or overmixing once the air is already incorporated. When you fold in the whipped heavy cream mixture, treat it like you’re folding feathers! You are trying to keep all those tiny air bubbles intact. If you stir it aggressively like you’re mixing cement (we talked about that issue earlier!), you will deflate the volume.
If you overmix, you risk the filling weeping liquid when it chills, or worse, it won’t set up properly. Fold gently until you see just a few streaks of white, then stop immediately. You can find some more great easy cheesecake ideas on my site, but this folding technique is vital for this particular dessert!
Make Ahead Desserts: Storing Your Tiramisu Cheesecake
This is where this recipe truly shines as one of the best make ahead desserts out there! Since it’s a no-bake dream, it actually *needs* that long chill time to become firm and sliceable. You can whip this up the day before your dinner party or family gathering, which means you get to actually enjoy your guests instead of frantically mixing when they walk in the door.
Once it’s fully set after that overnight chill—or at least 6 hours—you can store your assembled Tiramisu Cheesecake right in the springform pan, covered tightly with plastic wrap, in the refrigerator for up to 4 days. It stays incredibly fresh thanks to the high fat content!
Now, here is the golden rule for that stunning cocoa finish: Do NOT add the cocoa powder until the very last minute! If you dust it on the day before, the moisture from the filling will absorb it, and you’ll end up with sad, brown patches instead of that dramatic, contrasting black powder look. Wait until you’ve released the sides of the pan, put it on its serving plate, and *then* dust it generously with a fine sieve. It’s the professional touch that screams “look how elegant this is!”
Serving Suggestions for Your Decadent Dessert Recipes
Presentation is everything, especially when you’ve worked hard on a tiramisu cheesecake like this one! Since this dessert is so rich and creamy, we want to serve it chilled—that’s when the texture is perfect and the flavors really lock in. Don’t let it sit out on the counter for too long before you slice it!
When you finally release that springform pan ring, you’ll want to serve it on a simple white or black platter. The dark cocoa dusting against the white cream backdrop is dramatic enough on its own, so you don’t need much fuss. Slice it using a clean, sharp knife, wiping the blade between cuts so you get those clean, perfect edges for serving.
To really lean into that Italian coffee theme, I always offer a little something extra on the side. A tiny drizzle of slightly sweetened, thick cream is lovely, but honestly, a small biscotti or one of those almond cookies you dip in coffee works beautifully for texture contrast. And speaking of coffee, if you’re looking for something to sip alongside this coffee-infused treat, check out my favorite after-dinner cocktail recipes. A little espresso martini or even just a beautifully poured cup of fresh black coffee cleanses the palate perfectly after such a rich bite!
Variations: Baked Tiramisu Cheesecake and Kahlua Dessert Recipes
While I absolutely adore using my oven zero times for this no-bake version, I totally get it—sometimes a baked cheesecake brings a certain comforting depth that nothing else can match. If you’re feeling ambitious or just curious about turning this into a true classic, converting it isn’t hard at all!
For those of you eyeing that deep, boozy flavor, we can easily amp up the coffee notes, too. This recipe is flexible, which is why I love it so much.
Making a Baked Tiramisu Cheesecake
If you want that richer, subtly dense texture you get from baking, here is the quick conversion. You must add one structural element we skipped because we weren’t using the heat: an egg! Before you pour the filling into your prepared crust (you’ll want to bake the crust slightly first if you go this route, about 10 minutes at 350°F), mix one large egg right into your finished cheesecake filling mixture.
You need to bake it low and slow. I suggest 325°F. Keep an eye on it, because it usually takes about 50 to 60 minutes. You’ll know it’s done when the edges look set but the very center still has a tiny wiggle, just like a traditional cheesecake. Then, you still need to chill it for hours afterward to get that perfect texture. It’s slightly more effort, but it results in one incredibly satisfying Baked Tiramisu Cheesecake!
Amping Up the Coffee with Kahlua Dessert Recipes
If you want the coffee flavor to really sing—or if you simply prefer richer Kahlua dessert recipes—you can easily double down on the booze factor! We already mentioned adding some to the espresso soak, but you can take it further.
Try replacing about one-third of the heavy whipping cream you use for the whipped topping with chilled Kahlua. Since Kahlua is already quite sweet, you might want to reduce the powdered sugar you use for whipping by a tablespoon or two, just to keep things balanced. Careful though—adding too much liquid alcohol can make your whipped cream struggle to form stiff peaks, so add it slowly while mixing!
Frequently Asked Questions About Tiramisu Cheesecake
I always get so many questions about this recipe because blending two iconic desserts can bring up a few little uncertainties! You’ve got questions, I’ve got answers sourced from weeks of testing this exact tiramisu cheesecake until it was absolutely perfect. Think of this as your last-minute troubleshooting guide before you serve this amazing dessert!
Can I use graham crackers instead of chocolate wafers for the crust?
Yes, you absolutely *can* use graham crackers if you need to, especially if that’s what you have on hand! However, I highly recommend sticking with the chocolate wafer crumbs, or even Oreos with the filling scraped out. Why? Because the slight dark bitterness of the chocolate wafer crust gives you the perfect anchor for the creamy, coffee-forward filling. It complements the cocoa dusting so much better! Plain graham crackers will work as a base for any coffee cheesecake, but the chocolate wafer makes it truly feel like a proper Tiramisu hybrid.
How long does this No Bake Tiramisu Cheesecake last in the fridge?
This is a fantastic question for anyone planning a major holiday menu! Since this is a *No Bake Tiramisu Cheesecake* made with high-fat dairy (cream cheese and mascarpone), it holds up wonderfully. If you keep it well-covered in the springform pan (or transfer it carefully to an airtight container after setting), it stays perfectly fresh and delicious for about 3 to 4 days in the refrigerator. I still think the texture is best on days 2 and 3, but it’s definitely safe and tasty if you need to make it on a Monday for a Friday gathering!
What is the best way to dust the cocoa powder?
This simple step makes such a huge visual difference! You want that beautiful matte matte black contrast against the pale creamy filling, right? For those results, don’t just sprinkle it on—always use a very fine-mesh sieve or a small sifter. Hold the sieve high above the cheesecake and tap it gently. This ensures the cocoa powder falls evenly like fine dust rather than clumping up in spots. And please, only do this right before you serve it, just like I mentioned earlier!
If you’re looking for even more fantastic make-ahead options, I have a whole collection of breakfast and brunch recipes that are perfect for prepping ahead, too!
Estimated Nutritional Data for This Coffee Cheesecake
Now, I always like to throw in a little disclaimer here: I’m a cook, not a certified nutritionist! These numbers are estimates I’ve pulled together based on standard ingredient databases for one slice of this decadent dessert. They don’t account for slight variations in ingredient brands or, let’s be honest, how generously you add that final cocoa layer!
But for anyone keeping track, this gives you a good ballpark idea of the richness packed into your slice of coffee cheesecake. If you serve this after a large meal, a small slice is usually more than enough!
- Serving Size: 1 slice
- Calories: Approximately 450
- Sugar: Roughly 35g (High because of the cream cheese and mascarpone)
- Fat: Around 30g
- Carbohydrates: About 40g
- Protein: Around 7g
For more guidance on balancing meals, you might find my general tips on pairing side dishes helpful after enjoying such a rich treat!
PrintCreamy No-Bake Tiramisu Cheesecake with Espresso Ladyfingers
This recipe combines the rich, creamy texture of cheesecake with the classic coffee and mascarpone flavors of Italian Tiramisu. You create this decadent dessert without turning on your oven, making it perfect for special occasions or dinner parties.
- Prep Time: 40 min
- Cook Time: 0 min
- Total Time: 6 hours 40 min
- Yield: 10 servings 1x
- Category: Dessert
- Method: No-Bake
- Cuisine: Italian Inspired
- Diet: Vegetarian
Ingredients
- 1 1/2 cups chocolate wafer cookie crumbs
- 1/4 cup granulated sugar (for crust)
- 6 tablespoons unsalted butter, melted
- 1 1/2 cups strong brewed espresso, cooled (or coffee mixed with 2 tablespoons Kahlua or rum)
- 1 package (3 ounces) ladyfingers
- 2 (8 ounce) packages cream cheese, softened
- 1 cup granulated sugar (for filling)
- 1 teaspoon vanilla extract
- 1 cup mascarpone cheese, room temperature
- 1 cup heavy whipping cream, cold
- 1/2 cup powdered sugar (for whipped cream)
- Unsweetened cocoa powder, for dusting
Instructions
- Prepare the crust: In a medium bowl, mix the chocolate wafer crumbs, 1/4 cup granulated sugar, and melted butter until evenly moistened. Press the mixture firmly into the bottom of a 9-inch springform pan. Chill the crust for at least 30 minutes while you prepare the coffee soak and filling.
- Prepare the espresso soak: Pour the cooled espresso (or coffee mixture) into a shallow dish. Quickly dip each ladyfinger into the espresso, turning once. Do not over-soak; they should be moist but not falling apart. Arrange the dipped ladyfingers in a single layer over the chilled crust.
- Make the cheesecake filling: In a large bowl, use an electric mixer to beat the softened cream cheese and 1 cup granulated sugar until smooth. Beat in the vanilla extract and mascarpone cheese until fully combined and creamy. Set aside.
- Prepare the whipped cream: In a separate, clean bowl, beat the cold heavy whipping cream and powdered sugar until stiff peaks form. Gently fold the whipped cream into the mascarpone-cream cheese mixture until just combined. Do not overmix.
- Assemble the cheesecake: Spread half of the cheesecake filling evenly over the layer of soaked ladyfingers. Top with a second layer of espresso-dipped ladyfingers, arranging them neatly. Spread the remaining cheesecake filling over the top layer of ladyfingers.
- Chill: Cover the springform pan loosely with plastic wrap. Refrigerate the Tiramisu Cheesecake for a minimum of 6 hours, or preferably overnight, to allow it to set completely.
- Serve: Before serving, carefully remove the sides of the springform pan. Dust the top generously with unsweetened cocoa powder using a fine-mesh sieve. Slice and serve this decadent dessert immediately.
Notes
- For an extra rich flavor, substitute 1/4 cup of the espresso soak with Kahlua or dark rum.
- If you prefer a baked version, mix 1 egg into the filling mixture and bake at 325°F for 50-60 minutes before cooling and chilling.
- Use high-quality mascarpone cheese; it makes a difference in the final texture of this luxury dessert.
Nutrition
- Serving Size: 1 slice
- Calories: 450
- Sugar: 35g
- Sodium: 210mg
- Fat: 30g
- Saturated Fat: 18g
- Unsaturated Fat: 12g
- Trans Fat: 0.5g
- Carbohydrates: 40g
- Fiber: 2g
- Protein: 7g
- Cholesterol: 95mg