
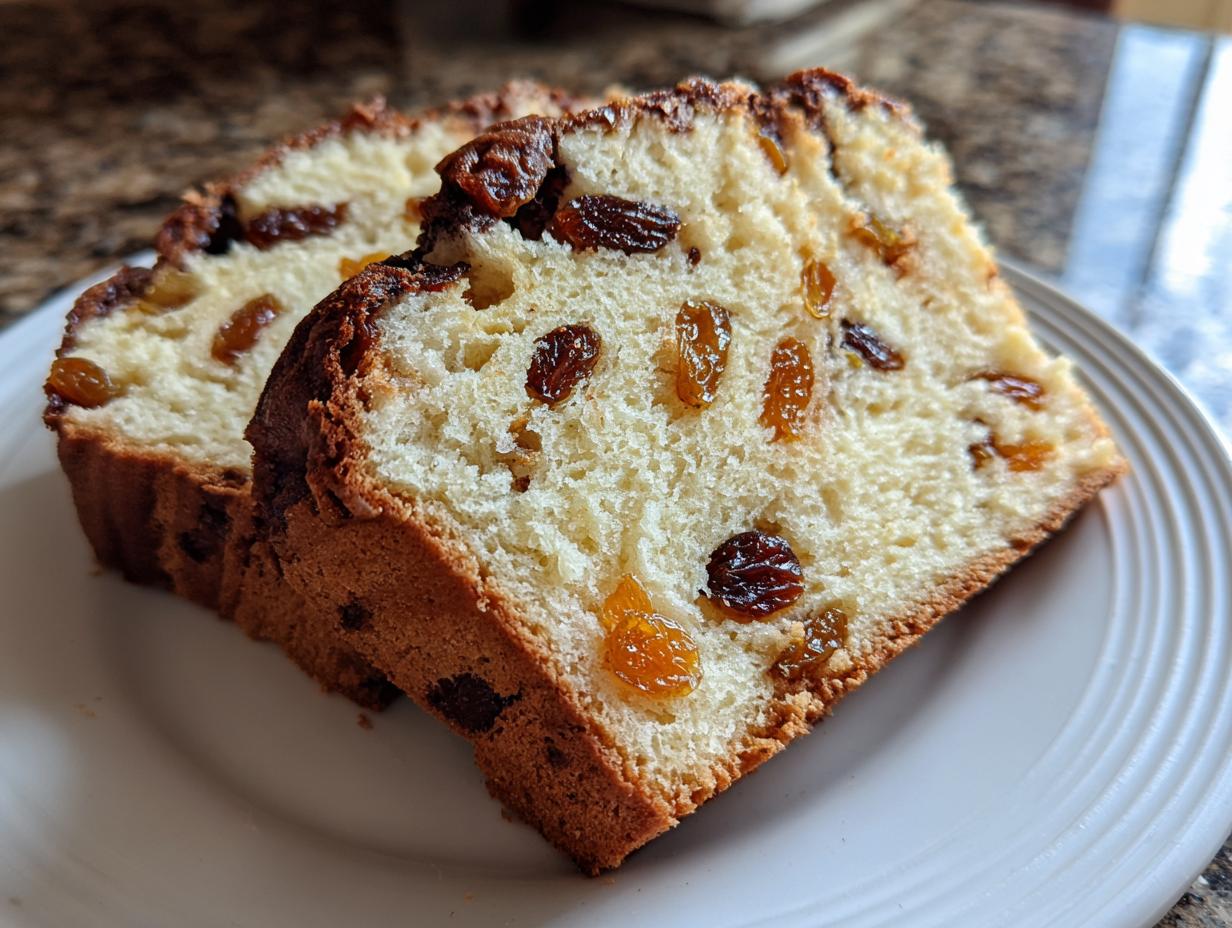
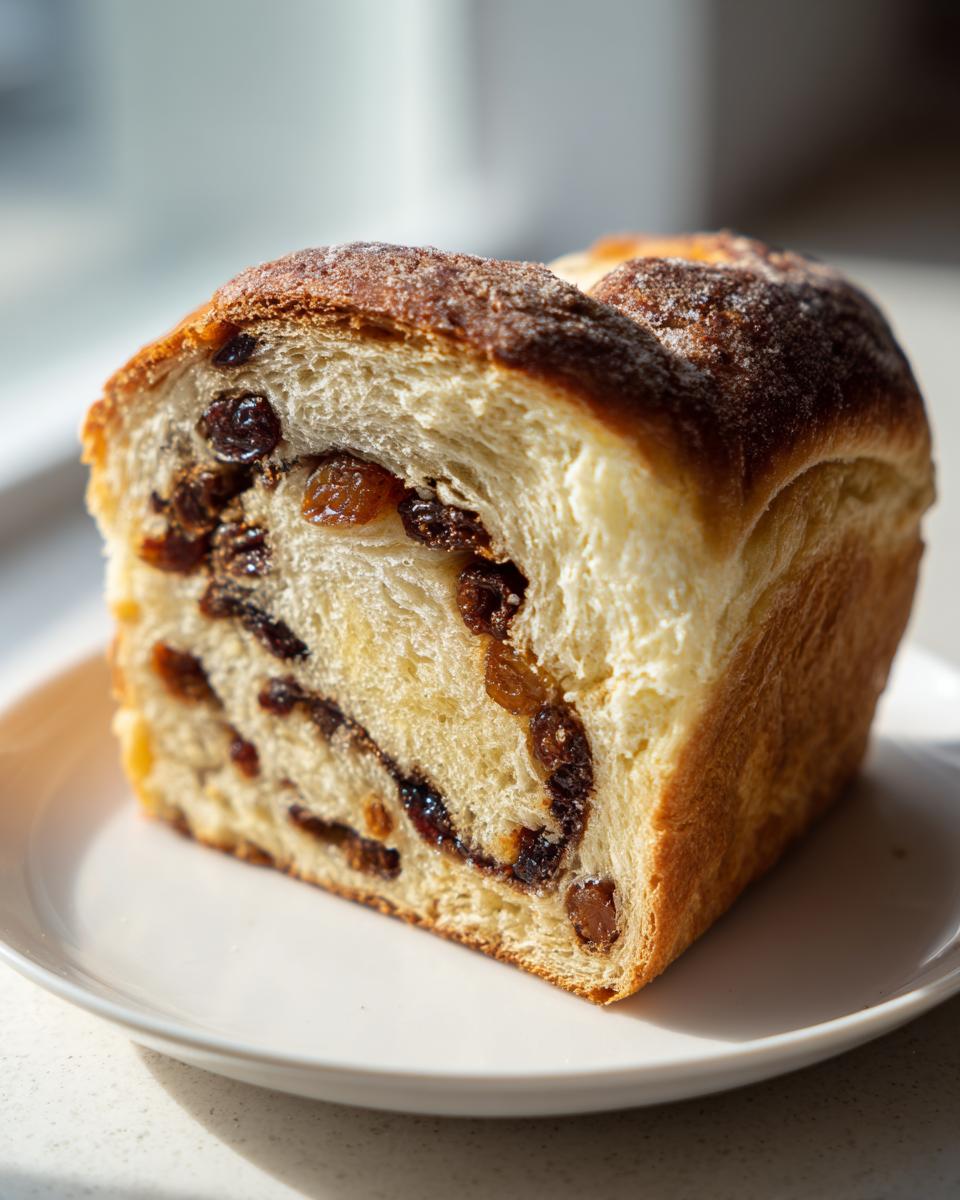
There’s nothing quite like pulling a loaf of warm, homemade bread out of the oven, is there? I mean, the smell alone makes you feel instantly cozy, like everything is right in the world. If you’ve been searching for that perfect recipe—the one that delivers deeply fragrant cinnamon, perfectly plump raisins, and a texture so soft it practically melts—you’ve found your forever spot. This Soft Homemade Cinnamon Raisin Bread is my absolute go-to, and after testing this formula countlessly, I can guarantee it gives you that gorgeous, bakery-style cinnamon swirl every single time. Forget those dry, sad loaves you’ve tried before; this one is tested, proven, and ready to make your kitchen royalty.
- Why This is the Best Homemade Raisin Bread Recipe
- Simple Ingredient Bread: What You Need for Soft Raisin Bread
- How to Prepare Your Fluffy Yeast Bread From Scratch
- Tips for Success When Making Raisin Bread
- Storage & Reheating Instructions for Your Homemade Raisin Bread Recipe
- Troubleshooting Common Raisin Bread Issues
- Serving Suggestions for Warm Spiced Bread
- Frequently Asked Questions About Making Raisin Bread
- Estimated Nutrition for This Comfort Food Baking Loaf
- Share Your Cozy Morning Baking Creations
Why This is the Best Homemade Raisin Bread Recipe
Look, I’ve baked dozens of loaves trying to crack the code on truly exceptional raisin bread. Most recipes are fine, but they lack that comforting, ‘just-bought-it-from-a-bakery’ quality. This one nails it every single time. I promise you’ll stop buying the store brand once you see how simple it is to get this level of flavor and texture.
- It’s incredibly reliable; the yeast always blooms perfectly for me.
- The cinnamon-sugar filling distributes evenly, creating gorgeous ribbons, not clumps.
- It yields a genuinely soft crumb that stays fresh for days without drying out.
As you can see from the ingredients, we lean into flavor and moisture. If you loved my easy pumpkin bread, you’ll appreciate the same attention to detail here!
Achieving the Perfect Soft Raisin Bread Texture
Softness is key for us here; we are avoiding anything remotely dense or tough. That fluffiness starts way back with the milk temperature—it needs to be warm, around 110°F, to wake up the yeast gently. I also insist on using room temperature ingredients, especially that egg. When everything is happy and at the same temperature, the dough mixes up smooth and elastic. That’s the ticket to that fluffy yeast bread rise we want!
The Secret to a Beautiful Cinnamon Swirl Bread Recipe
Everyone wants that dramatic cinnamon swirl that looks Pinterest-perfect, right? My trick is using softened butter, not melted butter, for the filling layer. When you brush that soft butter right to the very edge, it acts like glue for the cinnamon-sugar mixture. Then, when you roll it tightly—and I mean *tightly*—that cinnamon-sugar doesn’t escape or mix into the dough; it stays put, creating those beautiful, defined ribbons we call a proper Cinnamon Swirl Bread Recipe.
Simple Ingredient Bread: What You Need for Soft Raisin Bread
When I developed this formula, I focused hard on keeping things classic and simple. You don’t need any fancy flours or weird additives to get this amazing, soft raisin bread result. Truly, if you have a bag of all-purpose flour and some spices, you’re most of the way there! A few items do need to be warmed or brought to room temperature, and paying attention to those small details means you skip the troubleshooting later. For instance, if you’re out of light brown sugar for the filling, you can use granulated, but trust me, that molasses flavor adds depth! If you want to explore other moist loaves, check out my zucchini bread next.
Here is exactly what you’ll need for one gorgeous 9×5 loaf:
- 1 cup warm milk (it must be between 105-115°F—not too hot!)
- 1/4 cup granulated sugar
- 2 1/4 teaspoons active dry yeast
- 1 large egg, room temperature
- 1/4 cup unsalted butter, melted
- 3 1/2 cups all-purpose flour, plus more for dusting
- 1 teaspoon salt
- 1 cup raisins, plumped up and ready to go
- 1/4 cup packed light brown sugar
- 2 teaspoons ground cinnamon
- 2 tablespoons unsalted butter, softened (this is for brushing later, not mixing in!)
Ingredient Notes and Substitutions for Your Raisin Bread
Let’s talk about the two spots where bakers often run into trouble with yeast bread. First, the yeast: make sure that warm milk is in that sweet spot—too cold and it won’t foam up, too hot and you kill it! Second, those raisins! If you skip plumping them, they steal moisture right out of your dough as it bakes. Just soak them in hot water for ten minutes, drain them really well, and pat them dry on a paper towel. This guarantees plump, juicy raisins distributed throughout your loaf instead of dried-out little rocks.
How to Prepare Your Fluffy Yeast Bread From Scratch
Okay, deep breaths! Even though this is a from-scratch bread recipe, I promise you it’s what I call an “easy homemade bread” situation. Yes, yeast bread needs hands-on time for kneading and rising, but honestly, most of that time is just waiting patiently. The active work is minimal, which means you can sip some coffee and enjoy the amazing aroma building up. Follow these steps closely, and you’ll have that perfect loaf ready for slicing. If you struggled to get the perfect rise on your focaccia bread recipe, this standard loaf might feel much more straightforward!
Activating Yeast and Mixing the Raisin Bread Dough
We kick things off by waking up that yeast. Mix your warm milk (remember, 105°F is the sweet spot!) with a tiny bit of sugar, then sprinkle the yeast right on top. Don’t skip letting it sit for five or ten minutes. If it gets foamy and bubbly on top—that’s the foam test, and it’s your assurance that the yeast is alive and ready to work its magic! Once it’s happy, you just stir in the remaining sugar, your room-temperature egg, and the melted butter before gradually mixing in the flour and salt until you get a shaggy mess.
Kneading and the First Rise for Optimal Raisin Bread Volume
Now for the hands-on part! Turn that shaggy dough out onto a lightly floured counter. You need to knead this for about 6 to 8 minutes. I know, it seems long, but you’re building the structure—that amazing gluten network that traps all the air. You’ll know you’re done when the dough smooths out and springs back slightly when you poke it. Pop that beautiful ball into an oiled bowl, cover it tight, and let it rest in a warm spot for a full hour, or until it’s doubled up. This first rise is crucial for that open, perfect bread crumb!
Shaping for the Ultimate Cinnamon Swirl Bread Recipe
This is where the artistry comes in, folks! Once doubled, gently punch the air out and roll that dough into a big rectangle—think about 10 inches by 16 inches, long and wide. Now, grab that softened butter reserved for the filling and brush it everywhere, making sure you go right to the edges. Next, sprinkle your cinnamon-sugar mix over the butter. Try to keep the distribution even; we don’t want big patches or bald spots! Scatter those plump raisins all over the sugar. Starting from the longest side, you need to roll this up as tightly as you possibly can, like a jelly roll. Pinch that seam shut right along the bottom, seal it up tight, and gently tuck it into your greased loaf pan, seam-side down.
Baking and Cooling Your Sweet Breakfast Loaf
Before it goes into the oven, it needs one more nap! Cover that loaf pan loosely and let it sit until the dough crests about an inch over the top rim—usually 30 to 45 minutes. Next, slide it into a 375°F oven for about 30 to 35 minutes. You’re looking for a rich golden-brown color and an internal temp around 200°F. But here is my biggest tip for this **sweet breakfast loaf**: get it out of that pan immediately! Let it cool completely on a wire rack. If you cut it steaming hot, you’ll mash that soft, fluffy structure it struggled so hard to create. Patience pays off!
Tips for Success When Making Raisin Bread
Baking **raisin bread** is mostly about timing and simple preparation steps that make a huge difference later on. I’ve tweaked this method over the years based on what sometimes went wrong—usually resulting in a loaf that was a little too heavy or raisins that shrunk up mid-bake. Trust me, once you follow these little secrets, you’ll be making what feels like artisan raisin bread right on your kitchen counter. If you loved the filling in these cinnamon rolls, you’ll appreciate how we manage the spices here!
First, don’t rush the plump process for those raisins; that step ensures they stay soft and don’t suck moisture out of your beautiful soft dough. Second, when you knead, don’t stop just because it feels sticky initially. Keep going until that elasticity develops—that’s what prevents that dense loaf result. Finally, room temperature ingredients are non-negotiable for an even rise. Getting these basics right saves you so much stress later!
Storage & Reheating Instructions for Your Homemade Raisin Bread Recipe
You’ve made this incredible loaf, and now you want to make sure it stays just as soft tomorrow as it is today! Since this is a sweet breakfast loaf made from scratch, it truly shines the day it’s baked. If you have leftovers, wrap that fully cooled loaf up tightly in plastic wrap first, then maybe a layer of foil or toss it into an airtight container.
For daily eating, room temperature is great for up to three days. When you’re ready for a slice, toasting is perfect—it brings out those cinnamon notes again! If you want to warm up the whole loaf later on, wrap it loosely in foil and pop it into a 300°F oven for about 10 minutes. It just revives that fresh-from-the-oven feeling, almost like you just made my dinner rolls recipe!
Troubleshooting Common Raisin Bread Issues
Sometimes, even with the best recipe, baking yeast bread throws a little curve ball. Don’t panic! If your loaf didn’t rise as high as you hoped, 99% of the time it goes back to the yeast or the temperature of your liquids. Remember, if your milk was too hot, it killed the yeast, meaning there are no bubbles to lift that dough. That’s why checking that temperature is so important!
Now, if you end up with a beautiful color but no ribbon effect, that means the swirl disappeared. This happens when the dough isn’t rolled tightly enough during shaping, or if you used melted butter instead of softened butter for the filling. The melted butter seeps everywhere instead of sitting on top to form that distinct layer. Just make a note for next time—this reliable **raisin bread** recipe works best when you roll it up like a tight little log!
Serving Suggestions for Warm Spiced Bread
We all know toast with butter is heavenly, but this warm spiced bread deserves more attention! If you have any leftovers from your cozy morning baking session, don’t just let them sit there. My absolute favorite way to use up a slice is to dip it into my French toast recipe—the cinnamon flavor makes it so rich already. Otherwise, you can’t go wrong with a thick smear of softened butter or a generous dab of cream cheese. It’s perfect plain, too, if you really just want to enjoy that soft crumb!
Frequently Asked Questions About Making Raisin Bread
It’s funny how many questions pop up once you start making something homemade! Baking yeast bread always brings out questions about tools and technique. I’m happy to share a few of the things readers ask me most often about getting this bakery-style loaf exactly right in a regular home oven.
Can I use a bread machine for this raisin bread recipe?
That’s a great question that comes up often! Folks love the convenience. You absolutely can use your machine, but I highly recommend only using the dough cycle. You still want the flavor and texture of this classic loaf, so let the machine do the heavy lifting of kneading and the first rise. Once it’s done with that cycle, take it out, shape it exactly as I detailed for the big cinnamon swirl, and then bake it in your conventional oven. This keeps that beautiful rise and beautiful crust we worked so hard for! It’s the best compromise, as detailed in my mental Bread Machine Raisin Bread Guide.
What is the best way to get plump raisins for my bread?
Oh, you must plump your raisins—it’s the difference between a tasty loaf and a perfect loaf! If you skip this, the dry raisins suck moisture right out of your soft dough while it bakes, leaving you with little shriveled raisins and a slightly denser crumb. My simple trick is just to soak them in hot tap water for ten minutes while your dough is doing its first rise. After soaking, you must drain them completely and pat them dry with a paper towel until you can’t feel any moisture left before you add them to your rolled-out dough.
How can I make this recipe No Knead Fruit Bread?
I totally get wanting a truly no knead fruit bread option, especially on busy weekends! While this specific recipe builds its airy structure best with a quick knead, you can adapt it. You’ll need to switch to a much wetter dough—use about 3/4 cup more flour and slightly less if it gets too hard to manage. Instead of kneading for 8 minutes, you’ll mix it until just combined and then let it go through a long, cold fermentation in the fridge overnight—say, 12 to 18 hours. This develops the flavor, but a heads-up: the gorgeous, tight cinnamon swirl might get a little softer or less prominent when you roll it up after that long rest!
Estimated Nutrition for This Comfort Food Baking Loaf
I always like to give you an idea of what’s in the bread, even though this is pure comfort food baking and we aren’t stressing about macros! Please remember these are just good estimates based on the ingredients listed above, so your exact numbers might shift a little bit depending on brands and exact measurements. If you’re looking for an equally delightful breakfast treat, you have to try my Belgian waffles recipe next!
- Serving Size: 1 slice
- Calories: 220
- Sugar: 11g
- Fat: 5g (3g saturated fat)
- Carbohydrates: 40g
- Protein: 5g
Enjoy it warm with butter—that’s what matters most when you’ve baked something this incredible from scratch!
Share Your Cozy Morning Baking Creations
Now that you have smelled your kitchen transformed by the aroma of this truly delightful homemade raisin bread, I just have one favor to ask! When you bake this loaf, please come back and leave a rating—five stars if you loved that soft crumb, especially if you successfully achieved a great cinnamon swirl. I absolutely live for hearing how you enjoy your cozy morning baking! Tell me in the comments below: are you slathering yours with cream cheese, or sticking to simple, quality butter?
PrintSoft Homemade Cinnamon Raisin Bread

Bake a soft, fluffy loaf of homemade cinnamon raisin bread featuring a beautiful swirl and plump raisins. This reliable recipe is perfect for beginners and makes a wonderful sweet breakfast or snack.
- Prep Time: 30 min
- Cook Time: 35 min
- Total Time: 2 hr 40 min
- Yield: 1 loaf 1x
- Category: Breakfast
- Method: Baking
- Cuisine: American
- Diet: Vegetarian
Ingredients
- 1 cup warm milk (105-115°F)
- 1/4 cup granulated sugar
- 2 1/4 teaspoons active dry yeast
- 1 large egg, room temperature
- 1/4 cup unsalted butter, melted
- 3 1/2 cups all-purpose flour, plus more for dusting
- 1 teaspoon salt
- 1 cup raisins, plumped
- 1/4 cup packed light brown sugar
- 2 teaspoons ground cinnamon
- 2 tablespoons unsalted butter, softened (for brushing)
Instructions
- Activate the yeast: In a large bowl, combine the warm milk and 1 teaspoon of the granulated sugar. Sprinkle the yeast over the top and let it sit for 5 to 10 minutes until foamy.
- Mix the dough: Stir the remaining granulated sugar, egg, and melted butter into the yeast mixture. In a separate bowl, whisk together the flour and salt. Gradually add the dry ingredients to the wet ingredients, mixing until a shaggy dough forms.
- Knead: Turn the dough out onto a lightly floured surface. Knead for 6 to 8 minutes until the dough is smooth and elastic.
- First Rise: Place the dough in a lightly oiled bowl, turning to coat. Cover the bowl with plastic wrap or a clean towel and let it rise in a warm place for 1 to 1.5 hours, or until doubled in size.
- Prepare the filling: While the dough rises, combine the brown sugar and cinnamon in a small bowl. Set aside the plumped raisins.
- Shape the loaf: Gently punch down the risen dough. Turn it out onto a lightly floured surface and roll it into a large rectangle, about 10 by 16 inches.
- Add filling: Brush the entire surface of the dough with the 2 tablespoons of softened butter. Sprinkle the cinnamon-sugar mixture evenly over the buttered surface. Scatter the raisins over the sugar mixture.
- Roll and place: Starting from the long edge, tightly roll the dough into a log. Pinch the seam closed. Place the log, seam-side down, into a greased 9×5 inch loaf pan.
- Second Rise: Cover the loaf pan loosely and let it rise again in a warm spot for 30 to 45 minutes, or until the dough has crowned about 1 inch above the rim of the pan.
- Bake: Preheat your oven to 375°F (190°C). Bake for 30 to 35 minutes, or until the top is golden brown and the internal temperature reaches 200°F (93°C).
- Cool: Remove the bread from the pan immediately and let it cool completely on a wire rack before slicing for the best texture.
Notes
- To plump your raisins quickly, soak them in hot water for 10 minutes, then drain them thoroughly and pat them dry before adding them to the dough.
- For an extra soft crust, brush the top of the loaf with a little melted butter immediately after removing it from the oven.
- If you prefer a bread machine method, follow your machine’s dough cycle, then shape and bake in a conventional oven as directed above.
Nutrition
- Serving Size: 1 slice
- Calories: 220
- Sugar: 11g
- Sodium: 250mg
- Fat: 5g
- Saturated Fat: 3g
- Unsaturated Fat: 2g
- Trans Fat: 0g
- Carbohydrates: 40g
- Fiber: 2g
- Protein: 5g
- Cholesterol: 25mg