
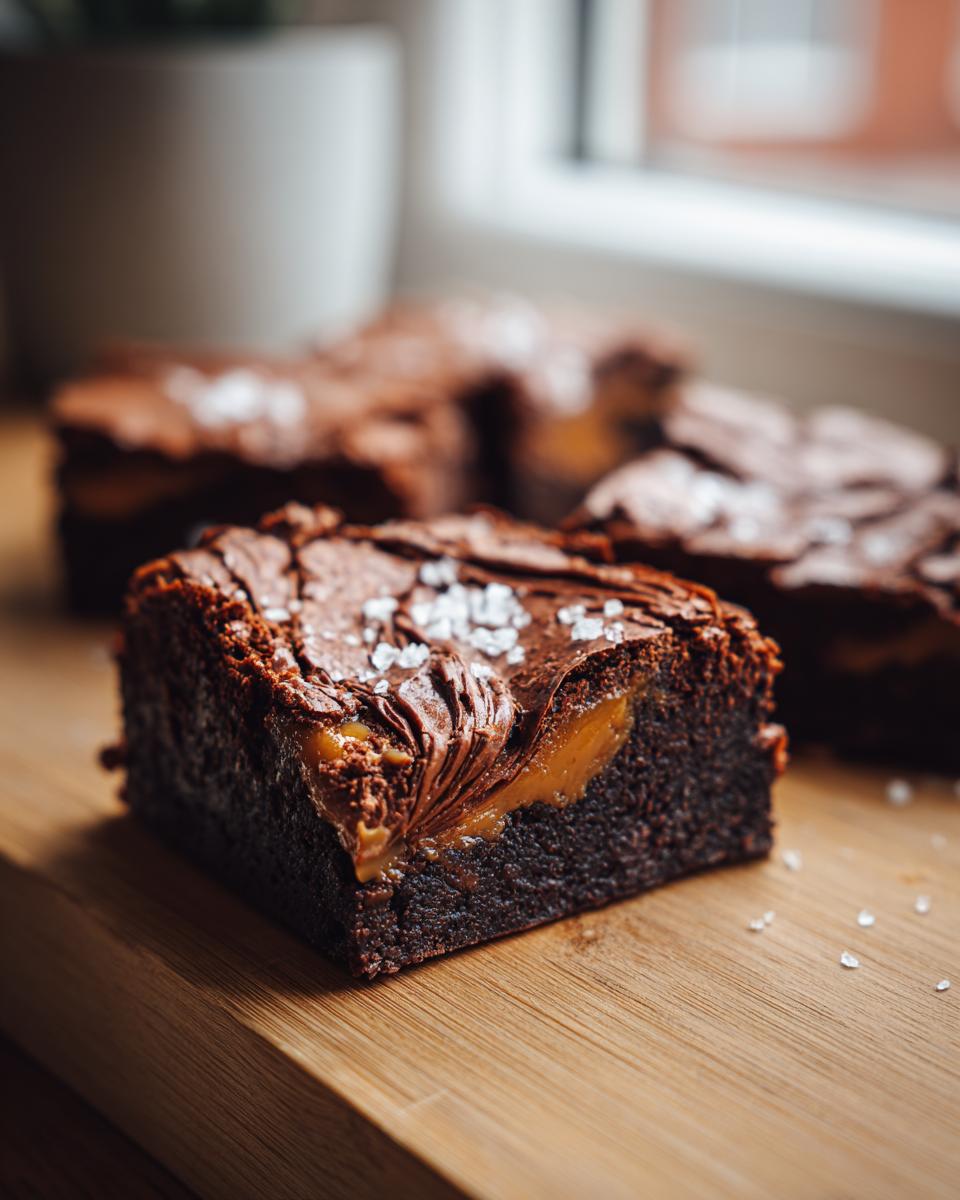
Oh, brownies! They’re just the best, aren’t they? But take a classic brownie and swirl in some gooey, homemade salted caramel, and suddenly you’ve got something truly magical. That’s where these Salted Caramel Brownies come in! My goal was to create a brownie that’s unbelievably fudgy (none of that cakey stuff, please!) with a gorgeous swirl of real caramel and a perfectly shiny top. Honestly, pulling these out of the oven, that smell… it’s pure happiness. I’ve tested this recipe over and over (you know how I am with testing!) using simple ingredients you can actually find, all to give you that confidence boost that yes, you CAN make incredible brownies right at home. Get ready to wow yourselves – and anyone lucky enough to snag one!
- Why You'll Love These Salted Caramel Brownies
- Ingredients for Perfect Salted Caramel Brownies
- Crafting Your Homemade Salted Caramel Sauce
- How to Make Salted Caramel Brownies: Step-by-Step
- Cooling and Slicing Your Salted Caramel Brownies
- Best Sea Salt for Brownies and Finishing Touches
- Make-Ahead and Storage for Salted Caramel Brownies
- Frequently Asked Questions About Salted Caramel Brownies
- Nutritional Information
- Share Your Salted Caramel Brownie Creations!
Why You’ll Love These Salted Caramel Brownies
Okay, so why are these the brownies you NEED in your life? Let me tell you!
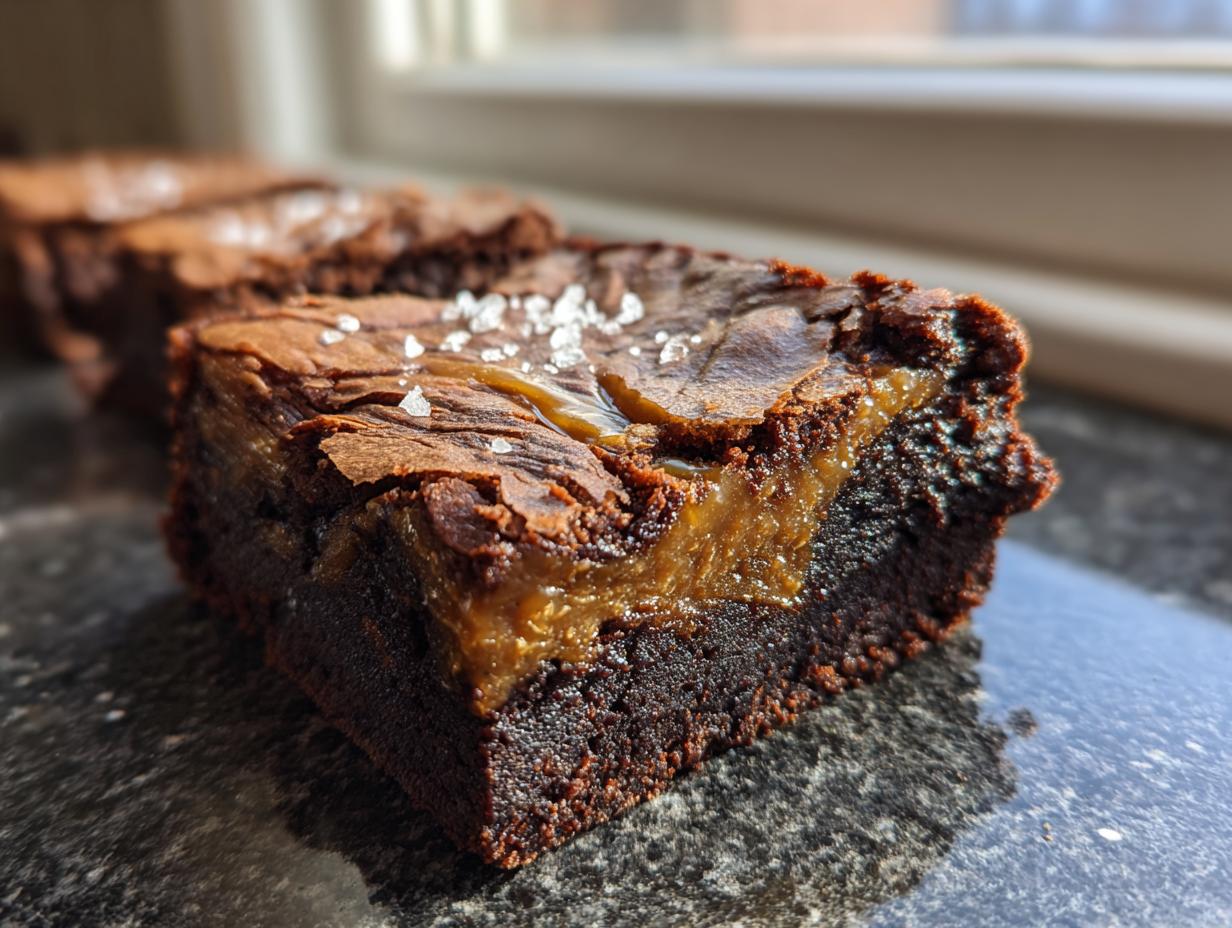
- Seriously Fudgy, Not Cakey: We’re talking ultra-gooey, melt-in-your-mouth texture that’s pure chocolate bliss. No dry crumbs here!
- Homemade Salted Caramel Swirl: That beautiful ribbon of homemade caramel adds an irresistible sweet and slightly salty punch that’s just divine.
- Shiny, Crackly Top: That coveted shiny top? Yep, we’ve got that! It’s the perfect contrast to the fudgy interior, and it just looks so professional.
- Perfectly Balanced Sweet & Salty: The hint of flaky sea salt cuts through the richness, making every bite taste just right. It’s that perfect sweet-salty combo we all crave.
- Decadent Dessert Squares: These look and taste so fancy, they’re perfect for impressing guests or gifting. They really feel like a special treat.
- Great for Potlucks: They hold up beautifully and are always a huge hit at any gathering! People will be asking for the recipe, trust me.
Ingredients for Perfect Salted Caramel Brownies
Alright, let’s talk about what goes into these decadent little squares. For me, using good quality ingredients is key – it really makes all the difference, especially with something like these brownies. You’ll need the basics for the brownie base, plus a few things for that amazing caramel swirl and finish.
Here’s what we’re working with:
- 1 cup (2 sticks) unsalted butter, cut into pieces – Real butter, folks! It’s non-negotiable for that rich flavor.
- 4 ounces unsweetened chocolate, chopped – This gives us that deep, intense chocolate flavor.
- 1 1/2 cups granulated sugar – For sweetness and to help with that shiny top.
- 2 teaspoons vanilla extract – Vanilla makes chocolate taste even more like, well, chocolate!
- 1 teaspoon espresso powder (optional) – This is my little trick! It doesn’t make them taste like coffee, but it really wakes up the chocolate flavor.
- 1/2 teaspoon salt – Essential for balancing all that sweetness.
- 4 large eggs – These are crucial for getting that fudgy texture.
- 3/4 cup all-purpose flour – Just enough to bind everything, we don’t want these to be cakey at all!
- 1/2 cup caramel sauce (store-bought or homemade) – We’ll talk about making this from scratch in a bit, but a good quality store-bought one works too!
- 1/2 teaspoon flaky sea salt, for topping – This is the finishing touch that really makes them sing!
Crafting Your Homemade Salted Caramel Sauce
Okay, so forget the jarred stuff for a minute, because making your own caramel sauce is SO much easier than you think, and honestly, it’s a game-changer for these brownies! Plus, it makes you feel like a total rockstar in the kitchen. Just a heads-up, melting sugar gets HOT, so be super careful and maybe have your cream and butter ready to go before you start.
Here’s the simple magic:
- Grab a medium saucepan – a light-colored one is best so you can see the caramel color change easily. Pour in
- 1 cup granulated sugar and 1/4 cup water. Pop it over medium heat. You want to stir *just* until the sugar dissolves into a clear syrup. Once it starts bubbling, stop stirring! Seriously, resist the urge.
- Let it bubble away. Swirl the pan *occasionally* if you see some parts cooking faster, but don’t stir. You’re watching for it to turn a lovely amber color – think deep honey or a pretty bronze. This usually takes about 5-8 minutes.
- As soon as it hits that perfect amber, quickly and carefully whisk in 1/2 cup heavy cream and 2 tablespoons butter (these should be at room temp or slightly warm). It will bubble up like crazy, so stand back a bit! Keep whisking until it’s all smooth and glorious.
Now, let it cool for just a bit. That whole flaky sea salt thing I mentioned earlier? This is where it plays its starring role. Stirring it in at the end gives you that amazing salty-sweet balance that cuts through all the rich brownie goodness. That beautiful, glossy caramel is perfect for swirling!
How to Make Salted Caramel Brownies: Step-by-Step
Alright, let’s get this baking party started! Making these brownies is a process, but trust me, it’s SO worth it. You’ll want to preheat that oven to 350°F (175°C) first. Then, get your 8×8 inch pan ready — I like to grease and flour it really well, or even better, line it with parchment paper so there’s a little overhang on the sides. This makes lifting them out a breeze later! It’s a similar prep to how I get my pumpkin spice coffee cake ready.
Now for the magic mush: melt that butter and unsweetened chocolate together in a saucepan over low heat. Stir, stir, stir until it’s super smooth and glossy. Take it off the heat, and stir in your sugar, vanilla, that optional espresso powder (it really does help the chocolate flavor pop!), and the salt. Give it all a good mix!
Next, it’s egg time. Add them one by one, beating really well after each one until the mixture looks glossy and beautiful. This is what helps give us that amazing texture! Then, gently fold in the flour. And PLEASE, don’t overmix here! We want it just combined, maybe with a few flour streaks still showing. Overmixing makes them tough, not fudgy!
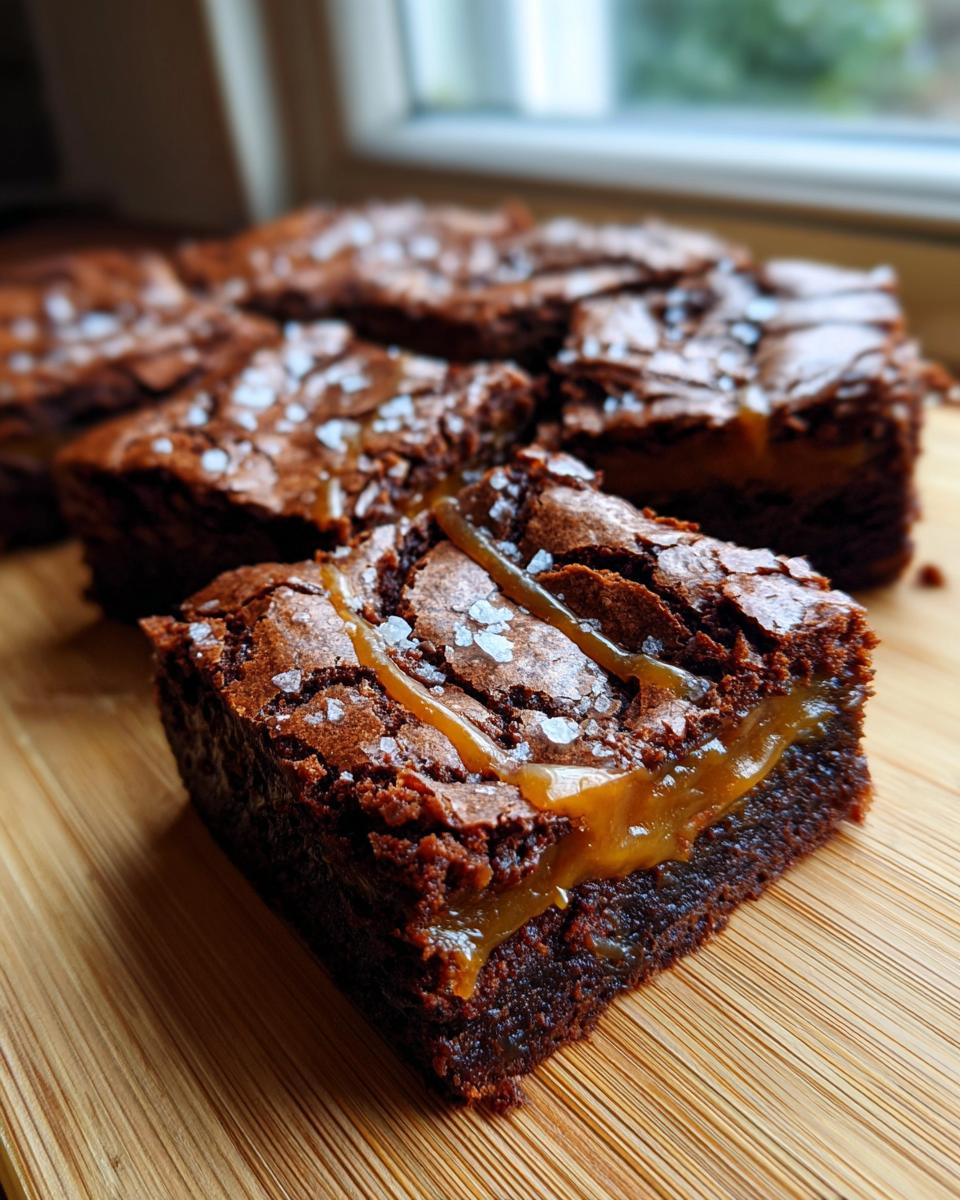
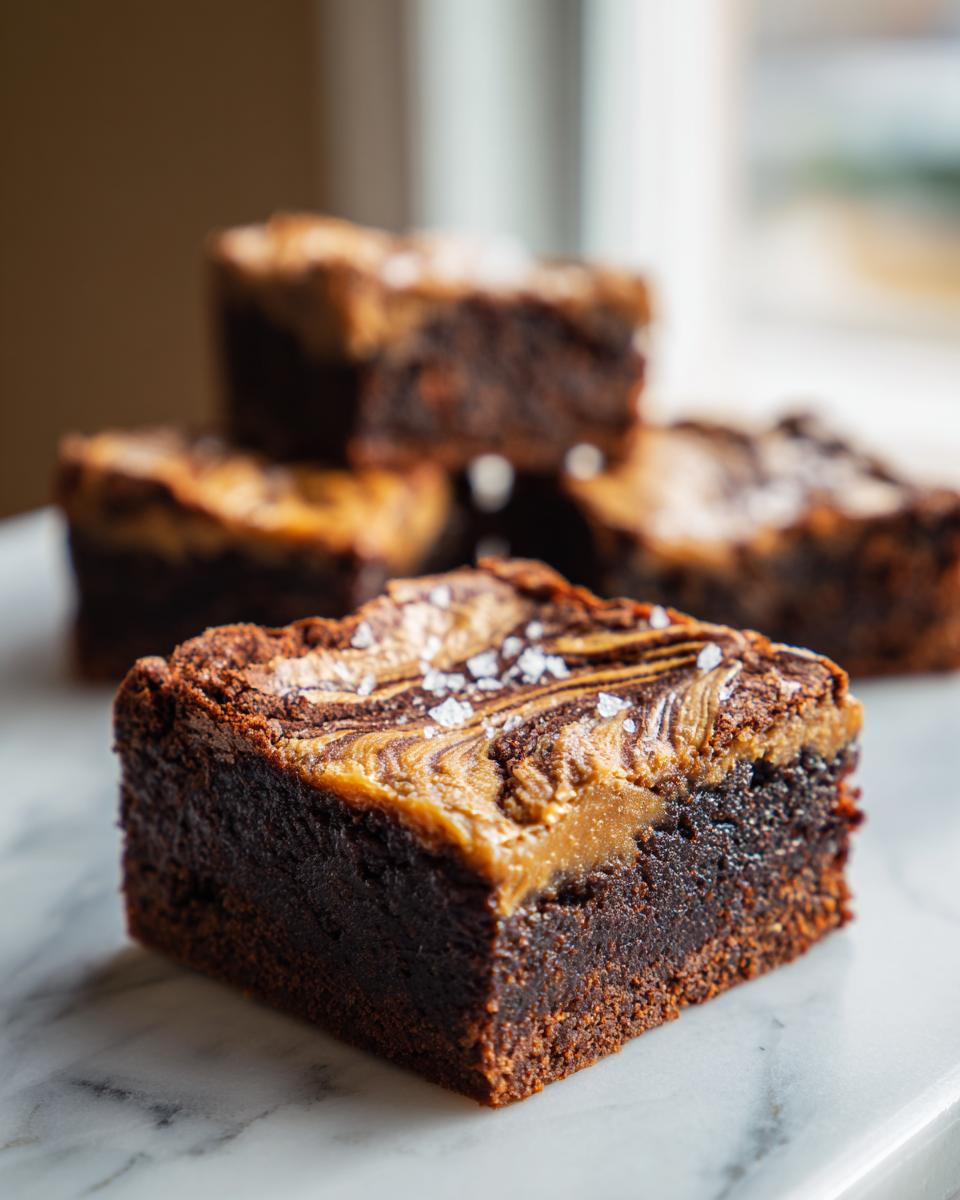
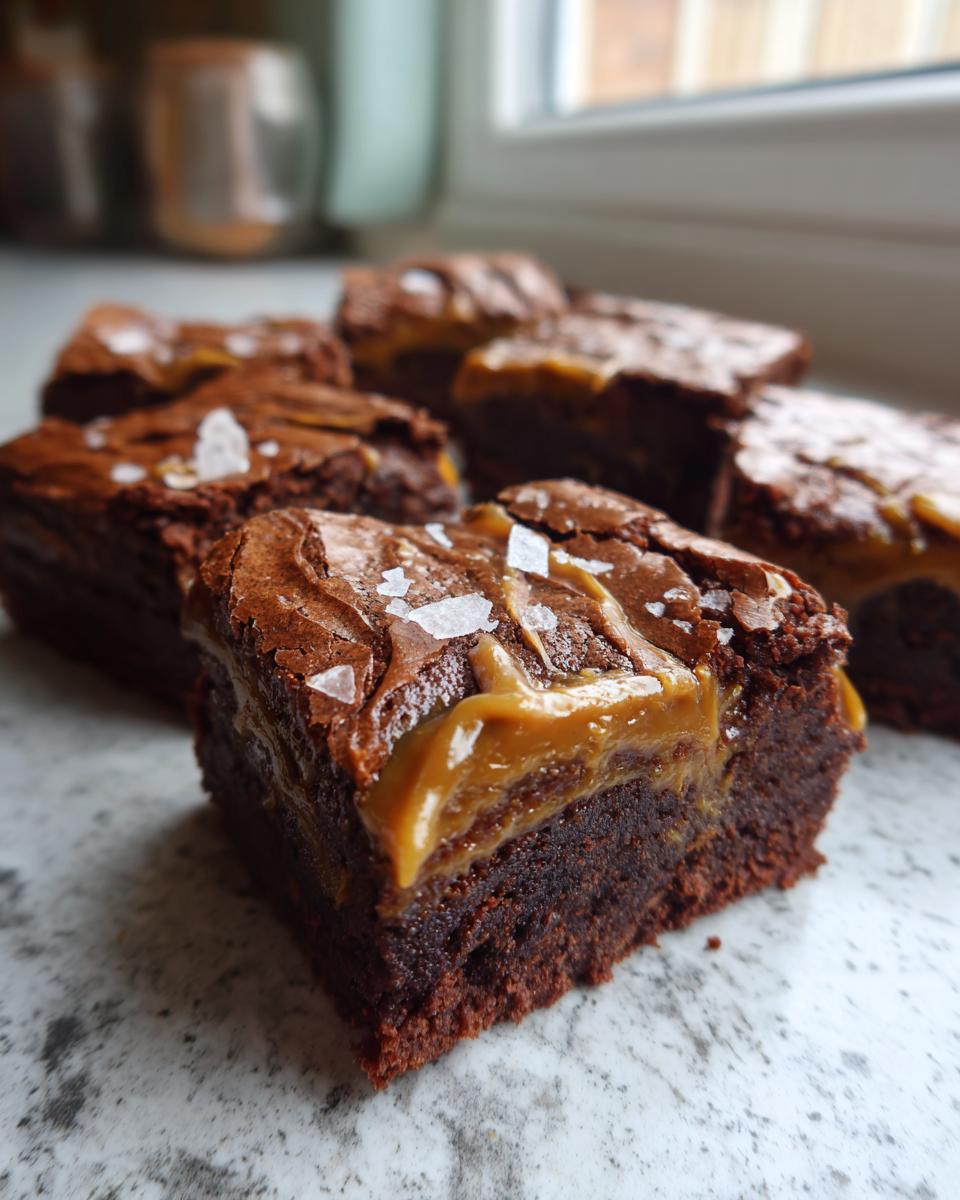
Okay, time to layer! Pour about half of that gorgeous batter into your prepared pan and spread it out nice and even. Now for the star of the show – drizzle about half of your lovely homemade caramel sauce over the top. Take a knife or a skewer and gently swirl it into the batter. Don’t go crazy, just a few gentle drags to create those beautiful ribbons!
Pour the rest of the batter over that caramel layer and spread it out smoothly. Then, drizzle the remaining caramel sauce on top, and give it another gentle swirl. This is how you get that beautiful swirl caramel in every bite! Finally, sprinkle that flaky sea salt all over the top – this is key for that perfect sweet-salty balance.
Pop them into the oven and bake for about 30-35 minutes. You want to test them with a toothpick – it should come out with moist crumbs attached, not wet batter. We’re aiming for *set* but still wonderfully gooey!
Achieving the Perfect Fudgy Texture
The secret to these gooey fudgy brownies not cakey is all about how we mix and bake! When you fold that flour in, stop as soon as it disappears. Overmixing develops the gluten, which leads to a cakier texture. Also, make sure you’re not overbaking them! Pulling them out when the center is still a little soft is crucial for that signature fudgy bite.
Tips for a Shiny Brownie Top
Want that glossy, crackly top? It’s a combination of things! Using enough sugar and eggs helps create that beautiful sheen. Melting the butter and chocolate together instead of creaming butter and sugar also contributes to a smoother, shinier surface. And don’t forget that 350°F oven temperature – it’s the sweet spot!
Cooling and Slicing Your Salted Caramel Brownies
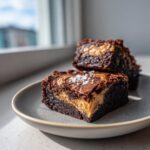
Okay, so these brownies are baked to gooey perfection, but now comes the really, really important part: letting them cool! I know, I know, waiting is the HARDEST part when all you want is a warm, fudgy brownie. But trust me on this one, it’s crucial! Let them cool in the pan on a wire rack. They need to cool completely – that’s usually a couple of hours. If you try to cut them too soon? Oh boy, you’ll have a melty caramel mess on your hands, and while delicious, they won’t look so neat as dessert potluck bars or fancy party tray desserts.
For the absolute cleanest slices and to really show off that gorgeous caramel swirl, pop the whole pan (after it’s cooled on the rack for a bit, of course) into the fridge for at least an hour, or even longer. This firms everything up beautifully. Then, use those parchment paper overhangs I mentioned to lift the whole slab out. Grab a sharp knife, give it a little wipe clean between cuts if needed, and slice away! Your brownies will be perfectly cut and totally irresistible.
Best Sea Salt for Brownies and Finishing Touches
Now, let’s talk about that sprinkle of magic on top! Salt is SO important in baking, especially with something sweet and rich like these brownies. It doesn’t just make things salty; it actually makes them taste *sweeter* and brings out all the chocolate and caramel flavors.
For these brownies, the best sea salt for brownies is definitely a flaky sea salt. Think Maldon, or something similar. Regular table salt is too fine and just dissolves right in, giving you a harsh saltiness. Flaky sea salt, though? It sits on top, giving you these little pops of briny goodness that perfectly cut through the richness. It looks gorgeous, too! Just a light, even sprinkle right after you do that final caramel swirl is perfect. It’ll catch the light and make your brownies look like they came from a fancy bakery – almost as pretty as my fluffy buttermilk pancakes!
Make-Ahead and Storage for Salted Caramel Brownies
The best part? These brownies are totally make-ahead friendly! You can bake them a day or two in advance, which is fantastic if you’re prepping for a party or making them as holiday baking gifts. Just let them cool completely, then store them in an airtight container at room temperature. They stay perfectly fudgy and delicious for about 3-4 days. Seriously, they’re like the best cookie box idea ever!
Frequently Asked Questions About Salted Caramel Brownies
Got questions about these decadent squares? I’ve got answers! Let’s make sure your baking goes perfectly.
Can I really get that gooey fudgy brownie texture?
Absolutely! The trick is not to overmix the batter once you add the flour, and definitely don’t overbake them. Pull them out when a toothpick comes out with moist crumbs – that’s the sweet spot for gooey fudgy brownies not cakey. It makes all the difference!
How do I get those pretty caramel swirls?
It’s easier than you think! Once you’ve poured half the batter into the pan, just drizzle about half of your caramel sauce over the top. Then, take a knife or a skewer and gently drag it through the batter and caramel a few times. Don’t overdo it – you want those pretty ribbons, not a totally mixed mess! Repeat with the remaining batter and caramel. It’s this technique for how to swirl caramel in brownies that makes them so beautiful.
What’s the best sea salt to use?
For the absolute best flavor and visual appeal, you want a flaky sea salt, like Maldon. Regular table salt is too fine and can make the flavor a bit harsh. Flaky salt gives you those delightful little bursts of saltiness that really balance the sweet caramel and rich chocolate beautifully. It’s truly the best sea salt for brownies!
How long will these last, and how should I store them?
These brownies are pretty forgiving! Once they’re completely cool, I like to store them in an airtight container at room temperature. They’ll stay wonderfully fudgy and delicious for about 3-4 days. They are perfect for making ahead for parties, just like my creamy mac and cheese!
Nutritional Information
Curious about the delectable details? Here’s an estimated breakdown of the goodness packed into each of your homemade salted caramel brownies. Keep in mind these salted caramel brownies calories are approximate and can vary based on specific ingredients you use, but they give you a great idea!
- Serving Size: 1 brownie
- Calories: Around 350
- Sugar: About 35g
- Fat: Roughly 20g
- Protein: About 4g
It’s always good to remember that baking is a bit of an art, and these numbers are just a friendly guideline!
Share Your Salted Caramel Brownie Creations!
Okay, now it’s YOUR turn! Have you made these incredible salted caramel brownies? Did you try a fun variation, or maybe snap some drool-worthy photos? I’d absolutely LOVE to hear all about it in the comments below! Please share your experience, and don’t forget to give the recipe a star rating – it really helps other bakers know what’s what. Seeing your creations makes my day! Check out some other appetizers and snacks too for more inspiration!
PrintSalted Caramel Brownies
Ultra-fudgy brownies with a homemade salted caramel swirl and a shiny top. These decadent dessert squares are perfect for gifting or potlucks.
- Prep Time: 20 min
- Cook Time: 35 min
- Total Time: 55 min
- Yield: 16 brownies 1x
- Category: Dessert
- Method: Baking
- Cuisine: American
- Diet: Vegetarian
Ingredients
- 1 cup (2 sticks) unsalted butter, cut into pieces
- 4 ounces unsweetened chocolate, chopped
- 1 1/2 cups granulated sugar
- 2 teaspoons vanilla extract
- 1 teaspoon espresso powder (optional)
- 1/2 teaspoon salt
- 4 large eggs
- 3/4 cup all-purpose flour
- 1/2 cup caramel sauce (store-bought or homemade)
- 1/2 teaspoon flaky sea salt, for topping
Instructions
- Preheat your oven to 350°F (175°C). Grease and flour an 8×8 inch baking pan, or line it with parchment paper, leaving an overhang on the sides.
- In a medium saucepan, melt the butter and unsweetened chocolate over low heat, stirring until smooth. Remove from heat.
- Stir in the granulated sugar, vanilla extract, espresso powder (if using), and salt until well combined.
- Add the eggs one at a time, beating well after each addition until the mixture is glossy.
- Gently fold in the flour until just combined. Do not overmix.
- Pour half of the batter into the prepared baking pan and spread evenly.
- Drizzle half of the caramel sauce over the batter. Use a knife or skewer to gently swirl the caramel into the batter.
- Pour the remaining batter over the caramel layer and spread evenly.
- Drizzle the remaining caramel sauce over the top and swirl again.
- Sprinkle the flaky sea salt evenly over the top.
- Bake for 30-35 minutes, or until a toothpick inserted into the center comes out with moist crumbs attached. The brownies should be set but still gooey.
- Let the brownies cool completely in the pan on a wire rack. For cleaner slices, chill the brownies in the refrigerator for at least 1 hour before cutting.
- Lift the brownies out of the pan using the parchment paper overhang. Cut into squares and serve.
Notes
- For a homemade caramel sauce, combine 1 cup granulated sugar and 1/4 cup water in a saucepan. Cook over medium heat, stirring until sugar dissolves. Stop stirring and cook until amber. Slowly whisk in 1/2 cup heavy cream and 2 tablespoons butter. Stir until smooth.
- Using flaky sea salt provides a better balance of salty and sweet than table salt.
- Chilling the brownies before slicing is key to achieving clean layers and preventing the caramel from smearing too much.
- These brownies are excellent for meal planning and can be stored in an airtight container at room temperature for up to 3 days.
Nutrition
- Serving Size: 1 brownie
- Calories: 350
- Sugar: 35g
- Sodium: 150mg
- Fat: 20g
- Saturated Fat: 12g
- Unsaturated Fat: 8g
- Trans Fat: 0g
- Carbohydrates: 40g
- Fiber: 2g
- Protein: 4g
- Cholesterol: 80mg