
Have you ever scrolled through pictures of these gorgeous, dramatic desserts and thought, “That’s beautiful, but I could never pull that off”? Well, I’m Kate, and I’m here to tell you that you absolutely can! This isn’t just another bake; this is the ultra creamy, show-stopping red velvet cheesecake that belongs right in the center of your holiday table or next big party. Every single step in this recipe has been rigorously tested until I was 100% certain that you, the home cook, will get bakery-worthy results without any kitchen frustration. Get ready to impress everyone!
- Why This Ultra Creamy Red Velvet Cheesecake Recipe Works (E-E-A-T Focus)
- Gathering Ingredients for Your Red Velvet Cheesecake
- Step-by-Step Instructions for the Red Velvet Cheesecake Recipe
- Tips for Success with Your Showstopper Dessert
- Serving Suggestions for Your Holiday Cheesecake Ideas
- Storage and Reheating Instructions for Red Velvet Cheesecake
- Making Variations of This Red Velvet Cheesecake
- Frequently Asked Questions About This Red Velvet Cheesecake Recipe
- Estimated Nutritional Profile for Red Velvet Cheesecake
- Bake This Red Velvet Cheesecake for Your Next Party
Why This Ultra Creamy Red Velvet Cheesecake Recipe Works (E-E-A-T Focus)
If you want the best **red velvet cheesecake**, the secret isn’t just the ingredients; it’s the method. This recipe is designed to deliver that rich, melt-in-your-mouth mouthfeel that makes people ask where you bought it! The Oreo crust adds a perfect crunchy counterpoint to the incredibly smooth filling, and that cream cheese swirl is what turns it into a real showstopper. We’re aiming for decadence that still feels achievable right in your own kitchen.
I spent ages dealing with cracked tops—it drove me crazy! I finally figured out that the slow cooling process after baking, combined with that essential water bath, is non-negotiable. That slow transition from hot oven to cool air is what keeps the surface perfectly smooth and crack-free. You can trust these steps; I’ve made this red velvet cheesecake dozens of times to guarantee perfection for you!
Achieving the Perfect Creamy Cheesecake Texture
The number one secret to that ultra-creamy texture is temperature and patience with the eggs. Make absolutely certain your cream cheese is fully softened—I mean like butter consistency. When you add those four eggs, throw them in one at a time and mix only until they disappear. If you beat them into oblivion, you incorporate too much air, which leads to shrinking and cracking later. We want dense and smooth, not airy and cakey!
The Showstopper Appeal of Red Velvet Cheesecake
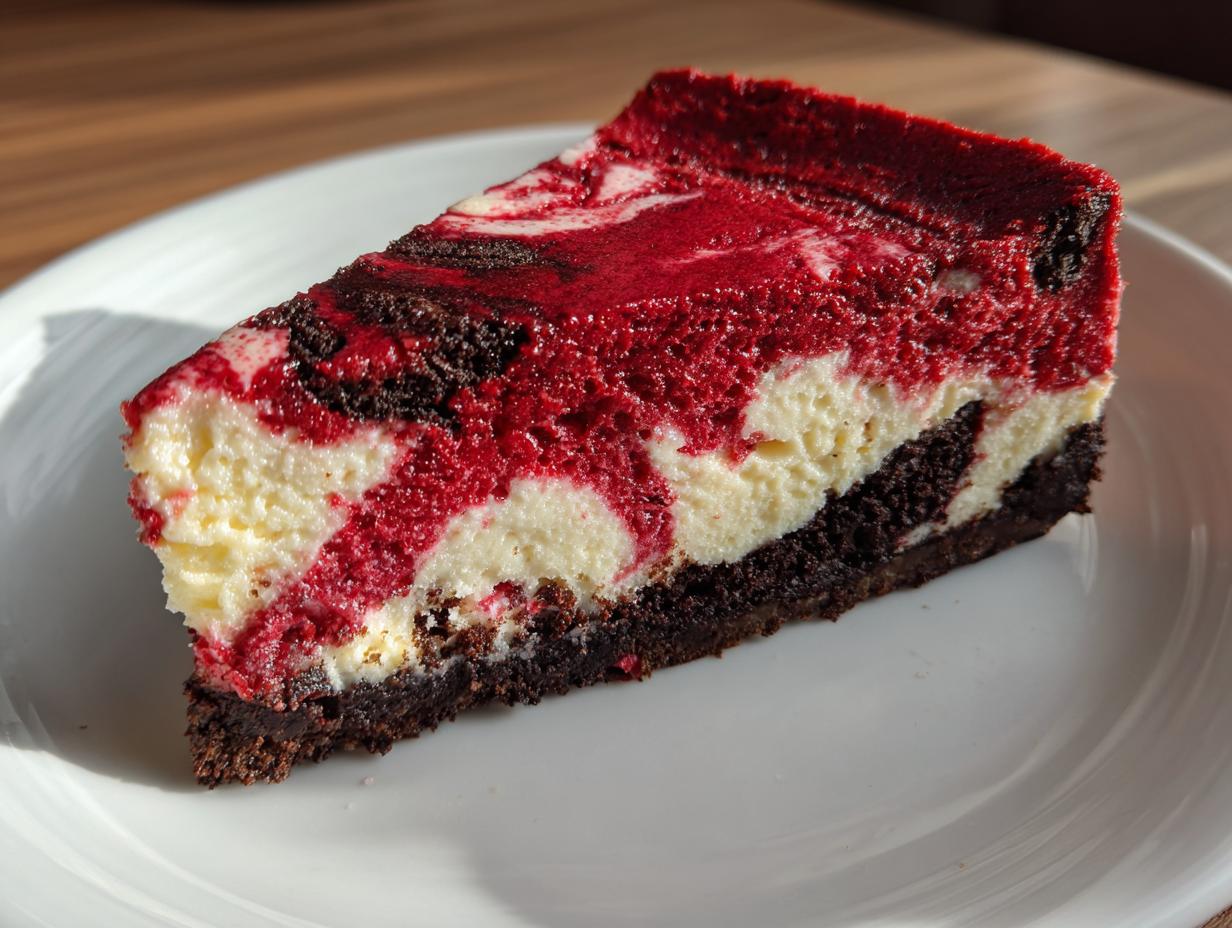
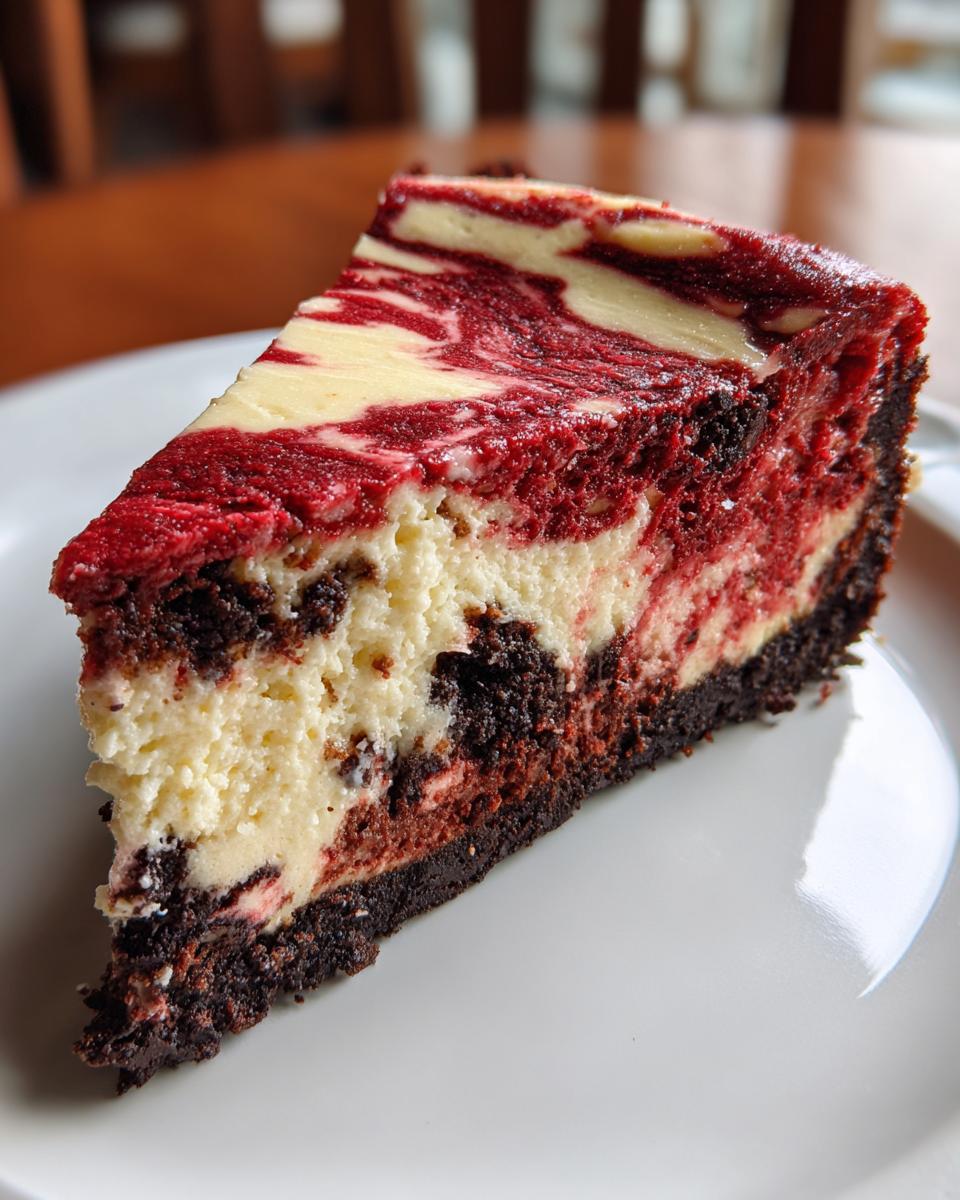
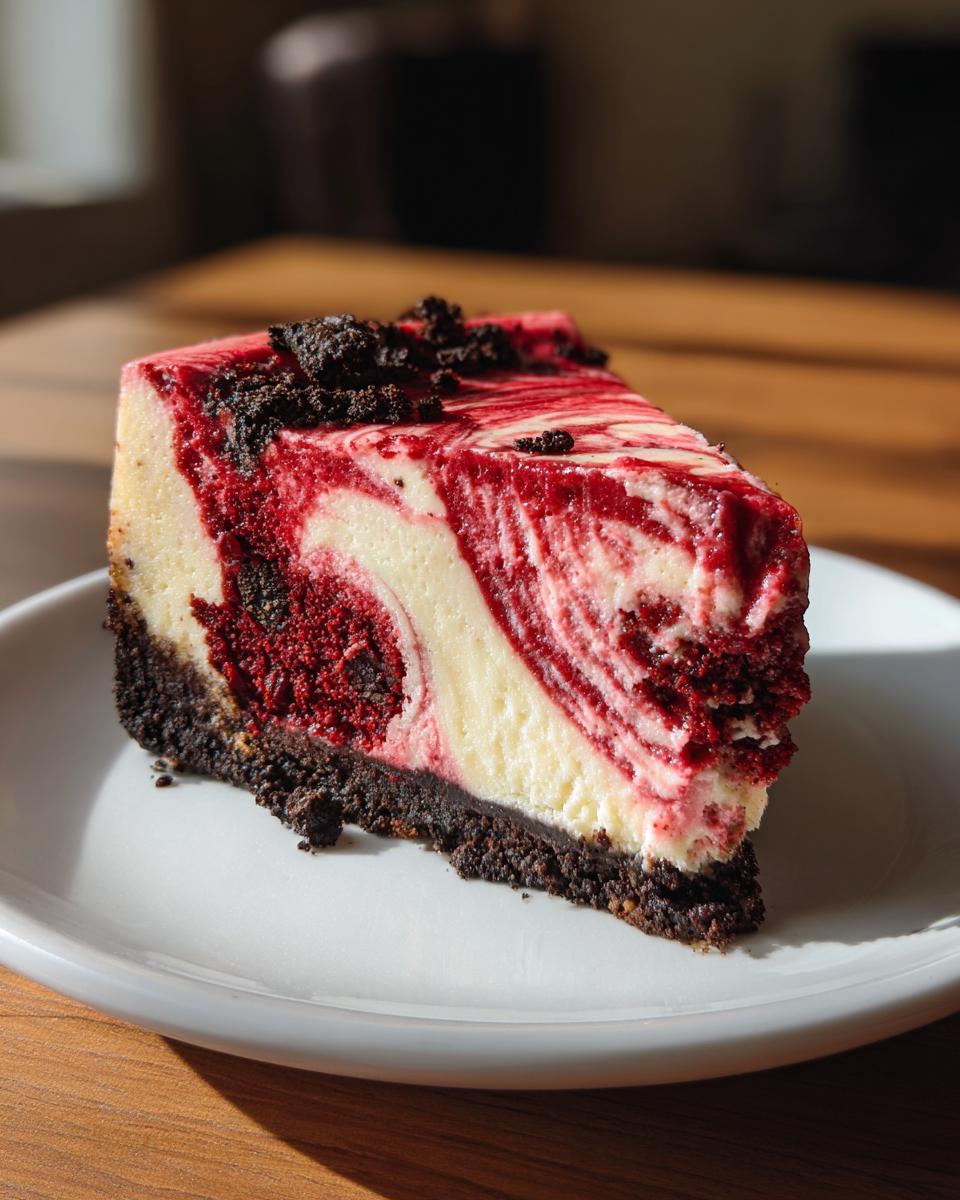
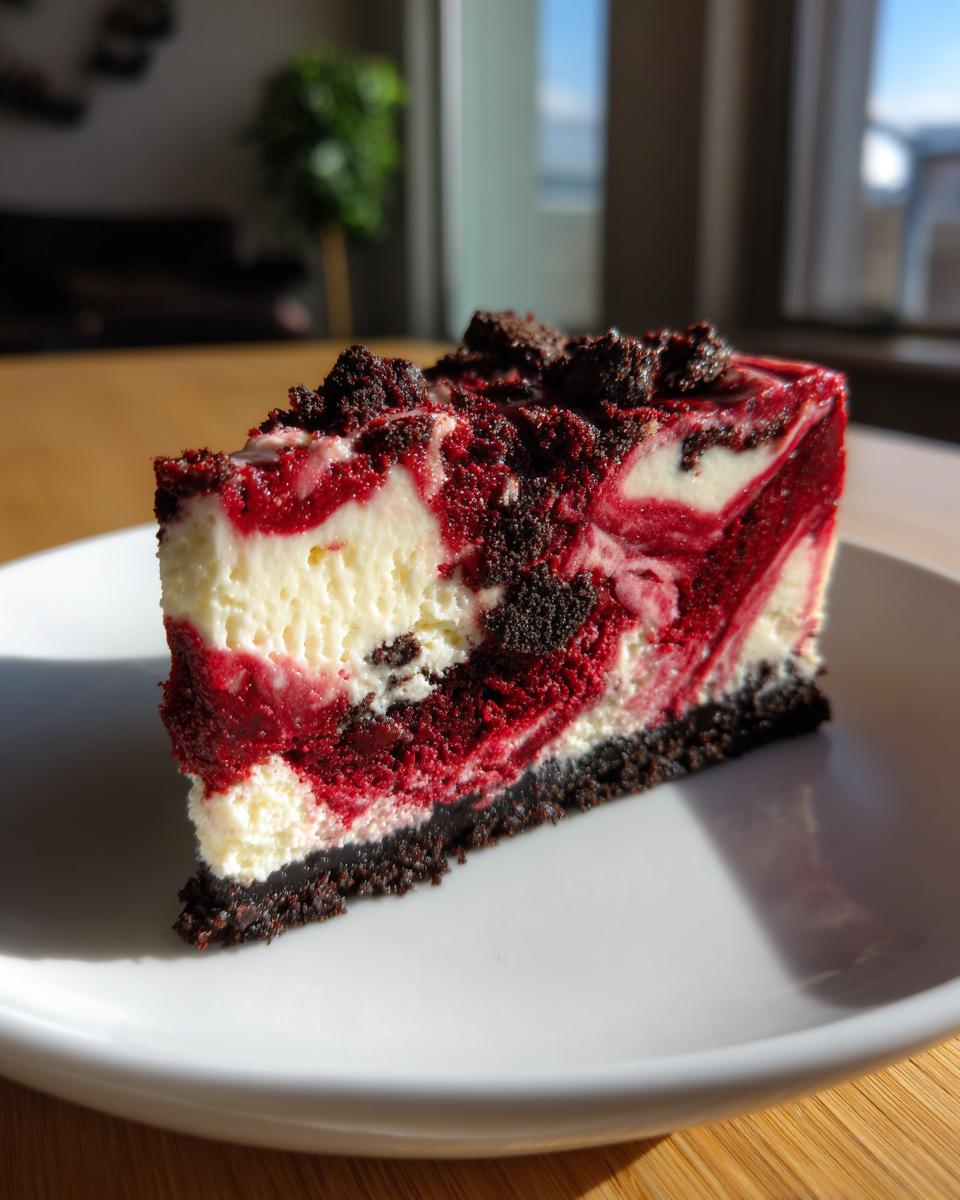
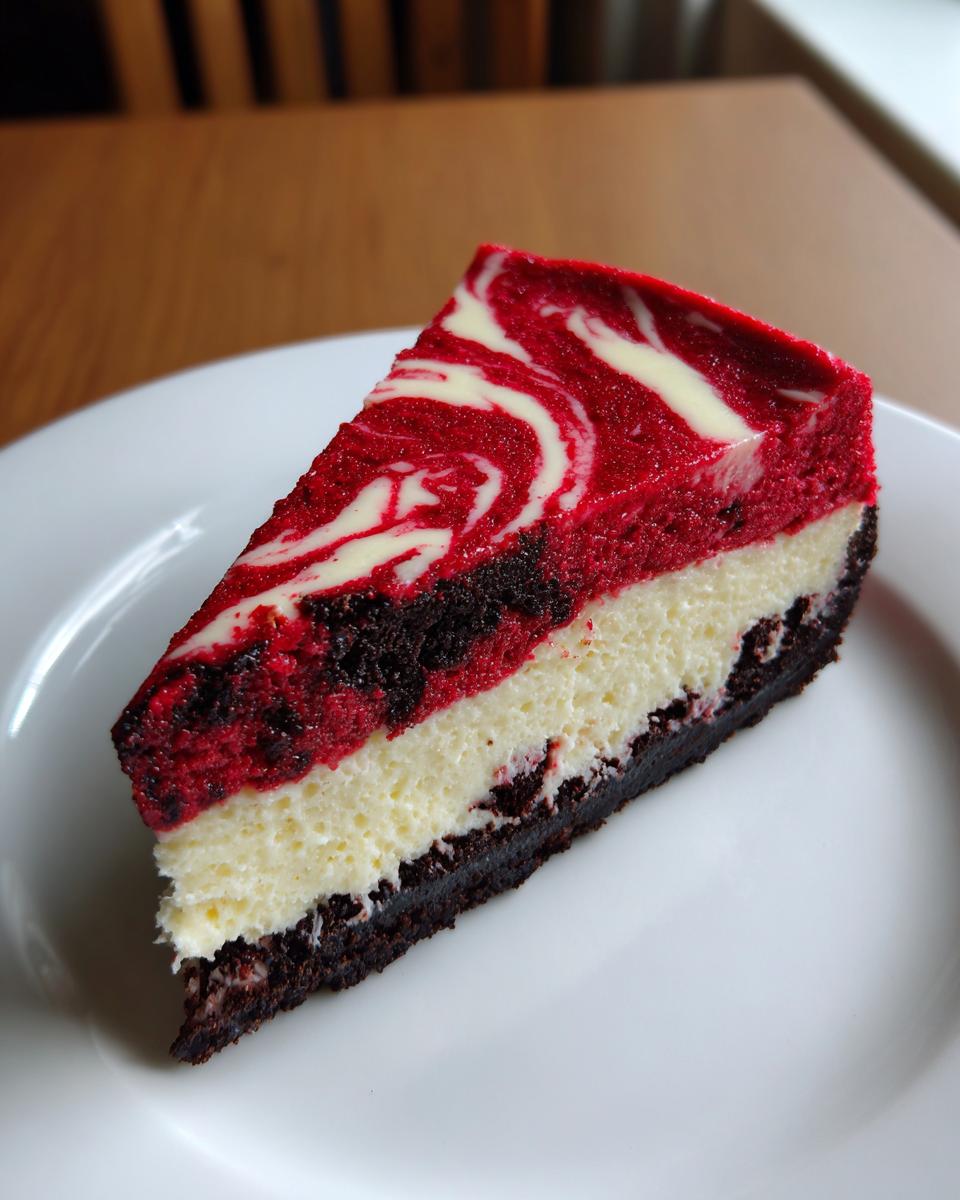
Honestly, this dessert wins every time just based on looks. That deep, vibrant red layer against the stark white cheesecake is just dramatic, especially when you swirl them together gently. It screams celebration! This isn’t an everyday Tuesday dessert; this is your go-to for making a lasting impression at any gathering. It definitely qualifies as one of those **Special Occasion Sweets** that people talk about for weeks after your party.
Gathering Ingredients for Your Red Velvet Cheesecake
Okay, here’s where we make sure we have everything ready so nothing messes up that beautiful, **Decadent Cheesecake** texture later on. Remember, cheesecake is sensitive! I’ve broken the ingredient list down just like we’ll use them in the mixing bowls. Don’t skimp on the quality here; it really shows in the final product, especially since we are using the full flavor power of that red velvet base. Trust me, having everything set aside makes the assembly feel like a breeze!
Oreo Crust Cheesecake Components
We start with the crunch foundation. You’ll need about 1 ½ cups of those chocolate sandwich cookie crumbs—yes, the ones that look just like Oreos work perfectly! Then, we bind it together with ¼ cup of granulated sugar and 6 tablespoons of unsalted butter that you’ve melted down. Pressing this in firmly is the key to a crust that doesn’t crumble when you slice it later.
Ingredients for the Velvety Red Cake Flavor Filling
For the main event, grab your 24 ounces of cream cheese—make sure it’s room temperature! We’ll use 1 ½ cups of regular sugar, 1 teaspoon of vanilla extract, and a half teaspoon of salt to balance the flavor. The magic comes from four large eggs, 1 teaspoon of white vinegar, 1 teaspoon of red food coloring (please, use the gel kind if you can; it makes a huge difference in that iconic color!), 1 tablespoon of unsweetened cocoa powder, ½ cup of buttermilk, and then we have a bit of baking soda and vinegar for that little bit of tang.
Cream Cheese Frosting Topping Ingredients
For the light topping that finishes this stunning dessert, we just need 1 cup of heavy whipping cream and 4 tablespoons of powdered sugar to make soft, beautiful peaks. If you want an even richer look, you can always grab some extra store-bought cream cheese frosting to dollop on top once it’s completely chilled. It makes for an even better presentation for your **Special Occasion Sweets**!
Step-by-Step Instructions for the Red Velvet Cheesecake Recipe
Alright, this is where the fun really starts! You’ve got your gorgeous ingredients, now let’s put them together without any drama. We’re aiming for that perfectly set, melt-in-your-mouth result, so pay close attention to these timing notes. I promise, if you remember to go slow, this whole process feels totally manageable. This systematic approach is key for anyone looking to master their Red Velvet Cheesecake Recipe!
Preparing the Oreo Crust and Oven Setup
First things first, you need to get your oven humming! Preheat it to 350°F (175°C). Now, take your 9-inch springform pan—this is a special pan with a removable side, essential for cheesecake! Wrap the outside of it super tight with a couple of layers of heavy-duty foil. This is your shield against the water bath! Mix your cookie crumbs, sugar, and melted butter, press that mixture down firmly into the base of the pan, and pop it in the oven for 10 minutes. Once done, pull it out and take a breath; now reduce that oven temperature down to 325°F (160°C) for the main bake.
Mixing the Cream Cheese Filling and Red Velvet Batter
We need two mixtures here. In your big bowl, beat that softened cream cheese, the main sugar, vanilla, and salt until it’s genuinely smooth—no lumps allowed! Then, add your four eggs in, one at a time. Mix just until each egg disappears. Seriously, stop mixing! Now, for the red layer: grab a small bowl and whisk your red food coloring, cocoa powder, buttermilk, baking soda, vinegar, and vanilla together until they look like a dark, smooth potion. Finally, gently stir in about two-thirds of your plain cheesecake batter into the red mix to thin it out.
Assembling and Baking Your Red Velvet Cheesecake Swirl
Time to layer! Pour most of your plain white batter right over that cooled Oreo crust. Next, carefully dollop the red velvet mixture all over the white layer. Take the remaining plain batter and make smaller dollops on top of the red. Now, take a knife or a skewer and just gently cut through the layers a couple of times to create that beautiful marbled swirl—don’t overdo it! Place the foil-wrapped pan into a larger roasting pan and pour hot water into the larger pan until it comes halfway up the sides. Bake this setup for 60 to 75 minutes. I know it feels weird, but when you gently nudge it, the edges should be set, but the very middle needs a tiny wiggle or jiggle, like jello. That means it’s perfect.
Cooling and Chilling for the Best Results
This next part is critical to avoid the dreaded crack! Turn the oven off, but leave the cheesecake inside with the door cracked open just a tiny bit for a whole hour. It’s letting it slowly adjust to room temperature. Once it’s cool enough to handle, take it out of the water bath, discard the foil, and let it finish cooling on the counter. Once it’s totally room temp, cover it up and stick it in the fridge for a minimum of six hours—but truly, overnight is always better for this **Layered Cheesecake Recipe** so those flavors absolutely marry!
Tips for Success with Your Showstopper Dessert
You’ve done the hard work creating this gorgeous, rich **red velvet cheesecake**, but a couple of expert moves here will guarantee it looks just as amazing as it tastes. Making this dessert is all about managing moisture and temperature, which is why I rely on this process every time. Remember that slow cool-down I mentioned? That’s really the key to keeping this dessert looking perfect when you go to serve it for your guests. It helps us achieve that ultra-creamy texture promised in the recipe!
Water Bath Technique for a Creamy Cheesecake
I know wrapping a pan in foil feels tedious, but trust me—it’s your best friend! That water bath, or *bain-marie*, essentially steams the cheesecake gently as it bakes. This environment prevents the edges from baking too quickly while the center is still raw. The steam keeps the entire surface moist and helps everything bake evenly, locking in that wonderful, ultra-creamy texture. It’s the single most important step if you want a stunning, crack-free top on your **Creamy Cheesecake**.
Troubleshooting Common Red Velvet Cheesecake Issues
If you see small cracks forming, it usually means your cheesecake cooled down too rapidly, right? Next time, let it sit in that cracked-oven door for the full hour—don’t rush it! Another common rookie mistake is overmixing once the eggs are in. If you beat too long, you introduce too much air, and when that air tries to escape during cooling, it pulls the top down, causing weeping or sinking. Keep your mixer on low once the eggs go in. For more on keeping cakes moist, check out my tips on moist carrot cake baking—the principles of careful mixing carry over!
If you need a really good reference tutorial for the water bath setup itself, I always point people over to this great resource when they’re making their first rich red velvet cheesecake.
Serving Suggestions for Your Holiday Cheesecake Ideas
When you pull this showstopper out for the table, you want the accompaniments to look just as good, right? Since this **red velvet cheesecake** is already so rich and decadent, you don’t need a ton of heavy extras. If you opted for my lighter whipped cream topping, a quick dusting of finely chopped pecans or walnuts adds a fantastic crunch, especially delicious when you’re thinking about **Holiday Cheesecake Ideas**.
If you’re feeling generous, a drizzle of high-quality white chocolate ganache makes it look incredibly gourmet without adding much work. A light side of fresh raspberries or strawberries is always welcome because that minor tartness cuts through the sweetness beautifully. Honestly, though, sometimes the best pairing is a slice of this amazing cake alongside a warm mug of coffee or tea—it’s truly perfect on its own! For more ideas on pairing desserts with seasonal flavors, take a peek at my thoughts on baking pound cake.
If you’re looking for festive inspiration beyond the bake itself, check out these gorgeous presentations for a Christmas Red Velvet Cheesecake—they always have such fun ideas for making the plate pop!
Storage and Reheating Instructions for Red Velvet Cheesecake
The best part about making something this decadent is knowing you have leftovers! Honestly, this **red velvet cheesecake** is even better the next day. Once it’s fully chilled, transfer it to the fridge immediately. You want to keep it covered tightly—I usually use a cake dome or cover the top directly with plastic wrap, making sure the wrap doesn’t stick to the topping.
It keeps beautifully for four to five days. You don’t need to reheat cheesecake at all! Serve those lovely slices straight from the cold. If you’re just storing a slice, wrap that piece individually so the cold air doesn’t dry out the edges. Enjoy those leftovers when you need a little pick-me-up!
Making Variations of This Red Velvet Cheesecake
I love that this recipe is so reliable, because once you master the base, you can certainly start playing around! That is the mark of a great foundational recipe, don’t you think? When you want to elevate this from beautiful to absolutely show-stopping, it’s time to think about textures and layers.
Oreo Crust Cheesecake Modification
We already nailed the classic Oreo crust, which is fantastic, but if you want that cookie flavor *throughout* the bake, try this trick! Take about half a cup of those crushed Oreo crumbs—just the cookie part, not the filling—and gently fold them into the red velvet batter *after* you’ve mixed in the baking soda and vinegar. You don’t want to crush them down, just gently fold them in so they stay somewhat chunky. This gives you delightful pops of chocolate texture hidden inside the rich, creamy layer. You can find some other fun ways to switch up your cookie base when you look at my guide on chocolate chip cookies, some techniques cross over!
Another easy win is presentation. Instead of just the whipped topping, try spreading a thin layer of melted white chocolate over the chilled cake, and then immediately topping that with dried, finely chopped red velvet cake crumbles for a textured roof. For a truly decadent inspiration that incorporates that Oreo element into the layers, check out this perfect guide on Red Velvet Oreo Cheesecake Perfection!
Frequently Asked Questions About This Red Velvet Cheesecake Recipe
It’s totally normal to have questions when tackling a big dessert like this! Cheesecake baking feels intimidating until you know the few non-negotiable rules. I’ve gathered up the things folks ask me most often about getting this **red velvet cheesecake** just right. Let’s clear those last few hurdles so you can get this showstopper into your oven!
Can I skip the water bath when making this creamy cheesecake?
Oh, please don’t! If I could give one piece of advice that guarantees success for you, it’s this: never skip the water bath. I know it seems messy, and wrapping the pan is an extra step, but that steam is what protects your beautiful cheesecake from drying out or cracking. It creates the perfect humid environment, which is the absolute key to achieving that signature soft, **creamy cheesecake** texture we are aiming for. Skipping it almost always results in dry edges or nasty cracks!
What is the best way to get a vibrant color for my red velvet dessert?
This is where quality ingredients make a visual difference! If you use standard liquid food coloring, you end up needing way too much of it just to get a decent hue, and all that extra liquid messes with your texture. That’s why I suggest gel food coloring. A little bit of gel goes a very long way toward getting that deep, gorgeous red that makes this such a **Best Red Velvet Dessert**. You get all the color saturation without compromising the richness of the filling.
How long does the best red velvet dessert need to chill?
Yes, the waiting is the hardest part when you’ve baked something this stunning! You must chill it for a minimum of six hours before slicing, no exceptions. That’s just to make sure it’s totally firm enough to cut cleanly, especially since we have that gorgeous swirl happening. However, if you can manage it—and I know you can handle the anticipation—leaving this **decadent cheesecake** overnight is truly the best thing you can do. The flavors deepen, the cream cheese firms up perfectly, and those red velvet notes really sing the next day. If you want to see some beautiful layered effects, check out this amazing guide Knock You Naked Red Velvet Cheesecake for comparison!
If you have any concerns about handling cheesecake after it’s chilled, my guide on my copycat cheesecake recipe steps might give you a few extra pointers on temperature management!
Estimated Nutritional Profile for Red Velvet Cheesecake
I know some of you are curious about the numbers behind this incredible treat. Since this is such a **Decadent Cheesecake**, it’s definitely a richer offering, perfect for those big celebrations. Here are the estimates for one slice of this Ultra Creamy Red Velvet Cheesecake.
- Serving Size: 1 slice
- Calories: 450
- Sugar: 35g
- Fat: 30g
Just remember, these numbers are my best guess based on the standard ingredients and serving yield! If you use different cookies for the crust or add extra frosting, your numbers are going to shift a little. But hey, when something tastes this good, we don’t sweat the details too much, right?
Bake This Red Velvet Cheesecake for Your Next Party
I truly hope you feel inspired to try this recipe out soon! This **red velvet cheesecake** isn’t just a dessert; it’s a guaranteed mood-lifter and the perfect **Impress Guests Dessert** for any serious celebration. Please, when you do bake it, come back and leave me a rating below the recipe card! I want to see who else is making this stunning centerpiece. When you share your photos, tag me! I love seeing how you make my recipes your own. Happy baking, friends; I can’t wait to hear all about your success!
If you are looking for more easy-to-manage bakes that seriously impress people, take a look at my collection of best dessert recipes. And for more inspiration on baked goods that turn heads, check out what my pals are doing over at kitchenfunwithmy3sons!
PrintUltra Creamy Red Velvet Cheesecake with Oreo Crust

You will make a rich, creamy, and show-stopping Red Velvet Cheesecake featuring a crunchy Oreo crust and a smooth cream cheese swirl. This recipe is perfect for holidays, parties, and special occasions when you want to impress your guests with a decadent dessert.
- Prep Time: 30 min
- Cook Time: 75 min
- Total Time: 120 min
- Yield: 12 servings 1x
- Category: Dessert
- Method: Baking
- Cuisine: American
- Diet: Vegetarian
Ingredients
- 1 ½ cups chocolate sandwich cookie crumbs (like Oreos)
- ¼ cup granulated sugar
- 6 tablespoons unsalted butter, melted
- 24 ounces cream cheese, softened
- 1 ½ cups granulated sugar
- 1 teaspoon vanilla extract
- ½ teaspoon salt
- 4 large eggs
- 1 teaspoon white vinegar
- 1 teaspoon red food coloring (gel preferred)
- 1 tablespoon unsweetened cocoa powder
- ½ cup buttermilk
- 1 teaspoon baking soda
- 1 teaspoon white vinegar
- 1 teaspoon vanilla extract
- 1 cup heavy whipping cream
- 4 tablespoons powdered sugar
- For the Topping (Optional): Extra cream cheese frosting
Instructions
- Preheat your oven to 350°F (175°C). Wrap the outside of a 9-inch springform pan tightly with heavy-duty aluminum foil to prevent water from entering during the water bath.
- Prepare the Oreo Crust: In a medium bowl, mix the cookie crumbs, ¼ cup sugar, and melted butter until combined. Press the mixture firmly into the bottom of the prepared springform pan. Bake for 10 minutes. Remove and let cool slightly. Reduce oven temperature to 325°F (160°C).
- Prepare the Cheesecake Filling: In a large bowl, beat the softened cream cheese, 1 ½ cups sugar, 1 teaspoon vanilla extract, and salt until smooth. Beat in the eggs one at a time, mixing just until combined after each addition. Do not overmix.
- Prepare the Red Velvet Batter: In a separate small bowl, whisk together the red food coloring, 1 teaspoon white vinegar, cocoa powder, buttermilk, baking soda, the second teaspoon of white vinegar, the second teaspoon of vanilla extract, and a splash of the plain cheesecake batter until smooth.
- Assemble the Cheesecake: Pour about two-thirds of the plain cheesecake batter over the cooled crust. Gently pour the red velvet batter over the top. Dollop the remaining plain batter over the red layer. Use a knife or skewer to gently swirl the layers together to create a marbled effect.
- Bake in a Water Bath: Place the foil-wrapped springform pan into a larger roasting pan. Carefully pour hot water into the roasting pan until it reaches halfway up the sides of the springform pan. Bake for 60 to 75 minutes, or until the edges are set but the center still has a slight jiggle.
- Cool the Cheesecake: Turn off the oven, crack the door open slightly, and let the cheesecake cool inside the oven for 1 hour. This prevents cracking. Remove from the water bath, remove the foil, and let it cool completely on a wire rack.
- Chill: Once cooled to room temperature, cover the cheesecake and refrigerate for at least 6 hours, or preferably overnight, before serving.
- Prepare the Topping: Before serving, whip the heavy cream with powdered sugar until stiff peaks form. Spread or pipe the whipped cream over the chilled cheesecake. You may also use store-bought or homemade cream cheese frosting for a richer finish.
Notes
- For the creamiest texture, ensure your cream cheese is fully softened to room temperature before mixing.
- If you do not have gel food coloring, you may need to use more liquid coloring, but be careful not to add too much liquid, which can affect the texture.
- To achieve a true showstopper look, consider topping this with chocolate shavings or fresh berries after the cream cheese topping is applied.
Nutrition
- Serving Size: 1 slice
- Calories: 450
- Sugar: 35g
- Sodium: 350mg
- Fat: 30g
- Saturated Fat: 18g
- Unsaturated Fat: 12g
- Trans Fat: 0.5g
- Carbohydrates: 40g
- Fiber: 1g
- Protein: 7g
- Cholesterol: 100mg